Transcripts
1. Introduction: You may be looking
to format and type set your own children's book as either a budget friendly option or just to take back
creative control. And I am here to help. Formatting a
children's book can be broken down into
five main parts. Setting up your
document, importing and placing the illustrations. Placing and styling the text, and exporting your
formatted book. I'm going to take
you all the way from choosing the
right trim, size, and resolution, to showing you the right export settings for the major print on
demand platforms. So your book is ready
for publication. Hi there. My name
is Vivian Reese, and I'm an author and a
freelance book designer. I have formatted
hundreds of books and children's books
are by far my favorite. I love seeing the cute little illustrations and the fun text, and being a part of
putting it all together. This course is all about
helping you do it yourself to format a professional
looking children's book. In, in design, I've broken everything down to
the beginner level. So even if you've never
used in design before, I promise you you
will not get lost. In fact, I think
it's going to give you the confidence to be able to format all of your
future children's books. I'll be explaining resolution, RGB versus CMYK
Bleed PDF standards. I'm going to take you step by
step through formatting and type setting a real
children's book my own, including where to
find commercial fonts. There's a bonus
resources PDF with cheat sheet do list
that you'll be able to download and keep forever so you can use them
again and again. There is a lot packed
into this course, but I love to teach every Youtube channel
with writing tips, by the way, and I truly think that anyone
can do this course. Thank you for watching and I will see you on the other side.
2. Tech & Key Terms for Designing a Children's Book: Hi there. My name
is Vivian Reese and I am so excited
that you're here. We're going to jump in and
cover some key terms and some technical specifications so you don't get lost
during this course. All of these items are
in the resources PDF, so make sure you download that for quick reference
during the course. First up, I'm running
in design on a Mac. For the most part,
everything will be the same between a Mac and
a Windows computer. Minus the command
control and function Alt keys for shortcuts we'll be using in design
CC for this course. And I'm currently running
Adobe in design 2023. Right now, the workspace that I use in love will be available in the downloads and we'll be using that during
this tutorial. Don't worry, I'll
walk you through how to load that into
your design program. And set everything up
to look exactly like my screen design requires
8 gigabytes of Ram. But the more the merrier, If you ever experience any lagging while moving
through your document, make sure to jump to the
speed up in design video. And I'll give you some
pointers on how to avoid that. For maximum efficiency, I'll be using some
keyword shortcuts, but I'll have those
displayed on the screen, as well as saying them out loud so you know exactly
what we're doing. Let's jump into some key terms. Pod is print on demand. We're starting with this
one because I'm going to use this phrase a lot in
the coming definitions. Pod companies are ones
like Amazon Print, Ingram, Spark, Lulu
Barnes, and Noble. Your books are printed as needed or on demand
at these companies. These are the main companies that independent authors use. Trim Size. Your trim size is the final size of
your printed book. The most common size for self published
children's books is 8.5 by 8.5 but eight by ten
is also a really common size. Hopefully, this is
something you've already discussed with
your illustrator, because the size of your illustrations
needs to match this. If you haven't commissioned
your illustrations or started
illustrating yourself, make sure you decide what trim size you want to use before. This isn't something
that you should leave up to your illustrator. Trust me, I've had
to resize many, many illustrations because this was not done properly spread. A spread is the left hand page and the right hand page
that falls next to it. All left hand hand
pages are even numbered and all right hand
pages are odd numbered. This is true in all books, not just children's books. In design will
automatically display your book like this so that your first page is not a
spread, it's a single page. And all even numbered pages have the odd numbered page
right beside it. They're not actually connected. But in design, displays it like this just to easily visualize what the book will
look like when it's printed and when
it's laying open. Illustrations can
either be full spread, meaning they cover
both the left and the right hand pages or single page. Most likely the text for that
illustration will fall on the opposite page with either a blank or a
textured background bleed. This is a 0.125 in strip that's an eighth of
an inch that goes around the outside edges
of each page and that's going to be trimmed from your book
once it's printed. The purpose is to ensure that your illustrations go all the way to the edge of the page. Most companies require
bleed to be added to the three outside
edges of each page. You don't typically add
it to the spine edge, but a couple want
bleed on all sides. I've highlighted what
settings you need for each POD company in
the resources PDF, but an example of adding bleed
to an 812 X812 trim size. Each page is 8.5
by 8.5 The spread, which is both pages, is going to be 17 by 8.5 That's
17 " wide by 8.5 " tall. For this course, we're
going to be adding bleed to all outside edges, which is what KDP print
and Ingram Spark want. They're the biggest POD companies
most people go through, so that's what we'll be
using for this course. We need bleed on
all of these edges. This might not be to scale, but the width around
our pages is 0.125 " adding 0.125 " to all
outside edges means our width becomes
17 plus 0.125 plus 0.125 which is 17.25
Our height becomes 8.5 plus 0.125 on plus 0.125 which is 8.75 Our
final illustration size for spreads in
inches is 17.25 by 8.75 You may need to do this math yourself on whatever
trim size you're using. If you're using a platform
that needs bleed on all edges, you'll add an additional 0.25 to your width for an 8.2 0.2
single page illustration. Each illustration needs to
be the width which is 8.5 plus 0.125 which is 8.625 And the height needs to be 8.5
plus 0.125 plus 0.125 which is 8.75 So your total is 8.625 by 8.75 All of
this information is, so you'll know what resolution your illustrations need to be, which is up next resolution. Your resolution
is your trim size plus your bleed times the PPI, which is pixels per inch that
you want your book to be. Basically, this
is the dimensions in pixels of your image. All POD companies want
at least 300 PPI, or 300 pixels for every
inch in your illustration. The more pixels, the higher
the quality of your image. Most digital assets
are only 72 PPI, which is extremely pixelated
for a printed book. But I have seen
illustrations provided at this PPI because the
illustrator did not know this. Back to our eight on
a two by 8.5 example. For a full spread illustration, our width is going
to be 17.25 ". And we're going to
multiply that by 300, which is the PPI that we want. So in this case, our
width is going to be 5,175 pixels for our height. We had 8.75 ". We're going to multiply
that by 300 PPI, which comes to 2,625 pixels. So your illustrations need
to be 5,175 by 2,625 pixels. For a single page illustration, our width is 8.625 ". And we're going to
multiply that by 300 PPI, which comes to 2,587.5 pixels. Our height, again is 8.75
multiplied by 300 is 2625. For a single page illustration, our dimensions need
to be 2,587.5 by 2,625 I hope I didn't lose you there. I'll go over how to make
sure your illustrations are the right resolution in the final review video towards
the end of this course. They have to be close
to this though. And remember, you may have
to do your own calculations. If your trim size is
not 8.5 by 8.2 margins. You may be thinking, I already
know what margins are, but we're going to
be figuring out what margin size we
need for our book. And again, we'll be looking at the two most popular
POD companies, which is KP Print
and Ingram Spark. You can refer to the cheat sheet for the links to
each one of these. I've included links
rather than a table here breaking down the
margin requirements. Since either company could change their
requirements one day, so it's good to periodically
check their websites. Right now, KP Print
wants margins of 0.25 " on all outside edges and
0.375 " on the inner edge. Ingram Spark just says
0.5 " on all page edges. For this course we're
going to make sure our file complies with
both at the same time. That way we can upload this
PDF for both paperback for K DP and Hard back
through Ingram Spark. We can do this as
long as we're using the same trim size
for both companies. We're going to go with the margin requirements
from Ingram Spark because we know that
that's also going to satisfy KPP's requirements. So again, that's
0.5 " on all edges, typesetting, this
is font selection, placement effects, et cetera. This is anything to
do with the text. Formatting is making sure that the illustrations
and the elements in the illustration are
in the right places and that they meet the
publisher requirements. Typesetting is just adding the text and the
styling to your text. Cmyk versus RGB, These
are called color ******. Anything on a screen, on your phone, on your laptop, uses the RGB color space, which is red, green, blue. It actually uses a
lot more colors, and images usually look more
vibrant in this color space. Cmyk, which is cyan, magenta, yellow and black is the color space that
printers are able to use. It covers a smaller
area compared to RGB. And if you've ever
changed the cartridges on a full color printer, you're familiar with the
fore CMYK cartridges. Since printers only
print in CMYK, your book will be exported
in the CMYK color space. Your illustrations
may be in RGB. So just know that
some of that vibrancy may be lost in the conversion
from one to the other. If you notice your
illustrations aren't as vibrant when you
export them to a PDF, then that's why linked
images in design, all of your images will
be linked from the file in your project
folder to design. In design composites
your illustrations so that they're not stored
directly within design. When you place an
illustration in design, it looks at the file in your project folder and
displays it for you in design. If you move a file
that's linked to that specific folder to another
folder on your computer, the link will break in design and you'll need
to re link that file. This is also why if
you ever send your end design file to someone else
or to another computer, your illustrations
won't load unless you include that file that has all of your
linked illustrations. This can seem like
a hassle right now, but it makes it so much easier
when you make changes to your linked files
without having to redo the placement in your
file each and every time. So if you change anything about the image in Photoshop,
for example, you just have to
refresh the link and it loads the new illustration
with all of your changes. I hope I didn't lose you too much with some of
those explanations. Absolutely. Rewatch
this if you need to, or refer to your resources, PDF when you're ready
to move forward. I will see you in the next
video where we'll look at some examples of
some children's books.
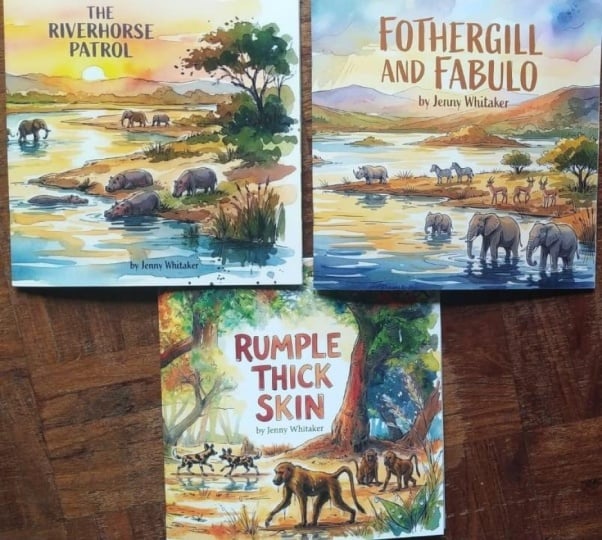
3. Formatting Examples - Getting Inspiration from Published Books: We're going to look
at some examples of typical layouts and some
typography customs. If there is a book that you love that you want to reference, you can feel free to do so. You can get some books from your child's bookshelf
or go to the library, or you can use the Look Inside feature on Amazon and you can see the interior of
most children's books. They pretty much all have
a look inside feature. So you can see at least a
few pages to see how things, We're not copying anything here, we're just seeing
what's standard. I have four different examples, we might not look at all four. I also do have an author copy of the book that I'm
formatting for this course, so we can take like a brief
flip through really quickly. I show you how to do these
patterned pages right here and set up every
single page in here. What text to put on
the copyright page. I've had too much
coffee, by the way. I'm shaking a little
bit as is typical. But I show you how to do, how to format, how to add these little shaded backgrounds. I don't know if you can see, I'm going to hold it
up just a little bit, but there's like a
texture to the pages, so it's not just white
behind the text. And I'll show you
how to do that. Like a brief little quick flip through of what's in this book. And like I said, I'm
going to show you how to do all those pages. So the first one
you can see some of these are well
loved by my daughter. Yeah, they've probably
seen better days. Let me move these. We're
going to look at layout. We're going to look
at typography. The font choice for Peppa
Pig obviously is a brand, It's on brand for
the actual TV show. They didn't choose another
font for their book, they just use their Peppa
Pig Ft layout wise. Sometimes you'll see
this in children's books and you can
decide to do this. This is not the layout that we're going to be
using for this course, but this is the title page. Some children's
books will include the copyright information
on the title page, but you can see it squishes
things up a little bit. This is not my preferred method, but the perk to doing this is that the first page that a
child flips is the story. It immediately starts on the page right after
your title page. This is an option you can include and copyright
information on one page, so you don't need to have
any additional pages before you jump into the story. Now these illustrations
are full spread. You can see this one, It's not quite going to the
bottom of the page, but there's a solid
background behind all of the text on pretty much every single page that
you flip through. It's always a solid background. They don't have anything
going on too much. Actually, I would have
made this white font because it blends a little too much with the
background right here. But you can see it's justified. All the text is left justified and they actually indented. That's not something that you see too frequently
in children's books, but it just depends
matter of preference, just flipping through and seeing if I notice anything else. But these illustrations go all the way to the
edge of the page. So this was printed with bleed. I do show you in
the course how to do something like this
if you don't have any space on your
illustration to add like any blank space or there's too much going
on in the background. I show you how to add
some additional space like this flipping through. These are single
page illustrations, They're not one big illustration that goes across both pages. Yeah, most of the text stands out really well
from the background. Yeah, this is our
first at the end. I guess we need to
look at layout wise. This is the last story
page on the left. And then they have
this hard page. I guess they expect
you to tear this out, which is just a recipe. They don't have
any front matter, any back matter really
like dedication or about the author or contact
or anything like that. But this is the first example. Next up, a popular
book which has also been well loved by my daughter is Where The Wild Things Are. This one, see it has some
extra pages in the beginning. When you're self publishing, you have to pay for every page. I think with KDP, 24 pages is actually the
same price as 28 pages. You can check to see if there's really going to
be a difference because you can include
additional cute pages. I would say like this
because it's not needed, but it's just for
styling purposes. They have an award
that they won. This is the pattern
page, like I show you. We're going to add
our own pattern page. Ours isn't exactly
full spread though, because no matter
what children's book, nonfiction fiction,
the first page is always a right hand page. That confuses some people. Especially how Adobe and
most PDF reader open a PDF. If you have two pages, the first page is always
going to be on the left. That's not actually
how books are printed. The first page is
always on the right. All right. Hand pages are odd, all left hand pages are even. The pattern page and
then a blank page. So it has the little
title page right here. Actually, that's
not even a page. This one has quite a few
extra pages in the beginning. This is the title page and it has copyright information
down at the bottom as well. I picked this book because it's single page illustrations, but it also has,
if I flip through, it has some that are
like semi full spread. Of course, I didn't
immediately find one. They bleed over this sine and I show you how to
do that in the course. I know there's one just
like the Peppa Pig example. This one is full spread. It took me a minute to find. Okay, we're going
to look at font. This is a bold font,
and it's a Sapan. Whatever font you choose
for your children's book, you want it to be easy to read. I have an example. This one
has more styling to it. It's not actually,
this one's a Sat. The stroke is not the
same for every line, so it looks handwritten. Even with this one, you
want it to be easy to read. You want little
kids to be able to recognize the letters
like the right here. Or the L might be a little
more difficult for little kids to put it together. That, that is an L because
it's got so much styling to it, that's something
to think about. Obviously, kids are smart,
they'll pick up on it, but this one is a
bold Saraf font. I like to use Saraf
or San Sera fonts for the text
throughout the book. All of these are left justified. All these text blocks, these have the layout of illustration on one side,
text on the other side. There's no background
to the text, it's easy to read, stands out. This is interesting that they let this slide
or let this go, but there's a lot more space on the top than on the
bottom right here. I would have center, see
it's centered right here, but it's not in the other ones. If you flip this page, actually, now that
we've got this, yeah, so they use the same, like you can see
distance right here. It's like they kept this layout of the text and
put it right here. But I would have
centered it even though the text would have jumped down. When you flip the
page like this, I think visually it would have looked better if
it was centered, which, this isn't to critique
anybody's formatting. But I'm just trying to show you just some general
things to look out for when you're
formatting your own book. I show you how to
do this as well, bleed the illustration over the spine but still
leave room for text. I think I already
mentioned that. All right, let's go to the,
so we can see the layout. They don't end with an
illustration on the last spread, which is actually not typical. Usually there's an
illustration on the last spread and then it goes right into
the pattern pages. This is the layout
that we're going to do because there's a few
different layout options. But we're going to have a
pattern page right here. Sometimes if you don't
have pattern pages like this whole
sheet right here. So we're going to have
the title page and then the copyright on the back side, which is common, it's not required in
the publishing world, but this is a typical layout. And then next to it's going
to be our dedication. Not all children's
books have dedications. The next page behind
that is going to be our story is going to start. And then at the end on this one, this is the last story page. Then directly behind,
that's going to be in about the author page with the pattern that we
have at the beginning. Then this is a 28 page book. My PDF file only has 27
pages because KDP is going to automatically
add a blank page at the end because they want a
blank page for their barcode. If you submit 28 pages, even if your last page is blank, sometimes they'll
add four more pages. So that's kind of something
to look out for because your page numbers have
to be divisible by four. So I avoided having
additional blank pages because they'll just
be white pages. I avoided that by submitting
a file that had 27 pages. Kdp requires a
minimum of 24 pages, so you can't submit
just 23 pages. You do have to submit 24 pages, even if you left the page
24 as a blank sheet. I can't confirm if
they're going to add those blank pages
at the end or not. Sometimes they do,
sometimes they don't. I've had some clients
say that they do, some say that they don't. It just depends, that's the layout that we're going
to use for this course. But let's just look really
quickly through this one. It has the title page and
another introductory page. This is also left justified. There's not any
paragraph spacing, it's all equal spacing
between the lines. This one bleeds to
the edge of the page. The illustration goes off
the edge of the page. But most of them in
this book, actually, they don't go to the edge of the page, your children's book, it might have to fall
within the margins, but if your children's
book just has images in the center of the page that don't go
to the edge of the page, you don't have to add
bleed to your file. This one obviously has full spread bleed images that
go all the way to the edge. Again, it's a sera font, so it's easy to read. The font size is
obviously larger than in a fiction book
or non fiction book. I have a little reference to for the layout that
we're going to be using, just a little diagram
in the resources PDF. Then, as I said in
the previous video, I also have some font
choices laid out in the resources PDF that
you can check out so you don't spend too much
time looking for a font.
4. File Handling Basics for Your Book Project: Let's talk about file handling, which is always important, but especially so when
you're working in design. As I mentioned in
the basics video, when you place an
image in design, that image is not placed
directly in your design file, which is right here in design will reference the file with that specific name in that specific folder
or the directory, in this case, I have them
placed in illustrations. And what you see in
design is a preview or an aggregate of what the file looks like as
a finished product. If you go into the
Links panel in design, you'll be able to
see every image or graphic that's placed
in your project. If you end up moving an image
from one folder to another, if I move this image and
go back into end design, you'll notice that there
is a missing icon. Let's find it. Yeah,
you'll need to update that link to the new
location, or in my case, I'm just going to move it
back to where it originally was and then in design
automatically found it. Actually, it still looks a little blurry
because I don't have. Let's change that really quick. High quality, that's
something that we'll talk about further
on in the course. This is really
helpful if you end up modifying the original image
in your project folder. I changed, I updated
this image right here. Maybe your illustrator gave
you an updated illustration. If the name stays the same and it's in the exact
same project folder, you can double click
this yellow icon right here. It'll take a second. That's a broken link icon, and it updates the image to the latest version
without having to manually replace that image in your design file every single
time you make a change. So it's really helpful, it's
just a quick little click. As long as the name stays the same and it's in the
same folder location, it's really easy to replace. So for that reason,
we need to keep all of our assets, our images, graphics, illustrations, in one project folder
on our computer. You can have these
in multiple places, but it's just best
if everything's in a neat little
folder altogether. Our end design file will also
be saved in this folder. Mine is just called
Children's Book right now. This is my finished project. Of course, I'm going
to take you through the steps in this course
to get to this point. So for the purposes
of this course, I'm going to go ahead and make a new folder and we're going
to start from scratch. I just named mine
course Project. In this folder, I'm
going to create another one called
Illustrations. Another one called other assets. Another one. This
is like my exports. I always call this deliverables because I do a lot of
this work for clients. You can call it exports, final files, whatever you want. You may not need
another assets folder. You may only have illustrations
that you're putting in, but I have some extra things. It's here just in case
I like to save my file. In this main course project, my end design file, so they
all live in one happy house. Let's move all of our
illustrations into this folder. I'm going to copy mine. It's best to put all
of your assets into your project folders before
you import them into design, before you place them in design, so you won't have
to later update those links when
your files move.
5. Creating Your Project File in InDesign: It's time to get
our end design file set up so that we can
take a look around. Before we dive into
formatting your book, you've already got a little
sneak preview of what it looks like when your
project is open. But this is what end design looks like when
you first open it. Yours might have a little dialog box that pops up right here. Mind shows recent
folders but once you close a little pop ups,
this is the main page. We're going to head up
to new file right here. This is going to open
our new document window. Depending on how long you've
been using this program, you may not have anything
under this recent tab. As you can see, I
use it quite a bit, but that's okay
because we're going to build your file together. Name your document
up at the top here. I'm going to call
this course book that's not spelled right. Next, let's set our
width and our height. The example I'm using
in this course is for an 828.2 children's book. You're going to enter your
single page dimensions here, not your spread. So this is your trim size. We're going to
select facing pages. It's not really going
to matter in our case, but we just leave it checked. It's checked automatically.
We're just going to have one page for now. We'll
add them as needed. We're not going to
worry about columns, and we've already figured out the margins that
we're going to use. So let's enter that as
0.5 " all the way around. Since this is based off a document that I've
already used it, they already all say 0.5 ", but we're going to
keep that how it is. If you're uploading
your book to KDP, you can use 0.25 " here. But again, this
course is going to be how people most commonly
upload their children's books, which is paper back through KDP and hard back
through Ingram Spark. So we want to comply
with both KDP and Ingram Spark has a 0.5 in margin requirement. So
that's what we're going with. Remember we need to add bleed to all outside edges but not the inside edge
which is the spine edge. So we're going to add
0.125 " to all of these. We're going to toggle
this lock feature off and then change the
inside one back down to zero. We're not doing
anything with Slug. Everything's ready to go,
so let's click Create. This view can be a
little intimidating if you've never used
in design before. This is a layout that
in design defaults to, it's the essentials workspace. We're going to first
set up the workspace that I've included in the resources file for this
course because we're going to want easy access to some
commonly used features. This is the
essentials View book. Editing is the one
that I use which may look a little
more intimidating. But trust me, it's
nice to have some of these features in an
easy to access place. Let's go ahead and I'll walk you through how to
set up this workspace.
6. Adding a WorkSpace to InDesign: After you download
the workspace file from the resource library, you'll need to load it into
your end design program. I'm just going to go ahead and press copy right now or command C. And then we need to put it in the directory for our
end design program, not just our file on a Mac. What we're going
to do, I already have it typed out right here. We're going to put this
little tilda forward slash library, forward
slash preferences. And it's going to pull up this folder right
here. Double click. You may have some other folders. In this case, I only have one. We want the Adobe and design
one and the latest version. Then down here we
have workspaces. Mine is already in here, but this is where you're
going to paste it. I'm switching this
back to essentials, because this is what
you're going to see. But we're going to
go ahead and save our file because the workspace
may not load immediately. You may have to
totally shut down or close down in design
and then reopen it. I'm just going to
save mine under the course project folder and I'm going to save it
in the main folder. I'm not going to put
it in any of these sub folders because I always like my design file
to be in the main folder. Now let's go ahead and
do in design for a Mac. You may have to right
click and press quit. Now we're going to open
in design back up. Your file should be down here. If it's not, you
can go back into your course folder
and open it there. Now you should be
able to click up here and book editing should
be one of the options. If for whatever reason that little things
not right there, you can always go to Window Workspace and select it there. Again, this view can seem
a little intimidating. I'm not going to
walk you through each one of these ahead of time. We'll just use each
property as we need them, and we likely won't use every
one of them in this course. This is just the view that
I am most comfortable with. I have customized
this over years of formatting and these are the
things that I use the most. If you can't get this book
editing work space to work, if you just don't
know what folder to put it in or what have you. I recommend going to
the Essentials Classic, because likely yours opens
in this Essentials and it just doesn't have
the same layout. There's just not much,
it's very stripped back. I recommend going to
Essentials Classic. If it loads, it looks
very similar to mine, then say I want to,
let's do paragraph type. If I have something over here and you just don't
have it over there, you can always click
this and you can drag it and that little
blue icon will appear. Or a little blue shading. And now it's docked there. So you can have easy
access without going up to window type and
tables paragraph. I promise that soon
enough this is not going to look intimidating
at all to you. And you're going to be
able to navigate through end design like a pro by
the end of this course.
7. Important Guidelines and Navigation Inside InDesign: When your file opens, it's going to default
to the first page. Let me just go over
really quickly, This square in the center of your white page is
the margin line. This is not going to print. So let's go up to view. Screen mode, pre view, and you can see what
your book is going to look like once it's printed.
There's not any guidelines. You bleed extends past this page but you can't see
it because this is what it's going to look
like when it's printed, that bleed line is cut off. Let's go back to display normal. And you can see our bleed line is back and we have
our margin line. Those are our little guides. I should tell you how I'm moving through
this really quick. You can click and drag the bars down here and if we
close this panel, you can see the one on the right or what I like to
use is hold command. And then I'm going to use my scroll wheel and I can move
to the left and the right. Then if you want to
move up and down, you just release
the command key. And then to zoom,
press option on a Mac and you can zoom in and
out with your scroll wheel. If you don't want to use
any keyboard shortcuts, you can come down
here or right here. And then if you want to
zoom in and out down here, you can click on this zoom tool. And then you can click and then move your mouse left or right, and it'll zoom in or out. Or if you have a laptop, you can use your Trackpad. You can't see it, but I'm
using my Trackpad right now. And you can use the
trackpad without having your zoom tool selected.
8. Set Up the Book Pages Inside InDesign: Before we bring in any
illustrations or text, we're going to set
up our document to make things move faster. So that when we do in our
illustrations and any text, it's going to go really quickly. Let's work on where the
images will go first. Unlike a program like Word, your image is going to sit within something called a frame. You can adjust the size
and the position of the frame without adjusting
the actual image, or you can adjust them together. Let's take a picture frame. Our example book is
going to have a mix of full spread illustrations and
single page illustrations. This way I can show you
how to handle either case. If yours full spread or all single page,
you'll know what to do. Let's go to our pages
work space and we're going to add four pages here. 1234 with a little plus icon. Right now, these are
going to be pages. You see how this is numbered. Pages 2, 34.5 of our story. Okay? For this example, pages 2 and 3 are going
to be full spread, meaning my illustration is going to go across
both of these pages. This is the left page.
Let me zoom out. Move you over. We're going
to zoom all the way out. This is the left page and
this is the right page. And this is true
throughout the book. Your first page is always going to be on your right hand side. And then it's going
to be left page, right page, left
page, right page. My first one is going to
be full spread and then my next one is only going to be a single page illustration. I'm going to have text on one side illustration on the other. The layout of your
book is going to depend on what you decided
with your illustrator. You may have all single
page illustrations all spread or you
may have a mix. Just keep in mind as you're formatting your
project that you may need to move your
frames differently than mine to suit your book. If you're following
along as I'm going, I'm going to zoom back in. And I'm going to
close this for now. So we just have a
little more space to see on the left over here, we're going to click this
square with a cross through it. This is the Rectangle
frame tool. This is our little picture
frame for pages 2 and 3. Since this is a full spread, we're going to make the
frame take up both pages, so make sure to include
bleed which is off the page. So we're going to
click and drag, and we're going to drag it, whoop, all the way over
to the other corner. Now we have a frame for our
illustration to live in. Let's scroll down
to pages 4 and 5. I'm going to add a
frame to the left page. You may choose to have the
illustration on the right. And if that's what
you prefer, just add the frame to the right side. Click and drag
where's the center? Okay, this is good. I can show you what
happens when it doesn't toggle as you want or it doesn't end up being
in the right position. So I'm going to release then. Right now if you
click this, it's just going to make another box. You're not going to be
able to adjust your box, I'm just going to control Z
to get rid of those things. And I'm going to zoom
in so I can show you if this isn't sitting
where you want it to, you have to go back up here
to your selection tool, press V. Then now you
have the little left and right arrows so
that you can adjust this and it will snap to your center line a little better sometimes than the
rectangle frame tool. Okay, so before we
move on to adding as many pages as we
need because we're essentially going to copy
and paste this layout. We're going to run into an issue if we have illustrations that need to go all the
way to the edge of the page which remember
is why we added bleed. All right, let me import one of my images so I can show you. We're going to use
this one which is actually not an image
that I'm using in this book but just
for examples purpose. You can see that my image, it's scaled way
too big in design automatically did so sometimes when you bring in
your illustrations, if you don't fix what
we're going to fix, your image is going
to be too big or too small for this little
picture frame that we have. So we want our illustrations
to automatically scale to fit this
frame proportionally, so we don't have to tinker
too much down the road. We will still need to
tinker a little bit and fine tune our
illustrations and things, but this allows us to start
in a good place every time. So let's change those
so our images are automatically sized
to fill the frame. And when I click
this right here, you can actually see
these orange lines. That's where my illustration is. If I click out of that, this is showing where my frame is. And when I click in here, you can see where
my actual image, how big my image is
outside of that frame. So I'm going to
delete this picture. So we need our selection tool toggled on select our frame. Go to object fitting. All of these are going to be grade out because there's not an image in this frame yet. Go to frame Fitting options, and we're going to select fill Frame Proportionally Click Okay. It doesn't look like
it did anything. I'm going to bring in my
picture again and you can now see that
it fills the page, It goes off into the bleed
as much as it can while still making it as small as
possible to fill the picture. So if I click this right here, now I can see the edges of my image which go
past the frame still, but only in the height. The width of the page is now the exact same
width as my frame. The height is just smaller. Yours may be the opposite. Your width may extend
just a little bit, and your height may be the
exact same as your frame. So I'm going to
delete this picture. We're going to do the same
thing with this frame up here. Object frame fitting, fill
frame, proportionally click. Okay. Down here on the opposite page of my
single page illustrations. I'm going to want a solid color over here. I'm going
to start with this. I'm not going to use
any for my book, but I'm going to
show you how to do it in case this
is what you want. For your book, you can choose to keep this background white. And if you want to do that,
then you can skip this step. But I want to show
you the option of adding a background
color to your text. So to do that we're going to add a rectangle instead of a frame, so it's right below
the frame tool. Click. And we're going to
click and drag it so it covers the entire page including bleed up here, right
in the middle. We're going to
click, you can see, I don't think it
snapped to the center, but we'll fix that, Make sure
it covers the entire page. We're going to zoom
in a little bit. We're going to go back
to our selection tool, then move it so it's
right in the middle. Zoom back out. Now we want to fill this with
something. Come up here. This is our fill color. Right now it's transparent. That's what this line means. We're going to
double click that. We can choose a color here. I'm going to go with this
is CMYK, by the way. Let's do a light
purple click, okay? And then you can lower
this transparency up here. Right now it's at 100%
If you click this, you can bring this down. I'm actually going
to select this. I'm going to go with 20%
It's nice and light. Now that our picture frames in the text background
is squared away, let's add our text boxes to make importing
our text easier. Let's go to our full
spread layout and select our text tool,
it's right here. Type tool. I call it text tool. Text boxes work much
like our picture frames. So it's a box that will
contain your text. Sometimes your text may
spill out of that frame. But we'll cross that
bridge when we get to it. So we're going to
click and drag. Don't just click, because it's actually this little
circle icon right now. Thinks that we want to fill
this entire frame with text, which is not what we want to do. So if we just click,
you see up here, it thinks now I want to type in this entire frame,
but I don't want to. So we're going to click and drag where we want our text to go. Right now, we don't know
exactly where we want it to go, but we just want to have
a text frame somewhere on this spread and we can
move it around as needed. And I'll show you what to do
later if you end up needing more than one text
frame per spread. Right now, we're going
to start with one. When we put a text
box on our page, it's going to default to be paragraph and character settings in our design preferences, which right now is
Minion Pro size 12. Yours might be a little
different than mine, but we want each text box to
start off looking the same. Then we can tweak
each page as needed. But we want to make
it easy to change the font of the entire
book if we need to. So to do that, we're going to use paragraph styles right here. If this isn't right here,
you can always go to window style paragraph styles. We're going to click
this plus icon down at the bottom to create a new style double click the title and we're
going to name it Body. We're not going to
actually worry about any of these styling just yet, we're just going to click okay. The important thing is
our text right here. And this little text box has
the paragraph style body. If this isn't selected, it might be on this one. Make sure it's on body. Now when we style
our text later, we'll just be able to update this body paragraph
style to match it. And then it will update
throughout the book every paragraph that has this
body style assigned to it. So we're going to press Escape with this paragraph
style selected. We're going to scroll down. Our text is going to fall
on this side over here. Let's select this. Go back to our text tool.
Click and drag. We might have to
select body again. Then we're looks like
it's mostly aligned, but we're going to
align this text box to be in the center of our page. I'm going to open this
align panel again. You can go up to window
object and layout a line. We're going to make
sure this is set to page and we're going to center it horizontally and
vertically, close that. For my example, this
is the page pattern, for the most part that I'm
going to follow for my book. I'm going to have
a full spread and then I'm going to
have a single page. Instead of adding all of our pages and then copy and
pasting each one of these, we can actually
select these pages. Right click Duplicate Spreads. At end of document, we're going to do
the same thing. Page two to page
nine, Duplicate. We now have 17 pages. Right now, we're going to
select ten through 17. Do that again. Right now we have one more page
than what we need, but we're going to
worry about that later. There's other ways to
duplicate these pages, but this is the most
beginner friendly, and it only takes a
few seconds to do so. Now that we have the
story pages set, I'm also going to add some
frames to our title page. Let's scroll up, double
click First page. We're going to add two
more pages after this, so this is going to
be our title page. Add two more pages. This is going to be
our copyright page, and this will be our
dedication page. So instead of drawing
new frames on these, I'm going to scroll down and I'm going to select
this image frame. I'm going to press control C where you can write,
click select, copy. Go back up to the top and I'm going to
paste it on this one. Control V or command V, I'm used to saying control, and I'm going to reposition it so that covers
this whole page. I'm going to do the same
on our dedication page. I might end up using one on
the copyright page over here, but we shall see. Then we're going to have
text frames on all three. Once again, I'm just
going to scroll down, select this text frame, copy it. I'm going to write,
click select, Paste in place that puts it in the same location that
you copied it from. I'm going to move over
just a little bit. We're going to paste
one over here. Reposition it, who we're
running out of space. Move over right in the middle, and we're going to come up here to our first
page, paste in place. We're going to end up using
more than one text box for this page because
we're going to have our title most likely. And then our attributes written, illustrated by on this page. We're just going to
leave it like this down. We have everything in our file
set up and we are ready to start bringing in our
illustrations and our text.
9. Adding Illustrations to the Image Frames: Now it's time to bring
in our illustrations. First, let's make sure
we've saved our project. I just did a second ago, but I'm terrible at
saving my project, so make sure you're
constantly saving. Let's go into our
illustrations folder. We're going to start
dropping in our images. I prefer, and I
recommend you number your illustrations so that
they are in order by name. In this case, I didn't
use anything like image or illustration or anything like that, I just use numbers. And you want to do this
alpha numerically. You want to include a zero. If you go into double
digits like I do, I have a page ten down here. You're going to want to
put a zero in front of it. This is because when you
import things into end design, it's going to automatically
sort alpha numerically. If I just had a one
here and not a 01, it's going to place
this image first. It's just easier if you
number it this way. I'll show you how to scroll through them if
you don't do that. And then you can select which image you want to place first. My files are all set,
so I'm just going to go ahead and
select all of them. You can place Photoshop files, by the way, if you want to. Most of these are images, but I do have a Photoshop file, I'm going to click,
drag it in here. And you're going
to have to select your end design program. Again, I don't want to place
my first image right here. I want to place my first spread. You can see there's a
little preview image if you didn't rename your files, or if the first one that pops up isn't what you want
to place first, you can use your arrow keys on your keyboard left and right to scroll through which
image you want to place. Mine's in order. So I'm going to scroll out just a little
bit so I can show you. You're going to click in the top left hand
corner of your frame. Click and it
automatically fills it. So I'm going to scroll through, place my next image. Remember, since we
set everything up to automatically resize
to fill the frame, everything is just
placing beautifully. I'm going to go
through, by the way, if you want to scroll down
to the next page on a Mac, you can press Function
option and the down key. I'm doing that because
my scroll wheel is broken on my mouse. That's why sometimes it
jumps a little erratically. I forgot that I organized my
pages a little differently. My illustrations,
I changed them. I'm breaking my
pattern right now. I'm going to skip this
spread because I want my next one to be full spread. And then the pattern
resumes, sorry, that's a little deviation, but this just shows
you, you can change things and move them
around as you please. So you can select
the first page, shift the other page
that you want to delete. And press this little
trash can icon down here. And it's going to
delete these pages. It's going to say that
it has objects in it, But that's okay. Just
go ahead and delete it. There you have it.
Your book is already starting to take shape. It
always looks really nice. Once you have your
illustrations, I'm just going to scroll all the
way back up to the top. If you notice that
your illustrations don't look high res, if you scroll in, don't panic. It looks blurry. Go up to
view display performance, and if you select
high quality design is going to render it
as high quality now. So you can see that
it's not blurry. I made that mistake
early on when I first started working
on children's books. Think why doesn't
this look good? That's because
design allows you to select which type of
display you want to use so that your computer
is not slowing down trying to process each image as you move
through the file. We're going to keep it
at typical display just to help in design work as
efficiently as possible. You can take this opportunity
to scroll back out, go through and make
any image adjustments that you think you're
going to need. You might not know what
you need right now, but you can just select
each one and make sure, oh, this is a good
example, is the spine. This is where the spine is
going to be. Right here. Right now, my fox
is falling right in the spine. He's going
to get cut off. You're not going to
be able to see him. I actually adjusted this
illustration so that I can move him all the way over here so that he's out of
the spine and he's not going to be cut off anymore. I'm just selecting the
actual image inside of the frame by clicking on
this little hand icon right here to make sure that everything is sitting
where it's supposed to be. Bunny looks good. Our
mice looks so cute. Actually, I might move this
one over just a little bit because that one is too
close to the spine. That should be good for
now, that one's perfect. If for whatever reason
you decide to change, say I didn't want this
to be full spread, I want it to be a single
page illustration. You can make sure your
selection tool is toggled on. You can select your
frame and adjust it so that it only shows the part of the illustration that
you wanted to show. Maybe I wanted these animals showing and not the other one so I could have
more room for text. And then you can
also select your image in here and you can move it and adjust it
within that frame. That's not something
that I want to do, but I just wanted
to show you that you can adjust your frames. Let me scroll up to one. To this one. I know that I'm actually
going to end up resizing this image to be smaller
because I'm going to put text up at the top right here if you
already know that ahead of time you can make some adjustments right
now if you want to, I'm going to hold shift, and when you hold shift it
scales things proportionally. I'm going to select, I'm
actually select my image. If I move it like this, you can see that it's not
scaling proportionally. So I have to press Shift. I'm going to scale
it down just a little bit so I have some
more room for my text. There you go. My frame is
still filling the entire page, but my image is now
smaller within that frame. You may want two illustrations
on a single spread or a single page to resize your frame and your
image At the same time. On a Mac, you're going
to hold shift in command or shift in control on a PC and you're going to
resize it as you need. Then now you can add
another illustration, just as an example. I'm going to show you
what that looks like. I'm going to add one
of my butterflies just to show you base. Then I can this one
down to as needed, so you can have more
than one illustration on a page or spread. That's just how we set it up in the beginning to
be one per spread. I'm going to change
this back to how it was and we're good to go. Don't worry, we'll be fine
tuning as we go along. But for now, we have all of our illustrations placed
where they need to be.
10. Adding the Story Text to the Text Frames: Importing the illustrations was pretty straightforward since we can just drag and drop
our pictures in the text. Can be a little
trickier sometimes to keep this tutorial as
beginner friendly as we can. I'm not going to thread
my boxes together. If you're familiar
with end design, there's a way that you can
link all your text boxes together so that your text is
essentially on one string, but showing up on
different pages, you can break it across
different pages. This can save time if you
know what you're doing, but it can be a headache if
you're just starting out. We're going to leave these as individual text
boxes that are not linked and we're
going to manually add our text to the corresponding
pages. I prefer this. Anyway, this is the
method that I use, even though I'm very familiar
with reading text boxes, it's just a little
easier to adjust things. If you change the
sizing of the text, you don't have things bleeding where they're not supposed to. Things just behave a
little more predictably. So the first thing we're going
to do is import our text. I'm actually going
to import it on the dedication page up here
or the copyright page, just so it's out of the way
and so I can clearly see it. So I just double
collect my page two up here to jump to
our copyright page. And now we can just click
and drag our file into Word. I'm going to click in this
top where the margins are, right here, and it's
going to automatically resize to fill the margins. We are going to
delete this text box. This is just here temporarily so we can copy and
paste our text in. You may have gotten
a missing fonts warning that popped up. Just press skip. We're
not going to worry about replacing any of
our fonts just yet. You're still able to
place it in your file, so just press Skip and then
place it on your page. If you have italicized or bolded text that
you want to keep, I don't, but we're going
to use an example here. Let's italicize
this part italic. This is a character setting, it's not a paragraph setting. My paragraph is styled one way, but you can individually customize how certain
characters look. Character settings,
anything that's italicized or bolded is going
to be a character setting. Let me show you what this does. If I select body, it actually kept at this time,
but sometimes it doesn't. And you can see if I click
on this text right here, This plus icon means that
there's some deviation from your paragraph style which
you don't typically want. If I say to clear the
overrides and to make it apply the paragraph style
to the entire paragraph, you can see that it
got rid of my italics. Let me undo that.
We need to create a character style. I'm
going to come over here. I always have my
characters and my objects, my paragraphs
altogether on one menu. If that's not open,
you can go to window style character styles. We're going to add
a character style, I'm going to call it italic. You want to reset this to
base because a lot of times it adds extra information
that we don't need. Then under basic
character formats, under font style, we're going to select italic, We're
going to type it in. We're not worried about size, font, family, or anything. We want all of that stuff to be the same as the
paragraph style. We just want this
particular setting to be applied to our italicized text. Say this is also italicized. You can select the word and
apply the character style, or we can find and replace. We're going to press
Command or go to Edit, find, Change what
we're looking for. We're not going to
type anything into these two boxes because we're not looking for specific text. We're looking for anything
under basic character formats that is italics. That's
what we're looking for. Then we're going to
change any text that has the character setting. We're going to apply
the character style. And then I'm going
to click change all two replacements made, which I know I
have two chunks of text that have
character setting. It doesn't look like
it did anything, but if you click
on this now it has the character style
italic applied. And then if I apply
my paragraph style, a peer body, it's going
to take a second to load. You can see now it's
not deviating from the paragraph style because
that has a character style. So you can do the
exact same thing for any bolded font
that you have. A quick note, if you have text that's bolded and metallicized, you can't layer character
styles on top of each other. You can only have
one character style, Say this is semi bold italic. You have to create a
separate character style that has semi bold italic. I'm going to undo all of that
because I actually don't have anything that's
metalized in my book. And then this part is
a little redundant, but you're going to select
all of your text and cut it and paste it where you want it to go
throughout your book. I know this is the text
for the first spread. It doesn't look good,
you can't see it. But we're not going to
worry about that right now. We're going to style it later. Again, there is a
faster way to do this, but this is just the most
beginner friendly method. I'm just going to go through, I'm going to speed
this up a little bit. This portion of the video
a little bit, paste. I'm using keyboard shortcuts, select command X, then whoops, double clicking where
I want it to go. All right, so I
have all of my text placed on the spread that
it's going to go on, and don't forget up here, we still have this textbox even though it looks like
there's nothing in it. We want to delete that textbox. So just go ahead and select that textbox and press delete. So it's looking a little
closer to a finished book. We've got our illustrations
and our text imported. We're not going to worry
about front matter right now, our title page dedication. If you have that information
already, you can add it. Of course. So I'm just going to type in mine. I
already know mine. I'm going to add my copyright
information later and I'm going to add my title page
information later as well. I just realized that my text
lost the paragraph style. That may happen,
that's because it kept the paragraph style that
was in my Word document. If that happens to
you, not to worry. We're going to control F. Again, we're not looking for italics and we're not going
to apply italics. We're pretty much
looking at all text. Our find format is
going to be blank. It's going to be everything.
We're going to change it, we're going to apply body. Let me move this out
of the way then. This is mind is automatically selecting the story which is just your individual text frame. We're going to select
the entire document, change all 11 replacements made, and now everything is back
to having the body text. I should have showed you how to avoid that, but there you go. Before I move on to
the next section, I just realized that I forgot to add the other half
of my illustration. I have a butterfly, P
and G. That's going to go on top of all of
my illustrations. And I'm just going to show
you what that looks like, adding an illustration on
top of another illustration. This is the one that
goes on this page. When I click, actually,
if I zoom in, it didn't size appropriately, but we'll change that later. I'm not going to use these
colored boxes right here, but if I click in here, it's actually going to layer my butterfly into
the colored box. Now my image has a fill which makes it look
like it's faded a little bit. So we don't want to do
that for those pages. I'm just going to
click off to the side. And then I'll move that
over in just a minute. So I know I'm not going to
use color behind my text. So I'm just going to
go ahead and delete these and then I'm going to
move my butterflies over. Okay, Now, everything look
out it's supposed to do.
11. Tips for Font Selection and Where to Find Commercial Fonts: Disclaimer. I am not a lawyer and any
commercial rights advice you here in this
course should be verified with your own research. I'll give you the
basics and I don't foresee any of these laws
changing in the near future, but do your due
diligence and verify. Let's go over a quick commercial rights lesson concerning fonts. This also goes for any
images you use online, but those aren't as
straightforward, and I'm assuming
that you've hired an illustrator to create
your images anyway. You cannot simply find
acute free font on line. Download it to your computer and use it in your
children's book. You need to verify
that that font is free for commercial use. Meaning if you are using it in a product or service
that you intend to sell, you need a commercial
license for it. A lot of free fonts require you to pay for
commercial usage rights. They're free for personal use, but not always for something
that you intend to sell. In summary, just because you found a free download link for a font does not
mean that you can legally use it in your book. An artist created that font and you purchasing the license is how they make money
off of their art. I'm going to go for
three different places that you can get fonts. One is included
with your Creative Cloud subscription with Adobe. The second is great for sourcing
commercially free fonts. And the third is a great
website that you can use to purchase
commercial fonts through. They have so many options with so many glyphs and special
characters, it's amazing. First up, there
are some tried and true fonts that you can
use with in design. And since Adobe fonts is included in your creative
cloud subscription, you don't need to worry about any commercial rights issues. Let's go to Fonts.adobe.com They have some that they
always highlight down here, and you may like how these look. You can kind of just browse through and see
which ones you like. If you use a font and
enable it from Adobe fonts, you have legal rights
to use it commercially, so you don't have to
worry about that. If you know the name of the font that you want to use, you
can type it right here. I usually just browse for fonts, so I'm going to collect
browse all fonts you can search on
the left, clean. These are some tags
that they may have. I always, this is a cute font, but you want it to
be easy to read for a little kid
that's not an a, a style for an, that
a kid typically sees. The rest of the letters
look pretty clean. This one looks good. It's
got some unique styling, but it's still
pretty easy to read. Some of these may be better
for like your title page, if you're doing that yourself, if your illustrator didn't
give you a title page. But on the left here, this
is what I usually click. Sands, Seraph, and scroll
through some of these. I'll include a couple of different fonts that
you can use of course, or some good ones to consider
in the resources PDF. The handwritten ones can
be cute for title pages or if you want to emphasize
a certain word in your book with a unique font, you can just scroll through and pick which fonts you want. Also, there's a little
camera icon right here. If you have an image, let me see if I can find one. This is actually, we'll see
what it does with this. You can upload an image
here that has font in it. Adobe will, it singled
out this text right here. I'm just going to
click Next Step and make sure that
looks pretty good. It's going to try to find fonts
that are similar to that. Obviously, it's
not going to have the color that's applied here, but it's going to try
to find similar fonts. If you have an image
or something where you like the font and
the background, the text stands out a good
amount from the background. It'll do its best to try to find a similar font which is nice, that is, Adobe fonts. When you add font right here, it should automatically
load within a minute. Usually in your end
design program. So then you can
change to that font. You don't have to
close end design and reload it or
anything like that. You just click Add Font here. And as long as you're signed in, it'll add it to your end design. The next one we're going to
look at is Google Fonts. Fonts.google.com It works
much the same as Adobe fonts. When you find a font that you're interested in, you
can download it. Which Roboto? Most computers
already have Roboto. You can download
the entire family or you can select which
ones you want to download. This looks very intimidating, but just click Download All whichever ones
you have selected, it will download that for you. Go back to Google Fonts, you select the category
that you want. They've got some really
cute ones that you can use for children's books or
like handwritten font. This is actually a font that
I already have downloaded. If you go down to
about and license, you can make sure it's
licensed under open license. You can use them in your
products and projects, print or digital,
commercial or otherwise. They always include this.
This isn't legal advice. Please consider
consulting a lawyer to see full license
for all details. They all include that. Nobody
wants to be responsible. But when you download
this, it's going to download usually as a zip
file and you can open that. The one I always let
me show you an example here because I
always have so many. This is the one that
I used in my book. I didn't want this
font style right here. Sometimes there's
two different fonts. This was actually
from Creative Fabric, but you're just going to
double click the OTF file. Sometimes there's a TTF file, and on a Mac, you can just click Install. Since I already have this,
it wants me to replace it, but I already have it installed. Windows is pretty much the same. You just double
click it, it's going to automatically install. It may take a minute
or two to load it in your end design file, but then
you should be good to go. Last up is my favorite place for any specialized or custom fonts. If I want a font that has glyphs or special
characters in it, creative fabric is my
favorite place to go. I have the monthly subscription, which you can see up here. They have different
pricing options. You can purchase
things like one time, so you don't have to use
the monthly version. And you can find
really cheap ones like $1 for commercial
rights for a font. Creative Fabrica has everything, they have
all kinds of things. Even if you want to
use it outside of your book, it's just a good, if you're making any digital products or things like that, it is an excellent resource. We're just going to look at
some San Sera fonts on here. They have all kinds
of cute fonts. There's not really
a great way to search by tags or different
things like that, but one of my favorite
things to do is if I have something like a book about
S, you can just type in B. And then on the left right
here, you can select fonts. It'll show you some cute fonts that may fit the
theme of your book, that you can use, maybe for your title page or for words that you want to
add emphasis to. That's something I
like to do. Or my book has a forest in it, so I might type in
forest and go to fonts. There's like little bunnies
and stuff in this one. That's like a fun thing to look for since all of
these are included. If I just click in, sometimes there's a
little preview down here that you can change the preview text that
you want to see, but you just download it. If you don't have the
subscription like I do, it may say something
like purchase. It'll have a price listed here. The prices range, They can be like $1 or they can go up to 15, $20 But you would
just download it like the other ones and open up the zipped file and
install the font. It can seem overwhelming to go through some of
these font choices. And trust me, I have spent so much of my life looking
for just the perfect font. So I've compiled some choices for you in the resources PDF. Feel free to use any of
those if you don't feel like searching through
thousands of fonts. These are some of them
that I've used or some of them that I think would be
good for a children's book. Once you have your fonts chosen, activate them in Adobe
fonts or download the file if it's something that
you're purchasing elsewhere and install it. Design should show these fonts
almost immediately if you ever have any issue and the font is just not showing
up automatically. Completely close down in design. Make sure you save
your file first and then open the program back
up and it should load. Let's move on to changing
our fonts in design now.
12. Add Styling to the Text Throughout Your Book: Since I added the
butterflies after I have my text boxes in the
layers panel over here, you can see that my butterfly is sitting on top of my text box. When I try to
select my text box, it's actually selecting
the butterfly. There's two things
that you can do. You can lock it by
clicking this right here. Now, I can't move
that butterfly. It actually moved my illustration
when I just did that, I can't even select
my butterfly. And this little lock icon shows that our butterfly is locked. And that's why we
can't select it. Or you can click and drag it below your text box,
So it's right here. If you don't want to
accidentally move anything, you can lock them. I don't normally do that, but I'm just going to go through and move my butterflies
below my text layer. I do things a little
out of order. I hope that doesn't bother
you for this course, but it's just kind of how
I've always done things. I style my illustrated
pages first, my story pages, and then I go back and I do the front matter. And if there is any back matter like in about the author or anything which I don't have,
I do that at the end too. We're going to go back up
to our first story page. I'm going to zoom in
quite a bit so we can see we're going to
double click in here. And I'm going to select all, just hit command A or control A. You can apply the font that
you are going to want to use. A lot of times I have
a top two choices of fonts that I want to use. I haven't narrowed it down to one, sometimes I have three. I'll use a different font
on a few different pages just to test it out and
see which one I like best. I have already done that though, and I know which font
I'm going to use. The font that I'm
going to use is called Golden Book.
I'm going to use bold. I got it from Creative Fabrica, which is linked in
your Resources folder. Just remember, you want your
font to be easy to read. You don't want it to have
too many embellishments or to have anything that's
disrupting letter recognition. Because it's a children's
book, it's for early readers. You don't want to waste all your money on
your illustrations and the time it takes to format
the book for publication. Only for the text
to be difficult to read once it's printed. I know some fonts can look
really cute or really pretty. But it's best in children's
books to keep things simple, especially for the story text. You can get creative
with your title page, but for the text
throughout the story, you want it to be easy to read. So you can adjust your
text sizing as well. I've experimented already. And I know I want
it to be about 25, which looks really
big. Like this. I recommend at least a size
14 font for children's books, and then you can go up as high
as you want in font size. It really depends on
how much room you have around your illustrations
or on your page, you may see there are some
hyphenated words here. We absolutely do not want that. So I'm going to control all. If you go down here, you can do your paragraph settings and we don't want that hyphenated, we don't want any hyphenations
in children's books. And you can mess around with your paragraph
settings here as well. I have a manual line
break right here. I'm going to get rid
of that because I want to be able to set the paragraph spacing so that it's
not a full line. I'm going to use 0.1 875. You can also do things
like center your text. These are also in up
here over on the right. I'm going to change
mine to be centered. I'm going to hide this
background image, these images so you can actually see my text really quick. You see that this sentence right here is not
really balanced. There's only two
words down here. The text is centered, but there's some lines that are longer than the others that little straggler
down at the end. To fix that, we can go
to paragraph right here. And again you can
go up to window type and tables paragraph. We're going to click this
little settings icon and you can balance
ragged lines. That automatically adjusts
the text on each line so that there's not any that
are significantly bigger or smaller
than the others. You can choose your
font color as well. I'm going to select
a double click on your fill right here. You can change it to
whatever you want. If you have a color that you want to use from
your illustration, let's bring that back. You can use your
little eye dropper. Let's see, You have
to click and drag it. Click this and drag it. And you can select a color from your illustration if you want to. I'm not going to do that. I'm going to leave
mine as black. You're going to want to stand
out against the background. Right now, mine doesn't. And you're like, why do
you have it set to black? Then I'm going to show you how, with our more advanced
text styling, how to make it still legible if there's a bunch of stuff
going on in the background, because this happens frequently. A lot of times illustrators
don't leave blank space for your text and that's okay.
There's some workarounds. This is going to be how most of our text is styled
throughout the book, but you may have an example of a darker page where
you want to use white font and I'm going to
show you how to do that, because that's
definitely something that happens in my book. I have this pretty much
styled how I want it to be. Now you can see up here,
we've deviated from our original paragraph styling,
but we can write Click. And we can redefine it so that our paragraph style body now has all of these
settings that we just made. Click redefine style. It doesn't look like it
did anything on this page. But if we scroll out and
go to our next spread, I'm going to press Function option down to go
to our next spread. You can see our text now has the new body
paragraph styling. I'm going to control
Z, so you can see it applied to
this specific page. Let's go down. You can
see this is what it looks like before. I'm
going to redo that. So you can see now our paragraph styling has
changed throughout the book, easy since I have manual
line breaks right here, I'm going to need
to delete those. And you can see this
little red box right here means that I have text
outside of my text box. Remember this is like
your picture frame. This is your text frame. It's possible for your text
to go outside of the frame, and that just means you need
to adjust the sizing of your frame or the size of your font to fit
within that frame. But we'll make those
changes as we go. This is a great starting
place for your font styling. Depending on how what
your book looks like, you may not need to make hardly any other
changes to your font. We'll definitely be
going over fine tuning your text and placement
in the next section. Something I prefer in all of
my children's books is to keep the font size roughly
the same throughout the book. I don't really want really small text on one page and really big text
on another page, unless I'm doing it
intentionally or if I want to add emphasis to a word
or page here and there. Again, if you need
any inspiration on fonts or styling or just how things are
laid out on a book, just go to your bookshelf or your toddler's
bookshelf, in my case, and pick out some
children's books and just flip through
and see what they did, see what colors they chose. It's always good to get
inspiration from books that are already
published that a professional has
already formatted. So now that we have our
basic styling complete, we can move on to our
more advanced styling.
13. Advanced Text Styling Techniques: Now we're going to
get into the more advanced text styling options. We are going to use
this page right here, I actually want this
text right here, control X. I'm going
to cut that out of this text box because
I'm going to add another text box over here. And we're going to style
this to be text on an we're just going to place
this text over here for now, just so I have it on this page. We're going to move
it a little bit. The easiest way to do
this is to create a line. First, I'm going to
make this a little smaller so it's not in the way. Select your line
tool, over here, you're going to
click approximately where you want your
Arc text to be. You'll notice this
isn't a level. If you press your Shift key, it's going to automatically
make it level. You want it at least
as wide as your text. This is going to
be on two lines. I'm going to be
duplicating this arc, but I'll show you how to do
that in just mit release. I'm going to zoom
in a little bit. We're going to add a
stroke to this line. Just press the up arrow on this just so we can
see it for now. I'm going to zoom in
a little bit more. Now we need to go
to our Pin tool. Go to Add anchor
point we want to add. You can see right here,
it looks really small. There's a little
blue dot, that's the midpoint of this line. I'm just going to click that. It doesn't look like
it did anything, but it added a
point right there. If we go to our Direct
Selection tool, we can click that little point right there. We can move this. The easiest way to do this, you can move it with your mouse. But I like to use the up and
down arrows on my keyboard, just so I don't accidentally
grab anything else. Let me zoom out again
so you can see. Then you're like,
that's not an arc. I'm going to show
you how to make it smooth, get it about
where you want it. We're going to grab
the pen tool again. You're going to hold
down option or Alt. And we're going to click that point and we're
going to drag. We're going to click and
drag option, click and drag. And you can see there's a light blue outline showing where the
arc is going to be. Now when you release your mouse, now you have a
beautiful curved line. If we just undo that really
quick holding option key, you can also make this a little wavy line instead of nice curve. If I release this, you can see it's got a
little wave to it. You can customize this
however you want. We're going to stick
with our little okay. Now we need to add our text. Go to your text tool. Right click it and select
Type on a path tool. This little icon is
the default icon. You have to make sure it
changes to a plus icon because otherwise you might not have it selected even
if it's in the area. You might just make a new
text box that's not on the path or the curve plus icon. Click and now you have
your text right here. But you can copy and paste this. But since mine's short, I'm just going to write it out. Mama and baby, dear, I'm going to control
a to select all, go to my paragraph
styles and select body. I'm going to make
that smaller again. Now we have this
on a curved line. We're going to take off this stroke because we don't actually want
to see this line. We just wanted to use it
as a guide for our text. We can remove that stroke. Now we have our first
line of text on a curved line to get
our second line. Unfortunately, you can't
just press Enter and type, because you can see now
I have overset text. It's not on this one line, but we can duplicate this. I'm going to hold option. You can see this switches to two cursors on top
of each other. This means it's going to copy. If you hold down option click
and drag it makes a copy. Or you can just C
control copy, paste. I'm going to double
click in here. Nibbling on Tender Grass period. Then we can press our
up arrow and we can hold shift to move it a little faster to get it
where we want it. I want to select both of these. I want these to be centered. You can go to a line, make sure this is set to page center. I'm going to zoom out. I can delete this one now. We're going to move
it up a little bit. Remember you want it within this margin line so you can get it as close as you want. I'm going to select
my picture and scale it down just
a little bit more. Maybe about like
that. That's how you do a little curved text. Let's go back to our
type tool because I want to show you what
may happen to you. Sometimes it does,
sometimes it does not. I'm going to bring back the
stroke really quick so I can show you what may happen to you, because this doesn't always
behave like it should. I'm going to click this. You see how my cursor
changed and drag it in Word, because yours may
automatically do this. Sometimes depending on what
your shape looks like, it may not set your
text beginning and end points to be the full width of whatever
line you're using. If yours automatically
looks like this, you can adjust these end points and starting points
all the way to the beginning and all the way to the end if you want
your text to be centered or you can adjust
it if you want these offset. Let me zoom out
just a little bit. You can also make
your line wider. Maybe if your text goes outside this line and your
line is not big enough, I'm going to hold option
and adjust this size. And you can see when
you hold option, it keeps your line centered and it adjusts
the left and the right, I'm going to release. You can see it didn't
adjust this line. I can move that
all the way over. In my case, I have
enough room for my text, but if your text went
outside of that, that's how you make
your line bigger. Once again, we're
going to get rid of the stroke on our path and we
have cute little arc text. Okay, so we're going to work
with this page right here. For this next example, I'm going to move
my text over here. As you can see, it doesn't
look like it's standing out, It's blending into
the background. No matter if I change
this to white, it's still not
going to stand out. One thing that you can do if you don't really have
enough space on your illustration
or any blank space without any texture behind it. What you can do to make
your text stand out is you can add a drop shadow to it. So you can add a
shadow behind it. But how we're going to use it is a little different than
your typical drop shadow. Press escape or go to
your selection tool, make sure your
frame is selected. And we're going to go
up here to drop shadow. I forgot, since we have
this on typical display, it looks very pixelated. So let's press cancel. Go to View Display High Quality. Hopefully my computer doesn't start taking off here
into outer space. And open up your drop shadow. And you can see now it
looks a little cleaner. It's not pixilated,
since my text is black. In this example, I want
to change this to white. It's set to multiply, which means when I
changed it to white, you can't actually
see it anymore. So I'm going to change
this to screen. I don't want there
to be any distance between the drop
shadow and my text. So I'm going to reduce
my distance to zero. And I'm going to increase
the size quite a bit. And the spread, you can see the white around
it just a little bit more. And we can play
around with this. Let me move this, I'm just going to play around
with a little bit. Let's set this to 55. I think that looks pretty good. I'm going to keep the
opacity at 75% and we can increase it if we need to
or decrease it throughout. I think that looks
pretty good now, it's easier to read. And you can change this
color back up here, drop shadow, you can change
to whatever color you want. You just might have
to play around with the blending modes to make sure that you can
actually see it. Another thing that you can do to your text is adjust the height, placement of individual letters, or of an entire word. We're going to go up
here to baseline shift. Then you can play around
with these numbers. You can move the entire
word altogether. I'm going to select
these three letters, because I want this to go up. We'll try two for now and
see what that looks like. Oops, I selected
my paragraph 22. Then we can increase this
text size just a little bit. You'll notice that increase the space between
these two lines, but not these two lines. We can either
increase the distance between these two
lines or we can decrease the distance
between these two. Since I don't want this line butting up against this
top line right here, I'm going to actually increase the distance between these two. I want to select this line and press the up arrow to move it
down just a little bit. It visually has
the same spacing. I like to do this
sometimes if the big, or the word gigantic, you can make those bigger. Or you can whisper, you can make it smaller. Say I want to make
this text bigger. I want to make it significantly bigger so you can see
what I'm talking about. Our text bled out,
but that's okay. In design, automatically
has all of your text stay on the same
bottom line down here. If you want to baseline
shift this so that your text is maybe centered on that line,
you can do that. I don't actually
want to do that. We're going to take this back to our paragraph style,
reset everything. There aren't too many
ways that you can add texture to your text in design without doing the image overlay that
we talked about before. The other ways that you
can go about adding texture are not beginner friendly, they're
not straightforward. But one of the ways that
you can do it is to add an inner glow to your textbox. We're going to go
to our Select tool, make sure our frame is selected, go up to our effects
and go to inner glow 0. Text almost disappeared. You can leave this as white, but we're going to add
some noise to this. These are like little dots, little speckles on our text. I'm going to set the noise to 50% Let's see what
that looks like. Yeah, very noisy.
We're going to reduce the opacity to 20% Take it down. I'm going to press okay, so you can see what
it looks like. I'm going to zoom in. Gives it this little pixelated
texture, fuzzy look to it. It does affect the contrast in this particular page between the background and your text, if you applied it to this page. Let's do the same thing, so you can see what
it looks like, inner glow Noise 15. Reduce this to 20. Okay, I'm going to undo
that and redo it so you can see a cheat to add just
a little bit of texture. I won't be doing that here, but I just wanted to show
you how to do that. I'm actually going to
go back down here. I want to get rid of, I want to get rid of the inner
glow on this one. You can just uncheck that. Now it goes back to
before click Okay. Just like with paragraph styles, you can apply styles to objects. This text frame an object, The text inside of
it is not an object, but the frame is an object. I want to copy this
white background. Instead of manually
going through the steps of adding
it to each text box, we can just add it with
a click of a button. We're going to add
an object style double click it and I'm going to call this white background. And make sure when you go down to Drop Shadow that your
settings are all right here. Click Okay. It didn't do
anything to this one. I'm but now when I click this one and apply
white background to it, you can see that I
don't have to go through all those steps.
It automatically adds it. It looks brighter here because there's a white
background right there. But if we scroll down, we can just quickly add it. And we don't have to worry
about manually adding it every time I am going to create
a white background one. And then if I scroll
all the way down here, I have some pages with
dark backgrounds. I'm going to change to be white, and I'm going to change
the background to be dark. For these two pages,
I'm going to end up having a dark
background as well. Then if you decide
that you don't want that or you want
to get rid of it, you can just go back up to your object style
and select none.
14. Advanced Image Styling Techniques: There's a couple things
that we can do with our illustrations that can add some nice finishing touches. I just want to
show you some tips and tricks before I actually get into how I'm going
to format this book. But let's just do some quick advanced styling for
our illustrations. First one we're
going to talk about is if your illustration
is mostly full spread, but not quite, this may have been decided in
your illustration phase or you may opt to do this if there's no clear spot for where
you want your text to go. I'm actually going
to go up because I know which one is it. I have a this is a good example. Right here is pretty much the only clear place
that I have to add text. There's a lot going on
here and down here, just different
textures and things. Okay, remember this line down the middle is where
our spine is. So we're going to have our, our illustration take up maybe about 50% of the left
side of our page. So that we can have our text in this nice little white
blank space over here. We're going to select our frame, and we're going to reduce it
to about the halfway mark. It should snap to
the halfway mark, but for now, that looks
nice how that is. I am going to move the
butterfly up a little bit, and then we can put text above and below
this little line. Now we have this nice
little space over here. We can adjust our text box. Dup, dup, dup. Make sure it's
still within the margins. I'm going to delete that
space. Delete this space. Like I said, there's space over here so we can
still utilize this. Maybe I clicked on my keyboard. I'm showing you live how I make some of
these adjustments. I'm going to add another
text box down here. And we're going to change this to be white
so we can see it. I'm going to end up
adding a dark background. It sticks out a little bit more. That looks pretty legible. Let's go back over here. I
know I moved my butterfly, but we're going to
move it back down. This is very trial and error, but I wanted to show you
real time what it looks like to format a book because you just have to play
around with things. Sometimes I'm going
to make that smaller, then an easy way instead of
adding another textbox here, I'm just going to press Enter until my text is
below butterfly line. We have space down here. I think that looks pretty good. Instead of having this
harsh line right here, we can have that harsh line
actually that looks better. Moved over to the image. Or we can add a
directional feather. I want the feather to be applied on the left
edge of my frame. If I increase this, you can see it adds a nice
little gradient. It fades into my illustration. You can set that how to
whatever number you like. You can also do the same, maybe on a different page. Let's see if you wanted to do the directional
feather on the bottom. You can add a space down here. And add your directional feather along the bottom edge so that you have space
down here for text. Some illustrators
don't always include a title page illustration unless you specifically
ask them to. But one of the things
you can do if you don't have a title
page is you can bring an element from one of your finished illustrations
into your title page. I'm up on page one,
my title page, I'm going to use
a circle here at, this is my text box, and I
don't have any images here. I'm going to hide these for now, just so they're not
in the way I want my little image that I have here to be placed
within a circle. I'm going to right
click my rectangle tool and click the ellipse tool. I'm going to click, and you can see that this isn't
a perfect circle. But if you hold Shift,
it's now a perfect circle. And if you hold option, it is now going to
scale from the center. We can change the
size of this in a little bit and I'm
going to go to a line. I'm going to center this
on my page, just for now. Yeah, we'll center it now. You can bring in the illustration
that you want to use, that you want to take this from. Let's go with the
bunny bunny's cute. I'm just going to click
it in here for now. And you're like, whoa,
that's not what I want. We're going to control or
command X, keep frigging. I'm on a Mac, we're
going to write, click, select, Paste Into. This particular
illustration is very large. When you click it, you can see it's much bigger than our
little circle. Whoops. I'm going to just drag,
let's find the bunny. Where's the bunny?
There it is, Cut. I'm going to scale this
down just a little bit. I'm going to hold Shift and Alt. So that, just kidding. I'm going to select our picture
shift, make it smaller. And then I'm just going
to use my arrow keys here to move the bunny cut. Okay, then you can apply
a directional father. Let's just do a basic feather because we're not really
doing it from a direction. It's going to be
all the way around. I'm going to increase
this feather just a little bit. It fades. Now if we go up to preview, because we see this
little circle, which we need to make sure you don't have
any stroke right here, unless that's what you want, but it's a little distracting
to see that line there. We're going to go up to
screen mode preview. And it's going to get
rid of all of that. Look, you have a
cute little bunny. You can have your
title above it. Author, illustrated by
all of that information. It's a little hack
to come up with a title page in case
you don't have one. This next one is a mix between
text and image styling. One of the things that you
can do is you can wrap your text around an
object in an image. You can't really force
this one every image, but you can look for
opportunities to use it, if you like, how it looks. I have some clients that
do not like how it looks, but we're going to use it
on our little bear page. What you want to look for is something near where your
text is already going to go. In this case, we have the line
of where our butterfly is. I am going to move my
butterfly just a little bit. So I have a little more
space for my text. I want this to wrap
around it naturally. Already looks like
it's doing that. But we can have it
follow the path. We have overset text here. We actually have
a lot more texts that we need to account for. Unfortunately, you
can't just select the, select your picture
and go to text wrap. Sometimes this works. Usually it does not because
the edge of your text, even if you detect edges, it won't detect your image. I think in this case, it's
detecting the butterfly. If I increase that, you can see it picked up a
little bit of the line. This will sometimes
work for you in my case because this dotted line is not being picked up.
I can't use this. But what you can do is you
can go to your Pin tool, we're going to make
a little path. This is not going to
have any strokes, so we're not going to
be able to see it. And it doesn't have to be exact. I'm just going to
follow the line. It doesn't look pretty,
It doesn't have to. Then we're going to go
around the butterfly. I'm just clicking,
not doing anything special. And then close it out. Now we can go back to
our selection tool, text wrap around
the object shape. It doesn't look like
it did too much. We're going to close it and
then now we're going to select our text box and
increase the width. You can see like
before and after. I'm undoing and redoing here. I like how it just curves. I like that curve. I
think it looks good. Then you can select
your textbox, and when you move
it up and down, you can see that still
it gets a little close. Let me show you what
you can do. This A right here is really close. I want some more space, so I'm going to select
that, go to text wrap. Then you can increase this. It actually moved
it quite a bit. And the reason it did that for this chunk of text is because
all of my text is centered. If I move to left, Aline, it's a little
easier to see that space, that distance, you can have
all of this left aligned. We can move it back up. As you can see, things
change quite a bit when you're just moving
your text box around. I will typically, I'm going to set this
back to be centered. I'll typically okay, in this
preview mode, there it is. I'm trying to find my path, I'm going to take this back down because that's
a little too much. But I like to move my
text around because you can see it changes
it quite a bit just so I can find a happy place, somewhat vertically centered. Let's go back to view just so I can make
sure everything is still within my margins. Yeah, that's how you wrap
something around an object. Again, this is not going
to have any strokes, so you're not going
to see it when it's printed, when
it looks like this. I'm going to show you. Let's go back to if you have a background
color on your text. I'm going to add my back
in here real quick. We want our rectangle, our colored rectangle to be below our butterfly. All right. We're going to select our
rectangle just to make sure we're not messing with our butterfly anymore.
Double like this. It's going to pull the
last color that we used our eyedropper tool on
go to set this to 20. Now you can see we have our
little background color. So back out. I'm trying not to overwhelm you with too many things.
Hopefully, I'm not. I would probably wrap this
around this butterfly too. But we're going to leave it,
the text how it is right now because we're going
to add a gradient to our colored background. Actually going to
lock my butterfly, because I keep selecting it. We're going to select
our rectangle. We're going to go back up
to our effects and we're going to select gradient father. You can have this be a linear
gradient if you want to. Right now it's coming in from the right side zero degrees. If we said this to 90, it's going to come
in from the top. Let's do negative
90 from the bottom. Those look good. You
can do it as a radial. Which right now the
green is in the center. If we want the green on the outside and the
white in the middle, we can flip those, then you
can mess with the midpoint. I hope you can see
as I'm dragging this that it's making
the white bigger. You can drag it the other
way, it makes it smaller. But if I remove it and add it, adds a little something
extra to your pages. Like I said, I'm
not going to use any colored
backgrounds for mine. So I'm just going to go
ahead and remove that. Our last advanced styling
tip is to add a texture to our text background pages instead of the solid background, because right now
I just have white. But I want there to be a
little something extra. This one requires you
to find an image, whether it's paid or free, that you have
commercial rights to. Just like with the
fonts, you can't pull an image off of
Google and use it, just any random image. You'll get in trouble
for copyright. My favorite place
for free images that you can use commercially is Pexels.com Up here you can do their license
agreement and what's allowed. All of these are free to use. Attribution is not required, which means that you like
on your copyright page. You don't have to
say that you image texture image was
sourced from Pexels. It's appreciated
but not required. You can modify the photos
and videos from Pexels, be creative and edit
them as you like. Here's some things
that are not allowed. If you come up here and
type in paper texture, you can scroll through and select a texture that you like. These are too busy for what
I want to use them for, but this one might be good. This one texture is a little big I like this one just something that's
going to add some texture, you can reduce the opacity
if you want change blending modes so
the texture is not going to be as prominent
as it is here. This is a good option if your
book is based in the ocean. Let's see what this says. You can just play around. You might want to add
a texture like this. This one's pretty. If
you have dark pages, jungle background, jungle texture, that
one might be a little. You could have a dinosaur, a leaf pattern might be cool. A paid option that I use all
the time is deposit photos. You do have to pay for these. But look, 100 images, 70% off if you want to use a lot of images for things
because you can say, this is something that
I was researching for my children's book. I might add end
pages with texture. You can select the size
that you want and you can purchase It Usually comes
out to about $1 per image, but I always use these
little multi packs, so I'm going to type
in paper texture. See this one comes up with more ones that aren't
so aggressive. I guess you can have different burnt edges
or antique looks, so there's a lot of
nice options here. This is actually what
I did with my book. I didn't have those
butterflies added originally. I just searched through
here and I found different butterfly images and purchased them commercially. So I could put them in my book, which there's not any that
are showing up that I used. But you can see there's, I don't know, millions of
assets on this website. It is a go to for me. So this is the paper texture that I'm going to end up using. I actually think I got this
one from Creative Fabrica, but there's a link in
the resources library. So I'm going to go ahead and
drop this onto this page. I'm going to add the texture right now and change
the settings, And then we're going to move this to another page
to make it easier. That was huge. If
your illustration ends up being ridiculously
big like that, you may want to click and drag. My snap feature is not
working that well. It's not snapping. Okay. Now we're going
to Hi my texture. See what this looks like? High quality. Yep,
it's nice texture. I may want to scale
it up just a little bit so you can actually
see the texture. Let's switch this back
to typical display. Right now, you're
probably thinking you can't see anything below it. You can go up here
to your effects and click Transparency. I'm going to set
this to multiply. Let me click okay. So
I can zoom back in. Is it just darkens everything? It's difficult to tell, but it is applying it
to the text as well. But since it's a nice,
delicate texture, it's not overwhelming, and it doesn't make it
difficult to see. Depending on what
texture you're using. You may need to
reduce the opacity, which you can do right there, or you can try different
blending modes and just play around with them
and see what you like. This one works
perfectly for my usage. I'm going to cut this because we're going
to use parent pages. Anything on your parent pages is going to automatically show up on the page in your
book that it's applied to. You can see each one of
these has a little letter A. That means they all have
parent A applied to them. If I double click in here, I'm now on my parent page, which is separate
from the actual book. I'm on a paste in place. I did go over adjust that
really quick and you can see my multiply setting
is still applied and I'm going to duplicate
this to the other side. If I go back here, wait,
I wasn't on the bear. Where was the owl? I don't know which one I was on. You can see that since a parent
is applied to this page, it now has the texture
applied as well. Since all of these pages
have this texture, is now applied to all pages, not just the ones
that have text. If you don't want
that, you can say if I want all of these to not
have that applied to them, automatically select all your
pages or whichever ones you don't want that texture added
to apply parent to pages, select none, and you can
see it remove the texture. Then now you can click and drag the texture that
you want to the page. You can pick and choose which
one you want it added to. I think I'm going to add this
texture to the entire book. Originally I was just going
to do it on Select Pages, but I'm going to add this
texture to everything. So I'm going to click
my last page, Shift, click my first page, right click, Apply
Parent to pages. We want the a parent,
this one right here. Let's click the
first one. We have that texture applied everywhere. It's not applied to
my illustrations. We are going to have to
have a texture layer. Let's go back up here, because I do want it to sit
on top of my illustrations. I'm going to move these
to my texture layer. Let's rename this. We
did end up needing it. Sometimes I forget
little things. Now you can see that the texture is applied to our
illustration as well.
15. Finalizing the Text and Images Throughout Your Story: Now that we've gone
through some of the more advanced ways that
you can format your book, you should have a lot
of the basics at hand. We're going to start at the very top of our title page here and we're going to work
toward the end of our book. And I'm going to make
final adjustments as I go. I'm going to show you real time, how I move things around
and format things just to maybe inspire you and show you some tips and
tricks along the way. We don't currently have any
texts on our title page. If your illustrator or
your cover designer already has a font picked
out for your front cover, you can use the same or you can request that they use
that font to create a new title page or just like a PNG with the text that
you can add it yourself. For this book, I have created a title page in a
Photoshop file. I'm going to open
this really quick so I can show you
what font it is. I have my title page
as a Photoshop file, and the reason I did
that is so I could add texture to it so
it's not just flat. This isn't a Photoshop course, but I just wanted to show you. That's why I have mine
saved as a Photoshop file and the text isn't placed
directly in my end design file. I'm going to activate
my text layer at the bottom right here,
just so I can show you. I used cartoon nature. This is a font from
Creative Fabrica that is linked in the resources file in case you want to
use the same thing. So I'm going to
save this and then go back to my end
design file so I can bring my title page. I'm just going to
place it right here. Actually may make this
a little smaller. I'm holding down shift
option command to scale, then I could move this
little bunny down. I actually went to deposit photos and I found a different picture
that I wanted to use. This one right here
on my title page. We're going to see
what this looks like. It's sitting above everything. My text, which I don't
want, I'm going to move it. We're going to get
rid of the bunny for now so I can see what
this looks like. I want this to be a
little big. I think. I'm going to move this towards the bottom so that
I have enough room. May move that up a little bit. I'm going to add
another text box. This is going to be written
and illustrated by Elizabeth. Whoops, Elise. And want this font
to be Secret Forest, which again, is one that I
got from Creative Fabrica. I'm going to increase
the size of that a bit. If you hold shift and
press the up or down, it scales it faster. Maybe reduce our line
height. I don't know why. Sometimes it just doesn't
let you easily. There we go. And then I'm going to zoom in because I want to
change the color. I'm going to pick something
from our picture down here. It's got to be dark enough
that it stands out, but I want it to blend
in with the greens. Go to a line and center
that on our page. Make sure this still says page. I want to make sure
this is also centered. Then I'm going to go up to
view screen mode preview, so I can see what
this looks like. I think that looks pretty good. Everything looks
pretty balanced. I may bring this up
just a smidge perfect. All right, let's go back to, I like to switch between
preview and normal. Just so I can check
to make sure if I make any adjustments in
the preview pane that my text is still
within the margins and that still looks good option. Down to go to the next page. For copyright page,
I have this one. I'm going to use this
on both of them. I'm actually going to use half of the illustration bleeding off the edge of one page and the other half on the
edge of the other page. Let me show you how to do that. I'm going to reduce this, then move this all the way over so that it's coming
off the edge of the page. I can actually maybe
about like that. You can see it's in
front of our text layer, which might not be a
problem right now. But I just want to move
it down just in case. Then I'm going to
control C, control V, we're going to move
this over to this edge, then just slide this on over. I have it bleeding off of
both edges of the page. Actually, maybe like that. Okay. I have a frame right here that I did
not end up using. I can delete that. I'm
going to resize my text. Let's expand this
again. This is Body. I'm going to italicize
this. Select it. You may notice if you download any fonts from Creative fabric, or it just depends
where you get it from. Sometimes there's not italicized
font option right here, but you can add a
slant right here. I'm just going to slant this a little bit, so it's italicized. Perfect escape. I'm going to position this then for our
copyright information. This is just something
that I copied and pasted. You can grab it. I'm trying to talk and type
at the same time. You can grab it from
the resources PDF. It's just a generic
copyright information. I'm going to make this
text a lot smaller. Well, that's too small. Make it a little
bit bigger. I want it to be in line with this. I actually want it to
be just a bit smaller. That's pretty good because I don't want too much attention
on the copyright page. So I like to make it
smaller and I'm going to put this as regular
font and not bold. Let's go to our preview. See how I'm actually going to select both of these
and move them down. Because I think the
dedication looks pretty good. A little farther up, but the copyright looks
a little funny, so high. I think
that looks good. I might end up reducing the
text size throughout my file, but I'm going to
put this out 21. I'm going to zoom
in because I want to color this to be green. Double click that so I
can change the color. We're just going to
grab a green color to maybe that one perfect. It's green, but it's not
in your face screen. I guess if you want to
save this color swatch, you can add CMYK Swatch. Otherwise you may have to use your color picker again to
try to find a similar color. We're going to add a Swatch. Click okay, select this text. And if we scroll down here, we just click this
once, scroll down, and then our color
is saved right here. I'm going to
use that again. Perfect. Let's go back
to normal double check, everything looks good,
and go to the next read. Right now we get
into the fun part of actually typesetting
everything. Okay, I'm going
to cut this text. I'm going to put it
in another text box because I want to split
it over these two pages. I'm going to hold my option key. Click this text box
and drag it release. Then I'm going to
replace that text. I'm going to use that white background we had added before. Again, you can add that by going selecting your text box
and going to drop shadow. These are the settings that I have used and this is what I have saved as my object style. I'm going to apply the
same thing to this one, where I go to view Preview. I'm going to click high display
so I can see this text. It stands out, but it still blends in a little too
much into the background. I'm going to adjust
just this one, this drop shadow so that the capacity maybe we'll try
80% and see how that looks. That looks better, just so it
stands out just to smigel. Let's go back to view
display Typical, there is a shortcut for that, but I don't usually use the
shortcut function option down to go to our
next spread For this, I'm actually going
to put this font to match this one right here, which is secret forest.
Let me go back down. I'm not going to have it on
this little curved path. So I'm going to add
another text box. Actually, I don't
want to press Enter because that marks it
as a new paragraph. Let me move it up, that
makes it a new paragraph. So we have that paragraph
styling right here, that adds space between our
paragraphs, like right here. We don't want that, I'm just
going to get rid of that. Let's zoom in a little bit. I'm going to change this
to that secret forest. May need to adjust
this a little bit. I'm going to
increase the size as well because I want this
to draw the eye maybe. Let's make it about 30. And I'm going to get rid of the period that
I have right here. Because this is like a continuation of the
previous sentence. So it's not a
sentence by itself. I'm just going to take off
the period right there. Since it is a continuation, I'm going to make
that a lower case A. I want this color to be a color from my dear needs to be dark enough that it stands
out from the background. That looks more red
than I want it to look. Okay, I just played around
with this a whole bunch and that's the color
that I chose to use. I'm going to stretch
this out just a smidge. And that adjusts the width of each individual letter perfect. Now that we have that set, I'm going to move
this up a little bit and I'm going
to make our little, our deer image just
a little smaller. That was the frame,
not the image. I'm going to hold
shift option to scale it proportionally
because I don't want that stem right there
to get in the way. I think that looks good for now. Let's go to preview
so we can see. Okay, I think that looks good. We're going to go back to
normal and move over here, so I can adjust this. I'm going to increase
the width a little bit. A little bit more. Okay, I'm not going to do too
much to this page. I think that looks pretty good. I'm just going to center
at the center of the page. Switch to preview
and double check. I think that looks
good. I'm pretty much just going to do this
on every single page. It might get a little
boring and redundant. Oh, let me go back up here, because I want to create
a paragraph style, we're going to call
this one animal. I don't want the color, we'll end up changing the color, but I'm just going
to keep the text color the same because it might actually be
the same for the fox. We're going to put this in a new text box control V. I'm going to get rid
of that period again. And click Animal. I think this
could be a little bigger. I'm going to increase this
font size, just made redefine. Go back up here and make
sure it still looks good. I'm going to choose a brighter
orange for this page. You can see it's very
hard to read that with the background where it is. I'm going to add a white background and it
sticks out a lot better. I'm going to move this towards the bottom just a little bit. I think that one looks
pretty good. Preview. Okay, let's go to
the next spread. Oh, I talked about this earlier but I didn't
actually do it. I want to switch, I like to alternate this
illustrations on the left. I like to alternate the position of the illustration in the text. Each time I'm actually
going to select my squirrel and
I'm going to click and drag this page over. It just switched these pages. You may notice that you have to adjust illustration
positioning, but I want to keep it like that. I like to switch
them back and forth. It's easy to do that if you decide later on you
want to change it. Okay, let's inson repeat. I'm going to control X. Delete
that part, new textbook. It's going to be animal, this orange color
actually works for these first few
animals because I wanted to match the color
of the animal function. Shift command write and
select all of that text. We're just going
to duplicate that. I hope I'm not
moving too quickly, but I want to show you
how I lay things out. But I don't want this to take
up too much time, I guess. I don't want you to
be here forever. Let's take this piece out because right now I don't
have any text on this page. And I want to even it
up just a little bit. I think that looks good. Let's add some texts
in this illustration and we'll add that
white background so it sticks out a little more. I want to make this
just a smidge. I don't usually adjust the
font size too much as I go, but because the
background is so busy, I want to make
sure it's visible. And I think I'm going to
increase the opacity on this. It's a needle brighter. Okay, I'm going to close that so we can see a
little bit better preview. Okay, there's more space down
here than there is up here. I'm going to just move things a little bit to even
out the spacing. I'm going to select
everything just so I can bump everything down. I think that looks perfect. Let's switch to high quality so I can check to make
sure this is still, this gets lost a little bit. I don't like where it is. Let's see, I'm going to increase this just
a little bit more. Okay, maybe increase the size just a smidge because on this page it does
get a little bit lost. I have that. That's much better. Because originally if I zoom in, I had this going across a
color change right here. It's light in the
background, dark right here. Sometimes visually
that can cut off the letters when I move it so it's not falling
across that line. It's a little more
clear what it says. Let's back to typical. Back to normal. Perfect.
All right, next page. This is my book, so I'm changing
the text just a smidge. All right, we're going to add
our white background here, which doesn't help
this situation, but I'm going to make
a new dark background to change that to black and multiply move
this side of the way. You can see that does
a lot of good things. We're going to reduce
the opacity just a little bit because that's
a little too dark. Actually, I think
I'm going to add, might try to use a brown from
this page instead of black. I'm just going to try to
pull a dark brown color. And we're going to add
that to our swatches. I use the eyedropper
tool for that over here. We're going to go back
in here so I can change this to our brown color. It didn't look like it did much, but let's zoom in to
see, yep, it did. And now we can save this at an object style and we can change this to dark background. I can apply it to this one
that looks pretty intense. I want this to follow the line of
this log right here. So I'm going to press
on my pen tool and I'm going to draw a
rough line around. You can see it pulled
that color that I swatched last time so we can make sure our fill
is set to none because we don't want to be able
to see that text wrap. You can see I have a little
straggler over here. I want all my text to be on
the right side and go back to V so I can adjust this over. The bunny has
bounced in the air. I want to reduce the
line height on this one, which I don't do too much, but I want to make sure the
text still stays together. Let's put this on another line. Actually, you can
see since these are on separate text boxes that the dark shadow on this one is laying on top of this text. So I'm going to select this
text and I'm going to combine these Ops text boxes so we
don't have that issue anymore. Then I'm going to delete
these extra pages right here. But for KP and Ingram Spark
you always need to have 24 pages and your last
page has to be blank. You don't want anything
to be on your last page, which right now I have a texture on it, I'm going to
get rid of that. It doesn't have
anything actually, you could see the left and right page of my texture.
That happens sometimes. If you wanted to texture on an individual page like
this and it was doing it, you can shift command
and click and it will actually allow you to select what was on
your parent page. Just for this one, it doesn't
change your parent page, but it allows you to select it and move things
if you want to. But we could just
delete it because we don't need that right page. I don't even think
it will export. I don't know why design
sometimes does that, but I don't want
anything on this page. I want it to be blank. You
can add like maybe about the author page right here and an end page with a texture. I may end up doing that
in the final product, I may add a textured
page at the beginning. It would be basically, I would add two pages. Let me just show you
what that would look like up at the top. Let me select those and
drag them above this. I could add a little texture so that when you
first open the book, on the right page is a
little patterned texture. And then on the
left page next to the title page is another
little patterned texture. Down here, I could do the
same if I have an about the author and then have
texture on the right. Your last page always
needs to be blank. The end is a little more
tricky to have like a front and back
pattern texture, but you could do like
about the author and then a little pattern
and then this page will be blank and white because that's what Kai
Ingram Spark wants. You should always have
your final page count be divisible by four just to
meet their guidelines. I'm going to delete
these for now. But yeah, that's pretty much, we have formatted
the entire book. We're going to do a kind
of like a final review, look through, check over things, tweak things as needed
in the next one.
16. Final Review of Your Book: Okay, I'm all the way
back up at the top. As we went along,
we switched between the preview mode and
the normal mode. But now we're going to switch
into presentation mode, which will make
things full screen and we can go through
our document and see if there's
anything else that catches our eye that might
need to be adjusted. And this is a great
time, by the way, to do one last little proof read and make sure there's
no typos in your book. So let's switch into
presentation mode. Let's go to View Screen mode. Presentation mode, or the
shortcut shift on a Mac. Let's go into presentation mode. Sometimes it'll take a second. You saw it was blurry
for just a minute. It'll take a second
to load your image. But we can scroll
through our pages and I might move
my little peanut. I did make some adjustments just now between the last
video and this one, but I didn't make too many. Why is my end
design full screen? There we go, Shift. Make sure you can
still read everything. Actually, this one, I'm going
to put this on a new line. I don't know if I had
it like that before. I didn't change too much
between the last two videos, but I always tweak things quite a bit when
I'm working on projects. Doing a quick read through, I might see how much space, if there's any more space
that I can move this. Yeah, I can. Well, not too much. I was going to try to maximize
the space around the bird, but my margin is in
getting in the way. I want to move this
down just a little bit. Our I added a little
stroke right here. Let me show you how to do that. You can select your text. Right here is the it's the same thing that we
use for the line and everything that stroke with. I added a black one. Then if you open
your properties, you can adjust the
weight of that. You can make it well, you can get rid
of it altogether. You can make it
bigger or smaller depending on how you
want it to look. You can see that made
it quite a bit thicker. But I just want to
leave it at one point. That's what I wanted. Make sure you don't
accidentally adjust your, any of your text like that
when you use your shortcuts. Actually yeap. Okay. Perfect. I think
everything looks really good.
17. BONUS: Adding Endsheets (Patterned Pages) to Your Book: This is a little bit of a bonus, but I'm going to
add some end pages like we talked about last video. I'm going to add that at. Let's add our texture. I wanted to go over the middle, copy, paste all these. Let's go to preview. We have cute little end pages. You could have this one say something like this
book belongs to, which I might actually do that. I have just this page. I'm going to copy
this, actually, I'm going to just duplicate this whole page at the
end of the spread. I'm going to add a page after, because remember I want it,
the last page is going to be a blank page which needs
to not have any texture. I'm going to put a
little about the author on this one here. I'm going to, this
book belongs to, I want it to be
on a curved line. We're going to do a little
curved line trick again. I'm going to do
this at the point, move it up, maybe like that, you don't want any film. Then back to this
one, our line type. Make sure you get
the plus icon and I'm going to see
this book belongs to change it to Secret
forest. Make it bigger. Let's make this the
same color here. And now we're going to do the
same thing with the line, but this time we're
going to add a stroke so that you can actually see it. I'm going to add a stroke. I
don't want it to be brown. Here is where I keeps
pulling that brown color. But I want to be
maybe that color, I think that's very similar. That's a blue color. So I actually want it to be
the same as this one. I'm just going to pull the
color right from this one. I want this line to be centered about this
down a little bit. Okay, so now we
have a little cute page this book belongs to. Let's go back to the end. I don't really have an
author image to use here. I'm going to add some text. All right, so I added a
little about the author. I'm going to pull the same. I don't have an image just yet. I'll end up adding one later. But I'm going to
actually grab this text, copy it, paste in place. I'm going to say
about the author. I increase the angle of that curve just a little bit. I'm going to move this up And then move this
down so that my little, my author image will
go right there. I think I'm going to add
this texture over here. And I'm going to show
you what I'm going to do to it layers. We have all of our end pages at the bottom, which
is what we want. Then I'm going to add a white circle here. It keeps pulling
that brown color. I keep forgetting to
change it. That's okay. I'm going to feather, the edges of this may have
to increase the size of it. Let's pull this below
our text again, I think that looks pretty good. Make sure it is centered. I'm going to move about the author and I'm going to
decrease the width of this so that I actually want it to text invert that. Now my text is in the middle. I want my balance ragged lines
to be on perfect preview. I want this to be
up a little bit. I'm going to bump this up. I'm actually going to
increase this just to Mitch. I want this to be that same color right
here, which I keep. Just need to save.
Watch as perfect. Last page is going to be blank.
18. Preflight Check for Errors and Adjusting Image Resolution: Now we're going to check to make sure our images are all still 300 pixels per
inch because we've adjusted our illustrations
quite a bit here and there. We'll just need to
make sure that we don't get an error
when we upload, even if the images were 300
PI before we brought them in. This one for example, it goes
a little bit off the page. If I perfectly sized
it to be 300 PPI and I increased the size of
the image in my file, I might no longer have a
300 pixels per inch image. We're going to open our
preflight panel right here, or you can go to window
output pre flight. I already have this
one set to 300 PI. Which DPI and PPI
mean the same thing? They don't exactly, but I used to use them
interchangeably, that's why it's labeled
something different. But we're going to click
this little settings icon up here and we're going
to click Define Profiles. And we're just going to go
ahead and add a new one. And I'm going to call
this one Pub Check. You can open these and see what the default, what
it's going to check for. This is just good to know just in case you
accidentally updated an image and forgot to re
link it in your links panel. We can keep this one
on if you want to. It's not the main thing that
we're concerned about here. Let's open text and see which one font missing overset text. That overset text
is just if you have something going outside
of your text box, which can be a helpful
thing to check for. So we can just leave that one on unresolved caption variable. We don't need that. We're
not working with captions. Okay, let's close that.
The one that we're really interested in is
images and objects. There's two things that
we're going to turn on here, but number one is going to
be this image resolution. We want this to
tell us if we have any images below 300 PP I. We're going to change
all of these to 300. Your one bit is already over 300, so we can close that down. Then we're going to
click this one as well. Non proportional scaling
of placed object. We're going to click
that one. Since we've resized things just a bit, we've toggled on and off our
little aspect ratio lock. Sometimes this is just to make sure that you didn't
accidentally make you didn't scale it outside of
the aspect ratio so that it looks a little distorted like too skinny or too wide
or anything like that. We're going to leave
that one checked too. This one's going to be
our pub check to make sure just some general things we can use this
engine to check for without manually checking
ourselves look like. Okay, then up here
under profile, you need to select which
one you want it to check. It came up pretty quickly. Sometimes it takes a minute
to process down here. Usually there's a little preview
of what errors you have. You can open this non
proportional scaling. I didn't realize
that I had this. Let's see number three. If you have any errors, there's going to
be this red thing down here. It's
going to be green. If you don't have
any errors, then it won't list anything here, of course. Let's see. This says that I scaled
it a little vertically. When you click on it, it
should select the image. You can see these two
numbers don't match, which means
accidentally. Let's see. Yeah, it looks like my height was scaled to
be a little different, which in this case I don't mind. But if you want them
to be the same, I'm just going to copy and paste the larger number because that's likely the one that
you were trying to scale actually like that. A little skinnier. That was an accident when I scaled this. I'm going to keep
that how it is. Then. My paper texture, apparently I s, which is fine. I'm going to fix it just so I don't keep throwing that error. But it's fine that it
was scaled that way. Anyway, we can fix
this one as well. Sometimes if you
have this clicked on and you try to fix
that like I just did, your numbers will keep changing, they'll never be the same.
Just make sure that's off. If you're trying to
fix those numbers. Actually, I'm going to
change this just so I can show you what it
looks like when you don't have any errors at all. When you have no errors,
nice little green check. And you can see it
down here as well. I'm going to scale one of my
images outside of 300 PP. I just so I can show you how to fix or work around
on how to fix that. Let's just scale this one. And I'm going to scale
it proportionally. I'm holding down shift and option just to make it
quite a bit bigger. And we'll see the throw an error right there
so we can open up our preflight panel
image resolution. And now this image it's telling
us is no longer 300 PPI. Down here you can see the
effective resolution, so after you've
scaled it is 277 PPI. This is helpful if you're like, I know my images are all 300 PI. Why is it throwing an error? That's because when
you scaled it, now it's actually at 277 PPI. And if you open this
info tab as well, it can show you my actual PPI of the image that was pulled into the program was 301 pixels. Per inch. But now that I've
scaled it, it's down to 277. So remember we want our images
to be already as close or above 300 PPI as possible before we bring
them into the program. If we resize things
and it's a little off. So the little trick
that I'm going to show you on how to fix this is not the best method for
resizing your images. The best thing that
you can do is go back to your illustrator to
get a larger image. Or you can export a
larger image from your own drawing program if you're the one that
illustrated things. Or you can download
a larger image from your stock website. However you originally sourced your image without
getting too techy. This method is loses a
little bit of quality, it's not going to be noticeable. I recommend only using
this if you're trying to, so this one's at 277. I recommend only
doing this method if this is like 250 or greater. If this is below 250 PI, I would say go back to your
Illustrator or download a larger image or from however you originally
sourced your image. So if your image is
still over 250 PPI, we can jump into Photoshop
to increase the resolution. I'll show you some examples
of what this can do to quality if your image
is under 250 PPI. This is an design course, but I want you to be able to fix these small things yourself instead of trying to hire
someone to fix it for you. That is if there's no
way for you to get a larger file from
your illustrator. So this is going to be just
a quick thing in Photoshop. If you have the Creative
Cloud subscription, you should have
access to Photoshop. Make sure you have
it downloaded, and then you can select
your offending image. You can write, Click and
select Edit with Photoshop. If you already had design open and then you just
downloaded Photoshop, you may have to
close design all the way down to see it on this menu. Or you can go back to
your illustrations folder and open it there. This one, open Photoshop. Don't panic, if you've
never opened Photoshop, yours might actually look a
little differently than mine. Sometimes they open. I've
never changed my workspace. It's just essential default. But don't worry,
because we're not going to use any of this. The only thing we're
concerned about is going to image image size. These numbers should look a little familiar
to you because it should be how your image
was originally sized. Sometimes for whatever reason, the resolution,
even if it is 301, yours might say 72, but these numbers
will be much larger. For example, if
this one says 150, Photoshop just reads it as 150, your height and width numbers
may be twice as large, it still ends up being 300 PPI. Sometimes Photoshop does
that, sometimes it does. I'm not really sure why,
but we're going to go back into end design
really quickly. Because something important
that we need to know is up here to know what our
image was scaled to. Right now it's scaled
to be 19 " wide, which is funny because I
hit it right on the money. But if we click off and you accidentally select your frame, it's going to show
your original numbers, which is not actually
the size of your image. If you click back
into your image, my width is 19 ", my height is 9.5 ". That's the new scaled
height and width. So I'm just going
to take this width number right here, 19. You need to make sure this is toggled on so things
move proportionally. I'm going to change that to 19. I'd like to set mine
to 301 just so I have one PPI of
wiggle room here. This is your little preview paint of what it's
going to look like. My illustration doesn't
have very clean lines. Anyway, it's harder to see
how this affects the quality. But there's different
resampling methods that you can scroll through and see
which one looks better. Some may look a
little more blurry. Unfortunately, with this image, you can't really
tell a difference, but that's just something
to check on yours. But sometimes that does
make a small difference in the quality you can
scroll through. We're not worried
about any of these reduction ones down here. I usually just check these
three and see if any of those look better than the
automatic one. And click okay. It's going to change the sizing of everything and now you can just go up to file, save, or control, and
it will save your file. Since I open the illustration from my illustrations folder, I'm going to need
to update this. If you opened it from
design this way, it should automatically update. But since I open
it from my folder, I'm going to double
click that to update. Now my preflight panel shows that I don't have
any errors anymore. And that everything,
if I click on this and go back into Info, my effective PPI is
now over 300 PPI. That's a quick way to fix that. I'm actually going
to scale this back down to its original size. This was one of
the sheet textures that I was planning on using, but we're going to use this
just to show you really quickly what happens if you
try to scale things too much. I'm going to just go
ahead and select 15. I'm going to try to
make this way bigger. And you can see I zoom in,
There's a lot of noise. That's what this is called
around the picture. Photoshop is with
their engine. It's Guess at what color
each pixel should be. When you scale it all the
way up, it's adding pixels. You can't really
see it, obviously, but it's trying to add
pixels and fill in those pixels so that it
doesn't look pixelated. But what ends up happening
is it's just guessing, sometimes it's off, things
are a little blurry. This is scaled up quite a bit, but this is just the preview, and it shows you that your
lines aren't as sharp anymore. If I go back down to five, even if I zoom in a little bit, this image isn't starting off
with the best of quality. But hopefully you can still see that when you scale things up, even if I zoom back out,
it affects the quality. This can be more noticeable
if you have any text embedded in your image or if you're using very clean lines
in your illustration, so they don't have this
watercolor effect. Anyway, I hope you can see that. Let's see if I can find another image just to show really quick. Okay, I have this
butterfly image as well, which is one of
them that I used to create the little
butterflies that fly around. If I open this up, it
says 72 pixels per inch, and it's at 6 ", which is, it's already a
little bit bigger, so it's a little more difficult to show you the
difference this makes. But if I change the 300, you can see when I move it, it's loading just a little bit. You can see that it just
looks a little blurry. It doesn't look as
clean or as clear. Let me open the original image so I can show you really quick. I'm going to try to move
this so I can show you. Maybe let's look at the top. I'm resizing this so I
can try to show you. It still doesn't look too clear, but you can see the colors right here get a little more muddied when you try to manually resize things like the lines
aren't as clear, the colors look a
little different. That's because Photoshop
is just trying to guess at what color each
pixel is supposed to be. It's trying to fill things in. Let's see if we can notice
a difference with the head. This picture is even
zoomed in and it looks clearer zoomed in than
this one does zoomed out. So you can see
these colors right here. They're just not as good. The quality right here
is very pixelated. It's something that whose actually didn't want to do that. It's something that
you might not notice too much on the screen,
but when you print it, it can be noticeable if
you have any kind of pixelation. You're the author. I know you paid a
lot of money for these illustrations and
if you did them yourself, I know you spent a lot of
time on these illustrations. So it's best to try to limit the resizing and
Photoshop this way, which is kind of
like a shortcut. It's best to limit that
as much as possible. And instead, you should reach
out to your illustrator, or you should download
larger file sizes so that your image is as clear and as high quality as you
can possibly get it. This was a little more of a technical section
of this course, but in the next one
we're going to jump into prepping our book to
export to an epub file. So I will see you over there.
19. Exporting Your Finished Children's Book to an Ebook File (Epub): There's a few different
ways, outside of design, that you can convert your print interior file
into an E book format. Kdp even has an option like a program that
will do that for you, but you can only use that if
you're uploading two KDP. You can't use it anywhere
else. So we're just going to stick to end design
conversion for this course. We're not going to worry about any of the
other programs or tools that you can download that are available in other places. Step one is to export
your book as an pub file, which seems like that's going to be pretty
straightforward. Go to file, export press command E. I'm
going to save this in my deliverables file
and I'm fantastic. I'm just going to say, oops, we're doing the
ebook ebook file. Change your format down here, make sure this is on
fixed layout reflowables. If you have text, this allows the viewer or the reader
to change text size, font types, and stuff like that. But we're looking
for fixed layout, which is basically going to
take a picture of each page. Your E book is going
to look exactly like your print file fixed layout. Then you want to export
all of your pages. Or for example, if I didn't want to export this first page, I could select a range
and I could change that. Or if you have a blank
page at the end, you can change your range
so that you don't include the blank page in
your ebook file because you don't need
it in your ebook file. Rasterize first page is
just means that it's going to take a picture
of your first page and use that as your cover. Typically you don't use your
cover in your interior file. We're going to choose
image for this step, you are going to want to
have your book cover image. If that's something that
you don't have yet, you're going to have to get
that and come back in here to re export your ebook file
before it's ready to upload. Because that is something that
you need in the meta data. I just selected my ebook image there on navigation
TOC, select file name. Your book can throw
an error sometimes if K DP doesn't detect that
there's a table of contents. Even though with
a children's book you don't really have a table of contents because you
don't have chapters. So make sure you click
file name because that can avoid having an error in
the future spread control, we're just going to leave as
based on document set up. This means that the person who's viewing your
book will view it landscape and will
view it spread by spread. It won't be page by page, it'll be spread by spread
conversion settings. These can affect your file size. I leave, that says
automatic resolution. You can bump up to
300 if you want. A lot of book readers
are recommending 300, But you have to pay
a delivery charge, which is based on your file
size, sometimes 300 PPI. You have a really big book size, you're going to pay
more to deliver that to your reader than somebody
who has 150 PPI. Something to keep in mind
and experiment with. I always just leave it at 150 and I'm going to show
you in just a minute. The quality still seems great, I leave this at high. You can choose maximum. But again, it's going to
affect your file size. We're not going to worry
about anything with CSS or Javascript in metadata. You're going to add your
title and your offer. This is stuff that you do
need to add here because there's not really an easy
way to add it after the fact. If this is going to be
your final book file, if you have your cover and
all of that stuff already, you need to add
this information. You can add the description, it's not needed.
Publisher subject. I'm just going to
put children's book. Add the description
if you want to. But the really important
thing is to add your title in your
creator and click Okay. Mine's taking just a minute. It may take a minute to, because it's writing PNG, it's converting each spread into an image and creating
an Epub file out of that pub is
actually a zipped file. It doesn't look zipped, but it's a zipped file that
contains all of the coding and images
illustrations, meta data. It contains all of
that CSS HTML in a zipped folder so that
your e book reader will convert all of that
information and display it. Sometimes it can strip
information that it doesn't think it needs
or it doesn't want. I wanted to jump in
really quick and explain the zipped file thing. So this is what the file
looks like on your computer. It's just pop, it doesn't
look like it has much to it. It's actually a zipped folder and there's a way that
you can unzip it. This is a program I have
in the background that is actually used to
edit Epub files. This is all the information
on the left that's contained inside
of that Epub file. That one file right
here actually has all of these separate things inside of it that are
zipped inside of it. If I scroll it back to the top, you can see it has
all of this HTML. There's a CSS
document right here. This is all the information
that's on the back end of an Epub file
that you don't see, and there's ways to edit
a lot of this stuff, but that's not what we're going to talk about in this course. I just wanted to show you
that there's actually a lot of files that go into
just this one Epub file. So one of the things
that we talked about, let's see down here, content is the meta data when you were exporting
is to include things like the book title and the name,
anything like that. Because this is going
to go in your file. It doesn't really look
like it goes anywhere. It doesn't just go
on the file name. This stuff is actually
coded into the book, so it is stuff that
you need to include. But I just wanted
to show you guys really quickly what
this looks like. So let's go back to design. So you don't really get like, oh yeah, export complete, you don't get any
message like that. But if you go into, I saved
it in my deliverables folder, you now have an ebook file, an Epub file on a Mac. If you double click this, it's
going to open in E books, which for a children's book, should not be an issue at all. But I always
recommend to open it with Kindle Previewer if
you're uploading to KDP. If that's the main
platform that you're going to distribute
your ebook through. Because every platform
ebook reader has different rules and it may not display it the same
for a children's book. Again, it should be
pretty much the same. But we're going to do it with
Kindle previewer just to make sure our Kindle will
display it how we want it to. I have a link to download
this in the resources PDF. I'm, if you don't have your cover image and you export it without that cover image, your little thumbnail
right here, your little preview of your file will not have your book cover. But since I had my
book cover already, you can see it looks
like a cute little book. See it says it's
enhancing the book. So it is actually
converting your E book, even though you already
exported it as an Epub file, it still has its own internal
conversion that it uses. Remember how I said
this was step one. This is an example of what
can happen in design. Is not able to export
certain things correctly. So I'm actually going
to report this, basically what this
is doing because I have my master pages, I have this applied
to every one of my pages as a texture and there's a transparency
attached to it. A blending mode right here, Instead of being normal, when a design exports
this to an ebook file, it will pretty much just
change this to normal. So if I change this to normal,
you can see what it does. It's doing that to
every one of my pages. Because if I go back in here and scroll through these pages, it just looks like I have those textured pages
laying on top. So I'm actually turn that off so you can see
another example of what this may look like
in case you didn't apply textures to every
one of your pages. So we're just going to name this 12 because I'm just
showing you when you re export it should save all of your other information in your meta data so you shouldn't have to
enter that back in. Okay, so this is
our second version, which on first appearances looks the same as the first
one. Oh, I don't know why. On Mac sometimes you
have to click and drag instead of once the
programs already open. It won't always let
you open it that way. Now you can see,
since I got rid of that texture that had
the blending mode, it is now showing my
first page as it should. If you go back, you can
see your title page, but it always starts with your content page automatically. When you open it up,
go to the next page. I'm just clicking
this right here, and you can see it
looks like a spread. When design converts
to an ebook, it has issues with any transparency or effects that you add to text or images. So remember right here I
have a directional feather, which I've already, I've
lumped them together. Let's see on this
oval right here, I have a directional feather. But once it's exported, it's not able to keep that look. Since my P and G
of the butterfly is laying on top of
my illustration. It's actually going to cover
every one of my full spread. If your print version
looks like this, then your ebook version
will convert really well. Mine. As you can see, it
converted differently. This isn't easy to read anymore. It's good to test this,
because if you don't have any crazy effects added
to texts like right here, you may be good to
go right now and you may not have to
do anything else. And you may be able
to upload this file, but go page by page and make
sure that things look okay. I'm trying to see if there's
another example of this. One looks pretty rough. They don't normally
look this crazy, but I'm going to show you what to do if yours looks like this. Again, it's good to test it because you may not have
to do anything special. So if your book is
ready to upload, then your book is
ready to upload. Yeah. But in my case, there's another step
that we have to take a couple extra steps before we have a file that looks
like our print file. Let's close this. We're going
to go back into our layers. And I'm going to add a layer
on top of all of these. And this one's going
to be called ebook. And this layer is the only
thing when I export my E book. I'm actually going to
turn these layers off. And I'm only going to
use the information in my book layer to export. So what we're going to do, let me scroll all the
way to the bottom to see if I actually
have a blank page. I don't have a white a
blank page added after page 28 because KDP will
automatically add one for me. Ingram Spark will as well. You can't do that if
you only have 23 pages. You do. Your file does
need to have 24 pages. Just make sure if you have
23 pages of content in your ebook that your last
page needs to be blank and there can't be any texture added to it. Mine's good to go. Okay. This time what
we're going to do is I'm going to keep this
in the deliverables we now let's do course project. We're going to do ebook images. Make a folder with ebook images and I'm just going
to call this image. We want to export every
spread as a picture. We're going to do all, we're going to leave it as spreads, because if it's as pages, we'll just have to add
twice as many pictures, if that makes sense. So we're going to
keep it as spreads. I'm going to change
that to high. You can set this to whatever your book is being exported at. I'm exporting -150 PI. I'm going to keep
the color space the same and click Export. This is going to take a minute, but if I open up, it doesn't like me doing both
of these things at one time. You can see it's saving the spreads as images. We're going to let
that do its thing. I'm going to open one of
these, just so you can see now when I export
it myself as a J peg, you can see that it still has all the text
effects and everything. My butterfly is not blocking
all of my image anymore. We're going to add
these illustrations, go back to our layers. I'm going to turn both
of these off and make sure my pin is in this layer, so I'm not accidentally adding my illustrations
to any other layer. Let's go back to normal view so we can see things
a little better. Remember at the
beginning of the course, I said if things
aren't alphanumeric, if I just select all of
these and drag these in, it's not going to be in order. Actually, it is for
that, let's see. But it's not in order. We're not going
to do that. I can scroll through, but I
don't like doing that. I already got that page. I'm going to select up to pay image nine before I get to
the double digits right here. And then they'll be in order so it doesn't include bleed
when you export like this, that's not going
to include bleed. So just go through and add your images again like
we did in the beginning, except this time we don't really need image frames because it's already sized to fit these pages because we
exported from these pages. This does seem like a
silly redundant step. It seems like design should
be able to do this for you. And as you can see,
Pup check down here. Now we have a bunch
of errors because we exported things at 150 PPI. So I'm just going
to turn this off so we no longer
get this warning. Oop, we don't have to worry
about that because for the book we're not
worried about 300 PPI. Really only worried about
that for the print file. Now we're going to export again. Let's go back to our
deliverables folder. I'm just going to call
this one V three and make sure you change your format
back to fixed play out. Dave, again, it should remember
all of your information. You can double check
to make sure it did. Let's go back to deliverables. It's good file
handling, by the way, to delete these previous copies if you're not going
to end up using them, because trust me, in a
month, when you come back, you're going to look at these, You're going to be like, wait, which one was the
one that I wanted? It's just better not
to have duplicates or extras that you have
to worry about later. You can see now I have my
texture is displaying properly. Go to the next page. Now if you double
click, by the way, you can zoom in on text or a
portion of the illustration. And you can see even
though this is at 150 PPI, it's still
pretty clear. It could probably be clearer
if it was at 300 PPI, but for me, it's not
worth the extra file size to have it for
that difference. You can see that's
still slanted now. It looks exactly like it
does in the print file. All done in design, we don't have to worry
about downloading any extra programs or
doing anything extra. This file is good to upload. It looks how I wanted to look. Everything exported
and converted well. Now that I manually replaced my images, this could
be a little clearer. But you can click
and zoom down here. Double click, perfect. Now this file is ready
to a good to go. Just make sure when you're going back to your print version
that you toggle off your ebook layer so that you don't accidentally export all of your ebook images which aren't as high quality
as your print files. Then we can turn this back on. Since we have this layer off, it won't check those
images anymore. Remember, good file handling. We're going to delete
these. I don't accidentally try to upload them. This is ready to upload.
20. Exporting Your Finished Children's Book to a Print PDF File: Our print file exporting is
much more straightforward. Make sure you don't
have any errors down here in your pre flight. And again, make sure
your ebook layer is hidden because we don't
want to be exporting that. I'm going to click
in another one, so I don't actually add
something to that layer. And then we're going
to go to file export. I'm going to name this
one print file down here, make sure your format
is PDF, print save. Then up here under
Adobe PDF presets, KDP and Ingram Spark want
you to export to this one. Lulu has their own if
you're exporting to them, they have their own settings
that you have to download. But we're going to use
DF One Alpha 2001. That's the main one that
all of the POD companies, it should automatically populate all of
these things so you shouldn't have to worry about changing too much
your compression, it's all going to
be over 300 PPI. The important thing
that you change here is marks and bleeds. You want to use
your document bleed settings because it doesn't
automatically tick that, but we want to
include that bleed so that our images go off the page. And actually if
you don't include this and try to upload the file, you will get an error
with Ingram Spark or KDP and they'll tell you your
file doesn't have bleed. But it looks like
you have images that you want to bleed
over the edge of the page. Don't include any marks. Pod companies do not want this. Traditional publishers do, but not POD companies don't
include any marks. Everything else
will stay the same. Of course, you want all pages. You want to export pages, everything else is good to go. Click Export. And up here
you can check the progress. My file is pretty huge because I have Photoshop
files in there. I've got a lot of effects. Your file may not take as
long as mine to export, but my file is pretty hefty. I have mine set to automatically open the file once it's done exporting to view things
as you would like. If this was a print file, you need to go to page display, make sure two page
view is toggled on and then show cover page
in two page view. This means that your
first page will show by itself and then if I
go to the next one, it'll show page two on the
left, page three on the right. If you don't change that, it's going to change the order
of your entire book so you can go through and make
sure everything looks good. Actually, I
don't know why. Let me go back into
my end design file. It's good to prove everything because it looks like
there's an issue right here. For some reason it looks like, yeah, at some point
this got moved over. It's good to prove
things and make sure that everything
looks as it should. I'm going to zoom out just a smidge so I can see
around the edges. Actually, that was too
much. Let's go at 65. Yeah, because I still
want to see the edge of the page to make sure I
don't have that issue again. Now you can see there's
a little white line, KDP may actually give you
an error for that too. It's definitely something
you want to fix. I'm just going to go
through every other page now and make sure it all looks how I
wanted to. This one. Again, I changed my
file a little bit. When I added the pages, I had to make some adjustments. And that's where
this is coming from. If you followed along with
me, should not have that. But I thought I
fixed all of these. But for this particular issue, the ebook file doesn't
include bleed. Actually, you can see
that it looks fine in the ebook file but I had to move it over smidge
in my print file. Luckily I don't have to
redo the ebook file. Perfect. Everything
else looks perfect. I can re export that and then my print file is
ready to upload. Something I do want to mention, I'm not seeing any light
leaks on these pages. Let me zoom in just a little bit and see if I can find some. You may notice some lines on around text that has any
effects. This one's not showing. I do have my settings changed a little bit tweaked in Adobe so that it doesn't
show those light leaks. But here's an example. If I in, it actually
disappeared. You can see this
line, and this is actually where my two
images join each other. And there's a vertical
one, but it's a little harder to see
where the pattern falls. A lot of times you may
see this around text, you may see like a
little white outline around some of your text. It may not even be around
the whole text box, It could be around a PNG. I think my PNG's are hiding
some of that. My butterfly. I'm not really seeing anymore, which stinks because I would
like to show you an example. But you could see it on
the pages that I had. Yeah, my text doesn't
really have anymore. But you can see this
white line right here. You may have it
around your text, You may have it around images that have any effects on them. These are called light leaks, and if you zoom in, mine
actually disappear. And I think that's just the
settings that I have set up, but you can still
see it right here. If you continue to
zoom in and it still remains like a one
pixel width line, it is a light leak and it's not something that
is going to print. I wanted to warn you
about that because it is something a lot of my clients
see and they're like, hey, what are these
lines? Why are they here? It's actually a display issue when any PDF reader
processes your file. So it's not something that's
actually going to print, it's just a display issue when these programs try to
digitally read your file. If you want more
information about that, there's a link in
the resources file. I'm not an expert on
exactly why it happens, but if you want any
more information, there is a link to
check that out. I just wanted to
warn you in case you see those and you're
like, What is happening? Where are these lines
coming from? All right. Now we have both our print file and our book
file ready to upload you. Did you formatted your
book all by yourself?
21. Troubleshooting: Speeding Up InDesign: Before we move on and
wrap this course up, I do want to talk about
a couple of things that you can do to speed
up your design, or if your program is
lagging a little bit, some things that you can
do to help it along. Design requires, I think it's eight gigs of Ram to operate, But that doesn't
mean that it's going to operate smoothly, That just means that's the
minimum that it needs to run. So I think there's four different things
I'm going to talk about. Number one is we toggle back
and forth between these, but to make sure
that your display performance is set to typical. If your program is
running a little slowly, it's not keeping up with things. Make sure you didn't accidentally leave
this on high quality, you can switch it to typical. Your pictures will be a little
more blurry, but again, it helps run more smoothly until you have things placed
where you need them to. But if it's running
a little slowly, that may be your
number one reason why number two is pre flight, which is always on
in the background. This one's just on basic. If you have it on 300 PPI, it's going to take a
little more juice for it to try to read
all of your images. When you move them, add them, add something else,
adjust the sizing. Preflight is going
to keep checking those files to make sure that
you don't have any errors. So you can actually toggle
this off so that design is no longer wasting any energy on constantly
checking your files. You can just turn
it on when you need it and turn it off when
you don't need it. Last step in design is you can turn down live screen drawing, which is a live preview of what your image will look
like when you resize it. So if you size something
up or down or move it, I have, I already have
that setting changed, so it doesn't show a preview. It just shows a little outline box of where
it's going to go. It doesn't actually show what it looks like
when I'm moving that. Let me show you the
difference really quick. So if you go up to end
design preferences interface right here, you can see this
live screen drawing. I have it set to delayed, which shows that it doesn't show me moving the image around. It just shows where my little
frame will end up being. It shows the outline
of my frame. But if I select
immediate click, okay, When I drag this, it's actually showing the image
as I drag it around. In design has to process what that's going to look like
at every little moment, every little place
that you're moving it around so that can keep in design a little too busy
and slow things down. Again, for mine, I
keep it on delayed, even on my computer that has
a lot more processing power. I always set it to delayed. And this last one is
outside of design. Make sure that you
don't have too many things running in
the background of your computer because it can steal away some of
your processing power, close everything else down. If you're having difficulties
in design on a Mac, that usually means right
clicking and pressing quit. Because even if I
close like this, I have, if I close this, it's still going to be running in the background
just a little bit. Not too much, but it's still going to run in the background. So you can go ahead and
quit things or you can make sure there's not something in the background that's updating. Or if you have anti virus that's running a
scan or something, you can pause those things
just so you can get through whatever changes you
need to make in end design. So there's probably some
other more advanced ways that you can speed
and design up, but I'll leave a
link to an article talking about those
in the resource file, if that's something
that you need. These are only the changes
that I've ever had to make. And as long as you meet the
minimum for end design, your computer should be able
to handle your book file. It may run a little
slower sometimes, but for the most part it
should be able to keep up.
22. Conclusion—You Did It!!: I'm so proud of you for making it all the way to the
end of this course. By now, you should be a pro at formatting your
own children's books. You should have an
interior print file and an ebook file
ready to upload. And you did it all by yourself. Don't forget to show
off your new skills by uploading a sample of your book to the class project section of
the course page. As a reminder, you can
do that by going to file Export, and choose Jpeg. Type in the page range
and select Spreads. Navigate to the class projects
and upload your file. I would also love it if you
left a review for this class, let me know what you loved and how this course
was helpful to you. Don't forget to follow
me on Skillshare If you're interested in
any more book related courses or you can check me
out on my website at Vivian Reese.com I wish you the
best on your book journey. I'm so proud of you for making it all the way to the
end of this course. By now, you should be a pro at formatting your
own children's books. You should have an
interior print file and an ebook file
ready to upload. And you did it all by yourself. Don't forget to show
off your new skills by uploading a sample of your book to the class projects section of
the course page. A reminder, you can
do that by going to file Export and choose Jpeg. Type in the page range
and select Spreads. Post it on Instagram. And feel free to tag me. I would also love it if you left to review for this class, let me know what you loved and how this course
was helpful to you. Check back here in the future
if you're interested in any more book related
courses or resources, I will have a course
on formatting your own children's book cover. So make sure to check
back. I wish you the best on your book Journey. Bye.
 Vivien Reis, Author. Book Formatter. Teacher.