Transcripts
1. Introduction: Hey guys, welcome
back to another one. My name is Braden messenger. I'm an artist, YouTuber, and I make content for
the Internet of things. I'll be your instructor
for this one. Yeah, This is number six out of seven series set
where I am taking you through and I'm showing
you how you can use seven different
reference photos. However, you can still use the same approach to
drawing all seven of them, basically using the
luminous method. That's the whole
point of this series. This is your first-class. Definitely start
at the beginning and then come all the way through being sure to
leave projects and reviews for every single
class in the series, that would be much appreciated. Now, what to expect in this one? I'm gonna be taking you through and showing you how you can draw a perfect circle
with a compass. Then implementing your oval, which of course, the side
plane of your subject. Drawing in your vertical
and horizontal axis. From there, pulling
over your hairline, your brow line, and the
bottom of your nose, and then drawing the
center line of the face so that you can identify
the bottom of the chin. Attaching the bottom of the
chin to the vertical axis, and then punching in
your cheek plane. That is pretty much it as far as the structure of Loomis head. Once you have that established, the rest is actually very easy. I'm gonna be showing you how
an exactly where you want to punch in your eyes and
the beginnings of your nose. I'm gonna be showing you how you hatch with the colored pencil and cross hatch a
little bit here and there to build up lower values. We're gonna be talking
about the value scale and building that underlying form, which of course is
the illusion of that third dimension on paper, which is two-dimensional space. We're gonna be talking a little bit about the Renaissance. We're gonna be talking
about are general. And yeah. So that's it. That's what to
expect in this one. I hope you learn one or two
or maybe even three things. And see you in class.
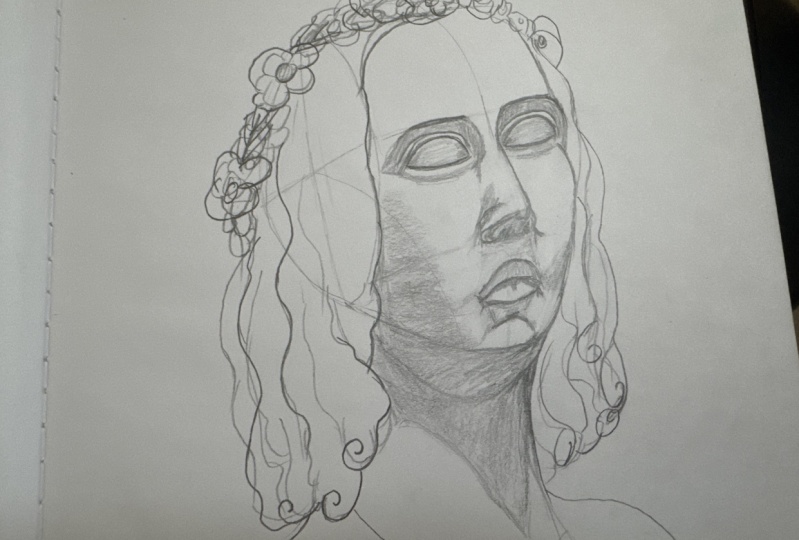
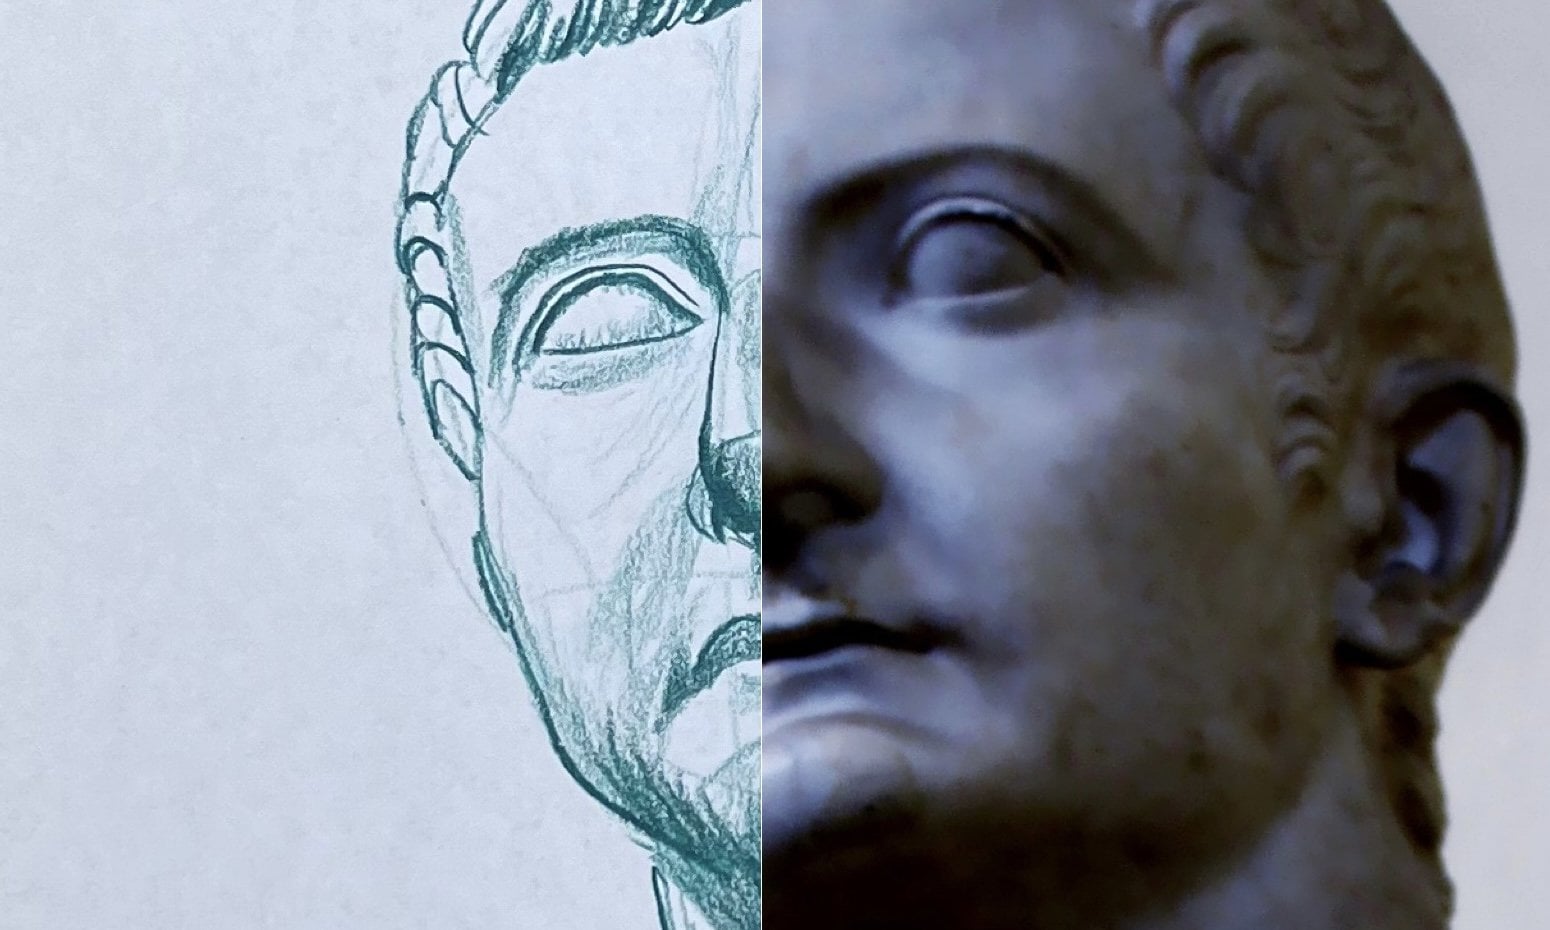
2. Step (1) Drawing out your Loomis Head: Okay, so we have our compass and I think we're going to
sketch this one out and read. Why not? Why not? Okay, So we're gonna
take our compass, we're going to set it to a two. I'm going to place
it right smack dab in the middle of the paper, which can do a nice light
circle here. Circle. And then from there, once
we have that established, we're going to refer
to a reference photo. We're going to look and
see where the eyes go. And right about here. Just like this, we're going
to punch in our site plane. We're going to place our vertical axis and then this is our
horizontal axis here. This is our temporal plane, right over from the
top polar hairline, over from our horizontal axis, that is our paraboloid. And then from here the
bottom is our nose line. This right here is called
the center line of the face. So I'm going to pull that down
and then nice equal pole. This chin on this subject
here is a little shorter. We're going to
pull up like this. And then we're going to pull
down from a vertical axis and then over that, the bottom of the chin line. And then of course we have this plane here which signifies
the bottom of the chin. And that just given
the nature of the angle that we're working with with our reference photo. Then we have our neck line here. And then that's
pretty much that. Now we have our Loomis
had established. So we're going to punch in our cheek plane and we're
going to move on to listen to.
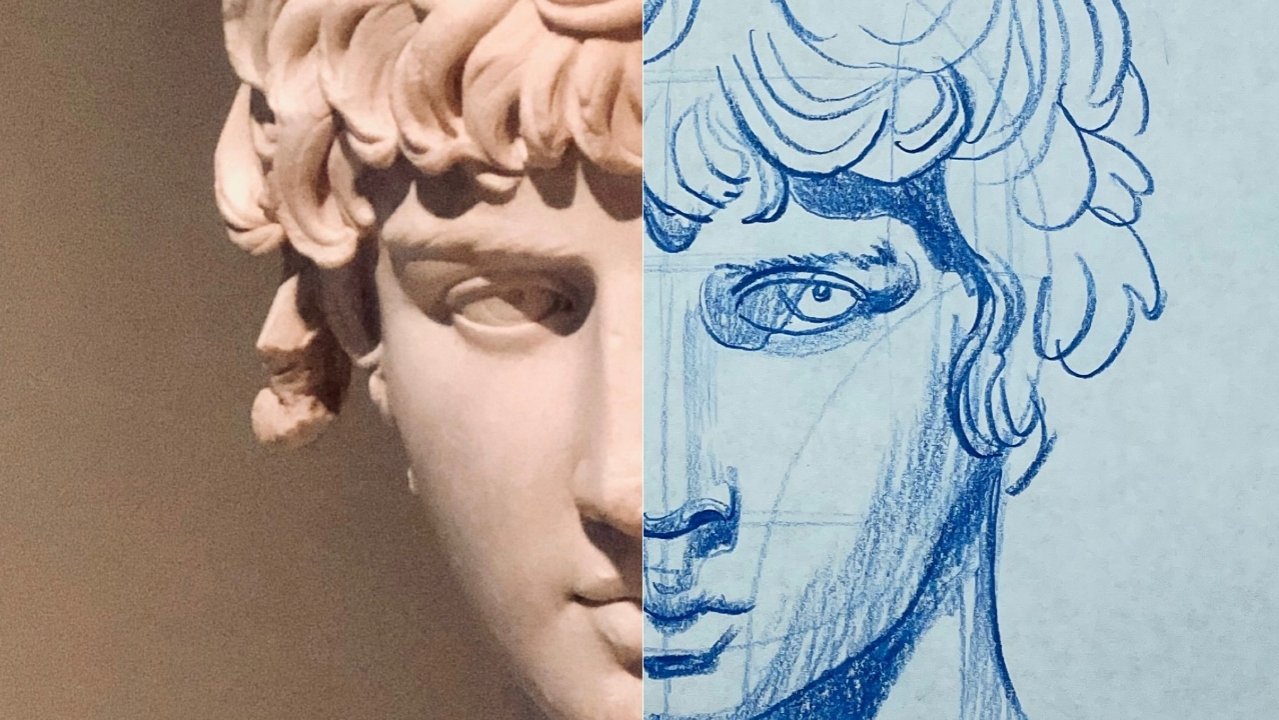
3. Step (2) Drawing your Eyes and Placing Nose: Lesson two. Now, in this lesson we're going to
be punching in the eyes. Okay? So just pay attention
to how we do that. Now. Here what I like to do
is I like to focus on the I that is the farthest
away from us. So in this case it's
the subjects left eye in the reference
photo. So nice and light. We're going to begin by hatching with our colored pencil here. And we're just going to
put a nice defined line. And we want to define
the edge of the nose. Once we have the edge of
the nose established, then we can start to use
the edge of the nose as a reference point for exactly where that
subjects left eye. It's placed. I like to put defined lines
into basically establish the basic shape of
the eyeball itself. And then of course,
because this is a statue, we can then put in the eyelid. Right? Then once we have
the established, we can basically outline that side of our subject's
face, nice and light. You don't have to
press hard at all. What we're doing in this series, as well as in this
specific class, is I am teaching you
the basics of hatching. Hatching, as we currently
understand it today, was derived during
the Middle Ages, um, some attributed to the
Italian Renaissance, is which of course is the
time of Michelangelo and Da Vinci and other artists. But it started off as hatching, which is this
technique right here, which is basically
where we just pull our pencil across
the paper one way. The method known as
cross hatching was derived sometime later
to basically build up our values and speak to a more pronounced
basic form on paper. But this is all
we're doing here. We're just hatching right now. Now of course, when it comes
to establishing that second, I, what I like to do is
this right here, okay, Don't overthink it to
use that brown line as the basis for the top of
the eye socket, right? If you think about approaching
sketches such as this, as the Renaissance artists did, what they did is they built
their portraits based off of a subjects inherent
skeletal structure. Then from there
they put on tissue and muscle and then of course, skin and the finer details. But for here what
we're doing is this is more or less just a
basic shape exercise. That's one of the
reasons why we're hatching and we're not actually doing this
series and charcoal. I want you to sketch this out. So much of what an artist is is the habituation
of their practice. They draw things out
and they practice. Practice makes perfect. There's a reason
why they say that. When you think about
professional athletes, Olympians, NFL players, soccer
players, what have you. Half of their time spent is
not necessarily in front of the cameras on the channels
that you watch them, but it's actually in the
arena, the practice arena. And that is what
we're doing here. We're just practicing. But one of the
things that you can do is once you establish
your line work, like I just did here, writer, you can build up
those line qualities. Line quality by definition. If this is your first-class, I will tell you is
the relative fitness or thickness of a line. Lightweight has a
correlation to that. By definition, line weight is the relative darkness
or lightness of a line. So by varying these
different qualities and these different weights, we can introduce basic form. Alright, moving on
to lesson three.
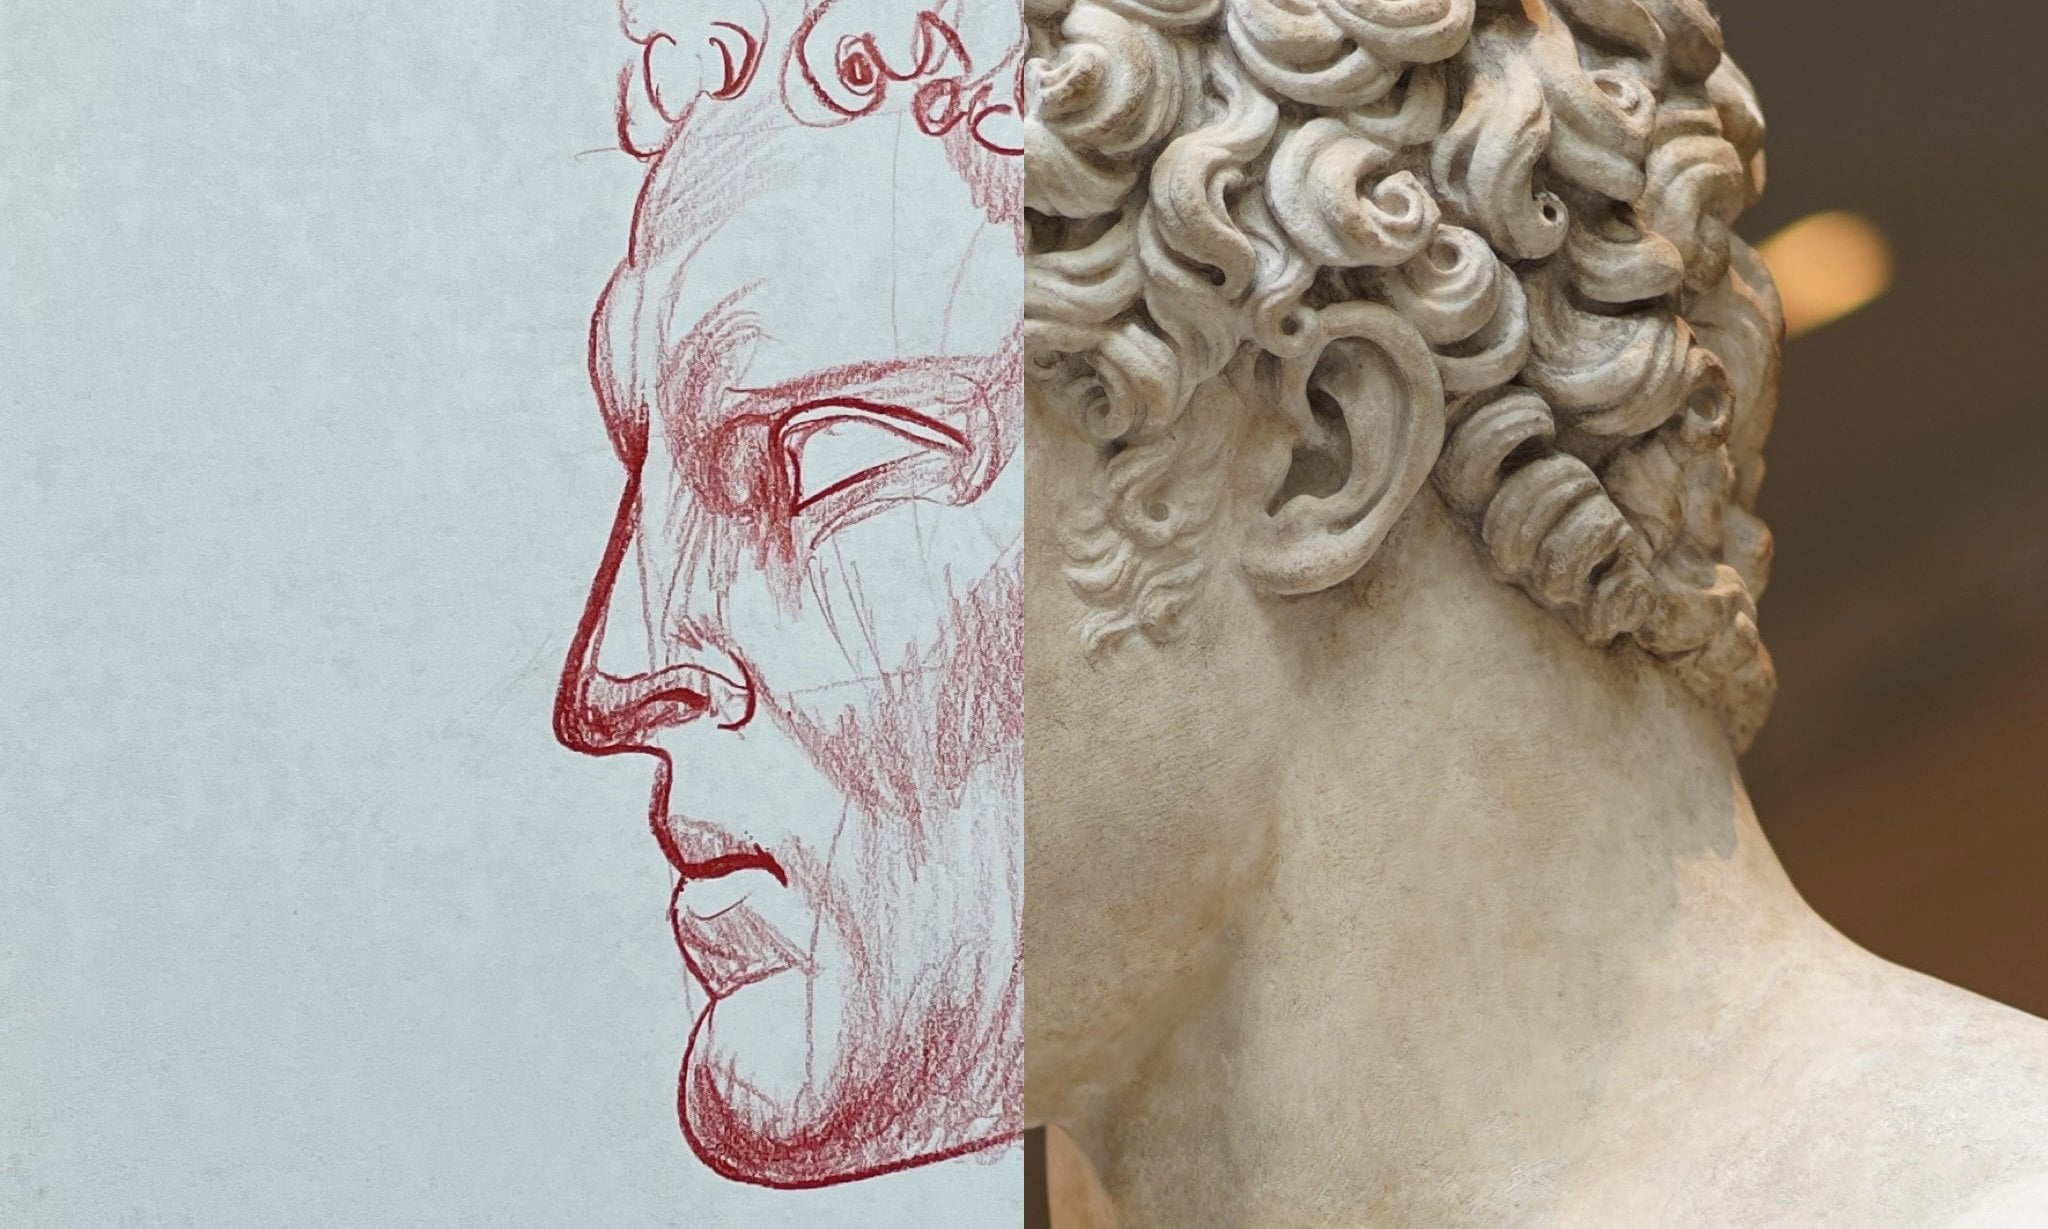
4. Step (3) Drawing your Hair: Okay, so in this lesson, what I'm going to be going
over is we're going to be drawing the basic
shape of our subjects. Hair. Shape by its very definition
is two-dimensional. So I'm going to be using the
fine lines as opposed to implied lines to bring out
that shape onto paper. For those of you that are new, I will explain very quickly
that defined lines are basically when you put your pencil on the paper
and you pull that line, or you push it right in one
way and you do not break it. Defined lines are important especially for putting
something in front of another. Or when you think
about a landscape, defined lines will be very prominent in an object
that is closer to you, the foreground
versus background. Now, Leonardo da Vinci, back in the 1800s, was very, very popular for
his use of implied lines. In fact, Da Vinci
and his paintings hardly ever used to find lines. In fact, he was
famous for not using defined lines because
when it comes to the principles of optics, he was a very big advocate for
not using a defined lines. And in this case, up until the time of Da
Vinci, many artists, such as Dell of
Rocchio and others were huge into using
define lines and their paintings as far as
manipulating the perception of depth of field in their
drawings and their paintings. However, Da Vinci noticed that, especially when it
comes to paintings and trying to really bring out the realism that you see as far as three-dimensional
space is concerned. On a 2D canvas, that defined lines
are not prominent. In reality. The
human eye does not perceive to fine lines
on the implied lines. And that's something to
be aware of when it comes to understanding
multiple mediums, right? Line definition applies
differently to painting. Say that it does
charcoal or graphite. I have found that you can use them in tandem with sketches because contrast is very
limited when it comes to using, say, black and white tones. So line quality
variation is extremely important to help convey
form and just overall depth. Now when it comes
to colored pencil, all of a sudden we have
hues that we can play with. Line work is still very much the same as the black
and white scale. It's simple tricks like this that will make
your work stand out from your contemporaries
onward to listen for.
5. Step (4) Drawing your Nose & Mouth: Now, what we're
going to be doing is we're going to be building out
the features of this face. So the nose and the mouth. When it comes to the
nose, Don't overthink it. Stick to the nose line. When it comes to your
little miss head. Those proportions
splitting the head into three equal sections. Mathematically. That is how a face
is divvied up. So stick to it and just focus on trying to bring
out that underlying form. Once you have the bottom
of your nose established, it becomes very easy
for you then to identify exactly where the
mouth itself is placed. In this specific image, I would recommend drawing out the bottom of the upper lip. When it comes to the bottom lip, especially on these sculptures, guys don't worry about
defining anything. It's going to be more or
less a play of value, right? So the more you sketch out, the lower that
value will become, the lighter you sketch out, the higher that value will be. And you can use varying
pressure control to manipulate what that
value it looks like. So say for example here, I'm gonna go ahead
and I'm going to put a nice light layer of hatching on the bottom
of his chin here. And this is going to
start giving us form. Also when you are looking
at your reference photo, this is what I really want
you guys to practice, and this is what I want
you to come away with, is I want you to look even in tight areas such as
this right here, right above the upper loop, Tynan to the bottom of the nose. I want you guys to start to
understand the flow, right? I've called it underlying
form in other classes. But essentially what
it is is the way right down to the way you pull that
pencil across the paper. That will convey a
certain underlying form as far as how it
flows to your viewer. When it comes to optics. Da Vinci touched on this in his work hundreds of years ago. But you can make a certain aspect of your drawing very
crisp, very fine line. And when you do that, the viewers eye
will actually spend more time in the area of your drawing where
it's very crisp. It's very sharp, It's very focused if you want to
think of it that way. Subconsciously, when your
viewer looks at your drawing, if there are any areas
in that drawing, or maybe it's not as detailed. Maybe it's fuzzy, right? Maybe you used a very
thick line quality for a portion of the hair
and then you used it very, very thin line quality
for other parts of their, the viewer's eye will
go to that crisper, sharper image because
we like to look at things that are
in-focus, right? Not things that
are out-of-focus. So with that in mind, let's move on to less than five.
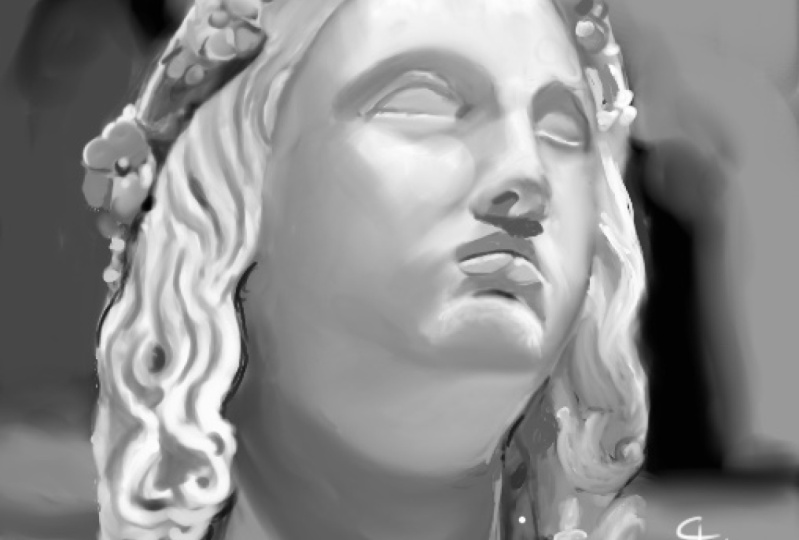
6. Step (5) Hatching your Underlying Form : Okay, so let's have
some fun. Now. This is where hatching really shines as a drawing
technique for you. Because you can
move very quickly. And then all of a sudden, you can take that flat very blatant
two-dimensional drawing and you can make it pop, jump off the paper. But that illusion of
that third dimension. So just like this,
just like this, we're going very light using a very light pressure
controllers doing a nice pole, pulling
out one way. Always pull your line up
from that jaw line to the top of the line associated with the top
of your cheek plane. Okay. Nice and light. And also you can take
your pencil and then you can put it pretty
much on its side. Because if you use the tip of your pencil, you're
going to have a very, very thin quality line
that you pull, right? If you put it on its side, that quality is going to
thicken up drastically. And then of course,
when you do this right, nice and light, you go over hatching with hatching that
you've already done because it's still hatching, attaching on top of
hatching because we're pulling with
the exact same way. It's not crosshatching until you actually cross it, right. Viewer also be very, very aware when you look at the reference photo
that you don't hatch over the top of
areas of the face, such as the top of
the cheekbones, where light is
striking completely. Because what you
can do is you will get maximum contrast between your values if you go complete white to
complete dark, right? That is what they
call accentuating the value scale to its fullest potential because
there's complete white, there's complete black,
and then of course, all the tonal
variations in between. So by doing just this, going over the same area
over and over again, you can actually
lower that value. So let's move on to the last lesson. We'll
finish this one.
7. Step (6) Final Thoughts & Details: Okay, So this is the last
lesson we're gonna be going over final thoughts and
just final details. So right here, what I'm doing is I'm just
pulling one way. I'm pushing a little
harder than I did before something because when you look at the reference photo, this is a much lower
value and the right, that light source is
coming from the top of our subject and it's casting
down across the face. So beneath the nose, beneath the lower lip, the eye sockets right directly beneath the brow of the subject. Those are all much lower values. So in order to bring
out that contrast, really make this sketch pop, we are using the proper
pressure control to really expand our
value scale right? Now, notice as your pencil tip will grind down on one side because you're hatching over
and over and over again. You can use that
to your benefits. So the sharper edge,
you can flip the pencil around and here you can punch in the defined lines that you
need for the rope that is draped over the
subject shoulder. And then of course you can
flip it back around and you can use it to really bring in those sharper definitions that you see cross value, right? But just like this,
this is one of the beautiful things
about hatching guys. This is one of the reasons
why it became so prominent During the Florentine
Renaissance is because you can draw so quickly and you can convey certain artistic
principles within a given work. Whether you're rendering for a painting or you're
simply just sketching, trying to get an
idea for something. Don't be afraid to go
through your guises, hair on your projects and really bring out
those defined lines. I really want you guys to play with your line
weights in this one, hatching, Yes, it's wonderful, but I want you to mess
with your flowers. Alright, let's see if we
can't get those flowers to really pop jump
off the paper. Um, I also want you guys to mess with your
underlying form. Okay, I cannot wait
to see your projects. Please post them. Stay
happy, stay healthy. And remember, never
stopped drawing.
 Messer Creations, Artist | Author | YouTuber