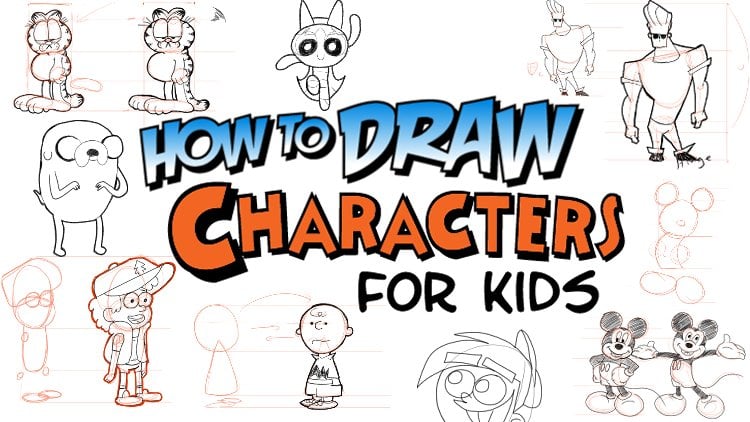
Transcripts
1. Vehicles Introduction: guys, I'm it. I'm the father and this is how to draw vehicles. That's your vehicle. In this course, we're gonna teach it at draw all sorts of vehicles, from cars to trucks, two tanks and helicopters all the way to incredible spaceships, all sorts of vehicles using basic fundamentals and occasionally things you'll find around your home. We even get into basic forms of linear perspective. So it'll help you to be able to construct and build up your vehicles from almost any angle you want. But fair warning this course isn't easy. You're gonna have to have taken our how to draw basics for kids course or have some good amount of previous knowledge. So join on in and join us as we creed all sorts of fun vehicles.
2. How To Draw a Truck: Hey guys, We're back and we're finally getting into this vehicles. Of course, you know, I know that the perspective stuff might've been a little bit tough. It's not easy, it's a lot to digest, but I'm impressed. I think you guys are doing really well here. And I think learning how to draw cubes and transparent cubes is going to help you a lot as we step into this. So Jolie, her You ready? Yeah. I can hear the confidence in yet. Okay. So what we're gonna do is draw a truck, kind of an old pickup truck to start with. And what we're looking at to start is where's the shapes? Where's the cube kind of thing. Okay, So why don't we grab a corner here and we're just going to kind of draw up, draw one line going up type of thing. Grab baby from this other corner. Draw a line going up, right? Okay. Maybe from the backend. That's what we know so far, right? We also know that this kinda line is coming across here. We've got some of these lines coming this way and stuff. And we've got this line coming back here. And hey, I'm kinda doing freehand right now. But if you guys want to, you can be using your rulers. You know, he's a bit tighter lines and stuff. Yeah, that'll work. All right. One thing that's really important to notice is we're looking down at the top of this and the top of the hood and the top of this back in here. So we're kind of looking down a little bit at this truck, right? If you guys remember from the cubes, that's probably going to mean that the horizon line is somewhere up in here, something a little bit higher. We're getting pretty close here, right? So horizon lines pretty close here. We're not going to bring this exactly to the horizon line like we might when we're practicing and stuff like that, right? That's not what we're doing here. We're just kinda, kinda rough this in a little bit so we can get some of that truck shape. Okay. So we can see that this one's that truck. The top of it, it's kind of there. And just trying to gauge what's going on here, what's going on with this truck. Now if we were to try the same thing below, we can kinda roughly you can even carry these lightens down if you really want to. Actually, the way I set it up on the papers was so that you could do that so we can draw it underneath, right? But now we're gonna kinda have to gauge, you know, how how thick is this first section. How how big is the front grill going back as well? You know, what's the angle? We're going to try to draw it roughly the same. But you can see how own. Now it makes sense, right? And if I was to, before I get too deep into this, I can see how, you know, here might be my my transparent cube type of thing, right? Like this is what we were talking about for drawing transparent cubes, right? So now we can see, let's say for example, the first hires here and the second tires here. Roughly speaking. More of an oval. We can see if we were to draw this over, that other tire would be here and that other one, if we were to draw through right. We're not we don't have to worry about it right now because we're not drawing all the way through on this stuff, right? Yeah. How tough is this? It is, right? Yeah. Yeah. This is a much, much harder unit. You know what? When you're following on your sheets at home. Pause. Don't worry about getting all stressed out about this or anything. Just pause a little bit. It's okay. The thing that we're doing right here with the blue is we're just roughing in a box. We're not going to do every detail on this box if we want to, we can say, okay, well, this door comes roughly here and it's about yay high, right. And so the roof is going to come off off to the side here. That cutting maybe I didn't leave myself enough room here. Something like that. Yeah. The main thing actually, if you take a look at what Joe is doing right now, is she's kinda doing the base of the truck, right? You know, everything from the trunk to the front hood and all that kinda stuff, right? It's not bad. The only thing I would suggest for Joey is maybe, you know, weird looking at how this is going off this way, right? Sorry, I'm not used to drawing on her tablet here. So that means this would be narrowing, right? This, this corner here that she was doing was a little bit too raised and that was what was throwing her off there. Right. Okay. So if you clean that up just a little bit, it'll make a lot more sense. Okay, So at this point, if you don't have kind of like a bit of a triangle box roughed in like Joey's got here. Then something's going to pause, right? I'm going to take a look at Joey's here and kinda correct. We're following these lines, right? So that means that this one would also kinda be following in that direction, right? So she's going to have to erase a bit more here. She'd have to come in here and erase that away, right? Yeah. And there we go. And now this is more of her her main box that she could work with. Right? Okay. Now, once we've got this box established, we can come in and start to do just a little bit more. Start to sketch into details and this is rough sketching, right? Like I'm just going to roughly come in here. And if you want to do it with a ruler, cool. Like really do with a ruler, it's okay. But for me, I'm just kinda gonna come in here and do a little bit of roughness. See if I can catch the main elements without really messing them up. And, you know, following the sketch guidelines makes it so much easier, right? Like I've kinda got all this directional flow that I can follow with, right? And then I can put some grills inherit something like that. Come up here. I've got another ledge. And then this comes up to this part of the hood. This part is going to come all the way back actually. And you can see how rough I'm sketching here. This is not going to look the prettiest or anything like that, right? Is going to come up kinda on both sides here. And it's going to come back now how far it comes back as I'm going to kind of gauge it and say, it's going to come back roughly to about there and the window will follow that. And this hood. Come back to that point. I might not have left myself enough space here. And that can happen actually if you're roughing things in and stuff for it. Sometimes, if I was smart, I would have bumped this down digitally. I can do it, but I'm not going to want to kinda lead why mistaken front of you so you guys can see it too, that we all kinda do it, right? You know, if you can see this, this has got a bit of a curve on the front here, right? So I can kinda, you know, grab this curve and then bring these lines back. And there's also this middle, middle section of the curve to this kind of middle line. Okay. So it's going to come up. There's a window. The window comes up. We've got a hood. I'm still kinda following these lines a little bit, right? And maybe all kinda sketch in the top of this. The roof a little bit here. There we go. The window ledge of it. They're not bad. Okay. Maybe I'll draw the wheel will come down, come back here, comes up for this. Rear wheel, comes down into the well, and then the back-end comes back. And, you know, I've kinda got these ridges coming back here, right. So it's going to come up and back into the back of the trunk a little bit, which is up here. Actually, this part for the door can come down and it's going to flow over these these parts in kinda come forward. And that's the one door little door handle. We can put them there. Looking at my truck though, I think I made him a little bit to up and down. Right. Like it looks like if I was to measure this point and bring it down, this one seems just a little bit longer, not much, but it all kinda adds up a little bit, right? Okay, now here's the thing. We know that a wheel is a circle, right? And we've practiced so many circles, but it's not, it's a circle when you look at it from one vantage point, right? But as soon as we start turning it, we can see how there's some, some depth to that wheel, right? Here's the center of it and here's that. We also, from this point, it looks like a circle with the rims are hubcaps in the middle. But as soon as we turn it, we can start to see the treads and all that kind of stuff, right? And so these wheels we're looking at, we're going to draw a bit of an oval here, right? And then we're going to draw a little bit of that thickness, the depth of the wheel there. Okay. And then we can draw the room for the rims in the middle, center that a little bit and then have like details coming out of that joint. I'm going to pause for a little bit and I want to see how you're doing. Yeah, you know what, looking at yours right now, I think it's okay. I think the things that you corrected are quite good. And now it looks like you've got literally a nice base of a vehicle there, right? What do you struggling with? Top part. Yeah. So you've gotta kinda measure and say, okay, well, if I'm looking at the truck and here's my distance from here to here. Right. Like where does this door come into it? Right. If I bring it down, You know, it's it's roughly about here or something like that. So that's where I would look at and say, well, you know, I can bring some of these lines down and I can say, well, the doors roughly about here, you know, the stores roughly about here. It's actually comes forward and then comes back a little bit. And then you can just start to add in some height. So what you're doing is basically you've got this little block that you've drawn, right? Okay? And now you're putting. Another little block on top, right. That's basically what we're doing. We've got this car here, and so we've got this the main block that we start with. And then the second block that we're just kind of almost like throwing of rectangle on top there, right? So it's not easy, but you can rough it in as a bit of a rectangle first and then start to add the details. Like, Well that's the thing, you know. All of it is going to follow this same lines that you had already laid down and stuff, right? And I mean, it's going to come something like this. This is where the truck is going to start to look. Here's the hood, something like that. Depending on how high we want to go, we can go a little bit higher here, right? And then you can start to clean it up just a little bit. Can't seem to get the eraser go. There we go. Okay. So we can see how here's the hood. Here's this part for the window. Here's the ledge of it. Here's for the side window coming down into the back. Here, comes up, Here's the top of that hood. And now that's starting to look legit. Right? So looking back at mind like I was saying here guys, basically what you're doing is drawing this rectangle for this, you know, something like that. Then about partway through your drawing, another little rectangle on top of it. This here is our truck. Now, of course, you know things. We wanted to get a little bit prettier. And so we would probably sketch some things in here, do a really nice lines and clean it on up and everything like that, right? But roughly, this is what we're aiming for. We're aiming for something that looks like a truck. You don't want something that looks like what we're doing. The one thing that I noticed I did here was I should have. I'm actually going to change it a little bit. I'm going to come in and I don't usually erase you guys know that, right? I'm gonna come in and drop this because I think the windshield on my sketch is much. There we go. That's starting to get the look. And you can start to tweak it, to adjust it to see how how you want it and stuff. To see if it makes a difference. If you bump something one way or another. If I bump this window out, does it give me the look that I want a little bit more, right. Okay. So now I'm going to say my truck is looking really ugly. But that's okay because I purposely what I wanted to do was show you guys how to sketch it out. You know, how to kinda just do a little rough design really quick. And then we took 10 minutes or so. That was really fast. And it works, right? It's not going to be perfect. If we want a perfect, we're going to use like some rulers and stuff, right? I didn't want it to be perfect, especially not for this one. What I wanted you guys to do was just to start to feel comfortable saying, oh, and what we've studied these blocks already, how are we going to apply it to an actual vehicle, right? Joy. Yeah. How's your years coming? It's okay. It's good for my first time trying. Yeah. Yeah. Do you think What would you change? Everything really? Yeah. Okay. Mine ends ended up looking a bit more like a tough truck than I wanted it to. I think because I gave too much thickness up and down and it looks too too short this way. I think I shorten it up too much. That thickness really really bumped it too much for me. Just that extra little height that I gave it here. I think if I would have dropped it down, it would be a lot lot sleeker. You know what, Let me see your truck. Honestly. You don't ever draw vehicles. And I think you did an awesome job with it. Yeah. No, I think it's legit. I think that I know that you don't draw a lot of vehicles or anything like that. So legitimately, This is one of the first times you're sitting here with me and kind of going at it here, right? So you guys at home, whether you draw cars and tanks and spaceships all the time, or whether this is the first time for you. Don't worry about it. Don't stress. Just have some fun. Take the lesson and learn from it. Learn that we start with simple little building blocks that almost look like Legos, right? Yeah. And that we just kinda start stacking up those Lego blocks, right? We start stacking them up and then we might start rounding some of these corners a little bit, right? And then all of a sudden now, what do I have? I have like kind of any research looking thing or something, you know, stuff like that. That's all you need to do is just if you master being able to draw the shapes, the basic shapes you're going to master. Being able to draw whatever comes to your imagination, whatever vehicle you want. Okay, guys, if this was too fast, what do you do joint stop and rewind. That's right. Stop it, rewind and get back into it, right? That's why you're watching this on video and that's why I'm not standing here in person giving you a hard time, right? Hey guys, have fun.
3. How To Draw a Porshe: Hey guys, welcome back. We've got another how to draw vehicles unit here for you. This time, we're looking at one of my favorite cars, the Polish. That's right. It's a porch. And listen, like this is not an easy course. I get it. You know, like I know some of you might have been struggling after that first unit and me and Joe, we talked about a word like, Wow, that was tough. All right. That's okay. That's what it's supposed to be. You know, if it was too easy them, what do you learn it, right? But right now I think what you guys are learning is exactly what I want is how to find the basic shape with a little bit of perspective and then see if we can modify it. Just like when we're looking at some of those earlier courses that we did about whether its faces are monsters or animals, just hunting for that basic shape, right? Okay, so we're gonna go with this corner of the Porsche here, right? Right here. Let's see if I can get it work in here. There we go. Right there, right? And we're gonna just kinda draw a vertical line up and down. Alright? This is kinda like even if I keep it continuous going down there, you can see a little bit better, right? There we go. Okay, now this line is going off into the distance. And if we want to use the window kinda line, we can use this one as also going off into the distance. So you can see how these are narrowing, going off a little bit just slightly. Looking at where this is on this front piece here, I would say it roughly goes off into the distance this way. And same with this one. This one query equals to something like this, right? So if we want to drop it down, drop it down below, and take a look where it would go. This one would kinda come off to the distance somewhere like this. And then maybe somewhere like this. And this is obviously looking really rough, right? And then we use the same marks and kinda come off to the distance and this side, and off to the distance in this side. Alright. Okay, and if I want, I can drop the corner downward. This would be all right. We can even drop this down if I really want to. But what we're basically looking at is this corner, this is where it's going to come down and this is where that bottom part would be going off. And we start to get our bit of a baseline cube type of thing. All right. Okay. Can you check mine? Sure. Absolutely. I feel like this needs to move with it. Yeah, I think so too. I would kinda come up this direction little bit more. Like I think it's maybe something more along those lines. I think you're a little bit too flat, too low. All right. Whereas in mind, I feel a little boxy here. I don't know. I think maybe I'll have to come back a little bit this way. There we go. Okay. So if you don't have kind of a little box done in just a simple box like this. Then you probably should put this on pause now, it's okay. Just put it on pause, wait a little bit, and make sure you're caught up. That's the awesome thing about these videos. You can pause it and make sure you're caught him. Okay, so now that we've got that, hopefully we're all on the same page here. What we're gonna do is try to find some, some other landmarks, right? I like this section here where the where the bumper starts to bow out, right. So I'm gonna kinda grab that and I'm gonna kinda bring it out and in. And again, this is just a rough sketching here, right? I'm going to kind of bring that out and in. And then just a little bit above it, the bumpers going to do the same thing, kinda come out. I'm back in. All right. And this is the front grill. Right. And we can have this section for that, the plate type of thing there, right? Okay. Now the next thing that's going to happen is roughly here is going to be a window. And here's going to be a window, right? Like this is kind of coming across. This window is going to kind of crop come across like that, right? So we can see how the hood, it's actually going to come back to the window and back to the window. And if we were to draw this part of the hood, it would come back this way. In this part of the hood would come back this way. Okay. So you want to have these nice sweeping lines coming over top there. You're not caught up yet to actually going way too fast. Okay. Well, let's let's rewind it just a little bit. I'm going to rewind back a little bit more and make sure we have it. Okay. So what we're looking for once we've got this front bumper and we're looking to see where this bumper were, all this bumper stuff might meet the windows up here. Okay. So you can see there would actually be aligned going something like this and a line going something like this. Okay? So this line maybe would come to about here, would come to about here. So because it's coming coming along this line, right? And so this line is bumper line would come up like that. And this bumper line here would be up like that, roughly. Okay. Now we might have to erase a little bit of this for the headlight in a little bit. But you can even see like there's this line front here. And it's gonna do the same thing. It's gonna kinda have this nice flowy part that comes over the hood, right? We've got these lines that are showing the nice shape of the hood there and then the windshield will come. Something along those lines. Right? Now, bed joy. You get in there. Okay. Yours is looking really sketchy today? Yeah. Like not even like yeah, it looks like a crayon or something. No, it's because I'm putting it on the side a bit more. Okay. I can do it. Right. Okay. So now we've got this hood established. We'll add the lights in a little bit. But now we're going to come underneath and do a wheel will. It's actually quite high. We're going to come back. We're gonna do, uh, we, uh, well back here. And it kinda comes to the back of the car. Right? This wheel well, comes back into the back of the card there. Okay. And do you remember when we were talking about wheels before? We're talking about well, a wheel of course is circular, but as soon as we start to rotate, it might go oval with a little bit of a side depth to it, right? Okay. So that's what's happening here at these these are not straight on looking at us there to the side. So they're going to be an oval. And you're gonna see some depth of the actual tire here. And then you can add something inside there, right? Again, oval with some depth to the actual tire there. Okay. Not bad. We can then start to add in some of these details if you want. But that's not really needed yet. Well, we do need is to have this nice slope for the roof. We can kinda look at it, how high it would be. It's not that high. Comes back at slopes down into this backend of the car, right? The hood or the windshield comes up and moves around like this. And then this side door comes all the way to the back and we can see this nice line that we can kind of follow here. Alright. Thank this nice perspective line that we've already got in place. Then we know that the door would usually start somewhere around there and come somewhere around there. And probably that when there's another section to the window there. Okay. So, so far We're doing okay. I think we can start to add some lines that kind of carry through some of the body a little bit if you want. All right. We can add in the nice little mirror. Want to put one on either side? Right? Okay. But there's one thing about the Porsche that is really distinctive. Joe. He's already got it in hers, but I haven't edited mind yet. Here. It's these headlights. They actually raise slightly above the, the curvature of the body. So then what happens is we get it like this, right? And that's going to be how the Porsche looks. You gotta make sure you have those nice buggy eyes, right? Cool. Not easy. And of course, this is a very, very light sketch and you can come in and if you want to start to refine it a little bit cleaner. Right. And tidy up everything, right? Yeah. That's if you want. Right now. I don't mind it being rough for what we're doing because right now we're just really trying to understand, you know, how do we start to put some of these shapes into into that box that had initially we set up for him. So I'm not worried about if your car looks a little bit rough, it shouldn't look like a car accident or anything like that. But it doesn't have to look perfect or anything. That's not what I'm looking for. What I'm looking for is something that looks like the Porsche, something that looks like the model that you are trying to draw, right? Mind kind of looks like, you know, sometimes those car and the car companies to try to recreate a port like not complement of a knockoff. Looks like that, which I'm okay with. Well, and that's okay. And that's not too bad. Yeah. I think mine looks good. I think I went a little bit too tall on it. So like if I start to clean up some of these lines, it will start to look a little sleeker and stuff. And that's something that you can do as you, you know, if I really wanted to, I would come in here and start to erase things and stuff, but I don't really want to, like I said, I want to keep this really rough right now so that we're, we're learning from some of our, not our mistakes, but our process. It's a better way to look at it. It's not, we're not making mistakes right now. We're, we're learning a process. And that's really what I find really important right now, is that we get this process down. Do you think you learn anything so far? Yeah. Yep. Are you getting better at putting it in the box? Do you think the box part? Yeah. Everything else and the WHO don't know. Yeah. I think initially you were a little bit slow on it and stuff and I was getting a little worried. But after looking at it now, I'm like, oh yeah, you know what? I think you you're kind of getting it. Yeah. Because of how tall is it looks like? The frontalis bit more tolerant, looks like a bug making your punch, right? Yeah. And you know, those new punch buggies, the new books, they got that longer front end. Yeah. It kinda has a little bit of that pipe. But of course, what are they doing? They're kinda copying the Porsche. So it's going to have that vibe. Yeah, you know what, if I wanted to if I want to get a little bit sleeker, I would bump this down. Yeah, I think I would just knock just a little bit off of these points, right? Looking at it, I can get it a little bit faster looking just by bumping this down. There we go. All right. That'll make it look a little bit faster looking. All right. So that's what you can do is kind of a goof around with a little bit. You're going to find too, if your initial box is a little bit of a different perspective, do you? I mean, compared to like say something like this. Yeah. I mean, that's not showing the top as much or something. These two boxes, they look a little similar, but just that enough of a difference will change it. So between these two cars that I've got going on here, There's a slight perspective difference that we're looking at the card just a little bit different. The foundation box was just enough of a change to give it enough of a difference. Okay, guys, I hope this unit helped you that you either draw a Porsche Porsche knock off. Right? And I hope that even if it was frustrating, that you gave it a try and then you know what? Take a breath, come back to it again and give it another try, right? Yeah, Joy. Yeah, you're gonna give it another try. But you should That's right. You should listen, Joy.
4. How To Draw a Tank Part1: Hey guys, we're back and Joey and I have another vehicle ahead of us here. What do we got, joy. That's right. It's a tank. You know. Thank you very much for knowing that. Sorry, I had to throw at it and you'll, you know, so far, it hasn't been easy. You know, there's been a lot of struggles, I know, with some of the students, you know, doing some of the shapes just themselves are tough, right? So I'm hoping by now you've already got it to a point where you can just kinda, you know, sketch out a shape like this, like that, right? That you're able to rough out a bit of a rectangle. In box form. You're able to play with it and really adjust whatever you need from it and stuff I get that you should be able to do this by now, guys. If you can't, if you can't make a transparent square quickly like on the fly, then probably that's why you're struggling, right? You should be able to just roughly just bang these out like there's there's no stress to them or anything like that, right? You can even do some different shapes and stuff, right? Like this type of stuff, right? You should be able to do this if you can't. That's why you're struggling with all of these vehicles and stuff like that. I don't think the vehicles are the biggest trouble. There's two stages to this. There's doing the rough boxing, right? And then there's the details, right? And I think where some people are going wrong is the rough boxing. So when we look at something like this, we can see, well, here's one line, Here's another line, right? And here's another line. We can kinda come up from the edge here, come across, come up from the edge here. Here's, here's our square, right? Here's our main kinda shapes. So we have it down here. We can kinda roughly do the same thing. Alright? We can start to rough in and even carry some of these lines down if we really want rough in where the tank will be, right? And listen if you want to. I've always said on, especially on this unit, you're welcome to use a ruler, right? That's no problem. Okay, so you know, if you can't do this box, then this tank is going to be hard, right? So try to do this box, see if it makes sense for you. Because on top of this box, we've got another mini box. We've got one here, here type of thing, right? So we can kinda one lines here, 11 lines here. One's here. It's kinda go on like this a little bit, right? And it's not perfectly like it's a little bit turned compared to the box below, right? So you can start to rough in some of these, some of the main parts of it. If you want to, the tracks, you can kinda rough in the grill this type of stuff right before we start to get into the actual finished lines. Joy, do you think you've got a box down? Maybe? Yeah. Okay. Okay. You know, the the closer the sizing and cheapo of your box to the original, then the closer the drug is going to look. But if you want your tank to look a little thicker, a little bigger or something like that. You're welcome to mix it up, right? Okay, so now we're gonna get into the details. The first detail that I'm gonna kinda show you is this line. We're gonna kinda go like that. Okay? What this line is doing is sloping to this front part. We're going to slope to these front grill put pieces. So we're gonna kinda come here. This actually comes forward. And it kinda come here and give it a little bit of kind of a slide thing on this, right? Okay, Oops, there we go. And if we want to, we can kind of carry this long for where it starts right? Then were these connect, we're going to come in, come across here. And this can kinda fold down, come over and come underneath, right? Okay. So, you know, these are kinda like little platforms that are sitting there and then this one's starting to come down from it can come down underneath, right. This fin comes down pretty far and then follows this line, which I can clean that up a little bit, follows this line up and then to the back of the tank. And then up here, right? And we can carry that over. And then you can kind of draw some, some lines that are cutting that. So this one here is kinda like a guard over top of the track. This, this one, this section here is more than body right? Now remember when we talked about how wheels look straight on circles, but as we start to rotate them, they start to turn into ovals and then you can see some of that depth to them, right? That's basically what we're going to have here. Is we're going to have a bunch of ovals, right? These ovals are going to get a little smaller as they come to the back, right? And if we want to, we can get a little bit tighter in here and just kinda give them a little bit more detail, a little bit more definition here, a little bit tighter. And then the track is going to run around them. In this way. That's how the trigrams, and so we can clean up the top of those ovals there if we'd like. And of course, if I'm going too fast for you or you gotta do is put me on pause at a moment like this. And in your little ovals right now the front of the track is going to be come forward like this. And it's gonna kinda, it's a little jagged, right? You can draw lines in it if you want. And the front of the truck is going to be there. Right? Okay. So you can see what's happening is that's almost like the front of the tire here, right? The tire is like this, but we've got the main body of it, the depth to a term. And you can put little centerpieces to the, to your wheels there. You can kinda do the same thing on this side, but we don't really have to show much. We're just showing the, the bulk of the tread, right? And we can do these little lines to show some texture there. And then the underbelly, the body of the tank there. All right. Cool. I'm liking how this looks. This is looking pretty good right now. Now, one thing that I would advise next to do, what I usually like to do is we've already talked about drawing cylinders, right? This type of thing, you know, draw an oval, draw two parallel lines and then back in that oval, right? That's what we're gonna do here. We're going to draw an oval. And actually, you know what, in the center here, if we want to, we can draw another oval and then just kinda bring it back to there as our guide. Okay. So you can see how I did that. How I found that center was if we have a box like this, if we crossed the to all the corners, that right there is our center. So I wanted to find the center of our little spacing here, right? And so that's how I did it. You don't have to be that precise, It's up to you. So here I'm going to draw the end of the barrel, come down, draw it, and then there's some, some details that are going around it as it comes into the housing of the of the actual tank cart and stuff. Now that I've got that in, I'm going to come underneath and start to do some of the body of this, right? Come up. And actually I'm going to round this part just because I like to see it a little bit rounded. I don't know if that's kinda showed it on the original design a little bit, but I just want to have that in there. And I'm going to round this edge too. So it's a little bit slightly rounded. Okay, there we go. And then what I can do is kinda come and finish off my tank form, right the backend and the far side of it, right? On the blue we've drawn through everything. But for these lines were we're not gonna do that, right? Okay, so right now, what you should have is the base form of a tank, right? Join. Is that what you got? Yeah. Yeah. I'm looking at yours. And yours looks legit right now. It looks really good. I'm liking how mine looks. It's exactly what I wanted and stuff. So now what we could do is start to head in and do some details. You know, you can do like kinda angle lines that are showing kinda form around it, right? You can come in kinda like that. You can throw in some details and stuff, right? Some of these small little details that you might find like compartments or something, you know, like right here there might be a compartment. And what you tried to do sometimes, especially with a vehicle like this is show symmetry. Symmetry is Joy. Yeah, It's seam on one side, right? From side to side. They had the same, right? Yeah. So you can do something like that, show some symmetry and stuff, right? It doesn't always have to be symmetrical. I think it looks goofy If it's always symmetrical, but you can you can do it often enough, especially if it's like handles on on either side of the vehicle or something like that. Like let's say there's a handle here. Well, I might want to put a handle on this side, two or something, right? That type of thing, right? So you want to show some symmetry. I'm going to show a couple ovals here where they think guys can come out of. There we go. And some little parts for the antennas. And you can add whatever whatever details you wanted. You could put lights on it or something like that. I could put more antennas if you want. This is where, if you wanted to, you could put in another Gunter here with a machine gun type of thing coming out or whatever, right? This is where you can kinda start to throw your creativity into it. If you've got some ideas, something you want to put in, then you can go with the original design. And then you could really start tweaking and throwing a lot of different things on there, right? So it's, it's really up to you how you feel with it. How do you feel? You want to do something that's creative and got your own flavor? Or do you want to just play it safe, right? The, the point of this lesson really is that you're able to do whatever it is you want. Because now you've got the form down, right? Like it's really up to you. With once you've got the form, how are you going to play? Right? What are you going to add to it? What are you gonna do to it, to make it to make it yours. Okay. So what do you think How was your tank today? It's okay. Just okay. Yeah. Nothing amazing. I think it looks really good. Is that your first tank you've ever drawn? Yes. Imagine that. Imagine if you showed it to somebody and say, Oh, I've never drawn a tank before. This is what I drew, right? The only thing that I would say is your top turret. Your original design, the body, that tank body is really large and it was kinda small compared to the image. But, you know, it's still looks very, very functional, right? It looks like it has like a sad face on top box, kinda the original drawing. I'm happy with mine. And you know, what I'm really happy with is if you guys are getting better at drawing those original form boxes. Because as I've shown, once you get that down, everything gets so much easier. It's just adding little details, right? So joy, I felt your original box look really good. And so your tank, it shows right? And I feel the same way with mine. Mine worked out exactly how I wanted it to. It's it shows because the original box was quite good, right? Minds. Kinda sleek looking and that's what I was going for. Okay guys. That's it for this one. You can thank me later. I'm not impressing my child here. You guys have fun and keep practicing.
5. How To Draw a Tank Part2: Hey guys, So I was hoping to expand a little bit on that last unit. I think that the tank is almost perfect vehicle to kind of work our boxes with him. So what did we have last time we had? Let's see if I zoom in just a little bit. Alright, then we had this simple box with a box on top, right. Slightly different angled box but so be it, right. And then the Gunter it and stuff. So that's what we want. You want to be able to draw boxes on top of boxes and stuff. I got her or cutting away at boxes, you know, maybe angling, sloping that type of stuff, right? Okay. One way you can do this is let's see. What we can do actually is draw some lines across here. Okay? And what we're gonna do with these lines across is maybe it's, I did it too small. But here's the laissez right side. Here's the left side. Let's try to make it about the same, same size. And here's the front, right. So the left side or the right side, maybe the Gunter, it looks like this and it dangles down the left side, the Gunter, it is something like this and angles down here, right? We've got this slope in the front, and then we've got our Gunter it up front. So I can kinda do something like this, right? Is this making sense? You know, you want to be able to have, then there's the guard on the side, the guard on this side, and then the tracks that come and we got the wheels kind of going through or something, right? And now we can see how this is really looking like a tank, right? And so what you want to be able to do is try to draw this tank from a whole bunch of different angles, right? Sometimes it's nice to kinda do something like this where you set up a turn at what we call this a turnaround, get we're we're turning around. I should do one more if I was really doing it and do it from behind, right? But doing something like this really helps you establish, you know, where things are, you know, where's that side panel wears a little access panel or something like that. If you can see it from from different sides, maybe it's different on the left, right, maybe on the left that access panels over here and on the right, the access panels here or something, right? That kind of stuff will help you if you're ever trying to design a vehicle of any kind. Especially, you know, it helps if you're looking at a reference and then you do something like this because you can kind of fill it all in, right? And, but then it also helps if you're designing your own. There's the treads, right? Okay. So no matter what a turnaround is going to help you, then what you should be doing is something like this, you know, draw this box on this angle. And then maybe draw it on, Let's see. Something like this. Right? Maybe draw it something, maybe not so much like maybe I'm looking up at it a little bit. Right? So how would that work? We've already kind of done it. So we're looking down at the tank, right? We had this other the other little box. Where do I want to have it? Maybe I'll have it turning this way or something. Right? So then, you know, maybe it's aiming this way. And these are really, really relaxed things, right? Really relaxed drawings, just sketches, will, on this one. What's happening is the treads. You know, we're gonna be seeing the bottom of the tank. So what would this be? Was maybe like it's coming over ridge and then we can see how it's sloping down here and stuff, right? And then on top we might have another gun, the gun to it here, something like that. And then we can see how the tank would be coming over, something like this coming over the ridge from the other side. All right. Does that make sense? So what I want you to do is try to draw a bunch of the tank from a bunch of different angles. Maybe like that. Alright. Maybe even just from straight on, almost like turning to the side just a little bit. Okay. So where would the current be? That kind of stuff, right? So this is good practice for you guys. And I know I'm sketching fast because this is kinda just a little bit of a bonus unit that I want you to think of. How can I draw the tank in different ways, right? Like I said, I think the tank is maybe one of the best vehicles for you to play around with this, to practice your boxes, to practice drawing them from different perspectives. So think of it, drawing it from the side, drawing it from the front, drawing it from the top, drawing it, looking up at it, drawing it, maybe coming at you. But why don't we lift it up a little bit. So for example, it's coming at us. But it's just coming over ridge, right. So what would that look like? Right. I can just barely see it. The current would be coming up a little bit, right? And it's coming over this rich. So how would, how it all that look right? Try to do stuff like that. Play with this tank as much as you can. Because honestly, I think this is the unit that will help you the most. Okay? So all include a lot of these sketches in there that you can play with. But I want you to do your own, I want you to try to look at what I did here, but add your own angles to it and you know what IT help you even if you just grab a book. What I mean by that, not the study, but like a thick book to put in front of you and then turn it angered. And that could be the base of the tank, right? You know, you you take that you couldn't even have a smaller one on top if you if it works out, depending on the size of the book and stuff, I get rum, but I've done that before. It's like grab something around the house. And I'm going to show you how to do this in later units, but grab something around the house and start turning it and turning it and turning it and see how that would work, right? I think it's really valuable. I think it's something worth doing. So think about that, grab a book and then use it. Because think like, what does this look like here? And there we go. Now, we've got a book right? Here's the pages and here's the pages and here's the back cover, Here's a front cover, something like that, right? So this is a book, your book, and turn it into a tank. So, you know, use that kinda stuff, right? Use those things around the household and it'll help you tons and trying to get it from different angles. Okay guys, have fun with this and keep practicing.
6. How To Draw a Helicopter: Hey guys, we're back and we've got a new vehicle for you. What does a helicopter? Okay. All right. We're doing a helicopter. Are you excited? No. Oh, yes. Yes. No. Yes. Okay. Anyways yet we're gonna do a helicopter. You know, what's interesting is we've been kinda thinking of boxes like flat boxes, right? We keep doing this type of box again and again and again. And I get it, you know, like because a lot of the vehicles that we're doing have been kind of flat that way, right? But this one is a little bit different. What we're gonna do here is do more of a thin rectangle box going this way. See if that makes sense, right? But first, before we do that, when we get into the helicopter itself, like let's take a look. I'm going to come in here and I'm just going to say, okay, well where's, where's our box, right? Well, we can kinda do a line here. We can kinda come up the back, maybe follow this line here, kinda come up this way. And I'm sure it's kind of going back this way, back that way because I've got this black line coming here, right? Okay, so there's our box. If I was to draw through it, it would look kind of like that. So it's kind of narrowing slightly, right? If that makes sense. So why don't we do that below here. I'll draw this bottom line. And I'll draw this top line. Draw this back-end. Draw this one here, draw here, draw it here. And then maybe something like that, right? Okay, so that's our rectangle that's standing up. Keep in mind it's not a straight rectangle. You know, I'm looking over at Joey's and she's got it. Straight, straight, straight, straight, straight, straight, straight. Like everything is kinda proportional, right? Like what I mean is this height is the same as this height and that's wrong. That's not what we're doing here. You can see that this height on this is much shorter than on this other side. Okay? Okay. So watch out for that. It's remember, especially when we're talking about perspective. And in this one we can see how it's narrowing as it comes off into the distance, right? That these points will eventually come and touch each other. Okay? So we wanna keep that in mind. We definitely don't want it getting wider, not how we're doing it here and stuff that all really looked pretty goofy there. Okay. So joint C, If you could fix yours up a little bit. And guys take this opportunity to kinda get working on yours a little bit, make sure you're caught up. What you should have is a stand-up rectangle, you know, like you can almost think of it like we were talking before about a book. You could put your book on the edge like this, right? And then you've got this book standing here like that, right? But that's we're not drawing a book today, right? So I want to clean that up a little bit. What else do we have? All we've got these kinda railings that go across. We've got a gun that's coming forward. You know, I'm just kinda lining in all of these things that are flowing in this direction, right? Everything that's flowing in this direction here, okay? We've got this top section here that's also wanted. So I'm going way back to a point that's way back here, right? For that perspective thing, right? I'm not really drawing it in. You don't have to, but, you know, it's something that's worth looking at her. What I'm gonna do is kinda see if I could follow this one and put the end of the tail back here. Maybe it went a bit far but something like that, right? And then I can kinda the tail can roughly come in like this. And it's roughly going to come in like that. And then the top of it can come the fin up there, that type of thing right there. We're going to have the housing and have that placed up here. And then the blades will be up top, right. Okay. So this is a nice little rough sketch we've got of the helicopter. If your sketch isn't quite up to this yet, don't worry, just go ahead and throw it on pause, right? This is not a rush, you know, on video and stuff, you can control the speed, so don't worry about it. If I'm talking too slow, you can fast-forward me, right? But legit, if I'm talking too fast and I'm rolling too fast, don't worry about putting on pause. I kind of watch Joey a lot and see how well she's doing to kinda gauge what's, what a student might be going through and stuff. Okay, so now that we've got that, we're going to start to add in some details. The first thing we're gonna do is I'm switching to black here. And I want to kinda do something with the nose here. So I know across here, I'm going to have a nose come forward. Okay. I'm also going to have this come back and come up, and then it's back into here. All right, so that's the window. So I'm going to kind of bring it back and up and then back into this side so I can kind of do that stuff. That's that's all the windows stuff, right? And I've got a front end to this nozzle. I'm going to drop it down and you kind of have it around it and stuff, right. I think there's a camera on the front maybe from down here. I've also got these windows coming up, maybe even a higher angle windows coming up and then back. And then I can use if I want to, I can add in some details here, some window lining and stuff, right? And then this is going to come across the back here. I kinda came too close to this part but not too bad. I might come up here, do the housing you an air intake here, another one here or something. And then have the housing come onto the back here a little bit. Something like that. Right. Okay. And I can put other things up taught that are going to go into the rotors. Cool. Now this nose, we're gonna come down here and imagine it goes straight across, right? But underneath it comes out this machine gun, this section for machine gun. And so you can kind of rough and usually the the base of it, right, the structure of it. And then I bring out the guns. In this case, it's kinda like a chain gun. It's multiple barrels. And you can see the bands on it in that kind of stuff. And if you want to draw the barrels at the end, that type of thing, right? Okay. Then the helicopter is going to come underneath and we could draw it back here. At this point. What we're going to have to do is draw this wing so we can look at all these construction lines that we had, right? So we're able to use these construction lines a lot to kind of find where things are placed. Like let's say I want to do this type of intake wall. It's just following these lines, right? It's just going to follow them to the back of it. Okay. But this one was the wing here. So the wing, what we're gonna do is bring it out, bring this part out, and then just kind of do the thickness of it, right, the depth of it. There we go. Okay? And again, if this is going pretty fast, you know, pause, just relax. There's an attachment on the wing that comes out. And on this attachment where it There's lots of these rockets, right? Or guns and stuff, right? Depends what's going on here. So there's a four pack on this side and you can kinda just draw them in like I'm just drawing them in looking at like rough sausages right now, right? But the main thing I'm doing is I'm following this flow of line here, right? So I'm drawing these rough sausages. And then There's going to be a cylinder in here. That's also a type of rocket launcher or something, right? And you can draw the little circles for the rocket launchers. Cool. Okay, and while we're here, we might as well put in the sled pipe. This is going to come underneath and come over and attach this will come up and probably attach it back in there where we can't see it. Right. Okay. Back to the helicopter. It comes here and then it's going to come back into the tail. The tail we've already erupted in sorta, can come up here and kind of have a little look on the Finn if we want to have something back here for a little bit of exhaust sometimes, right? And it's going to come back underneath. Good. And you know what, if I wanted to, I can kind of come in here and erase a little bit and put this small little establish balancing wing there. Alright. Well, that's looking kind of sharp. I'm big and how it's looking. I'm missing something. Joey. How to helicopters fly? I think propellers are for planes, right? I don't know. These are rotor blades, I believe, right? Anyways, what I would do is bring this up, have some kinda housing to it, and then start to bring it to either side. There's some more details in here and stuff, right? But that's what would make it fly. This helicopter though, had an extra little detail in it that I haven't drawn in yet. What was what am I missing? That's right. So this painted mouth could go on here. And you can just kinda like, you know, this is fun for intimidating your enemies or something, right? Drawing some type of deco on at all, right. And that's it. That's our helicopter. I think it's looking pretty boss. What helped most of all I think is establishing that first box, right, once we had that in Jesus, does that ever make everything so much easier? All right. Everything just flows after we have that first box. Joey, what do you think your helicopter so far? Yes. Okay. Yeah. I think it's actually pretty good. The only thing I might have done on yours is made the tail just a little bit longer but wasn't just oh, you're going to digital cheat or yeah. It's not cheating. No, I agree. It's not really a teat. I agree with you there. Yeah. But no, I think it looks really sharp and just that little extension there. I think that looks pretty good. Yeah, good stuff. I'm happy with mine. It looks sleek. It looks mean. It looks like it's coming for you guys. If you want to send me your helicopters, let's see, this is going to be a little challenging because this is the first time, you know, turning our little book rectangle on its side, right? And so this might be interesting for you. I want to see how it works out for you guys. And above all, what do we say joint keep practicing. And that's right. Just keep on practicing guys.
7. How To Draw a Jet: Hey guys, We're back and we're doing another vehicles unit. In this unit, we're going to look at a fighter jet. What do you think Joy few cars were not easy. We're doing a lot of those kinda like gum, base rectangles in perspective and stuff. And I don't know if the fighter jet, if it's going to be any easier, I'm going to be different. This is, this y is going to be different stuff because what we're going to be working on today is a cylinder. You know what a cylinder is? Yes. What's a cylinder? It's like a circle but okay. So there's a circle, it's like a circle tube type of thing, right? Okay. So we can kinda practice that. Basically you can draw an oval and then draw parallel lines and then draw the back-end of the oval. And if you were to draw three-word kinda look like this, right? So if I zoom in for you guys a little bit, okay? So if you're practicing cylinders, draw an oval, draw the line, and then draw the backend of that oval following the same curve, right? And you can even do like little circumference lines that will help you stuffer. Here's the thing though. We're also talking about perspective. All right, so let's say we have this kind of box going off into the distance, right? It's getting narrower actually. This type of thing, right? Well, what if we wanted to put a cylinder in there? We would have to have these parts narrow a little bit as they go off into the distance. So if we're doing a cylinder and it's going, it's really pushed into the distance. It would look something like this, right? These bands will get, and you can even sometimes do this, this kind of banding that helps you. Okay? So that's what we're gonna do when we think of this fighter jet. This fighter jet, we've got like all of this stuff. Look at this perspective line. It's going to come way back to about here, right? Everything seems to come back to about here. From the middle, this middle tube. These rockets know everything's kinda lining up so that it's coming back to this point. All right. So actually, maybe I should erase all this down here, give myself some room. So what we can do is the same kind of thing is draw out, maybe from a point back here. And draw out some basic perspective lines. You can draw. Bunch of them. Doesn't matter how many you want to draw. You can use a ruler if you want. That's cool to write. Using a ruler is no problem. Probably would have worked better for me if I would use the ruler right. There would be some straighter lines and stuff, right? Like maybe make it a little bit darker for you guys. There we go. That would be much better looking, right? Some of my lines are bending a little bit. But again, this is just a casual we're constructing here, right? So I don't want to take away from your rulers. I know joy really likes using ruler sometimes, right? But for me, I like to keep it loose at first and then really kinda try it out, lock it in. Okay. In the middle of this, we're going to have this tube. So we can draw an oval somewhere around here. And then have this tube going back and then around it out. And this is the basic main part of what we're going to draw here. We're going to have this oval, this tube in perspective going on back, right? Okay. The next thing that we can do to try to build this is have these wings. We'll put one end of the wing here. We can just kinda rough it in there. One end of the wing here. And then draw a line between them. Right? Okay. So this looks really weird right now. Should be very fast looking tube with some sticks sticking out the side. All right. Is that what you got? Yeah. Okay. Looking at your wrist joint, the only thing I would say right now, your tube is you didn't, you drew more of a circle instead of what should be an oval there. Right? So if we're looking at it, straight on, the tube, is going to be a circle, right? But as soon as we start to turn it a little bit, It's going to start to angle into an oval. And it's going to start to look like that, right? So you can practice like if you've got like pumpkins or soda cans at home or something to get. You can see how those tubes held the main circle angles as you start to turn it from different angles, right? Okay, so the next thing we're gonna do is kinda bringing this part of the wing up and this part of the wing up to this point. So we can kind of bring them to meet. Doesn't really matter too much, right? Okay. Yeah. There we go. We're also going to take a point down the middle of this cylinder. Like just make a point somewhere there. And then from that point, kinda round out the nose back into the body. So we're taking some point that's way ahead of the cylinder. And then we're just going to round out the nose and bring it in line with the body. Cool. The other thing we're kinda missing is we can do the same thing back here. We can do a little tick for the wings back here. Bring that line across back, right? Yeah. Okay. Now, one thing that would be nice to do, and I'm going to change colors just to kinda show you guys this is draw a center line down the center of this tube. And what that's gonna do is it's going to help you when you start to place things now. Okay. Okay. So that's most of the construction that I think we need. We're going to go on to adding in some more of the details, the lines right? The cockpit we're going to put here and it's gonna kinda round with this tube, is going to come back to a point and then kinda come over top a little bit. Okay. You can carry on the body behind it if you like for a little bit. The we're going to have the nose. We can follow that same circumference of the nose. Bring the bottom of the jet underneath here. And out towards this nose, the nose cone. And we can even put that little point on the front. Adding in little details as we pass them by, you can even put a band over the cockpit here. There we go. This when actually comes out from the body a little bit, follows this line. So it's going to start like that. That's how this wing is a little bit constructed. If you look at the detail up here, right, it will come out from the body a little bit and then start to come back. So if we want, we can put this sketch, this wing out to the side now. Put the end of the wing. And for, for now these little rockets are just going to be like pointy sticks. Okay, you can put little wings on the back of him or somebody got but they don't have to be hyper detailed or anything. Not yet. Okay. And so long as we're doing these wings might as well come from the other side. And do the other one as well. It's a little wings on it. Cool. Started to look not bad. You can see actually just looking at this already. This is more of a Down perspective. I'm looking down at it compared to this one is slightly more from the side, right? The initial one. But it doesn't really matter because when you understand the forms and the shape, you can look at them from any angle. And that's what I'm trying to teach you here really is that copying is great. You know, like learning to copy. We all did it. We all started copying and stuff like that, right? But I want to show you how to build things. So by using these shapes and by using a little bit of perspective knowledge, you're starting to build things up. Okay, speaking of building things up from the center line, we're going to come up. And this one will come up as well. And actually it is the original was a little bit narrower, but it doesn't really matter. We're going to come up to something like that. And this is going to be the middle wing. There are this can come to the back-end, something like that. And you can see the exhaust at the back-end there. We've also got these little wings, the tail wings, that come out trying to match it, for which point they're coming out from. There we go. And you know what was really helpful. All of these perspective lines that we're using, because now all we have to do is draw a missile or draw many missiles or whatever, rockets or whatever and stuff like that. And they're going to follow those lines. Those lines are our nice foundation for where we're going to start to put things. There we go. And what we can do if we want is we can have some, some nice little circumference lines along the jet. You can put details in the fins or something like that. All right. You know, a lot of people have this argument about. References, you know, Oh, you don't need a reference, you shouldn't need, a real artist shouldn't need a reference. You shouldn't need to look at something to be able to draw it. I don't know about you, but in person. Do we let me ask you, how many fighter jets have you seen in-person? So you don't see them every day now. So how would anybody expect you to draw one? Right? It's ridiculous. You know, like an apple. I don't even see an apple every day. You don't maybe you wouldn't occur. Depends on what color Sharia he looked back Like Renaissance. Had models for them. Oh, absolutely. So yeah, using live models, using references. It's tail is oldest time type of thing when it comes to this art stuff for him. So what whether it's searching online and looking at pictures, whether it's having a little model or a toy in your house, action figures, whatever it is. Never be afraid of references. Use them. The only thing is you gotta be careful of abusing them. So that line between use and abuse. It depends. As a student, it's almost impossible. You can use and use and use a reference until it's almost did everything. But as a professional, when you start showing your art or something like that, if you copied somebody, that's the time to kinda say, Hey, especially if it's another artist, you can say, Hey, I referenced so-and-so's art. And this is my version of it. And that's very respectable. But when it comes to a fighter jet or something like that, don't you worry about it? Just use that reference and then draw and practice away. Hey Joy, What do you think of your fighter jet? It's okay. Just okay. You're not in love with it? I actually like it. I think your fighter jet looks good. I don't think I've ever seen you draw a fighter jet before. Like cars. So you can tell that for somebody just starting drawing this stuff. Wow, you know, that's legit. That's how many people's first fighter jet looks good, right? But if you follow these basic perspectives and using basic shapes, I think I would turn out good. Okay guys, that's it for this one. If it was too tough, what do you do? Keep practicing, right? Rewind, play it again, practice again. So this is what my hope is that on the practice sheets, you practice one time. And then on a separate sheet of paper, maybe a sketchbook or something like that. You're drawing it again. Heck, maybe you can even switch the angle or something like that, right? Or a switch it just a little bit, do something different on it. Really challenge yourself guys and just keep at it. Have fun guys.
8. How To Draw the Millenium Falcon: Hey guys, welcome back. We've got another vehicles unit for you here. Joey, do you know what we're drawn? Yes. I know what it is, but I don't know the name. What is it? Let's start with that. Like a ship looking at their ship like for the sea. Know, like like I don't even know anymore. Does it go in outer space? It's a space ship. That's right. We're starting to move into spaceships now. Spaceships can be pretty fun. You know, the designs give us a lot of flexibility to play with and experiment with and stuff. This particular spaceship, as this may be familiar to some people don't visit from Star Wars. Star Wars, That's right. It's the Millennium Falcon, right? Okay, So in the past, we've kinda done, we've done rectangles this way, right? You know, we did that a bunch of times for cars, tanks, everything. Then we just did more of a stand-up one like, you know, thinner on this side for the helicopter, right. But this this falcon, It's a little different. What is it? It's a 3D circle. Those are kept there is a 3D 3D what OKC type of thing. So yeah, basically we've got a circle, right? And we've talked about it when we see a circle from straight on, right? You know, like a tire or something like that. All we're doing is looking straight on. But as soon as we turn it to the side and it becomes an oval, while then we start to get some depth to it, right? Depending on how deep that that actual 3D circle is type of thing, right? Like the tires and stuff that we were talking about before. Right. And that's what we've got here with the Millennium Falcon, is we've got this kinda circle on its side. So we can think of it like a big pizza or something that's kinda what it looks like, right? But then that pizza has some depth. That pizza has some depth this way, right? Okay. So why don't we try to draw it up below and it might not be perfect, don't worry. But you want to kind of draw, actually, I want to make my more of an oval. I think there that's better. And then I want to drop down. Dropped down because I'm looking at it from kind of this downward perspective, right? When I dropped down and give it the depth. So when I'm adding this depth and kind of following this bottom curve, all right? Okay, so we've got this really thick look and pizza right now, right? And then what else do we have on it? You said a little triangle, this triangle thing. So it kinda came like this and it came out of this side. Kinda came out of this side. So let's actually, you know, what helped was I think if we find the circle and then make, make it come out of there so we could find kind of a center circle. And then bringing it out to there. And bring it out to there. That's going to help us tons. I think you're going to find that so much of the Falcon comes out of this circle, comes out of the center. So we can have these lines coming out. And that will help us really kinda organize ourselves. So you can just draw a couple. Looks like a pie being chopped up now, right? Louis, skinny slices. Okay, so we've got this thick one coming here, this thick one coming here, one coming below it. And what that's gonna do is kinda give this bump and that's this ridge over here. It's going to be this bump for that that side section is that we're the yeah, I think that's where the pilots are. I don't think that's the gunnery section right from there. What's going to happen is it's going to come forward to a point out to here, right? We can see that this point out here is going to help us for our Pi shapes. So we can just come from this corner. And from this corner. There we go. That's looking pretty cool. It might be a bit far though. I might cut it back a little bit. I think the Millennium Falcon doesn't have that far of a snout to it, right? Okay, so we've got this, but then we want to add it and make it 3D. We want to have it so that, you know, it has that base to it, right? Okay. So what we need to do is we'll use this exact same thickness that we've got here, carried around, carried around, and then carry it forward. Okay. So we've got a drop-down, bring it over, drop-down here and bring it over this way. Looking pretty good. Joey, looks like you're keeping up. Yeah. Yeah. No, that's good. I think it's looking really, really good. Next thing, what we can do is bring this, this section, the, the cockpit kinda over here. And what this is is basically we're going to draw two circles like this and this small one, right? And all we have to do is bring this back to there, this back to there. And so this cockpit is here and it's going to come back and join in on this part. So this is the front of it. And then you're going to have the windows and that kind of stuff, right? Okay. The other thing that we're going to start to do is going to cut into this front end right over here. So the front end is not a solid piece. It's actually has a kind of a Prong looking thing. So these will come straight back. Maybe depending how far we want to bring them. And then we'll cut across on the same angle that we're doing this one. So we can cut across there. So what we can do now is if we want, we can come in, kind of erase in between this right. Here we go. And this will drop down, this will go back. And we can see how that's now cut out right? Right there. We're almost done. I think we're about 80% of the way. What we're doing right now is doing what we call cutaways. Okay? So that's, imagine if I cut a piece of this, this square weigh or all right, What's it going to look like? I start to fill in the missing details and stuff, right? So I'm starting a cutaway different things. I'm going to cut away on this disk as well. I'm going to use this line to come back, come back towards the center a little bit, all right? And then I can maybe connect them or something like that term. So this will also come back, it'll come back here and it'll connect that away. But that's not what's up in this drawing. What's up in this drawing is now we've filled it with a circle, filled it with another circle, and link those circles up. Actually, I think I can do a little bit bigger now that I'm looking at one circle, another circle, link them up that away, right? And this actually has a bit of a rich, so we can go with this and it's going to come again back to this center point. The center section makes it really easy to focus on everything kind of going back into that direction, all right, for this disk. Okay, joy, how are you doing? Okay, It's confusing. Which part is confusing? Everything to any details. Just focus on the base. The base is the main thing. You have the Pi we also there. Okay. Do you have the stuff coming out of the pie, jeremy, like the first the prongs a little triangle diamond. Yep. Got that section right. Do you have the cockpit, that circular thing that's jutting off to the side. Okay. What about this indent that we just did? The cutaway of the pie. What is it though? Like, Oh, I don't know. These ships sometimes the it seems like they have some function to some of the stuff and sometimes there's just something that looks cool. Well, it could just be looking cool and stuff. Okay. So you're working on that now. You know what? So I know it can seem kind of overwhelming and everything. But the truth is, you've already got it down and I get audi make sense and stuff. How you've got it, you know, you're already working on the on the proper pieces and stuff. In fact, right now, I would stop where you are and I'm going to stop where I am. And now we start to flip over and start to add some details. Okay? So what we can do is start to add some of these details. You know, I'm going to come in and add some of these circles, these kinda disk-like things right? In going around and looking, okay, I got a satellite dish here, it looks like right. Or whatever the technology they use at the time with little base, right? I'm going to do this cockpit level Part. Bring this over. And still sketchy. This isn't going to be a perfect drawing or anything like that. The cockpit comes out here. The forward prong comes forward, right? This comes up. There you go. And that's the cockpit style. Okay. What I might do is come around this side next. Draw this. And I'm kind of a hunting for the more complicated things. Because if I can get them in and drawn, then everything else kind of fits in a little bit, like then it's not a stressful. So I'm going to put this housing unit above. It's going to come back into near the center. The center actually has this kind of disk looking thing that's going around. And then out of these parts that are coming out this way, we've got some circles, circles that are going on, right? We've got some kinda half panel square type things that are happening, right? Some lighter lines. And some of these can just be random. Little panels are something that we're adding in there depending on how close you get to something like this. I'm sure there's, you know, if we had a life-size model in front of us right now, we'd see ridiculous amounts of detail that George Lucas and his team have added in, right? But we don't have that. So we're just going do this simple drawing from a bit of a distance using some of these lines coming out of the center as our marker, as our base for how we're going to, how are we going to do it? Okay, on this one, I'm kinda lifting a ledge here and I'm going to bring it back towards the center. So that's a raised platform and it's going to come down into these forward prongs. At these fronts sections, bring it on back. And there we go. And we're starting to really form up on our Millennium Falcon ramp. Maybe some, there's some type of greets going on here or something. Right? Some circles and some more panel work. Okay. Yeah, this point we're just kinda randomly adding in some panels that make it look cool sometimes, you know. But again, we're always following this, especially for a lot of these panels and a lot of these lines, we're looking at how they run towards the center, right? This, the center part is, is quite important for us. Cool. I'm thinking this is looking pretty boss right now. I might put some little lights around it. Right. But other than that, I think I'm done on this job. What do you think of your so far? I don't know. What don't you know? I think it's okay. Just okay. Yeah. How many spaceships have you designed prior to this? So this is your first spaceship if you've ever drawn, right? Yeah. So for, you know, sometimes I think, and this happens a lot with especially younger artists, but all artists in general, we get really critical of ourselves. You know, like, I think you guys at home are probably looking at Joey's Millennium Falcon and thinking, geez, you know what, that's pretty darn cool. That looks great, right? But when I asked her what happened, she kind of folds and says, I don't know, It's so-so it's not great and you start to lose our confidence a little bit, right? Yeah. Well, I only say that because I know I probably could have done better. Yeah. On your second time or something, right? That's the whole point. Is that sure you can do better. But what you just did right now was good, right? Recognize when you do something good and then next time you better. Because that's why we keep saying practice, right. Because, you know. Okay. She's drawn at once. What about drawing it twice? What about three times or four times? What about trying to rotate it even more? So instead, we had it. What do we have? We had kind of the disk like this, right? This was our desk. What if we turn it more? It's like it's narrow this way or something, you know, and it's flying straight forward this way. So kinda comes something like this, right? How cool would that be? I think it might be an interesting, you know, the cockpits off to the side here is something we're looking more down on it, right? You know, like this could be come, a really interesting perspective on, on the Millennium Falcon as it's, as it's blasting its way through Lightspeed or whatever and stuff, right? That all of this stuff, you know, like that's why I say practice. Don't just practice two ways. You can just repeat everything that we just did. And I think that's great. Like you'll get it and you'll get it good. I think do do the same unit once or twice, three times maybe. And you'll be like, you can draw that same Millennium Falcon, any which wave in that post, right? But what I really want is for you to practice on this kinda stuff, being able to change it around and see if you could draw it from different angles. Even if you mock up. It's okay. You just practicing, right? Yeah. So guys, especially guys at home, try to play with it a little bit, try to move it around. If you've got a plate at home, you've got just a normal plate, kitchen plate or something like that. Take it, rotate it, turn it, flip it a little bit, and use that as your base for something like this. Take something round and play with it, and then make it into the Falcon, right? Hey guys, That's your homework for this unit. Let's see some falcons being created. Have fun guys.
9. How To Draw a Spacestation: Hey guys, I'm Ed and and yeah, and we're back with another vehicles unit for you. This time. I don't know. We're looking at some pretty strange here on the screen. Show you what the heck is that in my hand? It's an Assad. You're you're right. It's one of those deep tissue massage rooms or something like that. Do you like it? Yeah. Okay. Well, I'm not going to use it on you today, but we are going to use it because we're going to draw this massage her into this space station that ended up looking this cool. You can see all the cool little ships buzzing in and stuff like that, right? Okay, So let's back it on up. And what I'm gonna do actually is I want to bring this space station over and out of our way a little bit right now it's a little tight and I want to I want us to be working in between them. Okay. So we can kinda have it on one side having on the other, and then get to work here. Now, what is this station made up of? Is it a bunch of rectangles now, cylinders. Cylinders, right. So I don't know if you guys remember, but back when we were doing the tank, we were kinda, you know, stacking one rectangle on top of another rectangle, right? And that's how we're doing that, right? We're combining shapes, right? Okay, so hopefully we can do that again. I know we've got one cylinder here. So all you have to do is kinda draw two parallel lines and then the curvature of the ends. Okay, so imagine we've got something like this, right? In this case though, because we're looking at it from this perspective. This end is round and this end is round. So imagine a Coke can, you know, from, when we look at it straight on the cocaine almost looks like a rectangle, right? As soon as we start to turn it one way, we can see it's starting to turn this way, right? But if we bring our face right up closer to the cocaine, it's still just ends up looking like one end is round, the other end is round. And we're looking at this base in the middle, right? So that's what we're doing, That's why it's so close and that's why we can't see the underbelly of either the sides because our viewpoint is so close in the middle here that it curves on either side. So like I said, imagine you're sticking your face close to that Coke candor, that cylinder or anything like that, right? And you're not going to see the ends of it on either side. The other one here though, we can probably see. So we've got another cylinder coming off to the side here. We've got the rounding on this side, and then we've got the overall on this side. Alright? Okay, so why don't we try that. We can have two parallel lines running up and down. We can around them out on one end, rounded out at the other. Then we're going to have another two parallel lines. Kind of cross-section yet, right? Okay. And we can round on one side, ground on the other, but that's actually going to end up being an oval there. Okay. There we go. And now we can see how this went to. This, went to this, right? Nice and easy. The other thing that's we've got on this one though, this one off to the side is this oval going around here. So we can do that now if we want, we can just rough in an oval. And if we want to, we can kinda do the top and bottom for it and stuff. And that's pretty much what we need to continue. You know, we're we're pretty good right now. The only thing I think I messed up on is I'd like to see this a little bit bigger. On this side, it seems to be slanting down and smaller, whereas in this side should be bigger and stuff right? There we go. Okay. So I think our point of view is somewhere around here. So we're going to be able to see that this cylinder kinda rounds up into this one here sit and let's call it cylinder number one, cylinder number two. So cylinder number 1 we can kinda see and we can use this curvature for our perspective just a little bit. We can see these, these curving lines and stuff. And even if it comes up above and stuff. And then these circumference lines will follow along this way. Once you've kinda late in the circumference lines. Boy, does this ever get easy? Do you? I mean, like it's the same as when we were doing kind of that circle and AIG circumference lines way back in how to draw basics. Which I really do hope you took that course before you got into this one, because otherwise this one's way too tough. But really, I think at this point, what I'm looking at right here, I can probably start to do some lines now. Okay? So I've got everything roughed in. I've got basically my directional flow for it, you know, the cylinders. So what I'm going to start to do is I'm going to start to come down here. Come around the bottom, come back up. But now on the bottom I'm gonna kinda put some type of bigger housing unit down on the bottom here with maybe some some type of exhaust things, right? A little brace. Some more detailed lines going in there, right on the top here. I don't think I'm going to define this line a 100 percent because this kinda comes up this way a little bit. We'll come back here to the engine, our main engine, it seems in cylinder number two. I'm starting to draw some of the detailed lines in that main engine, right? We can draw some disks for the power of that main engine and give it some depth in here. There we go. And basically what we're doing is drawing the tires from the tank earlier, right? We can bring this cylinder out towards the end here. Roughen the bubble at the end. And then I thought of this as kind of an observation deck with some windows. Maybe there's some interesting standpoints for people to stand there and view space coming their way or something like that. We can bring this up to the top here. And what I did was following this line, I drew a circle, circle, circle, circle, circle. And I don't know maybe these are gunnery positions or observation points or something like that. I just kinda draw some window lines in it or something, right? I was thinking that bridge would be up here. So I want only wanted it like that, like a half circle or something, right? And then maybe the observation there and then some small communications and lights and everything on it. In the front here I thought more antennas. Like I really wasn't thinking of this as a, as a, as a battleship or anything like that. I was thinking of it more just a space station, something to communicate with, right? Then this kinda doughnut going around the middle, we can kind of follow some of our curves from earlier. Bring it around to that side, right? Bring it around to that side. And I don't usually erase, but it'll make more sense if I come in here and erase this part. Not bad. So now that we've already got like all of these circumference lines. And this is where we can just easily come in and then do like some panel works or something like that, right? Just kinda making it up as we go along, do some bolts in some corners or something following the circumference of this tube. All right. It's gonna kinda come bend around. You can have some extra little details. I put like what I thought would be little ship ports or something. So like if a ship was kinda coming in, it would head towards one of those points of entry or even like maybe a docking clamp or something that the ship coming could kinda come in and come and dock in there and stuff, right. But, you know, keep going with these panels, put bolts, put ways that it could kind of match up and and lock itself in, right? How you do enjoy it. I'm pretty good. Yeah. The main thing you want to do is follow the circumference lines that have already been laid down and stuff. So it's making sense a little bit within itself, right? It's following the lines that you've put in it. So if I put a panel here, they're going to follow the circumference lines, right? If I put a panel here, it'll kind of follow the circumference line and bring it on down. Okay. Maybe I'll bring one around the back here. Break it up. There we go. Maybe a row of windows or something. More panels up top here. And all you're doing is continuing to follow the rough circumference lines that you've already put down, alright? But it'll all make sense as you lay it all in. Okay. That's looking pretty boss. Joy. How are you doing on yours or you partly done? Almost done. What do you think? Partly or way. Okay. Keep going. Like halfway. Great. Yeah, yeah. I'd say halfway. I gotta say I think I'm almost done mine looking at my now. The little thicker than I wanted it, right? This one's kind of thin, right? This one that seems kinda fat. But I don't think there's any problem with having a fat Space Station. Yeah, Right. What I might do is like, I would have come around here and add a rim around us back engine section or something that was missing off of the first go round. Right. But other than that, yeah, I might even add some depth as if these were tires sitting in here, if that makes sense. Like so what I'm doing is basically drawing this engine disk and then it's kinda coming down much like the Millennium Falcon, right? Like that type of thing. And so these disks, there's going to be four of them. And they're all place kind of in here where the engine is going to blow off. Alright? So you can kinda see how that plays out here and almost looks like I stuck tires on the back of this and then let them up, right. So you can see how all of this works. It's just constantly flowing with the circumference lines of the of the form, right? Anything else? You can add little lights. It's really up to you. You know. Once again, it's up to you how creative you want to be. So I used a hand-held massaging. Just so happens. That's what I had lying around the house. What do you have? Do you have a bunch of pens? Maybe. What would happen if you stuck three or four, Eight pens together? Like kinda take them together, right? You can make it into almost looking like a cage type thing, right? How cool would that cage look as a space station? You could put walls in it maybe, or a whole bunch of docking stations and lounges, observation decks, those types of things, right? Geez. There's so much potential, but what you wanna do here, you can grab your pencil case, Grab erasers. You can grab almost anything that's around you. And really just put it together to try to make what's come into your mind, right? Sometimes if you combine a little bit of reality, like the pencil idea, right? And your imagination, you'll get something pretty cool. Joey. You all done. Yep. Yep. I forgot the ships, but it's okay. Let's just say it's an empty state and it just came off the factory line. Yeah. What was the hardest thing for you? I don't know. I didn't find this one as hard as the others. I think so too. Yeah. Yeah. I thought it was way more so simple because it has two main shapes, like the two cylinders. So I think that helped break it up easier. Well, I also think how interesting that is that it has two main cylinders, but what if we added a third? What instead of a flying t that we've got here, we had a flying h, Right? Like, do you think it would be like that much tougher data third, no, I don't think so. Either maybe cylinders or just maybe like you've definitely got to get the circumference lines correct. Around them, right? Yeah. But I think that yeah, I think that, you know, so far this was pretty easy or we're just getting better. Maybe possible. So maybe that's your homework guys. You guys at home. Let's see what else you can come up with for space stations, we get something funky. Instead of our little t. Try to write something else with the alphabet. Make like sine or whatever. No, I totally think it would be cool to do like an alphabet and make it into space station. Just take a letter and okay, how am I going to make the letter F into a flying space station right? Now, that's how you get creative, right? That's, you just challenge yourself with some like that, right? Okay, guys, hope this was fun and hope you keep practicing.
10. How To Draw a Spaceship Speeder: Hey guys, we're back with another how to draw vehicles unit for you. This one. It's going to get a little different. For the next few ones actually. You're probably wondering why you're staring at scissors on the screen right now. Just scissors but scissors that are like merging together somehow or something, right? Yeah. Joey. Where did these scissors come from? The kitchen. That's right. He's got the Arctic or kitten scissors, right? What I wanna do is show you guys how to use them. Some things you might have kicking around the house and bring them into creating spaceships or interesting designs or something. A few units ago, I was talking about how to use a book, right? How to use a book in our units, and how that can help you building a tank or a building, something like that, right? And especially being able to see that book at different angles. Yeah. So the perspective will change on a little bit, right? Well, what we're gonna do here is we're going to focus on scissors. And this is strange, I know, but bear with me. So I took the scissors, right? And I thought, well, you know what? The scissors look kinda speedy, right? Like everything's kinda racing in one direction and stuff. So I thought why not make it into kinda like a very fast speed str, type of spaceship, right? We've got big engines in the back, some intake in the front bunch of guns and it looks like it's a quick fighter, right? And then eventually I brought it over here and colored it up and end up looking pretty cool, right? So what we're gonna do, what I would like to do is I'm going to move this one off to the side here a little bit. So we were kinda sandwiched between both of these references, right? And there we go. Now we're going to kind of figure some things out. So let's see if we can do this. We've got this, this spaceship. And I'm going to draw really lightly at first. Okay, we've got this spaceship and it's all kinda going in these angles, right? So that's what we're going to want to be working off of, right? So I'm gonna kinda grab this front point here, like this is going to be the front end of the ship and just kinda drag some lines going back. If you want to, you know, if you want to, you can use a ruler. That's fine. For this kinda stuff. It's really your choice. I wouldn't use a ruler yet if you don't need to, okay? Because at this point we're still drawing pretty loosely and everything, right? So one thing I've got going is I've got this kind of big kind of base coming about the the scissors handles that are coming here, right? I don't know if I want to keep those, but I might incorporate them somehow into this kinda ship design, right? So what I could do and what I did here was kinda chop it at 1 and bring it down and kinda make that rectangle type of thing, right? Okay. And in front of it, that's where I added a cylinder. So I kinda brought a cylinder here, had the intake here, and brought it back and had it kinda bumped up against there. There we go. And you know what, I'm kinda following this now and I'm kinda not. I'm going to do a new design that's similar in nature but just a little bit different. Okay? Okay. So I've got this cylinder that's kinda lying here. And you can see I've started, I've got these scissors, basic shapes, right? I'm gonna kinda pull this back here, maybe make this a bit of a housing. And then I want to come back into kind of some big type of Winger fin type of looking thing, right? Okay. And looking at it from here, maybe bring it back something along those lines so you can see I'm still using this base, I'm still using and these directional lines tons for, for which way I'm going to draw things, right. Okay. Kinda caught up or so. So yeah. You know what? Yours doesn't have to look exactly like mine. I'm kinda just playing with it right now, right? Speaking of playing, what I think I'm gonna do is change things around instead of having the wings, how I had them, I think I might kinda just using an arc like this, kind of connecting one side to the other, right? Okay? And then coming off of here, I'm going to draw a line that roughly comes here. And coming off a here, a line that roughly comes here. And here's my wing. This is going to be my wing. So I can drop it down and bring it like this. Drop it down and as if that's what the wing would look like. And I can kinda bring it around back if I want to, but I think I'll probably cut into it or something, right. And listen guys. I'm kind of just going with the flow of it right now, just having fun. But it doesn't have to be the exact way I'm doing it. So another thing that I wanted to do in here is I want to make a big engine. So I'm going to have this big exhaust coming out, coming out this way. So here's my exhaust coming out. Maybe it'll come through this part, right? So here's the exhaust lines and stuff coming through. This is a massive exhausted started in here maybe, but comes out the back-end there. So I've got this wing, got this wing coming here. What we could do to make it a little bit funky here is even put up some, some hooks on this wing and bring it forward just a little bit. Alright. So now it looks kinda like, you know, its pincers or something coming forward. All right. Underneath it though, I still want to have this base to my front end. And it's kinda jet looking. So if I was to erase all this, you'd kinda see, oh yeah, that's starting to make a lot of sense now. All right. There we go. Starting to look pretty fun paper. But I've got nowhere for the pilots to be. So what I would have to do is look and say, You know what, I'm going to draw lines across the side of here and put one cockpit here and one right through here. So I would only get to see a little bit on that side. Right? So one sitting here and we can kinda have as if it's a World War II kinda fighter pilots with the windows and everything to it. Alright, okay. This is looking pretty cool. I want to put some lights or something like that on it. All right, so that would look kinda interesting. What about some guns, some kinda laser things. So I can have them coming forward here. Right? That's going to be on the other side so you can barely see it, but it's going to come forward there. Maybe something coming off the side here. Some type of, again, I'm still following these directional lines here, right? Some type of rocket looking things. There we go. Yep. And now this back-end looks massive and the engine would be blowing it out there. So I'm leaving, erase this original stuff. And look how cool that would look, right? All of a sudden, this spaceship is punching out. It's going fast. It looks like it's going to travel super-fast, right? Okay. So now at this point what I would probably do is come in and start to add in the lines, the details. You can start to, depending on how well you want to finish this up. You could do a pretty good job with it, right? Like sometimes you can do changes at this point. Like maybe I didn't like how those windows look. There's something right. So I could add in some extra paneling or something, right? This is still probably not my finished lines. What I would probably do at this point is still one more rough draft, making sure it's what I wanted. Making sure it's it's giving me the feeling that I want on everything. And making sure that design. If there's anything I want to change on it, maybe I'll put something more sci-fi ish on the front of that. Is if it's a laser, pick the thing. And remember these are cylinders here so I can kinda round it out. Bring it back here, back to this fin. Fin goes, actually it seems like this fin might touch the top of this thing and kinda use it as a bit of a housing. Here we go. Kinda make sense why that fin would be wrapped around it now, right at the top. Cool. Well, I was going with yours, Joy. Good. I didn't really draw what you are drawing. I drew it closer to the example just so that I don't have to go out and I don't like a slower pace or wait until you finish one part. Yep. No, it's cool. I'm, you know, I think then students watching you could kind of get a feeling of what it would be like to do the exact same drawing, right? Or at least really similar to it. With me. I wanted to show that, hey, we can just go off of this base. And still be creative and still get something done that's functional, or at least it looks like it, it makes sense within this perspective and everything, right? And that we can have some fun with it, right? It doesn't always have to be copying. I want to, I want you guys to do a little bit of design work here. I think designing is pretty important. Okay. There we go. Okay. So I'm liking how my spaceship looks. It's not the same as this one. I actually think in some ways it looks a little cooler. But that's how you get like really creative with doing your designs as you just kinda pick a little bit of a base and then play with it. You know, there's tons more that I could put like panels and lights and guns and dials and like vents, all that kinda stuff in it, right. So there's lots of room to keep adding to this. I'm going to leave that up to you guys. What I want is for you guys too, one, being able to use a household item to be able to use it. So it'll do, it'll fit kinda how, what you're envisioning, right? To, to be able to use the example that I gave and then see if you could draw it out, right? And then three, and this is where we're starting to get to is to be more creative. In the initial units that we were studying here. It was a lot of okay. Follow me. Okay. Now follow me again. Now pause and follow me. And that's great. I think that's how we wanted to start off and I think it's smart, right? But at this point, I'm going to say, if you guys have made it this far, you're ready to flex and grow a little bit. You guys are ready to start creating your own. You're ready to start using these little household items to make chips or whatever vehicle you want, right? Okay. Joy. So what do you think of yours now? I quite like it. Yep. Yeah. Yeah. I think it's pretty impressive. Yeah. Yeah. And you use the basic, you know, the perspective that the shapes and stuff I got ended up working the same way, right? Yeah. Just the different spaceship. Now, what did you find hard that you find anything art? I think just getting all the perspective right or it's not fully correct. I think there are some places where I messed up a bit. I think if I tried to draw it again, I could get it correct. Sure. If we were to sketch really lightly, and then what could we use to make it the perspective even better to make it all tighter? I know I was gonna say a ruler because we're looking at that. Both of our drawings are just kinda, We're winging it. Right? Who would run some wings here? But I mean, like we're really winging it with a no rulers here. So what I would do is I would rough it out exactly how we've done it now. And then once you've got it, that's when you can use a straight edge. Yeah. Right. You start to use a straight edge to make sure it's a little bit tighter. Write your rough out your design and then you draw it in tight. Okay, guys, hope this was informative and I hope you had a little bit of fun.
11. How To Draw a Spaceship Gunship: Hey guys, we're back and we've got another addition to our how to draw vehicles course here. In this unit, we're going to talk about can openers. Exciting. Yeah. Yeah. You kinda noticed I've been stealing stuff from the kitchen. Yeah. Yeah, the kitchen is an interesting place. It's got like weird gadgets, right? Totally. That's exactly what I was thinking. Everything from big mixers, aji is, you know what, a mixer would pull the make an awesome lake station or something like that to just smaller stuff that you can kind of play with and stuff, right? I think this candle printer is kinda middle of the line, right? Yeah. So I think we can see what we can do with it. Well, I actually did something with it before this course. I decided to sketch it out and see, you know, what I could come up with doing it one time, right? And so I kinda came up with this. I thought, you know, kind of a fighter type of ship, you know, like some type of, I don't know, sometime a warship write. My original idea was it had guns coming off this side, intimidating looking wings, gun turrets, and then kind of a launcher coming out of this out of it. A little tiny thing, right? Yeah. I don't know if I really love how this launcher looks though. I think it looks kinda, kinda weird, right? So I think maybe I'll switch it up on this one. But listen. In this one, I'm going to do my idea. Joey will do what she wants. And you guys do what you want at home, right? You can follow along with me, you could follow along with Joey. It's really your choice. Okay. There's nothing wrong with either way really. But as you can see, we've started to become really comfortable with these, grabbing these shapes and then seeing how we could play with them, right? So Let's see what we can play with here a little bit. I'm going to grab this guy and I'm going to move them off to the side. I want to kind of work in between them here. Okay. So that's what I've got, right? The next thing I'm gonna do is I'm going to come at this and I'm gonna say, okay, well what's my basic shapes? I think if I was to look at this, I've got kind of a some type of rectangle here. You know, if I'm kinda just drawing over it, I've got this base rectangle. So I can draw this off to the side and I can say, okay, well I've got this kind of base, very flat looking actually rectangle, right? It looks like a thin book maybe. And then I've got these almost cylinders coming off. But they're kind of flat actually, they're more this way, right? So if I erase that a little bit, I think they're more kinda cylinders coming off this way. And they're wider back here, right? So we have these wide bases here and then narrow. And you know, what I might do is I might spread them just a little bit. I think I'm going to do, that's going to be my variation is I'm going to spread them. So I can connect these cylinders like this. And I don't know spreading them as a good idea. It might, it might end up being really bad. But yeah, let's see, let's see what it does. The other shape of God is this handle up top. And like I said in the first attempt at it, I really wasn't sure what to do with it. Right. Like I feel like something's wrong there something right now it's sitting as kind of a rectangle, sitting on top of this thing, right? Like it's very easy to draw just as this rectangle sitting on top. Okay. But I'm not sure if I like that. I've kinda wrestled back and forth with what I what I want to do with that, right. Like like I said at first I thought, Oh, I'm going to have it as a bit of a a bit of a launcher for shuttles or something, right? But now I'm kinda second guessing it. So instead, I think I'm going to make it into a gunnery position or some like I said, I think that I originally envisioned this as, as using as a warship, right? So what I'm gonna do is keep these cannons off to the side. But use this one as kind of main gun coming forward. So i'll I'll have the barrel here. I'll have it coming back. So this is kinda coming back to our tank type of thing. Right? You know, like how we did that. The barrel on the tank and stuff for it. Okay. So I've got this. The other thing I'm gonna do now is add some wings. So I like how I did the, the wings first I kinda cut through the back and then I cut through the front and kinda do that same thing. I'm, I'm think I'm going to come from this point and this point. And kinda like, I like these sweeping motions from the front of the wings. So I kinda go like that, right. So I'm just plotting out where the wings might go a little bit. Something like that. Right. And then I can still have gunnery positions on the front end. I can even I've got this gun in the middle. I can, if I want, what I can do is imagine that this can actually close, maybe these open and close or something like that, right? These can open and close. So I'll just keep the wings as they can. They kind of fold out or fold in. I don't know. Maybe it's the different function of the ship. So I've got guns on the side here. I've got these wings coming off to this side. Here we go. And now you can see how easy this was to kinda, you know, I want to put in these circumference lines a little bit to just give these cylinders a little bit of shape here. And totally this is making lots of sense. This is kind of a little bit of right in the middle of these two other things from our original can-opener to my gunship number one. Right? Now this can be gunship number two. You'll also see I drew that a little bit of a different angle. This one here is kinda a little bit flatter, little bit straight down, right? This one I've kinda I'm looking at it slightly more From level with it. Right. I've tilted It's just a little bit. Okay. So now what I would do before I get into this, actually, I want to check on Joey. Joey, how's your design company is doing? Okay. And what would you say is similar or different? What have you done? Oh, I'm just redrawing it. Oh, so you're going for the exact replica trying to The only thing that I think it looks different on yours is your base looks shorter like everything looks kinda little bit short and fat. That is okay. Yeah. No, I agree. I I you know, it's not like we're trying to exactly replicate something, right? We're, we're trying to create here at this point. So my islet all when no area, it looks like a baguette. Why do I think you're hungry? I am hungry. Well, there you go. You start drawing food when you're hungry, right? Okay. Yeah. You know what, I didn't add those little window areas. Maybe I should do that. I kinda liked it in the original design. So I'm going to, actually, I'm going to start with my not finished lines, but my, my sketch lines. Now I'm going to add these same window parts in, kinda sketch them in a little bit. Right? That I had almost like cockpit parts, right? But they're not. I actually kind of envisioned him as like you can look down into the decks below or something when I was first thing intimate. And you'll notice that these ones over here, these aren't cylinders there actually, I kept them straight. These ones I've turned into cylinders. I wanted them to come out ground. Okay. So that was another change that I did here. Bring this backup. There we go. So because of that, maybe some of the paneling can kinda wrap. I can follow some of the the wrap of the cylinders and stuff. I'm also going to be remember that the wing kinda comes in a little bit here, right? So the winged kind of comes into the cylinder a little bit and then it can come out into this cool looking thing. And if we want to, we could have, you know, kinda missile looking things coming out underneath the wing. Alright. Here's a wing on this side. And four little tips to the missile coming out on this other side here. Right? Now I'm looking at the base. I'm still going to draw it in like this. Let me draw this top of the base. We're still keeping it kinda rectangle ish, not rectangle, delicious. Just Rectangle. Ish, right? Sorry, I had to, and that's my dad joke of the day. We'll put these wings on the back end. At this point, I'm still kinda roughing in some shapes, right? What did I say? Oh, right, I wanted the gun here. I forgot about that. So I'm going to have to erase just a little bit for this gun would go. Me racing where this gun would go. And here's where this big canon would go. And then I kinda rough in here, right? And then this'll come back into this shape. And you see I'm kind of following along most of my original sketch lines and stuff I got not perfectly, but I'm going to be just adding some more little panel details, seeing if things kind of fall the way I want them to fall. Right. The other thing that I didn't really add in where the exhaust vents on the back here. Right. So I can do that now. I can put in and you can't see the second one here. Put it in where the, where the power is going to come from, right? I'm going to put some gun turrets here. But to make it so that I'm looking down at them, I'm going to kind of give them some lines coming over top and then the guns coming out that way. And again, I can have like have this whole section kinda pretend it's on a swivel. Have different panels going on here. There we go. Cool. I have this underside here. Okay. Yeah, I'm, I'm big and how this looks, I can even how this underneath here. And there we go. Maybe a few panels on the wings, something like that. And there we go. That's how quick it is to kinda do up a rough concept sketch of something that can be not so much functional because we don't need to make these flyer anything right? But more something that just makes sense unto itself. That's one of the key factors here as you want, something that makes sense like within its own universe type of thing, right? Like we, as humans don't have the technology to produce these massive space gunships right now. But we also know when we look at something and we're like, That doesn't make sense. Or it seems often are I write by using references and combining them with your imagination. It'll help trick that human eye to think, yeah, you know what? I don't know spaceships. But that could be a spaceship, right? So that's something that would help you. Now, joy, how are you doing? Then? I decided to change one thing. Oh yeah. Because I do really like the idea of the gun parts. I just made it like a stairwell that could probably go down into the ship. Okay. Yep. Yeah. And then they can also go up and check everything. Sure. So you can put ladders on them. You gotta think like when you're thinking in designing something, what's the function of it, right? Is it a gunship and looking for battle? Is it a space station that's looking to host events or ships coming in, right? Is it a speakership that's trying to go super fast? And then once you get that function, the form will follow. Okay? So that's a very, very strong statement. Form follows function InDesign. If you can remember that you're way ahead of most other people. So we've designed tons of vehicles in this course. And I'm happy with them all. I gotta say we started off a little rough, right? Like we're like, Oh, how did we do this? And even drawing boxes was kinda like, oh, what's going on? But now look at us. By the time you finish this course. I'm hoping you could draw a little bit more than a box, right? Yeah. Joint you're happy with your spaceship? Yeah. Actually, I'm pretty happy with it. Yeah. I think it looks good and it looks real enough that it fits the believability of its world, right? Hey guys, what I hope you're doing is taking a bunch of household items, can openers, mixers, whatever you are allowed to take, and starting to make some pretty cool vehicles. And I'd love it if you sent them into us, right, Joy. Yeah. Yeah. We wanted to take a look at them and I just love seeing them. I think it's awesome. You guys have fun and keep practicing.
 Ed Foychuk, Making Learning Simple