Transcripts
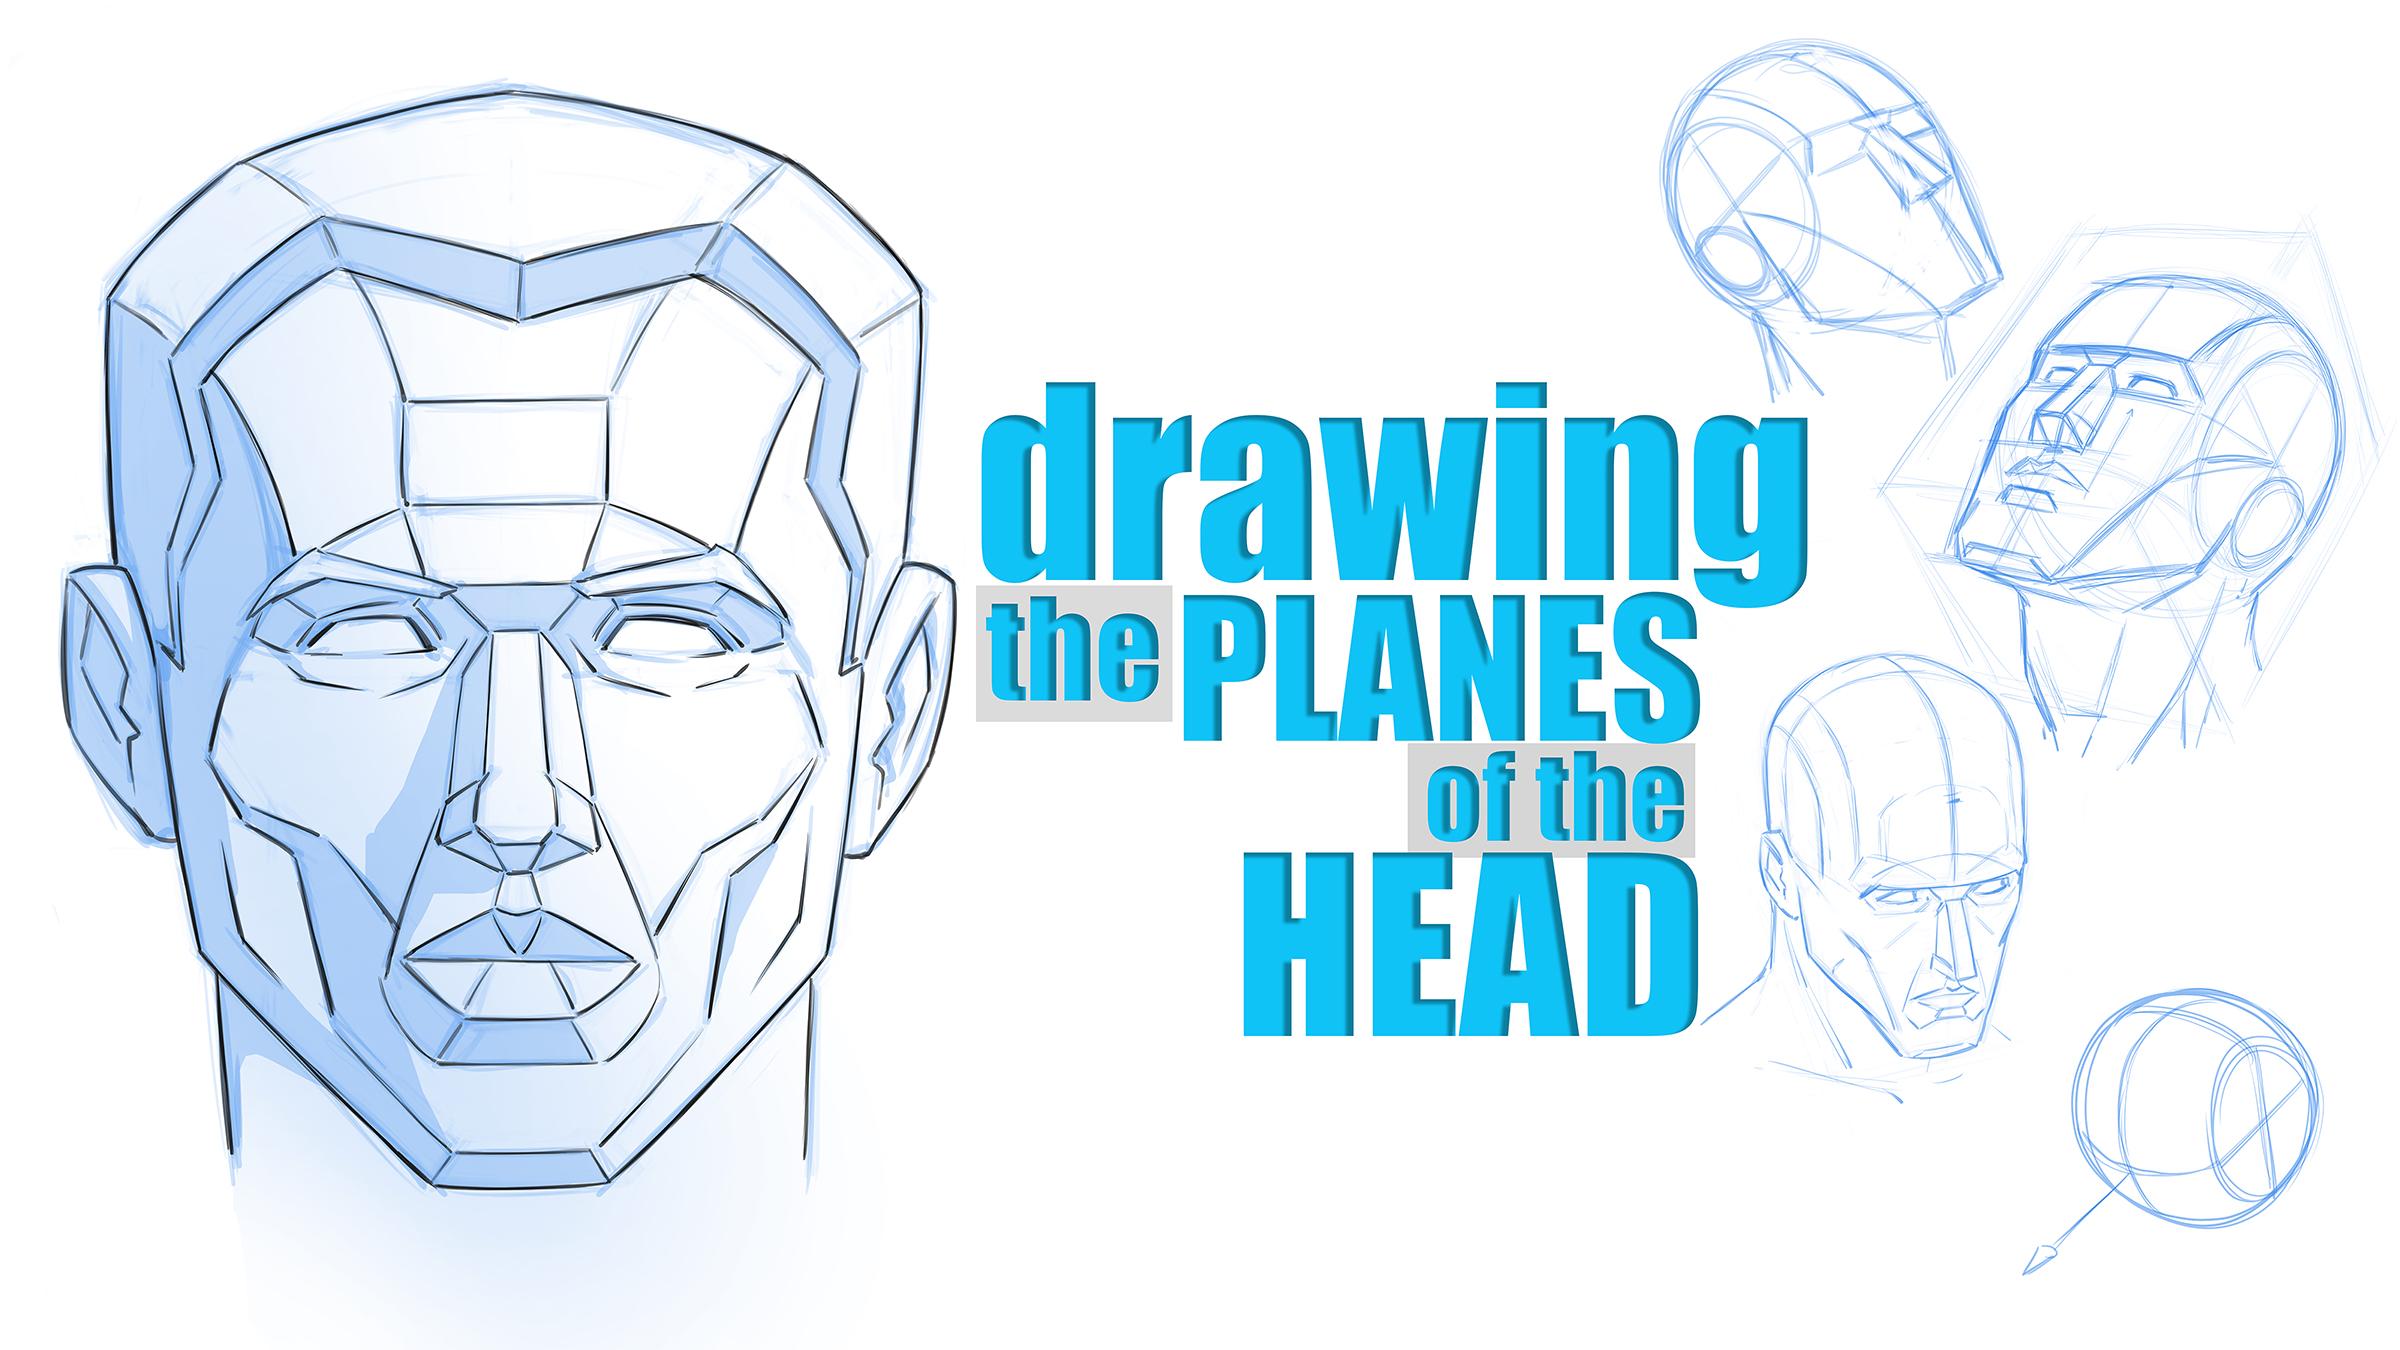
1. Introduction to this Class: Hello everyone. My name is Robert Marzullo and
welcome to my class, Drawing the Planes of the Head. In this class, you're
going to learn how to define the
planes of the head. And this is going to allow
you to rethink the head, approach it from a more
designed way of thinking, a structural based approach. We're going to be using
the Andrew Loomis head to start with and
then I'm going to show you how to further
develop that into secondary planes
and transitions. And then we're going
to work on up and down views of the head to help you relate this information in a more perspective
based manner. This class should be highly
beneficial for anyone that's trying to get more depth and dimension in their
face drawings. I hope you enjoy the lessons and let me
know what you think. Good luck with your
art and bye for now.
2. Basic Shapes to Practice: Hey, welcome back.
Now I want to talk to you about drawing
the planes of the head. But before we get started with
that and actually drawing the head and talking about like the Lumis method
and things like that, I want to first get you
warmed up to the idea. I've established a grid. It's just something my software can do or it can put
a grid in place. You can draw one out.
You can use grid paper. You don't have to do
this, I recommend it. I think it helps me a lot
with things like symmetry, alignment of features,
just consistency in the drawing and not having to think about that
portion as much. And it's just more of the
design way of thinking. Right. When we get into
drawing these shapes, you're going to basically start with angles and you're going
to build out from there. What we'll do is we'll just draw a couple basic shapes just
to get you warmed up. You can look at this like it's a pillar or something like that, but just some straight lines and some angles
dealt at the bottom. And then trying to
perceive how far out those angles come out. And then a line to the neck. If you were to draw a
line through the center, you're trying to
basically perceive a sense of symmetry
and balance there. There's going to be
elements of that, but then as we move through the process of the face and the
different elements, you're going to use like a lot
of triangular like shapes. You're going to taper
things out essentially. If this was the start
of a nose for instance, you'll see that we're going
to be using Keystone like shape like this, the
top of that pillar. Then as we come down
we're going to widen out the bridge of the nose. And for a very
simplified version, we'll just flip that
shape back the other way. Just like that, we'll
have the start of the bridge of the nose again. These are very basic concepts and if you feel bored
you can move along. But I do recommend you
practices get warmed up. It's going to make sure
that when you get into the more advanced versions
that you're ready to go. These ideas are already cemented in your mind and you
feel comfortable with them. From here, what we'll
do is we'll take even this basic shape and we'll relate it in a
more dimensional manner. Right now it's a
two D flat surface. Couldn't get any flatter, right? Just some flat shapes. Then as soon as you
bring these lines back, this way you start to get
a sense of perspective. If you bring this down,
widening it out just a bit, and then trying to be
even on both sides, a sense of symmetry
to this effect. Then from here we
could bring this up by establishing this angle, we give the
impression of a nose. But you can see it's a
very simplified version. What I'm going to
be showing you is the simplified versions of some of these aspects
of the face to, again, hopefully get
you to feel more comfortable about
these concepts. But then I'm going
to show you how to go a little more
advanced with it. One of the things you're going
to notice when you study planes of the head
from various artists is that not only are there certain masters that have taught it differently
throughout history, there's also interpretations
by a landslide of different artists
today that pick and choose what
resonates with them, what they utilize
in their own work. You have to remember that
you have simplifications, you have more advanced versions and everything in between. And there's no
right or wrong way when you look at this stuff. It's not like these are rules
that you have to follow. These are guides and these are suggestions
more than anything. Some people, their technique is going to make more sense
to you than others. You need to probably just
keep an open mind is what I would recommend to all
the different techniques. And then you're going
to use what you use and you're going
to discard the rest. We can't possibly remember
everything we learn, right? So that's our brains function, is to only keep what we need and we use on a more
day to day basis. And then some things
we use so much that we no longer even think
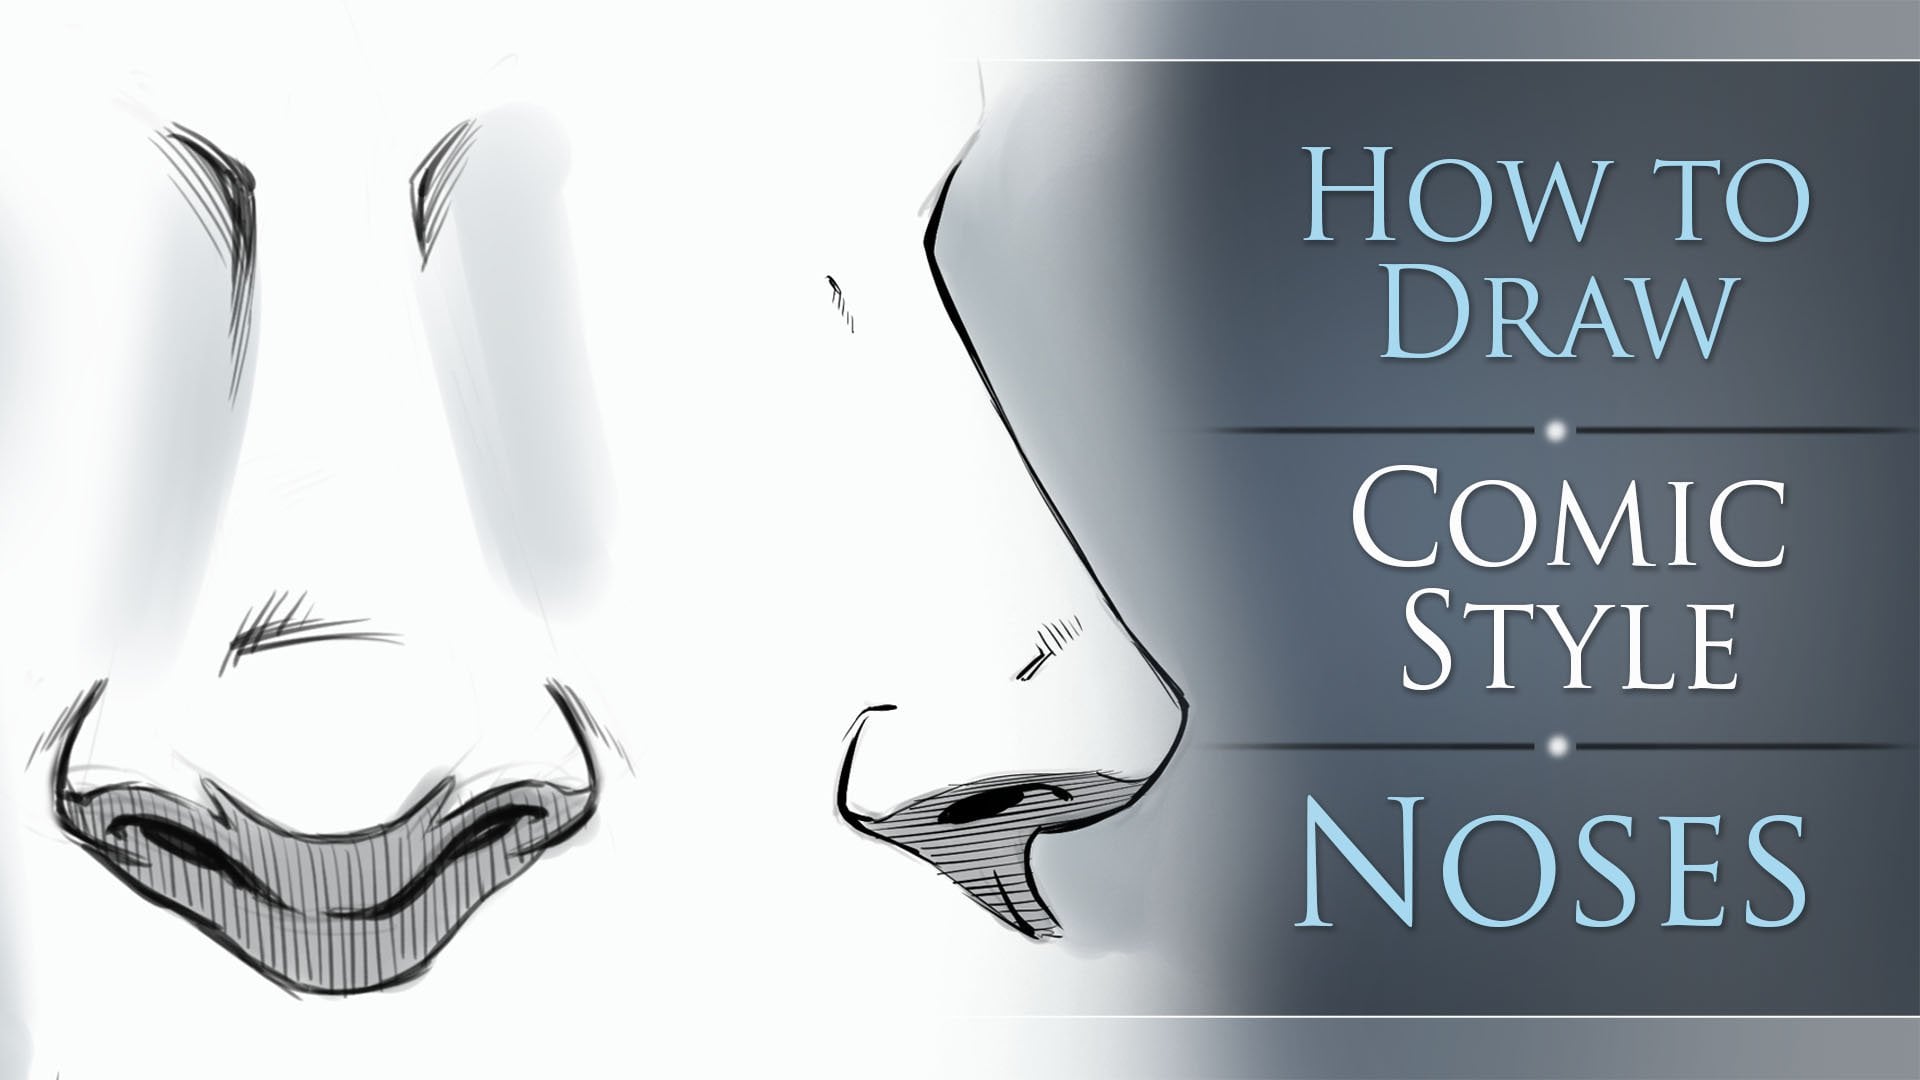
about using them, right? We don't think about breathing. Essentially profiles are
also a good example of practicing these
angles and noticing different relationships that
we're going to be drawing. For instance, if we
look over at this area here relating to this is
basically right here. It's that down slope,
that bit of a triangle. The bridge of the nose really, it's like, I guess the bridge, the nose at this point would
have to come back like this. I might be getting that wrong, but forgive me if I am. You see, even here by
adding this extra angle, I've done something
a little bit more complex than what I
initially started with. I didn't really mean to do that, but just think of
this stuff as you're trying to envision
all these shapes in a variety of manner,
a variety of ways. For this one, I'm going to
go a little more complex. There's the nostril, there's
another plane change. And you'll see some artists, they do a tremendous amount
of plane changes just in this area of the nose because there is a lot going on there. It's really hard to even think
of this as a nose, right? It's a little too simplified, but there are instances
where that's beneficial. Now, one of the things
I really like about studying plane changes
as well is that you're also learning how to make simplifications that may
result in style choices. I didn't see that at first. I thought, well, it's, it's a great technique for getting perspective in
the face, which it is. It's a great technique for finding the value
shifts that you need, where to put light,
where to put shadow. But also I started
to realize that, wow, this is like style choices, like when you see
very angular styles, this is similar to some of the
decisions they might make. There is that little bit that you can gain
from it as well. Then I don't know if I mentioned it, but
I'll say it again. If I did really consistency, this is going to help you
immensely with consistency and a sense of structure to the face because if you have that in, I don't know, like whimsical
or flimsy feel to the face or your character's faces look
a little too mushy, right? They just, they lack a sense
of foundation and structure. Well, this is going to
help with that as well. Now, another thing that
couples with this is also, you know, studying
the skull and being aware of the anatomy
and things like that. But really for
structure the skull and the plane changes of the face are really going
to help you with that. You see, we've got some
variations in the nose here. Let's do a couple other. I just want to get you
warmed up to these concepts. I'm going to do a mouth and I'm going to start
with an M for the top lip. Now remember two, you
can add a center line. It's never a bad idea. I probably will bounce back and forth from using some
symmetry tools as well. I don't want to do a whole lot
of that because I'd rather show you how to draw as
much freehand as possible. But I do recommend that at
times just to mimic it, you would just obviously
draw half of it, flip it over, and then check it. Just so say you flip it, right? And you're like,
well, I just cheated. I don't feel good about that. I want to really not
take those shortcuts. One thing that you
can do and you can see just like that this
side is longer, right? It's just one of those
things that I have to notice and pay attention
to in my own work. Well, sometimes I flip it, turn the layer back lighter, and I redraw over top of it. And I feel like that's
another good way to slowly bridge the gap. It's still cheating
a little bit. You know, I don't know
when there's deadlines, I throw cheating out the window. I just want to make sure
that you're aware of that. Like if you haven't worked
professionally yet in these things worry
you, believe me. When you have a tight deadline, you take the shortcuts you
need to to get stuff done. Don't hinder yourself
that way of thinking, but when you're studying, when you're trying to
improve your skill set. Yes. Trying to do as much of it freehand is good
mileage for you. Obviously we got like
an M like shape here. Are you like shape here? All right, And that's probably the most simplified way I
could think to draw a mouth. And then as you develop it, you might get more of
the angles in here. For the Lumas method, he does something
a bit like this. You can see that
keystone shape, again, even in the lip, you see it's similar to the center
of the nose over there. Then he really flips
it back and forth. And we'll get into
that here in a bit, but just really should keep it about the
mouth at this point. You see upside down right there, and then this angle on the
sides here for the top lip, then for the bottom, you can
really just bring this down. And then connect it back here. Now I will introduce some
curves along the way. So keep that in mind. It's
not like every line has to be an extremely straight line. For the most part, yes, that's what we're trying
to accomplish here. But I guess I bend the rules or bend the
lines a little bit, I don't think you need to be too awfully critical about that. Then also for more
accurate noses, as we get into
stuff and we start drawing a little bit more, what I would consider
more accurate noses. You're going to
have a few angles here as I've already mentioned. And the wings of the nostrils are almost always up higher. Most noses, not all noses are one of those areas where we get a lot
of shape variation, a lot of size variation, right? But generally the hood and wings of the
nostril are up higher. Something like that. Probably even
another transitional angle right about here. So a question you y
be having is like, when do I know the difference? To do more or less detail? Essentially, what I would
say to that is it's better to start with less
detail as you're learning, as you're beginning, less angles, more
simplifications, right? There's a natural progression
as you just get better, that you can implement
more, there's that. The other part is
what are your goals? What are you trying
to achieve here? Are you trying to draw
stylistic characters? But you have a little bit
of a struggle with staying consistent with
the characters or really drawing things
symmetrically, all those things. And that's a consistency
issue as well. Mapping out space and
proportions, even. Are you trying to draw
more stylistically then you could probably
stay to a more, a lighter version of the
angle interpretation. The planes less planes. Are you trying to draw
more realistic portraits then you're probably going
to use a lot more planes. In fact, that's really where I find this stuff
is more superior. Because now you're
talking a lot more about gradients,
light and shadow. And this becomes insanely
powerful for that because there's more
clear distinctions on where the light
and shadow would be. But if you're drawn organically, it's just a little
harder to discern. Right? It's not impossible. And I've actually
got that crooked away from my center line. Look at that. Don't make that
mistake. Hopefully didn't. But yeah, it's one of those things where
you're going to add more of this as you need it for
more complex illustrations. That's predominantly the
way that I think about it. I think we got time for just one more. I'll do a quick one. I'll just be the ear. Ear is super basic for what we're going to be doing
in this instance. And it's just going to be
basically a disc like shape, if this was on an angle. And we'll show the
front plane change of the area that's
closest to the head. Then the disc shape
will just bow out. And you could do that
at angles as well. You could cut here,
cut here, cut here. Some people do it very
angular, all the way through. Again, it's up to you. I don't do that entirely. But maybe I should just, I guess it is neat to
you'll see some of this. This is more, I
utilize this effect on a mapping distance
for a portrait. Maybe I'll explain that
in some upcoming lessons. But essentially you'll see this a lot with portrait artist
is where I learned it. Where you actually
draw outside of it with angles and you see these little
criss cross divides. You can do it that way as well. Something like that, simple
as it is, gives us an ear. Then again, if we were trying to be more complex about it, we would start looking
at the forms inside of the ear and interpreting
that with more angles, trying to find those
plane changes as well. We'll go and stop right here. We'll head over to
the next lesson and continue on with that. Let's move forward.
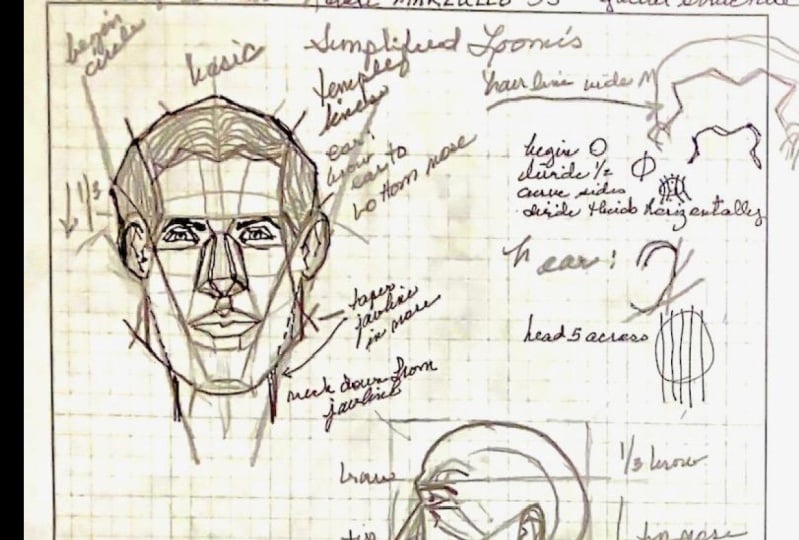
3. Basic Head Shapes: Welcome back. Now I want to give you some other
preliminary warm ups. And that's basically drawing a more simplified
version of the head. Again, I really want
you to think about the concept that you don't have to draw the more
advanced versions you can if you
find it necessary. But remember that
you can also result a lot of this down
to a basic version. I'll show you this one on
a forward facing shot. First we're going to start with our circle
slice off the sides. Bring that in like this and we're going to find
the one third that we need. Just divide up the sides. You can't quite see the vertical line here,
but it's there. Then bring that line over horizontally and
find your one third. You're using the top
of the oval here, the bottom of the
ovalproximately. The main thing is
that the one third here is relatively even. I always get people to ask
how big to make the oval. I don't have a set size. I just feel like if
I make it bigger, it's obviously going to cut
further into the circle, which is going to make
the head thinner. Likewise, if I make it smaller, it's going to cut
further this way to the head size and
make the head wider. I play around with
proportions a lot. If you feel like it starts
going astray right here, and the one third
looks funny to you, more elongated than
it needs to be, Just bring this back out, widen it back out a little bit. I tend to try to think
about this stuff and teach it in a way
where it's more fluid, not so strict, and everything's
perfectly concise. To me, that's a way to start drawing robotic
looking faces. Even though in this
case we are going to be drawing faces
that look like robots. That's the goal at this point. Right here, we've
got our one, three. Let's go ahead and
add the jaw line. So we're just going
to drop this down a bit. Bring that to the chin. We'll just establish a
chin with a flat line. So we've got a very
squared off jaw. And I feel like
there needs to be a little bit more taper here. I'm going to round out the head, even though this will
be more angular, I'm just trying to
get, there needs to be this feeling that the top of the head is bigger
than the jaw, right? You could probably even
cut that with angles, but I'm just going to round that out now we can get rid of a little bit of
the construction lines here. I will make that a
bit bigger for you. Okay. So now we have the
placement for the brawl line. We know the hair lines up
here and the nose here, and the mouth in this
space down here. What we'll do is
we'll start with this shape as we've done a couple of times
now, Keystone like shape. We'll draw the
bridge of the nose, we'll flip that Keystone shape. Actually, I'm sorry.
It's the same shape. It's just we'll squatt
here from left to right to keep nudging over
as I miss my center line. Constant problem in my work. Sure. You see some of
those in ears right. Let's bring this line back then. Let's drop this down. We've done all this before
in that previous lesson. Little triangles here for
the wings of the nostrils. Now we've got this
nose in place. This again is the realms method. We're going to do the
simplified version first. We're going to angle
this line back to here. As far as placement of this, what we're just going to look at is that if we were to think about this transitional area right here, that
needs to coincide. I just think of it like the
temple area of the head. And then bring this line over to that point we brought
back towards the face. The ears will go
in this quadrant. Just remember, the ears line up to the brow line and the nose, they're in between
those two points, the eyebrow line and the nose. I'm trying to induce a little
bit of perspective here. I'm not going exactly to
the bottom of the nose. We have this feeling
that we're looking a little up or the head's
tilted down just to smidge. But I will do that.
I'm not going to draw insanely big ears and put them right parallel
to those points. There we go. So it's a bit messy, but I'm going
to clean it up. But one last point I want
to show you is we'll take right where the ears
pretty much connect. Not quite the center point
of the divide up here, but where they
connect to the head. And we'll just draw down
to the chin. There we go. So I'm going to
clean it up a bit, but what I want you to
see here is that this is a very simplified version
of the planes of the head, but for a lot of artists
this will do the trick. I'm also going to show
you some variations away from the Loomis method and
let me know what you think. I hope it doesn't
confuse you as we go. But again, what I
want to do is arm you with more
knowledge, not less. And I also want to be honest
with you in the way that I actually utilize
these techniques. I don't stay wholeheartedly
to any one of the, the popular taught versions like the Asaro head and
the Lumas head. I study them as
often as possible. Maybe some of it is
just an inability to utilize it to its
full potential. But I feel like at this
point and juncture of my abilities
and how I use it, it's just not as necessary. Hopefully, I'm being very forthcoming with you and saying, okay, look, this is how I do it. Hopefully this applies to you, but also I don't want to
blow any smoke your way. I don't want to tell you, yes, this is the one right way to do it and this is the
way you must do it. I don't feel that way. Again, take it with
a grain of salt, learn from it, and utilize
what you can from it. There's that cheekbone line. Now there's certain
things that I just feel are going to be across
the board, accepted. This one is a prime
example of that. This line going down
the side of the face, it starts pretty much where
the zygomatic bone is, right? That's what
we're looking at. That cheek bone, that jaw line, or cheekbone, obviously this is on pretty much
everybody, right? There's nobody that doesn't
have cheekbones now. They might not have as
defined cheekbones. It might not be
something that you want to bring out as much in your character
concepts as others, but they're definitely there and they're definitely
consistent with all the methods of drawing
the plane changes. They just might work
around them differently. Some plane changes,
you're going to see where they do more of this and they draw these mini triangles and
they really divide it up. But again, we're
going for the more simplified version
at this point. This is a keeper. I
would say that's a must. I would say even the nose here, even though it's
super simplified. Just the benefit
of getting good at drawing it like
this, I don't know. It really helped me to think more dimensionally
about the nose. I noticed that immediately after I started doing
this that I was like now drawing the nose more
distinctly away from the face. That's something you'll
see with a lot of beginner artists that
they draw pretty well. But then they maybe
flat noses or the eyes don't look like
they are recessed into the cavities of the face but rather just stamped onto the front of it,
things like that. And I feel like these studies help you with that exact
aspect of your work. Now remember that these are
the basic planes of the head. We'll be approaching
it from secondary and adding more angles
and more complexity. But I just want you to feel
comfortable with this. Keep in mind, too, that
you're going to adjust these lines and try
different head proportions. I'll try to show you as
much variation as I can. One of the things I'm even
noticing with this one, I really should have brought
the temple lines in further. You'll notice when you reference
the Andrew Luis version that those temple lines
are brought in further. It's really a distinction of proportion when you widen
out the bridge of the nose, but bring in that top ridge of the eye or this area right here, you're basically going to get a different look. We have
to be careful of that. And I think that's really where referencing this same
series of techniques with photographs is such a big
deal because you're going to see so many variations
in proportion. I think that broadens your
perspective as to where. If you approach this in a
very systematic, rigid way, as I mentioned before,
I think you'll tend to get copies of characters
a little too much. Me personally, I like to play
around with these concepts, but keep that in mind
that because of that, there will be a little bit of variation to my work and that might occur
in yours as well, and that's nothing
to worry about. Just keep logging in. Plenty
of studies just like that. We have that very
simplified version and we could clean
it up further, but that's really not
entirely the point. I'll clean up some
of these for you, for your reference
files obviously, but. There's that. Now we have
that straight on view. It's again in a
simplified manner. It's something that
hopefully most of us could process with a few iterations, a few practice runs. We should be able
to get this right. This is the
foundational knowledge that will allow us to
do the other steps. Do this as many times
as you need to. Let me do a couple quick ones on an angle just to show
you the same concept. And by the way, something you can practice over and over that's
going to help you with these lessons.
Are these right here? I mentioned them in the other
lessons that I've provided. But I'll say it again, just
taking the time to do these. It's a great warm up activity. This is probably the
hardest part for me, is when it's a downward angle and getting that feeling
of that curvature, you could even go across
the top like this. Just do a bunch of these at different sizes,
different angles. Really try to try to
show some range here. It's like that. Okay,
so back to this one again, you can find
those one third. I will admit a lot of times
it just eyeball this, but I've done enough of these. Where that starts to
occur in my work. When in doubt, just sketch
lightly so that you can see through the work and keep making
changes as you go. There we go. Another
roughed out version. The other thing is this,
when you go to do these, try to log in more and worry
less about refinement. Volume is going to
be better for you when it comes to
practice activities like this versus refinement of that's going to
compromise the volume. So just keep that in mind. There we go. So there's a
couple to get you started. Hopefully that helps. Now let's go ahead and move
on and talk about drawing the face with a little more detail
forward facing.
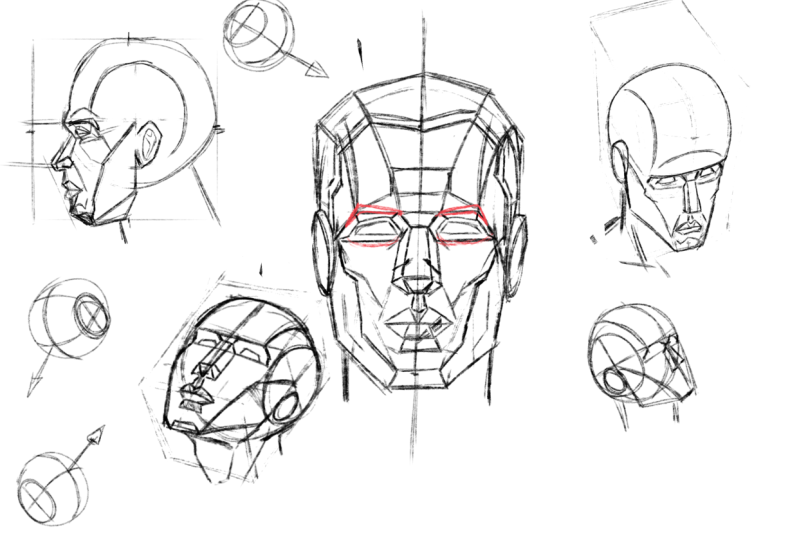
4. Additional Planes of the Head: All right, welcome back. So I'm going to show you how
we can take this, refine it a bit more. There's actually a
batch start right here. I just noticed it's
not necessarily wrong, I guess, but it's not as close to the Andrew
Louis method. He actually takes the side
plane of the head right here, brings it right down
to the brow here. Let's get that in there. That will also help us
direct this line up and wider through
the top of the head. Something like this.
Then we will race back all of this now and here, we won't need this anymore. So it really makes that
side plane of the head, this whole area
all through here. And then also bring
this line down to this line in the
cheekbone area like that. I feel like this head could
be thinner by comparison. Mine is going to come
out a little bit wider. We'll just say that mine
is a football player. But essentially, the
narrowness of the head, the length of it top to bottom, is basically going to affect the slenderness
of this head. If you stretch it out, I could increase the
top of the head. I could extend the jaw, and then it's going to
look more elongated. Just keep in mind mine's a
little bit more squared off. Now we can start
adding the mouth. And when we do this
similar shape, just flipped back an M like
shape for the top lip. Remember to the sides
of the mouth will sit on the inside of the iris, just almost centered
to the eye, really. But I always put
it like right to the inside of the iris if
I'm trying to be more exact. But that being said, not everybody's mouth
only is this wide. Look at somebody like
Cameron Diaz, right? She has a nice big smile, you like shape for
the bottom lip. And then that keystone shape
again back the other way, and then also one at the bottom. Now another thing I really should have added probably
even in the previous step, but I missed the bottom shape
right here for the chin. What you'll notice is that
in the Elms way of doing it, when he does the
original planes, the basic planes of the head, this shape is larger. Then when he moves to the secondary planes,
it gets smaller. Again, I feel like that's almost another cue to say, look, this information is a little subjective and you're going to utilize it in different ways. Now, he could have
meant that, hey, when we zero in on
those first planes, the basic planes of the head, we want to really get
big broad strokes, that's obviously what he was
implying with the drawing. Then when you get
into the secondary, they are naturally
going to get smaller. But it wouldn't change the
fact that the chin itself would go from a bigger
shape to a smaller shape. You can cut into these
ideas all sorts of ways, like I think I've already
mentioned with the nose, you can revert it down to
these big broad shapes, but you can also get very, uh, detailed and angular. And get in there and do
all sorts of variations to the angles and the plane
changes of the nose itself. Again, you're going to really take from this what you will and develop some of your own ideas. And
I think that's fine. The nose just cutting into
that bulbous part right there. I think that's something
he does in his it looks a bit like I don't know
what shape you'd call that. Just I widened square
with a tapered top. Looks like it's starting to be a house shape, but
not quite that. Then he gets the
nostrils in there. A little bit more detailed
but again, super simplified. Very basic. You've got
the angles right here. And then past that,
it's probably just, oh my bad here we've got the V in the lip and
then the U like shape, or two lines going
down the bottom lip. I feel like the eyes could
be a little bit wider. Then again, I will generally go back and check my symmetry. Either with a symmetry tool, if I'm drawing on
paper, a light table, or I will, sometimes you can just fold the paper or make a copy of it
and flip it over. But essentially just
whatever you got to do to check and correct
the symmetry. I'm going to do that
in the final version that I share with you
in the art files. But I'm not going to do
it here because again, this is more or less to just teach you the shapes
and the principles. The other thing that
he adds is two marks from roughly about the width of the nose or the
height of the nose, right along what I'm saying,
along this line here. He puts these angles
in like this. I'm not entirely sure
what those are for. I don't see a whole lot of
use form in my own work but since we are sticking to the Andrew Lumas method,
I wanted to show you that. So just be aware
those are in there. Then from the hair line he
does the hair shape which comes out to this
line back this way, cuts in towards the temple
area and then down by the ears and then raise that up. I don't know, I
look at it and go, well, is this really necessary? It's a very distinct hairstyle. Right? But I don't
think that's the point. The point is to, again, really hit home. That we need to simplify
everything into big, broad shapes and
strokes, big forms. And therefore, it simplifies these more complex
areas of the work. And hair is a perfect example. It's like whenever I
struggle to draw hair, I can generally take a
step back and go, oh, you know what, I'm not going for the broad strokes first and then slowly edging
in all the details. Because obviously
you can get very caught up in details with hair almost every time. If you just really
simplify it with the big shapes first and then slowly build
in those details, it just becomes a lot easier. I would say most
things are that way. I don't know if that's exactly why he explains it this way. Or utilizes even plan
changes for the hair. But it does make some
sense that you're going to get volume and gradient
differences even in the hair. Why not break it up into
these plan changes? But again, if you look at it in the idea of like when am I
going to draw that hairstyle? It becomes very, you know, it seems like maybe a bit of
a wait, but it's not really, it's just a concept
and something to practice and then use it on
all sorts of hairstyles. Right. Okay, so there we go. There's our rough sketch
and I think he actually excludes a center line
up here on the forehead. We'll get that out of there. Yeah, I think that's about it. Like I said, I'll
clean it up for you, but I don't want
to bore you with that part of the process and
it's not very necessary. As I've already mentioned,
I would rather see you draw more versions than worry about cleaning everything up
at this stage of the work. Now what we'll do is head
over to the next lesson. I want to show you
a similar approach for the side view of the head. With that, let's move on.
5. More Front Planes: Welcome back. Now I want to take this one and refine it
a bit more with you. I'm going to go and make a copy. I got to back up this one. Let's see. The next stages of the work that you'll see
in the Andrew Lomas book are to start to sculpt out more of these areas here,
something like this. This helps to get
this front portion of the forehead in
place right there. So you get the shape
of the brow line, that pocket of skin
over the eyebrows, and that flat region
of the forehead. When this is done
with the sorrow head, the shape, if I
remember correctly, is something like this.
It's much larger. I'm wanting to say it's
almost like a Superman logo, but maybe the sides are cut off. It's a very large plane change
on that front brow area. Again, areas like this
is where it starts to make me think more
independently of these ideas. Because again, everybody does it a little bit different or there's lots of variation
in various areas, but they all agree that this part relatively
flattens out. Again, one that I use
is more like this, that I've gotten more
from probably comic art than anything.
Something like that. And then if we take the, I think he brings these
in more of an angle. So if we take the
cheek area and, and take some of
these angles back, it's basically the
same information, but he starts to make
it look more organic. I think that's another thing that is special to pay
attention to with the stuff, is that if you were to use angles smaller and smaller
angles to describe anything, you're going to eventually get something that looks organic. You're going to
get enough angles, and small enough succession
will look like curves. That's a neat thing
to zero in on with. This is that if you just keep chiseling out
your, your angles, and again, smaller and
smaller iterations, you're going to eventually get that organic feeling
that you're looking for. But you're going
to do it in a way where essentially
you're mapping out the space and you're
just doing it in more perspective oriented
design way of thinking. For some of us that can help considerably for
others not so much. Keep in mind that these things don't help everyone the same. You might try to do
this and it might just seem like a
foreign language. Right angles are beneficial to some of us and
others, not as much. You have to just give it a shot and see what
it does for you. Now, we could take parts of
this back and say, okay, we've got more definition
through the cheekbone area, But you see it started with the initial layout that
he already provided us. There's also some
symmetry issues here. Mine doesn't look as well proportioned as
Andrew Louis version. I did want to take a
moment to show you how to just think about correcting
things like that as you go. Because for me being a digital artist
is easy enough for me to slice it down the
middle and flip it. And then generally
what I notice with my own art is I have to
transform it a little bit. I have to pull it to one
side even after I flip it. But I want to show you methods, even if you're working
traditionally, you know which means
bringing out a ruler. Right? And you'll
see artists hold up their pencil with
one eye closed. Right? There's all these
techniques for trying to gauge inaccuracies to the work. But what I want to do here
is I'm going to start with a center line, blue line. This what? Okay. And so hopefully you can
see it better and you could already start to see
how I'm skewing, but what I would do is I would
pick a side of the head, I would just take
points like this. And this is just like me
measuring off center. Right. I mean, you
could do this with an overlay or light
table underlay, really would probably
be the best bet. Or you could just make light
blue light marks in general, but another color makes
it easier to discern. But what I'm doing is
I'm just mapping off center the amount of
distance to the one side. You could pick one side and
flip it over to the other. Maybe you felt like the hair line was better
on the right side. You could flip it the other
way on portions of it. It doesn't all have to
be from left to right. I'm going to do
that just to keep it a little more
simplified for you, but notice each point that I make is basically giving
me alignment up and down. It's also given me
the width across. I can do this as
many times as I need to until it feels
a bit confusing. I feel like the
ear needs to come down a bit because this is
a pretty straight on shot. I'm actually not going to
map the ear right there. I'm going to probably redraw
that first and then map it. But I'll just estimate
it right here. I'm going to make it a
little bit above that. Should be good right
there. Again, I'm just using this as you
would use a ruler. If you were working
traditionally, you could do it point by
point piece by piece. Another way to do a way to do it when you're
doing it traditionally, is you would map
the distance over right with your
ruler and just put a small.in that you
could definitely use erasable colored pencil
or something like that. But now we've got
plenty of guides here. I need to flip this. In my instance, again, hopefully you get this is the way that you can do
it traditionally as well. I'm just flipping it instead of trying to rule every line. Now you see it's
given me a set of guides that shows me I'm pretty
far off on the one side. So let me soft erase
that and correct it. Okay. I added a couple more just to give me that perimeter
shape from the hair. So if I go up here and I also noticed that I needed to add a little bit
of height to mine, I'm going to do that as well. If I bring that all the
way out to this line, you see how much I
have to actually pull that line out from where
I was quite considerably. I probably should even made one for that mark right there. But I'll just add in the
other reference points first. Pretty far off in a
lot of these areas. And even my center line shows me now that I was a bit more
off than I wanted to be. There's the shape of the eye. Look at that major,
major lay off there. And then also, another
thing I noticed is that I needed to taper in
the jaw line a bit further. I'm also going to correct that, which is going to
throw off my mark for the previous stage. But also I have to
do is reference that to one side to the other. If I have this amount of
distance right there, left over, then if I make the mark over here, I can pay
attention to that. Almost like negative
space drawing, where I'm looking
at the blue lines that are passing over. And then I can nudge those lines over a little bit more,
a little bit less. But what I'm trying to do is get a little bit more slope
into that jaw line. Oh, look at this right here. So a big difference if
we go to this point. I think this is helpful to do because it helps me to realize how much my mind is pulling
to one side or my eye, I guess, but my, my mind is pulling from one
side to the other. Even right here, I was still
managing to skew and I've got this very discernible center line right in front of me. And it's still hard to not skew over again whenever we feel that bit of resistance and we're barreling through it, we're doing something
that's allowing us to fix it and
move through it. That's when we're learning and
growing hopefully anyways, that's where our
observations are being reinforced or reconciled or something they're
being challenged and that's a tricky thing to do. We can make the
same mistakes for a long time before
moving past it, I think. And at least with myself, I've had to battle certain
things for a long time. This is one of the symmetry
is a tough one for me. But I'm not giving up
because I absolutely love drawing symmetrically and I find it to be challenging, so I'm going to keep on going. But at least now with
techniques like this, you can start to see where
you're going off the rails. Hopefully, even this point I feel like it's
a little bit off. I'm not going to go back
and fix every line. I think that's a bit much. But certain times I feel like you need to
not just be lazy, but then at the same time
you don't want to fix every single thing because
then it looks too mechanical. Yeah, it's a balancing act, like many things
are withdrawing. It's like how much do I fix and how just do the thing and stay creative and stay moving in
a forward momentum without too much critical rethinking
of every single action. Yeah, it's a tricky one to figure out now with
the hair line here, this is the inside hair line. Then we still have to add the
dimension, the depth here. Something like that. And again, I mentioned, I'm going to
bring the ear down like this, so let me fix that. Now, again, this point here to the
divide of the hair there. It's a lots of correcting here, but I think it should
look a lot better. And then we can move on to cleaning it up a
little bit more. Okay. Now let's check without the guides,
see what we got. Yeah, I feel like that's
looking a lot better. Now, I'm going to
stop here because we're running short on
time in this lesson. But what I want to do is move
over to the next lesson. I'll finish cleaning up a
little bit as I go here, there's still some wobbly
lines and some bad marks. But I want to show you
now how to cut into the eyes and refine
this even further. With that, let's move
on to our next lesson.
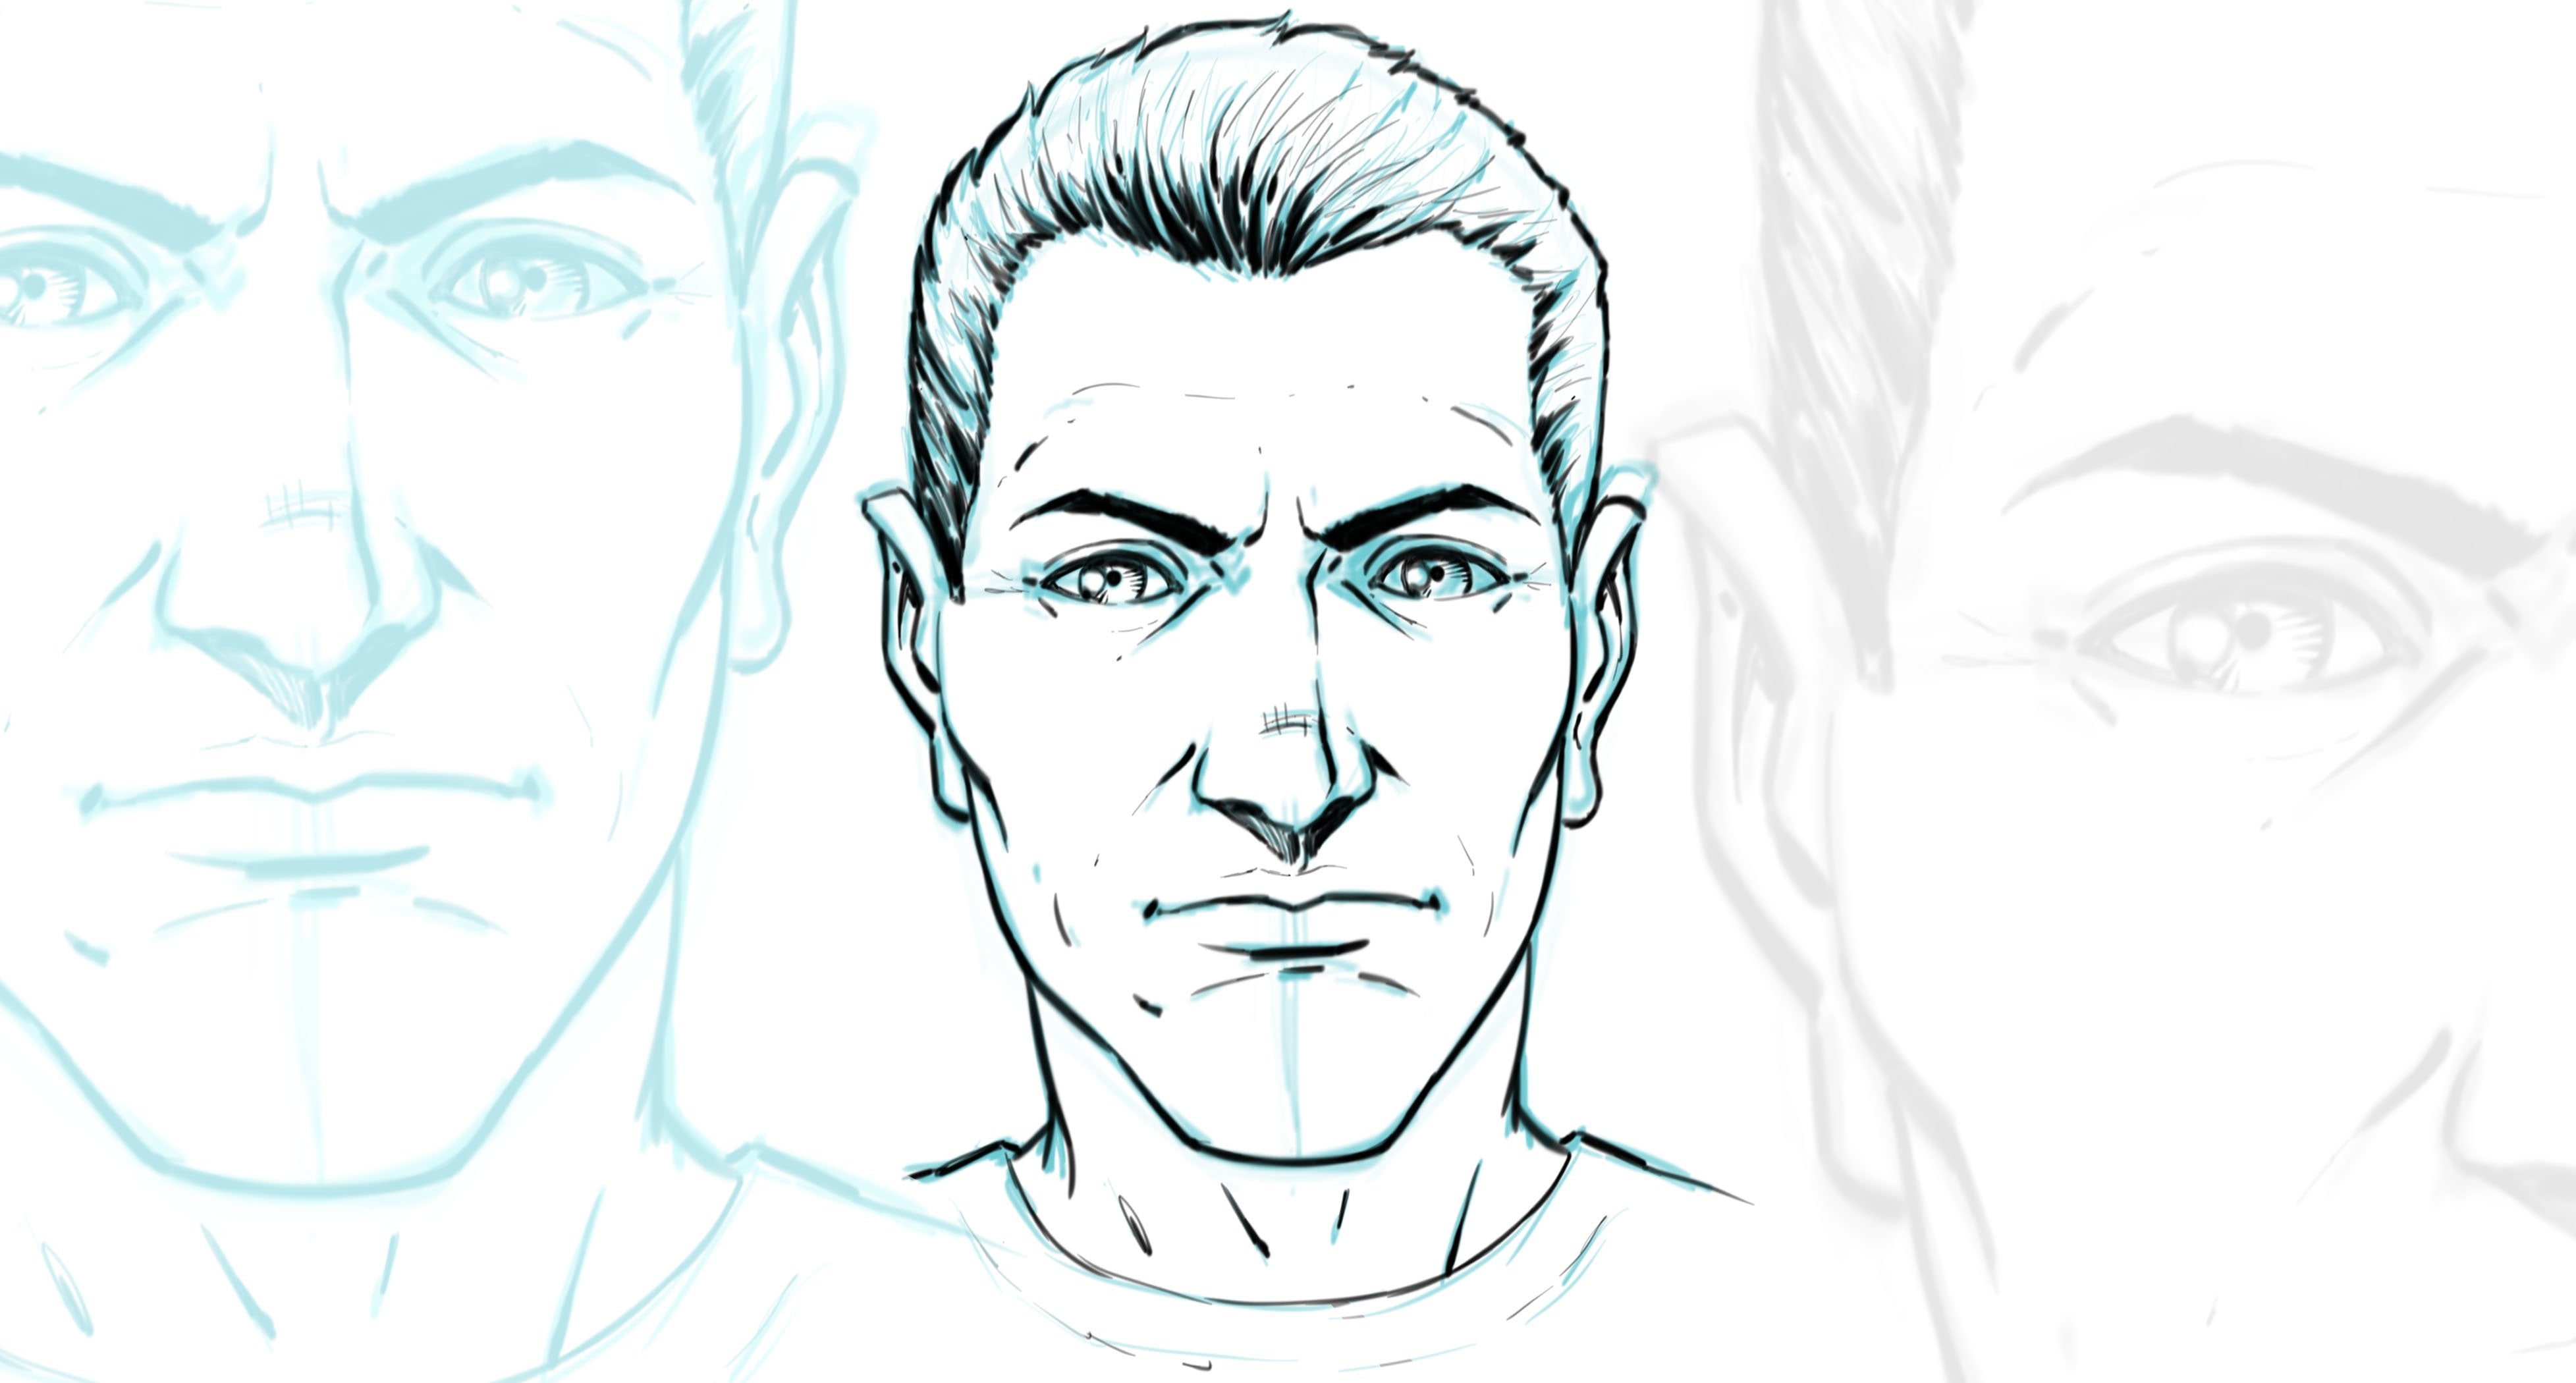
6. Refinement of the Front View: And welcome back. Now we will take this and develop the eyes. This is initially what
made me realize that this was pretty far off is that when you go
to put the eyes in, I had started drawing
them because I draw a lot of the stuff before
I start the lesson. And when you go to
draw the eyes in, they line up pretty
much the base of it, lines up pretty much
to this point here, but a little bit up from there. It doesn't sit right
on that bottom line. But it's also not probably
dead center, I guess. It feels like it's a
little bit centered here, But I usually leave a little
bit more space up top. It's hard to discern in
the Andrew Limas book because he changes this line
to something like this. And we'll do that
here in a minute. But what I want to explain
is that you always have the side of the nose to give you the inside
of the eye, right? The side of the mouth should be roughly the center of the
eye. Just so you don't. When I say the center of
the eye and I say roughly, it's because if you look
at the eye like this, you have the iris
right in the pupil. The mouth is usually right here. If you go all the way down, it's usually right about there. It's not dead center. But then I think I've
already mentioned there's so many variations
to that, right? Some people just have
really big smiles. These are guides,
they're not rules. But this will help you place
the eye right about there. But the other thing
is this, you see, I've got almost a little
too much distance to the eye face,
it's not as bad. Now, I tried to correct it
a bit as I was going here. Really could even bring
this in a little bit more. We have to remember
if we bring it in, we got to bring it
in on both sides. And I wanted that taper and that sloping down to the
jaw line like this, which I think that's a
bit better than it was. But again, when you
go to place the eye, make sure that you
have five eyes across, you're going to get
one spacing here. The spacing of the eye. Spacing between the eyes, another eye and the
other side of the face. That's 12345 across. Right again, it's
the eyes across, It's the width of the nose
and it's the placement of the mouth should
help you to get the, the general placement of the features pretty
accurately placed. But it's still pretty tricky. It's because there's
so many other proportions to the head, The slope and the scale, or I should say the slope of the head
itself will make it odd. If the head just too
widely drawn, too boxy. Any of these things, even though you're getting all
those other things right, it can still look odd. I think that's where I've seen artists even question
on the less and say, how does myself look? And I'll look at the
art and it looks pretty good overall for proportions. But then something will be
misaligned, or vice versa. Everything will have
this great alignment, but the proportions will be off. It's just a tricky thing. There's a lot going
on here and that's where we have to just keep on, keep it on, and do lots
and lots of volume. The other thing he
starts to define in his version is there's more of that angle
to the eyebrows. It's already there
with the other lines. But it's good to get
that in more distinctly that we do have this noticeable
angle to the brow line. It does pretty
much coincide with the side plane of the head. The eyebrow here is at
points, misaligned it here, but it pretty much lines up to the side
plane of the head, at least in his
illustration of it. We'll do something
like that then. For the eyes, as I mentioned. It also gets rid of this really harsh straight line,
which makes sense. It doesn't look very organic. He just brings in a
couple of lines this way. And he also gets the brow
line in which I feel like maybe I didn't
leave enough space. Try to observe this
under the top eyelid, I should say the top
eyelid right about here. I have to squeeze that in. So I think that
maybe my proportions and alignments off there bit. And then a couple angles
under the eyebrow there. He also cuts to the ears a bit. Again, I'll continue to
clean this up for you, but as I mentioned, that's not entirely the point. It's mainly getting you to see these different
shapes and to think about them and hopefully by seeing me draw
through it with you, it gives you just somebody else's
perspective on it so that you can work through it and
gain some ideas on your own. But yeah, it's again, I got to say multiple times wrote these lessons
that I really don't think it's about drawing it exactly the way these
other artists do. Because if that was the case, there wouldn't be so many
variations out there. Then look up planes
of the head on Pentraest you'll see all
sorts of variations. There's three D
sculpted variations, there's different
artistic variations. There's even people that are redrawing these particular ones. The popular ones, the Asaro
head, the Andrew Loomis head. Then they're doing
in a way where I would say some of the
decisions are better. They're different but better. I just don't like to
take that off the table. If you're more new to it, just remember to back it
down and simplify more. Even this right here
is a little bit more complex than I would typically use for any
head drawings that I do. It's still a great
study to do and hone your skills, but yeah, there's just a lot here for most of my drawings are a little more
simplified I guess, but every time I do this
I feel like I'm learning. I feel like I'm getting
a better idea of the structure of the head and allows me to feel more
confident about drawing it. Let's go ahead and stop here, and we will continue on to the next lesson. With
that, let's move on.
7. Planes of the Head Side View: And welcome back. So now I want to talk to
you about drawing the planes of the head
from the side view. So what I want to do is
show you first how to draw the side view that is similar
to the one we already did, that's similar to the
Andrew Lumis method. So the more basic
planes of the head. And then I'll show you how I
start to deviate here and do another version that has more planes, more
transitional areas. But again, I'll
start to veer off the Andrew Lumis method
and show you some of the distinctions that
I tend to gravitate towards With that,
let's jump in. What I've done
here is I've drawn a perfectly squared off box. You could count the smaller
squares in the grid and see that what I have here, 102-468-1010, if
we went five down, obviously we're at
the halfway point. The other way you can
do this is just to, as I've mentioned, criss
cross your corners. And that will give you center, this would be a good
opportunity to check it. And it falls right there
where it needs to. The center line is a really
good point to measure because it's going to give us
placement of the eyes. It's going to also help us
locate relatively the ear. What I'm going to do is
start with a circle. Put that to the back.
The back of the head and the top of the head are
going to hit that area. I guess I could have drew
it right to that spot. The nose will extend and
reach this left line. We'll start with our similar
approach where we slice off the sides,
find center there. That's our brow line. It's about right. It should
be higher than the eye. Obviously, the ear
will go back here. The bottom of this gives
us our base of the nose, then this will give us
the base of the chin. We're going to work
actually back here, because we've got to
leave room for the nose. I'm going to start with a
more primitive version. We'll get the jaw line in there, work back to the
top of the head. Remember the top one third gives us the
approximate hair line. Another thing that varies quite greatly from person to
person. Something else. You're going to always
adjust these things. I always feel the need to stop
and explain this further. And I think about this a lot myself when I'm
doing my studies, it's pretty hard to say. This is going to encapsulate all the different people
you're going to draw. One of the things that
I notice when you study from photos is you'll see a big difference in the one third,
especially right here. You see it here, you
see it everywhere. But for some reason we see it more distinctly
in the middle where the brow line to the
nose can be quite different. You get people with larger
noses, slender faces. Again, I just always feel
I need to point that out. The one third is a nice general way to get a
sense of understanding first. And then over time, like I said, you're going to
really play around with moving these things
around a bit more. I think that one reason
it's easy to stay to it, more often than not is
when you look at skulls, they typically look
quite similar. But there are variations
in there as well. But then more variations come
with the facial anatomy. Obviously, we're going to get the plane change at the
bottom of the draw line here. I think this is an important
one to pay attention to. We're going to grab
the center line. We're going to go down
to the chin here. Another important distinction. So just remember this, I'll see this referred to by
different artists higher and lower in different
renditions anywhere in here. But you're basically pulling
from that zygomatic bone. But again, I typically see a lot of variation right there. Now we've got the brow, we'll
bring it back this way. Remember that indentation
points to the eye, right? We'll bring that back down.
Back out for the nose. I'm trying to keep it
pretty angular just to get these simple ideas in place. Another good relationship to pay attention to is a
slope like this, from the nose down to the chin. Usually the top lip not always sticks out just
a little bit more, sometimes more
noticeably if they have pretty
significant underbite. And then some people
have an underbite. Did I say underbite twice?
Hopefully I didn't. If they got a more
significant overbite and then it doesn't show the lower jaw sticks out if they have an
underbite. Right. So there's the basic angles that you'd see from the profile. That bottom lip should
really be pointing up. That top lip should be
angled and pointing down like this. Pretty obvious there. Something like that. So now
we can take this and say, okay, for the ridge
of the eyebrow. If you were to think more
like the Andrew Luis method, it probably looks
something like this. Then you get the side
plane of the nose. I'm not going to
draw the front plane of the nose because
it would pretty much be hard to see
from this angle. You might get a little bit of it if I zoom even a
little bit tighter. Show you what I mean
here. You might see just a little bit
of a transition there, but from this angle
you're going to see that side plane of
the nose very well. Maybe the bottom planes
of the nose like this. I'll start getting rid of some of these construction lines. This is back to here. I remember we've got that angle here. This comes down to the
side of the mouth. Realistically, if this exactly as a Luis method would describe, you'd get that other plane
change across the base of the chin and this would come down and
connect to there. I've got it going probably
too far back on the chin. Again, I do feel like some
of this is subjective because I've seen it done
many, many different ways. Hopefully the main
thing that you get from these lessons is
the way to search, studying plane
changes on your own. And developing your own
understanding that you commit to your way of doing
things, your skill set. Now one that I think is
probably the most important and everyone agrees on this one is just this big major
plane change here. I don't know, every
different type of head study I've seen, they all pretty much
agree upon that. If you look at this
eye cavity right here, you wouldn't see
it as eyes, right? You'd see it as an
entire eye cavity. It does slope back and go across to the
cheekbone like this. When it comes down here. I would say that I probably see this area a little different. I'm just going to show you that. I would say it does
more like this. Let's just, personally, I would see the shapes a little bit more like that, a
little more chiseled, a few more angles like this, little shifts here and
there, nothing major. But again, you can start with a more basic interpretation
of it first, get comfortable with
that, and then you could slowly start to
notice things, right? That's what we do, we
do what we can do, and then we observe and then
we re calibrate in a sense, we're, it's why you can
be drawing something in a certain way for years sometimes and then all
of a sudden you're like, wait a second, I see
that differently. Now it's like your
whole paradium on a certain topic can get
shifted and all of a sudden you're drawing
it in a new way. Then then you wonder, why did I always draw
this previous way? I can't believe I didn't
see this glaring idea. It's weird, but yeah, it just shifts the way that
we perceive that given thing. It's neat though,
just like that. We've got some major planes now, Other ones that if I had to keep going with this and
develop it further, other ones I'm going
to pick apart would be like the cheekbone
coming this way. I like drawing this little
shape for the masseter. I guess that's a
bit distracting, but there is a definition there, especially with a very
chiseled jaw line. You could get in here and say, well, there's this muscle here. This starts to feel a bit more like anatomy, so I'm
going to do that. But the cheekbone, I
definitely feel like I would want to bring out some of the
plane changes here because they're pretty noticeable
on almost anybody, but really noticeable on
other people, on some people. There's also sometimes a
notable definition here, it's not so flat, it usually
comes out a little bit here. I get that in there. Then maybe I'll take this and bring it over to the side and just do
a little bit more cuts into it to show you how
I would think about it. Let me do that. I'll
say that we have this more basic version where we just go for
the broad strokes, secondary planes, basically
something like this. There's some major planes. Then the way that I would
take that a bit further, the way that I
would add to this, probably bring out this
definition in that cheek bone, you could even play around with shapes of the ears or ear. In this case, you could make the argument that there would be a pretty
defined plane change here. You'll see these
lines. Andrew Loomis has this in his book as well. Where he shows the distinction of top surface of the head, secondary surface back here, and then away from
the light down here. Stuff like that. Then for the eye cavity would really
cut into this a lot more. Let me do that real quick. The eyes at the halfway point, it doesn't have to be exact,
but around that area, I would pull out some of
the angles across this way. Maybe even some of the top
of the cheek bone, da, da, and about something
like that. Again, you could take this even further, but that's probably
enough for what I would see as the most needed. I guess one more.
Maybe this right here. I tend to draw this in my work. I'd probably get that
in there as well. And then I'd probably get rid
of this line now like this, and this now becomes
a distraction. And then I would carry
back up this way, get some of that top of
that zygomatic bone. I think I would move
this line back this way. I almost try to get this
feeling that the areas, these planes are
rotating around this, this indentation
of the eye socket. I think that's about it. But again, as I've
mentioned over and over, you can really just keep taking
this further and further. It's hard when you
get into developing these ideas to know when to
stop again. Less is more. A lot of times until
you absolutely need it, which I always tend to notice, people that utilize
this more are doing more advanced portraitures
and things like that. More advanced portrait work. Hopefully, that explains this. With that, let's
go and stop here, and head over to
our next lesson.
8. Upward Angle View: Welcome back. Now what
we'll do is go and draw a upward shot and
a downward shot of the head using a
little bit more of the primitive major planes
that we've learned. I think that again,
this is good for you to try to log in lots of volume and then slowly add more additional planes as you need them and as you
feel comfortable with them. I'm going to start
with a box like prism. It just helps me to have
another reference point. I could draw this
nice and light. You could even take
the time to draw this in a correct perspective. But I actually prefer the speed we're going be
the speed of drawing it. More simplified like this,
without all the guides. And since we're
going to be making so many changes on
the fly anyways, I feel like this, this
is a good way to go. Now keep in mind it may take you a little bit more practice to get comfortable with drawing even these box like
prisms where they feel like they're in a correct
three dimensional space. But that's a good
thing to practice. If not, you can always go
right to the next step, which is obviously the circle
and slicing off the sides. The reason why I'd like to
show you this as well is that the side slice is a direct, direct correlation to the box. Essentially, that's
what you're implying. It's just another
way to go about it. You see that, that
little plus sign there, cross section is aligning with both this line here
and this line here. I would say vertical and horizontal, but
they're diagonal. It's tilted back, but it's
parallel to the, these lines. Likewise, if we go
across the face, we can really make
the distinction in the association to
this line up here. It just gives us that idea of
perspective rather quickly. A lot of times I will do the
curve to find the one third. I think I've already mentioned
that a couple of times, but I'll just keep reiterating. But once I get to
that point where I think I've defined my
one third in this case, here to here is the
first here to here is the second, here
to here is the third. And I'm just going to extend
a little bit further. We also have to think about that idea, perspective, right? That it's going to get
a little bit wider as it comes towards the viewer, towards camera,
things like that. I think that's why
this particular way of drawing the head is so well, this method is very
beneficial to it. But drawing the head in this
angle is pretty darn hard. I've done a lot and I
still can battle it. But hopefully these techniques give you a sense of comfort and allow you to see
that there are a lot of methodical ways
to go about it. And each one of them reinforce other aspects as I'll show you. Essentially we've
got our one third. Now remember we're going to
want a nice straight line. Say we were exaggerating
this box further. Say we had our initial
prism was like this. We wanted to apply that really exaggerated perspective
to the face, because there's going
to be instances where you might want
to do that, right? Well then each time you
introduce this line, they need to feel
parallel to one another, but they also need to go
with the perspective. I think that's pretty obvious, but I just want to
point that out. This one's pretty easy. This line will go
right about here. Right about here. There's
a little bit of widening, but not a tremendous amount. There's our one
third of the face, obviously it's very
flat at this point, the ear is going to be back
here in that lower quadrant. The jaw line will come
down and then forward. Now keep in mind the more
you rotate this head back, at a certain point, instead
of drawing the jaw line up, you'll actually
draw down and back. That's a pretty extreme version, but you'll get there as
you rotate the head back. This would be way back here. It's just something
to be ready for. But it's almost like a
real difficult thing to draw because
our force of habit makes us always want to
draw the jaw line down. Because 99% of the time, that's what the characters
were drawing are oriented at. It's very rare that
you start to draw the head that far
back looking up. Unless you're doing
that scene where you're looking up at the
hero flying into the scene. Then it's going to
be a little more common where somebody gets knocked back onto the
ground, chins up. Then you're going to have more chin than face there, right? But essentially we've
got this and then we can take this center
line, bring this out. Now remember the zygomatic bone is a little more like this, but we typically bring
this out at an angle, down to the side of the chin for this overly
simplified version. We also want to start
thinking about, I call it the temporal ridge. I don't know if that's
accurate terminology, so you don't quote me on
that, but sounds about right. We get that next
little temple area. This particular area too is pretty tricky to
get right as well. I play around with this line, at this perspective, I play
around with all the lines. I move them around constantly and try to get the
best out of it. Again, these are guides. And then you're going to
need a certain amount of just creative thinking and observation and
being open minded and adjusting things
because it is one of those trickier angles. As we get the Andrew
Loomis method sunglasses, we get those in place like this, we find that temporal line,
we'll bring that back. We bring this line across. Now remember this top
line was the brow line. This bottom line is about
where we place the eyes. Now if you're looking at the
face straight on the eyes, don't sit right on this line. But now that we're
looking up at the head, they're definitely
going to sit a lot closer or directly on it. Remember, this is the nose area. There might be a little
bit too much space for the mouth area,
but I don't think so. Because what happens is, again, after we place these eyes, which I'll go ahead and do now, we get this area right
there between the eyes, the keystone shape,
Bring this way out. Now something to pay
attention to here is that the nose can get very shallow from top to bottom from an
angle like this. Be ready, study your photos. Try different variations. Here you'll be amazed. Especially the further
the head tilts back, the more shallow
the nose will get. It will start to encroach
upon the eye and the side of the cheek. We got to figure too. If they have a more extreme
angle to their nose, then that's going
to occur as well. Something to really
zero in on when you study from photos and you try this technique
from various photos, which is super
helpful technique. If not, we probably draw
too many carbon copy faces. I'm trying to chisel out some of these angles here,
right about there. Get the angle for the brow, how it's dropping back into
the eye cavity a little bit. The angle of the cheekbone Now, the more the head rotates back, the angle of the cheek bone and the nose will start to
align more as well. That's something else
to pay attention to. We have to remember that the mouth jets out
from the face as well. And also that we have to
compress past our center line, the other side of the lip, the furthest away from us has
to get compressed the bit. We're going to have
a wider version on this side that lines up to approximately the inner side
of the thrius or pupil, I should say, right
about the middle. Then this side, all
this information over here has to
be compressed R, We have to keep an eye on that. The bottom lip, I find it. It's good to hurry
up and get the, the lower portion in that lower keystone shape because since we are looking
up at the face again, we're going to see
less that bottom lip. It's almost better to focus on this plane change than
the bottom lip itself. At least that's
the way I see it. That might just be
personal preference. Same thing with the chin. Get that bottom plane change
of the chin in there. Again, hopefully we're
getting this effect. It might be a little
too extreme here, where we're getting a widening of the jaw line and chin area. And a narrowing as we go up. That coincides with our basic
prism that we started with. Now the other thing
that you start seeing here is this bottom
ridge of the neck, bottom plane of the lower jaw, bottom of the jaw, neck area. This transitional area here. This one's pretty tricky. What I will say
about this is that the neck is really a lot
of diamond like shapes, triangles and diamonds
really triangles. Pay attention to that
as you simplify it with these plane changes in V's too. You'll see the sternocleidomasteroids
as they come down. Lots of V's in the neck
muscles though we're not zone in on the actual muscular anatomy
as much right here. But something to
just keep in mind, you know, it all ties
together because there's, you're thinking
of the one thing, maybe you're drawing
the other aspect of it, but you're still kind of thinking about these
other concepts. Again, they all in, in your ability to draw this stuff even though it
doesn't directly pertain. It's just like when you
think about the skull, even though you're
drawing the anatomy, the superficial anatomy, you're thinking about
the skull as you draw, just like we thought
about the zygomatic bone, when we place that
plane up to the ear. Now with the eyes,
keep them very simple. I think a good suggestion
for eyes anytime, but definitely at an
angle like this is just to do one side then the other. Really just draw the tops
at an angle like this. You could even, well
obviously you can omit the bottom because it sits on that bottom plane change. But still it's just a good idea to simplify the eyes by just drawing either the
tops or bottoms and playing around that
concept, it really does help. That's about it. I mean,
we could get in here and we could define a lot
more plane changes, but I want to keep
this relatively simplified for you so
that you can again, log in more of these and start tilting the head in
different orientations. Let's go and stop here and
head over to our next lesson.
9. Downward Angle View: Welcome back. Now we'll do the downward view,
the same approach. It'll be a little bit
redundant, but then again, it's somewhat quite
different because all these forms and volumes just look different
from different angles. And that's where we have
to really take the time to do all sorts of variations here. And you can let me
know if you need to see more variations, but hopefully these
primary ones give you a nice variety to consider. We'll draw the basic prism. Again, put our sphere inside, slice off the sides, and find our center lines. Remember that these
lines are parallel to the vertical and horizontal
lines of the prism. And we'll now find
our one thirds. This part, to me is a
little bit subjective, as I think I've
mentioned before, because it's hard to discern if these are perfect
one third perspective. But we have to make a
decision and then we have to keep an open mind
for changes as needed. So I'd like to keep
this line straight down the middle as I did with
the Up few similar concept. Now I do want to mention
there is a way to divide up the box in perspective and
find your equal one third. I was almost taught
it and I started to, but then I thought,
you know what, it's going to make it
just far too messy. It's not in Andrew Lemmas book. I don't see any of them really pointed out, but
you can do that. It's a perspective trick. There's videos out there
that you can look up. Just look, dividing a box
into equal one third. You'll find it
pretty simple to do. But what happens is we get a lot of construction lines
all over the place. I already feel like this is a lot for what we have
in front of us now. I didn't want to
confuse you too much. Hopefully, that's not something that you would have
preferred to see. But again, I think
a certain amount of this we have to get good at gauging what we're looking at and make those distinctions. That's why I want to teach you these methods for drawing
the planes of the head. But as I've said,
and I'll say again, you really do need
to reference this against various photos
that intrigue you. If you see a really cool
perspective to a face, you can just draw
by observation, which you've probably
already been doing, I imagine if you're here. But then also take the time
to break that photo down into the prisms, these planes. You'll be amazed at what you see because you'll see all
the differences in the variation from the way the noses look at
certain angles, the proportions of them. But in a plan or method, and a angle based method. And it just gives you
another perspective on the face that we don't get when we just
draw all the curves, all the organic,
superficial anatomy. In fact, I think a lot of
times that stuff can confuse us until we take the time to
do this. It's a mixed bag. I know that I've spent most of my time drawing organically. It's not like I can say that this has revolutionized
my art yet, but what it's done is it's
really opened my eyes to things I wasn't
previously seeing. I'm excited to do a
lot more of these and that's ultimately why I was excited to share these
lessons with you. You see a lot of my lines here
are a bit off and crooked. There's other steps you
can take, obviously, to draw out these
parallel lines. And then digitally, you can copy and paste them up the face. So start with the brow line, draw a horizontal line or line going across
the brow line. Then just copy and paste
it all the way down to each of the major facial features that you
need to align to. And that's really a
better way to do it. You'll probably see a few skewed areas since
I'm not doing that. Generally, I pay the price
by drawing freehand. But again, it's
that same concept of when you are
drawing freehand, you are training a
different part of your mind to be
accountable for that. There's a time in a place, there's times I rule
every line that I can, and I take more structure. And there's a time that I try to draw more organically
and freehand, but generally, like I said, I pay the price there
most of the time. Now also I want to
point out that I drew those circles in for
the eye sockets. I was really trying to show
you how you have to think of the eyes spherically and
pushed into that eye socket. If you don't, you tend to draw the eyes really pasted on
the front of the face. That's another reason
why taking the time to learn the planes of the
head, super important. The brow area
specifically is super, super important
for these angles. Because as more novice artists, we will draw the eyes stuck
right to the front face. And we do not put them back in that recess cavity
like they need to be. That's just a little
trick that I do that I picked up from
various artists where I like to draw those circles in
and really try to push them under that brow ridge and get that feeling that
there is a cavity there, there's a pocket of depth. Then when I go to draw
the eyes, they generally Retain a little bit
of that feeling. So something that I find
to be super helpful, just really trying to
get the feeling that the nose is coming out
away from the face and angling back to the
flat portion of the face, getting in the angles
for the eyebrows. A lot of this is pretty
much just refinement. Now. I'm just really going
over what's already there. I'm not going to make a whole
lot of additional changes. I do end up changing
the height of the head. As I look at that more and more, it just started
to look too tall. But obviously proportions
vary greatly. I think that as we do
more of these studies, we might, I think
the initial goal is to get a standardized head
and get good at that. But then the other goal
should be when we do explore various proportions
and various character types, having a consistency
throughout that, a continuity in the storytelling and panel
work that we're doing. I think that's really, again, where this approach
really shines. Because the angles and the
development of the planes allow you to have a better sense and control of even proportions. Again, hopefully that helps
with your continuity of drawing different characters
from different angles, but also being aware of their
proportional differences. All right, I'm going
to go in time, lapse this part a little bit just because it's
basically redundant. And all I'm doing here is
sculpting the work and making some small
changes at this point. Which I tend to do because I'm just too darn critical at times. But that is a necessary
part of the work, right? Try to get the best out of it. We've made the big
sweeping passes and now just trying to
bring some things in. I do get the question of
like how do I know how to gauge and fix proportional issues or
neighboring anatomy. So I think this was more in
the entirety of the body, but I think it applies
to big and small. I always gauge the
size of something. When I'm in a perspective and a foreshortened perspective, I gauge the size of something by the most neighboring thing. For instance, if I'm
trying to judge the eyes, I'm looking at the
scale of the forehead, the slope of the
forehead, and that slope of that forehead gives me a
reference point for the eyes. Also the cheek bones.
The cheek bones down to the mouth and on and on. It's getting good at
spatial relationships, size relationships
between your studies. But again, that all comes from, like I've mentioned a bunch
of times in these lessons, studying from photos in life, and you really just
can't get around that. It's a lot of
paying attention to everything around you and drawing it in one
way or another, whether it be quick sketches
or more rendered versions. But obviously, like I mentioned, quick sketches is going to give you the volume
that you need, that's just part of the game. We have to do that daily. Hopefully these lessons have
been informative for you. I'd love to know what you think, as well as what else
you'd like to see. Let me know if you
have any questions, and I really appreciate
you watching the content. Good luck with the
art and bye for now.
 Robert Marzullo, Online instructor of Figure Drawing and Comic Art