Transcripts
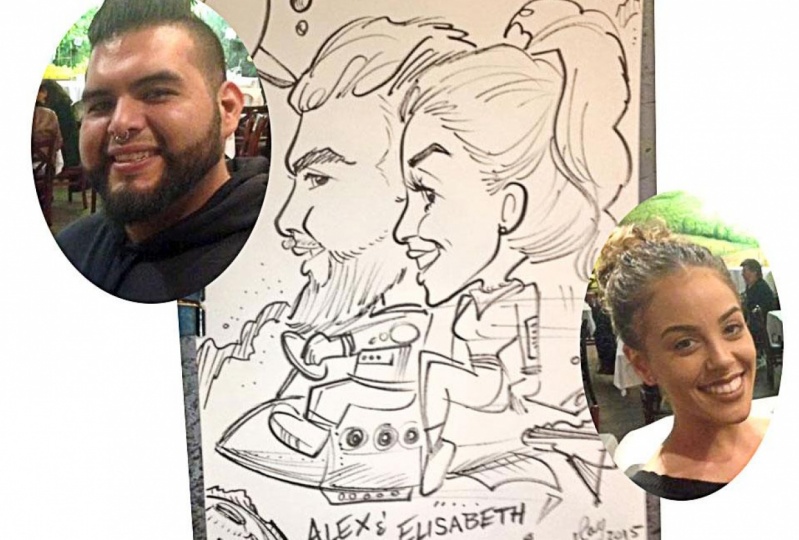
1. How to Draw Caricatures - Class Intro: Okay, we are ready to draw caricatures. In this class, we'll cover the quick sketch profile technique that I learned from my dad. Will go over getting some photo reference. I used the iPhone for some picture editing. We put together a quick lightbox out of an old picture frame so you can get started on some tracing practice. And this is how I learned initially, is tracing on a light table and learning the skeletal structure in the proportions of the face. And then we get into doing some free hand drawing and study in depth how to draw eyes, how to draw the nose in profile, draw some lips and the mouth. And of course how to simplify and draw the ear quickly. And then here we go. We're going to draw some hair. It, it's sort of like sculpting with a pencil. You learned how to simplify the shapes so you can get a good drawing fast. And then we cover a library of cartoon poses to cover any favorite sport, hobby or occupation. Next up, let's pack are gig bag, some essential tools you need to have in your caricature gig bag. I used this painter's easel for my care. Could you sketch box will set up at a party and walk through the best practices for making your guests feel comfortable and doing a quick sketch with people watching. So grab a pencil and let's get started drawn some caricatures. And there's always keep that pencil moving.
2. Preparing Photo Reference: And get our photo reference together here, here's some photos I took many years ago. People that agreed to let me take their photo for my caricature practice, you'll find lots of people will be very supportive if you just ask them for a picture for reference. Me and John juggling, check out the hair. Sometimes this is, this is the kind of photo you get from somebody, hey, draw a caricature of us. Can really get a lot of detail after that. So it's always best together. Photos, reference or good headshot. That's actually pretty good. Will started with this one, should be pretty straightforward face to talk about drawing the profile. So I'm going to use a light table. We put the photo down and then we'll go over some basic structure, what you look for when you start drawing the profile. Move ahead. Starter. For the skeleton shape is the I line. Will turn the light back on. And the head is the ball in the center of the circle. And then the chain in the front of the face down pretty much straight. And that's where you get the variations of different faces. So let's try this portal. He's got a stamp on the back. We can see through it. So we can see the structure in here. And then done we can start seeing the shapes come out. His chin, pops out a little more, little more angular. We just kind of pretend it's a skeleton for the moment to get an idea of all the proportions. During the light back on. Now you can see variation. Starts, CAN choose more straight down. His chin kinda came more curved out. He's got this this shape, it curves in and then points out. So those are some of the things you started looking for. Go to our photos. Select the first photo we want to work on. Use the iPhone app here. Tap on edit, and the upper right, we can adjust the color, brightness and contrast. I'm gonna add a little more contrast. And you just mess around with the controls to get an image you like. I could work with this and say Done, I hit the little share button, but I scroll down and then want to duplicate this. Because I want to do the flipped version where he's facing to the right, go back. And now I have the duplicate at the bottom, at the end of my list here. Tap Edit. Tap. The little thing that looks like a box is the third icon on the bottom. It's for scaling and transforming. In the upper left, this little triangle, two arrows. And you flip it that way. And now he's looking the other way for the left-handed artist. So let's select the next picture. We're going to crop this one slightly. So we click edit. Hit the little cropping icon, and you use two fingers and pinch and move. And she's crafted a little more and maybe too much, but just slightly because we still want to see her hair a little bit and the color looks fine. So I'm gonna click done, go back to this photo and do the same thing I just worked my way through the list. Now we have a collection of photos to practice from. Now we're going to search for side view, face. Sideview face there it is, an unspliced.com. And now you can use these two for caricature reference lots of faces. Some of them are lit in different ways, but this, this is actually a pretty good face. The practice from unspliced.com, you can get these for free. Cat face. Of course. Somebody would class design. That's good to practice from. When you find, when you like, we're going to use that one. Click Download, Do you want to demoed? And I say yes. And then you can copy the link that says thank you. And make sure you add that. If you're going to use it for anything, you just tell them, thanks. I'll give a shout out on our class. Details. You click on say thanks. It put you in contact with the person that took the photo. And you can put a little message. So you can go back and then keep searching. And let's look at our photos to make sure it's a snag that picture. You gotta go to your downloads or guess. The download is this little blue arrow pointing down by the menu header by your search bar. There it is. Now you could click your share icon and save the image. Now you go back to our photos. There it is. And let's go ahead and edit this for caricature, practise, tap the edit, zoom in, a little more done. Duplicate, edit, transform, flip it. You can go to and splash or if you have a I stock or Getty image account, search, profile, face or person side view. And you'll get lots of good pictures.
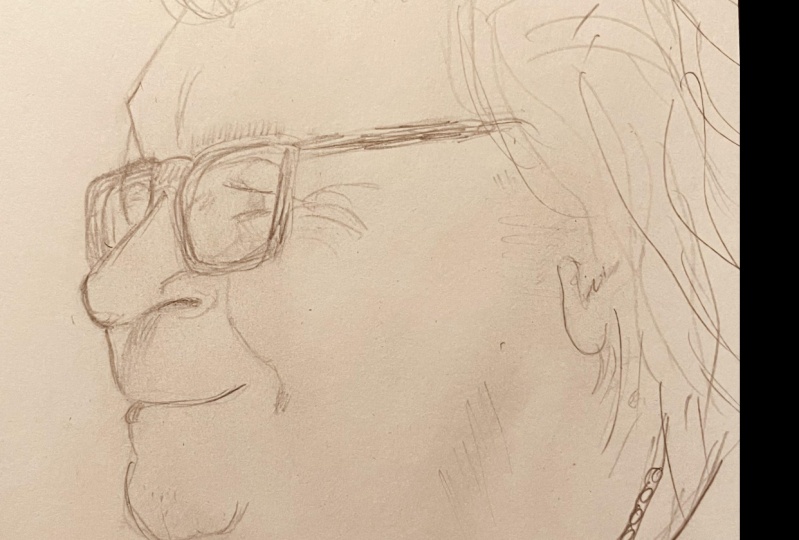
3. Light Table Tracing Practice: In this video, we're going to make a light table out of an old picture frame. So we got this at the thrift store. It's like a little advertisement or something. It's a picture frame of glass. It's glass. So be careful the edges will be sharp. And take out the old picture. Maybe I could use the matte for something someday. Okay, now we have a frame. What I'm gonna do is this, prop it up on some books. Get it a little bit higher I got books. I got a chessboard, not playing a lot of chess lately. Well, that's a little, that's a little bit, I want to go a little higher. So I got this little box. And that's pretty good. Then I just take a sheet of paper. I have some of this, you know, 11 by 17 or whatever size this is. Then I have a lamp. You might want to use a little tape Step-down with. Okay. This is actually a watercolor pencil. My turn my top light way slightly. And then I could see what I'm tracing. Yes. So there is the quick light table made from a picture frame. For the next part of the lesson, I'm going to use my regular joint board. So we'll work on my white people, which is my animation desk from every good gone bouquet animation was one of my first enemies in jobs. And then I worked at Disney for many years. So this is just a plywood table top with a big hole. Cut it for your animation. This is the piece of glass, thick glass. And then the flight is just a ring light on a light fixture. And it's hooked up to late switch Andrew here. And you put your sheet of paper to filter. And now we can do our tracing practice here. And we can frame the shot a little better for lessons. I have this paper. It's kind of like Xerox paper. I'm also going to take a little tape. Hold this down. Just one piece to hold him down. My practice sheet. We'll just cut that down to. And there we go. We can actually zoom in slightly. We'll go over some basic anatomy for this, the underlying structure of the profile. And I use the guy with a picture with a hat on to kind of show you that the hat kinda sits on top of the head. When there's a, there's a little bit of space here. Before, you know, it's not right on the skeleton that there's always a little bit of a space when there's a hat. So you draw a circle. Now, turn it to get in a hurry and try to add bunch a detailed look at the structure. Use your whole arm and draw the circle. Then the front of the face comes down here. And the chin is actually very boney So you can follow the shape of them. And the jaw line comes up under the ear. And the eye line is almost the middle of the ball. In general, it's about the middle of the ball at the top of the head. And then the IRR is about two-thirds of the way over. So we'll start at now those structures later when I want to talk about the structure of where the eye. So I lives, the eyeball is a circle with a then the iris and the pupil. So it's an eyeball that lives inside of the bony socket here. We can add a little more light so you can join. And the nose is cartilage inside another bony socket. And the bone does come under here. Little bit of a robot phase. And we'll turn off the batch by, let's talk about it. So the important thing about eyes and profile drawings is when we need to realize that the sphere is inside that socket. And then we can look at, I'm gonna flip this. So then we look at the how these shapes of the eyelid and the lower eyelid form around the I there. Let me use a pen. You see hard to see in the photo, but you can see in here it is. His iris is. Kind of looking towards the front eyelids structures are wrapping around the ball. This one's coming straight across. And this is how you get a good, good rendition of, of an eye in the profile because you imagined it inside and then all of the stuff actually wrapping around it and covering it. And then there's bro you can see the little bit of bone right in here. So the eyebrow shape comes up on top of the bone. And let's go ahead and trim. Then we can start. Let's get ink. And we'll just go ahead and trace what we see on the face. Who catches knows. Oh, this is like the order of operations. We need draw profile caricature. Let's start with a fresh sheet. So the order of operations. I start with the forehead. Now since he's wearing a hat, I'm gonna start a little bit underwear, the hat goes but I'll add the hat later. You draw the nose will shape of the nostril. And you draw the upper limit and the lower lip. So it's like upper lip teeth if they're showing and then come around and get the chin, then you work your way back. Well, he's got a little bit of a moustache. We'll add that in a bit. Cheeky. Little indication of the moustache can be just sketchy lines. And now remember how we want to try to make sure we catch the form of the ball of the eye. So some of these lines have a slight curve. Tomb is ice in there. And then the, the iris and the pupil, he can be looking forward and we always leave a little bit of a highlight in there, which helps give our drawings a little bit more life. In the eyebrow, we just sketch the shape. The outline shape. Quickly and fill it in. Just some sketchy lines is fine. He has a bit of a demo. I believe. We can indicate a Dibble who's just a little bit of a stroke rate there. Now here's where we start working in the hat. And we imagine the hat going around the back of the head and connecting over here. So you kinda keep those things in mind. You're looking, you look at it. You're also looking through it in thinking through some of these shapes. This is a little cut off but didn't get the idea. And we don't need to put all these details. You can just put a few lines to indicate that it's got a pattern on it. And then next, we finish off with the IRR and we can see actually some of the hare is going over the year and it's curly hair. So we can use our stick figures with style, scribbly sketch and get some curve with some curls in here. They're pretty tight, but some of it's puffing out over the hat, which is part of part of the character of the join. Now if we turn the backlight off, now we got a pretty good, pretty good little likeness of him just from tracing. But keeping in mind we have to simplify those lines, but that's the, that's the order of operations. Let's do one more. Now this picture I got from an splash. You may have seen this photo in the photo reference video. So let's just sketch slightly. I'm going to use the soft sketch pencil like a 4B. And we'll follow the same operation here. Let's look at her basic structure. And the same with the hair when I was talking about with a hat. You could, the Hare actually sits on top of the skull. So you never really want to draw the hair right down to the bone. The hair has some mass and some weight. I mean, some people have lots of hair, some people don't. And when you're drawing characters, sometimes they go, hey, can you add more hair? And then you say, yeah, yeah, we can't hear cost extra. Sometimes it's a good gag, depends on the person. And then lots of funny jokes from my dad. And the same thing. The chin is definitely the shape that the bone underneath is pretty much what the shape is going to be. And her jaw line is a little more angular. But the same same applies. The islands where again here is the eyeball in there somewhere about that big and her per pupil. And then her eye socket, her nose socket, and her jaws and teeth would be in here. So let's turn off the light. So it's very similar and little bony structure. And we'll do the same kind of process. That person's wearing glasses. You can still look inside and see some of these basic shapes. The thing you need to get a hold up to get a good likeness is what angle are the is the eyelid going in and what angles? The bottom going in and where do they meet? And maybe there's a little more of the brow line coming up under here. And how far is it to the top of the eyebrow from the eyelid. So all those things you try to consider and we'll get a ink pen and trace it up. And the order of operations. Now she's not wearing a hat. So we will start our drawing. We appear and look at the shape. That's one. And then we do the nose. We catch that the nostril shape. And we do the front of the lip and the top of the lip. And it doesn't have to connect. My given the bottom lip doesn't have to connect all the way. Try not to sketch, but this ink pen is sort of sketchy. Now her jaw line, we have a little bit of a line here for the smile. And her cheek. We can indicate a cheek line right in there. And now the bottom of the cheek line kinda connects to the bottom of the, I snuck back that pencil that we have it. So when I when I draw, I usually do that top eyelid first that has the eyelashes on it. Then you draw this a little bit of a wedge shape and pay attention to the angle of it. Sometimes it flows into the brow. And then you look at the bottom line. When angle is bottom, coming down here. And now you see what the top of the cheek line. Almost Connects, but in some cases you might want to connect it, but most of the time we leave it now, she has moreover Irish showing. And then draw pupil and leave a little highlight their name for a lashes. We gotta remember not to get some scrap paper. You know, when you do when you draw an I, you know, we don't wanna do lashes like that very much. Let's draw it even bigger. That's not the way they're going. Lashes are coming out, sort of growing out from underneath. So you can look at that form and just kind of indicate that there's some heaviness there. Then my bro just outline the shape slightly in filleted depends on the color. And now for glasses, this is really hard. You have to, I'm not gonna say really hard. You just have to think about your elliptical shapes and drawing. And drawing a shape from the side like you take a circle. And I can stick figures, we'll style the circle looks like a circle from this parent. And then as you turn it towards the side, it's still a circle, but now it's, this is how it looks from the side. It's the same with like eyeglasses. In from the side. It'll just be a little bit of a elliptical shape overlapping. The other one behind him in the nose is underneath. Okay, so that's the face. And then we can use broad bulbs catches to to get the hair. Her hair is like coming out from behind her face as well as over. So we're going to sculpt the hair with just a few strokes. And she also has a bit of a cheekbone line coming under here. So I'm going to indicate that two you get the the lines going back from the glasses and the glasses sit on top of her ear here. So you don't want to just randomly draw lines for the gloss is you want to like where they go and what are they connected to you. And then I'll do a little bit of an indication of her shades here. It's a little darker into their late. For your drawing a face stuff. You know, you practice with tracing just to get you familiar with the, put the facial structures and proportions. And later on we'll get into doing it. Freehand.
4. Eyes, Nose, Mouth and Ears - Part 1: We're gonna draw some eyes, noses, mouths, and some ears. Get your photo reference. I went ahead and printed the capitals could be pretty large ones. And we'll start with him. I'm just going to use a soft pencil. This is like a four B has kind of a smooth feel to it. Or pencil go Xerox paper. Instead of tracing where here the sketch and talk about this. When I look at the face, the things you think about when you're drawing on the profile, only drawn profile caricature. We start with the forehead and we just follow the contour. Sometimes we exaggerate the bump and a little bit that depends. That is knows comes down straight and it actually starts to pop out a little bit. Then we'll get to that in a minute. But this is the order of operations. Then the bottom lip. And we simplify the teeth. We never want to draw in the lines of the teeth because that's just looks a little scary. That is Cham, we will look at how the chin and this line is face down. A lot of times when we draw on the profile, we have a tendency to make the chin come back. So we're gonna keep in lightness or keep in mind. This is like straight up and down on some faces. Some places do go back. Some places go like this. This is a slight angle back. So we think about slight angle back. Comes out. Some of the spaces cut off in the photo. So that's what that's how we started it. And then we'll work our way back up with a few more details in the mouth. Get the nostril in there. You can see it's a little bit of a triangle. And this cheek line comes right up. You can see the cheek line comes right up against the end of the nostril. And now we'll zoom in on. I usually start with the line that is the eyelid. And then you, if, if the eyelid is a little bit of a feature, is not very deep set. And let's kinda forward towards the front of the nose so you want to catch a little bit of that shape and then lightly draw that back. And the bottom lid angles down. His eyelashes kind of pointing in. And then his eyebrows. Arts scribble editor. And then we sculpted my hair. I call it sculpting because you don't want to draw every single hair. You just want to get the masses of the form. The ear is generally between the bottom of the nose and the top of the eye. The times when I was learning, actually I think is chins too big. I'm going to fix that. That's all better. And here comes down. Look, let's look at this. We've got this shape here. If the limit comes down like this, little z for lightening ball-shaped man comes across. We wanna try to capture that. Because I had too much going on here. On this line. I just kinda randomly drew a line that way. There's nothing going that way. So I want to make sure it catch these angles coming back, cuz that's gonna help. That's going to help with your likeness to him. This is pointing down towards his eyebrows and then kill it off here. And I totally missed that. Little flag lightening bolt is way up here. Then the sideburns comeback kits the top of the ear. And we just indicate some of the shapes inside the ear. I'm a little bit vague on this page. To this to the back. What's close to a good start? But that's the operation we draw. I'm gonna use a black and white now to go over it again. We start with the forehead. Then we draw a nose. We're just trying to silhouette first. If you can get a good silhouette shape, your likeness is going to be very close from the beginning. So this is, this shape here is the most important thing at the beginning. Bottom lip. And the Chan, we're gonna actually do a little bit of a correction here. We come back up, do the nostril indicate a cheek line? Don't make it too thick. And here's something that I missed is the front of the island is actually angling back. So we can do that. And this is going to help with his likeness. And the eyebrows starts a little higher. And it must go to inherit with big broad strokes. I'm using this brush pen that has a flexible tip. So you can do depending on the pressure, you can be thick and lighten up as you finish the stroke. Okay, I lay the pen sideways for these, some of these broad strokes pollute more weight in the back. And now let's say his favorite sport or hobby or occupation? We were a universal studios, so he was a tour bus driver. A universal. Maybe those guys wore a tie and his arms on the edge of the window. And then you have all these happy tourist in the back. That's where stick figures we'll style comes in. To draw your old cartooning stuff in the background. Sometimes I spend more time on the cartoon part than on the face part. Because in caricatures, sometimes they really enjoy getting a personalized scene. For their caricature. We could very universal. Maybe they're at Jurassic Park, draw little dinosaur and sort of shrubs. And then what else is a universal, Just a couple of things I would maybe a robot like Transformers, don't overdo it. I have a tendency to overdo it. And then we put his name on the side. And then you saying your name and the year. And that's sort of the order of operations. So the style of caricatures that I do are quick lesson on the eye area. Remember the eye is a sphere inside the skeleton. So when I'm when we draw the caricature, we do the do the nose, mouth, teeth, lips, nostril, cheek. Then we get back up to the I, I, I'll sketch this line first. Look at the shape there. And draw the top of the island back. And literally lips for the pupil and the iris. And catch the shape of the eyebrow. Okay, so let's do it without tracing. You know, we'll try to draw exercise. The note. So forehead, nose, I'm actually cutting it short little bit. Flips. Master who? Cheeks? And then we get the top eyelid, you know, the bottom of the island where the eyelashes are. The top of the eyelid, angle it back. Bottom eyelid angles down. An ellipse for the eyelash or for the iris and pupil. And libre. And then back to eyes. Remember it with eyeballs in there. So we wanna try to catch a little bit of the form of slight curve. And then has i comes back like that and it's barely open because he's kinda laughing someone's eyes. You know, the expression you squint up in your eyes squeeze. So we want to catch a little bit. And the eyebrow. Then if I have more paper and we'll do the hat, and we'll do the rest though. Let's do one more. Let's really kid kids bases, literally August third, their chin is smaller and the nose his nose as kinda turned up. So I'll kind of do the same thing. I'm going to give myself a little guide. Where all those points are. You know, his face, everything is pretty straight down. And then it has no slopes out. So this'll shape here is what we want to really try to catch. And that'll really help with the likeness is so we can't see as forehead. We kinda know it's in there but we're going to draw the hair later so we could start with the nose. And this mole, we can exaggerate a little bit. Tip of the nose is about fair. So it turns out it's a little bit pointing. The millet curls around an angles down. A little bit of a shape right in here. So we've got a wedge or a V, sideways V here. Really see what's going on in this photo's blurry photo. But I'm gonna go ahead and put some indicate some teeth here. Or if you smile a little bit. And his chin is smaller than the adults. And that's something that helps with when you draw kids. People look in adorable. So you have small, small chance and their noses are kind of turned up. And let cheek seal the cheek is right up against the law stroller. News going to do with Dembo. And now his eyes angles back quite a bit. And then the eyelid. This little shape we're going to indicate. We can't really see as eyebrow. Sometimes you want to, you know, you can kind of look. Maybe I think there is something right in there. So we add value for then. This were part of his caricature and his character comes in as hair like right down over reside. And now let's supposed to be an ER lesson two, omega 0. I get to the rest of this unit. We have this kind of shape here coming back. That really helps getting your location when you look at these, at these masses and these big areas, how does all connected to the rest? And this goes overs ear of ETL and and kids ears are generally not as big, but especially the ear lobes on older adults, the earlobes starts to get bigger in this kind of like thick here and then thin down here. So thick and then T and then we just draw a for the inside of the air. Because indicate the little lobe part here. Go on, go on over. And we don't have to shade it in. And this ink joint has small chain. So it comes down. And we'll talk about later when we draw a bond is how to connect the neck. Because all the big handle bodies, we tape with the fit onto a little cartoon body. And he's got this little line of hair coming in here. So this is a triangle shape. And that's is it, what's his favorite sport, her hobby? Let's show his little body that works for just about everything. That's he's a baseball player. So we we taper the neck down. And we're starting with the arms, was two lines going down. A little hand-shaped, draw another one behind to give it a bit of dimension. Adds some sleeves. And we'll color about tell me top of the shirt, legs, and feet. Now he's he's going to be a baseball player. So we'll put you also like baseballs arcs, little stripe. The baseball number, and a BAT. Here comes the ball. Stick figures and style. Because name.
5. Eyes, Nose, Mouth and Ears - Part 2: Go to the iss over time. Hers is hard to see and let's zoom in but we can still catch the shape. So eyelid down. See her. She got heavy eyelids. So we get the top and we imagine it still on the ball. Goes I eyelid down, tops, bottom lash or bottom lid ellipse for the for the iris. And then I'll also notice that the iris will go up inside under the lids, which helps give a little more believability in character than the eyelashes are growing out from under. Maybe exaggerate the eyelash little bit on the more glamorous models here. Now we draw the nose to, nose is straight here. And then it starts to curve out a little bit flat on the front and little bit flower on the bottom. You really look at the shapes. And you can even exaggerate their cause. But the profile, and that's the silhouette is the thing we want to capture. And nose and mouth are connected. You come down off the bottom of the nose right here. And the curves around. She's got this this shape here, curved in the front and tapered to the back. So we establish that first. And this curls up was a little bit of a of a grin. Then we sketch the top shape of the lip and the bottom lip, chin. Then we work our way back up to the nostril. And it's it's elliptical shapes. Maybe more of a teardrop shape on its side. And we'll backwards half circle. And the nostril and her cheek line right here is not that apparent, but sometimes you still want to indicate it. And you see it comes here and then she has this line here for that smile, we will exaggerate that a little bit. Put a little bit of weight under the lip. Half circle on top, little flat here. Are it's down and then curved on the bottom. Ears or all kinds of shapes. But mostly like this. You know, you're you're sizes may vary. But at least get the basic shape. The caricature. We usually just try to catch this and this. Like how thick is that looks like compared to compared to this kid's ear. It's kinda wide up through here and then tapers down. So his ears kind of sticking out a little bit, hit his ears more back and flat so this doesn't look as thick. So we try to avoid parallel because it does taper down. So it's a little thick here. And that works pretty good. You can, if you want to. Sometimes we add that little indication in here. So really just lots of I'm sure there's lots of stuff on the internet to how to draw any ear. That's how we draw near. His is a little little bigger at the top than at the bottom. So more more of a question mark shape almost. And then this is straight down. And then we have this little connection here. So really when it, when I'm drawing caricatures, you pay attention to the, the overall shape. But then I'll just when I draw an arrow, okay, I got that basic shape. And then I'll just just like that. And the overall big picture works. It's a face, he's got eyes, nose, mouth, ear. And then a cartoon style.
6. Hair We Go - Hair drawing tips: We're going to talk about drawing hair, sculpting hair to simplify it for your quick sketch caricature. If printed out some of these images from unspliced.com. Plus a couple of my old when I was learning and practicing. So let's just jump right in it. So in the last in the eyes and nose, and mouth and ears video, we've got our order of operation, forehead knowns. So here we're using him as an example because it got lots of hair. You just want to catch that outline and you can see as lip in there and the bottom. And if you look closely you can see his chin. But then we don't have to draw every little hair, just a little scribbles, stick figures was styled to catch some of that form and mass. And even with his moustache, we're just catching the big bulkiness of it. Not really thinking about each individual hair. And we work our way back up with the nostril cheek line. Some somewhat series expression for caricatures. It's always if we can get the people to smile. But, you know, we're just using photo reference. And then his brow down. Okay, so now for the hair, we just want to look at the big clumps of shapes. And we see that it kind of comes down in front of is above his eyebrow. Loopy currently shapes. And we see his ear in here. And remember from our ear, listen, you just catch a few the internal shapes. The hair is coming out and covering it so you could do that. And it's it's currently well, we could totally simplify like like some of this stuff. You might want to throw it because it's part of his character e-mail. You can emphasize that some of those curls, but you don't need to spend lot of time filling in the rest. Just sort of tell the story of curly hair. Let's talk about the kid face just for a moment. We notice that it's very round. And the eyes, even though he's looking down the Isar, somewhat large compared to the rest of the face. The nose is smaller, the mouth is smaller, the chin is smaller. So those are things to look out for when we're drawing kids. And similar to the last guy that he's got curly hair. And there's a couple of things that'll be fun for the caricature. And his character in his personality is little ringlets there that are coming around, forehead, little nose. And I'm going to kind of emphasize the turnip ness of it lit the street down and he's got a little bit of a grin. Small lip, and smaller chin. But his cheeks are very kid cheeks are a little more puffy and, and adorable. And then the eyes are big and you can emphasize that he's kinda redone and looking down those heavier your lashes. So now let's get after these little ringlets. And you could just, you don't have to draw it exact, but this kind of curly Q shape was, is fine right in here. And you see how his ears flat and comes around. So now we have a little variation on your sheets from our last lesson. It's flat, comes down, but don't draw it too big. He's just a kid. And the hair covers up a bit. Now some of this face is cut off so we have to improvise and we know it's curly. So continue the curliness on the outline and skull. And keep in mind that direction it's common from we could add a few more lines to show the curliness. And his cheeks are, are a little more rounded. So that's the younger face. Here's another great photo for an Splash.com. And sometimes you get kids that can't sit still. But you can capture that small knows as small chin. And now he's got a sum expression in his eyes. So forehead, nose. And let's kits that bottom lip painting. We can see the there's other cheek slightly you over here. And you can shade that in. He's got his mouth open, small chin, cheek. And now here's where we can have a little fun with his squinting. I just look at that kind of sideways V-shape in his eyebrows is light colored. So the way I do that is I just draw like a little outline. I don't fill it in. But now we can sort of see as expression. And for the hair, we just look at these clumps. And that'll help us. We started out with the banks and the sideburns and that helps us find the IRR placement. A bill swirl. Maybe I gave it too much there. So that's where I get all carried away. I'm going to unlock that back. So often, his forehead, his hair isn't really that coming out that four it's more like that. There we go. Now he's got shorter hair, a little bit of a clump. This curves back. And then the ear is, you've got a few little wings come on up here. And then we just do big sculpt the shapes for the back and try not to be. Here is a Here's a tip, a beginner's tip, or what they say is the rookie mistake, is when you draw on the back of the head, sometimes we get too small. So keep in mind our skeleton lesson and get that back of the head to really fill out. Because kids have big heads, the small faces. So his head's kinda baeg is faces a little small. And there's little cheek. Maybe go. Some stylized hair, longer and more flowing. And more. Her forehead is showing. Forehead. Knows. She's kind of pursuing her lips a little bit. So we want to catch that. I see kits that lot. Capture. Let's capture those shapes for a little bit of a Percy lit. And her chin kind of points out a little more. So that's Sutton. Now, we're starting to do more caricature and exaggerate a bit more. And her cheek comes down like that. She's got a big eyes. Now, notice how her eye is kinda set back from her nose and you want to think about where the cheek lines up. Even though this is a hair lesson, we just cover the whole thing and you can get an idea of our approach to quick sketch profile. She's actually turned a little bit so you can indicate those other eyelashes that are sticking out on the other side. And now here's where we I'm going to go ahead and draw this little. Imagine her skull under the hair. There's some mass. There's mass around that. So we want to make sure we, even if you want to sketch lightly, that helps you get your proportions work in. So this part of the hair comes around from the back. And this helps with the likeness to Because you see her hair is coming really close to her. I am sort of has these S curves coming down. So we want to catch some of those in a little S curves. But not every single hair. Same thing. You just wanna get clumps to tell the story and we can even exaggerate how puffy the hair is. Now when I was drawing hair was it was the eighties. So there was lots of goofy hair when I started drawing caricatures. So here's changed. That's why I say Here we go. Here we go again. So S curves. And that helps with kitchen so that glamour capturing. Well, this example will cover how we can simplify hair wraps and fabric or head bands, that kinda thing. And she has a really nice profile, will have lots of good shapes. Let's try to catch, capture those shapes. Forehead, nose, kinda points up a little more. And now remember what I was talking about. But before her, the angle of everything is going down this way. So we want to make sure we keep that in mind and in line. More fuller lips. And the chain is kinda rounded. Work your way back up for a nostril. And deuces emphasized her light on the mouth. And then her eyes. Last comes in. There's this little shape here on the leading into the top of the eyelid. This will help. And she's someone looking up. And she has prominent cheekbone here 2a, we could indicate that with a slight little brushy line. And now the head that the fabric on her head wrap. You imagine it on the surface of her head. So it sort of wraps around and there's a little bit of a thickness there. So you just see these shapes? We can't miss that cooling. Neither. We can see the bottom of her ear. And just draw this upside-down teardrop indicator. Indicate a few little lines. And now let's look at the structure of how it's wrapped. We have sort of a bandana coming across here. This is coming down in this, in this direction. I'm going to draw little arrows That's coming down in this direction. This is going in that direction. And this little shape is up in this direction where we're not even going to attempt all the detail that's in the rap. But we could maybe get this black line kind of triangle in here and a couple of the shapes just to indicate that there is pattern on it. So first I'll get this one wrap like this one. And this is two, and then this is three. So I'll get this, this big shape and it comes way up. If you notice like this is as big as her face. So we want to keep that in mind. I might be going out of the frame a little bit. And then here's that little bit of a pattern that's in there. And just find the pattern and simplify it. They're not going to be your your customer. Your subject is not going to go, hey, you messed up the pattern on my fabric. I'm never had anybody worried about that. I think that if you make an effort to put a little bit of a pattern on it, you know, in here is like little triangle. And then that just tells the story of, of what they're wearing. Here's another example of solving a. How am I going to draw this hair question? We'll just draw her will start from the top forehead before it comes in and your nose comes down. And you can see here other eye because their eyes are very forward. And also it's straight up or straight down. So keep that in mind. I'm going to give her a little more expressions are very serious looking. Sometimes you can just force the not forced but turn the mouth up a little bit. Or more pleasant expression. That helps when they'd drawn caricatures of people. Their eyes are close to the front, angled down. And then we didn't even catch some of the other one that's put some eyelashes N. So now let's look at, it's the same approach. You imagine how much bigger head is and hot in here. And then we have like these football, kinda of like football or squished footballs shapes. The way I would approach it. Like find some of those. And this comes over her ear. You can capture the bottom of the ear. And just sculpt in the form. And we have another little half circle shape and there's kind of a flattened half circle. And now these, you know, sometimes I do like a like a little chain, like this little DNA chain. And then you can just create little end and maybe put some of the little scratches on there to hold it together. Richard. We were to Universal Studios. He was a merchandising manager. We have lotsa forehead here. Here's one of those situations where they, they might ask for more hair. So you don't want to. We could kind of caricature him a little more and get that expression is noses a little more pointy. And we could make the, make the mouth a little bigger. As he's smiling. Really emphasize that he's kinda laughing. I may have said something like, Don't be nervous, everyone's looking like that in the cheek. Now we can scribbly and so, so here, so for the beard it's the same thing. We just want to capture these masses of, of hair. And this is a, you know, that's an S shape. To want to try to capture that too. Because that's the way he sculpted his trimmed his, his beard, and now his eyes are very almost close. So we can even just go something like that, just two little scribbles and that captures his expression, maybe catch the bottom that eyelid and his eyebrows are, are up and we can emphasize that. And then here's our, our glasses. These were somewhat square rimmed. So let's just rectangle from the side. And then these will help guide us to wear. The ear is located. Okay, now, you can see where's his hair is bought in line with this. It's here in here. And just sculpt in some of those bigger shapes. But I get very close to the edge of the paper. And don't make the backlinks had to small. And here's where. Some of the caricature technique comes in. We made his mouth a little bigger and we suppressed his eyes a little more, but it's still kind of looks like him. And that's the point. Just big masses or the hair. And now we'll, we'll approach. Draw hat. His eyes are a little closed but there's someone opened. He just has that sun. This squint t. I's from being in the sun. Kind of look. You know, what we've got is Texas Ranger mustache. His chin is actually a little smaller. So we could see the sum of these shapes like that. Blue wave little ocean shapes. And the mustache you could just draw as a big shape was a little bit of lines to indicate the edges of the edges of the hair. And his eyebrows who's kind of pointed down. Maybe even emphasize that for a little more serious expression. There's mosquitoes comeback. Keep in mind this big trapezoidal shape right in there. And that way I'd make sure I leave enough space for as far as face and not crowd the front. Too much. Agreement here back that year is a little bit under the hat. So Here's where we imagine. Imagine his head inside the hat. I move this over, over. The bottom of the hat, comes up, down. Then the pro, the Braille just loops around like a little scoop. I don't like all shareable almost. So that's what I usually do is established this where this brim is. And then you can get the top of that. And we're going to exaggerate data bit because this kind of a big old ten gallon hat. But make sure you get it big enough to go on the back of his head. And it's got this little indentation we could indicate with a little bit of shading underneath. There's a shadow back here. You could actually maybe shade that in. And there's hairs a little scruffy back here. And this is a bit of a shadow under here. So that's kind of a, a quick look at drawing hair and hats and wraps in or quick sketch profiles.
7. Cartoon Figures - Standing Poses: We're gonna draw some cartoon bodies, will show you a few poses that can be reused for many different situations. And when I say situations, that's what we call the little scene that somebody requests to having their caricature. When you say, hey, what's your favorite sport or hobby? Their head is big, of course, like this. At Mike, I play baseball to two arms sticking out. Little little hand. Sleeve, color. Tell me bottom-up. Sure. Legs and feet. And we always want to be sure to sort of be balanced to like have the head centered over the body. So now I'm a baseball player. So this, this basic shape of a, let's just say a man standing or a boy standing. Now, we can put a baseball bat. Rehab. Maybe you couple stripes were some baseball socks and a number and some grass. And there it is. So now what, what do you like to do? This? In this case, you put shorts. You draw a stick with a circle and cross hatching. There you can put on line coupled lines in the back with more crosshatching to indicate the net. Let me add the ball to come in and same here. Whoops, same here on, on the baseball guy, have a ball covered in. What do you like to do? Oh, I like to cook. And let's say it was the lady who says as so and put a little bit of a figure. It can be, it could be a dress. So it's, I see it in same hands. And then we'll put a little pot with the lid. So do dancing off with some smoke coming out. Little box for a stove, some circles for stove dials. And some flame. Basically the same body. And what do you like to do? I'd like to draw or I'm a painter. And sometimes I'll put the legs standing out for a little bit of like motion. And I'll put a paintbrush and a little square canvas. Whatever painting I'm going to say it's a flower. And sometimes I put a little face on the flower. And what do you like to do? Real estate inspector. You go okay. Let's see. And I'll maybe their awareness wherein a jacket is that same old standing pose. And you give them a clipboard. Maybe indicate a little bit of a head with a pencil. And then you put a little house in the background. I've just gotta make stuff up and build this page with the same body. Well, what do you like to do? Here's a kid say allot, play video games. So, and also just imagine the head is like big like this video games. Ok. So here's, Sometimes I'll, I'll change the position of the hands zone. They could be holding something. Put the other arm here. And I'll draw like a little controller sheet with a couple of circles on it. Same figure. Kinda like the painter and put a little screen like at the screen. And then I'll have like stuff shoot ego the screen. And sparks flight and plays video games. What do you like to do? Oh, I want to be a veterinarian. Says the little girl who wants to be a veterinarian. And you say, oh sounds cool. Little, little hands, maybe a longer sleeve. This time we're going to put like a lab coat. A little variation on the length shapes, more standing street. And then we put a little a little countertop is like the inspection table. And then stick figures, list-style kind of type cartoon of a puppy. And then you can actually have this one. Draw part of the face, please, where we can add props. You know, we could put the stethoscope and the dog's tail wagging. We'll put it all together in the next round. Okay, I got five more to go. Five more situations. I like to do that. Your favorite sport hobby? What's my favorite sport or hobby? I like cats. Okay. There's my variation. I'll kick the foot up and get have little table. And just draw a little kitty face. Maybe even another one down here. And where do you like to do? Oh, I'm a mechanic. You could have million forward just slightly more, but it's still the same pose. And now we can draw like a little indication of a front of a car. Here's a wheel is the headlight. You could draw the range in their hand. And here's another gag that I, I liked. I'm gonna, I'm gonna give away a couple of my caricature secrets. So I'm a mechanic. I'll go, oh, that's cool. But I'm not going to draw the bottom of the feet yet. This is where it's kind of like saving the punchline for later. Put a range in their hand. Like, oh cool. Like you put a ranch in his hand. And now this is where our stick figures mystyle is gonna come in handy. I'm gonna draw a loop. Now he's inside the car. We can get a shade that in. And then maybe even somebody in here. You know, question mark, what if you want to get a normal chains and he was standing inside of your car like that. Another scaling pose. Oh, I'd like to work in the yard. I'd like to grow flowers. Okay. Stela was very good at Gould flowers. My wife. She drew these gigantic Chris chrysanthemum. Chrysanthemum. Chris, you guys can help me out. Just holding a little pot with some flowers in it. Maybe more of a guardsmen to background. And I always like do a little Alice in Wonderland flowers. One more. I'm an attorney. I practice law. Well, there's gotta do a lot of reading, you know, and if you know something about the thing that they ask about, you know, we share stories but you usually let them do, do the talking, even though you're trying to draw them. You can capture their likeness while they're telling you a story. And I'll put a little suit jacket on carrying some papers. I usually have the papers falling out. And then here's my here's my lawyer gag. Put the judge over here, let me sleep in. And there we go. There's 36912 little scenes you can do with the with the same body. Here's a couple more that I left out before we move on to a sitting pose. So the same standing pose, a what do you like to do? Like to go surfing, arms forward. Don't put it in a sleeves for a guy is political belly button shorts. I don't even draw the phi. I just draw like a little shape for the surfboard. Some squigglies for the wave. It is. Maybe you can even draw a little CR line with some palm trees. For the, for the ladies. Give me the same pose. Is put a little top. Was a little more of a figure. Tapered legs. And that's it. You know, they might say skateboard. So you leave the wave out, didn't you put wheels on it?
8. Cartoon Figures - Sitting poses: So let's talk about sitting poses. People do stuff when they're sitting down. You know, what do you like to do or what's your favorite sport or a hobby? You know, I'm a graphic designer. I work on computer all day. All right. And then you know, you chit chat about what programs are you using in that kinda thing. So now you're sitting there all Chair. You can vary variations of chair's office chair. You draw a desk. For a laptop, you can just Dual shape like that. Put some buttons and they're working on a computer. So more sitting pauses, nine more sitting closes. And what do you like to do? I like to play cards. Oh, yeah. What do you plan? I like poker. Alternate between ladies and guys on the figure. You know, we just add more more of a more of a shapely figure. Maybe you more street up kinda chair. I leave a little bit of a space in here for some of the scene, but we can draw like a tablecloth. And you put some cards. You don't have to draw the little shapes unless you have a lot of space for detail. And then I do like a little, littles, little spring shaped that indicates a stack of chips. And they're doing really well. Miss always goes over pretty good. Like maybe draw some money, signs, a play cards. Since we're on the subject, what do you like to do? Oh, I like slot machines. You can do sitting down. In this way. This one I might change up the hand position a little bit to have one hand up for pulling the handle. Even though nowadays, when you play slots, you just pushed a little buttons on the controller. Some slots still have handles, and that's it's more of a stool. So you draw I draw this like little trap the soil sheep. And then you draw the handle coming up, wrap your fingers around it. And I draw three sevens. Because if you want to hit that on some machines and the money's all coming out. It doesn't take long. Just a little variation, you know, add the other hand that doing something. Hey, what do you like to do? I want to be a scientist. You don't want to be when you grow up, sometimes you ask that with the kids. And I'm going to be a scientist. And the same thing, maybe the variation that has him or her. And this is where you add like the lab coat. It could be on a stool is well, maybe they're holding a beaker of some kind. Sit down at a, at a counter with paper and pen. And a beaker may be in the other side to balance it out in the background, you have more like scientific gear with dials. That's me get null and carried away, but it's a sitting pose. A couple of props to tell the scientists story. One of my favorites, and it doesn't take long to draw, is what he liked to do. Oh, I like reading. Oh, and you go, yeah, what do you read in these days? And they might give you the title of what they're, what they're reading. So I'll put a big book. You just draw like a little V-shape to indicate the pages. Leave some space in there. And then this is my gag. I draw them sitting on top of a stack of giant books. These trade secrets. Or maybe like a little stack of books in the background. What do you read these days? You know, Kung Fu Panda, kung-fu ninja. That's what I've been reading a lot of lately. Actually be reading some samurai history as well. And there's a reading pose. What are you, what do you like to do? What do you famous for? It's one of my questions too. Helps prompt the response. I like, I'm a writer. I like to write. And that's another sitting pose. And I keep this one simple to put a little table. And I'll make it like a, like a scroll that they're writing on and give them a big quill pen and their writing. And what do you do? A few more. Just have my wrote and galleries bands playing piano. And this one you can get like it's a concert. So you put, instead of John the legs, he could draw like a god for the ladies. Little piano bench. For piano. Here's a couple of ways, but this is probably the easiest way. I can taper lines down. Maybe a couple of lines from the petals. And then just a few little, little lines to indicate the piano keyboard and some music notes. And I'll, I'll throw it a stage on stage. And then the audience is applauding. Stick figures with style, hands, with hearts. Hey, what do you like to do? Well, actually he plays piano and I play guitar. So I'm a guitar player, so suddenly do sitting down. Now this is where the arm pose has a variation because you want to have them holding something. So here's the head. So Guitar oppose. So I usually draw the pick and hand first. And then the other hand is like that didn't yet. You could add the stick from the neck. You know where the tuning keys are. Then you draw a little guitar sheep. So this is the big variation of that same pose. You can still have them kinda turned and sitting like this, like on a stool. And a couple of little, little hash marks for motion. It's a music. You can even throw it a microphone, since the circle in a steak with some lines on it. So that's all variation of readjusting your inner figure to have to be holding something. I'm going with hobbies that are around our house and things that we do. My wife likes to so she makes, she makes lots of stuff selling. So we can go back to the traditional pose of sitting just a plain old chair. And, and you can get like I just do a little wavy line to indicate some kind of fabric. I'm not exactly sure what a slug machine looks like, but I know that has like spools of thread or something like that. And now we'll go over some practice ideas to sort of fill your head with props and ideas of, you know, it'll hopefully, if somebody asked you to draw something, you might have an idea of how to do it. And nowadays, you know, with the phone, you just look it up on your phone and find some reference part real fast. I do them a lot. In fact, let's do that now. Okay, so does Google sewing machine in a get on images? And now we've got lots of pictures of sewing machine for reference. So really I wasn't, I wasn't too far off with this little box shape that came down with a stick on the end. But if somebody was real, real particular like I want one of those old-fashioned Singer machines. Then you can look that up. I use a lot when kids are requesting cartoon characters as well. Okay, let's get back. And what do you like to do? Like, I like to draw caricatures. What a waste of time that is. I might say, for my dad used to say that when they come to this BU I'd like you to caricature of what do you like to do or like to draw. And he goes, boy would always the time. But he can get away with being wise crack e like that. So I'd like to draw, maybe have the other hand. Holding a pen. And you, this is a sitting down poems. Use easel. And then I just, I just make the gag like a stick figure. A very GO someone who likes to draw. And there we go. We have nine sitting poses in a couple of leftover standing poses. And those are big heads, a little bodies. I'll do a sheet of action poses like running at other sports.
9. Cartoon Figures - Action Poses: Like ruining other sports ideas. Now for some action poses. So we get sports as requested. Lots of kids like to play soccer. So for US Soccer and other rending ever running pose. So we'll do a lot of our running poses at the earthworms, opposing arms. And I haven't leaning forward slightly. We'll go over how to do a few samples. The whole process, draw the face, and then add the body. But I'm just giving you some body samples. And now soccer, we wrap some those long soccer socks. Maybe you fill in the shorts for black shorts. And then draw little ball. Soccer ball is, you know, a few, a few big dots around the edges and then a dot in the center. And that can tell the story of soccer ball and put some grass, maybe some speed lines. There are lots of very fast. And what else do we have here? A basketball, that's a that's a popular request. Basketball. And I'll do one hand reaching up because they're going to be slam dunking. And the other hand is keeping their balance. And then we put the tank top basketball jersey shirts and they're jumping. Put the ball here. Basketball is generally like that. With the lines. You can do a little page of balls. Who's, you know, look up sports balls online and then you'll get all kinds of reference to practise drawing balls. And now he's jumping way up there, slammed OK. We'll do another version of the tennis player with a more of an action pose. So this is similar, similar to this pose. Babies like somebody like Serena. And then a steak with a circle. And from a cross hatching for the racquet. And the net is in the background. And then the ball coming in. You can have the ball bouncing off. All kinds of variations. Football, football you, you pretend that we did the head. So we want to add some roundness for shoulder pads. And we have the front hand running and we have this back on, hold the football or do their arm. I sometimes draw stripes from the shoulder pads. Put a number, you know, whatever the number is. And the reading part was kind of like the same legs as the soccer guy. Maybe some stripes for the uniform. Sometimes they tell you what team, Iran, you know. And I write that on there for me. It would be the ramps are suppose there really fast. I like to ski. No, actually that standing pose we did earlier can work for skiing. But you just lean forward a little more. You know, put bigger boots for ski boots. Put the ski poles and put skis. And going down the mountain. Sometimes I put little chunks of snow covered up. Formal action. What do you do? I'm a runner to run marathons. So we use that same, same, same pose. This, although this is a girl who likes to run. So you want to maybe get a little more of a figure shape. And then here we had a little sign that says Marathon. And I got a little crowded, but the sign gag works a lot like running towards something. And this person likes to play with dogs. What do you like to do? I play with my dog. And here's what am I. My favorite dog tags starts out like most of the other poses. But I draw them like they're flying. Draw little happy dog. And if, if there's specific about their breed, your phone out and maybe get some reference. But usually you can just draw, you know, sort of a, usually you can just draw a cartoon dog. And 90% of the time they'll go a, it looks like fluffy or whoever. You know, the dogs taking them for a walk. That's a pretty fun one. And I'll draw me working out. Oh, you know, like what we lifting or yeah, like weightlifting. We do this a little bit of the same as the running pose. We put a tank top. And then I'll draw the Weitz inherently dumbbells. There's so many variations for weightlifting With this is usually one of the fastest ways to do it in the caricature little motion action. And draw me doing karate. Kinda like the football. But I'll make a fist. And I'll draw like the little loose, loosely fitting karate Iggy. You know, your karate outfit moves fist, lets loose fitting and then we draw the loop black belt. Because black is the only color we have. So sorry, you're going to have to have a black belt. Then I draw the legs sticking out the other way, coming back as a cartoon tos. And then I'll put like the Brook of board or something. And I'll keep it fun. And there's a little karate action. What do you oh, I like to ride bikes. And guess what? Sitting pose can work for bikes. You know, maybe you put the bike shorts on their bike. There's several ways to kinda work it out. A couple, this worked for me most of the time. I'll draw the wheels first, just just quick circles for the wheels and then connect handlebars. And then make the frame and put a c. And then put those little sprocket for the petals. And then you could use a dotted line to indicate the chain. Maybe strengthen up those wheels a little more. And sometimes I'll put a basket and put their little, put the puppy in the back.
10. Pack Your Gig Bag: In this video, it's what you should have in your caricature gig bag. Of course, you want to have pens is like a Tambo marker. Sharpie, I use Sharpie sometimes the Copic brush pen, pencils. But this is like the 4B pencil we'd been using. Ink pen because you never know if you have to write down phone numbers and such. Erasers. Kneaded eraser in regular blocking research. Have your business cards. When people say, Hey, do you work parties or whatever, I pack a bungee cord or several links, a bungee chords. Of course, plenty of paper. I use this card stock. I get the current stock at the office supply store up by 11, either 90 pound index or 110 pound index paper. That's in my gig bag. Scissors. Some tools. My easel has a Philip screwdriver. Screws, some clamps, clothes pins to hold paper down. Flashlight. Make sure the battery is good. Extension cord of different lakes lamps for so you can see when you're working at parties sometimes is another type of lamp I'll showing you by easel set up later. Adopters for your extension cords. Tape duct tape is a must have scotch tape earplugs. Sometimes you're going to be sitting next to the DJ and it's very loud. So I'd like to bring earplugs to when I'm working at parties. A toss in a ruler. This, this ruler cracked, but it still can draw a straight line with it. And I'm sure people will pack of gum romance inside my easel. And of course, a tip jar as nu prime it with a book or five. Never refuse tips. Something else I keep in my gig bags. These little plastic bags there that's big enough for 8.5 by 11 sheet. You draw sketch and see if I have one of my samples here. You draw up a sheet and you throw it in there. It's a little bit of a wrestling match. You know what I also do? Instead of putting it in the bag, I hand I'll hand the. Customer, the bag in the picture and say here's a bag to keep a fresh. That way you don't waste time bagging it. You're, you move onto the next drawing. Now we're going to put all this stuff in a little kit and I can carry around to the different different jobs. I have like a canvas bag. I don't really need to bring the entire bag of bags for you. Make sure you have enough for the one job you're going to be doing. So let's toss it. Just visually keep my tape and an extra cord, tip jar and a little kit full of pens in my paper. And I pay for my bags. Will canvas bag to hold you geared. Along with the canvas bag, the hold various things, green caricature, gig bag, rolling cart, asynchrony suitcase with wheels on it. It opens up and keep keep records. There's some extra occurs, some extra light bulbs, lamps, and just various stuff that you want to have at the party. Because you need to know what you're going to need it as far as lighting. The handle. In returns under a little bit. A big bag on hot, roll it away. Loosely sketched boxes or a painter's easel. The legs folded up inside these names holding out. And you stand it up. You'll see it in another shot later. And what I love about these, so you can have your whole painters are artists kit inside comes with a little bored. And then I have lots of spring clips or use this little placemat as a cushion for joining on. And then overly Drawing supplies I showed you earlier, the scissors, screwdrivers, etc. Pens. They get a little jumbled around when you're traveling. But they're all here. And then the GD comes out, you lift it up. These little things. These little guys line up with these slots and you can lift it, can slide it out. And I keep a few more items this where I keep my ear plugs, another little tool kit and some extra paper napkins, some more colored pencils. Some of the stuff can fit under the door. This, it's important to keep track of this board because it keeps everything in its trays. Otherwise, all that stuff ends up down at the bottom section and sometimes even falls out of the bottom. Let's go handle each. You want to tighten this too, and you carry it away.
11. Party Set Up & Thank You!: Let's draw some caricatures. Here's a little example of setting up at a party. This is the lazy T ranch out here in the lower valley. So you always want to arrive a little bit early. I usually give myself an hour, 30 minutes at minimum. Most of the time. The venue will have chairs and places for you to set up. Sometimes you need to bring your own chairs and maybe even your own table. That's why I like to use the sketch box easel. So because it's my art station in the box. And sometimes you get a few distractions. Kids let ask lots of questions. Be kind, be polite, but keep working on your setup. Don't delay. So no party situation. And you set up a couple of chairs and then you have your guest sit right here a few feet away. And then we'll look at that way. Same test their profile. So that's no meat. Okay. Now can I put my feet up like this? I mean, now it's very relaxing. Now that I look at, you know, you look towards in this case, there's the tractor gear and concentrate over that. And yeah, I'm looking at because actually smiling, smiling, good. Smiling is good. Or at least my own favorite sport or hobby. Mine, horseback riding him, jukebox collecting OK. All at the same time. Remember making a jukebox purchases on itself from onwards. I don't remember. Now while we're drawing, we have a conversation about our surroundings. I'll ask about the ranch or whatever occasion year happened to be. If it's a birthday party, you ask about the guest of honor had you know, the guest of honor. And if they already mentioned they like horseback riding. Maybe you had some horseback riding experience, but it's not really. You gotta watch out for playing that. Me too, or the game of topper, where they tell a story, but then you have a story that might be even better. That's called topper. I try to avoid that. He usually just let them do the talking, but try to keep them looking in that direction. But once you get the head done, but you can tell him it's okay. It is, you know, it's okay to breathe or it's okay to relax. I'm just drawing a cartoon part now. And then we sketch out the little scene. He said he likes, this isn't jukeboxes. So I put a little jukebox and a wagon and he's told it it across your data already. Ms. J. Bugs for one. And that wraps up another day of big heads and little body cartoons. I enjoyed showing you how I draw caricatures. Don't forget to keep that pencil moving. And thanks for watching.
 Ray Hofstedt, Keep That Pencil Moving