Transcripts
1. Introduction and Supplies You Will Need: Hi, friends. How are you? I hope you're having
a great day today. I'm excited about sharing
this project with you. This is a drawing and
watercolor painting project that I designed,
especially for kids. Students do not need to have any drawing or
painting experience at all to be successful
with this project. I will guide students step by step so they will feel
comfortable at all times. Today, we are going to be
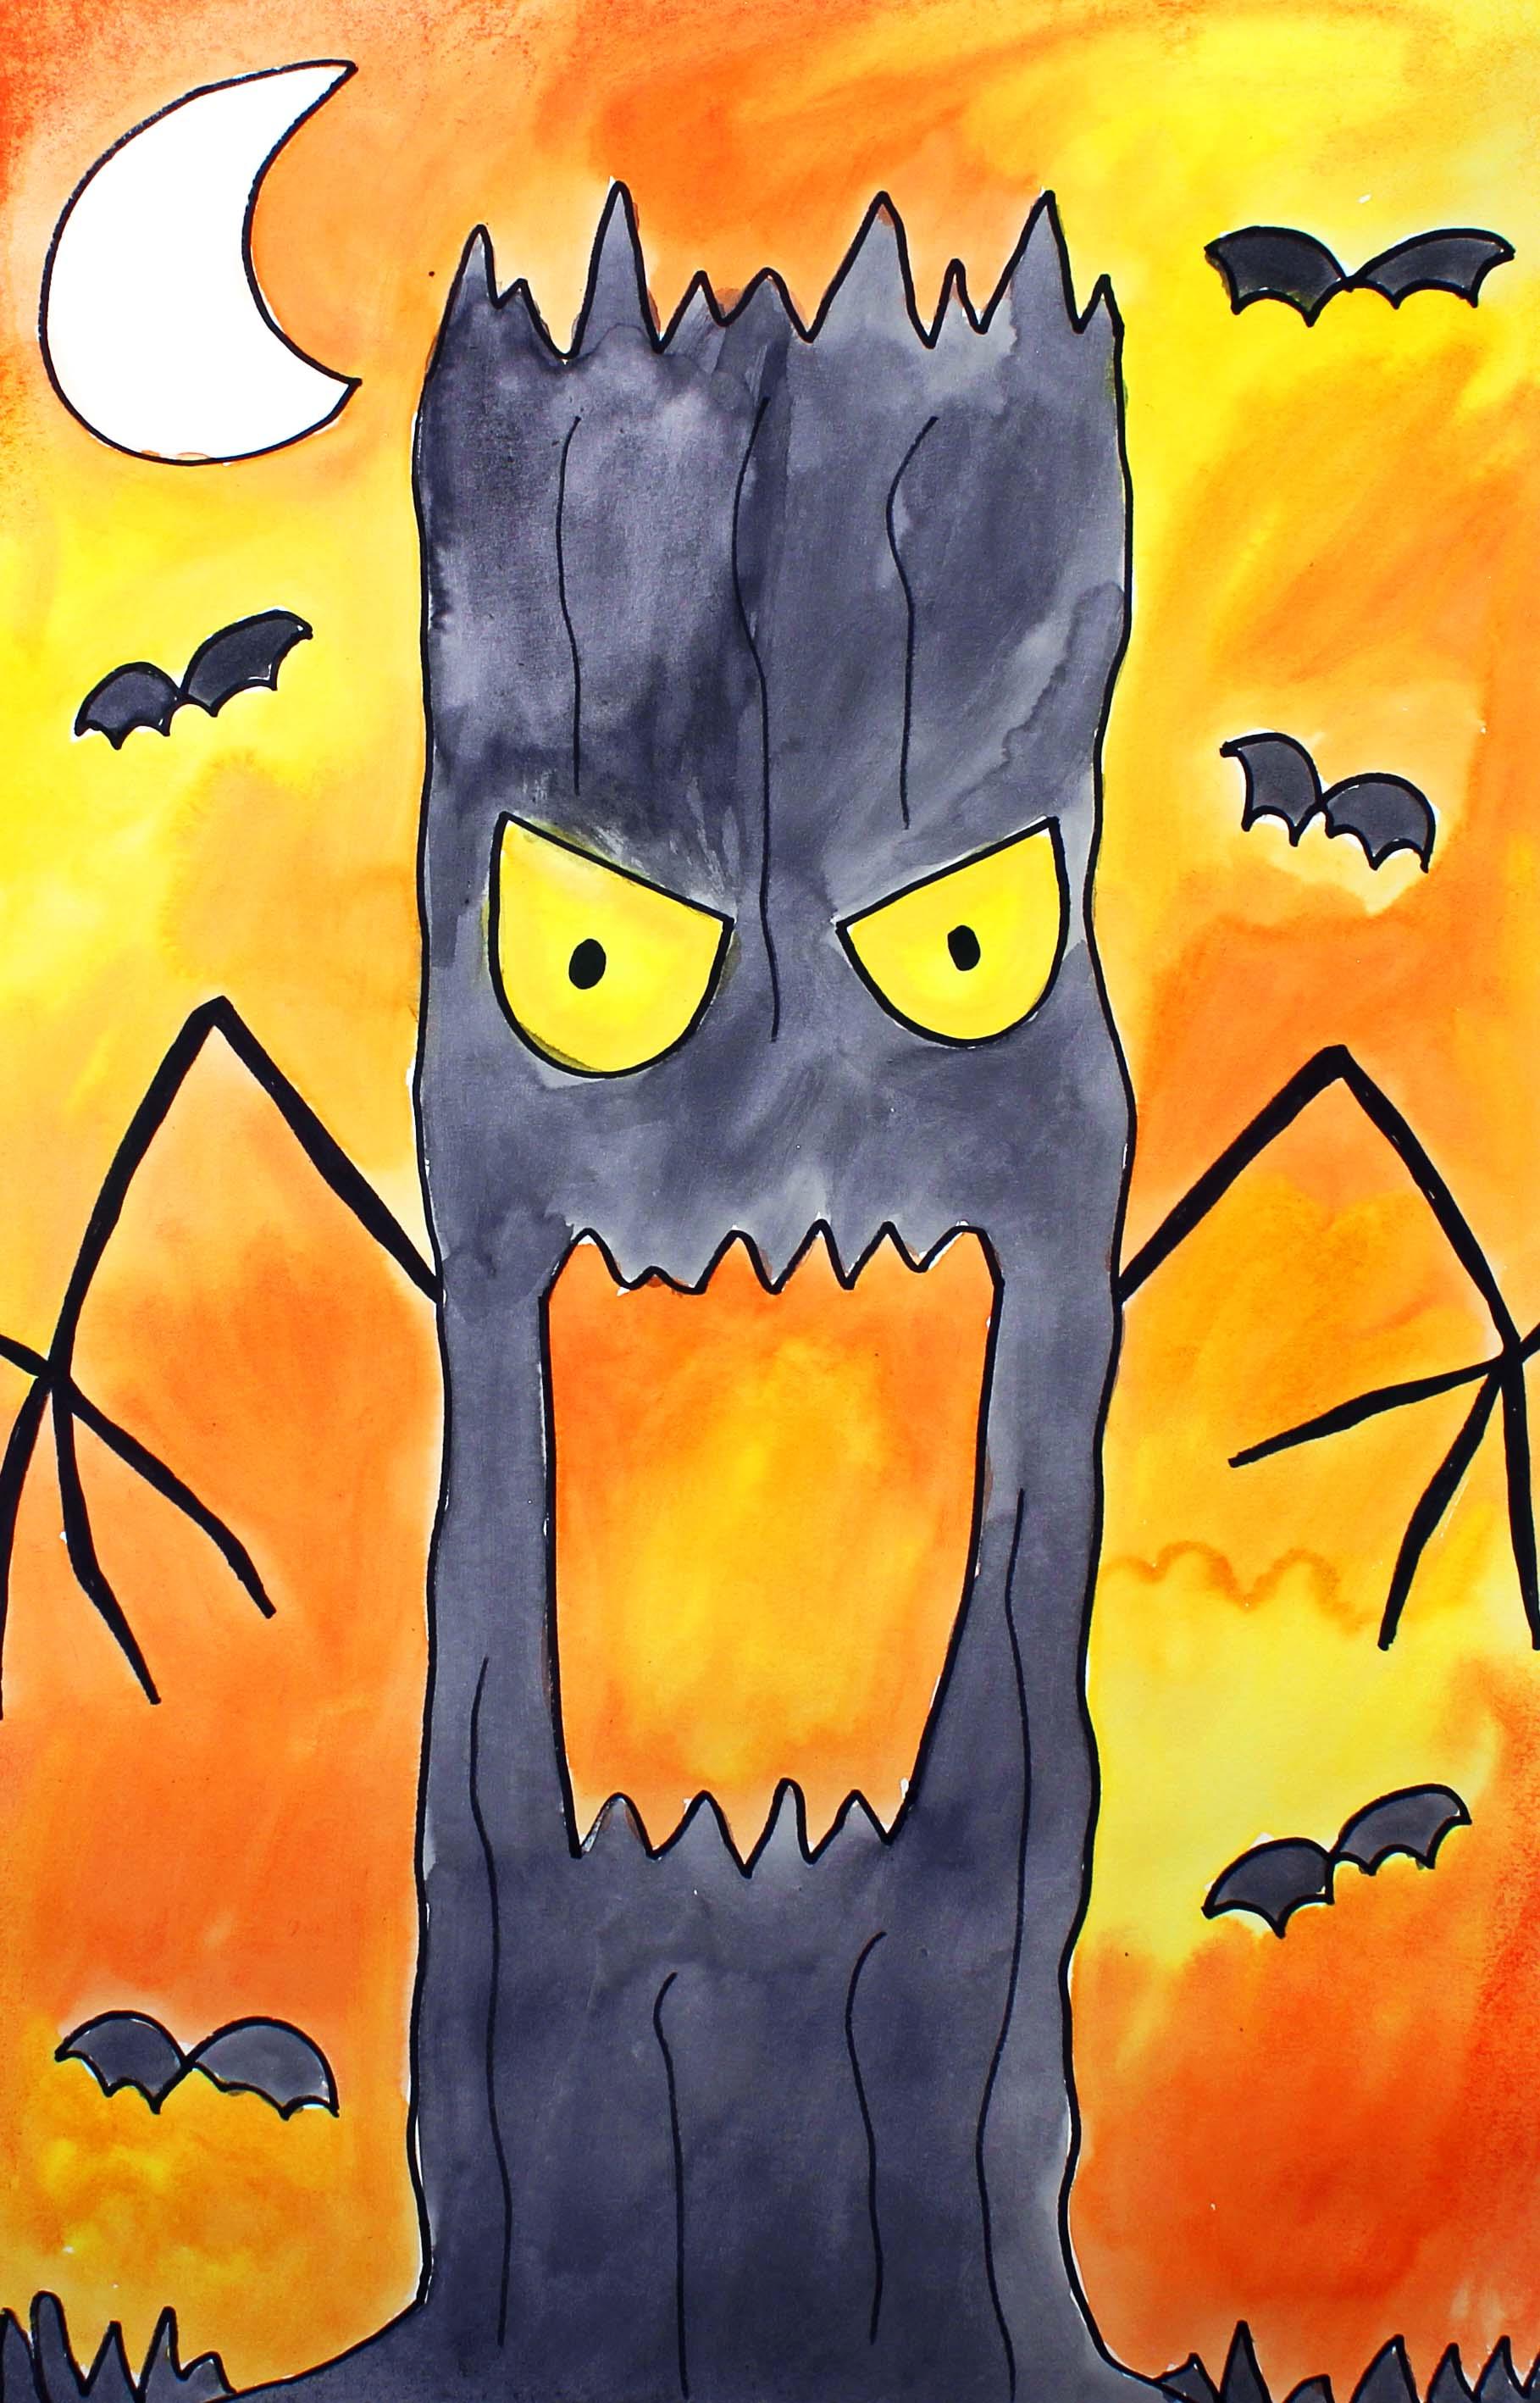
creating this spooky tree. Let's talk about
the supplies and the materials that you will
need for this project. The first thing
that you'll need is a sheet of watercolor paper. You will need a set of watercolor paints and two
different size paint brushes. You'll need a larger
paint brush for the larger spaces and a smaller paint brush
for the smaller spaces. You will need a cup or a
bowl with clean water. You will need a marker,
a permanent marker. Permanent means if you apply water or watercolor
paints to the marker, the marker will not run
around, will not spread. You will also need
a paper towel. So go ahead and gather all of those supplies
and materials, and I'll see you back
here in the next video.
2. Step 1: Draw a Spooky Tree: In this step, we
are going to draw our spooky tree design. So let's get started. The first thing that
we're going to do is pick up our marker
and take the cap off, make sure that you
put the cap on the back of your marker
so it doesn't get lost. We're going to go pretty
close to the top, but not all the way to the top. And this is where the top
of our tree is going to be. Alright? So we're going to make the top of our tree
about this wide. We don't want it really wide because then we won't have
room to fit the arms. So we want it to be
about this wide. That would be about five or 6 ", about seven or so centimeters. Alright? So the first thing that we're going to do
is we're going to make a jagged line here at the
top of our piece of paper. I'm going to start
about right here, and I'm not going to be
too careful with this. I'm just going to
come up and down. Just like this, a jagged line, maybe about that long. Notice that some of my little bumps are taller than others, and
that's a good thing. Now what we're going to do
is we are going to make some lines coming down
from the end of this line. We're going to come
down a piece of paper, and the line is not going to be really straight because
this is going to be a tree. And if you look at
trees out of nature, you will notice that the trunks aren't
perfectly straight. They're not like straight lines like this is a straight line right here on our
piece of paper. We're not going to make
them super straight. Okay? That way, it will look
a little bit more realistic. So I'm going to come up, start about right here, come down with a line. And then once I get fairly
close to the bottom, I'm going to branch out onto the bottom of
our piece of paper, and then I'm going to do the same thing on the other side. Let me show you. So
I'm going to start here and I'm going
to make a line, but remember, it's not
going to be perfect. Once I get close to the bottom, I'm going to branch
out like this. And then I'm going to
do the same thing on this side. Here we go. Alright, so it looks
like a tall tree that has been cut
at the very top. Alright, what we're going
to do next is we are going to create some features
inside of the tree. So I'm going to go about
right here and I'm going to make two diagonal lines. And then underneath
those diagonal lines, I'm going to make some
curve lines like this. These are going to be the eyes. I already looks spooky, right? And I'm going to
make some pupils. Now, I'm going to make a mouth. And the mouth is going to be
here underneath the eyes. And we're going to do the same
thing that we did up here. I'm going to make a line. I want to decide how wide
I want my mouth to be. And I want my mouth to be pretty wide on my
piece of paper. So I'm just going to go
up and down like this. There we go. And then down here, I'm going to make another line, and it's not going to be
quite as long as this line. It's going to be a
little bit shorter. So I'm going to start here and just go up and down like this. Now I'm going to connect
this line to this line. And then this side of
the line to this one. So let me show you what I mean. Doesn't have to be perfect. I'm going to connect this
line to this line right here. Look at that guy. Wow. Now what we're going to do is we're going to
create some arms, okay? You can make your arms
go anyway that you like. I'm going to make my
arms about right here. They're going to come up and then they're going to come down. And then at the end of the arms, I'm going to create
some fingers. Okay? So I'm going to start
on this side, and remember, I'm not putting my
arms way up here, and I'm not putting my
arms way down here. I'm putting them somewhere
within this area. I'm going to put mine closer
to the top of my mouth. So I'm going to come up, and
then I'm going to come down. And then same on this side. Come up, and then come down. Now what I'm going to
do is I'm going to double up this line right here, and this arm is going
to be fairly thin. Same on this side. Remember, these lines
don't have to be perfect. It's better if they're
not completely perfect. Now I'm going to
make some fingers, and I think I'll make
four long fingers. So they're not going
to be perfect. Maybe I'll make one
going off the piece of paper. Same on this side. And then I'm going to double up those lines like I
did with the arms. Just follow along. And then I'm going to do the same thing on this side. Awesome. Okay, the next thing
that I'm going to do is I'm going to fill in these lines right here. I'm going to fill in the arms and I'm going to
fill in the fingers. The reason why I'm
going to do that, I'm going to fill them
in with this marker is because when you are painting really small
areas like this, it's more challenging to get
into the really tiny area. So I find it easier for students if they just fill these areas in instead of with black paint, they fill them in
with the marker. If you want to change
the shape a little bit, you can go ahead
and do that like I just did with that one finger. Maybe I'll make that
a little bit thicker. Okay? I'll do the same
thing on this side. Alright, so now I have my tree. It's a tree trunk, actually. And then I have my
arms and my fingers, and I have my kind of
spooky expression. What I want to do
now is I'd like to create some details for
the background, okay? I'm going to start down
here at the bottom, and I'm just going
to make some grass. And remember, it doesn't
have to be perfect. I'm not sure if you can
see this on the video. It's just some up and down
lines down here at the bottom. Then what I'm going to do is
I am going to make a moon. So it's a large letter C and then closed up
with a curved line. And then because this
is a Halloween project, I thought it would be
fun to make some bats. I'm going to show
you how I make bats. But if there's a different way that you'd like to make bats, you can go ahead and do the
way that you'd like to. So the way that I make
a bat is like this. I make a curve line, and then I attach that curve
line to another curve line. And then what I do is I make more curve lines
underneath for the wings, and then I attach them
right in the center. That's a good simple bat. Now, if there's a different way that you'd like to make a bat, go ahead and do your way. Alrighty. I'm really
happy with my background, so I'm going to stop there and put the lid back on my marker. If there's anything else that you'd like to draw on
to your piece of paper, now's the time to do it. So if there's any other
details that you'd like to add to make your
artwork your own, you can definitely do that. Actually, I just
thought of something. I just thought of
something that I'd like to do. Sometimes I do that. I look at my artwork
and I think, there might be
something missing. What I'm going to do is I'm going to add some
light lines like this. I didn't even think
of that earlier. But I'm going to make
some lines because I feel like it'll make this
tree look even more spooky. Yeah, I think that
that adds a lot. So I just made some light
lines with my marker. Now I feel like my
artwork is finished. So in the next step, what we're going to
do is we are going to go ahead and paint our design.
3. Step 2: Paint the Background: In this step, we are going to paint our background
of our design. So let's get started. The first thing that
we're going to do is we are going to add a drop or two of water into each
of our pans of paint. And what this will do
is it will soften up our paints a little bit so
they are easier for us to use. So I do encourage my
students to take that step because it really does make your creative time a lot easier. While our paints
are softening up, let's turn our attention
to our design. So in this step, we're going
to paint the background, and then in the next step, we are going to paint
the actual tree and the bats because those
are going to be black, okay? Ooh the grass to down
here at the bottom. So what you're going to do in this step is
paint the background. Think about a color that you'd like to use
for your background. I'm going to choose
the color orange. Because I like the
way for Halloween, I like the way that the orange
and black look together. But you can choose whatever color you like
for your background. I'm also going to
paint the mouth of my tree orange with
a little bit of yellow, and then I'm also going
to paint the eyes either orange or a light yellow. I'm not quite sure yet. So I'm going to start
with the background, and then I'm going to move to the mouth and then the eyes. Alright? So let me get some of this paint ready.
The orange paint. I'm going to add
some water into one of my wells Alright, I'm just going to
start painting, and I'm going to speed up this
video so you can watch me. Alrighty friends, I'm finished with the background
with the sky, and I think it looks amazing. I'm really happy with
my color choice. Remember, your artwork is not going to look
exactly like mine. Your artwork is going to
look like your artwork, and that's what we want. I decided to use orange
and a little bit of yellow after I started painting with the orange I thought
it might look amazing, and I'm really happy that I did. Now, for this area right
here and for these eyes, I'm going to start with
yellow here in the middle. And then on the outer edge, I think I'm going
to use some orange. So let me do that. There we go. So see
how it's a little bit lighter inside because
I used some yellow. Let me put a little
bit of orange here on the outer edge.
See how that looks. A lot of times art is
about experimentation. So if you feel like
doing something in art, just do it because you'll
probably be really happy that you tried something
new. So, there we go. Oh, I'm very happy with this. When we come back
in the next step, we are going to be painting our tree and our
bats and the grass. So I will see you back
here in the next video.
4. Step 3: Paint the Spooky Tree and Bats: I in this step, we are going to paint our tree, our bats, and the grass. And we're going to
paint those black because this is a silhouette. So let's prepare
our black paint. I'm going to put some water
into one of my wells, and then I'm going to add a
small amount of black paint. You don't need too much
black paint because the black paint
is pretty strong. The color is pretty strong, so we don't need that
much. Oh, look at that. So beautiful. So now that I
have my black paint ready, what I'm going to do
is I'm going to use this larger paint brush
to paint the actual tree, and I'm going to use the
smaller paint brush that I have here to paint the bats and the grass because these
spaces are smaller. Okay. So I'm going to go ahead. I'm going to start at
the top of my piece of paper and work my way down. I actually think I might need a little bit more black paint. There we go. I want
it to be pretty dark. So I'm going to just take my
time so I do my best work, and I'm just going to go right
on down that tree trunk. Alrighty friends, I'm finished
painting my spooky tree. I'm really happy with the
way that it turned out. I hope that you had a lot
of fun with this project. I will see you next time.
 Em Winn, Teacher, Art Instructor, Artist