Transcripts
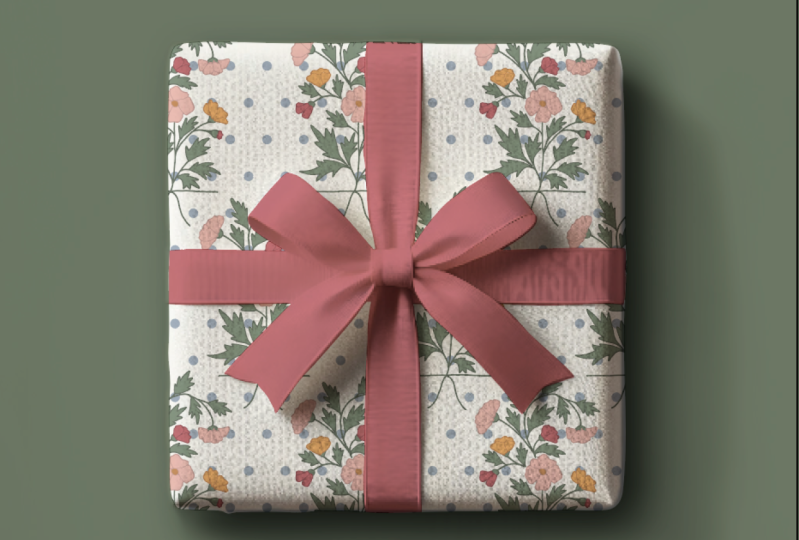
1. How to Design Gift Wrap: From Sketch to Print-Ready Patterns: You've ever dreamed of seeing your own designs printed on
beautiful custom gift wrap. But maybe you weren't
sure where to start? Well, you're in
the perfect place. This class is all about giving
you the tools, techniques, and the confidence to turn your creative ideas into
something tangible, your very own unique
gift wrap design. Step by step, I'll guide you through how to take
a simple sketch or idea and transform it into a seamless
repeating pattern. Ready to print on
wrapping paper. By the end of this class, you'll have your own
custom gift wrap that's ready to be printed and
used for any occasion. How exciting is that?
I'm Bonnie Christine. I'm a surface pattern
designer and educator, and I'm so thrilled to be
your guide in this class. Over the past decade, I've had the privilege
of designing for some of the world's top brands and teaching thousands
of students, just like you, how to turn their creative
ideas into reality. Like you, I once wasn't really
sure how to move forward. I was excited but a little
uncertain of where to start. That's why I'm passionate about making this process simple, approachable, and,
well, filled with joy. In this skill share class, you'll learn how to
take your sketch, vectorize it in
Adobe Illustrator, create a custom color palette, and build a seamless
repeat pattern. So whether you're
completely new to surface design or maybe
you have some experience, this class will guide
you through each step in a really fun and
encouraging way. So let's dive in together. I can't wait to
see the beautiful designs that you create and the joy that your
custom gift wrap will bring to all of
your special occasions.
2. Lesson 1: Turning Your Ideas into Digital Designs: Hello there. Welcome to class. In this lesson, we're going to make sure that
you have everything foundational at
your fingertips in order to get started
as simply as possible. I have a couple of tools
here that I want to go over. I have a regular piece of paper that will be great for sketching on.
It's nice and clean. I also have a piece
of tracing paper. This is optional, but I'll show you how to use
it here shortly. Then I have some basic tools. A nice pencil. This is a black wing.
Then I also really love having a nice black
thin marker or pen. This has a really nice,
just solid ink tip on it. I will link all of these resources in
the class resources. This is another great option
for a nice black ink. Then if you want to
play with any paints, you can grab your paints. Now, I have a couple
of very simple brushes here and my favorite
Windsor and Newton paint. You can use
watercolor or gouache or probably just about anything
that you have at hand. There are three different
ways that you can create artwork for
your simple class. Again, the focus
here is going to be to start as simply as possible. The first one is going to
be with ink or pencil. Now the focus in
this class is going to be to create
really simple shapes. The key here is going to
be to make them closed. If I were to come in here
and draw, let's say, a leaf, I want to make sure
to come back and close it. This is going to be
important as we move our illustrations
onto the computer. Again, it is specifically so that we can get started
as simply as possible. You can do petals
or flower shape, but you want to simply
make sure that they are closed in order to move on to the next part of
our lesson here. Now, if you're working with pencil or let's say
you end up having a smudge mark or mistake
or something like that, a piece of tracing paper
comes in great use. I'll just slide this underneath.
Then you can come back. Again, this is a bit optional, but if you want to make
sure that you have the best scan when we come
to the computer as possible, you can take a nice black pen and just trace over
your own marks. That way you end up with a
really nice final a piece of paper in order to scan in. Now the next way that you could play if you want,
is with some paint. Of course, you don't
have to do this, but I wanted to
make sure that you knew how in case you do. I'm going to add some
of this squash from Windsor and Newton over here to my paint palette, let's see. I want to actually use a
fairly wet brush for this. Again, our focus is going
to be on closed shapes. I can come in here and start making some maybe leaf shapes. You also don't have to worry about the color at this stage. We're going to be able to
use our digital tools right inside Adobe Illustrator in order to change the color later. At this stage, you want
to make sure that you're focused on the shape, the final shape that
you want to create. Now, we'll also be
building what we call motifs once we get
inside the program. You can create all kinds
of different shapes here, like petals or leaves, even things like marks and squiggles are going
to work really well. Once we get into
Illustrator, I'll show you. So even something like marks can come together to make a really
beautiful pattern. So have fun making marks. Again, our focus here
is on solid shapes, and we'll take them over to
the computer and be able to make something really,
really beautiful from them. It's now, if you're looking
for some inspiration, one of my favorite
things to do is to gather vintage magazines
and books that have all kinds of fauna and local
birds and flora that you can look at to use as inspiration for your
sketches, your paintings. This is just all things
from an old book that I've either cut out
or saved along the years. Give yourself some time
to gather inspiration. Maybe you need to go visit your local library or do some
collecting or go antiquing. Or just take pictures of things out in the world as you
go explore as well. But I wanted to take some time to think about what you
want to draw first. What do you want to create
for your repeating pattern? Now, it can be as simple
and it should be as simple as you can possibly make it for this first pattern of yours. Let me show you a
couple of examples of things that are going to work
really well for this class. We're going to use an approach called what you see
is what you get, meaning exactly whatever you have on paper is
what is going to translate into Illustrator in order to keep this as
simple as possible. Here are some nice
mushroom shapes. They're good enclosed.
Here's a nice bird shape. Again, every part of the
bird is a closed shape, meaning if that branch was
open on the end like this, we wouldn't be able to utilize the exact method that I'm
going to be teaching you. In this class. You
want to go ahead and make sure to close that shape. This is a nice butterfly
shape and a couple of flowers done in pencil that are going to
work great as well. Now, if you're using paint, here are a couple of other
examples that again work well. Single color, nice contrast on these is really going to scan
in and work beautifully. Here's a lots of leaves. Now these are some open shapes, but I'm going to keep it just like this when I get
into Illustrator, meaning I'm not going to
try to color this in. I'll show you that.
Then this one is a smaller piece of paper. Spilt some water on it that is going to scan and work
really nicely as well. Here is some things that I
have pressed from the garden. These are also going to work. If you want to add
something like this or maybe skip the
drawing part altogether, you're more than welcome to go find and forage different items from around maybe your yard or the garden or
the grocery store. And bring them in
in order to scan. Again, I've pressed these, so they're dry and they're
also nice and flat, which means that they're going
to scan in really nicely. However, if you are
going to do this and you don't have time to
dry or press something, you can also just look for nice flat shapes that
are going to fit on your scanner or be able to take a photograph
of them nicely. From here, we're going
to move into taking these items and getting
them digitized. So now that you have your
artwork, your doodles, your little things
that you are ready to take into the computer, we're ready to document those.
There's two ways to do it. You can either use a scanner or take a picture of
it with your phone. I'll show you both ways. Now the first will
be if you want to simply take a picture
of it with your foam. Now, the most important
thing will be to make sure that you aren't
skewing it in any way, so you want it to be
completely level. And then ideally you want even light and no edges
or shadows in it either. I'm going to come in
just right on top of this and then take
a simple photo. Now the other way
is on a scanner. Now, I'm using a simple
cannon PixMa scanner. You can use anything
that you like, but I will link all the resources
in the class materials. And with this approach, what you'll do is simply
scan your paintings, put those down and scan it in, or you can do your sketches. Or you can also simply scan
in your pressed items. So this is the one that
I'll do to start with. I'm going to add a couple
of others here as well. And we'll simply scan this one. Now, I'm over at my computer, and I'm going to work to scan in a couple of the items that
we've been working on. So I'll go ahead
and click Overview. That way I get to see a preview
of what's on my scanner. So here I have a little
pencil sketch and a pen sketch of a butterfly
and a couple of mushrooms. Now, my scanner automatically detects the different motifs, if you will, or illustrations. But if yours doesn't, it's probably just
going to scan in the entire thing,
also completely fine. So I want to scan this in in
black and white at 300 DPI. I'm going to save it to
my desktop as a JPEG. And if you're able to
do image correction, what I want to do is bring the contrast up about
as much as I can. When we get into
Adobe Illustrator, the higher the contrast, the better the vector
result will be. So with that, I'll go
ahead and click Scan. Now you can see I
have those over here on my desktop. They're
going to work great. Now I'm going to work to scan in one of the paintings
that I worked on as well. Okay, so I'm going to do the same thing with the
manual adjustments, and this one has some parts on it that have
gotten a little smudgy. I really want to focus
on this area right here. I know I want to use this motif, so I'll just draw a little
marquee around that area. Again, if yours doesn't
have that capability, no worries, you'll scan
in the entire thing, and that's going to
work great, too. I'll go ahead and
click scam. Okay. Lastly, I'm going
to scan in a couple of the found items
that I have, as well. These are pressed
leaves and flowers. Great. So for this one, I'll do the same thing
with the contrast, and I'm going to make this
marquee just a little smaller. But go ahead and scan in
all three at one time, and I'll go ahead
and click Scan. Okay, now it's your turn. Go ahead and work to scan in all of your different motifs,
sketches, paintings, found items, any
element that you want to be able to work with right
inside Adobe Illustrator. Now, don't forget the
other way you could do this is to take photographs
of them, as well. Either way, you'll want your photographs or your scans transferred over
to your computer. I'll meet you in
the next lesson. Okay.
3. Lesson 2: Polishing Your Design in Illustrator: Okay, my friends, welcome back. By now, you'll want to have
downloaded Adobe Illustrator. If you haven't done that yet, head over to Adobe to download
it from their website. Once you have it installed, you will click to open it
and then select New File. Now, I'm going to choose
the letter preset. This is a standard
piece of paper size. It's easy to kind of
wrap your mind around, so I suggest you do the same. Now, I also like
to work in pixels. If you don't have
your set to pixels, you can do that right here. And we'll leave everything else just the way it is
and click Create. Now, this is our
brand new document. The rectangle on the page
represents your artboard, which is what we'll be using to design inside the program. Now, a couple of things if you've never worked in
Illustrator before, your page might look a little
bit different from mine. Illustrator is a complex
program with many, many different
tools and options. We're going to keep things
as simple as possible. And so what I want you to
do to get yours looking as close to mine right off the
bat is come up to Window, select workspace and
choose painting. Now that will likely
rearrange your setting a little bit to look
more closely to mine. Now the next thing we
want to do is bring in our scans or photographs. They both work the same way. They're both probably JPEGs, right into Illustrator to
start getting them vectorized. And so there are a couple of different ways
you can do this. You could drag and drop them in from your folders or finder, or you can use the
place command. If you come up to file
and select place, you can come to your desktop or wherever it was that you had your drawings and select the ones that you want to
place inside your document. Me, there are three
that I want to place, and so I'll just
select all three, hold down command to
click on the other ones, and then select place. Now you can see my
arrow has one of three and a preview of what it is that I'm going to be
dropping on my artboard. So I'm just going
to start clicking to draw the size where I
want these to be dropped. And it doesn't really
matter at this point. You just want to get
them onto your page. That one's going to
be small. It's fine. Okay, so there are a couple of keyboard shortcuts
that you'll want to get familiar with
as you work in Illustrator. The first one is the
Black Arrow tool. You can see this
Black Arrow tool now is how I select things
and move them around. You can always find it in
the top left hand toolbar, and you can also
always get access to it by tapping V
on your keyboard. So any tool that we use is located in your
left hand toolbar, you can grab the
keyboard shortcut for any of them by
hovering over it, and it'll tell you right there what the keyboard shortcut is. So the next one is Rotate. We have two images
here that we need to rotate to just get
them facing straight up. So I'll select this image
here of the little butterfly, and rotate is R
on your keyboard. So I'll tap R. You can see it got selected in the
toolbar over here as well, and there's your reminder
of the keyboard shortcut. When you tap R on your keyboard, it is going to drop a
little teal marquee right in the middle
of your image. That's showing you the mark of where it's getting
rotated around. And so with that, I'm
going to come over here and start
drawing kind of in an arc shape to the upper right hand
corner of this image. Now, you can just
kind of eyeball it or you can hold
down the Shift key to constrain it to
459180 degrees, okay? It's up to you. If you
want it to be exact, hold down the Shift key, and it will constrain
it for you. Now I'll tap V on my keyboard to get access back to
the black arrow tool. I'll bring this one around, tap R on my keyboard, and rotate it up as well. I'm holding the Shift key to
keep that directly in line. Now, I think this one is
a little bit too small, so I also want to
increase the size. There's one more
keyboard shortcut. It's S on your
keyboard for scale. So I'll tap S. You can see
it's over here as well, scale. And I want to start
dragging this up in the upper right hand corner
to increase the scale. Now if this is all you do, you can also kind
of skew it a bit. And so you'll want to hold down the Shift key again to
constrain that to make sure that it's not
getting skewed in any way as you increase
or decrease the size. So now we're ready to
turn these images, your sketches, paintings,
and found items into vectors inside Illustrator. In order to do that,
we're going to use a tool called Image Trace. If you come up to Window
and select Image Trace, right there it is, you will
get this pop up dialog box. So you have to have an image selected in order to
get access to this. Meaning, if I click
off of here and I don't have anything selected,
this is all grade out. So if you don't have access
to any of these options, you'll probably need to click on an image in order to
bring this to life. So from here, I want you to use the black and white logo preset. You'll click on
that, and this has automatically
changed to vectors. Now, there are a couple of settings I want you
to pay attention to. The first is threshold. A high threshold is going
to pick up more black, and a low threshold is
going to pick up less. This one actually looked good pretty much
right in the middle. Now, paths are how complex or how many paths are getting built into the lines themselves. I typically bring mine up, but it kind of
depends on the image. A lower path threshold is
going to give you less lines. So something in the
middle or upper 75 percentile range is going
to probably be the best. Lastly, you're going to want
to choose Ignore color. Now to demonstrate this, I ought to draw a
square back here. Don't worry about
how I'm doing this. I want to show you, for example, that right now there is a white box behind all
of our images and scans. And so when you select, ignore color, what it
does is punch that out. It takes it away, which is
essentially what we want. With all of that selected, I'm going to choose Expand, and that has turned our
butterfly into vectors. I'm going to get rid
of this orange box and then move on to our
next illustration here. One is really only for this one particular motif right here that I want
to get access to. So I'm going to use
the same preset, the black and white logo. This time, I want to
bring the threshold up a bit so that I can pick up
some of the lighter areas, and I'm also going to bring up the paths pretty high, as well. Now, noise, if you
bring this down, is going to bring in more
detail. Did you see that? So I'll take noise up and you
kind of lose some of that. You bring it down, and
it builds it back in. So I very much want
the texture here. It makes it look like it
was painted, which it was. And then I want to
select Ignore color, and then I'll click Expand. So now I want to clean this up. It automatically gets grouped
after you use image trace. So from here, I'm
going to right click and select Ungroup. And then I want to come
in and probably just delete some of the things that I don't really want
access to anymore. You can draw marquee around it to select more than
one thing at a time. Actually like this one, so
I'm going to keep that one. So now I want to work to group the individual
motif back together. So right now it's in a bunch
of different elements. So what I'm going to do
is again draw Marquee. I'm just holding my mouse
down as I draw over that. And then you can right
click and select group or use the keyboard shortcut
Command G on your keyboard, and then I'll move
that one over. I'm going to select this
one as well and then tap Command G on my keyboard
to group that one together. Now we can do the last one here. With it selected, I'll use
the black and white logo. That looks pretty good,
right off the bat. I'm going to increase
the threshold just a little bit and the paths and decrease the noise, and then I'll
choose Ignore White or ignore color and
then select Expand. So with that selected, I'll go ahead and
right click and tap Ungroup and then move these elements over to the
left hand side of my artboard. Now I can select anything here I need to and just
kind of clean it up. I'll tap delete on my keyboard. One more thing that you
might need to know is how to zoom in and zoom
out on your Rboard. And there are a couple of
different ways to do it. We're going to keep
it super simple. So Command minus zooms you out. Command plus zooms you in. That is, if you're on a
Mac, if you're on a PC, it'll be Control minus
and Control Plus. Can also get access to these percentages in the
bottom left hand corner. You can say Zoom out. You can zoom pretty far in or
you can say fit to screen, which is going to
pop you back out to the size of your artboard.
Now it's your turn. Work to get all of your
sketches, your paintings, your found items
vectorized inside Adobe Illustrator and brought over to the left hand
side of your artboard. This is where we'll pick up in the next lesson and start creating a custom color palette. I'll meet you there. Okay. Is
4. Lesson 3: Choosing + Playing with Colors: Welcome back. We're
back in our document, Inside Illustrator, and I've
done a couple of things, as I'm sure you have, as well. I have finished scanning in
and vectorizing a couple of other motifs over here exactly the way
that we did before. And the additional
thing that I've done is I've brought in two images. These are both pictures
from my garden. Order to pull colors from. So this is what I would love
for you to take a moment, grab your phone, scroll
through your images, and pick out a couple of
pictures that you would like to pull colors from in order
to build a color palette. So a little trick here is that nature always makes the
best color palettes. So you can always start there. You can change
colors as you work. I'll show you how,
but I love to be able to pull colors
directly from a photograph that I've
taken in order to build out a custom color palette for our projects here
in Illustrator. So I've placed these images the same way that I
placed our scans earlier, and we're going to get straight to pulling colors from them. So my favorite way to do
this is to simply draw a couple of black squares
in order to fill as we go. So in order to do
that, I will select the rectangle tool from the
toolbar and left hand menu. The keyboard shortcut for that is, if you want
to remember that. I just want you to start
drawing a simple square. It's probably going
to already be black. If it's not, though,
you can change the fill color right here
under your swatches panel. So you could change the color. Again, I like to
start with black. Now, one thing that might
trip you up is if you have your stroke on top here, that means you're
giving it an outline. You see now it has
a red outline. So if you ever get
tripped up over that, you want to give no stroke and then just click
on the fill to bring the solid square to the
front and then just make sure that that is
what you are selecting. I'll choose the black square, make it black, and then I want to make a couple
of copies of this. Now, one way to do this
would just be to come in and start drawing
more squares. You can absolutely do this. They don't need to be the
same size or anything. Those of you who love keyboard shortcuts
and want to try a new one, let me show
you what this is. I'm going to leave
these and start over. I'll tap M on my keyboard, and then I'll start
drawing a square. I'm going to hold down
Shift in order to keep that a perfect
square just for fun. And then with that selected, I'll tap V on my keyboard
to get the selection arrow. And I'm going to start dragging
this over to the right. Now, I want to hold down Shift to keep it
directly in line, and then a new keyboard
shortcut is the option key. This is going to
allow me to drop a duplicate of whatever it is. Do you see the arrow
has two arrows now? So I'll drop that. Now, if I don't
do anything else, there's this really cool
command in Illustrator. That's Command or Control D, and it duplicates the last
action that you already made. So it's a really easy way to do the same thing
over and over again. If I went too fast, you
can rewind and go back. You can simply
draw some squares. They don't need to be perfect or match or anything like that. They just need to
be black squares. So now we're going to use the eyedropper tool to start pulling colors from
the photographs. So I'll select the first square, and then I'll tap eye on my keyboard for the
eyedropper tool. You can also find it over here
in your left hand toolbar. And I'll start picking up
colors from the picture. I'm going to scroll in some so that I can get really close. I want this kind
of blushy color, so you can just click around your photo until you find
a color that you like. Once you're there, you can
move on to the second square. So V on your keyboard
for the selection arrow. Click on that and then I on
your keyboard to get back to the eyedropper tool. And then you can go
pretty quickly in between those two as
you move along here. One trick to a really
solid color palette is making sure that you
have enough variation, not only variation, but enough contrast between
the different elements. So you want some light colors, some dark colors.
That one's pretty. I always love to have a neutral, so kind of a creamy color. I might have to come
down here to get. Well, I'll grab this one, and I'll show you how to
lighten it in just a minute. And so you also want
some dark colors, even a dark green or dark
black in order to pull from. And then I really wanted
some blues in here, so I'm glad this guy has them. And then let's come back over
here and do one more pink. Hmm. Let's do a bright pink. Okay, so this looks like a pretty good color
palette to me. There's one color that I think is missing that I
would really love, and it's just a nice,
creamy neutral. So I'm going to
duplicate this square, any square you can duplicate. And then I want to just kind of use the color picker
to pick my own color. So I'll double click on the
swatch fill right here, and then I can bring
this color up, and it's going to automatically
change right here. So if you couldn't get the exact color that
you wanted, don't fret. You can always come over here to the color picker and pick
whatever color that you want. So I wanted something
really neutral like that. I'm going to click Okay.
And then this color, I wanted it to be
a bit more peachy. So I will open the color picker, and I'm going to come down to my oranges and kind of
make it a bit more peachy. Peachy peach. Now this one
is sticking out to me. I've got to change it.
I'm going to bring it down to a peach, as well. Okay. I'll select Okay, and now we need
to get our colors over to the Swatches panel. So, super easy, all you
do is select all of them. Come to the bottom of
the Swatches palette and click New Color Group. You can name it if you want, or just leave it as it is
and select Okay. All right? So now you've got
all your colors right here in the
Swatches palette. Hey. Good job. So now I can just
get rid of all this. That feels crazy, right? Just select it and delete it. Now it's time to start adding color to your black
and white images. So we'll just be coloring
these one solid color, and you can choose
that color now. So you can select one and then tap on whatever color
you want it to be. And I like to call
this tossing color on. Just get your
elements, your motifs, get them out of their
black and white stage so that you can just start to envision what they
could look like as illustrations instead of
black and white vectors. So I'm just going
to have fun and toss some color on so that I can see what
I'm working with. Now, this one I will
throw a color on, but I want to show you
something about this, as well. I'm going to do that
same keyboard shortcut. Again, if I start dragging this over to the
middle of my keyboard, but let's say I want
to make a copy of it, I can just hold
down the option key that gives me those
double arrows, and then I can release, and it's going to just
copy that for me. So if I wanted to
fill this shape in, there's a couple of
different ways to do it. One of the easiest is called
the Shape Builder tool. Now, the keyboard
shortcut for that is Shift M on your keyboard. You can also find it over here
in your left hand toolbar. There's ever a tool that you're looking for that you can't find. You can come to the
three dots at the bottom and scroll through all the
tools that you have access to. So this one, again, is called
the Shape Builder Tool. You'll know that you have it
active when you come back to your illustration and
the solid areas that are closed in kind of have
this grid inside of them. So if I want to just color
this whole thing solid, I can simply draw
straight through it, and it's going to
color it solid for me. You can grab the
selection tool and click off and back on to
exit using that tool, and then you can change the
color of it however you want. So now I have two variations
of that little butterfly, a solid one and an outline. So now that you have your motifs all colored with
a custom color palette, well done you, we will meet in the next lesson where
we're going to start building our repeating
pattern. I'll meet you there.
5. Lesson 4: Designing a Seamless Repeating Pattern: Hi there. Welcome back. We are here inside our
Adobe Illustrator document. We have worked on our art, gotten it vectorized, and
made a custom color palette, as well as colored them. So the best part is here. Now it's time to actually
make our repeating pattern. Now, there are two
different ways to make a repeating pattern
that I want to teach you. Talk about them in this way. There's one where you draw
the bounding box first, and there's one that you
draw the bounding box last. And they both give you
different amounts of flexibility when it comes to
creating repeating pattern. So the first one that I'm
going to make is going to be one where we draw the
repeat bounding box last. And so I'll just dive
in and you'll be able to wrap your mind
around how we do this. And so I want to do
something that's really simple for
our first pattern. So I think what I want to do is just grab this
single motif here. This is one of the
elements that I painted. See that my brush was pretty
dry and it's really loose, and I think it's going to make just a really simple yet beautiful gift wrap
option for us. And so what I want to do first is scale this down a little bit. So I'm going to click
on it and then tap S on my keyboard and just
scale it slightly. I'm holding down the
Shift key to make sure that I don't end up
skewing it like that. So the shift key
keeps it in line. Now I will move this up with
the direct selection tool, and what I want to do is
start making a copy of it. Now, this is just
like we did with those black boxes when we made
the color palette as well. So I'm going to start
to drag this down. I'm going to hold
down the Shift key to keep this constrained
and in line. And the option key or
the Alt key if you're on a PC. To make a duplicate. That's going to make a copy
of this particular motif, and then I'll just
drop it there. Now, before I do anything else, if I want to replicate that action, do you
remember what we do? We tap Command D
on the keyboard. So I'll zoom out a little bit. Now we have four
of those elements. So I can do the same thing
with this entire line. Now I'll bring this
over to the right, Hold down the shift key
to keep it in line, and the option key to make a duplicate or sorry,
a copy of that. And then I'll drop
that one and then tap Command D to
make a duplicate. So this is already a
repeating pattern, right? You can tell that
it's repeating. We call this a block repeat. Now, if you want to take
the center column here and start to drop it
down about halfway, this is something that we call the half drop repeat, okay? Now, another really
fun thing to do, depending on what
you're creating is potentially play with
this middle section, maybe you want to
turn it upside down. So I'm using the rotate
tool to do this. That's R on your keyboard. And then if you again,
hold down the shift key, it will snap it to where
it's exactly vertical. And then you might
have to play with the placement a little bit again, maybe
something like that. Or maybe you want to bring these in to where they're
a bit closer, then I'll bring this
one in as well, something like that so
that they look tighter. The other thing that
is fun to do with this kind of middle row is use O on your keyboard for reflect and see what that looks like
reflected around itself. So I am very much liking this. The other thing you can do
is play with alternate rows. I don't think I
like that, though. We'll leave it right here. So now what we need to do, we've set the
motifs like we want them to be in a
repeating pattern. Now we have to visually
work to find the repeat. So let me show you what I mean. I'm going to choose
any point in the kind of bottom right hand quadrant
of this particular motif. So I think I'll
just choose maybe the very top of where
this breaks right here. Do you see that? So I want
to grab the rectangle tool. That's M on your keyboard, and I want to just
start drawing. And at this point, I'm
really just eyeballing it, but I want to get
as close as I can. I'm going to draw a
square starting at the top of that
point to the top. Se I'm about to hit it on the right hand side in
the right hand corner. I'm going to hit it right there, and then I'm going to bring it down until I find it again. And there it is right
there. You see that? Now I can zoom out and
know that that really just about represents
my repeating pattern. I can right click and go ahead
and send this to the back, and I'll change the colors so that we can see
what we're doing. To make this easier, this
is a really tight repeat. The other thing that I could
do is go ahead and bring this square down to even
the second one right there. Do you see it right here? So I did that using
the scale tool. Let me just start over. I'll again, grab
the rectangle tool. I'm going to start drawing here. I'm going to hit it on
the right hand side, and then I'm going
to bring it down. Right there is the
first time it repeats. Right here is the
second time it repeats. You could really
do either, but I think for you to follow
along with me today, a little bit larger like this. So I'll zoom out, and here's
what you need to know. Anything that doesn't touch that square or rectangle
can be deleted. Now, this pretty closely
probably repeats pretty exactly, but it may be off a little bit because after all,
I eyeballed it. So what I want us to do now is ensure that this
repeats perfectly. In order to do so, I want you to select the background come up to your top tool bar where you can find the width
and the height. Now, if you don't have that, you can come up to Window
and click on Transform. It's also going to give you the width and the
height right there. It is currently set to this broken chain,
and that's what we want. Yours may look like
a linked chain. If so, I want you to click it and turn it into a broken chain so that you can change the dimensions free of one another. So we have a pixel here
that is add a decimal. And again, you can be
doing this here in the Transform panel or up
here in the top tool bar. I want to just round to
the nearest whole pixel. So I'm going to take
this one to 156. And then I want to take
the height to 276. So now they're whole pixels. Now I want to replicate
those edges so that they are exactly placed
in 156 and 276. So these numbers, you'll
have to remember, not mine, yours, of course. But whatever yours are and the whole pixel, you'll
want to remember. So jot them down or know
that you can come click on this rectangle to get
access to those at any time. So let's use 156 first. I'll select everything that crosses over this
right hand margin, and I'm just going to delete it. Now I'm going to select
everything that crosses over the left hand margin
and replicate it. So we're going to right click, come to transform
and select move, and we're going to go over 156, the size of our box to the right and zero
pixels up and down. Now, I have preview selected, so it jumps over there for me. And instead of clicking Okay, I'm going to click Copy
to make a copy of that. Now we know that it's perfect. I need to do the same thing
for the top and bottom. So I'll delete everything
across the bottom, select everything that
crosses the top margin. Right, click, come to
transform, select, move. This time we're going
zero left and right, and we'll do 276 down. So interesting 276
down is positive 276. If you are moving this up, it would be negative 276.
Now we'll click Copy. So just as a reminder, we got those numbers
from our background. It's 156 to 276. Yours is likely going to be
something entirely different, but you will use your numbers. We know that this repeats. Now we need to turn it
into a repeating pattern. So the trick to
that is to select your background,
make a copy of it. That's Command C
on your keyboard, and then paste a
copy of it behind. The keyboard shortcut
for that is Command B. Now, you can also
get access to those right up here under
your Edit panel. You can copy Command C and
then paste in back Command B. We have two of these
here now, right? So with the one in the back, it has this cream
color applied to it. We must have no
stroke and no fill. This is what tells Illustrator, Hey, this is the repeating
bounding box, okay? So no stroke and no fill. So if I want to prove it to you, you can see right there, we have one in the back that
has no stroke and no fill. Now we want to select everything that makes up this pattern and drag and drop it over
to the watches panel, and then we can
test our pattern. So I'll grab the
rectangle tool and draw a big old rectangle and fill
it with our new pattern. Now, it repeats beautifully. Something that's fun to do
here is to with it selected, right click and come down to
transform and select scale. Now we want to make sure this is uniform and deselect
transform objects. So now all we're doing is
transforming the pattern, and you can just scroll with your mouse to reduce the size and see what it looks like as you take it down or up in scale. So this is a super
simple pattern that is so incredibly beautiful, right? I'll go ahead
and click Okay. So that is how you draw
the bounding box last. Now, for the next
part of this lesson, I want to do something that is a little bit
more complicated. I want to show you
first how to make a pattern with the
bounding box drawn first, but also how to really build and create some of your
very own motifs. In order to do that, I
decided that we needed a fresh set of motifs. So I'm going to take you through exactly what I've
done here, okay? These are just scans. There's nothing new here that
you've not already learned. These are scans
that I have done. So I've labeled
them here. This one I painted with paint
and a paint brush. I just use watercolor there. This I drew with a pencil. These are some leaves from
my yard that I scanned in. These are some leaves that I painted with paint,
again, just watercolor. These are a couple of
other leaves from my yard, and then these couple of
elements are, again, paint. So these are the
scans themselves. If I come over here, I have gone ahead and
vectorized these. So now they're in vectors using image trace, just
like we did before. And now if I come over here, you can see that I've added some color to them.
So that's all. I want to use these to show you how I might
go about building some more complex motifs where
things are really layered. So I think that I want to use this kind of group
of flowers here. I'll select them all and then just scale them up
using the scale tool. And what I want to do is maybe build in some little
centers to this flower. And I think I just need
maybe a different color. I will come in here and choose maybe this darker
brown color for now. Let's turn them all brown and then come in and
just layer these into the centers
so that they have a little bit more going on here. Now, I don't have one for here, so I'll just copy this one
by holding down option key, maybe rotating it
around a little bit. Okay. Now I'll zoom out, and I want to build in
some leaves around these. So let's just see what's
going to maybe be cute. Yeah, I think I'll
use these for now. Now, if you needed to
change the layer of these, you can select it and come down to a range. You can
bring it to front. You can send it to the back
or somewhere in the middle, you can move it up one at a
time if you need to, as well. Now, as soon as I like
the way one set looks, I want to select it all and
then just group it together. You can also just tap Commangi on your keyboard to
do the same thing. So I want to build out as many different little sets
of motifs here that I can. Okay. I think I'll save these for when I get to
building over here. I've got these motifs that
are going to be great to use, and I think I'm ready to
start building my pattern. So I also want to make sure
that these are a solid color. I want to select
them and use Shift M for the Shape Builder tool to just go ahead and
make those solid. So let's begin to
create this pattern. This time, I want to put
the bounding box first. So I will select
the rectangle tool, and rather than come
in and draw something, I want to just click once. That way, I can type in the width and the height
to be whatever I want. So why don't we go
with, let's say, 700 pixels wide by 600
pixels tall and click Okay. So we'll use this to create
our repeating pattern. I'll give this a
kind of cream color, and I want to go ahead
and send it all the way to the back
of this document. So we'll need to
remember 700 by 600. And what I want to do is start
to build out everything on the left hand kind
of margin over here. And I'll be using the rotate
tools and the reflect tools in order to build something out that I think is going
to flow pretty well. So again, rotate is
R on your keyboard, and reflect is O
on your keyboard. So I think I want to do a couple of little I don't
know, groupings. Oops, that's not
grouped together. A couple of little
groupings of flowers. Let's see if I can use some
of these in here as well. Okay. So from here, I think what I want to
do is go ahead and drop this one down because
I can see it's going to overlap and kind
of come into this area. So this is 600 pixels tall. So with just this one selected, I'll come to transform, come down to move. We'll go zero, left and right, and then we'll go down, which is a positive 600,
and I'll click Copy. So, see, I can tell that
I want to bring these up a bit so that they're
not touching that one. Now let's go ahead and duplicate this margin with
the one on the right. That way, I can see
what I'm working with. So I'll select everything that crosses over this
left hand boundary. I'll come to transform,
select move. And this time I'm going
700 pixels to the right, zero up and down,
and I'll click Copy. Now I can work on the top edge. And so I am out of motifs, which just means I'm going to make a copy of some
of these and reuse them. But a great way to do that
is just to maybe turn them around and reflect them
around themselves. You could even change the
scale if you wanted to to ensure that they don't look like an exact copy
of themselves, but they're all
still very related. I'm working on just a kind of simple all over floral print, and I want it to just flow and be kind of summary
and very natural. To make a copy of these, I'm holding down
the option key as I move them around the document, so you can do the same thing. Oops. Okay. Let's go ahead and drop this one down so I can see what I'm
working with down here. I'll select it, come to move, and then we're going zero, left and right, and
positive 600 down. So I think I want to
build out something here. This is looking kind of funny. Okay, let's see if I can
fit this one up at the top. We'll come to transform
and select Move. This time we're going up, so it's going to be negative 600. And I can see
that's overlapping, and I don't really want it to, so I think I'll move
this one a bit, like so. So it's really just
working almost like a puzzle piece
to find a flow. You can play with this until you find
something that you like, and then we'll test
it and see what, if anything, needs to change. So you can play with as many or as little motifs as you want. The fewer colors, the easier it will be to recolor once we get to
playing with colors, that'll be in the next lesson. And so I just want to
work with a couple of these extra little leaves and motifs to see if I can find
a flow here that feels like, you know, it's going to
go well with the pattern. You. Okay. I think I'm to
a place where I'm ready to test this pattern out. One thing that could be fun is to I'm going to grab a
couple of these little guys. We already use this
set of little doodads, if you will, for the
centers of the flowers. I actually think
they would also be really cute to scatter along inside of the pattern
itself with a new color. So I am just going to use the option key to drag these
around and just fill in some of the open spaces
that I think could use a little more filler or color or just something to
liven it up a little bit. Thank you. Okay, so far, I've been really careful to match everything that crosses
the top down to the bottom. Same with the left
and right, but I'm not 100% sure that I did it. So at this point, I want to just kind of check all of my margins before
we even check the pattern. So in order to do that, I'm going to delete
everything that crosses the right
hand margin and just put it back using the
left hand for a guide. So transform and move. We're going over 700
pixels zero up and down, and we're clicking Copy. Okay? Now, this came
on top of the flower. I want to just make sure
the flour is back on top. Now we'll do the same
thing with the bottom. So I'll delete everything
that crosses the bottom, and then we'll move
everything down from the top. And I'll click Copy. So why don't we go ahead and test the pattern
and see what we think? In order to do that, remember, we'll grab the background, make a copy of it, and
paste it in back. That's Command C, Command B, or control if you're on a PC. And with this selected,
you'll give it no fill and no stroke. So it's back there. Now we'll select all of this and drag and drop it over
to our swatches panel. If I come and draw
a new rectangle, then I can fill it
with our new pattern. Now, it looks pretty good. I can also come down to
transform and choose scale. Remember, we'll deselect
transform objects and just use our mouse
to scale this down a bit to see how it's looking and actually think it's
looking pretty cute. I think there's maybe area right here that I might like to
fill in as well as here. So I think that area is right here that I
want to work on. And so I think let's just maybe drop something like
a new flower over here. So let's take this one up. I will come to
transform and move, and we'll go zero, left and right, and then
negative 600 up and click Copy. Let's see how that looks. I think this area right
here is maybe standing out to me as well because
these are just so similar. What if I came in here and with the middle one used Shift
M to just close these off. And that way, it's
going to look a little bit different
than the one that's right underneath it. Okay, so let's re test this. I'll select it again,
drag and drop it over to the Swatches panel and then select this pattern and
fill it with the new one. Now we can come back to scale it down and
see what we think. I think that flows really
nicely. It's cute. Okay, so in the next lesson, we'll cover how to export
these for gift rep and also play with
different colors using a tool called the
Recolor Artwork Tool. I'll meet you there. Okay.
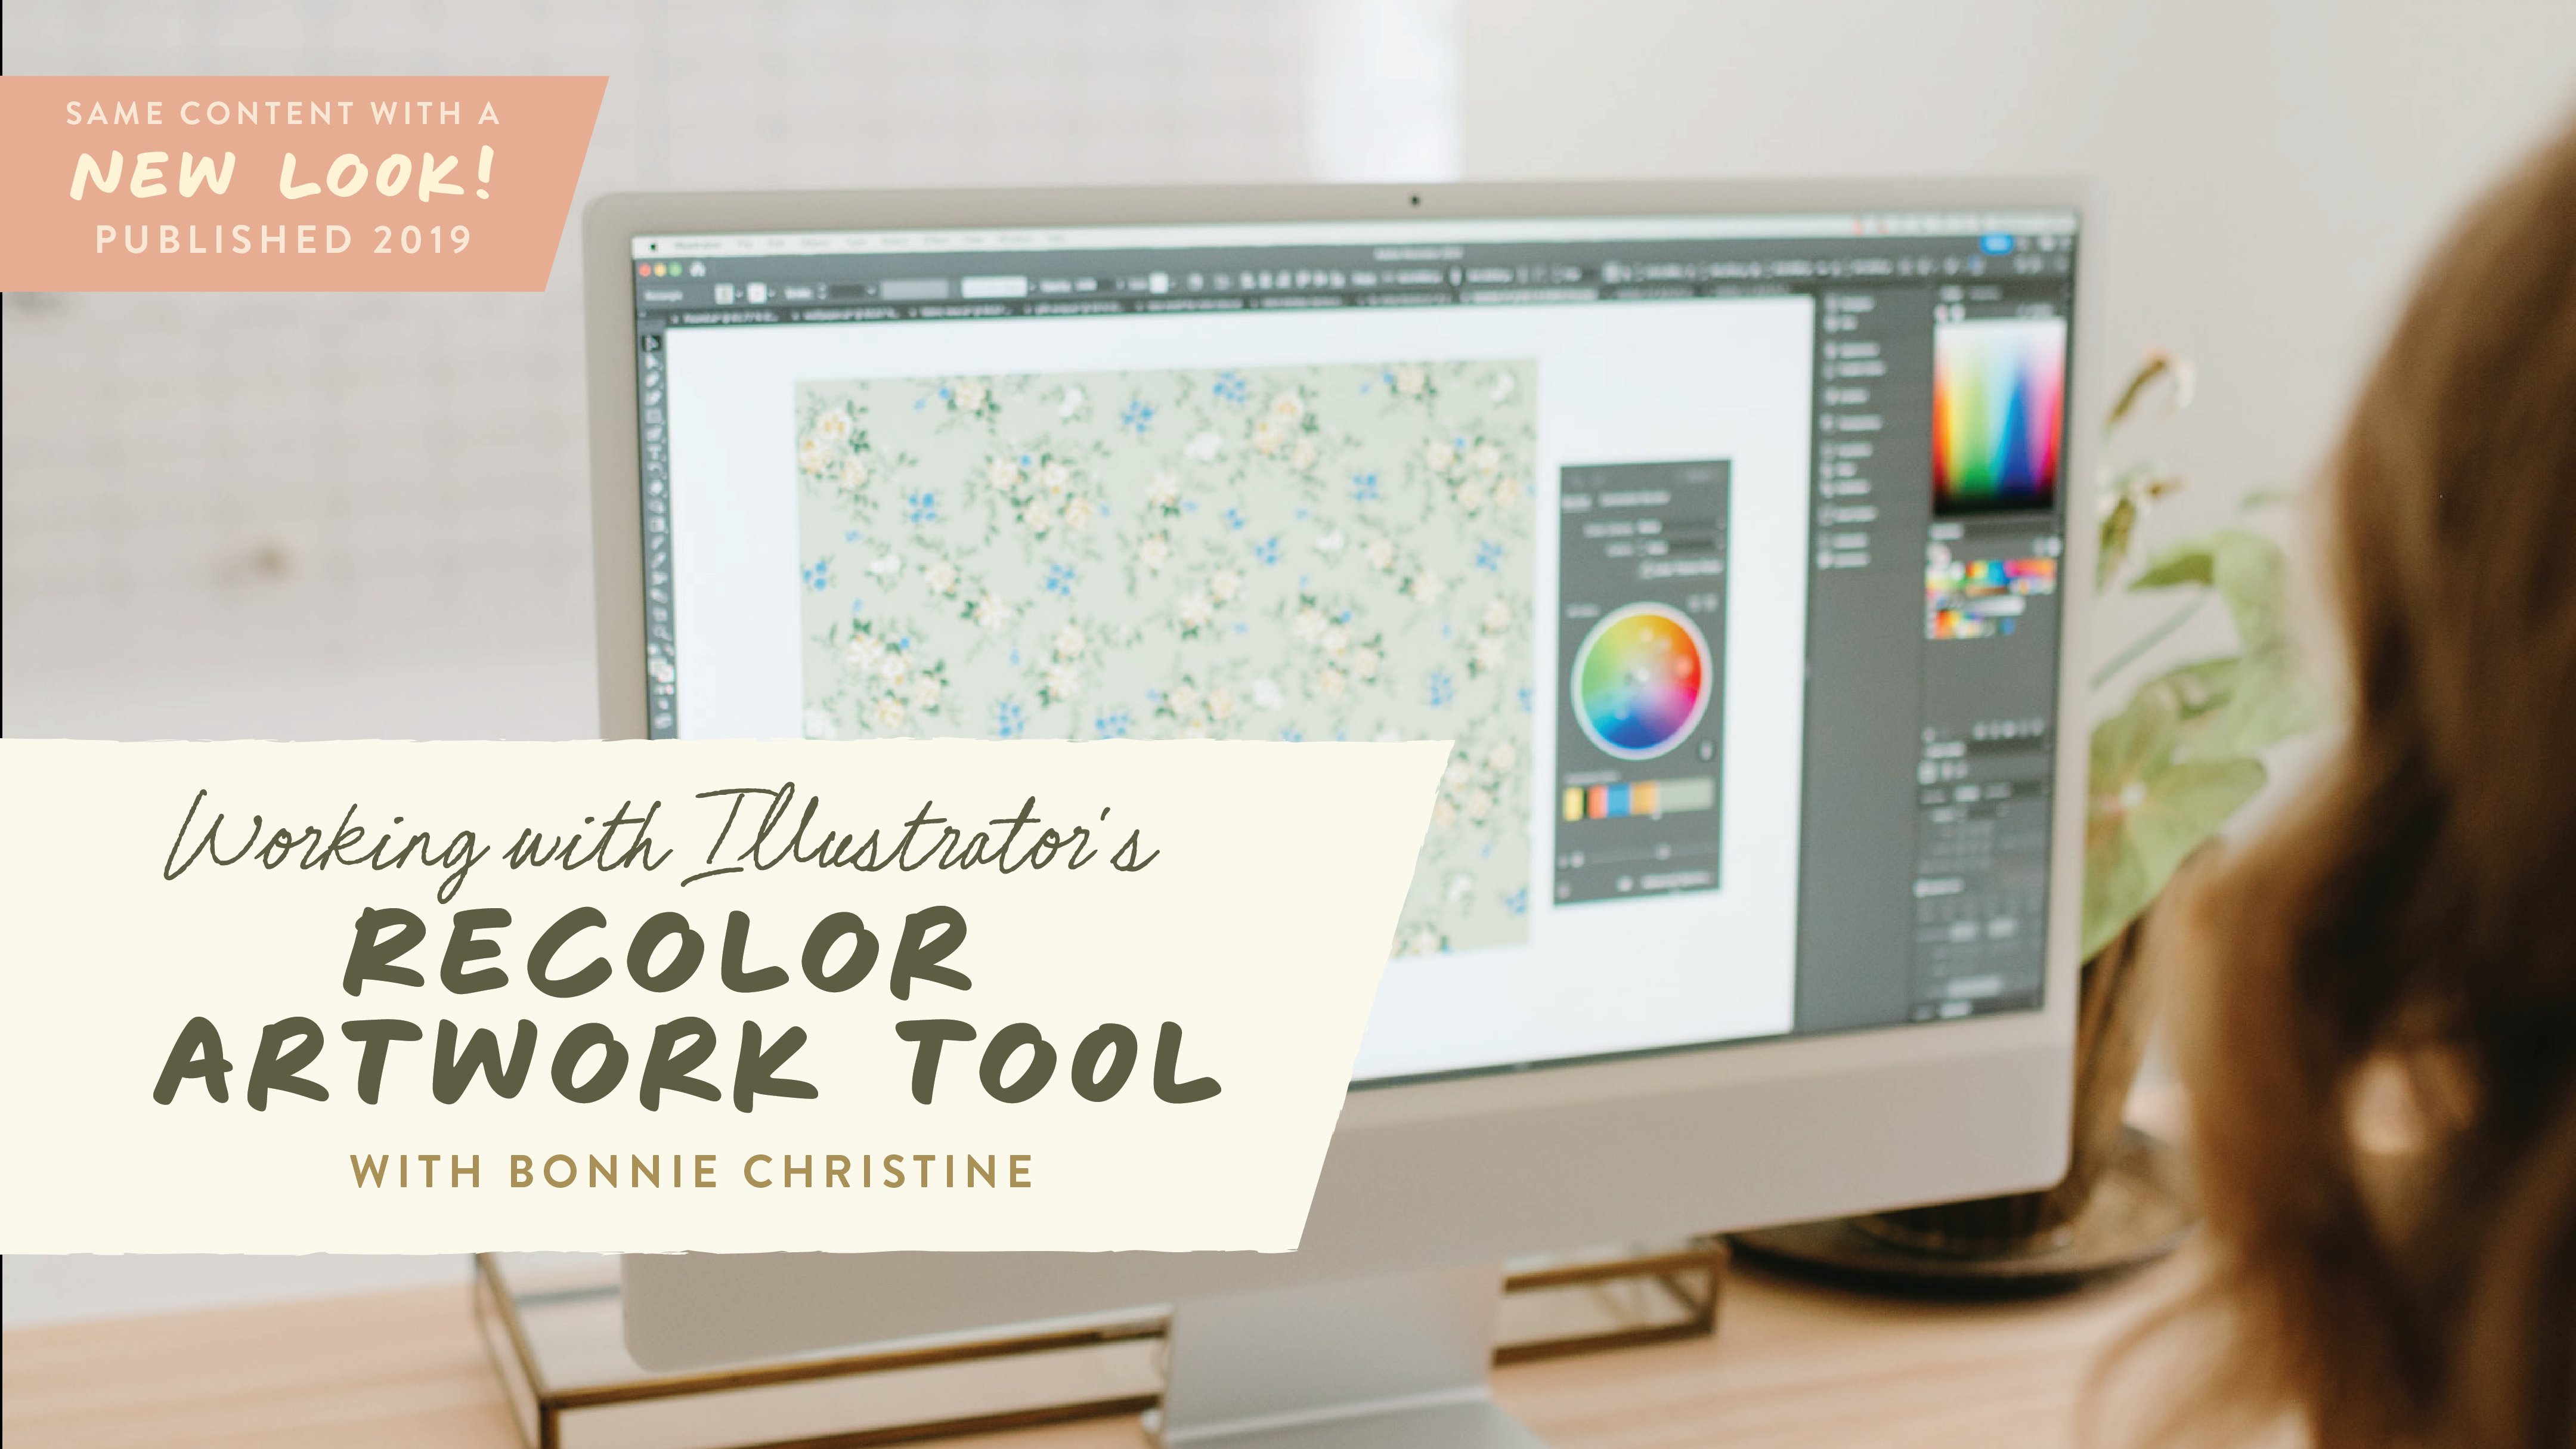
6. Lesson 5: Preparing and Printing Your Gift Wrap: Okay, welcome back. Now we get to play with color. Before we go and upload our very own gift wrap design,
I can't wait to show you. So first, I want to
introduce you to a tool called the
Recolor Artwork Tool. Warning you are
going to love it. Maybe get a little
obsessed with it. So let's take this
pattern to begin with. So this was the first
one that we created. When you click on the pattern that you want
to change the color of, you'll see up in the top hand tool bar
this little color wheel. And when you hover over it,
it says Recolor Artwork Tool. So go ahead and click on that. You will get this dialog box. What I want you to do is
click on Advanced Options. And if you want to skip
that step in the future, you can click on Open Advanced recolor Artwork Tool every time. Now you'll see the colors here that are represented
in the pattern. You'll also see all
of the color groups that you have represented
in your swatches panel. So you can have as many
over here as you want. So if you click on
the color group that we made just a couple
of lessons ago, it's going to show you
a new color option for the pattern that
you have selected. Now, you can use this box
randomly change color order to randomly change the
color order. Super fun. So you can scroll through
different options to see if there's anything that you like warning, you can't go back. So make sure if you find one that you like that
you remember it. Now, the other thing that
you can do is click on New Row to add all the
colors to the panel here, and then you can drag
and drop them around. So you can drag one up into the panel or change those
around any way that you like. Let's see if we wanted
to do something like blue and cream. You can select them to drag and drop them
around as you see fit. Let's say that I want to go with something like
that for this one. If you like it, you
can click Okay. Then select No. Okay, so let's go over to
this pattern and see if we can also find a color for this one that
we like, new as well. So this one is a little
bit more complicated. I'll click on it, select
the recolor RW tool. This time we come
directly to this panel. And now I will click on this color group and randomly go through different color
options for this one. We'll see if we come across
anything that looks good. I might make the flowers, cream, and then maybe the centers
this yellow color. Okay, so I think
that I like this. Let me click Okay, just so
that I've got that one saved. Then I can come back and
just play a little bit more. Oh, that one is really cute. Okay, let me play with
this one for a second. I might change What if
we made it all blue? I might change that
dark green to a blue? Okay, let's go with this one. I like it. Okay, so have so
much fun playing with color. You can always add new colors and just have a ball with it. Now I want to show you how to order your very
own gift wrap. I use stationary HQ for
all of my gift wrap. I love the rolls and also the sheets of
gift wrap, as well. So what I do here is come up to products and choose
wrapping paper. Then you have a
couple of options. What I want to do is the
custom wrapping paper sheets. So one of the best things to
do when you are working with a company is to see if they have any downloadable templates. And stationary HQ does,
oftentimes, they will. They have a Photoshop template and an illustrator template. So we want to download the wrapping paper template
for Adobe Illustrator. So that automatically
downloaded. All I have to do is
click on it to open it, and this is the template for
the wrapping paper sheet. So we can simply
use their template. It has their bleed
included as well. So all I'm going to do is, let's take this
gift wrap, copy it. That's Command C
on your keyboard. Come back over to your new
document and paste it. That's Command V.
And then what I want to do is add it to this
wrapping paper sheet. So to do that, I'll just
grab the rectangle tool, and it doesn't even
have to be exact. I will probably make it a little bit too big and just
draw it in here. Now, if yours did this and let's say it wasn't
filled with the pattern, all you'd have to do is use the eyedropper tool to then click on the pattern to
fill it with the pattern. So I'll click on
this and delete it. Now, this is too little
for what I'm looking for. So this sheet, if I look again, is 20 " by almost 30 ". It's 20 by 29 after
it is trimmed. So if that helps you kind
of give you some reference, I know I want this to
be a little bit bigger. I think I'll right click Come to transform and scale this up. So now I want to
deselect objects. I'm only transforming
the pattern. And let's try 150%. I do want it to be
a little bit small, but maybe even a
little bit bigger, something like that. Okay? So I'm going to click Okay. Now let's come back
over to stationary HQ. And the first thing you'll
do is select upload artwork. So you can choose
your file here. There's my PDF. I'll click Open. Now, you can hide those
instructions right there and see a preview
of your print here. This looks good.
Now, I'm logged in. I've got wholesale pricing. You may or may not,
depending on your business. But either way, it's a
really affordable way to be able to get your own
custom wrapping sheets. You can choose the
quantity here, name the project if you like. The paper stock is
between opaque and gloss. I typically always
go with opaque. It's a beautiful map finish, but of course, it's up to you. Select the orientation
if it matters. For us, it's portrait, and then simply
click Add Decart. It's that easy, my friends. Now you have custom gift
wrap at your fingertips. It is so much fun. It makes it so incredibly
special to wrap all your gifts. I hope you enjoyed
this. I cannot wait to see your gift wrap. Wow. What an incredible journey
that we've just been on. I'm so proud of you for
making it this far and really diving into the exciting world of surface pattern
design with me. Whether you're still refining your sketches or working
on your repeat pattern, or maybe you're ready to order your very own
custom gift wrap. You've already taken huge
steps towards turning your creative vision
into something that's real and that's really exciting. But we're not quite done yet. Now it's time to
bring everything together and complete
your class project. This is where the
magic really happens. So for your class project, you'll design your own custom gift wrap from start to finish. You'll find all the details about what to submit and how to do so on your class project in the details of
this class below. Also got something
really special just for you that is going to help you take your designs
to the next level. So I'm thrilled to introduce the Gift Wrap printing
Essentials guide. Now, this is an in depth guide. It's packed with everything
you need to do to ensure that your custom gift
wrap turns out perfectly. It covers file setup,
resolution tips, and color accuracy
so that you can be sure to just avoid
any common mistakes. Make sure that your design prints exactly how
you envisioned. Plus, it's filled with
my best practices and a step by step checklist
for flawless printing. It also includes an
exclusive bonus lesson. Now, in this lesson, I'll show you how to design
your very own custom tape. You could use this
for things like washi tape or packaging tape. This is going to use a
unique technique that really opens up a whole new
world of possibilities. I'll even share my favorite
printers and resources for bringing all of these things and extra touches to life. Together, this guide and the bonus lesson are
designed to give you everything that
you need to create a fully personalized
gift presentation. So just head to the
class resources to get your download and your
free bonus lesson now. Thank you so much for
joining me in this class. I can't wait to see the beautiful gift wrap
designs that you create, and I'm even more excited
to see how you'll take this newfound
skill even further. Don't forget download
the bonus lesson, upload your class project, and let's keep
creating together.
 Bonnie Christine, Surface Pattern Designer + Artist