Transcripts
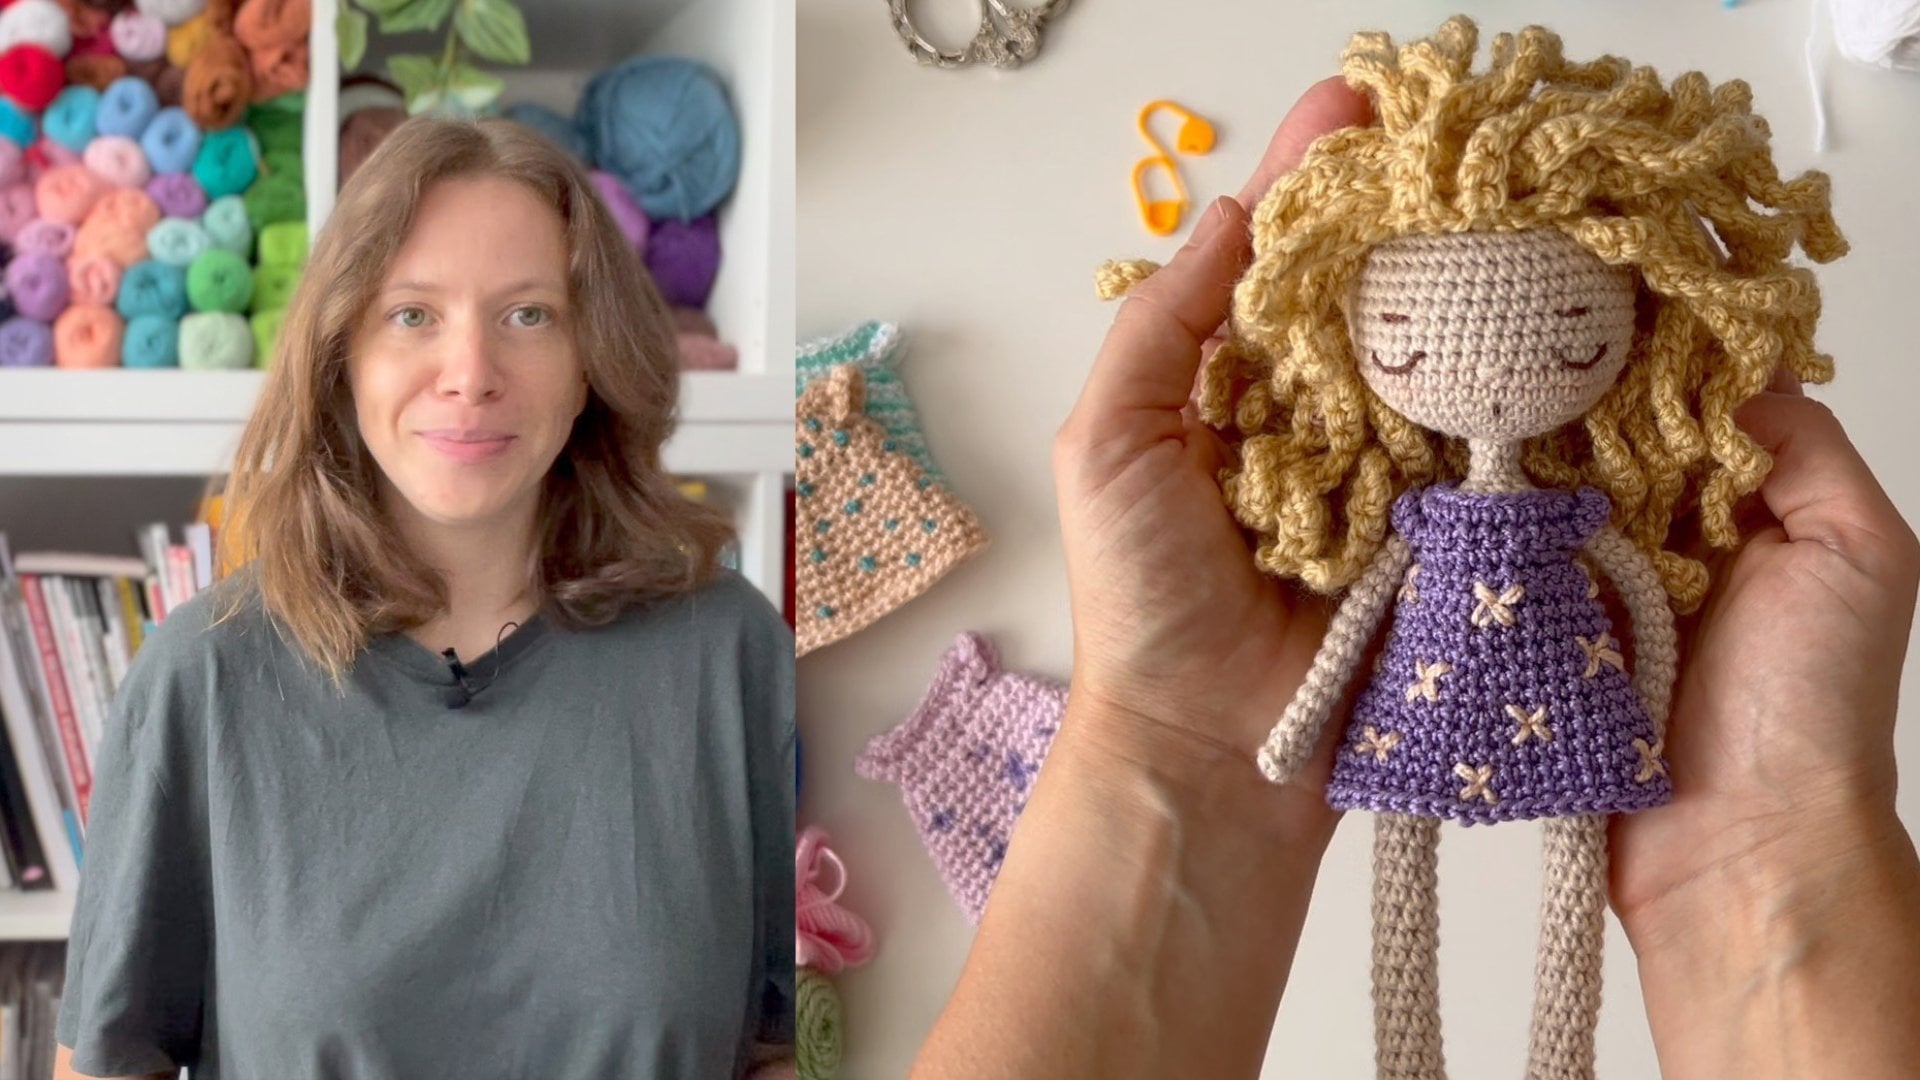
1. Introduction: Hi, everyone. My name's Paige, and I've been crocheting for a little over eight years now. When I first started crocheting, the thought of learning how to tapestry crochet
was so daunting. I put off learning how to tapestry crochet
for so long because I had such a hard time finding someone who could
teach me how to do it. Since I've been doing this
for years now, I figured, why not collect all my tips and tricks and teach you guys how to crochet any design you want with the use of
tapestry crochet. Class is perfect for
absolute beginners. So even if you've never
touched a crochet hook before, I go slow and I
explain everything in detail so you can
still take this class. It's also good for those of you who've done a couple
crochet projects, but you can't quite
wrap your head around tapestry
crochet specifically, because that's what
I'll be teaching you. Before we jump right
into the lessons, I'd like to take a
second to show you what you can do with
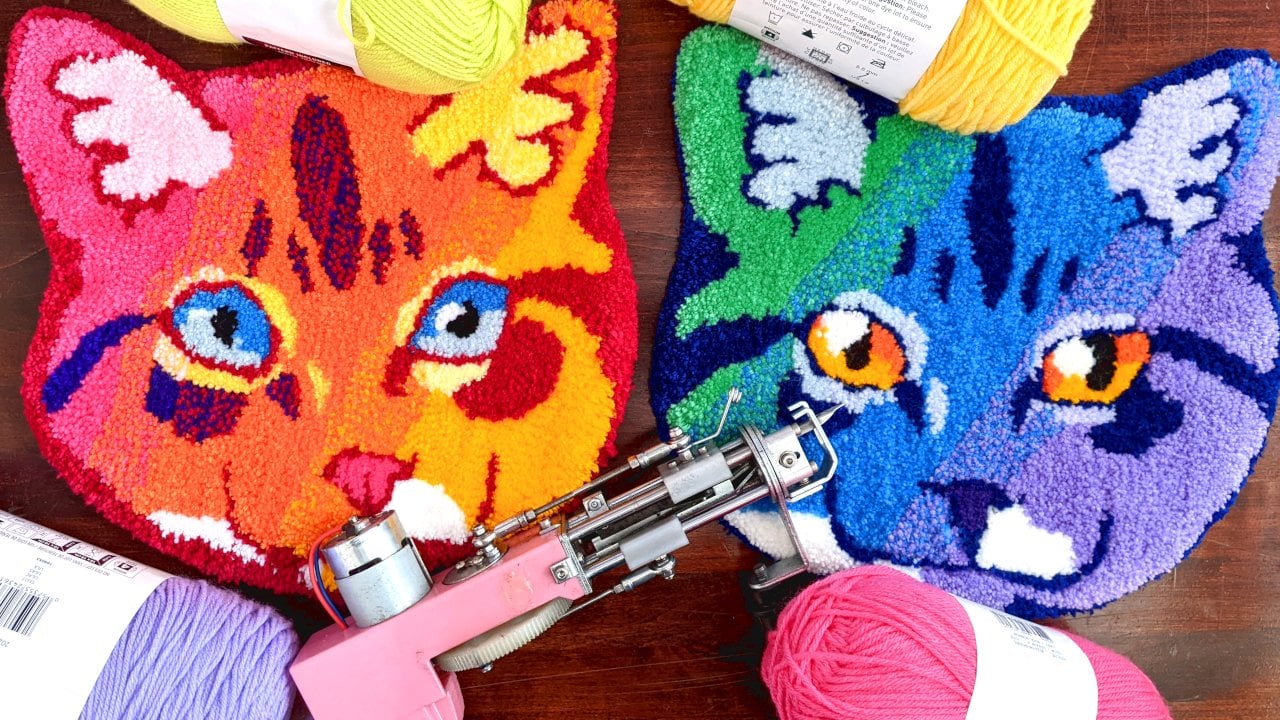
tapestry crochet. Some of my most recent
tapestry crochet projects. And as you can see, you
can make anything from giant wall hangings based off your favorite
TV show character, like a person's face
with tapestry crochet. It's insane. You can make medium sized tapestry
wall hangings based off your favorite TV
shows or even make smaller tapestry hangings
like this one that I made based off one of
my favorite video games. That's what I love
about tapestry crochet. You can do a lot
of things with it. You can make wall hangings. You can make bags. You can add tapestry to any
already premade pattern. It's completely up to you. In this class, you're going
to be learning a few things. You'll learn the basic crochet stitches necessary
for the project. You'll learn the three different tapestry crochet methods. You'll learn how to read a tapestry grid and pattern
and how to create your own. And with the provided
tapestry crochet pattern, you'll be making your
own wall hanging. After this class, you'll have all the necessary skills to crochet any size
project you want. A big tapestry, a
small tapestry, it's completely up to you. So let's get started.
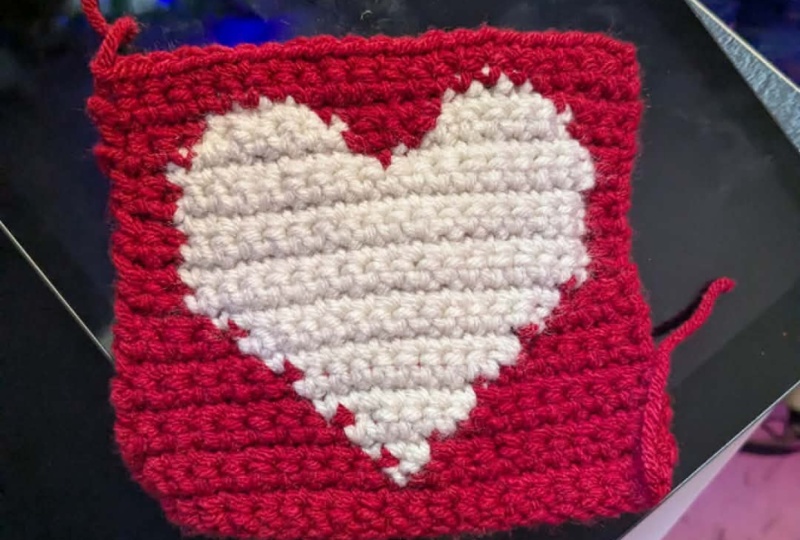
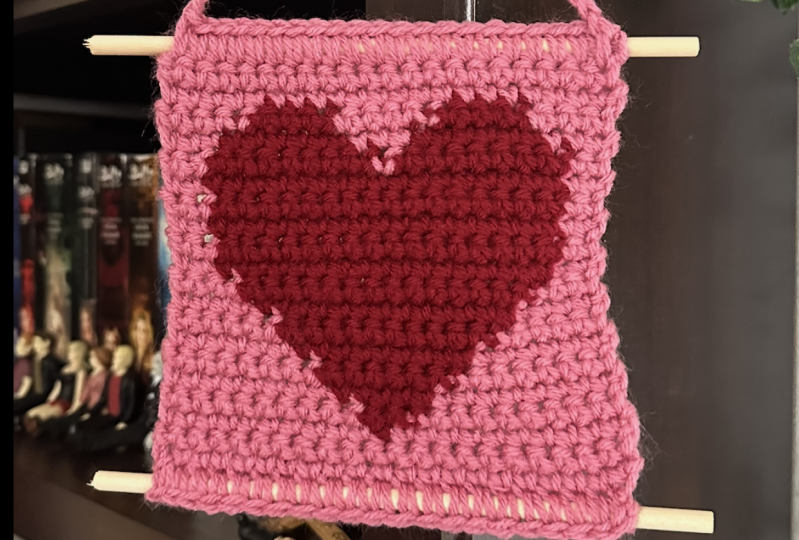
2. The Project: Project for this class will be a small tapestry heart
crochet wall hanging. We'll be using a pre
made crochet design with written instructions to help guide you along
throughout your project. Throughout this
process, you will learn basic crochet stitches, basic crochet
abbreviations and lingo, as well as the skill of
tapestry crocheting. We will be working with the premade pattern
for this project, but it will give
you the necessary skills to design your own. You're going to need a few things to
complete this project. First, you're going to
want to go download the provided grid and
written instruction. You're gonna need
two different colors of weight for yarn. For this class, I'm using
light raspberry and burgundy, but you can use any two
colors as long as you remember which ones you're
substituting for which ones. You will need 15
millimeter crochet hook, crochet needles, and
a pair of scissors. This part's optional, but
if you do want to turn your tapestry crochet
heart into a wall hanging, you're gonna need
two wooden dowels, or two chopsticks or anything that's similar
in shape and size.
3. Basic Stitches and Techniques: Let's learn some basic stitches and techniques that you're
going to need to know. Go ahead and grab one of your It doesn't matter
which color right now, you're just going to
learn the stitches. So I went ahead and grabbed
my burgundy, wait for yarn. First, I'm going to show
you how to do a slip knot. So you're going to take
the end of your yarn, and you're going to
pull a good amount out, and you're going to
take two fingers and you're going to twist. Then you're going to pull
through that top yarn piece. And there you go. Now
you have your slip knot. Now, this knot can be tightened, and we're going to go
ahead and tighten that around our five
millimeter crochet hook. The next thing I'm
going to show you how to do is how to chain. So to chain, you're
going to take the yarn. Ignore this extra yarn piece. You're going to take
the yarn that's connected to your skein of yarn. You're going to yarn over your crochet hook and pull
that yarn through the loop. And that is one chain. So you're going to do
that again, yarn over, pull through the loop. That is what it looks like
when you have chained two. Practice this for a little bit until you get
comfortable chaining, and then I'm going
to show you how to do a single crochet. Now that you know how to
do a slip knot in a chain, I'm going to show you
how to single crochet. This is the stitch
we will be using for the project
throughout this class. You're going to insert your
hook into the next chain. Then you're going
to yarn over with the yarn and pull through
that chain loop you just went into yarn over again and pull through the
two loops on your hook. Let's do one more. So
you're going to insert your hook you're going to insert your hook into the next chain
that you just did. And then you'll have
one loop on your hook and you'll have your hook
in your chain stitch. Now, you're going to
take this piece of yarn and you're going to
yarn over your hook, pull the yarn through until you have two
loops on your hook. Then you're going to yarn over and pull through both
of those two loops. And that is a single
crochet stitch. So insert your hook into
the chain, yarn over, pull through, yarn over, pull through both
loops on your hook. And there you go. You've done three single crochet stitches. Now I'm going to show you
another important technique for tapestry crochet, which is changing colors. When you are reading
your pattern, which I will show you
how to read the pattern. But when you're reading it, you'll notice that it
will say something like three single crochets in one color and two single
crochets in the next color. So it's important to know when you need to switch colors
and how to do that. So for example, three
single crochets in red, two single crochets in pink. Here's how you would do that.
You do the first three, you'll do one single crochet. You'll do two single crochet. But on the third single crochet, you're not going to
complete it fully. This is where you're going
to do your color change. On the third single crochet, go ahead and pull through the
yarn, but don't finish it. Leave the two loops
on your hook. At this point,
you're going to grab your second color
and you're going to line it up to where this is the color
you'll pull through. So go ahead and yarn
over with the new color. Pull through the two loops. And there you go. Now you
have your new color on your hook and you've completed
three single crochets. Then you just do the next two single crochets
with your new color. Just like that. You're switching colors on the last stitch
of the previous color.
4. The Three Methods: There are three common
tapestry crochet methods that I'm going to be
showing you in this lesson. The first one is the hold
the yarn as you go method. The second one, cut and
the reattach method. The third one is the drop
and pick up the yarn, my personal favorite, and also the one we're going to
be doing for this project. I'm going to be
showing you three different tapestry
crochet methods, and then we're going
to pick one to use throughout this
class for our project. The first method
I'm going to show you is the method where you hold the yarn underneath each stitch as you work
throughout the project. This is what it looks
like in the end. It makes your project have
no front or back side. Both sides look identical, and that's the appeal
of this method. If you're making something where you need both sides
to be visible, this is the method
you're going to want to. Now that you're using
your new color, you're going to take the
color that you're not using this red color and hold
it against your project. Because when you crochet, you're going to be
crocheting over both your project and the
color you're not using. Insert your hook
into the stitch. You can see where I'm
holding the stitch and you can see where I'm holding the color
we're not using. Now what you're going to
do is yarn over and do your single crochet while holding that yarn piece
close to the project, as close to the project
as you possibly can. You're going to do that
all the way across. So as you work through, you're holding that extra piece. Now let's switch colors to
do it with the other color. So insert your hook, yarn over, pull through, and then you're going to take
your new color, yarn over, pull through. And then you're holding
this pink strand against the body of your work and you're single
crocheting over the strand and into the stitch. Just like this. So
that creates a project where you can use both
sides of your project. The next method I'm
going to be showing you is the cut and
reattach method. For this method, you end up with a lot of ends to weave in. But if you enjoy
weaving in ends, then this might be
the method for you. For this method, you do your
normal single crochets, whatever your pattern
is telling you to do. Then when it comes
time to switch colors, you will cut the yarn
that you're using, leaving enough to weave in for
later, but you cut it off, and then you start
your next stitch, yarn over, pull through, and then you take your new color and you hook that in,
switch to your new color. Then you continue
with your new color, but you're not carrying like
you did in the other method, just continuing like normal. Then when it comes
time to switch colors, you do it again. You cut this off and you
put the new color on. Then as you go, you want to stop every couple
of rows and just tie a knot with the two ends so that
they don't come apart. And you'll just continue this process all
the way through. The third and last
method I'd like to show you is the drop and
pick back up method. This is my favorite method and
it's also the method we're going to be using for our
project throughout this class. As you can see, you end
up with a front side of the project and a
backside of the project. But you don't have any ends to weave in with all
of your color changes. It stays nice and clean, and what I like about
it is you can't see the other color poking
through like you can with the other methods. So this is the method
we're going to be doing, and I'm going to show you
how to do it right now. For this method,
you crochet like normal and then when it comes
time to switch your colors, you will start the stitch
to switch your color. You'll go ahead and grab your
new color, pull it through. Then we're going to treat
this side as the front side. Since this is the front side, I'm going to crochet
like normal. And you're not
carrying anything, you're dropping the
previous color back here, you're letting your
end stay there, and you're just going
to crochet however many you're supposed
to. So we'll do three. Then on your third one, when you go to change colors, what you're going to do is you're going to leave
this back here, and then you're going
to pick up where you dropped it earlier, and you're just going
to pull it over, not too tight because then
your tension will get wonky. Just going to pull
it over and go ahead and pull it through. Now you have your new color, you'll continue down the line. There you go. And when
you flip it over, you'll have the front side and then the back side where
you carried over your yarn. I find this to be the
easiest method for absolute beginners because it leaves you with less
ends to weave in, less cutting and reattaching, and it's easier to keep your consistent tension
with this method, whereas with other methods, it's hard to keep a
consistent tension. As a beginner, since you're
still figuring out tension, this is the best method that I found that works for beginners.
5. Reading Grids and Patterns: We're going to learn how to read a tapestry grid and follow along with
written instructions. Now I'm going to go ahead
and show you how to read a grid for your
tapestry project. So go ahead and either
screenshot this or you can download this
off of the class. I have this available
for you as a download, and I also have the written instructions available
for you as well. So go ahead and make sure you've downloaded both and you're looking at them while I explain this to you to make it easier. With this method, you can create any design as long
as you have grid paper. So for the ease of this class, I've went ahead and
added our numbers here, so it's easy to follow along. But you can just use any plain old grid paper and
any design you want. This is the design we're going to be doing for our project to learn how to do
the method and also change colors and make it all the way through
top to bottom and read a chart as well as
reading written instructions. So when you have your chart, go ahead and look at the
bottom of your chart. You'll see this row of numbers. Each of these numbers is
one stitch or one chain. When you're looking
at the bottom, that is 21 single crochets. Every square equals
one single crochet. Since you have 21 single
crochets on this first row, you're going to want to
chain that amount plus one. And at the end of every row, you will be chaining one. And I will show you
what that means. But when you're
reading your grid, you're going to start
where one starts, and you're going to
read it left to right. So you're going to
start where one starts, follow along, and then you're
going to get to row one. So after you've chained 22, you're at row one, and
then you're going to go back the other direction
right to left. So you'll follow row
one all the way across, and then you'll chain
one, and you'll go up to row two and you'll
go back across. So it's red left to right, right to left, left to right, kind of like a little snake. All the way up to the grid. The numbers along the sides of your project represent how many rows you're
going to be doing. So this is how many stitches
and this is how many rows. So for this project,
we have 21 stitches across and 20 rows up. I've also provided a written instruction download
for you as well, which is essentially
this grid project, but written in row
by row instruction. And I encourage you
to download this, especially if you've never done this type of crocheting before because it's very helpful it's very helpful to go through. And we're going to
be going through each row, and I'm going
to help you through it. But if you download the
written instructions, please note that
you are going to be chaining at the
end of every row. And here's some
symbols to watch out for when you do download
the written instructions. The arrows indicate
which direction you're going on the grid. The RS stands for the right
side of your project, and the WS stands for the
wrong side of your project. Every number represents
a single crochet, and we're going to have
the colors laid out as light raspberry or burgundy. But you can use any colors
that are available to you. Just make sure you
know which ones you're substituting for as
we work through the pattern.
6. Crochet Along: Now that you know how
to read the grid, how to follow along
with the instructions, some basic stitches
and techniques, let's jump right into
crocheting your project. Go ahead and get your grid chart and your written instruction, and let's get started
on our project. For this project,
we're going to start with our light raspberry color. I also might refer to it as pink just to make things faster, but it's your lighter color or your outside color that you've chosen for
your heart design. So go ahead and start
with that color. We're going to do a slip knot, which is something I
showed you earlier. You're going to
do your slip knot and put your yarn on your hook. I will be putting the row
by row instructions on screen so you can follow along with your written
instruction paper as well. So for the first thing you want to do is start by chaining 22. So yarn over, pull through, and do this 22 times. Now that you have
your starting chain, we can start with row one. This is the right
side of your project, so all tails should
stay on the back side. Or the wrong side.
So for row one, you take your light
raspberry color, which is the color
we're using, and you're going to do 21 single crochets. Since you're chain 22, you're not going to
go directly into this chain attached
to your hook. You're going to go
into the next chain that doesn't have
anything attached to it. So be sure you're not
putting your hook right into this one where
there's yarn coming out. You need to skip that one
and go into the next one. So do 21 single crochets
across your first row. In case you need a reminder, you insert your hook, yarn over, pull through, yarn over, pull through two loops,
and do this 21 times. Once you reach the
end of your row one, you're going to chain
one, yarn over, pull through one time,
and then turn your work, flip it around so your hook
is on the right side again. Now we're going to do row two. Row two is exactly the same, you're going to go ahead and single crochet 21
all the way across. At the end of row two, you're going to chain
one and turn your work. Feel free to pause between rows if you need to catch
up on your stitches, and I'm going too quickly. Now we're on row three. This is the first row where we
will be changing colors. It's important to
note that we're working on the right
side of our work, which means what
you're looking at is your front and back
here is the back. That's what that
means. Row three, you're going to do ten
in light raspberry, one in Burgundy, ten
light raspberry. I want you to crochet the first ten and on the tenth
stitch, don't finish it. Let's single crochet nine. Okay, so you've
single crochet nine. On your tenth single crochet, you're going to pull
through and do what I showed you for changing
colors. Don't finish. Grab your new color.
And since this is the front of our work
that we're looking at, we want to make sure this
little tail stays in the back. So when you pull it through,
now you're on your new. Feel free to pull this to tighten it. You're
on your new color. All of your threads
should be behind you. They shouldn't be in the front because this is
the front of our work. Now that we have our new color, our pattern says one burgundy, insert your hook and since
this is the only one, we don't want to finish it because we have to
change the color again. Pull through, and then
drop that burgundy color. Up the light raspberry you dropped and go ahead
and pull it through. This should create one
perfect burgundy stitch and then you have your ten
light raspberry stitches here, and then you will
finish this row with ten light
raspberry stitches. Go ahead and just leave that
red or burgundy strand. Just leave it here.
It's okay to hang out. Just leave it there and
finish off this row. At the end of row three,
go ahead and chain one and turn your work over. Now we're going to be
working on as you work your yarns might get a little
tangled off to the side, so you can take a
second untingle them as you go, but
it's up to you. So now you're on the
wrong side of your work. So you should see the other yarn threads
kind of sitting here. I'm going to show you how
to work a wrong side row because it's a little different. So now that you're
on the wrong side, our pattern reads light
raspberry nine times. So let's go ahead and do that. On the ninth stitch is
where we're going to be changing our color, and
here's what's different. Instead of keeping everything back here like we did before, since this is the wrong side, we want to pull that
thread to the front. I just use my right thumb
to hold it in place, and then you're going to pick
up the color we're changing to and then we're going to just pull it
over to where we need it, yarn over and pull through. Now, when you do this, your pink strand
should be facing you. You should see it should
be on the wrong side, with this little
strand we have here. Then you're going to it
might get a little tricky because you'll see how you pull this red piece in the way. Just go around that
red piece and go into that light pink spot that light raspberry spot and do your first single crochet. For this row, we
are doing three, two and then on the third one, this is where we
change our color. Again, since we're
on the wrong side, we want all of our ends
to be on the wrong side. Pull your color this way. You can hold it with your thumb. Then take your other color and go ahead and yarn over
and pull it through. This is what your project
should start to look like. You should have these strands
going back and forth. Make sure you hold this
out of the way with your thumb and go ahead and start working
into the next stitch. Now, you changed one
and you turned around, and this is the front
again, the pretty side. You want all your ends
to be on the other side. This is row five. We're
on the right side now. We're going to do
eight light raspberry. And on the eighth stitch is where you're going
to change your colors, keeping all of the
ends on the back, drop your pink, pick
up your burgundy, pull it through, and do your
five burgundy stitches. On the fifth stitch, you're going to
drop your burgundy. Find where your
light pink ended up. Should be over here. Pick it up. And you don't want
to pull this too tight because if you
pull it too tight, your project will kind of bend like this and you
don't want that. So you kind of want it to
stay loose, kind of, like, let it flow over and then wrap it around your
hook, pull it through. Chain one, and turn. Working on the wrong side again, we're going on row six,
seven light raspberry. On the seventh is where we're
going to change the color. Keep Remember, we're
on the wrong side, so we want to pull this
little guy into the front, hold it with my thumb,
find our burgundy strip. Yarn over, pull through. And you can always
tug on this if your stitch got loose
like mine just did. You can tighten it a little bit, and then do your seven
burgundy stitches. Don't finish the
seventh one, pull your yarn to the front, hold it, grab your light raspberry, change it to a raspberry, and then seven
light raspberries. Now you're going to chain
one during your work. You're back to the right
side for row seven. Do six light raspberries. On the sixth is where
you change your color. All of your strands
should be on the backside together. Change your color. See how my stitch just got
really loose right here. So I'm gonna go ahead
and take this and just kind of tug it
just to tighten it. That might happen as you
go along, and it's okay. At the end of the row, you
chain one, flip it over. And now we're back on the
wrong side for row eight. Got five light raspberries. On the fifth one,
we're changing colors. Since we're on the
wrong side, you should see all your
little ends here. Pull this, hold it
with your thumb. Grab your burgundy and pull
it to where you need it. Yarn over, pull through. On the 11th one, pull
the yarn to the front. Go find where you dropped your
other stitch, pull it up, yarn over, pull through, to your last five raspberry. Chain one, and turn your work, and we're back on the right
side going into row nine. Yarn over with your new color. All of your strands can stay on the back we're working
on the right side. On the 13th one,
don't finish it. Go and grab your strand. I like to kind of
lay it like this to make sure I'm not
pulling it too tightly, and then do your last four
light raspberry stitches. Chain one and flip. So you're on your wrong
side going into row ten, three light raspberry on the third one is when
you change your color. And since we're on
the wrong side, we're going to pull
it to the front. My work is curling a little, trying to hold it so
you can see it better. Yarn over, pull through and
do your 15 burgundy stitches. On the 15th one,
pull to the front. Grab your other
color, yarn over, and do the last three
light raspberries. Chain one, and turn your work. You should be on the right
side as we go into row 11. For Row 11, it's two
light raspberry. On the second one,
change your color. On the 17th, grab your other piece of
yarn, no, pull through. Two, chain one, and turn. Now, the rest of this project is exactly
like I've been showing you, so I'm going to go
ahead and let you do rows 12 through 20 on your own. And then we'll meet back at the end when you finish row 20. We'll meet back at the end, and I'll show you
how to finish off. So now that I've worked through a little over half
of the project with you, I'm going to go ahead
and let you take the reins and finish
your project throughout. Follow along with the written instruction like I showed you, and be sure to remember to chain one and turn at the
end of every row. Be mindful if you're
on the wrong side. Or the right side
of your project and where your ends should be. I'll meet you back here
when you finish row 20. Once you've finished row 20, your project should
look like this. You should be finishing on a wrong side row and you finish row 20,
but you haven't changed, so let's go ahead and
chain one and then take your scissors and leave
a good enough length, a few inches to
weave in your end. Cut the light pink off
or light raspberry, pull your yarns straight out, your hook straight out, and that creates a knot on your yarn. Then go ahead and go to where you have your
burgundy color, cut that off, leave some
room to weave in that end. Now all that's left to do is do the finishing touches
to your tapestry.
7. Finishing the Project: Oh, you've done all the
crocheting. That's finely done. Now it's time to just
do some final touches, like weaving in
your ends and maybe even adding some wooden dowels and making
it a wall hanging. Now that you've completed all of the crocheting of the
tapestry section, we're going to go ahead
and weave in our ends. So how earlier I had you
grab a crochet needle. These can be metal or plastic. They usually come in plastic,
but either one will work. So you're going to take
your crochet needle. And flip your work over. Now, you should only have
four ends to weave in. You should have
where you started, where you first
added your burgundy, and then where you
finished with both colors. To weave your end in,
you're just going to insert the yarn
into the needle, and then you're
going to make sure you're on the backside
of your project, and then you're going to
go to where that color is, and you're just going
to insert your needle. There's not really
a rhyme or reason. You just insert it where
you feel it will fit best and you do this
through a couple stitches. And then you can cut
closer to your project. Go ahead and do that
for all of your ends, just these other three ends, and then come back here. Now that all of your
ends are weaved in, your tapestry
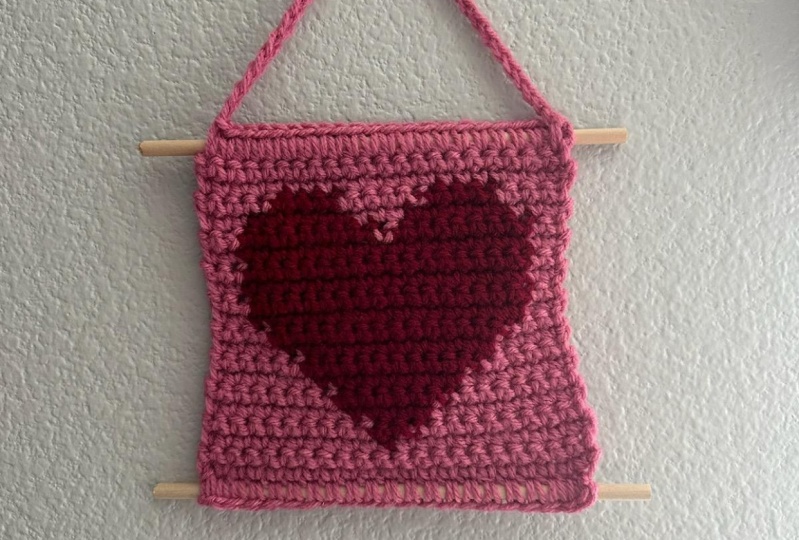
project is complete. So if you'd like to stop here, you can totally do that. But if you'd like to continue and add some wooden dowels to the top and bottom of
your project and make a cute while hanging
like this one, then go ahead and keep watching
this part of the lesson. You're going to take your two wooden
dowels or chopsticks, whatever you have, and I'm going to show you
how to attach them. Mine are a little longer than
I usually would like them. But for the purposes
of learning, I'm going to use this long one so you can really
see what I'm doing. You're going to take one of your wooden dowels and place it at the top
of your project. Then you're going to
take the color of yarn that matches
your background. For me, that's light raspberry. And we're going to be
using the same hook that we used earlier in our project, the five millimeter hook, and what you're going to
do is make a slip knot. Perfect. Put your hook through the
slip knot, tighten it. Okay. And then you're
going to insert your hook into your first stitch right
here of this last row. Then you're going to put the wooden dowel
against your project. And we're going to be single crocheting around
the wooden dow. So I'll show you what
this looks like. You'll do the stitch
you already know. You will yarn over
and pull through, and then you'll have
your wooden dowel between where your yarn is
and where your hook is, and you'll yarn over, and
you'll pull it through both loops like you would when you're normally
working down a row. I'll show you a few more
times. Insert your hook. Use your left hand to hold the wooden piece and
the project together, and then you're going to insert your hook into the next stitch. Your hook should go
behind the dowel, yarn over, pull
through that stitch. Should have two strands
on your hook now. Yarn over, pull
through both strands. Now, this part might not be
as tight as your project, and that's okay because it's all going to
stretch out anyway. Then you'll insert to the
next stitch, yarn over, pull it through, yarn over, pull through both stitches. Now, keep doing that all
the way across the top, and I'll meet you
at the end here to show you how to tie it off. Okay. And once you
reach the last stitch, ah, it is a little tricky to do. You should look
something like this. And then since this is
the top of our project, we want a little piece
of something to hang. So you're going to chain until you have
the length you want. For me, that's going
to be about 28. And now that I have 28 chained, I'm going to insert my hook into the first stitch I made
right here and go slow. It is a little
tricky, but I'm just going to pull the yarn through. Yarn over, pull it through the stitch and pull it
through the loop on my hook, and then I'm going to chain one, and then I will cut this yarn and pull my hook all
the way through. Then if you want for
extra sturdiness, you can tie a knot between
these two strands. I usually do that just to keep everything sturdy.
Then there you go. You have where
you're going to hang it, you have your top rod, and then you're just going
to do the same thing for the bottom of your project, but you're not going to
add that chain part. You're just going to do it
chain one and cut it off. When you're working that
bottom wooden dowel in, a helpful tip is to insert your hook into this back
loop thing you have here. You have a weird
back loop on this because this is where you
started your project, so it won't look like a normal stitch like
the other side will. So you're just inserting
your hook into this back loop
stitch right here. It'll be one strand, whereas the other side, it looks like two
because it's a stitch. Then at the end of
the row, chain one, cut the yarn, pull it through. And then earlier,
you're going to take one of your crochet
needles and just go ahead and go through
and weave in all the ends that we just made from adding
the wooden dowels. Now, all your ends are weaved in and your project is done.
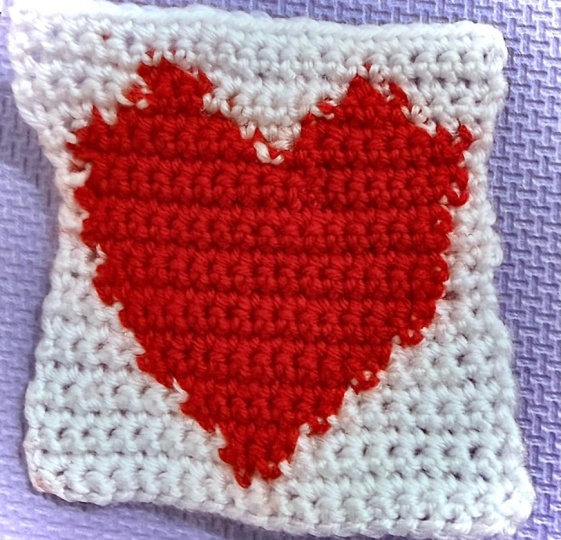
8. Conclusion: Did it. You finished
your heart wall hanging. Oh, my gosh, even if you didn't make it into
a wall hanging, this makes a really
cute coaster, or you could even pin
the corners on the wall. You don't even have
to add the wall hanging parts if
you don't want to. But congratulations.
You've made it to the end. You've learned how
to tapestry crochet. You've learned how
to read a grid. You've learned how to follow along with written instructions. You've learned all
the basic stitches you need to do
something like this. And now you can take those
skills with you to make any kind of design that you
want with some grid paper, color pencils, and some markers, and a dream, okay? Congratulations. You
made it to the end. Don't forget to take a
second and take a picture of your finished project
and share it with me, as well as leave a review
for the class or even follow me on skill share for future crochet related classes. Thanks for hanging
out with me and learning how to
tapestry crochet, and I will see you next
time. Happy crocheting.
 Paige Nicole, find me on youtube!