Transcripts
1. Welcome to the class!: In today's digital age, technology is
continuously evolving and offering us new avenues to
explore our creativity. Ai, or artificial
intelligence is one such groundbreaking
tool that is revolutionizing the
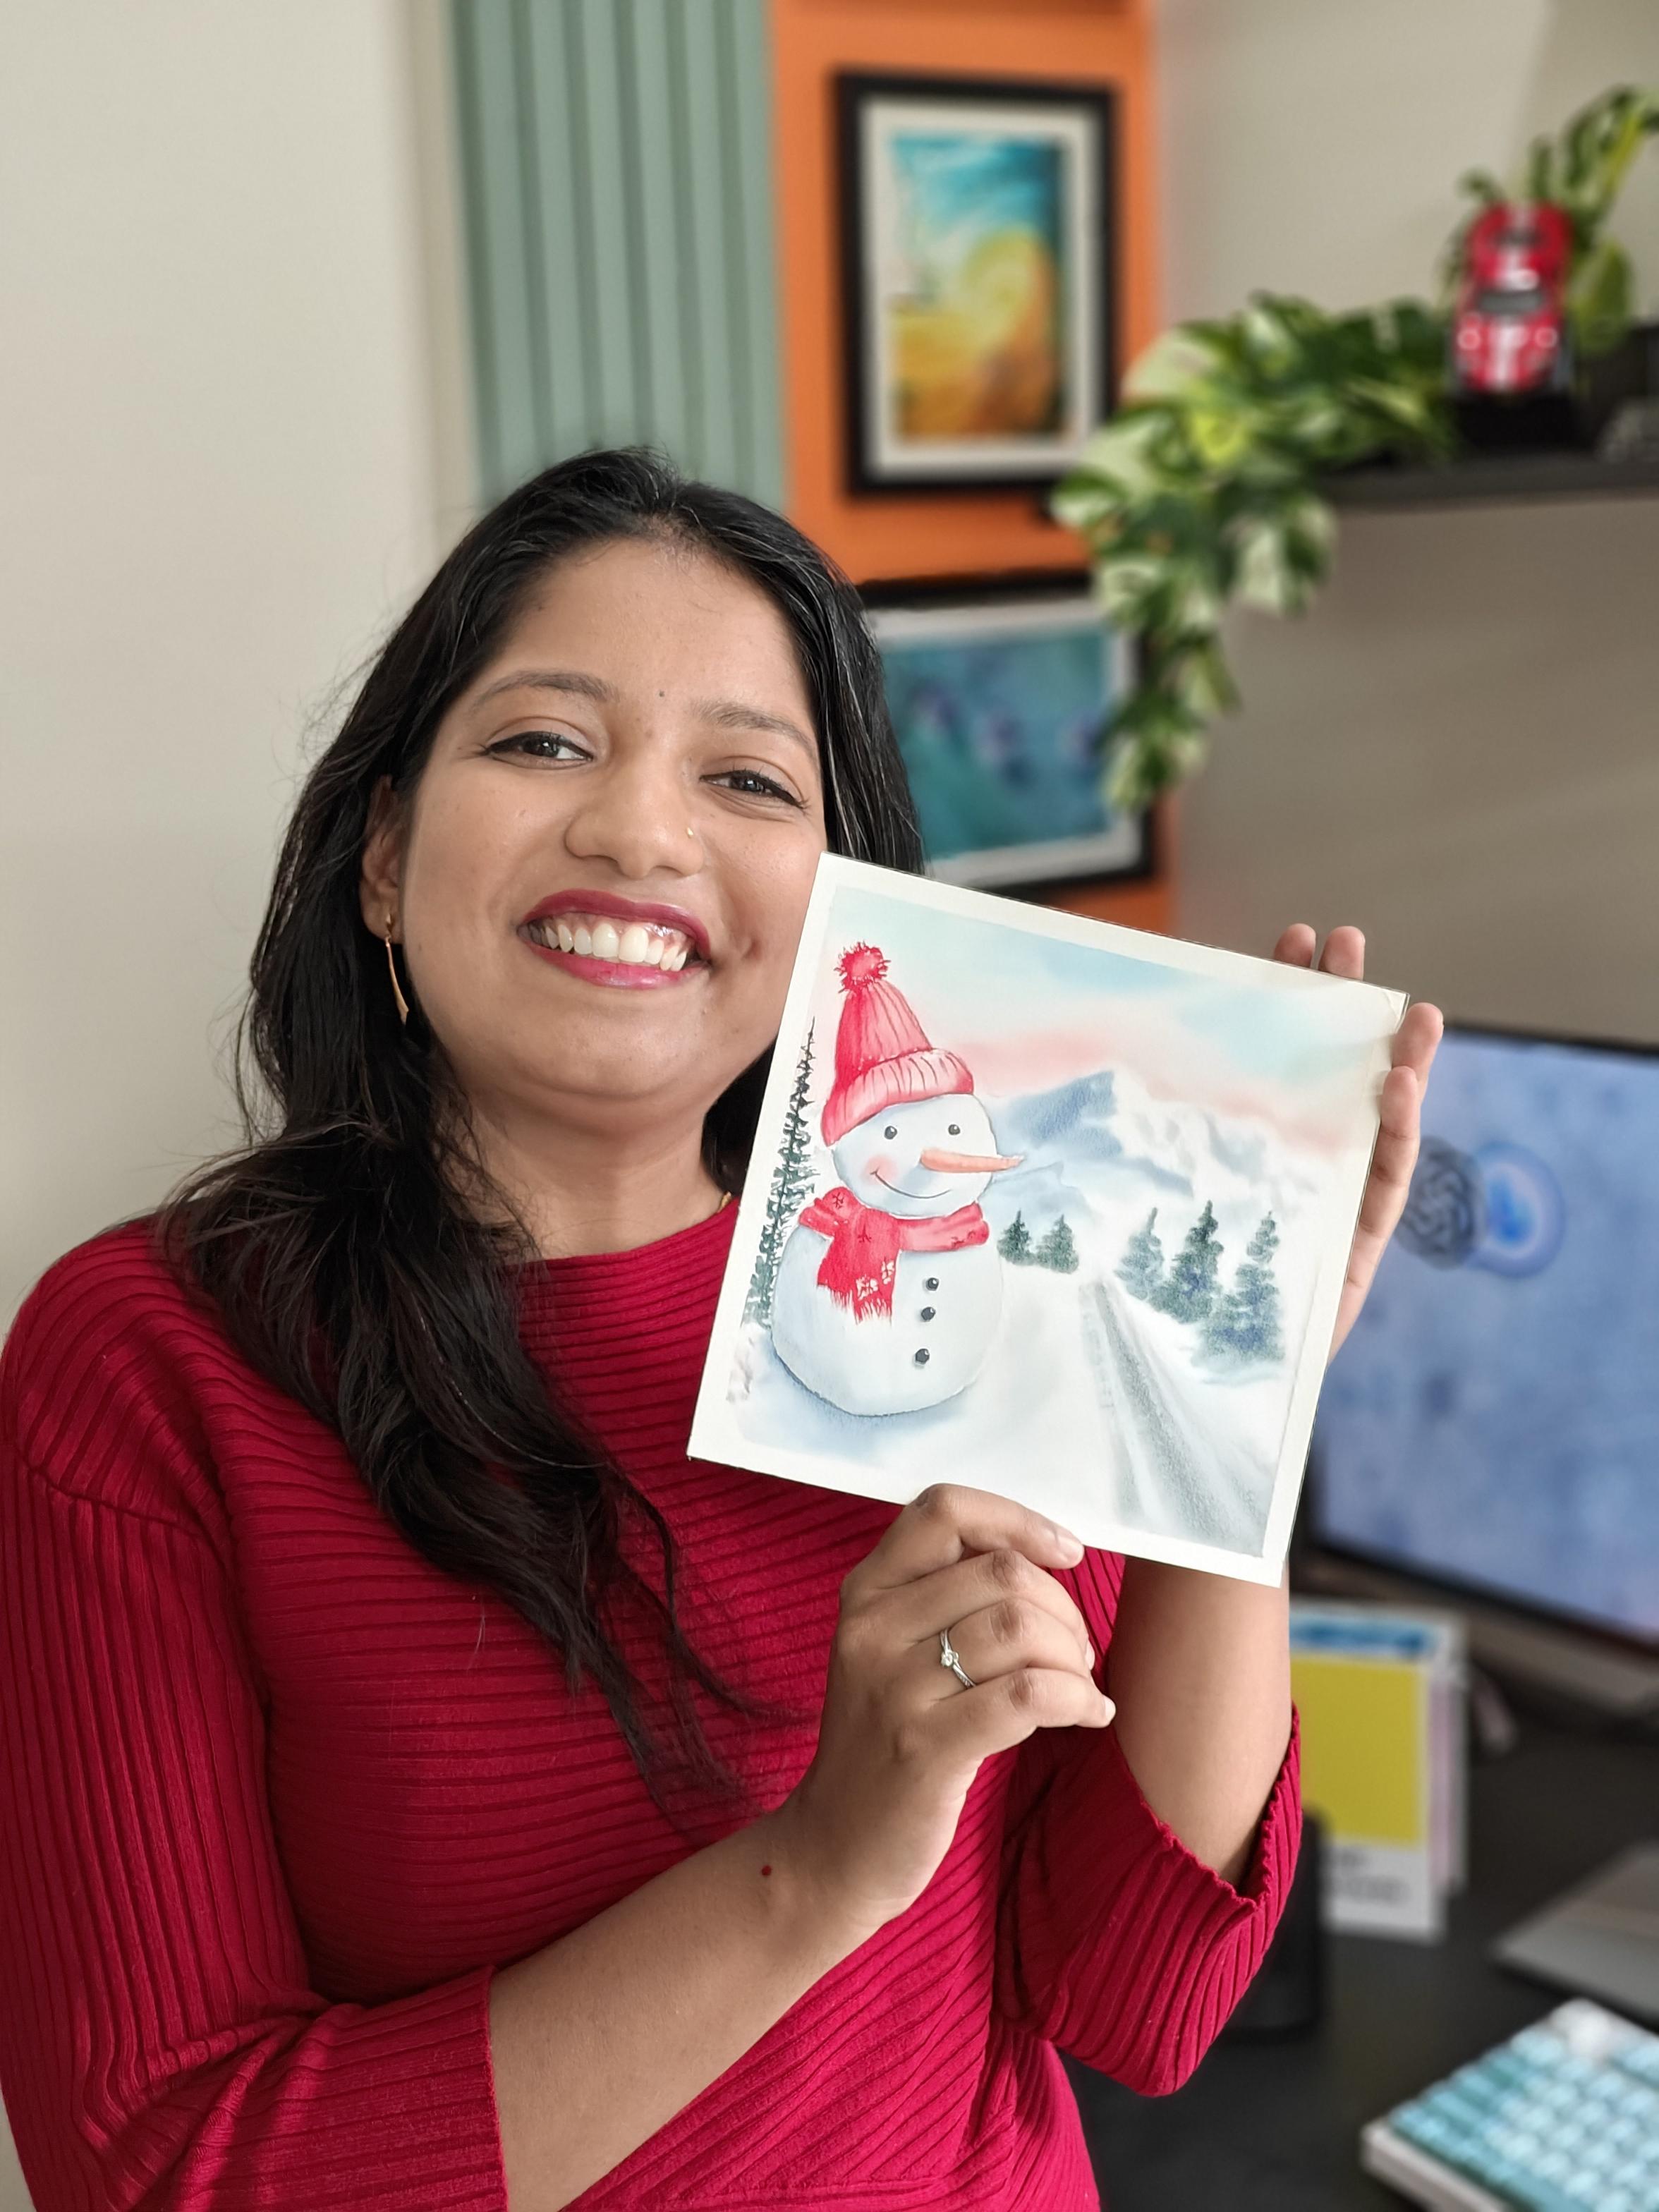
way we create art. Hi everyone, I'm Swati, a watercolor artist by passion and a product manager
at Microsoft. By profession, I go by the handle tinted
toodles on Instagram. I'm Microsoft certified
AI fundamentals, that is AI 900. And I welcome you to this
exciting skeltere class on painting holiday
themed cards, magic of AI generated images. In this class, we will delve into why and how AI can help us generate inspirational
images that brings out our unique
thoughts and ideas. Giving our holiday cards
a truly customized touch. Traditionally, when we set
out to create a holiday card, we often start with a
reference image and then try to align our
imagination with it. This process can sometimes
limit our creativity and make it challenging to bring
our unique visions to life. But with AI generated images, we have the power to reverse
this creative process. Instead of confirming
to our reference image, we get to let out
our imaginations run wild and bring
our ideas to reality. One of the most incredible
things about using AI in art is the
flexibility that it offers. You get to choose the
style and medium that best suits your
artistic sensibilities. Whether you prefer
the softness of watercolors or the dynamic
energy of animation, AI can adapt to your preference. Color selection becomes
an enjoyable exploration. When you have AI on your side, you can experiment with
a wide range of colors, ensuring that your holiday
cards capture the essence of the season in a way that
resonates with your personality. And for those of us who
sometimes struggle with adding depth and
perspective to our artwork, AI can be a great teacher. It helps us understand where and how to incorporate
these elements, elevating the visual impact
of our holiday card designs. In conclusion, this class is an invitation to combine your imagination with
the power of AI. Together, we will
create holiday cards that are not only
visually stunning, but also deeply personal. Let's pick up our brushes, embrace the limitless
possibilities of art and technology, and get started on
this exciting journey to create holiday cards that
are truly one of a kind.
2. What you can expect: Thanks for joining my class. In this session,
we will embark on a creative journey that
merges with a world of traditional art with the
cutting edge capabilities of artificial intelligence. Let's explore how AI
can empower us to craft personalized and
imaginative holiday cards like never before. Why AI for holiday cards? Traditionally creating
holiday cards often involving
finding reference, image, and attempting to align our imagination
with these visuals. This process, though
it is very rewarding, could sometimes
be limiting as we try to recreate
someone else's vision. However, with the advert
of AI generated images, we have the opportunity
to turn tables and bring our unique
thoughts and ideas to life. Ai allows us to infuse our cards with a highly
personalized touch. Instead of confirming to
a pre existing image, we can craft visuals that
truly reflect our thoughts, emotion, and the message
we want to convey. Ai offers a vast area of
styles and artistic mediums. Whether it's lifelike
watercolors, captivating animations, or any other artistic
form you desire. The only limit is
your imagination. Here, with a generated images, we can take control of
the creative process. No longer are we bound
by the constraints of technical expertise or the worry of converting images into
our preferred medium. Ai provides a bridge between our ideas and their realization. Ai generated images can serve
as a invaluable reference, helping us grasp the
intricate of depth, perspective, and
visual storytelling. Whether you are a beginner
or an experienced artist, AI can be a guiding hand in perfecting your
holiday card designs. How does AI help? How exactly does AI assist us in creating these
beautiful holiday cards? Ai allows us to
take the spark of an idea and transform it
into a tangible reference. Instead of struggling to match our vision to a reference image, we get to dream and
vision and then watch as AI bring
our ideas to life. Ai enables us to choose
the colors, styles, and themes that
resonate with us and our imagination and
the occasion in hand. The power is in your hands to craft unique eye
catching designs. With AI, you can work in the artistic medium that
you're most comfortable with, whether it is digital art, watercolors, or any other
medium of your choice. Ai generated images also serve as a fantastic
learning tools. They help you understand where
to add depth, perspective, and various artistic elements, enhancing your artistic
skills along the way. In conclusion, in this class, we will dive into
the world of AI generated images and
harness their potential to create holiday
cards that are not only beautiful but
deeply personal. I'll continue to paint a
watercolor holiday card. As part of the class project. I urge you to
publish your prompt, your AI generated image and
the final artwork as well. So that we can all see your imagination and see
how it has come on paper. Let's understand a bit about
artificial intelligence, natural language processing, and get started with
the class project.
3. Let's understand AI in simplistic terms: What is AI in simplistic terms? Imagine AI as a digital
artist assistant. It's like having a smart and
creative partner who can help you with the tasks that
usually need human thinking. This partner can look at lots of information, learn from it, and then use that
knowledge to do things like making predictions, solving your problems,
or even creating art. How does AI work? Ai starts by looking at massive
amount of information. It's like reading
lots of books or studying countless paintings
to understand patterns. Just like how you practice your painting skills,
AI practices too. It learns to recognize shapes, colors, and ideas from the
information it collected. Once trained, AI can use what
it has learned to help you. It can suggest colors, styles, or even create new images based on what it learned from
all that information. How does AI benefit
people worldwide? Ai is like a helpful
friend that can make life better for many people
in many different areas. Be it in healthcare, education, finance, transportation,
customer service, E commerce, Enron, mental care, accessibility, language, or even entertainment,
just to name. So think of AI as a friendly tool that brings a touch of magic to
your creative world. Helping you with your art, and making life more
interesting and comfortable for people
all around the globe. There are many AI tools for creatives like My Journey,
Adobe, et cetera. I'm going to show how to
use a chat pot that is Bing chat that uses
to generate images. As per my prompts that I give. Using a chat pot
has its own perks. You get to chat with it, like how you explain
things to your peers. Bing Chat is a chat pot within Microsoft edge
browser application that can be launched anytime. Microsoft has integrated an
advanced version of Dal model from Open AI into Bing
Chat, known as Three. This integration is
designed to make image generation
easier for users. And it allows them to create and refine images through
conversation with a chat pot rather than relying on the perfecting
their initial prompts. Dal Three stands out for its improved creativity and photo realism compared
to its predecessors. Microsoft has also introduced safety tools within a Al three, including watermarking
a generated images in bring image creator and implementing a content
moderation system. You can use it to create images from natural language
prompts within Bing chat or even within the website,
Bing.com slash Create. Do note that these images are for personal and
noncommercial purposes only. I'll go ahead and set
up the Bing Chat. Now I'm using Windows
operating system to use Bing Chat on a Mac Open, your preferred web
browser like Chrome, Safari, Firefox, and go
to Bingchat website, www.bingchat.com Now I open Microsoft Edge App
Open chat board, set up to Creative. And I will open the
browser version so that I can show my
prompts easily to you. Now I can ask any questions
and expect a response from it as it understands my language through natural
language processing. Now the question is, what is
natural language processing? Let me show that
question to Bingchat. This is a very
descriptive answer for what is a natural
language processing. Let me ask you to summarize
in two sentences. Basically, this is a
branch of AI that helps computers understand and
manipulate human language. Whatever language I'm using, the phrases, all the adverbs, nouns in order for
the chat board to understand what my sentence mean and the emotion behind it. That's all done through
natural language processing. Now that we know what is
natural language prompt, you can start to ask being
for your AI generated images. Let's try some prompt
in the next lesson.
4. How to frame your prompt : Let's understand how
to create a prompt. I have created my prompt
in three different parts. First, wherein I tell what role it has to assign to and
what I expect out of it. That is watercolor
artist is the role here and I expect holiday
cards out of this prompt. Next, there is some description about what I want in
the holiday card. Maybe the nature, it
has roads, trees, snow landscape, and a
snowman placed somewhere. All this becomes the key
words of my description. Next up, even further details
which may or may not be, that is a carrot
and a black hat. This way, what happens, My prompt will have three
distinctive categorization. First is the initiation, then the description,
and then the details. When I give this entire
prompt together as a sentence to chat bot, that is the being chat. It will now understand that I'm looking for a
holiday card where I'm painting a
watercolor holiday card along with all
these descriptions. And I want you to generate
that something for me with the natural
language processing and by all those key elements in my sentences that
I have provided, it will be able to generate
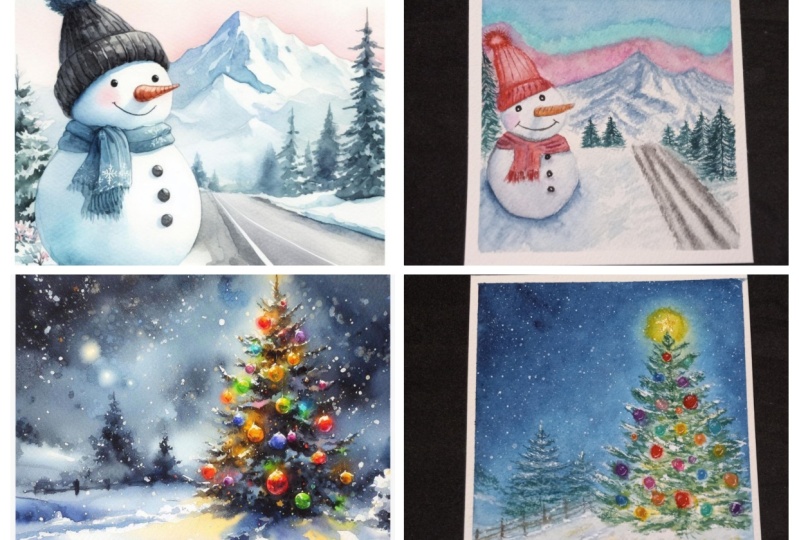
these images for you. See, all these images look good. Now, if you have very specifics of how your image should come, you can specify that as well. Here, I want the background
to be of a pastel theme. I'll mention that in
my prompt as well. You have to remember that
it might not be able to edit the same exact
images it had shown before. As it generates on the flow, it doesn't make edits to the previous suggestions
that it had made. This looks more near to
what I was expecting. Let me give an
example of how you can create for another
medium, like here. I'm trying for digital art. Okay, here I'm looking for pop of fibrant colors,
of Christmas theme. And I've also given the
elements which I'm expecting in this prompt here. The key is that all these elements are
running towards the viewer. That is, towards
the screen or us. Let's see how this is
going to turn out. I'm imagining
something literally coming out of the screen for me. Oh, the first one does
the trick, right? It looks like Santa is
just running towards you and it has so many vibrant, beautiful
Christmas colors. So I think it did understand
what I was imagining. Actually, I missed out adding a Christmas tree
in this image, right? So let me go back edit my prompt and ask it to add
a Christmas tree as well. It gives a summary
of my prompt and says that he's
generating what you say. This, this is the call
that is going back to Dale that I had explained
in my previous lesson. It's trying to generate
the image and here we go. Yes, we do have the Christmas
tree in this prompt, right? So this is how you can create with different
mediums as well. For the next medium, I'm
going to try with acrylic, and now let me try something
different and give it that it should take
inspiration from Monet artworks. Of course, there are a lot of works available
on the Internet. It'll have that in its data now. We'll have to try to incorporate Christmas as well
as Monet artworks. Let's see how it comes, it shows these are the images
that it could find. A Monet artworks
that is correct. Is it is trying to generate
some of the images, uh, incorporating some of those elements into
the Christmas theme. Let's see how this turns out. It still has a brush strokes
like how we saw above. I think there is some
similarities within it, but of course, there is
difference in the medium, so it will not be
entirely the same. But this is not what
I quite had in mind. I want it to be specific to the Lies series,
Water Lilies series. I'll go ahead and mention that. Okay, now you know how much these keywords
actually matter. While you're adding the
prompt, these keywords help. While natural language
processing is happening, these keywords are
extracted specifically and all the search and
the generations are done according to that. Make sure to keep these
keywords when you're describing your prompt so that you get very much near to
what you're imagining. Okay, I think here
what it has done, it has taken some of the
reference of the water lease, but just generated
a holiday card writing Merry Christmas. And this is not what
exactly I wanted. I'll ask it to create a different version
with the Santa in it, because I want it to understand I'm not looking for a direct holiday card like this, but a reference from
which I'll be able to go ahead and make some
changes in my painting. This is the summary
of my description. It, it has added that
the Santa is riding, let's see how it comes up. And if it is what I'm imagining, this does look beautiful. But this is not exactly
what I had in my mind. There is a Santa riding
that I have to give, but this is quite not the
same what I'm imagining. I will rephrase my
description again. I will tell about a snowman, um, and watching over the lake with the water lilies
reference or inspiration. It's a small cottage
or a village, a scenario where
I want it to be. You see, all these
was in my head, but it never made
it to the prompt. A I will not be able to understand without
these keywords in it. I really want to emphasize more and more that keywords
matter a lot. You have to be very descriptive
of your imagination. You can take multiple attempts, see what it is missing in your previous prompts and
update it in watercolors, and in my digital prompt, it was very quick in
understanding or maybe I was very quick and very clear in explaining
what I wanted. This version seems somewhat
near to my imagination. The only thing missing is water
lilies from Monet's work. I'll specify the same and emphasize more on it so that
I can get something similar. Yes, this prompt, the summary of what it is giving
looks promising to me. So let's see how this turns out. Trust me, this is exactly
what I had in mind. Very much near is the third one. This is the one. The
only difference is maybe I had expected Santa
Claus to be a bit bigger. But nevertheless, with all the perspective and everything, this looks very much
near to my imagination. And I'm really happy with it. So this is how you can give your imagination
into prompts and create your own AI generated
prompt or artwork. I'm really excited to
see all your creations. And for my class project, I'm going to take some of the
references from here that I generated for watercolors and I'm going to go ahead and
teach you how to paint that.
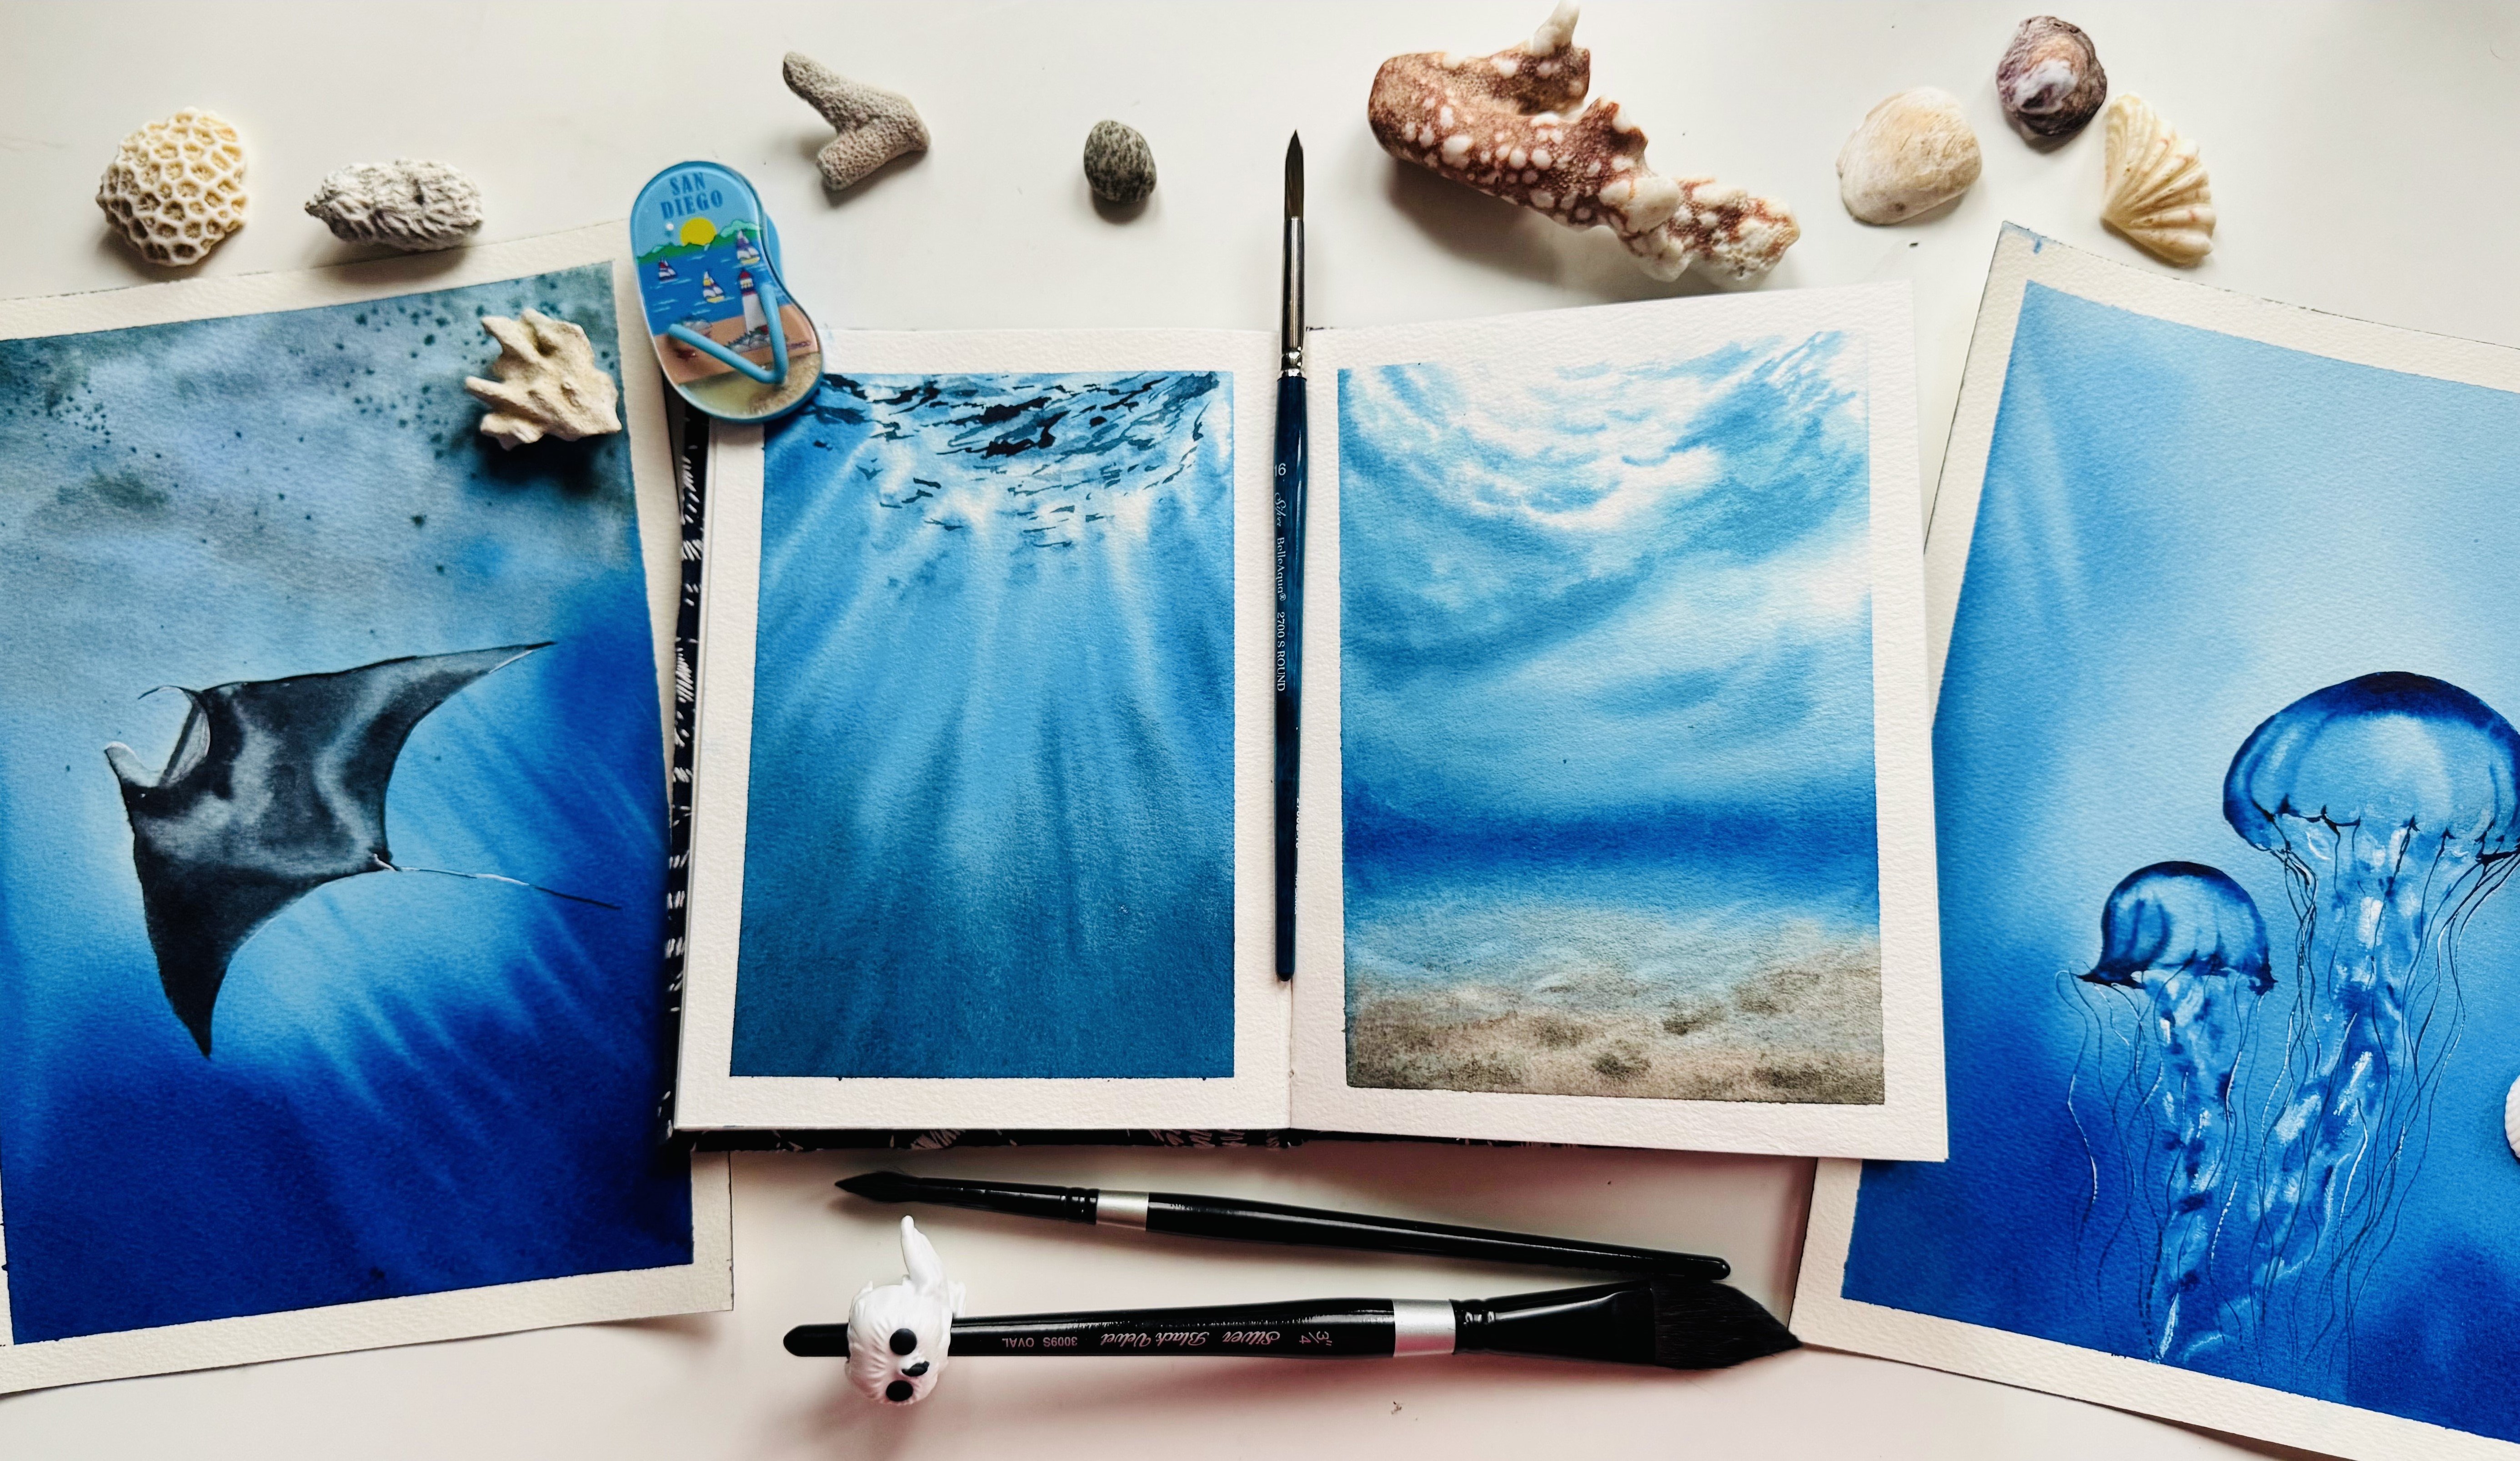
5. Supplies required for painting: Coming to all the supplies that is required for this class. First off is paper I have
used saunders water, food, CP 100% cotton paper I have cut into the size of
a square of 18 centimeter. Okay, This becomes
the size of it. All right. You can see that the tooth of the
paper is fine grain, so this much is enough
for me to get started. Okay. Next off is a pencil
and a needable eraser. This is really helpful
if you want to remove excess of graphite from your paper or even to remove any of the mistakes
that I have happened. Some of the watercolor brushes, and these are the four
brushes that I have used. One is a flat brush
to apply water, and also to keep rewetting
the paper whenever required. This is from Princeton, a square wash brush
from Neptune series, And it is of three fourth size. Okay. I really like
how this brush works. It is also very useful
for all the flat washes, if I do any in my paintings. Another one from Princeton is this liner brush of size one. This is totally and
completely optional. If you have a very pointy
tip with your round brushes, you can choose to use that. You can choose to use that only. This is from Princeton Aqui light series liner
brush size one. The other two brushes
are from silver brush, black velvet series 3,000 S and their size
8.4 respectively. They have amazingly
pointy brush trips that retain a lot of water
for good amount of time. So these are the brushes that I use and some of the
mixing palettes. These are ceramic ones, You can use any others that
you have a masking fluid. This is from brand brustro, but you can use other
masking fluid also. This is completely
optional for this class. You can use white quash or a white pen for wherever I've
used masking fluid as well. Okay, then we have
a spray bottle so that if my paper starts
to dry off from one edge, I can just spray it and
activate the paper. Or even to activate the
paints whenever it's needed. Okay. And some of the
watercolor paints, we will be looking into all
these watches later on. So these are some
of the watercolor paints that I'm using, a masking tape and a nectrolic board so that I can tape down my paper for painting. This is another brush
that I have used for adding masking fluid
onto the paper. Okay. So these are all the
supplies that I'm using. Let's see, all the colors
used in this class. Chevy Starting with for the sky. I have used Coral. This is from brand, this is from Band White Nights, this entire Tin and
also row squads. Actually I've used
a mix of both. If I mix them, I'm
getting the shade. We can use only coal
as well if you want. Okay, Next is celestial blue and a bit of mint. Okay, these are the shades
I have used for sky. Also used the shade for
adding cheeks to our snowmen. Now next is our major
color, that is indigo. Different shades of indigo
rather, let me show, with more concentrated indigo, the colors are varying and this is the
next concentration. And if I add a lot
of water into it, this becomes our very dull
or diluted share of indigo. Okay, and indigo I have used extensively for the mountains
and the snow capped land. Even for snowman. Okay. Next is greenish umber. This is from brand sell. This is for adding trees. In fact, you can
just mix indigo to your green and you can use
the same shade as well. Okay. Next is neutral tint, that's also from white nights. This is the shade. Okay. So this I've used for road and giving some
more depth to snowman. Okay, Next up is the red shade. I have two shades for getting
the perfect that I wanted. One is palm brand PVC, and the other shade
is a crimson. Me, I have mixed these
two shades and I have got this beautiful red. Let me show you this red. Okay. You can see how gorgeous
this red looks. I will show in the class in
what ratio I have mixed. This is that one red that
I have used extensively. Okay. Next is cadmium red light from white nights as
well as golden deep. These two I have used for the carrot that we
are using. Okay. The last but not the least, I have used paints gray. You can skip using paints gray and just use neutral tint only. It's up to you. Okay. These are all the
colors that I have used for painting
our holiday card.
6. Basic watercolor techniques: Let's go through all the
watercolor basic techniques that are required
for this class. Okay, to get started with, I'm going to show the
Ton Wet technique. In this, the paper
will be wet as well as the paints
that you will be using will also
have water in it. Hence, it is called
Ton Wet technique. This helps us to achieve the
soft edges of any object in our watercolor painting
show a color indigo. Okay, here you can see, even though I'm
stopping it right here, once it completely dries, you will have a very soft
edge to it once it dries off. This is the ton with technique. I'm going to be using
this for adding a distinct mountain and
even the background, basically the entire painting. The next technique is a
bit extended part of it, wherein the paper is semi dry. It is not having
so much of water, but it is still damp. It helps me to enhance
some of the features of my objects that I'm adding and not completely merge
it with a background. Okay, For that what I'll do, I'll add some water
here and I will let it dry for a bit and then come back and
add my object onto it. Okay. Okay. Until
this is drying, let me get ready with the masking fluid
on the other side here. I'm taking a very old brush
and dipping it into water, removing the excess of water. Let me just draw a line here. Okay, so this is a masking
fluid from bristo. This is optional
in this painting. You can skip it, but here I've applied it. And I'll wait for it
to completely dry off so that I can show you how
to, how I have used it. Okay. Now there is a thin line of shiny layer on
my paper. So this is good. I'm going to add an object here. Say for example, I'm
going to add a pine tree. Okay, Red is not at
all my first choice. But let me yeah, here you can see that even
though it is dispersing, it has not dispersed completely
like the other side. I can still see some of the distinct features that I want to retain
off my pine tree. This is extensively used so that I can retain
the structure of my object and not have any harsh edges in
my painting as well. Okay. In this same,
usually what happens, even though you
want your paper to retain water for a very
long duration of time, sometimes it dries off. In that case, what I
do is I take water. This is a paint here right now, you can see that there's
a harsh edge created. I dip into water once again
in my brush remove excess of water and just slowly merge it. I'll continue to do
that until I reach a place where the paper
is still having water. You can see that here
there was still water. It easily merges off with it. Right? So this way
also I'll be able to add additional depth here. Now that it is still wet, I can go on and add additional
additional paint onto it. And here I will have a very
smooth transition, okay? Okay. Now, okay, next
up is lifting for that, let me add two colors here, Both these colors here. Okay? Now, I'll try to lift
off some of the paint. For that, I'll dip my brush into water and dab off
excess of water. And just apply
some pressure onto my brush and remove
water like this. Okay. Again, dip it into water. Remove excess of
water from the brush. Same. I will do with the
other pigment as well. This is called
lifting technique. And I'm doing this while
the paint is still wet. You can also come back
and try the same. Once the paper is
completely dry, then you'll be able to lift. The only difference is here, you do not get any harsh edge. It is softer, but once
the paper is dry, you might expect a hard edge, but it is also completely fine. It, if it suits your painting, you can try that itself. Okay. Now this is dry. Let me go ahead and
add the paint here. The job of this masking fluid
is to make sure there is no paint u at the places
where it has added. So once the paint
completely dries off, I'll come back and remove
this masking fluid. And we can see there will be wide spaces remaining as it is. If you don't have a masking
fluid, it's completely fine. You can use a white quash
wherever I have used masking fluid and it is completely optional
in this class. Okay, a few of the
other basic techniques is how you can
control your brush. If you want to add some
finer details or anything, you make sure you hold your brush at the
further end of it, at least after this
bulge that you can see that it becomes easy if
I keep it in this angle, which is easy for me. Okay. If I want a little
bit of smaller lines, I can always, again, hold it nearby and
just do it this way. Yeah, it depends on the length of the line
that you want to paint. Also, if you want more paint to be coming
out of your brush, all you have to do is put a bit more pressure
while applying. For example, here you can
see that you get more paint. Okay? This is some of the brush management techniques that I usually use that
has helped me a lot. And of course, it has come with a lot of practice
and everything. Okay. I'll wait for
this to completely dry and come back and show
you how to remove it. Okay. Seems like this is dry. Before you start opening, I will make sure to just
it once if there is any pat dry on the masking
fluid that will come out. Okay, now next I'm going
to take any sharp object. I'm taking this flat brush. You can also use a palette
knife to start removing it. Here, let me show it. This only start by one
corner and then pull it off. Okay, it's that easy. You just have to make sure to wait until it's completely dry, else there might be
tear in your paper. Okay. So you see how
easy it is to use this, but again, it's completely optional and you can use white. In fact, if you see
my end painting, I have not used masking
fluid a lot at all. That can be very
easily achieved with just a white ball pen. This is all about techniques. Now let's get started
with our class project.
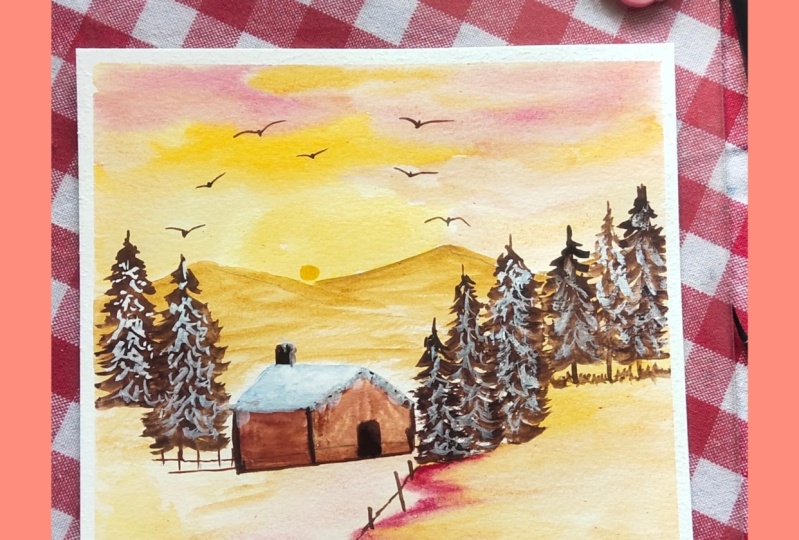
7. Outline: Welcome back to the lesson. Now that I have my
reference image from the being chat
that I have generated, I'm going to get started with
painting that holiday card. I have my needable eraser here and a pencil.
Let me get started. Here is my horizon line. This would be my horizon line. Just not entirely half, but around a bit more than
three fourth of my paper. Okay, this is my horizon
line, almost half of it. I have this snowman here. Let me first draw a first draw the snowman here is
one circle, okay? And here it's a bit flat, so I'll do that later on, this becomes the cap part of it. Okay, so this is our
point, the cute cap. And here we have the eyes. This is our carrot, and this would be the mouth. Okay, let me remove
unwanted lines a bit here. Okay? And this one, it's going to be a
bit flat over here, So I'm doing that. And let me remove this. Okay? So I'm fixing this a bit, and now I'm adding the
muffler part of it. Okay. Now I'm adding
the buttons as well. I want to add those
no elements on the muffler right now so that I'll get more time for it
to dry off completely. Here I'm taking
the masking fluid from and a very old brush, a very thin brush as well,
in order to apply it. You can completely skip
this step and make use of a white guash or a white bullpen at the
end of the painting, Okay? So the next one is Road. It would be from here up
until this part, okay? And the same one is
coming from here. I will go over till here. Okay? Now for the mountains, I'm going to add a
pointy mountain here. I want to leave a good amount of space for the sky,
so that's why. And bringing it here, these are some of the small
peaks that are visible. Okay. I'm not going to
draw the pine trees because those will be on the
floor that I will paint. This is our entire sketch. Let me go ahead and remove
excess of graphite from paper. So this is just I'll also
extend this mountain part here, but mainly we will
have a tree there. No. Okay. I'm removing multiple
lines from the caps here. Since we are painting
in watercolors, having multiple lines
will be visible if you're using very
transparent colors. That's why I'm making
sure to remove multiple lines or
even harsh edges on the paper before I start
with the painting. Okay? Okay. This looks good, so I'll get started
with my painting.
8. Background: Here. I will first start with
the entire background, the pines, and everything, and then I will start
painting snowman. Okay. For applying of water, I'm going to take the flat
brush from Princeton, dip it into water. Also, I'm keeping a
spray bottle ready so that in case something
starts to dry off, I can just activate the paper
again by spraying water. Okay, so let me start
flying water here. You can use any
other brush that you have for applying water. Just make sure it is having a good tip so that it helps you to twist and turn so that you
do not paint over snowman. I'm not taking too much
water in my brush. I'm taking only a
little bit at a time. Okay, Now I'm starting with
my second layer as well. Now that all the borders
are done easily, I am just putting some
water here and there. And by the default
property of water, it will flow back to until its edges till wherever we have applied water
for the first time. Okay. I'm tilting my paper and removing excess
of water from it. Okay. I bring my pistol set here. This is from white knights and I'm going to
take my brushes. These are both
from silver brush, black velvet series, and size eight and size
four respectively. I will start from the sky part. For that, I'm taking Coral. Okay. And a little
bit of Rose squads. So this one is Rose squads here. Okay. I'm happy with this shade. So I'm going to start
from applying here. Make sure there is
not too much water in your brush else it will start to seep into the mountains part as
well, which we don't want. Okay. So these are all. I'm making sure that the
excess of paint or water doesn't flow back into the peaks and just
falling it across. Okay. Once they are
there, once it is done, I'm going to just smudge it with the background and I'll also take some and apply
it on the other side, because anyways, it will
dry very light in color. So adding some more coral, I have a tissue paper
handy here so that I can remove excess of
water from my brush. Now, I will be taking
a celestial blue from this palette and applying
it here randomly. At some places I'll
also take mint. And apply it on the top. This just gives me the feel of candies during the
holiday season, so that's why I have kept it, these with pastel shades. Okay. I'm happy with how our background has
turned out now. Next part, I'm going to
start with our mountains. Okay, For that I'm
going to need Indigo. I'll keep my pastel
palette away. Okay, so for Indigo, I'm going to take it
into a separate well here I'll take a smaller size and I'll be very
careful to not have too much paint in my
brush or water in my brush else it will
go back to the sky. Right. So I'll just make sure that there is little
amount of paint and water. Okay. I'll take some more
diluted form of it, dab it onto paper, and start with the
below layer as well. For the other places, some of the peaks here and
there they are in the back. My focus here will not be
on the mountains at all. It is mainly on the snowman. Hence, I'm keeping
minimal amount of details onto the
mountains part. Okay. I observed that
these are all drying out. I'm just retting it a bit. There was some excess
paint in my brush. Okay. Now, for the next one, I'm going to take some
of my greenish umber, this is my horizon line, right? So I want to add few
pine trees there, just some zigzag motion. And I do get the pine trees, I'll also make some indigo
to it so that I get a darker pine tree shade. And that is going all
the way back here. Okay. And now more of greenish umber and just the zigzact
lines for pine trees. If you want to learn how to paint pine trees more precisely, there is another class of
mine that you can refer. Okay. Once this is done, I'm going to take
some paint screen again, mix it back to it, and add it here and there, so that difference
in the tunes gives a very beautiful effect once the paper completely dries off. Okay, now we have to come back to painting
this side of the snow. Let me stretch here, okay? So this is one part of our snow cap and this
is the other one. So I'm taking some
indigo again and marking our road here with this. Okay. So once, let me see if
the paper is still wet. Else I will have to at
least add this part of it. Because I'm going
to paint the roads. Okay, For the roads, I'm going to take some neutral
black into my palette. Okay? And I will start
from one end of my paper. I'm going to leave
that wide space here and not paint on it. There's also one more thin
line of it's required. The thin line would
be here. Okay. I'll just take some
more water on onto my brush and just bring
all this across like this. I see that they're mixing of, of course due to water. So let me do a
quick lifting here. You can skip this and just add the white lines using wash at the end of your
painting as well. Okay? Okay, so this becomes my
road now for the next part, I'm going to take more indigo because we are going to
add the snow part here. It'll be very diluted, so I'll add more water
and wrap off excess of water from my brush. And start with, okay, getting the feeling
of a bulged here. I'll take a bit of more
concentrated indigo to add the shadow
of our snowman. Okay, so this is
our snowman here. I will add another pine tree, so let me get started with that. I'm going to take greenish
umber here and tilt my paper a bit like this and start
with it, pointy tip. Make some indigo to it. Okay. And the place where
it is meeting the ground, there's already water in it, so it will beautifully emerge. Now I'll take some dilute
indigo and we'll also add some leaves here. I'll extend it.
This will give us the feeling of snow
capped um, leaves. Okay, just a little bit. You can add this with the help of white quash later on as well, but I'm going to
use indigo here. Okay. I'll take some coral, which is there already
on my palette here, to add blooms of flowers. Okay? Okay, this looks good. I think the background part, we are almost done here. It looks a bit white. So I'm going to take
some indigo and extend our mountain to
this side as well. Okay. Now that this is completely dry, I'll just make sure there are no hard edges that are leaving off any one of my
important element here. For example, I will take
some more indigo and make sure this is
neatly covered, okay? And just take some more water and mix it up, okay? So this looks good. I will wait for everything
to completely dry from my background and come
back to paint our snowmen.
9. Snowman | Part 1: Okay. Now the painting
is almost dry. Completely dry. So I'm going to get started with
painting over Snowman. Okay. Even the masking fluid that I had applied here
is completely dry, so I'm going to get
started with it for cap and the muffler. I'm not going to use Indico
as a reference image, but I'm going to change
it and red shade. So here I have pyroll red. Let me take it into my palette. Okay, this forms a good amount of pyroll red on my palette. To this, I'm also going to add some Alizarin Crimson
from Schmike. You can use any brand that
you have. Just a little bit. You can use any
red for this one. Trust me, I'm going to
add some water onto it, fresh water, and
just mix it nicely. Okay, This becomes
my good red that I want for my painting. Okay, to get started with, I'm going to start
by applying water, because this will also be
a wet on wet technique for painting the snowman
with the indegotiate. Okay, now to get
started with, let me start by applying it
everywhere on the snowman, the lower ball of our snowman, I'm making sure to not put
water into these buttons. There was still some indigo
from my previous washes. That is fine. That becomes
our initial base color. Okay? Okay. Now this is good. I'm going to switch back
to my smaller size brush. Take some indigo onto it, and start from the side of my snowman, slowly bringing it down to the other side and removing it. I'm making sure to
add a lot of indigo onto the other side because the entire shadow on the side you can see
even for the mountains, we have shadow side. We have to maintain that
perspective here and make sure to keep it. Okay. So here we go to this. I'm going to take a little bit of neutral tint and
just drop it in here so that we get a different
perspective here. Okay, now once
this is still wet, I have to add them shadow
for our buttons as well. So adding the shadows here, just across the
button and that's it. Okay, And for the
muffler shadow as well, I'm going to take some and just go here for a small shadow. If your paper is also dry, you can just take some
water in your brush, p it on the paper, and slowly bring it down till
wherever your paper is fit, the site is looking a lot more. I will do the same here as well. Okay. I'm good with
the lower part. Now, let me go for
the face same. I'm going to apply
some water here. And making sure that I don't apply water to
the eyes button here. And also not for the nose part. I'm going to apply it another time so that when I come
back with the paints, water is completely
seeped in and it will stay wet for longer
duration of time. Okay. I also need to make sure that I keep blush ready for the skin. I'm bringing this back. This is the same blush that
I'm going to be using, which is coral shade. Okay. Now again, I'll
take some indigo, starting with a bit
of a dark shade. And I'll start with the
outline of our cap. So again, this side a bit more. Take some water before it completely dries off. I'm going to take some coral
on my brush and light here, just like this, okay? It's a very light
tint and definitely, once the paper dries off, we will see a
beautiful shade there. So I'm going to
apply more of it. Okay. It is naturally
dispersing into the background. I'm good with that as well. Here, I'm going to
take some more and add a strong shadow there. Okay, sounds good. Same, I'll do for
here. Now, we also need to add a shadow
for the nose, which is creating in this angle, I'll take some diluted mix
and make the outline here. Drag it till the end. Okay, this should be good. Once it completely dries off, it will not be in
this darker shade, so we will have a
good shadow here. Okay, so this looks good.
10. Snowman | Part 2: Now coming back to the
muffler, muffler and the cap. Okay, let's start with painting that I have my shade ready here. I have my red shade ready
here for this also, I'm going to first start
by applying some water. This is just to make
sure I don't get a hard edge while I'm still applying paint to
the other parts of it. Okay. Now I'm going to take some red. This is a beautiful, gorgeous holiday
red, I must tell. And I'll start by. Okay? And for the see here, what you need to make sure is in the angle or in the drape in
which this muffler is going. You have to bring your brush
movements to the same, because once it will also dry in the same angle and
we want to capture that flow movement or
fabric as well, that's why. Okay, and here also we have some extra threads
of world coming out. Let me just get that
with my brush details. Only very thin lines. This is all with my
size four brush itself. It has a very pointy tip. If you want this effect, you can use any of
your pointy brushes, brushes or a liner
brush as well. Okay, so here, one more
line to distinguish these. Now what I'll do
in order to create a good depth effect here, I will lift some of the paints. For lifting, What I'm doing is I've completely cleaning
my brush and I have dapped off excess of water on a paper cloth with a
little bit of pressure. I'm removing some paints. Okay. You see a distinct
line here, which is good. I'm going to do the same
on this part as well. I have thought extensively about lifting and other
techniques used in this class, In my other classes, if you're interested,
you can go through them. Yeah, this looks good
for the muffler part. Now, let me get
started with the cap. Same again, I'm going to apply some water. Okay? Now, let me start with
this end of our cap. I'm going to take some more
and just neatly get a, okay. This looks good. Okay? Once this is still wet, I'm going to take
a line of brush. I'm going to take a
line of brush and add those lines here. A key. And one on two, this one, okay? And for painting this cute
little wollen bun over here, I'm going to first start by making all these random
strokes here. Okay? Once I'm done,
just going to take some water and mix it again. Remove excess of water
and just mix them here. I have my bun ready the next, and I'm happy with how
the cap has turned out. It is good. I don't need to
do any more lifting there. I might want to add some
red shades here and there. So let me try if it's not
completely cried out. Okay, yeah, this is enough.
11. Final details: So far. Now let's come to
painting the nose. And for that I'm going to be using cadmium red light as
well as mix with golden deep. Okay, so going to take some, going to take cadmium red
light and golden depo. This mix is good for the
carry that I want to paint. Now, let me start
by, this is good. Once this is done, I'm going
to take some water and bring it along. Okay, Our carrot is having a good
treaty effect to it. I'll just add one
more line here. Also mixing some
red from above so that were Snowman is
cohesive with the shade. Okay, now I'm going to take this and add the
lines on carrot. It is in this angle itself. Make sure to add
it in this angle. It will be very flat. I will just make some
indigo with this. For a darker shade, yeah. Okay. That is good. Next up for the eyes,
basically the buttons. So I'm going to take
some paints gray. Okay. This is paints
gray for each one of it. I'm going to leave
a reflection, okay? Now, our painting will
really come live. Let me create an elevation
because I want to paint it neatly here. I will tilt it to an angle
which I'm comfortable with. Let me start with
these ones first. A very dilute shade
and a pointy tip. Now one circle? Yeah. And the white patch, these sizes of buttons
are varying like you see. Okay. Once they dry off, it will be a very good sheets. I'm good with it now for
adding the eyes part as well. And let me first
paint the circle. Okay, These circles look good. I'm going to leave some
space and then paint it. Okay? And then next, for a pretty
smile, it's going to start, I'll make sure that it's a small and then the smile, okay? I'm happy with this,
how it has turned out. Um, you have to make sure
that it's completely dry before removing this
masking fluid as well. I think it is completely dried, so let me make sure there's no water and try to scratch it. Okay. Yes, this is some shades on it, so I'm going to add
some additional shades on additional snow fakes with the same shade
on the muffler. Entire muffler as well. Let me add. Okay, that looks good. This is how it finally looks. Let me see if it needs any additional detail.
I think it is good. The only final touch that
I would love to add is if I want to use some
glitter onto my greeting, I would absolutely love to
add some glitter onto it. Probably I can add some glitter on the
overall of the cap. But for this painting, for the reference that I had, I think this is
pretty much good. I'm happy with how
this has turned out. Let me start
removing the tape so that I can see how
it finally looks. Okay. Starting from
one end of it, and I'm opening
with an angle here. Okay. So this is how it looks. You can see our
greeting is ready. You can add snow, you can add any
additional pine trees. Or you can do, instead of roads, you can do a stream
of water going, you can do any of those things. Okay. So here there is
another sample that I did for the same
painting as a trial, but I did use a lot of
some glitter onto it, and you can see this
is how the glitter is. Yeah, you can add some
of the glitter as well. Okay, this is what
we have painted and using a reference image that was generated
through AI in Bang, you can add some notes
here as to Happy Christmas or any other holiday note
that you want to add, your holiday card is ready.
12. Thankyou: Thank you for joining
me on this class. Me being a techie and an artist. This was definitely
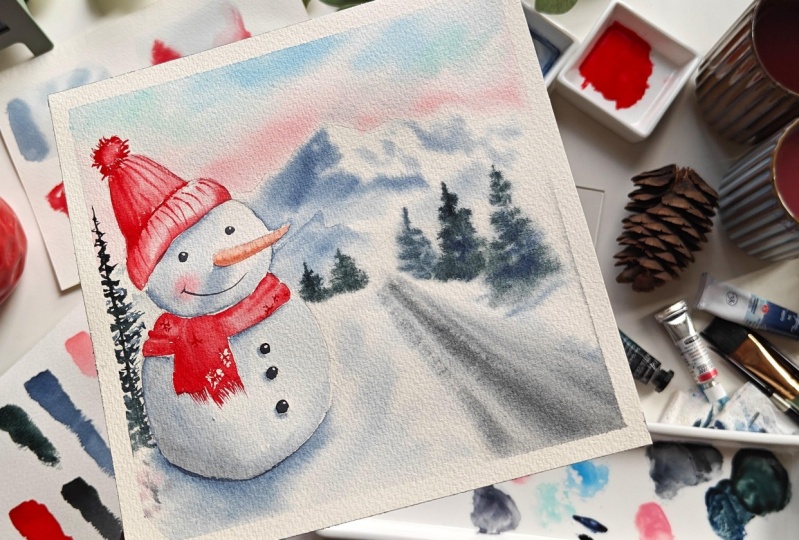
an amazing class for me to create for you all. We have painted this
beautiful holiday card with a snowman with
a pastel theme, and I love the way
it has turned out. I would again emphasize that all these image generations
that we have done through AI should
be used only for personal and
noncommercial purposes. Please be conscious about it. Make sure to post
your generations and the final paintings in
the project session so that we can all
admire your work. See you next time with
something fun and exciting by.
 Swathi Hegde, Watercolor artist | Aqua | Night sky