Transcripts
1. Introduction: Hi everyone. My name is Yana and it is my great pleasure to welcome you to the head spin workshop. In this workshop, we will
cover the basics of head standing and we'll also dig deeper into different
aspects of headstands. This car is, this workshop is suitable for complete beginners. So no worries at all if
you've never done a headstone before or even if Heston
name is not your intention. If it's not something you
want to get into right away. No worries at all. You can still you can
still stay with that. You can still follow
along because I will be providing you with
different drills and exercises and also flows to get your body and your mind ready
for possible inversion. So discourse and after you can decide for yourself if that's for you or not at all. We will be covering different
aspects of outstanding. We will start with a little flow where we will just ground
down, arrive on demand. This will take
around ten minutes. Then I'll answer. The big why, why you should even consider getting your
legs up to the air. Why you should even consider turning yourself upside down. So I'll talk about the spiritual health benefits of heads. Then I will cover the basic
anatomy and the muscle groups that we need to
engage to get into her head stand safely
and with control. Next, we will do a
little conditioning, which will take as big
around 15 minutes. We'll work through some drills, exercises to strengthen
and stretch our body. And then we'll get to the
core of this workshop. That part that everyone
is excited to do. And it is getting our legs up. So I will take you
through the process of head standing step by step. Afterwards. I'll introduce some more
advanced variations. Or maybe better said, some options that you can, that you can take when
it comes to extending. We will owe finish
it with a low flow. Of course, there'll be an
opportunity to stand and do just cool down and ground
again and really observe. Yeah, don't really absorb
all the energy that you've created during this
whole workshop.
2. Headstand And Its Benefits: So let's get right into it. Let me talk about headset. We often hear the
word or the name suggests and that's
another name for them. However, in Sanskrit, which is considered to be
the yogic language. So shisha means head. Athena is a posture
to assassinate. Head posture or in
English had sent Perfect. So why you should even
consider getting your legs up? Why you should consider
learning hits them, and why is it
beneficial for you? So first of all, it is an incredible
way to relieve stress, calm the body, and draw
the attention inwards. This is also a great opportunity to connect with your breath, to connect the body
mind connection. So when we are upside down, try really think of
elongating your breath, inhaling and exhaling for nose. Maybe even counting in your head the duration
of the breaths. And this will really help you
to connect with your body, create a body minds connection, and calm your mind. It is a really great practice for relieving anxiety, stress, letting go of worries and just falls that
are no longer serving your purpose and not really necessary on
your way anymore. So stress relief, huge
benefit of head standing. The second benefit
that I would like to mention is increased focus. And this comes, comes down to the fact that getting
your legs upside down, entering quite
challenging posture really increases
the focus itself. So obviously to be able to perform this afternoon,
this posture, we need as certain amount of focus to enter it and to perform
it correctly and safely. This aspect is already
included in the boss, true by default, but also by putting our
body upside down. By putting our heart
above our head, we increase the blood
flow entering our brain. This really helps us to bring
more oxygen into the mind, into the brain to
clarify our minds, and to take away any faults that are
no longer serving us. So it's really about the
clarification, purification. And that comes down to
an actual science and actual physiology
because by increasing the blood flow into the brain, the oxygen, the
level of oxygen and the level of glucose increases, and also the amount of nutrients that the blood carries all the way
to brain increases. So our brain, our mind gets nourished,
clarified, purified, and at the same time, the blood takes away all the things our brain
doesn't need anymore. And that can be viewed from a physiological point of view as well as from the spiritual. Perfect. First that I pointed down. It's improved digestion. So again, turning upside down helps move any stack material
and the digestive system. So we are pretty much
working against gravity. We are getting out of the usual, we're introducing something that our body is not
used to that much. So introducing some,
some sort of change. Can they really
promote the movement? So getting into inversions, getting into headstands can really improve digestive health, health of the digestive track by releasing some stack
material and by also increasing the absorption of nutrients into the
digestive organs. Because again, the blood flow
into the organs increases. And, and so that's the flow of the nutrients
into the organs. Digestive health. This is also a big blast. This is something you want
to work on even more than I recommend introducing
some belly breath while you are inverted. So really directing your
breath into your belly can improve your digestive
health immensely. And lastly, last but not least, headstones really improve
our overall strength. In a particle. It strengthens
our amps, our shoulders, our core, and really open
our hamstrings as well. So when I talk about
strengthening the body, I'm not talking
only about creating that six-pack that
everyone seeks. Know. Obviously, it can be a
byproduct of strength, of strengthening,
but it is not what I mean by creating the strength. Speaking about core
strength and particle. Having strong core is the key. As I said, it doesn't matter if you have a six pack or not. That's obviously secondary. What matters is how
your core supports your overall body help how it supports your posture and
how it supports your body, your well-being in general? Strong core support our spine. If we didn't have core strength, our spine would collapse, our posture would collapse. It would not be able to
carry our body weight. So having a strong
core is really important for keeping our bones, keeping our joints healthy
for as long as we can. So let's just focus on trying
to keep the money for Euro, which is the chakra over here. To keep it active, to keep it strong, to keep it fired up. To create that powerful
center of our body. That is really the heart of
the overall body strength.
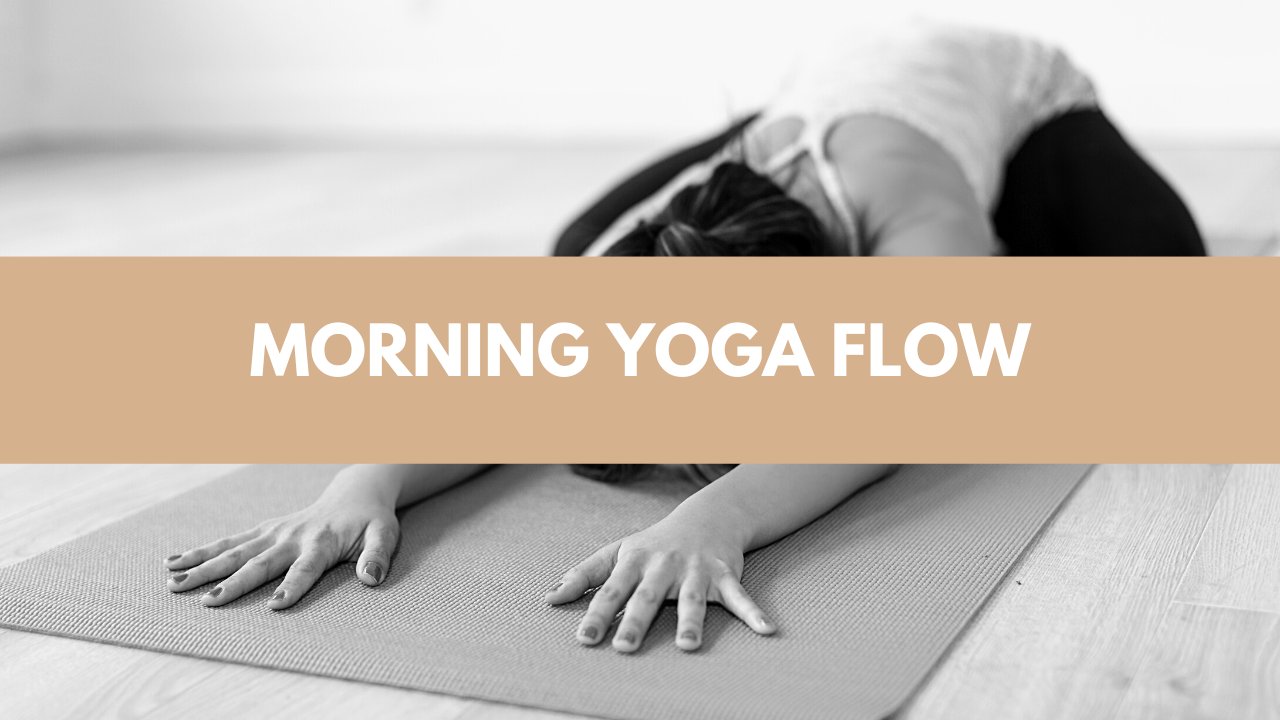
3. Warm-Up Yoga Flow: Right, I think I've
talked enough. Let's move our bodies. Let's get ourselves warmed up
and grounded to start with. So let's find a comfortable
cross-legged position at the back of your mat. Just ground down here
for a few moments. So place your hands
and your knees, palms of your hands out at, rest it on your
knees facing down. Shoulders, back, reach
the crown of your head, up to the sky or to the ceiling. Now let's just breathe
through their nose. In and out. On the next inhale, right. I've sweeps up, left
hand goes down, bend to the left. Big stretch of the
right side body. Right arm is extended
by your right your left shoulder away from your ear. Amazing. And the next inhale, come back to center
and change the side. So place your right
hand on the ground. Lift your left arm and
stretch to the right. Stretching the left side
of your body this time, left left left leg is extended. And make sure you pull your right shoulders away
from your right ear. As you stretch. On your next inhale, sweep both of your arms up, exhale cactus, those arms. Shied heart forward. So little hard lift here. Nothing big. Inhale here. Exhale round your spine. Extend your arms
in front of you, interlace your hands and
push your palms away. Inhale, come back to
this cactus shape. Exhale around. One more, inhale cactus. Exhale around. Inhale, sweep your arms
back up, neutral spine. Exhale, place your
hands down and find your way to tabletop
position offers. Hands are underneath
your shoulders, knees, underneath your hips. Inhale, sweep your right
arm up to the sky as well. All the way to the left. Place your right
cheek on the ground. If that feels good and open
her left arm up to the sky. Inhale, exhale, release,
come back to all fours. And under next inhale, sweep your left arm up, exhale, fold it all
the way to the right. The next inhale,
come back to center. Beautiful. On your next inhale. Extend your right
leg behind you. Keep it those underground. Push away from your
hands as you push back. Drawing your right
heel behind you, keeping the length
in your spine. And on the next inhale, lift that leg and step it to the outer side of
your right hand. Come to a lizard. We invite you to stay
up on your hands. If you want, you can
come down to four amps. Always listen to your body. So come down to four arms
only that feels good. Always remember to keep
your back straight. Amazing. And the next inhale, come back up on your hands if you're
down on your forearms. Inhale, sweep your right arm up. Easily twist. Inhale here, exhale, plan that
right hand down. Heel-toe, your right foot
to the center of the mat. Sweep your arms up
for low, lunge. Inhale here. Exhale, shift your weight back, half split, extend
your right leg. Point the toe. Started bringing your torso
towards your right thigh. Welcome back to low lunge. Exhale. Inhale. Low lunge. Exhale, half split. One more time,
inhale and exhale. Place your hands down and step it back to all
fours position. The next inhale. Left leg steps behind, push away from your
hands as you push back. Your left heel. Stretching the left golf. Next inhale, lift up, step it to the lizard, throws a bigger right
knee gently behind. Find the length in your spine. And again, it's up to you if you come down to your forearms, all stay up supporting
yourself with your hands. The next inhale and you
wrote down on your forearms, come up to your hands here, sweep your left arm up to
the sky and use it to list the next inhale planned
and hands down, heel-toe, your left
foot to the center. And say your arms up
to the sky, low lunge. Inhale, Exhale house. But the breed torso
towards your left thigh. Left leg is extended stone tools I've pointed crown of the
head is reaching forward, inhale and exhale half splits. In Halo lunch. Exhale, have split. A inhale. Exhale. Place your hands down
underground instead, but to all fours Position. Beautiful. From your
all fours position, make sure your knees are still underneath
your hips and walk your hands in front of the mat. Melt your heart down
towards the ground. But peoples, you might want to place
your forehead down underground if that's
extra civil order, chin. Don't let your spine
collapse completely. They're still keep your keep
your course still active. Drawing your lower abs in. Feel the stretch of sensation
in your shoulder space. The next inhale, bring yourself. Oh, I did a friend of them. I don't know. Bernie. Sphinx pose supporting yourself
if your fore arms, great. Right forearm. Inside. Just a little bit. Inhale. Bend your left knee and bring
it to your sitting bones. Lift your hips are squared. Push yourself away from
your right forearm, open your chest, and
stretch through that area. And really lets it be the
same on the other side. So I'm down to the ground. During your hand slightly. Bend your right knee and bring it towards
your sitting bones. It doesn't have to touch it. It's just the general direction. Again, squaring the hips. Keeping the hips underground, opening the chest up to the sky. And release beautiful. Don't let the light anyway. These control. Amazing. Place your hands
underneath your shoulders. Push yourself all the way
to a kneeling position. Great job. Place your right hand
gently behind you. Sweep the left arm up as
you lift your hips. Hello. Hey, exhale, inhale. Exhale over. Inhale. Other side. Left hand goes behind you who
ride like Apple, little hard lift, lifting
the hips up and lower. Let's repeat fewer times. Following your came oppose. Lifts going to be tiny. It can be something like this. That's absolutely fine. Listen to your body. Move in your own
range of motion. One last time. It side. Who and therefore
find some stillness. Going on legs out. Extend them in front of you. Inhale, lengthen your spine. Exhale, fold towards your
knee, towards your legs. Just lowering the daughter cell down to hurt your phi is
finding the length in the spine again,
directing the torso. But it's still a crown of the
head is reaching forward, stretching through those
hamstrings, gulfs. And under next inhale, bring yourself all the way up. Find a cross-legged position. Place your hands on your knees, shoulders, back, crown of
your head switching up. Sphincter will find
your breath again. Connect with it. If you had your eyes closed. Open them gently. Okay. So let's continue. This was a little flow to
just get ourselves grounded, to get ourselves ready for the upcoming flows and upcoming movements that
I want to introduce. But before we start
getting our legs up, I want to talk about little
bit about the anatomy, about the muscle engagement. And I've ordered main muscle
groups that we have to work with while getting Alexandra awhile and learning headstands.
4. Headstand Anatomy: So as I mentioned before, headstands really
strengthen our arms, shoulders, and core, but also stretch our
hamstrings are better set to be able to get our legs
up to get into a hat stand. With control, we need to have
that hamstring flexibility. Although it may seem that we are pretty much just
standing on our head. That is not really the case. It is a heads than two. Yes. Our ground of our head is
placed down on the ground. But actually, what happens
there is that v bear most of the weight on
our arms and shoulders. So this is a very important
aspect of head standing. To build that strength, to be able to support our body, to be able to carry the weight of our body so it doesn't
rest just on our head. This is actually a question that is often asked and I've been asked
a couple of times. Well, it's headstone actually, safe is an issue. Safe to stand on your head? Is it safe for the neck? Well, yes. Has standing is absolutely safe. As I said, it has a bunch
of different benefits, but it needs to done it
needs to be done properly. It needs to be entered safely. So that's why I'm actually
doing this worksheet as well. To show you, to demonstrate it, to teach you how to
perform it safely. So you can actually experience, although all those benefits as opposed to getting injured. So as I said, usually people think of some people
think that hits them. It means that the derivative of our body weight rests on
our head and the neck. Know who I'd say it's just three per cent of
the whole body weight. The rest is distributed between the arms
and the shoulders. Really need to build
that strength to be able to support
our body there. So that's a very key element. And also talking
about shoulders, we also need a certain
degree of flexibility there. Or as they often say, you have to have our
shoulders opened. So what does it actually
mean to have open shoulders? If I didn't have enough
openness in the shoulder area, I wouldn't be able to lift
my arms up like this. I would maybe finish here. It is not a bad thing. But again, it will make getting
into a handstand harder. So how can we actually
increase that flexibility, that openness of
the shoulder area? Well, it's not really about opening just the
shoulder themselves. It's about stretching
the side of the body and stretching and
opening the upper back. So this can be done by
different exercises, by different drills that
I'll show you later on. Okay, so let's talk
about the core strength. Strange, as we've already said, as if already mentioned, is very important when it comes to not
only hits the neck, but all aspects of our lives. Having enough strength in the core area and
actually being able to access that strength will provide us with a
sense of security. We have a sense of balance. Not only when we have
our legs upside down, but also want to be understanding
on our feet when we, when we carry out different styles and
different movements during our everyday lives. So being able to
access that strength, access that engagement
is very important. And B will activate the core muscles before we
start training for headstands. And I strongly recommend
doing that anytime. Your finger off doing
some headstone training. So before I invite you to
just do a bunch of Gerasa, I'll show afterwards
they will only help you activate that core strength. And essentially it
isn't really comes down to pulling everything in
towards the center line. Center line is pretty
self-explanatory. Just imagine a line dividing
your body into house. And just imagine all of your core muscles pulling
in towards the center, towards that imaginary
line in the middle. By doing so, you will be able to create a lot of
stability and to support your body weight and to support pretty much
your whole body just with that core strength. And last but not least,
hamstring flexibility. This is something
that gets forgotten. Very often. And in fact, it is something very important
and very crucial when it comes to getting into headstands if control,
and also safely. I will show you what
happens if you don't have enough flexibility
in your hamstrings? So let me show you. I want to get into a headstone
in a very controlled way by my legs off the ground
and lifting them up. The key there is to walk your
feet as close as you can, towards your elbows
are towards your head. For that, I need to have that hamstring flexibility
because I didn't have that hamstring flexibility. I wouldn't be able
to walk this far. If I didn't have the
hamstring flexibility, I would finish
somewhere around here. What happens now? Since I don't have my hips above my shoulders, I can lift. I can lift just like that. But what I can do
though, is to jump. This is a big mistakes
many people do. They don't work on their
hamstring flexibility. Therefore, they're not able to stack the hips above
the shoulders. And that results in having urge to jump without control,
without core engagement. And what happens is usually, is that they usually don't find a balance up
because they don't have enough time and
enough engagement and that body to actually
catch themselves, themselves up and
supra their whole body just by finding that momentum. So I'm going to demonstrate
what I don't want you to do and what I don't recommend
doing at the beginning, because this is actually exactly how I
started my journey. I didn't have enough
hamstring flexibility, but I wanted to do
headstands so bad. Of course, of course I jump, but it didn't lead anywhere. This is not how I progressed. I started progressing once I realized how to actually stack those hips about my shoulders and build that strength and flexibility that
I really need it. So I'm just going to show you
what happens if you jump. So let's say I'm somewhere around here
and now you really, really want to get my legs up. So I do this. I started I started. I was able to catch
myself because I have already experienced and
that strengthened my core. But usually end somewhere here. I start to bend, I start to wobble, and then it's really
hard to fix it. It's really hard to find
a central line again. The middle points to walk my my core muscles and to be actually able to lift my leg up. So yeah, I definitely don't
recommend doing this. I don't recommend jumping
against the wall. And finally, the
bend in the spine. It is not leading anywhere. Logging from my own experience.
5. Headstand Practice Drills: Alright, so let's work
on those muscles. Let's work on that string, and let's work on that
flexibility. Right now. I wrote some. Let us strength drills for you. I recommend grabbing
a couple of blocks. If you have some, maybe
books will do as well. I have two chord box right here. Those will do. Actually gets that didn't laying
down on our backs. And we'll start working on that hamstring flexibility that we mentioned just recently. Layers hold down on your back. Extend your left leg down underground and lift
your right leg up. Hold of your right foot, your right shin, cough
or ankle or even afford, but I recommend staying
somewhere here. Good thing called
off your cough. Wrapping your fingers around it. Make sure your
shoulders are down in the ground and start bringing
that leg towards you. So we enter the Yan Kingdom
leg here just gently. They've control, drawing
it towards ourselves. Don't forget to
breathe here as well. Now I want you to
let go of the leg, but still keep it lifted. And let's try to work on
that active flexibility. So let's do the same, just the same thing
that we've just done. Keep drawing that
leg towards you, but without the
help of your hands. So before it was so-called
passive flexibility. Now we are working actively. Both of those types of flexible, they are very important. So keep drawing that left
to R2 and release. Great. Let's change the legs. So blaze your right
leg down underground. Lift your left leg
up to the sky, interlace your fingers behind your cough phi food and draw the lacking shoulders
are rested on the ground. Finding that stretch. Don't forget your breath again. Now let go off the leg, place your hands
down underground. That was biocides. And keep drawing the leg
actively devote to you. And release. Great job. Shake your legs,
shake your hands. Let's find a low lunch. Now I recommend
grabbing two blocks. We'll get into a
supported low lunch. I will put this back on. So let's get into a
supported lowlands. We'll start right leg in front. Use the blocks to
support yourself. Just place your
hands on the blocks. Choose the level, the height of the blocks that
works for you the best. You might have it on the highest or you can find
that middle point. If you are super flexible there. Or if it just feels good, then you don't have to
use any books at all. Absolutely. Again, adjust this posture
to your own needs and wants. But really want to get
here as deep as possible. And we'll stay here for
a couple of breaths. Really, adjust yourselves. Make yourselves
comfortable here. Free. Okay, slowly shifted back and change the site. So if you had your right
leg in front this time, now, go for the left. So left foot blends
down to the ground, right leg extends behind you. Again, find your blogs. Allow yourself to sink deep. Finding the length
and the spine. All the time. Shift yourself away. Exit the position. Place your blocks. Fireside table, not
need them right now. And we will find a
high plank position. So find a high plank position. Hands underneath your shoulders. I only want you to think about pressing away
from the ground. Gently protracting
your shoulders. So by pushing away
from the ground, you will create a
little curve here. So you don't want
this right now. You want this, you want to
protract, push yourself away. For all of your muscles
towards the center line. Engage your glutes. Engage your core. Hold here. Shift your weight gently,
forests and Haldane. In an hour. They all do scapula pushups. You can by all means
student on your knees. I will just show
you the movement. So even let your shoulders
collapse down towards the ground and
then push yourself back down to the ground, the chest lowers and back up. So these are scapula pushups
and we will do ten of these. You can either do them in the high plank or if
your knees lower down. On-demand. So choose the version
works for you. You can try five in high plank five if you need
them underground. So let's go 10987654. 321. Rest, feeling the burn for sure. Amazing. So these are scapula pushups
grade by how to build that strength in the shoulder
space in the shoulder area. You'll repeat this
once again. Again. You can do them on high plank, your knees down again,
then scapula, pushups. This time, just do that. In your own time. When you are finished. Meet me in a child's pose. Just rest her role
in the new towels, both hips from one
side to the other. From your child's pose. I want you to come to all fours position grep grep
the two blocks that you have on your site and place them in front of you. Place them in front
of you, shoulder. Distance apart. And now we will enter into
a extended Verbit boss. But our elbows on the blocks. To open fruit and place your elbows on the blocks
and delays your fingers. And start lowering your chest
down towards the ground. If you can, start bringing
your hands behind you. Do this while bringing your
chest down to the ground. So you're bringing
your hands behind you and your chest
down to the ground. Again, it's a general direction. Your chest doesn't
have to touch the mat. Just the direction. Forget to breathe in. You can feel the stretch
in your side body, in your upper back,
your shoulders. Gently. Who really beautiful. We'll find Novartis
and I bought books. So straight back,
legs lifted, lifted. I invite you to stay
in this variation. It's a middle point between
the full boat pose. In the boat pose with
your toes on the ground. I invite you to stay here. On your next inhale. Let's lower down, but don't let your
shoulders touch the ground. Exhale is bring it
back to Nevada. Hey, inhale. Exhale
never asked them. Finding the balance,
finding the strength. Inhale, exhale, inhale, exhale both. Let's go. Three more. Inhale, exhale, inhale, exhale, bow, and last one,
inhale, exhale, vote. Hug your knees in. Beautiful, great job. I hope you are warmed. I definitely am amazing. Spree. Let's do it one more time. This time, let's go
for seven volt lowers. So find a boat. Let's go down 7654321. Now we're really hug your knees and give yourself a huge hack. You deserve that. Amazing. Few more to go. Let's find
a low plank this time. Just my microphone again. So let's find a low plank. Come down on your forearms. You can choose your fingers. That works well for you. Well, I definitely want so for the purpose of reaching
your head pencil and merge you to
interlace your fingers and find a little blank. Pushing yourself
from the ground. If your, if your forearms engage your glutes,
engage your core. Again, remember to protract so it's the same
as the high plank. We want to push ourselves
away from the ground. So push strongly due to ground. Fear for apps. Finding link in your upper back. Let's find a side plank. So please keep your right
forearm down on the ground. Gum, theta right here. Lift your left arm up. Keep lifting your hips up to the sky and change
to the other side. Left forearm studies
on the ground. Right arm lifts up and
come back to a low plank. Hold here. And laser knees down release. We have two more drills left. And I really want us to
focus on the form already. Let me just put this away
and get hold of your elbows. Just like this. So really wrap your arms
around your opposite elbows, or maybe better said,
the upper arms. This is the distance you
have between your elbows in low plank as well as heads that so keep your
arms like this. Place them down on the
ground in front of you. Keep the elbows close, intimate chest road they are. And connect your hands
in the triangle. So in the point when
they come together, that's where you will
also place them. Then he'll want to blaze the crown of your head
between your forearms. So what's the crown
of your head? Crown of your head is
pretty much the very top of your head where you would
place my generic around. So that's the part of the head
that goes down to the mat. You want to make
sure your elbows are underneath your shoulders. But this will naturally happen. So if we do this, measuring correctly, this is
what will naturally happen. Your your shoulders will get naturally aligned
with your elbows. Again, measure connect, plays the crown of your head
between your forearms. So this is what you will
do in the next drill. Bath. Before we, before we get there, you will start in local axilla. First step your feet
back to a plank. Keep the arms my data. Now from your low blank, you will place the crown
of your head down. And where do we set?
And then start walking your feet towards your elbows. You can by all means bent. The priority here is to get your hips as close as possible. So ideally you'd stack your
hips over your shoulders. And the fact that you bend your knees will
facilitate this. So instead of focusing
on extending your legs, focus on for lifting yesterday
loads up to the sky. It is the same like in
a downward facing dog. And this is pretty much
all you will do for now. So just walk as
close as you can. And then walk back
to a low plank. You'll repeat is
a couple of tabs. Please do head down underground, work as scholars as you can. Hold here, and walk
back to a low plank. Let's do this ten times. Once you are done, meet
me in a child's pose. So keep doing. Just couple more. Let's keep going. Amazing. If you are
finished with your ten, just fine. A child's both. The moment of stillness. Extend your arms
in front of you to stay in place your forehead
down on the ground. Still feel some stretch
through those arms again. Shoulders. This worked super hard.
6. Headstand Step By Step: My friends, it's time
to get to the core. It's time to get our app. Okay, as I said before, if this is not your goal, if this is not something you are striving for and
simply if you are just not feeling like getting your legs up today,
That's absolutely fine. You can pause me on here. You can come back to this
workshop some other time. It is yours forever. So you can play it
as many times as you need to look like to
work on headstands, you can keep working on the
drills I've just shown you. Really make this practice yours. Alright, so let's get into it before we start
working on our heads, then I want to give you some
practical recommendations. I know that there is, when it comes to inversions, there's a lot of inversions. Headstands are associated
with the fear of falling over or falling
getting injured. I know it is really hard
to let go of that fear. I know this is
really easy to say. And I will not say
that because I know that sometimes
it's impossible. So instead of trying
to let go of the fear and just forget
about it completely, Let's try to step into it. Let's try to become
compassionate with that fear. I don't want you to pretend that there is no fee
and nothing can happen. Yeah. We can fall and
we probably will. It's absolutely okay. So as I said, there
is a lot of fear associated with
inversions falling over. And that's why many people started learning
inversions, a wall. And I definitely don't
want you to feel discouraged from using a wall. It is definitely a
great way how to get started and how to alleviate certain degree of fear from the Hudson practice. But I want you to try to do it the downloadable
at least once, at least give it a go. And if you feel like
it's not for you, if there's still a lot of fear, lot of anxiety coming in, then by all means don't
try to push through it. Go to the wall. And once you are ready
to become intimate with the fear to really
access it and to really, to really cultivate that
compassion and that acceptance. Only then step into
an open space. But I wanted to show
you one thing that, as I said, can happen
every forward, especially at the
beginning, it can happen. I want to show you
that it's okay, that it's okay to fall. I recommend just for the peace of mind to put some
questions in front of you. This will mitigate some
of the fear, then. Great. Okay. Accommodate yourself. Make this practice enjoyable. It's not about, Oh my God, now I have to do this
this way because she told me to know, please. I'm giving you recommendations. I'm only giving you
options to try. So don't feel obligated to
do exactly what I said. Again, if this doesn't work
for you, then go to the wall. But I want to show
you one thing. I want to show
that falling down. It's okay. So let me just
show you how to fall. And if you feel like doing so, do please try it just to see that nothing
happens even if you fall. So I'm going to get
myself into head stand. For some reason I'm just losing my balance and I feel like
I'm going to fall over. Well, I can either
cartwheel out of it if I have enough space or if
I have enough time even. But this will, sometimes
it won't be possible. Sometimes I will not manage to jump out of the
balls, will fall over. Only thing I want you to
remember when falling over, please, to protect your
head and your neck. So start stop, start
putting yourself, curling yourself up
into a little ball. And then just for
preferably your questions. So let me just show you Let's say I kick myself
our bylaws, the balance. I felt. Nothing happened. I didn't enjoy myself. I didn't feel anything. The cushions got me an
island it safely. Okay. So if you are
feeling if you're up for it, try this as well. Try to fall. Because
it will most likely happen at some point
during your practice. This is not for you.
No worries at all. Right. So all link back dog
they wanted to give you. Now, let's get into the basics
of, of health spending. So we've already pretty much
started working on it by doing that little drill from the low blank and
walking our feed to the elbows and stacking the hips up so we will take
it from there. So find the distance
between your elbows again. Get hold of your
opposite upper arms. Those arms in front of you. Keep the elbows
glued to the ground. Connect your fingers together and plays the
clarinet of your head between your forearms. Then push yourself away
and start walking. Your feeds divides your elbows. Okay, so we already know what's happening if I'm lower body, we want to keep
the knees bent to be able to come as close as we can and to stack the hips
over the, over the shoulders. But let's have a look
at what's happening. Our core and the shoulders. So core gets engaged. We'll focus on bringing all the muscles in
towards the center line. That's the first
big then shoulders. Again, there's a protraction
movement happening. So instead of letting our shoulders collapse
towards the mat, we want to push them
away from the mat. So there's a lot of pressure
happening in our fore arms. So we're pushing down
through our forearms to fool ourselves away from the
ground to elevated pressure. That might alleviate it, net pressure from
our head and neck. So again, if you just focus on the movement
of the forearms, we are pushing the forearms
and lay from the ground, lifting the elbows up. So we'd be upside down. We are lifting the
elbows towards our ears. So when we're upside down. Now lifting the elbows up towards the fitting
loads, pretty much. So. Let's focus on all
of deals movements. To get it. I'm just walk your
hands as close as you can and hold it here. You're feeling like you can
get your hips very far. You still feel like you
are somewhere here. Then let me recommend
the use of blocks. You might want to
stack blocks under your feet for some
extra leverage in practice may look
something like this. So here you see
that it has already given me a lot of leverage. My hips are way
higher than before. So this is without
blocks. Blocks. Okay? So if you feel like you don't have that
hamstring flexibility, but you feel strong enough to lift yourself
into head stand. We've control. Then help
yourself with the blogs that perhaps added to help us
make a good use of them. So if you are here and you feel like you
want to take it further, then shift your
weight on your dose. This will result in shifting yourself
forward a little bit. You can stay here or
you might want to bend one leg up towards your
left DiMaggio sitting, still staying high
up on your tiptoes. Ben de unelected place in one place today
and the other one. Place it down. Still focusing on engaging all
of the muscles and staying high up on the dose to stack
the hips over the shoulders. If you feel like you want
to take it even further, then walk yourself
as high as you can. Get them on your tiptoes. Shift your weight forward, lift your left leg, or the other one
doesn't matter it. And see if you can shift
yourself even more forward to perhaps lift your gaze right dose of the ground
just for a second. So this will be done by him, really pushing into the
idea the side as well. Always do the other
side as well. So really shift your
weight forward. Scam high up on your tippy-toes, should do it forward. Push away from the ground with your forearms to be able to lift off the mat
just an inch or two. If that works. Amazing. If it doesn't grade, keep working on it or keep working at your own based working where
you are currently. If you want to take
it a step further. Walk yourself
towards your elbows, bent one like in the moment. Your other leg starts shifting of the mattress
teeny-tiny bit. Tried to bring it towards
the other leg and get back. Don't forget the
other side as well. It is all about
lifting the hips up, shifting the weight forward, and pushing MA from the ground. Fifth year four amps. That's it. So keep working on this. If you manage to left both of your legs
up off the ground. Great job, Amazing. We can take it even further. So let's say you've already
managed to lift your legs up. Now. You are here. Your knees, bent, knees, pointing towards your chest. Try try bringing your knees up. Just lifting you away from your torso and
bringing them back. Here, it's really important
to engage the core. So again, imagine all do phase. How the car muscles coming
in towards the center line. So tiny movements, nice from
the chest and back to it. It just in love
with yourself down. Never forgets to rest. If you are confident enough, if you feel stable enough to lift your legs all the way up to the
sky, by all means. So let's say you are
somewhere here right now and you want to
take it even further. So again, focus on pushing away for shinier four amps
away from the ground. Your shoulders are drawn towards your sitting bones
you are protracting, pushing away from the ground. Core is engaged and you
start lifting your legs up, creating a straight line, squeezing the glutes
together, core working hard. To go down, bend you, bend one leg, bend
the other one. Bring the knees
towards the chest. We've control yourself
all the way down. This is a handstand. Now you got it. Now you know
how to get your legs up. If you want to still work
on this, then again, put me on pause or just keep working where you
are at right now. For those of you who feel pretty confident in your head stand. And he would like to
take it a bit further. I'll show you a
different variations are options of headstands. You don't have to do them right now to have to do
them all today. Those are just some options
for you to try in the future. So I think I'm going to show you first some light variations that you can do when
we're up in the air. I will lift myself. Up. Ahead, step again, slowly. Control. What do you can do if your legs, the options had numeracy. You can play around. You can get playful. This is the fun part. This is what I love the
most is getting playful, thinking of different
vase of my legs. So what I like to do
here is a diamond. It's a really great way to
open through the hip space. Then from diamond, It's a
great way to transition, to struggle again to work
on those hamstrings, hips, the inner thighs as well. Then you can work on bringing your legs to struggle
and backup to pencil. This is probably one of
my favorite variation. Then, when we do that, let's talk a little bit
about getting upside down a bit differently. What I would like to point out is that no matter how do
I get myself upside down, I always do it with Control. I would never want to jump up having control without having all the aspects that I
need to have in place. So that's just something
important to mention. Split let x, one of
my favorites do. It, requests a little bit
more hip flexibility here. Again, you can help yourself
if the block so if you place the block under
your standing leg, then you lift your leg up to the sky, you
keep it straight. And then lifted leg
works as a weight here. So as it goes up and over, it lifts the allelic
of the ground that it works is a
little weight here. And then what you can
do in the years to switch between the legs, Bring it down and rest. So this is one of my
favorite variations as well. And the last one, I'm going to show
you a pressing up. This option is really
more advanced. I don't recommend trying it
if you are new to headstands. But as I said, it's
something to keep in mind. It's something to work on as
you go and as you progress. It takes time. It doesn't
happen overnight. So really take your time. So I'll get myself into
this starting position. Again, I will want to walk my feet as close as I
can towards my elbows. Here. The very important
thing here is really to push yourself away to elevated
pressure on your neck. Because here you are really pressing herself apps
so you want to make sure that almost 100%
of the weight is, rest it on your arms and the shoulders as opposed
to your neck and head. Advice, you can really
strain your neck and it can create some way in which we absolutely don't want. Make sure you're pressing
hard into the ground. Walking yours as
close as you can. When you can walk further, you start shifting
your weight for it's coming up to your tiptoes
with both of your feet. And you are always
almost feels like you want to roll yourself over. You want to come to the very edge of the
crown of your head. Then you start lifting up. Okay, So I'm not jumping. I am myself up by pressing into the
ground with my forearms, shifting the way forward and almost over to the outer edge
of the crown of my head. A lot of core strength
is involved as well. So it's a combination of many elements that you will
simply get over the time. And actually, one more thing I'm going to
demonstrate now that I've mentioned that it's jumping up again,
they've control. So if you are already
at that point when you can lift yourself up, if control, when you
can perhaps even press. You have a lot of
control and hats them. Then I invite you
to try jumping up. So this can be done even from Asana or even from the
starting position. You don't have to walk
yourself that far. Just woke whatever
it feels accessible. Then bend your knees to launch
and launch those legs up. And just chill here. Again, you can always just find different variations
to play around with. A huge number of possibilities. Can twist. Ego, struggles, whole back, even some really fun one to try. And all the rest down
in a child's pose. Okay. So this was said this was your head said workshop,
the core of it. What I'm going to do right now, still guide you through a little ten minute practice to try some headstones again. Most importantly to wind down, cool down the body, and restore a little bit.
7. Wind-Down Yoga Flow: And we'll get to that. In a seated position. Cross-legged, kneeling,
whatever works for you, the best. Ground down here. Through your sitting bones, crown of your head
is reaching up. Close your eyes. And on the next inhale, start walking your
hands forward. Plays the forearms down on
the ground that feels good. Round your back. Fault. This time, we are not trying to find
the length in the spine. We just look around, do back in the LO ourselves
threats to restore. Next, inhale. Walk
your hands back. Place. Both of your
hands behind you. Lift your hips up, off the ground, showing
the heart up and forwards. Maybe send your head back. It feels good open for a
broad breadth row Chuck. And release come back
though to see that. Shift yourself all the way
over to all fours position. Let's take get to go here. Inhale, I shined
how it forwards. Arched a bag, Exhale round, push away from the ground. Inhale, exhale, inhale, exhale care. The next inhale,
backyard those on the exhale downward facing dog, pushing yourself away
from the ground. So thick bones reaching up. We'll do keep your knees bent. Will go downward facing dog
a little bit if needed. Next inhale, right
leg steps form. Is it missed? Open? Your right arm up. Left knee is left. Inhale here. Exhale, come to right
sides condensed and open your chest
up to the sky. On the next inhale, bring
yourself over to left sides. Can ask open the chest. Oh, open the chest. And under next inhale. Come back to her right side
scan S and I can open. And how frame that right foot. Come back to. That E is a twist for a moment. And exhale over the
derived right handed down and step yourself back
to a downward facing dog. Next inhale, left
leg steps forwards. Easy twist. Right leg is lifted, left arm is reaching up. Inhale, exhale, bring
yourself around, stalactites condense
and open your arms, lift the chest up. On the next inhale, shift yourself to
the back of the mat. Right sides come to us
on the open the chest. Next inhale, come back to the left side is
condensed and it opened here under next inhale frame that left foot open into that easy to
just for one moment. Inhale. Bags help
lays the left-hand down and step it into
downward facing dog. And your downward facing
dog come to a dolphin. Either love or both
of your fore arms down to the ground at the
same time or one-by-one. In your dolphin, align your
upper ears if you're sorry. You don't feel alone. Your upper align your
upper arms of your ears. Start walking your feet
towards your elbows. Keep your knees bent if needed. Lifting the symbols
up to the sky. Stay here in your
dolphin or interlace. Your fingers. Plays the crown of your head down and come to a head
stand of your choice. This is a great opportunity
for working on your breast. But if breast is not
in your practice, then just keep working on those drills and on
lifting yourself up. Who unlike at the time. So keep working on
variations of your choice. Whatever you find your
way back to dolphin. Dolphin push yourself back
to a downward facing dog. Probably around facing, duck, over your knees
down underground. Come to a wide
legged child's pose. Your child's pose. Lift your right up to the sky, exhale friend it under. All the way to do stretching food at
the right shoulder. Juicy stretch. Hello, The next inhale, release. Return your right
arm to the center. Inhale, left arm up, exhale Fred is due to
stretching that left shoulder up towards your knees? We go your legs, place them in front of you. Bend your left knee in
towards your chest. Place the sole of your left foods to
Innosight. Fear right fight. And she says, I know you
inhale, lengthen, exhale, fold over your right leg. Inhale. Welcome back to center. Switch the legs. Inhale, lengthen, exhale, fold over your left leg. Onto the next inhale.
Walk yourself back, bring your legs
or your feet too. But I can ask on a butterfly. Good. Hauled off your ankles, inhale, lengthen the spine. Exhale fold. You want to find length
in the spine this time stretching
through the hips. Staying up on your hands
or on your forearms. Inhale, walk yourself back up. Move your feet a
bit further away. Create this diamond shape. Again, inhale, lengthen,
and eggs helpful to this time we want to round your back because
it plays your head. A little gap between your feet. Knee inhale, walk yourself
back up to seated. And gently with control, lower yourself back
down on your back. You might want to keep this, but I can ask another
variation for your legs. Or you can just extend
them and come to a traditional version
of Shavasana. Corpse pose. So find what works
for you today. Well, just finished a
whole practice here. Resting, restoring, reflecting, really
absorbing everything we've learned today, on-demand. And although we've been
working on physical movement, physical asana, some
physical postures. Also strengthening our mind, our endurance, our spirit. Remember that the
physical practice is only a door to the
realm of your soul. It opens up
opportunities for us to really delve deep into our, ourselves, to go inwards. To get to know ourselves better. Not only here on demand, but also in our everyday lives.
Just Foreign. Few last moments of stillness. Relaxation. Slowly started
waking yourself up. Maybe find a stretch your arms, your legs, maybe find a yawn. Take whatever movement
you need to take this. And I moved from that
moment to wake yourself up, to come back to the space
that we've created together. The space of new learnings
of knowledge, understanding, space of physical learning, but also spiritual growth. Quite a comfortable
seated position, cross-legged or on your knees. Fake, fake releasing
breath together, inhale, arms up, exhale, bring your
hands down and a prayer. Thank you so much for
following with me, for doing this whole
workshop with me. I know it was a lot
of information. I don't expect you to
remember everything at once. As I said, once you purchase the workshop, it's
yours forever. So feel free to come back
to it anytime needs to. Don't have to watch
it all over again, but just go over
some little bits that resonated with you and you feel like
you want to work on. So I hope you enjoyed it. Don't hesitate to
leave any feedback. I would very much appreciate it. If you have any questions, please get in touch with me, preferably on Instagram,
yoga dot Yana Blanca. Thank you so much for taking this workshop and I'm excited
to see you some other time. Keep working on your goals and have the most wonderful
rest of your day. Bye bye.
 Jana Zlunkova, Certified Yoga Teacher