Transcripts
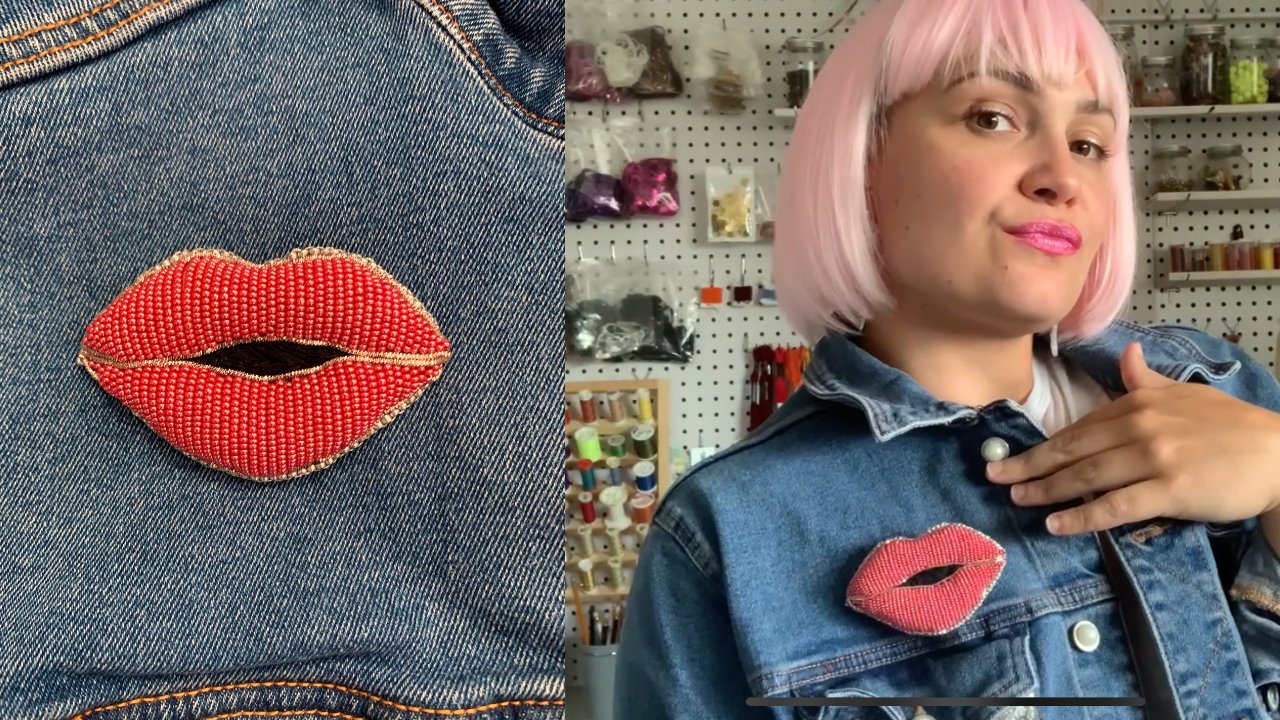
1. Introduction: Hello, I'm April scroll and I'm a mixed media textile
artist and designer. I use lots of different
surface design techniques like the dying painting, printing and stitching
of fabrics and papers to create my
art for my business, sprawl studios, I create
one-of-a-kind fine art pieces, stencils for painting on fabric, collections of hand embroidery, patterns and kids, and workshops on the Mixed Media techniques
I use to make art. I originally learned
hand stitch and so for my grandmother's
when I was really young, my early experiences with what they taught me
about making sparked a lifelong interests in the love of creating in
different mediums. I've explored lots
of artistic mediums, but hand embroidery is
become my all-time favorite. It's just so wonderful to see the stitches emerge
on fabric and paper. I love having projects. I can toss in a
bag and take with me almost anywhere as well. There's something so
calming and rewarding about the repetitive
movement of the needle and thread moving
through the fabric. And that's one of the reasons embroidery has become a
daily practice for me. Now let's move on to
the project I created for you that you'll be
making in this class.
2. The Circle Sampler Project: Alright, so let's talk
about the project. This is your project
description. So we will, we will be stitching
an eight inch square of fabric using just basic
tools and supplies. The most important thing
you will probably learn is the work process
and the workflow. And that includes just
the step-by-step process that I use for getting
really great results. And I'm sure that you will too, because that's
really important to set up a good
practice like that. So I have two templates
that I provide. So the first one is
just concentric circles and this is all you
need to get started. And I will go through all of the marking and all
of those details. So here is the second template, and it's just a lighter version printed lighter
than the first one. It allows you to create
your own designs. So this is the little mock-up
I did for this example. And you can see that I just filled it in
with colored pencils. You can do different sections, different ways,
whatever you desire. So you can either
follow along with me step-by-step and recreate
this one exactly. Or you can create
your own version. It's up to you.
So you will learn to easily and quickly
mark your design. People sometimes dread marking. I don't know why
it's not a big deal. It's kind of nice to have
those marks for reference and they will come out
completely so you don't have to worry
about any of that. We'll talk about the
benefits of using a stabilizer on the backside. And that's the stabilizer
that stays and it's optional. You don't have to do that. But I recommend it if you can, because it really
helps to even out your stitches and it just makes the whole process
so much easier. We will be doing all of this
embroidery without a hoop. And I have numbered
or without a hoop because I get such
better results. And it's so much easier. I mean, once you've learned to do that and just
gotten used to it, which only takes a
short amount of time. You'll never want to go back
to using an embroidery hoop. So then we will start out very simply by just
outlining the shapes. And I will walk you
through it step-by-step. It's not complicated. There's nothing hard about it. And I think you will
really enjoy this process. We will also learn to create beautiful textures and patterns using just four basic stitches. So this entire piece was created with just
those four stitches. And you can practice on a scrap of fabric
first if you like, and then go on from there. And you will receive a
supply list, like I said, the two templates and a
sequence guide for stitching. If you want to go back and
look up exactly what I use and a certain
step, you can do that. And I have this sequence
included in most of the videos. So you know exactly where you're at and you can stop
and look that up. That is it for the
project description. So let's go ahead and get
started on our project.
3. The Best Tools and Supplies: Now we have the tools and supplies that
I recommend using. So I will tell you why
I like these tools. So for my marking, I use the friction pins. They are heat erasable, which means as soon as I
presser steam the fabric, all the marks go away. So you get a really nice, clean, precise mark with these. I've never had any problem
with them coming back. Some people say they have, but you should test it for yourself and make
sure or use your, your favorite fabric marker. And next we have beeswax. So I use the beeswax for waxing all of
my thread before I. So I also use it for the
embroidery floss and it helps to keep the thread from getting
tangled up and nodded. And all you do is run the thread through
a couple of times. I'll demonstrate that
for you and then smooth the wax off
with your hands. And it works really,
really well. Next I have pins. I like these small little pins. These are, these are actually
garment sewing pins. I think they call them
silk pins a lot of times. But they have a sharp
point and a thin shaft. And so it's really great for
pinning your fabric width. Next we have embroidery needles, and these are combination pack, and they have sizes five to ten. The needles on the
outside are the smallest, and they are the size ten. And so the embroidery needles
have a very sharp point and they have a long oval I, that's easy to thread. So if you tried to do hand embroidery with
a regular sewing needle, you would be very frustrated
in no time at all. So I recommend trying
some good needles. They aren't expensive and they usually last for quite awhile. And next we have scissors. So I like to use
embroidery scissors. These are nice. They have a big ring
for your fingers, so they're really easy to grab, they're really sharp,
only use them for cutting thread and that way they stay sharp for a really long time. And then I use plastic, these plastic rulers
that they use her drafting and
things like that. So I use them for pretty much everything
there see-through. They have a grid that's marked in 1 eighth
inch increments. So it makes it
great to work with and really easy for
marking things. Next. Now we can talk about some of the
supplies that I have listed in the supply list. And so I recommend using DMC embroidery floss,
cotton embroidery floss. If you have access
to other threads or losses that you like,
certainly use those. But this is what I
find to be really reliable and it's
very easy to get. And so if I run out, I have no problem running to
the store and finding mark. And that's important because
you don't want to run out of embroidery floss in
the middle of a project. So these are some of the colors that I've
chosen for this project. And there's a list
of all the colors in the supply list that you
can download and print. Then for the fabrics I use, I often use silk stabilizer. So it's a silk or danza. It's not very
expensive and it works really well for a stabilizing your fabric
when you're stitching. And I'll show you
how to use that. You want to have some regular sewing thread to match your background fabric, whatever color you're
using so that you can base it is to your top fabric, to the organs, and also
for stitching around the edge to keep
it from fraying. And then the main
fabric you use, you want to make sure
that you can see through the fabric
to the pattern. You can always use a
light box or a window, but I tried to make my patterns dark enough when I design them so that you can actually see it without needing a light box. So all you need to do is pin
your fabric to the pattern, the template, and
market from there. So it's pretty, a
pretty easy process. I liked his linen
because it's so easy to stitch through and
it's such a beautiful fabric. But other fabrics would
be suitable as well. Maybe a really lightweight wool. Cotton or silk would
be great as well. So that's it for the
tools and supplies. And next we can get
started on our project.
4. Project Preparation: Now we are ready to start
on our, our project. So you need to have your
template and your fabric. And make sure you have the
right side of your fabric up. If you can't tell
the difference, that probably doesn't
matter that much. And you need a few
straight pins. And you're going to pin your pattern through the
fabric to the paper. Pinned to the corners like this. Make sure it's even. And then we'll put a
couple in the center area. That should be good. You can always move those
around as we need to. And then I'm going to
use a red friction pen. Please. The read quite
a bit because it's not quite as dark as a lot
of the other ones. So you can still
see it well enough. So when you mark, you just want to mark dark enough so that you can see all of your lines, but it's not overdone. So when I make my patterns, I tried to make them dark
enough so that I can actually see all the lines right through. And I don't have to use a
light table or anything. So I'm just marking lightly. And because said I'm going
to mark all the lines. Just kind of hold
it in place with your fingers as you mark. The workflow that I follow
is to mark a little, I just mark enough minds to get started
with my stitching. And then I will
stitch these lines and then steam block it as I go. When I mark these
straight lines, it's easier to just put a little kind of a hatch mark there and then draw the
lines in with a ruler. End up getting them
a lot straighter. So you want to mark those lines, The dissect the shape. And they'll go all the
way through the center. Just a couple of more lines. So all of my marketing is done. And that's what
I've ended up with. Alright, so I'm gonna take
my piece of silk or danza. I was using up some
scraps of fabric, the soccer games, so, so
mine is not exactly square, but it's nice to
have an inch around the outside of your fabric
because it gives you something to hold onto as
you're stitching through, just going to pin that in place. And next, we will
base that down. Alright, so now I have my
regular needle and thread. Just easier to do this with
regular sewing thread. And I run it through the wax
so I don't get it nodded. And I just do the regular
little sewing not where you wrap the thread around your finger and pull
it off and do a, make a little knot. So I'm going to stitch
close to the edge. I'm gonna go in-between where that first
line of marking is. The silk organiza is
kind of slippery. The advantages that it's really thin and very easy
to stitch through, but it doesn't
stretch out of shape. And it holds its
shape really well. So if you washed it, it would come out really soft. It would be almost like chiffon. Because it has something in it from the silkworms
called Sarah sin. That gives it that little
bit of extra body. And I've just fallen in love with it to use
for a stabilizer. So I'm going to go all the
way around the outside. And then I'm going to go
in through the center. So I will be back when I'm done with that and show
you what I've done. So you want to use a
light color or a white, something where you can
see it, pull it out, but it doesn't
interfere visually with your work as
you're stitching. Now I have my piece all base did and basically what I did was I stitched around the outside and then I switch to the center. And in quarters, you can just do maybe three
stitches each way, whatever you wanna do, or
three of these centers, but it really does help to
hold everything intact. And then here around
the edge I've just done a little kind
of a whip stitch. So it's just a little
overcast stitch and that holds that raw edge really well. And then next we can start
doing our stitching.
5. Stitching Basics and Foundation Stitching: So now we are ready to
start our stitching. And the workflow that I
follow that works very well for me is to mark a little bit. So just mark what you
really need to get started and then
stitch a little bit. And then in-between. Before you mark again, you can steam block
everything so it lays very nice and
flat and even, and that will make a huge
difference in your work. So to begin with, I have the DMC embroidery floss. Here's the number at the bottom. And you can see how
I have a tale of thread sticking out
floss, I should say. So what you're gonna do is
just pull that straight out. And I pull it the length from my the tip of my
fingers to my shoulder. And that's the general way
that I measure my thread. Loosely twisted together. And so I've pulled off
two on the side here. That's what I'm
going to work with. And I can just pull
my finger all the way down the center to separate those strands and set
this piece aside. Alright, so now I've
got my two strands. Sometimes you need to trim
that end off a little bit. And then you're going to hold the ends of your thread
very close to the end. And then you just kind of push the eye of the
needle over the top. So I'm using a size ten needle, which is a pretty small. But the threat, the size
of needle that you want to use is the size that is the easiest to
get your thread through. Because if you can't
thread your needle, you're going to have a
really hard time getting very much stitching done and
you'll be really frustrated. Now to do a not. What I just did was I ran
my thread over the top of the wax and then I smooth
it out with my fingers. And now I'm going to put
the thread over the top of my needle and then
wrap it around twice. Now I put the little
tail over what I'm holding and slip it off
the end of the needle, holding it in my fingers. I end up with a really
nice little not okay. So I trim my thread
close to that. Not the first stitch
we're going to do. This is going to be
in the center here. And so I'm going to
start on the outside. And then I'm going in between an eighth and
a quarter of an inch. So about three-sixteenths
of an inch. And I'm coming back up in that same hole where it started. So again, I'm keeping my
thread to the bottom. So I am making a little stitch. And then you can see my
thread is actually being carried over from here
all the way over to here. So that's why you want to keep your actual stitches
pretty short. And you can just
continue on across. And then I'll show you how
to get to the next part. And then at the very
end, to finish, you just go down in the same hole and pull your
thread through to the back. Now, when you go over
to the next section, you could do it a
couple of ways. You could either do a little
tiny stitch here and just catch the silk organic
and wind your way over. Which is the easiest
thing actually. Since this is gonna
be pretty solid by the time I'm done with this
stitching in the center, it's probably not
going to show through. But if you were
just stitching on a thin layer of white fabric, you would probably
not want to do this. Okay. So there's my next little
spoke in the center. So I'm just going to
continue on stitching these. Alright. Now I have one last little section
to do and I wanted to show you how I finish
my thread off. You can use shorter
thread if you want, but I just don't like
to have to change my thread anymore
than I have to. So I like to use a little bit longer thread than some people. And when you're going
through the center here, you can just kinda
go underneath. It will be solid when you're
finished here in the center, but you don't want a huge, big lump on the top. So I'm to my last stitch. That's pretty much tying this
off on the back is pretty much the same way. So I'm gonna go again down
through my last hole. Then I'll flip it over and
then go through underneath. Just catch that stitch once, twice and you're going
underneath that stitch. And next we will go ahead and do the blanket or buttonhole
stitch as some people call it. I'm going to use a darker blue. This first one was the 38103810. So it's medium, medium
to dark turquoise. And this next one is 3765. So it's a darker blue. So you're going to start and you're starting on the
outside, very outside circle. And then you're going
to come up right on the inner line here. Then you're going to come
up just a couple of threads over from that line. Then instead of doing the
stitches all the same length, we're going to do a
short stitch that goes half the length and I'm not quite a quarter of an inch part. You're coming up
right on that line. Okay, We're going
back underneath. And the thread goes
through the loop here. Alright, so it's coming
up, you have a loop. The thread goes over the top. And that's what makes it
catch right here. Okay. So don't worry in the beginning about your stitches
being really perfect. You can just practice on a
scrap of fabric if you like. And just go all the way around. And what you want to do as you're working this
stitch is you want to make sure that your stitches
follow the angles here. So you want to keep,
you can divide that in half and just use that as a reference if that
helps you out. But you don't want
them to start getting to slanted one
direction or the other. And if you wanted to put another mark halfway in here to help you get used to doing just
a little bit of that. Half the stitch instead
of the full length. You could also try that. Whatever makes it
easiest for you. And again, you want to pay close attention to your stitch
length. You don't want it. You want it to be taught,
but not too tight. So what we're doing here, I call this doing the
foundation stitching. And what we're doing is we're stitching a little
bit in each area. Because what that does is it
anchors all the fabric down and distribute your stitching more evenly so that in the end, your fabric won't be puckered and drawn up and it'll be a lot easier to
stitch this way.
6. Adding Details: Alright, so I've
made quite a bit of progress since you
last saw the piece. And what I'm going to do now is show you how to finish
off the blanket stitch. So I've done the blanket
stitch all the way around the outside and I have the
long and the short stitch. So now I'm going to show
you how to finish that off. I'm right here in the center and I'm going to put one more because I have two
long stitches here. I'm going to cook. I'm going to put one more short stitch right in
the center there. Alright. And then to end this, I'm just going to bring
it right over to here. So now you can see how that
ends up pretty nicely there. And then on the back we have
that one little stitch. So again, just catching
the soccer games and trying not to catch
the outer fabric. Just going to slip it through a couple of times and then make a little tiny naught
there and trim my thread. And then going back over here, this is the stem stitch. And so I've started
outlining the shapes. And now I have a couple
of more stitches. So you can see I
have enough room here for about two more
short little stitches. And I wanted to show you
how to turn a corner and get a nice sharp corner like
I have on these others. So I'm going to end I going back in that
last little hole there. Then I'm going to come
up just a couple of threads to the left of that, just to the outside so that if I came up right
in the same hole, I would just pull my
thread back through. So I made just a
little tiny stitch there by going over just
going over a couple of stitches and then I just
continue on down with my line. I can show you what that
looks like on the backside. So it's nice to do it this way
because if you had carried it over on the back and you're using white fabric
and it went at a, at a diagonal there. You would see the thread through the white
fabric possibly. So I'm just going to
continue stitching this. Now we're ready to
do the next part. And so all you really
need to do for this is take your ruler, line it up with your
center right there, and then go out to the very
corner of your fabric. And then you can mark your line. So just mark the center line. Alright, so now you're going to mark you're dividing lines. So I've sketched mine
out here in pencil and I'm just regular pencil and colored pencil to give me an idea of how it's
going to look. And so what I'm gonna
do is mark the, around the outside
of this white area. And so I will mark
down the center first. So all I did was I line up my center with the outside
corner and marked a line. And then I'm going to mark just like an eighth of an inch to the outside of
that on each side. So when you stitch, it takes up some width. And what we'll do is
do a stem stitch down each side and then we'll do
French knots down the middle. And so I will go ahead
and stitch that for you. It doesn't matter which
direction you go. The gray acts as a great blender for other colors
if you ever have the colors that don't
go together too well, the gray is just
perfect for that. Alright, so I'm
finally back again. So you can see how much I've done since the last
time I was here. And now I'm going to continue on with just a little
bit more stitching. So what I'm trying to do is stitch everything
that I've marked. Now, if you try to mark
every single line, especially at the beginning, you're just going to end up
with a big mess and you won't have any idea what's
supposed to be stitched, in what order or in which color. So this is where
I prefer to work. You can see how it's getting
a little bit wonky here. I'm getting some puckering. It's not very even, this is what I call The
Ugly Duckling phase. And pretty much everything
I make those through that phase where it just
doesn't look very good. It might not look
that appealing. It might not look perfect. It might even look like
there's no hope for it. But it's just part
of the process because as you keep working, It's going to come to
life and it's going to develop its own
personality and charm. And you probably will not be able to put it
down and stop stitching. So just bear through this
phase and keep going. I do all my searching
in the evenings, so I usually will sit and stay for a couple of
hours each evening. And it's become a
regular practice for me and that's how you
get better at things. And so next, I'm just going to stitch across the bottom of these shapes for right now. And then I'll show you how
to do the running stitch. Okay, so because my
running stitch will, but right up to
that on the inside. And so I need to pretty much
have that stitched first. But for right now
I'm just going to stitch across the bottom
of each of these. Tend to two. Use my red pen a lot, so it's about worn-out. And I just like the
red because it's not as dark as the
blue or the black. And so it doesn't interfere with your design decisions
quite as much. Okay, so I'll start right here. And I'm gonna go just
inside that line. And the running stitch is
just up from the back. And then my stitches are gonna
be equal distance apart. So you can stack several stitches on
your needle at a time, just like I have. And then you pull it up, you kind of smooth it out. And that's the general
role when you're stitching without
an embroidery hoop. You just, as you stitch, it's important to just
smooth those stitches out. Now, if your stitches
don't look perfect to you or are they don't
look exactly like mine? Don't worry about that. I mean, your stitches
absolutely improve in time. And it's kind of like your
own personal signature. So I really don't
even think about the stitch length very much. So you could choose to
either go underneath or over the coral stitch. I'm just gonna go underneath. And again, I'm going just
like a 16th of an inch or so. From that line. Just pull it up, smooth it out. Then I have one tiny bit
of a stitch right there. And actually I'm going to pull that up right there
and just pull it out. Now, I'm going to show
you the inside part. Here. It doesn't matter. You can go over under whatever
you feel like. So we'll just go over this time. You can see the difference
a little bit more in. And then I'm gonna
go up to the center. If I have very far
to carry my thread, I will usually just kinda
go through the stitches on the backside to get
there so that it's just not a big loose thread
hanging over the back. So you can mark
this if you want. It's not really necessary. You just going
down, up, down, up. Something I tried to do is
to when I have several rows, I will try to
stagger my stitches. And that means, so
here the thread is on the top here it's
going to be underneath. So it doesn't always
work out that way. But I will try. I'm going right down the center In-between
those stitches. You know, in a few think it looks your stitches
look a little bit wonky or off or, you know, probably no one no one is gonna notice that by
the time you're done. So I would just
not be concerned. And then I have
one more row here. So I'm going to do
the same thing here. This line in here, the smart, That's where my next row of
stitching is going to start. And that's going to be a
different type of a stitch. Okay? So here I'm going to do
the same thing and I'm going to stitch
right on that line. I'm going to stitch
inside of it just a hair. So I will continue stitching
in this space and then I will come back in a little bit when I have
some more done to show you.
7. Making Progress: All right, so now I want to show you what I just
finished stitching. So I finished doing my
running stitch all the way around the outside
of this circle. And again, I'm stitching dislike a little fraction of an inch, 16th of an inch from beyond that line, the
other side of it. And so I've gone all the
way around with that. And then I also did
the same thing here. I stitched my stem stitch
the bottom of this shape. And then I did my running
stitch close to that. Next I did, I'm more on
the central medallion. And so what I did was I stitched
another row of stitching in-between each of
the original lines that I had in the
same color thread. And at the end,
I'll go in and do a lighter row of stitching. So now I'm going
to do the blanket stitch in this area right here. So I'm going to start here. See I need a bigger not
we'll start right here. Then I'm gonna come up
just inside of that gray. Then I want to come
up just the other side of where that stitches. Okay. So I can start doing
my blanket stitch. So you can do these
further apart or closer together,
whichever you prefer. I'm not coming up
to close to where gray stitching is because otherwise it will
kind of overlap it. So I'm gonna come up about and not quiet an eighth
of an inch away. And I'm not trying
to align my stitches up with these spokes in the center because
I want them to be a little bit closer
together than that. And you just kind of
push up with your finger underneath and you'll
get a nice stitch. So, um, that is going to be the last drove
stitching I do before I can, um, go ahead and
steam block this. So I will show you
how to do that next. All right, now we're
finally to the best part, which is not being finished, but it's to the
point where we can actually do some steam basting. Let me grab some
pins right here. And so you can see I just finished doing the blanket
stitch around the inside here. And so I'm I've gotten I've got everything stitched
that I had marked. Alright. And so now I have all
of that information for the rest of any
marking that I need to do. And so I'm in great
shape and you can see how it's gotten pedigree and I'm just kind of
ungainly and an even. So now we're going
to even things up. So I flip it over
to the back end. I'm going to begin
steaming this. Alright, so I hold my
iron a quarter of an inch above the surface of the
fabric on the backside. So I steam it gently and then I can start stretching it
out a little bit. So linen is really interesting
because when you wet it, it relaxes the fibers a lot. So it becomes all
bubbly and funny looking and it sort of stretches
itself all out of shape. But as it cools,
shrinks back up. It tight, actually tightens it. And a lot of other fabrics like silks can do the opposite. So you do need to watch
if you're ever doing wet blocking on I'm like
silk crept machine, you might have issues with that. So what I do is I just kind
of stretch it out a little bit because anywhere
there's more stitching, there's a chance that
it will be brought in more drawn in more like on the points here
close to the edge. So I'm just going to let
that cool for a bit. It's still warm. But I can go ahead and
steam it a little bit more. So I'll fit my iron in here. And again, I'm just holding it a quarter
of an inch above. So let me give it one more
quick press on the front. And again, I'm just
skimming over the top. You never want to
put pressure on your stitches and
flatten them out. So I will just
stretch that out a tiny bit and let it cool. And then, um, there'll
be able to move on. Now I'm outlining
my shapes here. And what I'm doing is the
stem stitch and I'm doing, I have an outline stitch in
the coral, the lighter color. Now I'm going in with the rest. So I'm just doing the
stem stitch and I'm just doing Rose close together. So they kind of stack up. And I did one row in the coral. I'm doing three rows in the dark rest round. Alright. So that's the filling. And then I'll decide
what to do in here. And it really changes the
way your threads look. I mean, look at the difference here with the running stitch, where it's much more open, but the same color where
it's filled in solid. So you can get a lot of different interests
using minimal colors.
8. The Final Touches: Now we are ready to follow up on the
progress that I've made. I've finished stitching
around these shapes. I'm ready to actually
do my French knots now. So a lot of people have
trouble with French knots. They really liked them, but they have issues. And that's usually for
a couple of reasons. And I would recommend
that if you haven't done any of these
stitches before, just practice on a scrap of fabric until you feel
comfortable with them. So I'm going to start
in here, close. Now with French knots. You can use, you could do French knots with
one strand of floss. They wouldn't be very small, very tiny, but that
would be possible. You could also use six strands. I never use six strands because it makes it
really hard to pull the needle through the naught when you have that much thread. So what I'm going to do is I want these to
be fairly large, so I'll do a little sample and see if they're the right size. So what I'm doing is
I'm putting my needle down close to the fabric. I'm wrapping my
thread around twice. Now I'm going just a
couple of threads. My fabric away from
where my needle came up. A lot of people will go
right in the same hole. And then when they
pull the knot through. So you can see I'm
holding this very close. So a lot of people
when they pull the needle all the way through, they'll pull so
hard that the whole not pops through
to the other side. So that would be
very frustrating. But all you need to do is pull until your
thread is through the other problem
people have a lot is getting their
thread all tangled up. Then they end up
with a huge mess. Okay? What I do is I just hold it with my thumb until the
thread is through. Now I just carry it over on
the back to the next spot. You can mark these if you want. You can also just
do just eyeball it. So I'm going around
my needle twice, going over a couple of threads from where
I first came up. I'm pulling those loops down to where my needle goes
into the fabric. Then I'm going to hold my finger there so that the thread
doesn't get tangled up. And you see how easy it is. And you can make
perfect French knots. No problem whatsoever. I like them because they give
a very different texture to your work and add a
lot of interests. And what's amazing is how each little section changes the piece so much that
always amazes me. I wanted something to connect
these blues visually. And I think that's going
to work really well. So I don't know, I might not
put anything in here at all. It takes working through the whole piece gradually and developing the
different areas. And then you can see
what you're gonna get. Here. You don't have anything else
to anchor those stitches. Just go back underneath your last knot and
then pull it through. Just do one little
not of course, if you were going to wash
this and use it a lot, you might secure
it with a couple of loops there and knots. Now we are up to
stitching in these areas. And that is in-between the
concentric circles that are numbered 45 on your
first template. So we're going to
stitch these long rows of stitches here. And those are called
straight stitches. And I wanted to show
you how I would mark that on my paper. So if you used your
lightly printed template that's printed in
the light gray, this would make it pretty
easy for you to mark. So all I did here
was to use my ruler. And from these lines, I marked it in a quarter of
an inch from here to here. Alright? And also one-quarter
inch from here to here. Alright? So you can just kind of practice on your little handout
that I gave you. And then you can mark
it on your fabric. And it will give you a better
idea of what you're doing. Okay. And I'll fill this in with some colored pencils so you
can see how I did that. In the center. I just marked it in this shape. I just marked through the
very center of the shape with pencil and then about
a quarter of an inch total. So 1 eighth of an
inch on either side. So it would look like this
with a straight stitches. Just to give you an idea. Okay. So I would use my gray
straight stitches to mark in here or
stitch in here. And then for these outer areas, what I did was close to the gray lines here with
the blue French knots. I did a little bit of green, just a short little bit
on each side of that. So so a little bit of green. Okay, and then I use my blue. So here's my piece. And here's a little practice
swatch that I've marked. So these, um, these rows are
a quarter of an inch wide. So I'm starting on the top
and going down to the bottom. Right, and then back
up here to the top. So I'm going right on the line. When you pull it, you don't want to go too tightly
because what you'll start to do is this where
your puckering it in-between. So you wanna do it
a little bit loose. I'm leaving like the width of one thread in between because I don't want it to be
like a satin stitch. I don't want the stitches packed into tightly next
to one another. So I'm leaving a
little bit of space. Okay? So I'm going over-the-top, some coming up on the top. I'm going straight down
to the bottom here. Alright? And then I'm going back over kind of at an angle
a little bit underneath. And let me do a
couple of Morris. I'm going straight down, back up at an angle. Okay? And if it seems a little
awkward at first, you can kind of pull
your thread down like that to figure out where it's going to be straight,
directly perpendicular. Alright, and just keep going. So I did this same
straight stitch. I'm in all three of these
sections here, here and here. And so in my center here, I've gone back in. And after a stitch, the first marked lines here in the center with
a darker turquoise. Then I went back and I
stitched in between again. And then I did a third row in the center
with this light blue. And so you can see
these are shorter. So I marked a little
bit smaller circle. And that's where I
ended my stitches on that little row inside with
the lighter blue stitching. Now, I'm just going
right outside there with more French knots. This time I'm doing them smaller because it's a
really small area. So whereas before here we
use three strands of floss. Now I'm using two and I'm wrapping my thread
around three times. So now we're almost
finished and the only thing we have left to stitch
is the background. And I just wanted
to show you on here these straight lines that are running parallel
to the edges. Those are just reference
lines for the background. So I mark my lines this way because you have to allow
for the width of the ruler. So if it's important that you try to fit a certain
number of lines in. It works well to do it that way. So I'm just stopping
when I get close to where the stitching is for the outside
of the circle there. So now everything is marked. So I haven't marked in
quarter-inch increments and that just gives
me a good guideline. It's not necessary to
do that much markings, just a matter of
personal preference. And it's easier to just
go ahead and mark it now because as I complete
stitching one section, it's going to pull
it out of kilter a little bit and it's just easier to mark it now
while it's all flat. So I'm going to do
a combination of just kind of a light beige
colored thread and the gray. And so I'll see how it looks
and we'll go from there. Okay. So here what I've done
is more of a long, That's actually that's a
regular running stitch here. I did a long and a short. So I'm just going
to mix these up a little bit for a little
bit more interest. Alright, so now you
can see this area is pretty well stitched. I have to do one
little bit here. So I'm going to repeat all the way around and
then remove some of my marks with my iron and decide if I want to fill in anything else with
backgrounds stitching. But, um, I will come
back when I'm up to that point and share
my progress with you. Alright, now, I'm
really happy all of my stitching is finished and all I need to do
is give it a light. Press from the back. I found this little
board stashed away that has all these
straight lines marked on here. So it's kind of nice. Sometimes I use a little
template I've made. So all I do is steam it lately. Put a couple of pins in here. And then next we will
move on to the finishing.
9. Finishing: So for this piece,
I've decided to mount my embroider panel on an eight by eight inch gallery
wrapped canvas panel. And what I'm doing
now is prepping it. So I've masked off the front side with just
blue painters tape and I mask off the backside
and the front side where I don't want the paint to go because I'm using white fabric, that gray paint could show through the fabric itself
on the front side. And I don't want that to happen. So I'm just painting on the very edge and making
sure that it's covered. And I'm painting one coat of paint on and then I'll flip
it over and do the backside. I'll do the same
thing on the back. And this is a lesser
quality paint. And so I will have to let
it dry in-between coats and add another coat of paint to the top and that
should cover it pretty well. I will show you in a
minute how to attach the embroidered
piece to the Canvas. I really like the way
these pieces look. They look nice, just sitting on a desktop or or
hanging on the wall. And it's a pretty quick
way to display your work. Alright, so I've prepared, finished preparing my
canvas. It's ready to go. And now all I have to do is trim my silk organiza off
the back of my fabric. So I want to be really careful not to cut that stitching
that I've done. I'm just trimming like 16th of an inch from
the edge just in case because I don't like to go back
and repair things. If I can possibly help, and I'm almost done. My last side, I'd rather err on the
cautious side here. And I'm just going to trim that little thread
off right there. So now I have my
piece all trimmed. And all I have to
do is put it on top of here and center it. The edges of these gallery
wrapped canvases are really nice because they have a slight little
curve to them. They're not just square. It will actually wrap
around the edge. So I'm going to put, I'm just poke some pins
all the way through the Canvas to hold it all in place. And the glue that I'm using is Roxanne's glue based it it's a temporary blip basing
glue for fabric. And I want to do something that's not completely permanent. And that way if I needed
to actually pull it off and use this piece or
something else I could. So all I need to do is, and I'm not quite ready. I'm going to use this panel, something in a little bit, so I'm not going to actually
glue it on here today, but all I would do is run two or three small
little beads of glue across one direction. And then flip this
down and smooth it down and let it dry
for a little bit, just so you're not pulling it up when you go to finish it. And then what I do is flip
it over once it's dried. So I flip it over to the back. And then I actually
put my glue right on the very edge of the
fabric here. Alright? And so this way I can see
exactly where it's gonna go. I don't want glue all over the canvas where
there's not any fabric. And that way I can be assured that it's going to be
right on the very edge. And so let me quickly grab
another piece that's done. I will share that with you.
10. Conclusion and Take Away: Well, you covered an awful lot of information in this class, including which suppliers to use and why marketing
techniques. Great basic tips to make the stitching process easier and how to finish and
display your work. Moving forward, I hope
you'll keep in mind the basic workflow you followed
and use it in the future. And don't forget about
the design concept of varying your stitches
to create contrast, texture, and dimension
with your embroidery. Please leave a comment to let us know what your favorite
part of class was. And don't forget to share a photo of your work
when it's done. We'd really love to see what you've done with this project. I'd be very happy to
answer any questions, so don't hesitate
to get in touch and thank you very much
for taking this class. You can follow me
on Skillshare to find out what my new
classes are released. In the meantime,
happy stitching.
 April Sproule, Mixed Media Textile Arts