Transcripts
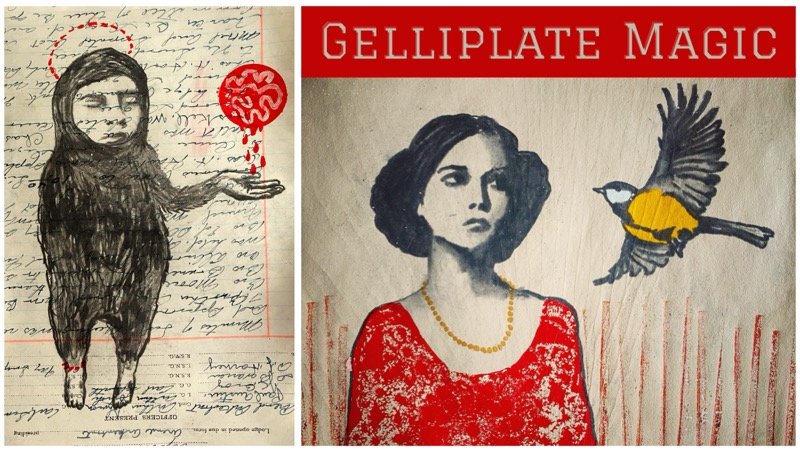
1. Let's Make Some Gelliplate Portraits!: Do you want to
learn a cool jelly plate technique
that will help you to practice your portrait
skills in a quick and fun way? Then I think you will
enjoy this class. If you don't know me yet,
my name is Journey Marsha. I am a Dutch art teacher
living in Antwerp, and I focus on making
the process as enjoyable as possible without putting too much pressure
on the end results. In this class, I'm
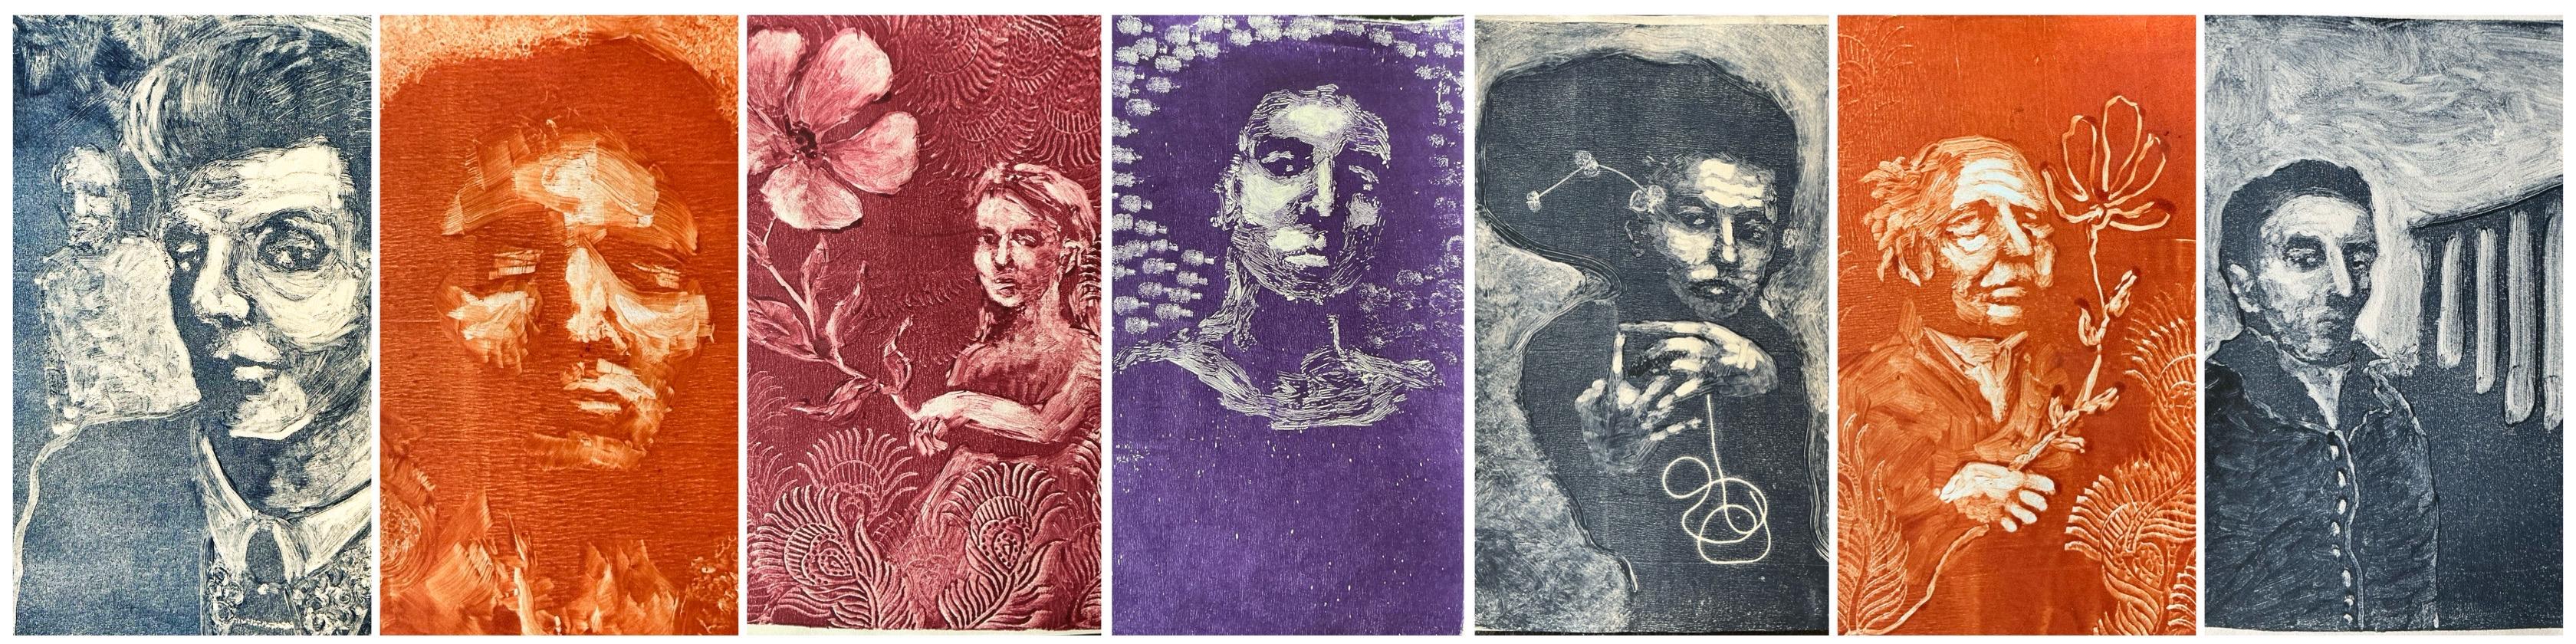
going to teach you the subtractive mono
printing technique on the jelly plates. And as usual, we're
going to take it step by step so that everybody
can follow along, whether you are
beginning artist or someone with a little
bit more experience. You will get something out
of this class for sure. Sounds good. And let's make
some jelly plate portraits.
2. Welcome to Class - Supplies You'll Need: Welcome to class.
I'm so happy here. I want to start by taking you through the art
supplies that you need. First of all, of course, there's the jelly plate, is a wonderfully squishy
thing that is really a game changer in at
home mono printing. If you don't have a jelly plate, you can also do the exercises
with an acrylic glass. You know, It's
prospects, I think, in America, just know that you'll get better results
on the jelly plate. And then we need something to create our portraits
with, of course. I'm using open acrylics
by golden paints because I really like that
they stay wet for a long time, but they also dry completely. So if I would want to bring different media into my Jelly
play portrait later on, then there's no risk of
reactivating the paints. But you can also use
block printing inks, just know that they can be reactivated by wet media
after a good while. All printing inks will
work for this technique. You can also use oil
paints to practice, just know that they will
tarnish the paper over time. It won't be ciful, but they're perfect to practice. If you like the technique, then you can always purchase a tube of open acrylics,
see how you like it. If you like it,
you can buy more. Another thing you can do to your regular acrylics
is to mix in some retarder medium that will slow down the
drying process. That way you only
have to buy one thing and you can use all the
colors that you already have. You'll need a prayer,
some brushes, something like a bamboo pen, something pointy,
but not too sharp. Otherwise, you're going to
damage your jelly plate. You can use pretty much any
type of paper to print, whatever you prefer to use. I'm working on a light box, so it will be clear to
you what I'm doing. If you have an
iPad or something, you can go to the
app store and find a lightbox app and you can put your jelly
plate on there as well. Or you can just take a piece of printing paper or printer paper, and you can put that
underneath your jelly plate, and that will work as well. I think that's it. Now before
we dive into the exercises, let's talk a little bit about
choosing a reference photo. Of course, you can use the
same ones that I'm using, but if you don't like those or they are too
intimidating for you, just go to my Pinter sport. I will put the link into my PDF that you can download
in the class resources. I will also add a couple of my personal favorites
in there to spare you the search because there are a lot of uninteresting
photos on the Internet. So I want to spare you the trouble of doing
a deep search. The best types of
reference photos are those in black and white, high contrast, so
you can really focus on observing the lights
and the shadows. Something that resonates with you because if you don't
like the reference photo, you won't enjoy practicing. That's just how it works. And also try to find something with a little
bit of emotion in there, you know, no blank stairs. Something. Yeah, that
looks interesting. Okay, I'm going to stop babbling.
Let's make some prints.
3. Prepping Your Plate: L et's prep that plate. We're going to put a little
bit of our paint on there. And it's always trial
and error, you know, It takes a little while
to figure out how much you have to use, and even then, I
will get it wrong. So that happens,
don't stress out. Also, don't roll like this. You just lift and
roll and you go from left to right,
top to bottom. And that way, you'll be able to get a nice and even layer. If you do have a little bit
too much on your plate, then just take a
scrap paper and roll some of the paint onto there and then continue
on your plate. And then we're good
to go. Now, let's move on to the next lesson.
4. Observing the Light: We're going to start by just observing the lights
and the shadows. Wherever there is a light area, we're just going to remove
some of that paint. At first, I'm making sure that I'm not putting a lot of
pressure on my brush. And also, I'm not going to
wipe it every now and then. I'm just moving the paint ad. And that way you can
build up the highlights. If you remove it all at once, then you have nothing
to work with. We need some variation in value to create an
interesting portrait. If we really want to, we can remove it all anyway later on. But let's start
with some caution so that we can get to know our portraits before we
make that kind of decision. Just try to do your
best observing and don't be too hard on yourself if you don't get it
exactly the same. This photograph is only here for inspiration so that
we don't get stuck. It's not our objective to create a copy of
this photograph. No. This is just a helpful tool to get some creative time. If you have taken one of my
other classes on skill share, you know that I
love wonky figures. Trust me, he's going
to get a little wonky. The most important thing is that you're going to practice
with this technique. You can find unit later. Even then, you have off
days and great days, and we have to do a lot of
work to grow our skills, and it's not linear. So If it's not going your way, just finish the portrait anyway because you never
know what will happen. I used to give up way too early in the process when
I was a budding artist, and things went way better
when I just accepted my skill level and
I decided to do some practicing and let
them be let them be wonky. Each portrait has its value, even when we don't
particularly like it because it helps us
to learn and to grow. Give yourselves
the opportunity to grow and finish your
portraits before you throw them out
or maybe you use them to continue working on. I would love that
if you do that. Bring in some other
media and have some fun with them because
if you don't like them, then you have nothing to lose. Use them as a playground. But first, let's give them a fighting chance and
finish our project. Do you notice how
I leave the eyes very dark until I've scaled
the rest of the face. I want to have a good feeling of that portrait before I decide on how I'm going to
create the eyes. First, I will start
off with eyelid, and then I will remove the white of the eye.
But not quite yet. And if you really want to
capture his expression, then pay attention
to the shape of the eyebrows in the
eye, the mouth. I'm not concerned with exactly
copying his expression, so I'm giving myself
some wiggle room, for him to be his own person. I think that makes it a
little bit less intimidating. It can be a little scary with jelly plate printing because
when you take it away, it's been taken away and you
can put it back in there, but you will see some difference in the darkness of the paint and the texture. But it doesn't always matter. It's about experimenting
and trying to troubleshoot. Don't freak out if
you got it wrong. No. You're allowed
to make mistakes, and it's only paper in the end. Also, Jelly plate printing
is a very quick process when you compare it to maybe acrylic painting or
something like that. You can do a lot of portraits
in a short amount of time and you will see that you
will get better very quickly. Just keep on observing. And if you are having some difficulty letting
go and you're very tense, then put on some music. Music that you love and
that you can sing along to, maybe. It always helps me. Now it's time to
create the background. I'm taking away the negative
shape around my figure. As you can see, I'm going
rogue on my reference photo here because if I want to
respect my reference photo, I would not really
touch the background, but I would remove the
paint where his hair is. But it's our art and
we make the decisions. We can choose to follow along
or make up our own world. And maybe a little bit of both. When it happens by mistake, that's fine as well because the longer we are observing
a reference photo, the more we will notice. So it's only natural that you will make some
mistakes early on. That's fine. We'll just work with them. Nobody knows which
reference photo we've used, unless they know it. Even then, who cares? This is our little project. I do like the figure and that zy figure
in the background, so I'm going to put it in
there or something like it. There. I think it
adds to the story. If you're a beginner and
you feel overwhelmed by this photograph because it just has too many
details for you, that you're not
comfortable with it yet. Just download my PDF
in class resources, and I will link to my Ptras board and you'll find a whole lot of
portraits in there. A partly lit face
in black and white, high contrast on a dark
background is perfect for you to practice with if you're not really
sure about this one. I'll link to my favorite
ones. Make it easy on you. The reason why I chose
this portrait for my real time lessons is
that I want you to be able to easily follow
along when you do feel ready for a little bit
more challenging portrait. But whichever portrait you
use as your inspiration, the process is the same. Just observe the lights in the darks and slowly
build up your portrait. You'll see in the
upcoming lessons. Just follow the steps
and you'll be fine. Do you see those little dots
in the reference photo? I wanted to put them in there because I'm
going around it, it's a very painterly result, and I absolutely love it. If you're not sure how to create something
on your jelly plate, just give it a try and maybe
you surprise yourself. Again, it's not the goal to capture your reference
photo perfectly. I'm just going to
repeat myself until I'm blue in the face
and you're convinced. And you see those painterly
strokes right now. It's because my brush is so filled up with the paint that, I'm just moving it around, but it's not going anywhere. I like it. It's very subtle. Okay. For now, I'm done. Let's move to the next lesson and I will show
you the next step.
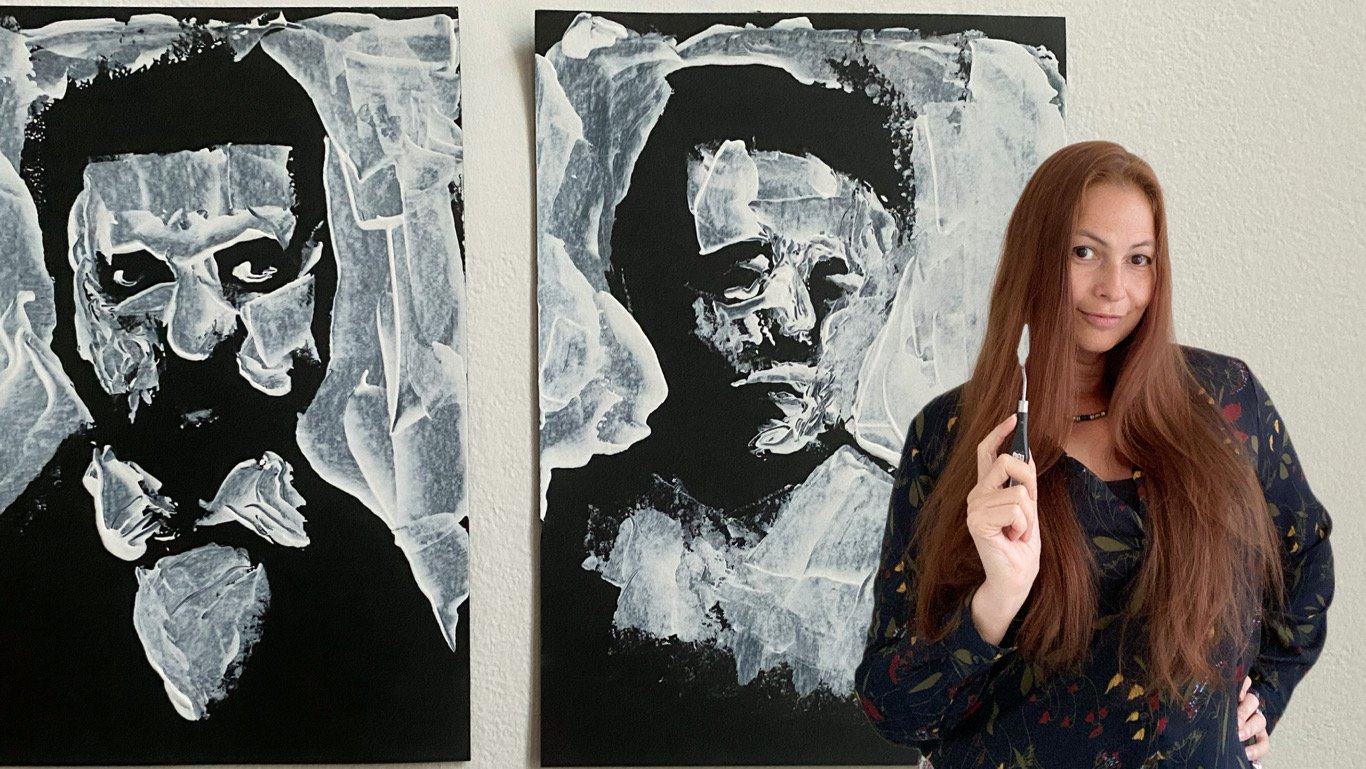
5. Intensifying the Highlights: This time, we're going
to do the same thing. But after we make some brush strokes and
we remove the paint, we're going to clean our brush. That way you get more
intense highlights. And we need them to
create contrast because if we are going to make a
print like it is right now, It's not going to look. We need to remove more of the paint and let some light
shine onto our portrait. The more contrast you have, the more dramatic your
portrait will be. And I like drama in my
art, not in my life. Let's just watch for a while. Another great way to intensify the highlights is
to use a Q tip. I will remove even more paint. When you're done intensifying
your highlights, let's move on to
the next lesson.
6. The Art is in the Details: L et's find tune this portrait. I'm taking my bamboo pen, and I'm removing the white
of the eye like this. If you don't have one of
these, that's no problem. You can just use a
pencil or something. Anything that's not
too sharp so that you don't accidentally
damage your jelly plate. As I said before, I like to put in the eyes
at the very end, just so that I'm
sure where I want my Pter to look at because maybe somewhere
in the process, I'm creating something that
I want him to look at. And if I had decided
that early on, then it would bug me because
you can't take that back, once you know what you
want to figure to do, then it's time to
put in the eyes. When you're done
figuring them out, a great way to bring
life into them is to create a reflective
light in there like this. Just a tiny little dot. What difference that makes. Try to put them in
approximately the same place, not one on the left and in the other eye on the right because that would
look very weird. Just go around the
portrait, take it slowly, and think about
tiny little details that you would like to adjust like the shape of a nostril, or maybe the tip of the nose, will depend on
your own portrait. Here, I'm just fussing
with that shirt for a bit, but not really life changing,
what I can do here. I'll just move on. It's fine. This is the most important one. I'm taking away a
little bit of the side of his face to give him
more of a defined cheek, little b masculine because
it was very before. Once I've made a little
start with my bamboo pen, I'm taking my Q tip to
make it more permanent. Sometimes you just want
to feel out something without taking too much
of the paint away. Like I said before,
take it very slowly. Most of the time, you won't
need to do at this stage, just a tiny little tweaks
and then you're good to go. Remember not to rest
on your jelly plate. I'm going to do the hair
brush with thick bristles. Just a couple of quick ses. Not too much pressure. And it'll make all
the difference. You'll see. O When you're ready, let's move on to the next
lesson. I will take a print.
7. Pull That Print!: You can use just about any piece of paper to pull your print. When I like coming off, I love to use these
papers from Aa gami. It's a sample pack and it has a lot of di very nice papers. But like I said,
any type will do. I'm taking my time for the
placement because my paper is as big as my plates. I'm just starting to rub it. Just take your time
and get every piece of that paper because we need that paint to make
contact with the paper. You don't need to, but you can certainly use something
like a spoon just to pick up a bit more
paint, but it's optional. It's not essential like with charcoal transfers from a
previous jelly plate class. Let's see what we've got there. As such a satisfying moment right to pull it off and
see what you've done. Atmospherics. Even though we've done a
great job with our spoon, let's see if we can another. That would be the reason not
to use the spoon at the end. But I'm going to use it
now to see if I can pull a the last little
pieces of that print. I'm amazed by the
result because I thought there was hardly
any paint left on there, so I'm glad that I tried. You can use this to
practice on drawing. You don't have to
start from scratch. But, of course, don't use
your good paper for this. I use some printer
paper. That's fine. And there they are. Are you
ready for the next project? Let's go.
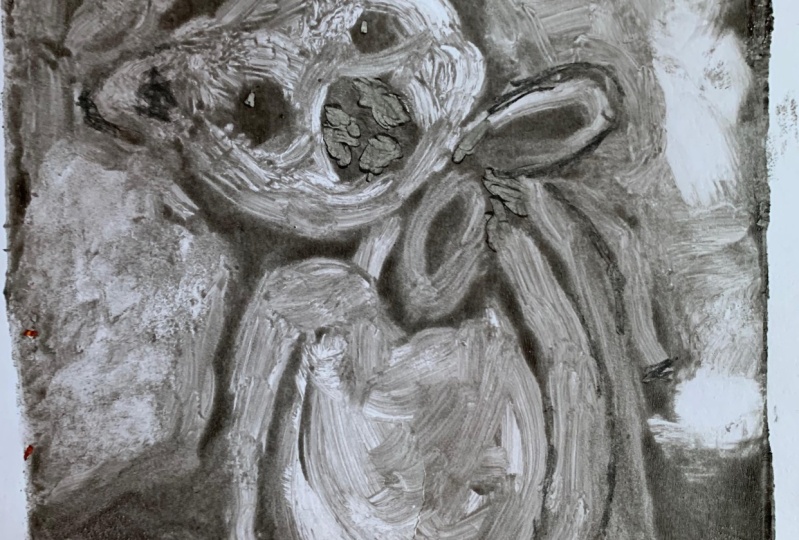
8. Little Faces Everywhere: If you're having trouble with creating loose
phases in general, not necessarily in this class. This is a really great exercise. Just take a Q tip and roughly create some little
phases all across the page. No, we're not going to
create to frame or to sell. No, I is just for practice. And because that QTip is a rather large tool to
create these little faces, especially with the eye there. You know, I don't have
that much control over it. And that is teaching me
to just let go, you know, do your best to capture
an expression or, you know, some kind
of body language. Maybe you want them to
interact with each other. But, you know, you
don't need to, spend some time observing
some reference photos and allowing yourself the
freedom to change things up, you know, be messy, and most importantly,
have some fun. And if some of them
turn out really ugly, you know, who cares?
Just keep going. We learn by practicing, not by being paralyzed and getting stuck
in perfectionism. No, we're just going to get that QTip and go to town
on a jelly plate, and we're not going to obsess over the appearance of
these little faces. We're just going to
put them everywhere. And as you're just playing, you know, and you're
getting warmed up, maybe it's fun to embellish
some parts of this page. You know, like here,
with this figure, I'm deciding to put in
color in about a minute. There you know, I'm
taking it further, and I'm creating little
dots underneath the collar. And as you're playing, allow yourself to
just follow your guts and put in little
details here and there. I'll just let you watch as I'm going to have some
fun with these faces. Oh I hope you enjoy this inspiration and
that you'll have fun with it. Now let's move on
to the next lesson.
9. Playtime! Introducing 2 Gelliplate Techniques: Uh Let's get a little bit more playful
and bold with this one. I picked out another photograph of Egon Shilla because he
was quite a drama king. And I thought it would be nice to throw in some quirky hands, and these are quite challenging because I
want you to observe me while I am struggling and slowly sculpting these
hands just by observing, like we did with face before, But for some reason, with hands, we tend to freak out and think
that we can do it. And maybe I couldn't do
it exactly as they are, but that doesn't matter. You know, take a
risk and put them in there because hands add
a lot to the story. And if you are freaked
out by desens, just pick another photo. Pick something that
you are excited by and not too much intimidated. Find a happy balance between
challenging and manageable. Oh. And as you can see,
I wasn't really paying attention there
with the fingers. So what you can do is take a brush and kind of some
of the paint back on there. I am going to warn you that
it can be frustrating, especially if you don't have
a lot of experience yet. I don't recommend it. It's better to just accept the little mistakes here and there because the jelly
plate is really smooth, so you can easily remove
the paint as well. You can make it
worse by doing this. But I like a challenge and I like to show
you what is possible, but this is not risk free. And at this point, let's go rope on that
reference photo. Let's put it away. And I have decided that I'm
going to make her a lady. And I'm going to
keep it very simple, some kind of rope without
too much detail in there. I give her weird hair. I like giving my wonky weirdos
weird hair. Suits them. Yeah, play with a contrast
in the background as well. And with texture. Try
different brushes. The pristel brushes, the ones
with the thick bristles. They are great to get a lot of texture in
there if you have them. Here I am ing a paper towel to remove a lot
of the paint in this spot. I'm not pressing
too hard because I don't want to get rid
of all of the paint. And in some places,
I just dab it. Let's take some string. And be careful not to
touch your jelly plate as you are trying to bend
it all kinds of ways. Because we don't want to
remove any of the paint. We just want to
make a little mask. You can use other found objects, whatever you have at home, whatever you think
would be cool in your story. Place it on there. Here I have a little branch
of my string of hearts. Again, I'm doing my best
not to touch the plate. It's a challenge for sure, and I'm going to get rid
of some of that stem, going to make my life easier. I'm going to carefully
place them there. I'm taking my paper and I try not to mess with
that string of hearts. I'm starting on the left there, so I'm sure that my
papers under and now I'm going to see, I'm keeping it in
place and I'm going to roll it right over there. Then I'm rubbing my paper. Taking my time with dirty hands. That's why I have a couple of spots there on the
back of the page. It's not a big deal, but
if you want to avoid that, clean your hands. Now it's time to peel off that little branch
very carefully because I want to
print this as well. Don't remove all of the paper, so you can very
easily put it back. Put it back on top of
there and rub it again. And that way you will get all those beautiful textures as well of the little leaves. Let's take a look.
It's nice, huh. And if you know other cool jelly plate
techniques, use them in your art. Play your heart out. Are
you ready to move on to the next lesson? Let's go.
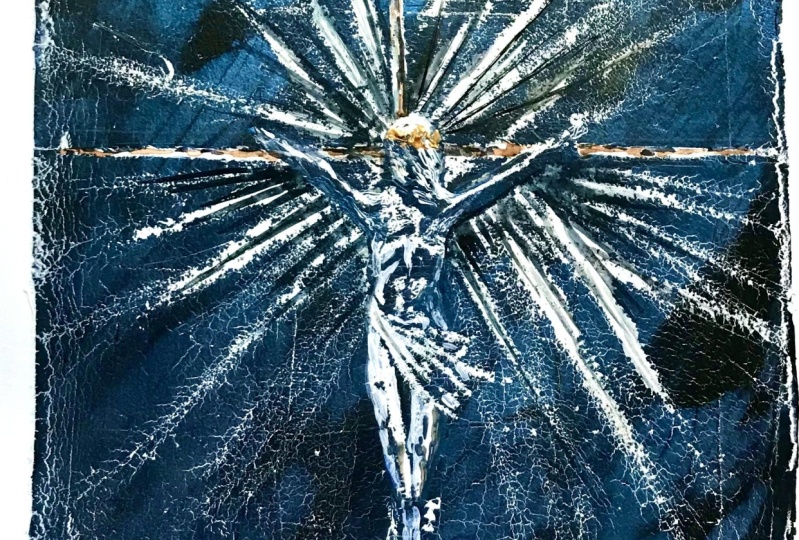
10. Troubleshooting - What to do When Things Go Wrong: In this lesson, I
will demonstrate some troubleshooting because
we all mess up right. We're only human and
there's no shame in that. And let me show you
how you can use a reference photo to
gather some inspiration. And still Put your
own twist to it. I'm really inspired
by that baster, but I think I will make it
into some kind of columns, Have him stand in front of
some ruins or something. I also want to switch up his
features and his expression. Let's put something of
ourselves into our arts. Oh Oh. H. You can already see that
I've messed up that part. We're here. Now I'm
going to make it worse. So this looks very weird
because his shoulder should be higher and he's
like a giraffe right now. And sometimes that
happens when we don't allow ourselves
to get breaks, and we just don't
see it anymore. And Now I will show you
how I will address this. I also messed up his
eyes a little bit. I'm just taking a
tiny brush and I'm putting some of that
paint back into his eye. I'm going to do the
same thing with the shoulder here with a
slightly bigger brush. Here you can really see
that the texture and the coverage is just different
from the rest of him. What I need to do is I'm going to do the same thing for
the rest of his coat. Otherwise, it's just
going to look very weird. And I end up being very happy
with the decision of just filling up his coat with these brush strokes and
a little bit of extra paint. It really helps to bring
some life into this drawing, have some contrast in texture. And it's funny how something
that frustrated me at first, you know, I wasn't
paying attention, but In the end, that helped to make
my print better. If you are struggling with your print and you are disappointed by
a mistake that you make. Don't give up. Just try to fix it and maybe it will
turn out better. We have to keep trying.
Otherwise, we'll never know. The one thing I really
want you to take away from this lesson is to just
have faith in yourself. You know, you can fix things, you can be creative and have some fun with it while
you're at it, you know? If you're ready, let's go to the next lesson and we'll
add some color into the mix. Let's go.
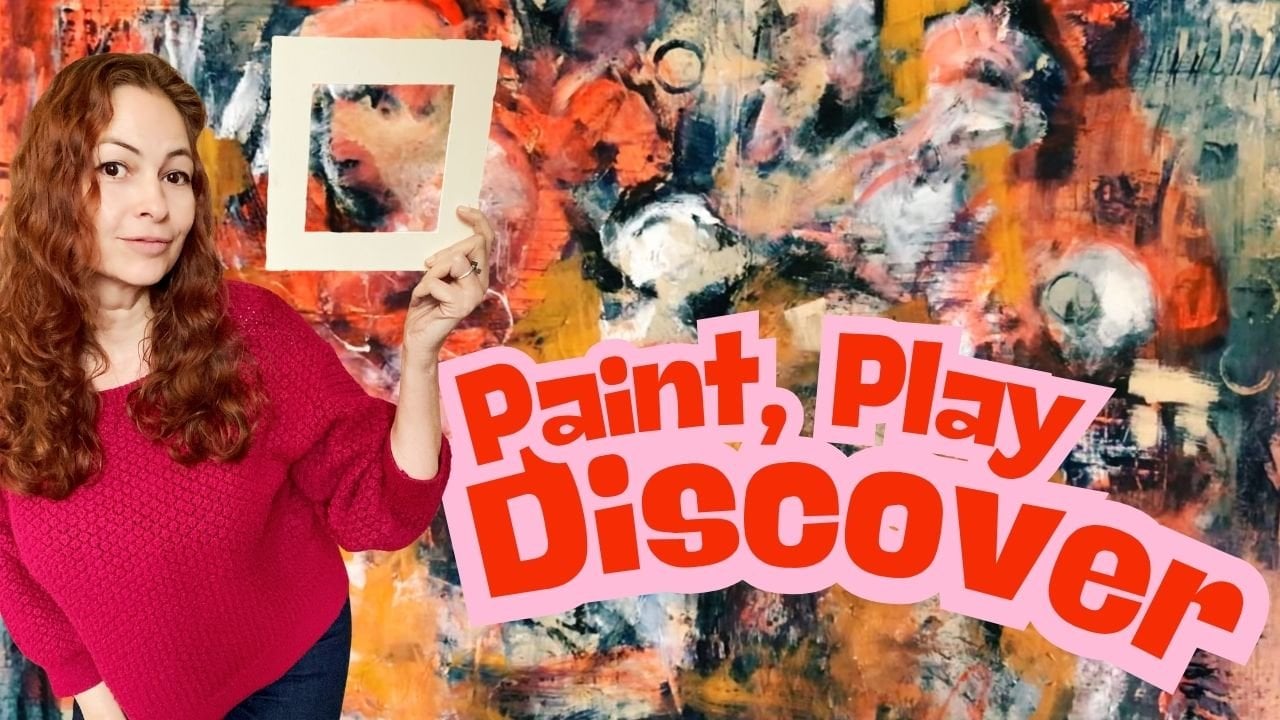
11. Exploring Color & Emotion: Let's branch out and use
different colors for a print. Just try it out and
see what kind of impact a particular
color has on your print. If you're experienced
jelly artist, then you can also do gradient, Go, M it your own. But for this class,
I'm going to keep it simple because I don't want
to be too overwhelming. There are a lot
of exercises here to play with and I don't want
to make it too complicated. But I do want you to experience what of
an impact color has on the emotion
of your prints. So don't be afraid to even try out colors
where you're thinking, no, this is not going to work, it's to light or something. Just do it. I like I said before,
it's only paper, and the learning
experience is so much more important
than the end result. In my case, I'm really
enjoying this dark purple. It amplifies the
moody atmosphere that I want to bring
into her. You'll see. At the drug store. I'm able to find some Q tips with
different shapes, and they are perfect to stamp on your jelly
plate, you know, create a background using a loose pattern,
varying pressure. It's an interesting way to
fill up that negative space. Let's try out to
different color, a warmer color like this transparent iron oxide
to show you the difference. M. And this is what I mean. In this portrait, my
proportions are off, the angle as well. Her mouth is a little bit weird, noses isn't really
in the best place, and still there's lots of
emotion going on in this print. So, I hope that you
will be patient with yourself and allow
yourself to be a bit. You. In the end, it doesn't
really matter. And if you really want to, you can try again, you know, Right now, I'm creating some kind of pearl
necklace with a Q tip, and with a brayer,
I'm pushing it more into the background
because it was too dominant, like it was, you
know, I took away from the expression
of the portrait. So know that if you
don't like something, there's always something
you can do to change it up. Just have fun and
make many prints. You know, practice,
practice, practice, and I promise you
you will end up with some prints that
you absolutely love and sometimes they're awkward,
and that's fine, too. Are you ready to go to the
next lesson? Let's go.
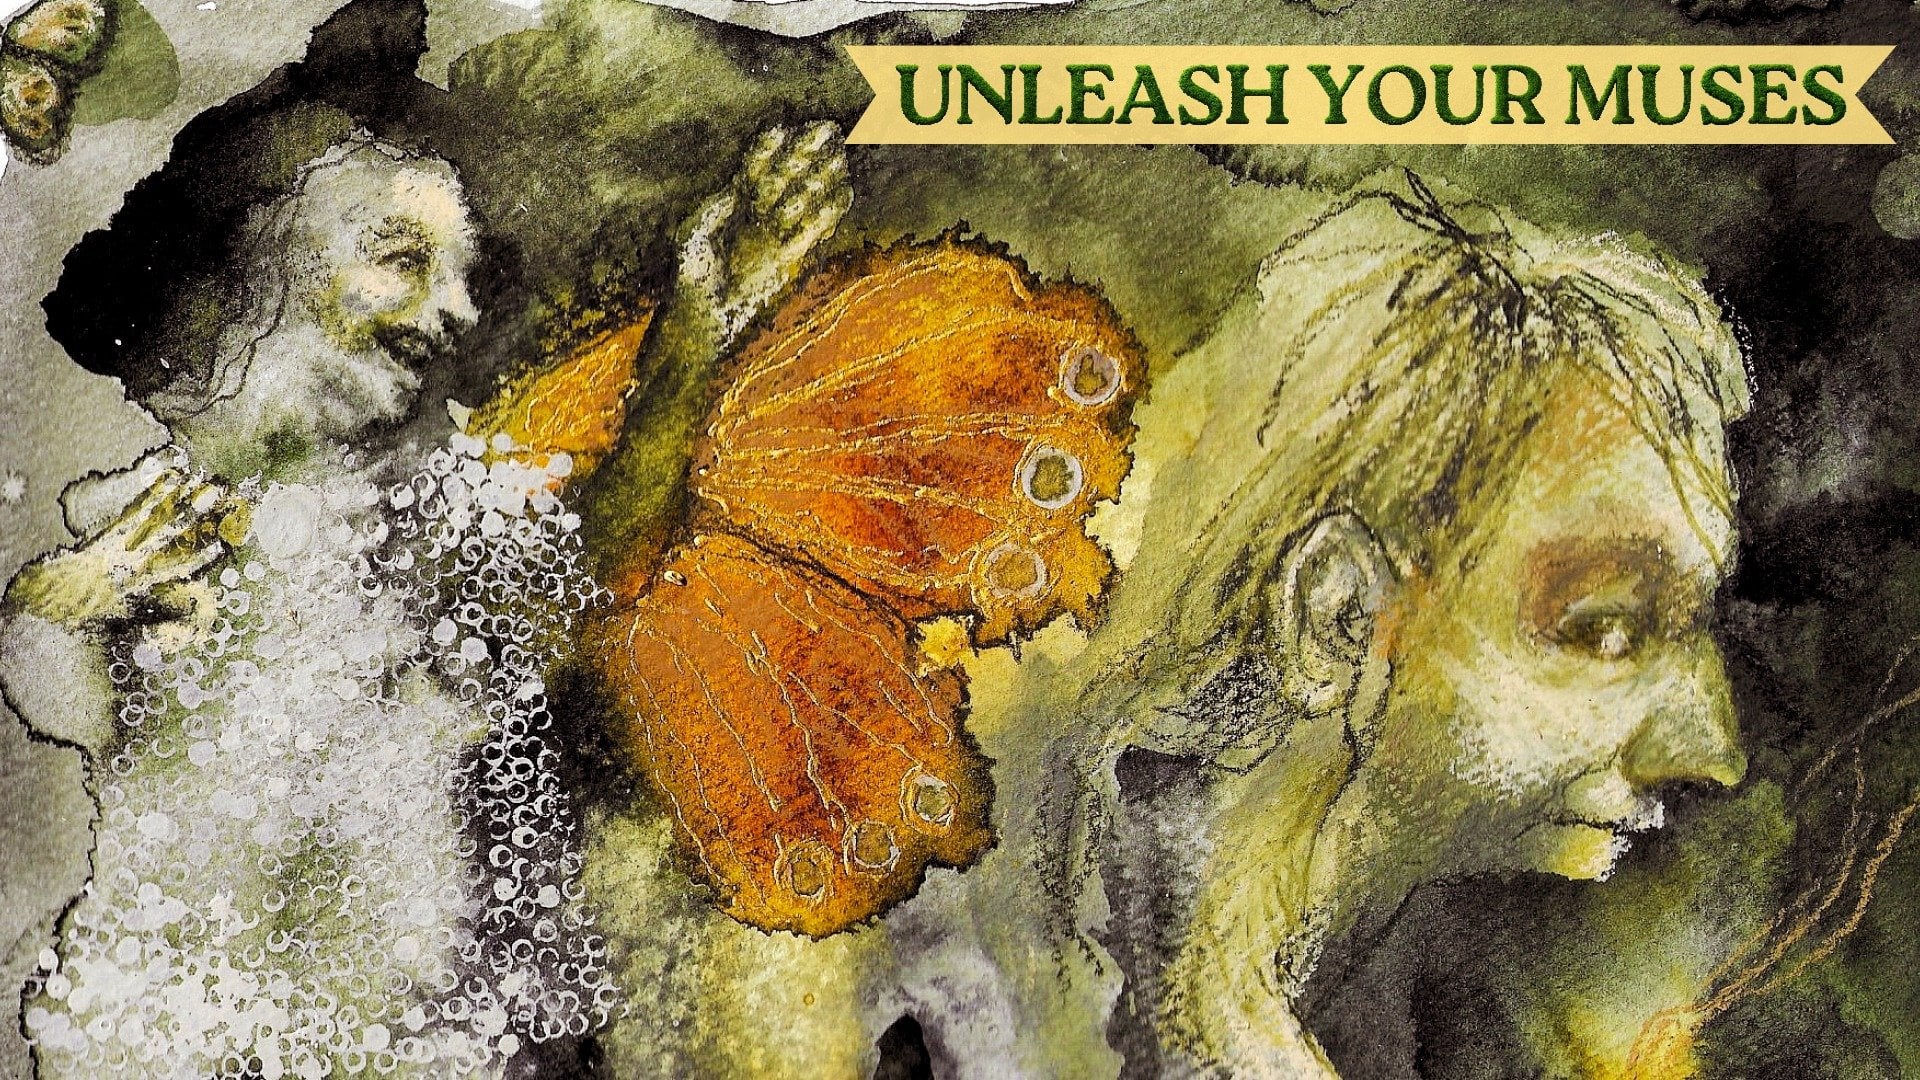
12. Take It Further (Class Project): Now, let's talk about
the class project. First of all, I want you to pick your favorite lesson or lessons and just practice and
have lots of fun. That is enough. But if you
want to take it further, and I know some of you do, then I would like you
to add a little bit of narrative into your
into your portrait. It can be very
simple something to communicate your emotions
or your feelings of today, your desires or just
something that you love, you know, edit in there. And whatever you choose to do, I hope you will
share your art with the rest of us and upload
it to the classroom. First of all, because I am
really excited to see it, and I'm curious what you're
going to do with it, but also so that you can
inspire each other, you know, that you'll have
more interpretations of the jelly plate
portraits than just mine. It's always so mind blowing
to see how everybody will create the lessons
in their own unique way. I think that's a
pretty awesome thing. And to help you on your way, I'm going to do the
exercise myself as well. I hope you enjoy
the inspiration. While I'm not one to obsess
over perfectionism anymore. I do value growth, and that is what I wanted to
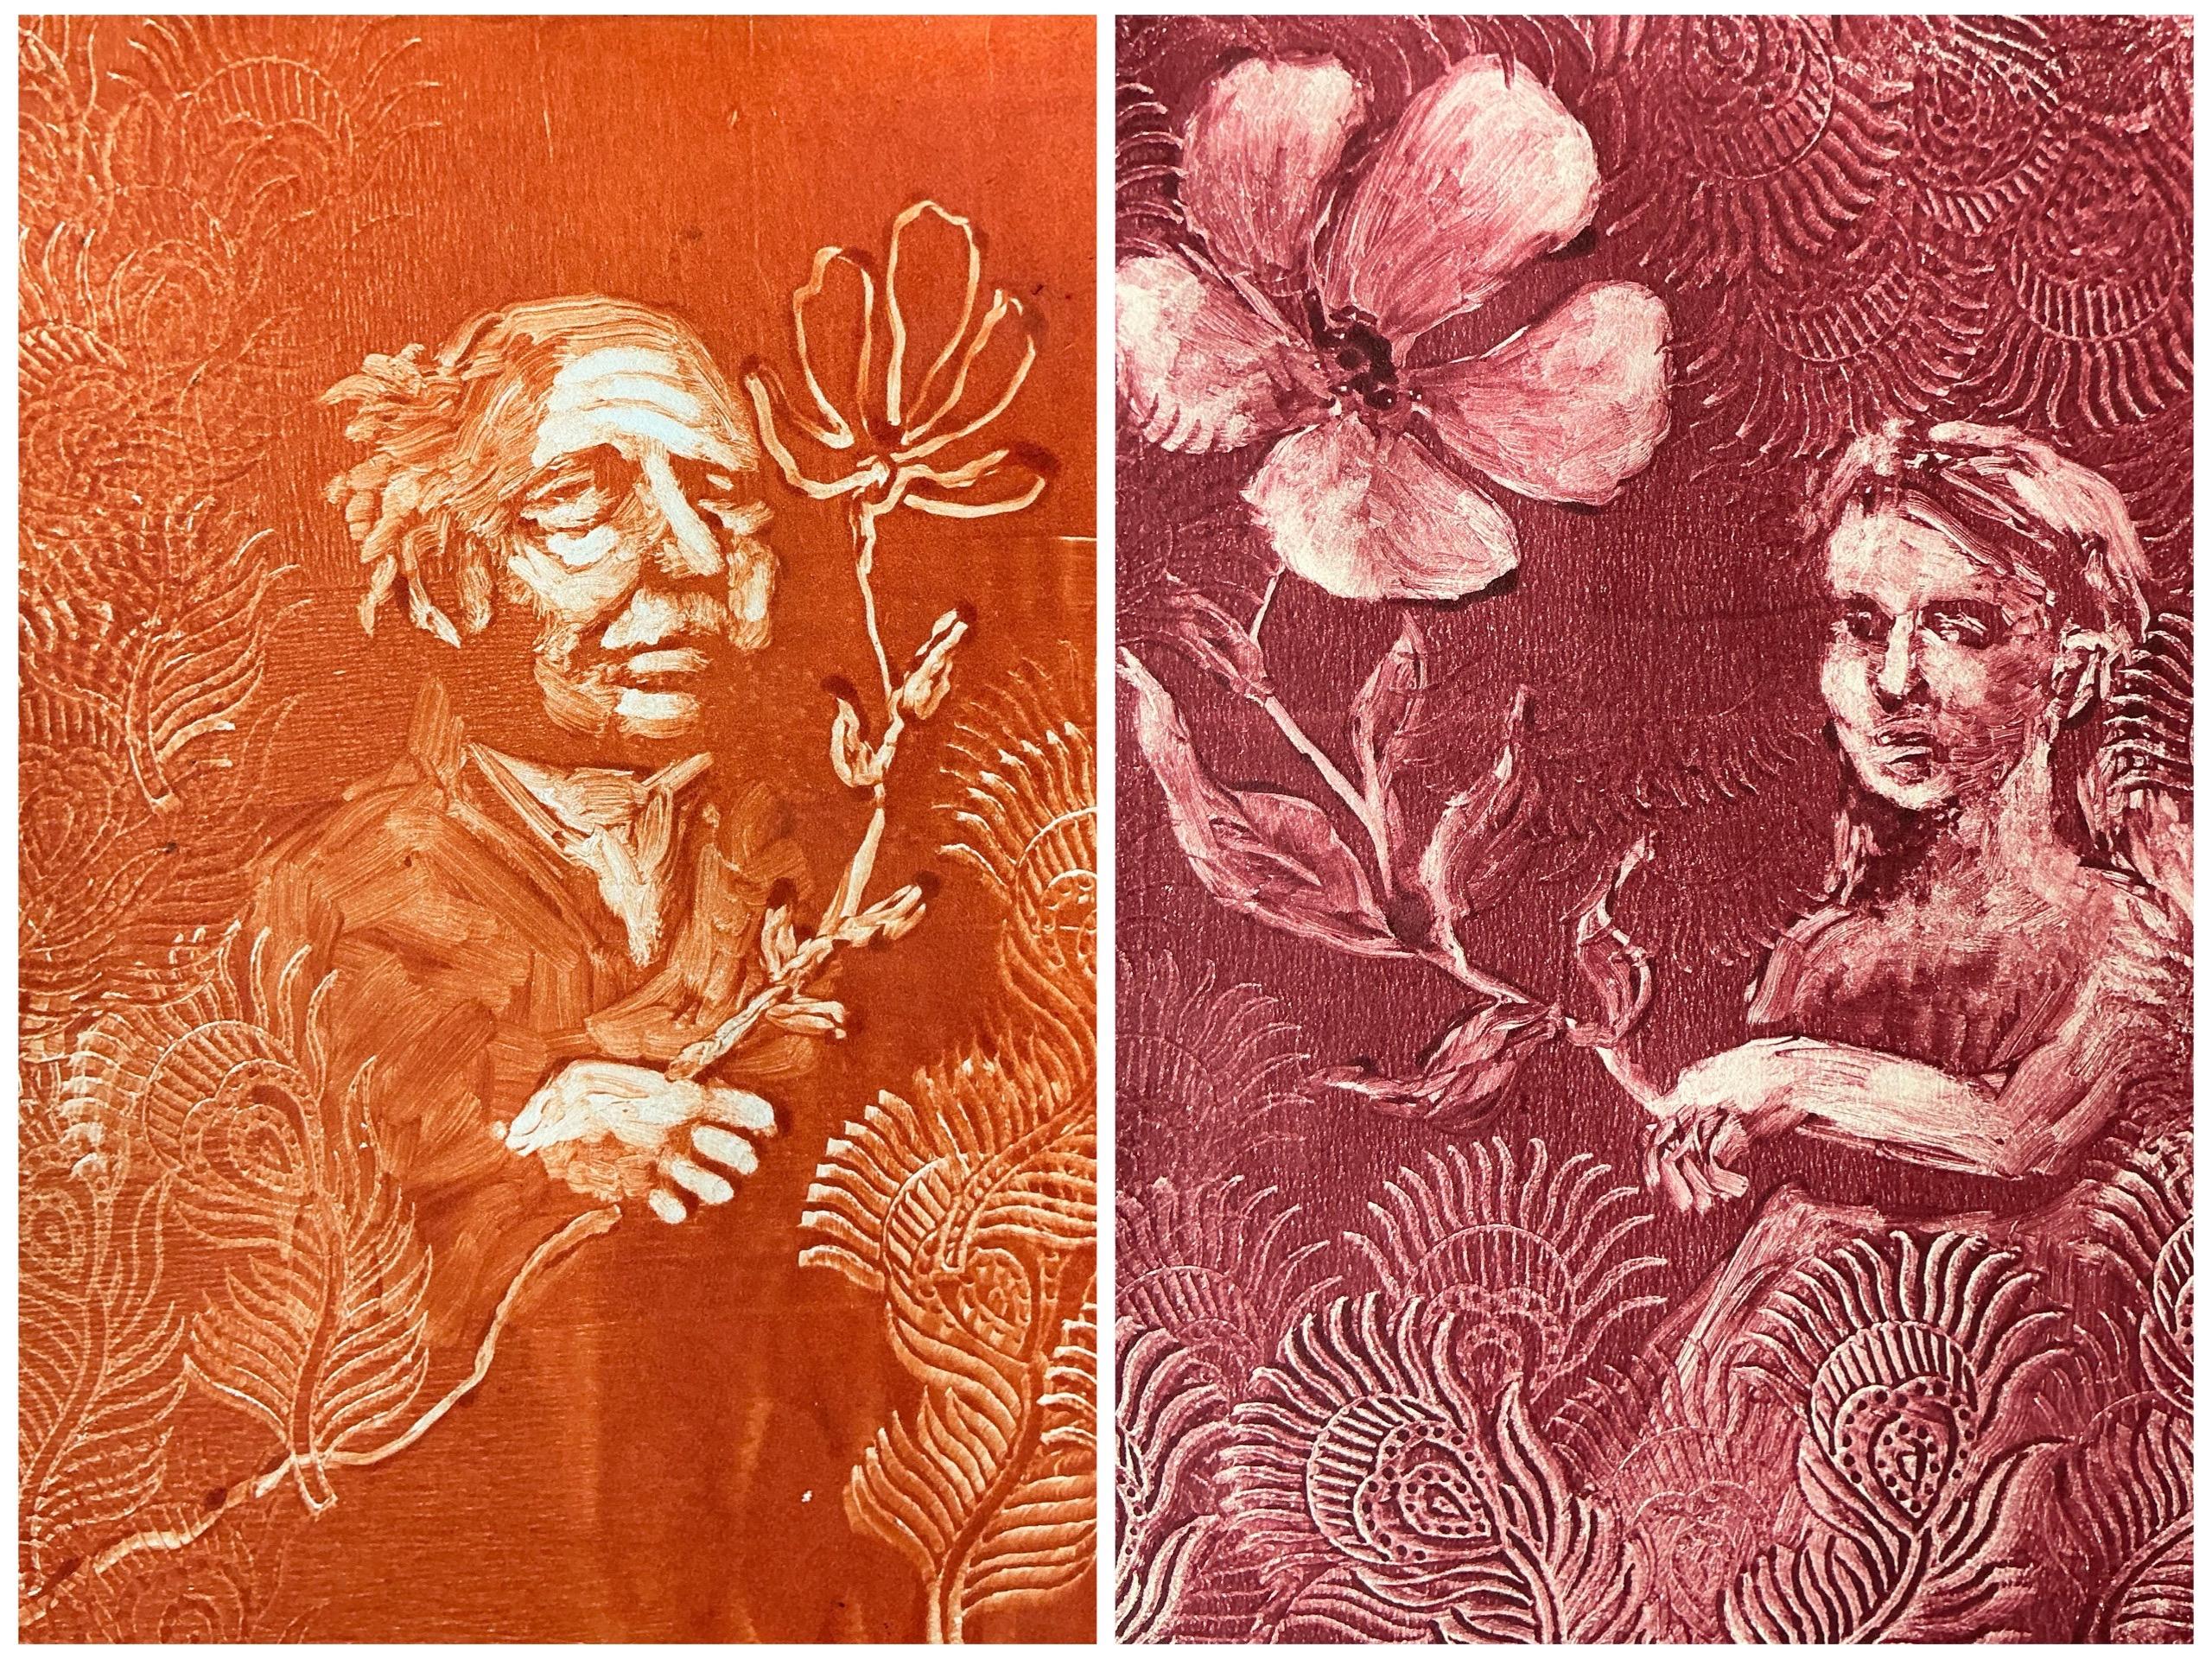
bring forth in this print. So I'm going to add a
big child like flower and it's childlike because I like to play as if
I were still a chil, which I often am at heart. Here it is. Some tiny leaves. And in this manner, you can tell a little
bit about yourself. Not everybody needs to be able to decipher
it or anything. Just as long as
it's clear to you. And here I'm using
a wooden stamp just to add a bit of a pattern. It's really fun to play with a with pressure and wiggle it ale bit while you're
putting it down on the plate so that you'll
get more contrast. Just try it. Okay. Let's
explore a little bit further. Here I have drawn a
different figure, very wonky, can you see how
she's still very emotive? She's telling a
story with her eyes. This time I'm creating the
flower in a different way. And by working this way, by trying to tell the same
story in several manners. It's more likely for you to stumble upon a design
that you really love, instead of just doing it once and then moving
on to the next thing. That was a critique that my art teacher when I studied
art therapy, she gave me. I move on too quickly,
and she was right. I really hope you will try
this way of working out. I think it will help you
to explore some themes going on for you and to find
ways to tell your story. And also include the
techniques that you really loved in your
previous prints, like stamping with the
wooden stamp for me. In the previous piece, I didn't really have
the hang of it yet, but now I know what I have to do to keep it more subtle and here the wiggle to create some more contrast and
it's more controlled, than in the previous piece. I applied it a little bit
more mindful in this one. Okay. Let's take a print. And now I will show you
how you can fix it if you get really noticeable
blood on there. You can see it already
coming through the paper. Se there it is. It's
distracting to me. But the paint is still
wet so I can take a Q tip and remove a little
bit. It's not cheating. Why accept something
that's going to annoy you? If you don't like
something, address it. Otherwise, going to
drive you crazy. Okay. Let's move on
to the last video.
13. A Huge Thank You!: I hope you enjoyed the class. If you did, then I would appreciate it so
much if you would leave a review because not only does it help
me with visibility, so that other students can enjoy the class as well, algorithms. But also, it helps me to figure out what you
liked about the class, what you maybe missed. You know, you can share
both things with me or what you would like
to see in future class so that I can keep improving my classes and that I can give
you what you want. And as long as I'm
on the subject, I want to thank you
all so much for your beautiful reviews on
all my previous classes. It was so heartwarming to
read, that you enjoyed it. And that you wish for
me to be a top teacher. I'm working on it. It's going to take me a while, I think. But the reviews will
really help with that. So thank you. Thank you so much. Yeah, you really helped me
to grow on the platform, and I really appreciate it. I hope to see you again soon, and I wish you
happy creating. Mm.
 Jerney Marisha, Making Art Fun Again