Transcripts
1. Introduction: [No Speech]
2. Drawing a pose with a Stick Figure: Hi there. In this lecture, we are going to talk about
how to draw a character in a pose that we feel empathy
for, what is sympathy? Sympathy is when
someone, for example, hurt themselves and you
feel sympathy for it. Empathy is something where the character has done something wrong by accident and
you feel for them. We're going to start by
drawing a stick figure. I'm starting with a
blue pencil because a blue pencil allows you
to draw more freely, make mistakes, and it
doesn't feel so final. If you have followed my
courses from before, you would know that
with the blue pencil, you get more freedom and
drawing freely like that, with a whole arm. We are going to draw a
couple of poses using just stick figures and the poses will be of a character
who's done something, a mistake, basically, and
you feel sympathy for it. We are just going to draw the pose of a
character feeling shy. We're going to draw
the spine here, and here we are going to draw where the hips are or torsom. We are basically doing a
skeleton really of a character. This will allow you
to draw any kind of character on top of your
skeleton using tic figure. The spine will be
bent as if saying, I didn't mean it when you've
done something wrong, you want to squeeze
yourself not to be visible. You want to apologize by having this posture of
shame, invisibility. We're going to draw the legs. Like that, we still don't know what character
we are going to do. This technique allows you to
draw any kind of character. And we're going to
have the character look a little bit towards us. For that, we are going
to draw a helpline. That indicates where
the face is facing. It means that it's a little
bit three quarters from us. This line indicates a
middle of the face. From this line, the face splits
into two parts and now we are going to draw where the nose is going to
be the other helpline, and you draw it bend like that, like round following
the shape of this sphere and here following
the shape of this sphere, but a little bit narrow
because as a globe, we follow the shape of the sphere and the more
you come to the center, the straighter, the line is
going to be just as a globe. Now we are going to
draw one arm here, we are going to draw
in the same manner that we drew the hips, we are going to draw the shoulders like
approximately here is if you're drawing
real shoulders and one arm is going to
be here to the mouth, saying, Ops, what did I do? The other one is
closer to the body. Remember, we want to have the character
squeeze its posture. Basically, this is all you need. To draw an empathizing
character. Now, let's go ahead and find out who this character is,
add some features, some other traits, and continue
developing or character.
3. Drawing a rough sketch of the Bunny: So let's continue with this character,
adding more features. Let's make this character
to a little bunny. On top of this skeleton, we are going to add bunny features like long
ears, floffy character. We have the pulse already
with a stick figure. Now let's refine it. We are going to draw the body. We have the head here already, being kind of floffy, you kind of want to contain this character
within the body, and now we're drawing on top of that another stick figure. Now we are drawing on
top of that on top of the stick figure, a
fluffy character. Here you can start
adding features. We are going to add a bunny nose like that and we are going
to add large eyes. Now remember on this side, we have perspective
change for the other I, which means that
the other I will be more like an ellipse
instead of a sphere. The more towards the end you get of this character's
head sphere, the more squashed the
I is going to be. This is because of the
perspective change. Now we're going to have
the character look towards us and here
we are going to have a shame expression like
ops I did not want to do it. I'm sorry. I'm so sorry. And here we are going to
draw two lines for the ears. When you have a character
having an expression like sad expression and
you want to squash it, you try to squash all the
features of this character, so you don't have perky eyes. You try to enhance this pulse. To have the ears
squashed as well. You have the other ear
slightly bent like that and you want to have asymmetry when you
draw your character. That will give more
life to your character. Now let's draw the legs and they are going to
be large bunny feet. You draw an ellipse over
here that ends up where the line is and you draw the thickness of the legs
the way you want them to be. From this thick figure, you can play around
with thickness, you can play around with
thickness of the body. You can change it afterwards. You have the puse basically
done and from now on, you can just fell and just do the features that
you want your character. To exhibit and to have and here you can draw basically any
kind of character. This is what I'm giving you. This exercise is basically just to practice how easy it is, when you can draw a stick
figure, how easy it is. To do the rest of the body. Because many people
say, I can't draw. I can only draw a
stick figure while I'm telling you that that is enough for you to
draw anything else. Now we have here the pound, the fist of the bunny and we can just round it up
and add a thumb, something like he's
squishing and saying, squeezing his hand and saying, Oh, I'm so sorry. I did not want to
do that, later on, we can just add an event
over here what he has done this little bunny to just
enhance the sorry pause. Remember, we create or sympathy for the characters
when we create them when we feel
empathy for them, and then we like them more. A likable character is someone that would be a little clumsy, a little bit human, so to say, we say human because we make
mistakes as humans. Now we can have this arm
here and just maybe have him cover his face a little bit like that
with another palm, it's like, I'm so sorry, I didn't mean to do that. We create also the facial
expression with the eyebrows. Now that is enough
for us to continue enhancing this look
with the black pencil. Let's do that.
4. Refining the Bunny character: Let's continue finishing our
bunny with a black pencil. Now you have all the poles. The we have the bunny and now you can enhance it with
thick black pencil here, I'm using six B. The higher the number of Bs, here is the softer the
pencil, what does it mean? It means that the
blacker the lines are, the softer the pencil, the higher the number, more black you're going to get
to outline your character. The lower the pencil
when you have two B and then H B when you go to the H the pencils
are rather hard, which means that they
make lighter black line. I like to finalize my characters using
this black pencil because when you
just outline it, you don't see the
blue line anymore. When you have, for example, if you go to Disneyland
or if you Disney cup. You see that the characters
drawn on these cups and sold and they have blue lines underneath
the black line. This is very cartoonist, you feel like there
is a hand done this. It's not AI, it's someone art that has done this that has freely played
with the shape. Because when you get into
art into cartooning, you like to see these
rough sketches. You like to know
that the artist have basically just tried to
discover this character. Here it's very easy
to do fingers, just to add two lines on top of this black on top of
this round shape. And now we have to think
about what we see and what becomes something that is underneath or
behind this shape. The body here is before this
arm and even though we drew the line here to
the bone structure, we don't see this spot so
we don't draw it anymore. We just draw whatever we
are going to see from here. We see the body here, the body, this part of the
body goes behind the head and we see
the head first. We see that and we outline
the head and you see that you don't need to draw a straight line
from the get go. You can just draw many lines like that if you're
more comfortable. Even though I have an experience in drawing and I
can draw this line, I feel more confident
and comfortable. To draw this line. It gives also a little
bit of a soothing feeling to take it slower to see
how your drawing evolves, how this character
comes to life. Because you are basically the
parent of this character. You are giving birth to this character from
scratch. That's how you do. It feels like your
child, really. That's how the feeling
you're going to get when you start
drawing new characters, you found, you feel for it, you feel for his little
mischievous expression here and whatever
mischievous thing he's done, we're going to find out
a little bit later. Here you can do two fingers
as well and just draw. The arm, I will extend the thickness a little bit
because this one got thicker. But you see how easy you can fix things when you have this
rough drawing underneath. Now let's draw the
other ear like that. Now the body and here you can start thinking
of who is this character? Who is my character, and also think of, shall I give him some clothing? Shall I leave him
bunny just with f? In cartooning, you can draw
your character anyway. The way you draw it, people will perceive it that way and they will just accept it. Whatever you try to do, whether you give it clothing, whether you just
leave it like that, like a round little bunny, that will be the style
for this character. For example, if you
are drawing a book or if you're drawing
an animated movie, for example, if you put clothes
on one animal character, you will have to do
that for all animals, or they will think that the
other animals are naked, or if you don't put
clothes on one character, then that's fine to do
that for other animals. Let's for just the fun of it, let's put some clothes on it. Let's have trousers
are approximately here and they will end up here. Here you can use I'm not
using eraser usually. But if you want, you can
just tidy up the blue lines. They will not go
away completely, depending on how much you have scribbled and you can scribble as much as
you want, really. Just don't be scared to do that. And if you're drawing on an
iPad or some digital tool, here is easy to basically just hide this layer
or minimize it so you can still see the drawing. Again, I'm used to just liking to see this
drawing to me that feels fresh and exciting to see how the artist have
discovered this character. Now let's give him
some t shirts. Here, we don't see the sleeve, but maybe we will see
the neckline here, and here we can give patterns. Patterns on the clothing give
the clothing more volume and it gives a clouding
the character also volume. Let's draw the character
having this pattern of checkered clothes and
we draw these lines, imagine that this is
clothing, basically, how that would be done just rounding them
up a little bit. They follow the shape of
the leg and the body here, and this one is like that. Let's just do it in the other direction
and we follow this shape, this line and the lower it gets, the wider the lines are very slightly really
to have some pattern here and maybe just color or
shade this in the middle. The squares in the
middle of the pants. If you want to, if you want to, you can just shade
them like that. One thing here is
that how do you have one leg appear to
be behind the body? One thing is you shade it, grab everything and just lightly shade this leg and
even the foot. Slightly and you see that
just a little pattern here makes it look as if this is another material from this one and the shading, make it appear that this leg is behind this one
and behind the budging. You can give the t shirt some
sign or just shade it with another shade that makes it
look as if it's clouding the material here is different from the whiteness of the bunny. So like that, and here we
have our little bunny. He is afraid, now let's give him some whiskers maybe here, add more details and from here, you can do anything, maybe some whiskers here with
the bunny and maybe we can have his eyes more defined. Another thing you can do here, you can also shade this here to make it appear as if it's behind the head this here it's ending up its root somewhere
here like that. If you want to give roundness
to your character, again, you just shade one side of
the bunny of the shape, just like that to have it
appear as if it's a rounder. Even on this foot, you can just add
another shading site. This is when you work with pencils and I'm showing
you to do that with pencils because that's what you need basically to draw
cartoony characters. You can just have pen and paper and pencils and
just doodle it out. If you're interested in
more of my lectures, you just you go in my profile, there are tons of lectures
of how to draw bodies, how to draw, other
cartoon characters, how to come up with personalities
and so on and so on. Now we have this
bunny and let's give him some shade in the ground, so it makes it look that he is really standing
on the ground. This is extra, if you want
to round up your bunny and let's have something here to give context
to this character. Why is he so ashamed
what he's done? Maybe we have a bunny
that has broken a plate, you draw half of shear here and just imagine as if
it's a broken glass. And here and here, you have the other
half like that and just make these tagged lines
as if it's a broken glass. Oops, he's broken a plate poor bunny and now you
feel empathy for it. You feel like I've done that
too and I really had to be had to stand for it and I had to apologize or I
would get my mom's, my dad's angry expression and maybe some shouting and we feel empathy
for the bunny. We know how he feels. This is one way you can draw polls of empathy for
your character and you can design a character of stick figure without
knowing which the character is and add
the story on top of that. It makes it very easy. I hope you enjoyed this lecture. I'll see you in
the next lecture.
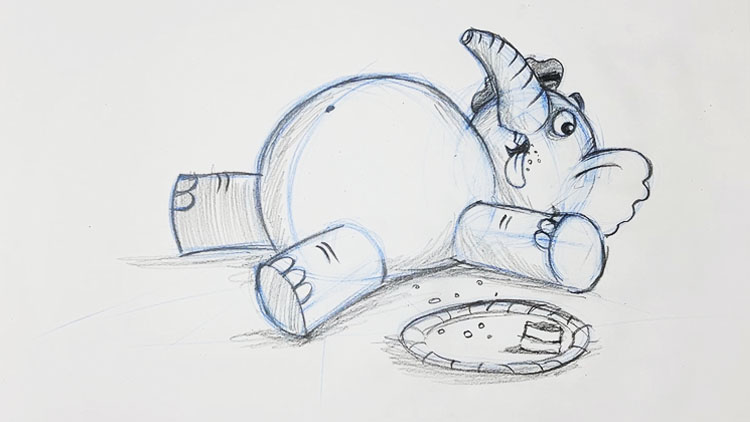
5. Drawing an Elephant as a Stick Figure: The other thing we
are going to do is draw another character
that we feel empathy with. Again, what empathy
is is when we feel for a character and we
don't feel sorry for them, but we feel for them. It's a bit different. This one, we are going to draw a character that has
eaten all the cake. So we know how we feel
when we accidentally, it's an old cake, we are going to draw a large
stomach's on the cake. That's how we feel anyway. Even if we don't
have the stomach, we feel as if we do, but it was just an
accident eating the cake. We're going to start
from this element. With this exercise, I
want to show you that you can start from
any part of the body. You can start from anywhere. There are no rules. You can feel how you feel
where do you want to start? And just explore it. The important thing here is that you learn how to
draft characters, how to make mistakes, actually, and not be afraid to draw free. This is the stomach
and we're going to draw the character
laying on the ground, flat on the ground, stomach
full with cake accidentally. We're going to have an arm here stretched out and two legs. We're going to draw the
middle line of the stomach. So we are going to see the
character three quarters. Why do we do characters
in three quarters? That's because we always want to see the
character's expression. We can have it in profile, but when we see two eyes, we just get a more
expressive look. Let's draw the two legs
as a stick figure. One leg here and we will assume this leg is finishing somewhere
here and this one here, just as a stick figure, and here is 1 ft, and here is the other one. We can find out who the
character is later. Let's draw the head. The head is lifted
up looking at us. How do we have a character that appears to have big stomach. We do that by having the
head looking smaller. We're just going to
draft a smaller head. Just try to make
another sphere and you see I don't draw the
sphere right away. I don't try to draw clean lines. I just doodle around, and this is what I
encourage you to do. I want you to relax
when you draw. Just relax and take it
easy and don't stress out, you're going to get there. Don't make a big effort to make perfect lines
from the get go. So here is the head and let's make the middle line of the
head, approximately here, a character that is looking at us and here we are going to draw the nose
approximately here. Now, we have the stick
figure of the character and let's explore who this character is that has eaten all the cake, and we are going to draw also
maybe the cake over here. We're going to draw
an ellipse as if we have this perspective that
the ground is over here, if we draw lines for
the perspective, I'm not going to go
too deep into that, but I have other lectures that are what I talk
about perspective. This is the fundamentals
of drawing. If you want to check it out. I'm not going to
complicate things because this is a lesson
that we have fun with. Here is an empty cake plate. Now, let's explore
the character. Who could eat that cake? Maybe we feel like an elephant when we
eat the whole cake. Let's draw a cute
little elephant. We're going to place
the trunk over here, make a sphere on top of this middle line where
those lines meet. Let's draw a line from
here that is going to signify the trunk here and
let's have it end up here. Now we just connect this side of this sphere to the trunk, lower part of this sphere, and another one to that
part, and we are done. Let's round it up here. From here, we can just
explore how is this around? How is this going about? We are going to draw some lines to help us with the shape. Now, let's draw the eyes. Now, this e is going to
be like we can't see, the other eye because
the trunk is on the way. Let's draw one I on
top of the trunk. And just a part of the
other eye here and let's have this elephant
just looking at us in this direction and some eyebrow just to
signify that it's heavy. Didn't expect that
it was delicious, but now it's heavy. Let's draw the mouth. Expressing the same
emotion of heaviness and a tongue maybe drolling
and trying to breathe. A tongue coming out and play around with elements that
you want to put there, maybe some droll drops here. This is you can add later. Now let's complete the
mouth here like that, and let's draw the ear. For the ears, we
are going to draw some ellipses like that on one side and maybe something
on the other side, but we're not going
to be able to see it. Draft something and that's it, we have the character
already in place. Let's start completing it in the next lecture.
I'll see you there.
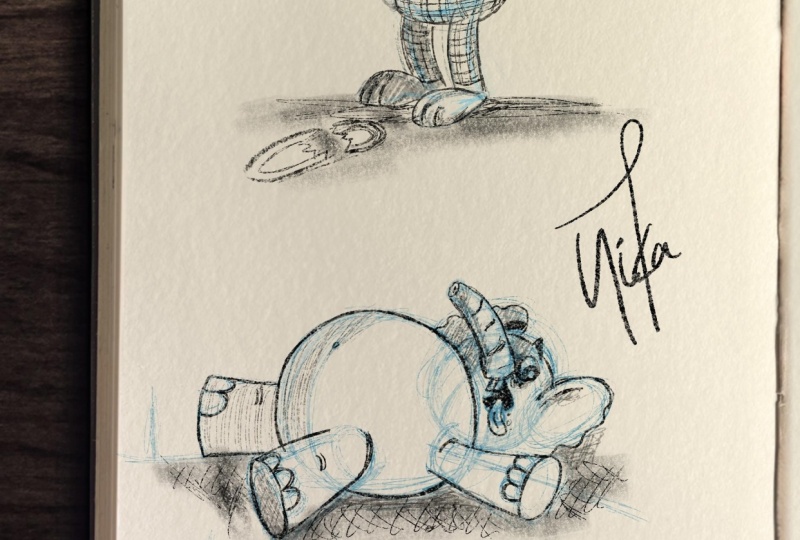
6. Refining the Elephant Character: Welcome back. Let's continue
drawing our little elephant. Now this character
doesn't have feet. It has big chunks of feet
or legs. Let's draw that. On this part, we are going
to just connect this line with something like a line that goes in the same direction
as this line here. Now we are going
to imagine that it feels it finishes with a
sphere on ellipse here. Drafted out and ellips
maybe we can just round out this leg
here and extend some fleshy we want to have these chunky elephant legs
and another thing here. Now, we're looking
from this direction. What do we see you think? We see maybe a part of the
elephants foot underneath. We're going to draw
another ellipse like that. A little bit narrower over here, draw a line like that
to make an ellipse. Everything could be
described with ellipses and with spheres
with stick figures. Let's do the other leg. Now we are not going to see
where this leg is finishing. Connect this leg to the
stomach and that's it. Now let's make some
nails here for the elephant just
to signify that the leg of this Character
looks like that. It has nails, it
doesn't have toes, it doesn't have feet,
but it has nails. Let's do that with the arm. Now, the arm is
stretched out but we want to have this chunky arm, we're just going to draw
approximately on top of that. Here, you have to really feel
how you want the arm to be. But in a way, you have to place it approximately
perpendicular to this line. Again, we draw a similar ellipse on this side and we
just connect them. This is the arm of the elephant. Let's draw on top
of that some nails, three nails here as
if it is fingers, and that's it, and here
is the belly button. Our elephant is basically done. What we do now is we go
in with the black pencil. I'm getting I'm having here
six B and I'm having four B. The higher the number
of Bs on your pencil, the softer it is. Now we have at least I have scratched and drawn
very, very loosely. I have a lot of blue
lines that would not concern me because now
with a tick black pencil, I'm going to just go over
the lines that I see best. At that point, you will
be able to basically see the character and even though you have a
lot of these lines, you will be able to
know which lines are important to you for the
character and which one and not. This is something that our brain is basically
connecting for us. Sometimes when you look
at the clouds and you find you see a
figure in the cloud, you can just take a pencil
or just with your finger, you can draft it and
see that figure. It happens the same thing here. You can see the
figure after you've scribbled and done
all this. Work ahead. You know what to draft over
with the black pencil. Here we don't even
see the other I as you noticed and
just draw the head. Let's draw the I
and finalize it. I'm leaving a white dot as if it's glossy the I is glossy, that gives a little bit
more life to the character. Here, I'm not going to put
any clouds to the elephants. Again, if you draw a style and you go with
a style of animals that animals have their natural
skin just skin and don't have clothes because we don't see animals with clothes
in the nature. This is going to be the
style that you're going for whoever is this
character for, if it's for illustration, if it's for a book or
a movie, you know, that is going to be
accepted by your audience. Now we are going
to draw the ear. Instead of just
drawing an ellipse, we're going to draw an
element of weigh the years for our elephant and just add some curvature here
for inside the years. We're going to do that
for the other side, and now I'm just following
this year that is actually behind like that and
everything is done for me. I just need to thicken the lines that I think is important
and you see how you start to see basically just the lines that
are important for this drawing and you don't see the blue lines anymore.
You know what to do. And here, the other
thing, I'm like, I like to draw together with you and not speed up the drawing
process even if it's hideous and so I can
talk to you about my drawing process
and going step by step to see that there's
no secret about it. There is nothing I do of camera
that I haven't shown you. Another thing is
now, if you want to, you can just erase the blue lines because the
pencil is more of a chemical, you're not going to
erase everything. But again, I say that you
draw the blue pencil, as you see these new characters on the cups that they have, they usually have them with the blue pencil
on because the artists we want to see the thought process
behind the character. We want to see the
blue lines so. That's something that you don't
want to completely erase. It feels juicy to leave it on and to have an
untidy drawing. Here we can add some
elements like wrinkles to signify where the
needs are here as well. And we have the ice.
We can shade it. We can make these
lines on the trunk of our character like that, and we can shade
around the ice just to give some more depth to
the flesh of the character. And here we can add the
plate with no cake. The cake is over here. Do you recognize yourself? This is something that
we don't want to admit openly when we've eaten something delicious,
especially cake. So we're going to draw maybe
just a small piece of cake to tell our viewers or audience
what has been in here, to give them a suggestion that a cake has been
eaten and you have maybe a little piece of cake and some crumbles on the side, maybe have some
crumbles over here just to lead to the elephant. You know, when you
track your cat or your dog having eaten something
or your kid and said, it wasn't me, I
didn't do anything. You want to laugh and,
you know, it's them. It's chocolate all
over their faces, but they wouldn't admit it, and you want to laugh. That's what empathy is. And we tend to like characters
that we feel empathy with. Someone that has
tried not to do that, maybe they just gone for
a piece of cake and then one piece became
another and another. And when you know it, the whole cake is gone and
maybe this is the mom's cake or the sibling's cake and it was for an
important birthday. Or even the character was
on a diet and just meant to have just a slice and
look what happened. Now we'll have the arms here and now we can shade a little bit
underneath the character. That gives us more
depth, more stability. We know where the
ground is and it gives more volume and
depth to a drawing. Another thing is just shading. One leg. When you shade one leg, it starts to appear behind the other surface or the
other part and just shading a little bit on the
side of the character of the shapes of the character gives the
character more volume. This is a very easy trick. How to make your
characters have volume, even if they're just
pencil drawings. Just with light
strokes like that, you see how I hold my hand almost very loose and
very light and just shade one part of every shape as if this is a cylinder on its
own and these two. Here I'm going to shade the ear while pressing slightly
more and here you see that it looks like
the ear is further away from this head shape
and a little bit here, that's how you can
separate shapes basically by adding some shading and you can create
the illusion that your character is
three dimensional and that is what you want. I'm going to shade even
this part of the character, and when you start shading, you do not know where to stop. Because it's getting better
and better and you say, Well, I'll just share this
and I'll just shade that and here we go. Here is another
character we created together that we
draw from scratch, a character that we
feel empathy for. This is an easy way to create lovable characters on your
own, starting from austkFgure.
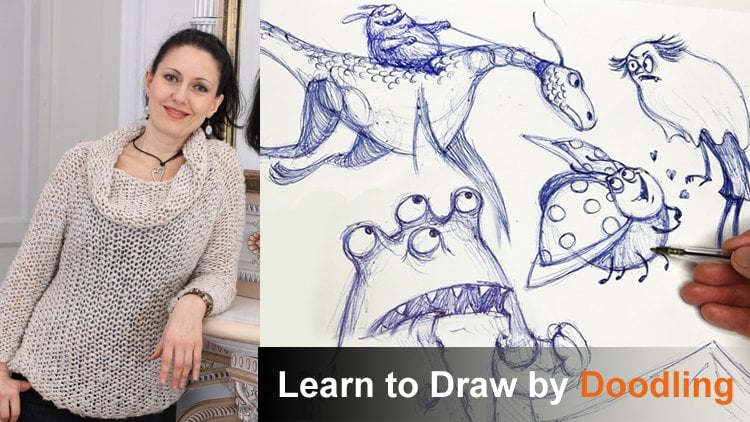
 Maria Avramova, Illustrator/Animator/Filmmaker