Transcripts
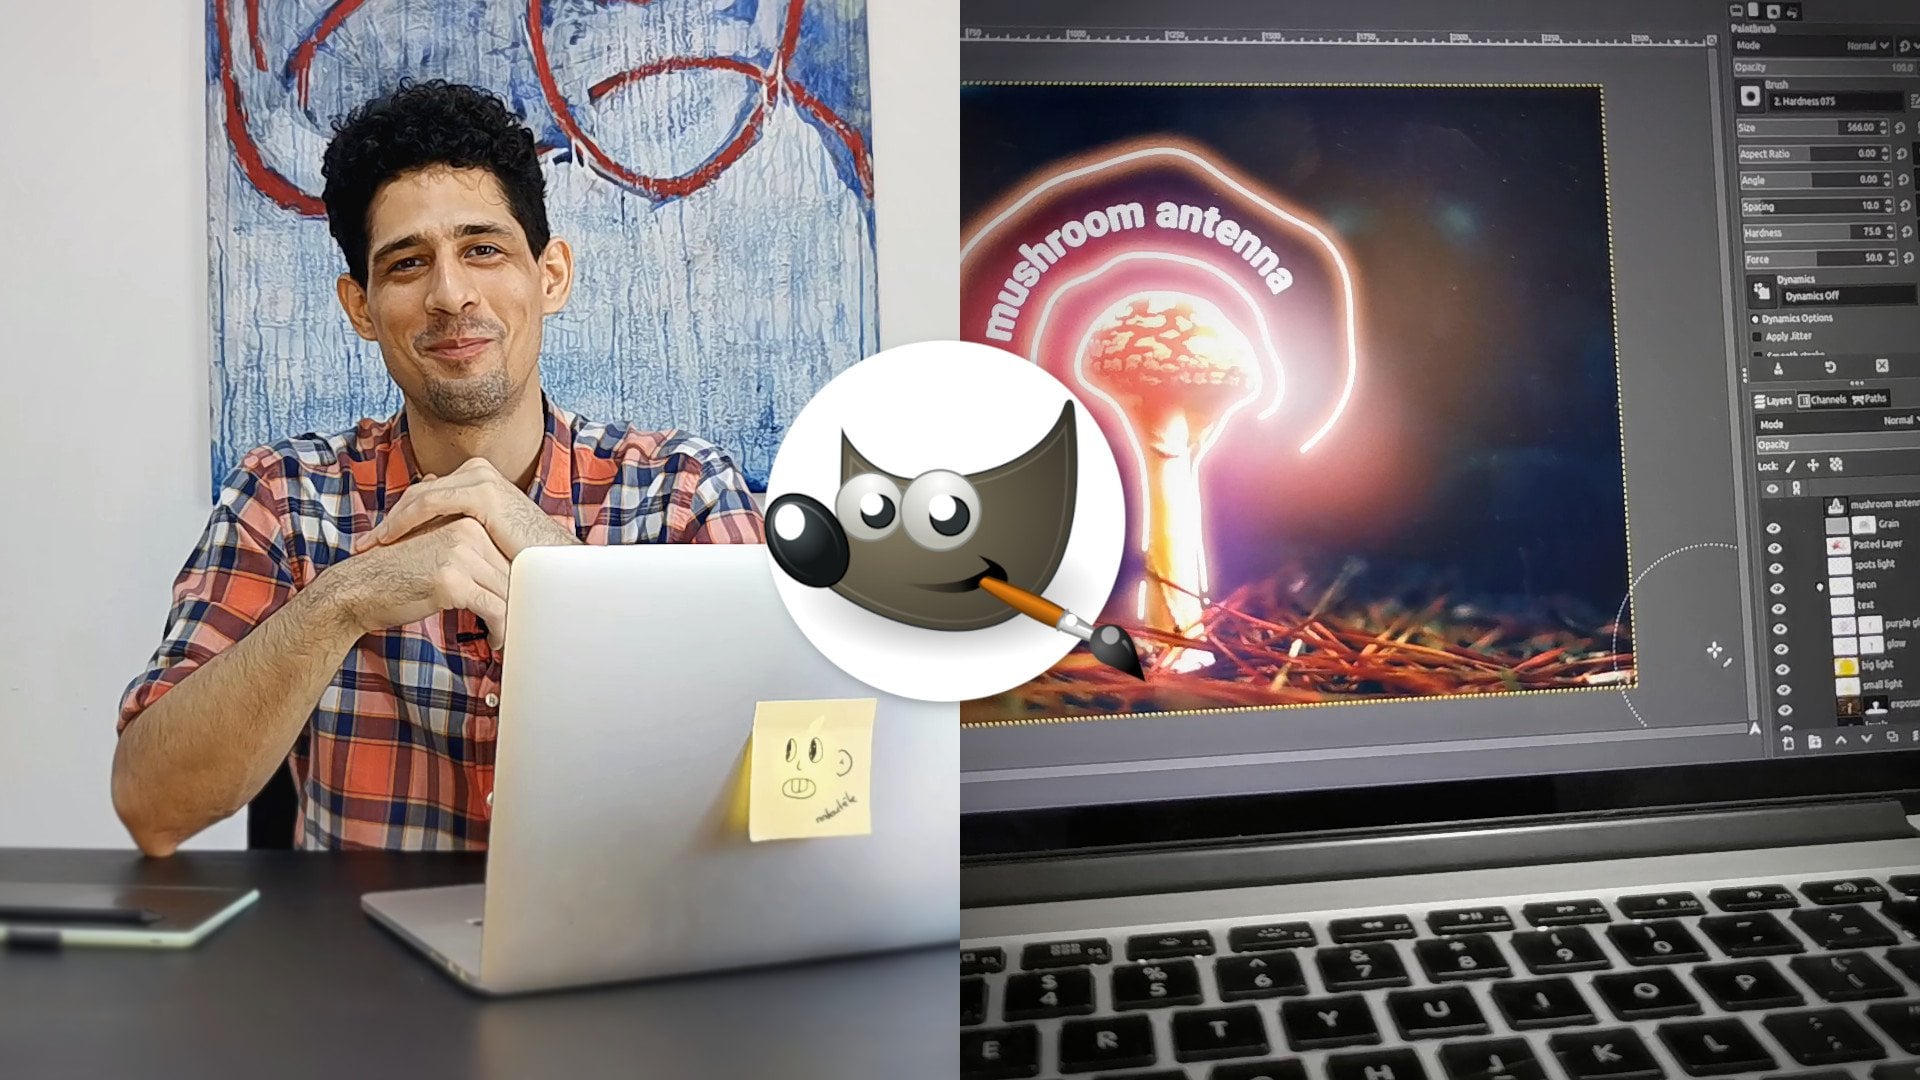
1. Welcome to Friction Graphics: Hi, and welcome to
this introduction to Friction Graphics
for motion graphics. My name is Jonathan. I'm an animator and
graphic designer, as well as the founder of nuc Stuck Creative
Studio over on YouTube, where I upload tutorials and occasionally
animated shorts. In this class, we'll be
looking at Friction Graphics, which is a versatile raster
and vector animation software that allows you to
create animations both for web and video. Friction is free
and open source, and for those of you
who know After Effects, either by name or by experience, you might find friction
to be somewhat familiar as there are similarities between the
two, but they are different. After Effects is mostly
for compositing, whereas friction
leans heavily on animation and web
animation as well. I personally use friction to do character animation and
sometimes motion graphics. I combine it with other
tools such as Cat and Live, Gimp, even blender, in order to create more
complex scenes. So without any further ado, let's make sure that we get on the same page and get started.
2. Download Assets & Friction: There. In this first lesson, we're going to first
download friction, download the resources
if you want to follow along with what we're doing exactly with
the same footage. So to get friction, we're going to go over to
friction dot Graphics. And we'll head over to Download. And from here, we get to choose
our version of friction. Now, for this class,
I'll be using version one of
Friction RC three. This is the release
candidate number three for version one of Friction. Version one, RC three
is where you'll find all of the new features
that Friction has to offer, and it's the closest to the upcoming release
of version one. Now, simply identify which one is compatible with
your operating system. In my case, I'll be using
the Linux app image. Once you've downloaded
and installed friction, you can check out
the class resources to download the assets
that I'll be using. Now, all the video
clips that I'll be using are from pixels. And by the end, we'll be
using one soundtrack, and this one I got
from motion array, and unfortunately, I
cannot share that. Now, before we jump
into friction, I highly recommend exploring
their documentation page. And there, you'll find so much information
about friction, and it'll make it so
much easier to learn friction and get used
to the user interface, the different
features that it has, and how to navigate
some of those features. But right, enough about that. Let's go ahead and get
started with friction.
3. First Look - Friction UI: Hey. So before we start
with our first project, let's first learn about the
user interface of friction. This will be a quick
one. There's not too much to learn about. We have our menu bar at the top. Under that, we have our main
toolbar, and below that, we have some properties
that are going to vary depending on the tool and the objects that
we have selected. So we'll look at that later on. Over on the right, we
have the color toolbar, and this is going to
allow us to change colors on the fly
instead of friction. So we can change the fill color, the strokes, and even the
background of our scene. Okay. Now, in this big
middle area here where we have our black background
and our fiction logo, this is the viewer, and there is where we're going
to find in area. And over on the right hand side, we have our properties panel. So at the bottom here, as well as our assets in the queue. These three panels here stay grouped together,
and above that, we have the fill and stroke, and this is where we
can control the fill and stroke for our
shape and paths. These two panels here
can be readjusted, so you can adjust the size. So this little faint separation here is how you can adjust them. And you might
notice some arrows, and these arrows allow us
to modify their position. So we can move, for example,
the properties panel, left, right, up or down, the same thing for
the fill and stroke. So we could separate them
and even move the fill and stroke all the way to the
other side of viewer. So you can basically
modify the user interface. Now, if ever you make
too many modifications and you want to revert
back to the default, simply go up to the
menu bar inside of help and go down to Restore
default user interface. Right above that, you'll see a few more options to restore
different properties. So the fill and stroke, reinstall default
expression presets and reinstall default
render profiles. And whatever changes you
do to the user interface, friction will remember for the next time you
load up the software. Now, underneath our viewer area, we have the timeline, and we can resize this as well. So there's nothing
here on the timeline because we haven't
created a scene yet. Now, over on the left
side of the viewer, we have the tools menu. And here, we're going to find the default tools for friction. And if we right click on
it and go down to labels, check this on, we'll get the name for each
one of the tools. So I'll leave that open
for now so that you can see the name of the tools
ifever I call them out. Now, lastly, all the
way at the bottom, we have our status
bar where we can see the amount of RAM
being used by friction. We have the width and
height of our scene. So right now it is set to 11 because we don't
have a scene yet. We can control the resolution. We'll look at that in a bit, and then we have the
different layouts. And finally, a couple
of tools over here, such as the grid, snapping, and the Gizmo, which we'll
look at in a moment. The last thing that
we'll look at for the user interface is in the upper right corner where we have the friction logo. If you left click on
it, we'll get a pop up. And let's expand this. Inside this pop up, you can see some information
about your system. You have an about
section for friction, and right next to it,
we have the shortcuts. So if ever you wanted to learn
the shortcuts of friction, they're right there
in the software. You can have a look at them. Unfortunately, we cannot
yet change the shortcuts, but that will come soon enough in future
releases of friction. We also have their
privacy statement and the license that
friction comes under. So these are the very basics
of the user interface. If you navigate over
to friction graphics and go to their documentation
instead of user interface, you'll also get a breakdown
of the user interface. So they'll tell you about
the different parts, give you some information
about each thing. And I highly recommend exploring the documentation
on their website. They have a lot of information inside of the documentation which can help you learn
friction even better. With that out of the way,
let's move on to creating our first scene and
importing our assets.
4. Create New Scene - Friction Navigation: Hi there. In this lesson, we're going to create
our first scene, import our assets, and familiarize ourselves a bit
with navigating friction. So let's start by
clicking on New. We're going to get a
pop up. This pop up allows us to change the
parameters of our scene. Now, these can be
changed later on, so this is not a
final commitment. At the very top, we have
the name of our scene. I'll leave it to the default. Next, we have our
width and our height. You can set these in
manually or click on these three dots over here and choose from this
list of presets. I'm going to leave
it to 1920 by 1080. Next, we have the duration. Now, the duration can
either be seen in frames or in seconds. So
this is up to you. We have the start frame, and we have the end frame. Under that, we have the FPS, so frames per second. This is the frame rate of
your animation or your scene, and you can either set
this in manually or again, click on these three dots and choose from a list of presets. Next, we have the background. And if we click on this
little square over here, we get a pop up so we can
choose the background color. Background usually does
not render this is more of a placeholder unless you're exporting images, if
I'm not mistaken. But you can also control
the alpha of it. So basically, you can
make it transparent or fully opaque or
semi transparent. Right under there,
we have bookmarks, which allows us to save colors, but we'll look at that
later in the class. So I leave mine to near black. And lastly, we have
set as default. If you check on this checkbox, these settings will become
the default settings next time you create a scene. This doesn't stop you from
changing those settings. Just remember to uncheck
set as default so that you don't overwrite your previous
default unless you mean to. Okay, once we're done,
let's click on Okay, and now we have our first scene, and we can see now more
information on the timeline. If we expand this over here, we have the frame
count at the top here. Although if you are
working in seconds, you can always right click on it and go to display time Code, and now you're going
to see the seconds instead of the frames. I'm going to stick
to the frames. So let's have a complete
look at the timeline now. Over on the left hand
side at the top, we have the scene frame start. So basically, where you
want your scene to start. It could be on frames
or seconds again. So you can change
this number manually, and now this will be the new
start frame for our scene. So I'll leave it
to zero for now. And then in the middle, we have the current frame. So wherever the playhead
currently is set to. So if I left click
up here, drag, you can see how we're changing the value by moving
the playhead, which is this bar over here. And then on the right hand side, we have the end frame. So these values
you can change on the fly right here
above the timeline. And at the bottom
of the timeline, in the bottom right corner, we have Fit horizontal. When you click on it,
it's going to fit the entire duration of
our timeline into view. So if I were to, for example, change the start to 50, and then I clicked
on Fit Horizontal, it would start from 50
all the way to 250. Okay. All right, then. Now, above the timeline
inside of the viewer, we now have our canvas. You can scroll with your
middle mouse wheel in order to zoom in or out or simply
use the keyboard shortcut, minus to zoom out
in plus to zoom in. If you go over to the menu
bar inside a view, Zoom, you'll see all the
keyboard shortcuts, the zoom in, Zoom out,
fit Canvas, et cetera. One keyboard shortcut
that I use very often is the Fit to CNVs,
which is Control Zero. So by pressing Control Zero, we can fit the viewer
to our canvas. So let's go ahead and
impart our assets, I lectli code and drag
it into our project. I'll do the same for this
video clip over here, left click hold and
drag into our project. So that is one way that you
can import your assets. On some rare occasions when trying to drag in
some video assets, friction might crash, and this is where the main
toolbar comes in, where you can import
or link your assets. Anything that you
import through here, it's going to open
a pop up window. Pick whatever you
want to import, click on open, and
it will import it. So now that we have
our assets imported, if we want to move them around, we want to be on object mode. So this default mode over here. And if we left click
hold and drag or assets, we should be able to grab
them and move them around. Alternatively, you can also grab your assets directly
from the timeline. So each asset is its
own track or layer. Now, the order of your
layers does matter, as you can see the
video being above the logo places it above the
logo on the Kendis area. If I were to left click hold and drag it underneath the logo, it would then move underneath
the logo in the Canvas. We can also hide our assets
by clicking on the eye icon, and we can also lock them, which will keep us from
clicking them or selecting them on the Kendis area or
even in the timeline. Now, another thing to note, if we look over on
the Properties panel, we have nothing here. And if I select a logo, we can then see the logo
in the properties panel. If I select the video, we then see the video in the
properties panel. This is simply because if
we go up to the menu bar inside of View down
to Properties filter, by default, it is
set to select it. So inside of the
Properties panel, we can only see
what is selected. We can change that
from selected to A, for example, and now we'll
see all of the layers. This is how I personally work. I have all of the
layers visible. So I've already said
that you can left click hold and drag your
assets on the canvas, but you can also
modify your assets by using either G to grab. So if we press G and
we move the cursor, we can move or object. You can press Escape to cancel. Otherwise, when we grab it, we can left click to confirm or simply press Enter or
Return on the keyboard. The next thing we can do
is press R for rotate, and this will allow us to
rotate or object or path. And lastly, we can
press S for scale, and this allows us to
scale or object or path. Now, all of these transforms in more are things that we
can do using the Gizmo. So at the bottom right corner
of friction, we have gizmo. If you left click on it,
left click on the drop down, you can choose which properties you want to be able to affect. In this case, I have all four of them selected
to the shear, scale, rotate, and position. Now, let's turn off our
video layer here for a moment so we can
better see our gizmo. And the gizmo here, if
you left click hold, for example, you can move
your object on the X axis. We can also do this
for the Y axis. We have the ability
to shear our object. We can sce it uniformly by
using this top corner here, or we can scale
it only on the X, for example, or only
on the Y value. It also lets you move your
object and rotate it. So essentially, with the gizmo, you can do all the
transforms that you would but directly
on the canvas, and this goes for
all of our objects. So if I select the video here, we get the gizmo again, and we can do all of
these same transforms. I'll turn off the Gizmo for now. Now to undo all of this,
we can either go to the upper left corner
and click on Undo, or we can use the keyboard shortcut Control Z to undo the transforms
that we just did. Okay. Now, I'll undo all
the way to this point where we had only done the regular transforms
without the gizmo. Now, another way to
undo our transforms is if we hold down
Alt and you press R, you will undo the rotation. Hold down Alt, press S.
I will undo the scale, and hold down Alt and press G, and it will undo the
grab that we did. When it comes to the
position of objects, it's usually set to the upper
left corner of the canvas. So, for example, if I grab the video clip over
here and I press Alt G, it's going to position it
at the upper left corner. So this goes for
basically all objects. A few more things to
know, for example, if we right click on an
object over the canvas, we get a few options here. Now, because this is an
image that we imported, we can either reload
or set a source file. Basically, you can change this
object for another object. We can also center
the pivot point, which is this litter
point here in the middle. So if ever we had moved it somewhere else
because we wanted to rotate from a different
point of origin or even scale from a
different point of origin, by right clicking, we can go in center the pivot to set
it back to the middle. I will press out an R to reset the rotation and in S
to reset the scale. You can also center
align your object, so it goes right to the
center of your canvas. So when we right
click, we also have a few more options
like copy, cut, duplicate, delete group
in the raster effects, but those will be for later. Okay, so inside of
the properties panel, we have this little menu
at the bottom here, which allows us to align
either the geometry, the geometry by pivot
or the pivot itself. And then we get to
choose what we want to align it to so it
can be the scene, last object selected, last selective pivot in bounding box. And then we can use these
arrows to align it. All right. So now I'm going to center a line or video
in the background. It is smaller than our canvas, so I'm going to
press S for scale, and I'm going to scale it up. You can also type in the values. For example, if we were to
press S and we press two, it would make it twice as big or press delete or backspace, let's say 1.5, and that makes it fit
into our canvas or press Enter to confirm. And lastly, I'm going to lock the background video or grab our logo or press S to scale and scale this down
a bit and Enter. Okay. Now, let's have a
look at the timeline. So right now, we're not really seeing the entire
length of our video. So I'm going to change the
frame to 800 press Enter, and then I'm going
to fit horizontally. Now we can see the
very end of our video, and we can scrub to the
timeline to see our video. Now, if you want to
jump the playhead to the start or the end
of our duration, simply hold down Shift and use the left or right arrow keys. So I'm going to jump to
the very first frame and then I'll press
space bar to playback. Now, you might notice
that friction is caching in or seen, and this is to help it
have a smooth playback. So once friction
is done caching, it's going to play our scene
and we won't have any lag. Now, this really
varies depending on the complexity or the
heaviness of your scene. If we press spacebar, it's going to pause or playback, but it won't actually stop the
playback. It simply pause. If I press spacebar again, it's going to continue playing, but it hasn't actually stopped. To stop the playback or
exit the playback mode, we can either click on
this button here to say stop review or press
escape on the keyboard, and now we've broken
out of playback. One way to notice
when you're inside of playback mode is if I
press Spacebar right now, you'll see that the outer edges of the canvas are pitch black. When I press escape, they're
a bit more of a dark gray. Now, on that note, let's go ahead and unlock our video clip,
left click on it. I'm going to sce it up a
bit bigger than our canvas. So if you look here, we
have this gray border which indicates the
limits of our canvas. So anything outside of this, if we were to render
would not be rendered. Okay, I'm going to place the cursor over this
part here that expands. And notice that when
I press Space Bar, so we enter preview, we can no longer see that area, that space that's outside
of the canvas because it cuts out anything that is
outside of the canvas area. And because we change the video, friction has to cache
the animation again, or cache the video in this case. Now, speaking of the caching, at the bottom here in the
status bar, if you remember, we have this number here
which indicates the amount of RAM being used by friction when it
caches our playback. If you don't want to cache the
animation before playback, you can go up to the
menu bar inside of view and simply
uncheck preview cache. And when you play back,
it's simply going to play back without trying
to cache anything. With this, wherever I place the playhead and press space bar is where it's going to
start playing from. Now, if ever you want to start the playback from
the very first frame, you can hold down Shift
and then press Space Bar, and it's going to start
from the first frame. Okay. So earlier
I mentioned that this part outside
of the Cenvas is going to disappear
when we playback. So now that we've
disabled the cache, when we playback or SN, this part outside of the
Kv no longer gets clipped. But if you want to
manually clip this part, you can simply press C on
the keyboard or go up to the menu bar inside of view
and then go to clip to SN. This is going to hide
anything that is outside of the canvas
or press C again, and it's going to unclip it. So I'm going to turn on the
preview cache for myself. Now, ifever you want
to clear the cache, you can go up to the menu
bar instead of Edit and go down to clear case or
simply press control plus R, and it's going to
clear the cache. You can see that the
blue bars at the top here have disappeared.
All right. Now, lastly, when it
comes to the timeline, you can middle click
and move around, and this allows you to
pan around the timeline. And when it comes
to the timeline, this bar over here is the visibility range
of this video clip. So if we left click
on it, we can move it around to move our video. Going to undo this Control Z. Okay. But you'll notice that we don't have this for the logo. This means that the
logo is always visible. If you want to have a
visibility range for the logo, simply right click on it and
go down to visibility range. And now we have this
visibility range over here. You can zoom in and
out of the timeline by holding down Control and
scrolling on your mouse wheel. And if you want to
pan left and right, hold down Shift and scroll
on your mouse wheel. Now we can expand the
visibility range. Whenever the playhead is not
above this visibility range, we will not see the logo. Okay? Same thing for the video. Now, ifever you want to
make a cut on a video clip, hold down Shift and press K, and it's going to make a copy of it and cut it at where
the playhead was. Okay. So lastly, I'll press
Control A to grab everything, and I'll press Delete
to delete everything. I'll go over to the assets tab, and inside of the assets tab, we can see whatever
we had imported. So even though I deleted
it from the scene itself, so the timeline, we can still
see them inside of assets. So now I can simply
grab these and drag them back into our scene. Just like that. So go ahead and center line or
background, scale 1.5, press Enter, or move
the video underneath, or right click center line, and scale this down a bit. Alright, if you want
to rename your layers, you can either right
click on them and go to rename or simply
middle click on it. You'll get a litter pop
up and we can rename it. So let's say background
winter video, press Enter, and
there we have it. Now, the very last thing is at the very top above
of our viewer, we have these controls here which allow us to
move our object, rotate them, scale, change
the pivot, and the opacity. So you can do a lot of these
transforms right up here, either by left
clicking and dragging those values or manually
typing in something, so 90 degrees, and it
will rotate 90 degrees. So for this, press Alt R, and for something
like the scale, if you want to scale it
in a uniform manner, you can left click,
type in a value, so let's say a value of 0.5. Before you press Enter,
simply hold down Shift, then press Enter,
and it will make it 1.5 for both values. Likewise, you can
hold down Shift, left click hold and drag, and it will change both
values at the same time. So let's make this 0.5
again and press Enter. Okay, so that is it for
navigating friction. In the next lesson, we're
going to start animating. So we're going to
create keyframes and make our objects
move. See you there.
5. Animation Basics - Friction Keyframe: Hi, and welcome. In this lesson, we're going to start
animating our objects. So finally, let's
make things move. So I'm going to
start by sculling down the logo a little bit more, and we can get started. To animate the
position of our logo, let's either expand it inside of the timeline or we can expand it inside of
the properties window. So whichever one
works best for you. Iever you want more space over here inside of
the properties panel, you can press F on the keyboard to hide
the fill and stroke. If we press F again, we'll see the fill and stroke. So just keep that
in mind. All right. So for now, let's go ahead and create our animation
over in the timeline, and then later we'll start
using the properties panel. So I'm going to expand the logo inside of it.
We have transform. I'm going to expand
the transform. And what I'm looking for
is inside of translation. So let's expand translation over here. Let's scale this up. And we're looking
for the Y axis. X is left and right. Y is up and down. To add a keyframe, we can simply left click on this
white dot over here. This is going to add a keyframe. Now, each one of these dots
is telling us something. The blue one at the top
here is telling us that something is animated
inside of the Noktax logo. The green dots are telling
us that inside of transform, something is animated, and then inside of translation,
something is animated. And then, lastly, this red
dot at the bottom here is telling us that the Y
value is what is animated. So this over here at the
bottom is the actual keyframe. And when we select
it by left clicking, they all turn yellow. Okay, so we have
our first keyframe, and to change the Y position, we can either use the Gizmo. We can press G and Y to lock it on the Y axis
and move it up or down, or we can left click
on this value, hold and drag it to
move it up or down, or manually enter the
value, all up to you. So I'll simply press G
and Y and then I'll move it all the way at the bottom here and left click to confirm. Next, I'm going to
move about 24 frames. So this is going to be 1 second, and then I'm going to press G and Y again, and
I'll move this up. Friction is going to
automatically add a keyframe. Now, ifever you move the playhead and you
want to add a keyframe, clicking on the red dot
is not going to do that. If you click on the red dot, it's going to delete all
of the existing keyframes. So keep that in mind. All
Control Z out of this. Likewise, if we left click on
the dot of the translation, what it's going to do
is add a keyframe to the X and the Y value because it has two
values inside of it. If we left click on it, again, it's going to delete
all of the keyframes. Let's undo this. If we left click on the
dot of Transform, it's going to add a keyframe to all of the transform properties. And if we left
click on it again, it's going to delete
all of the keyframes. Let's undo that, and
there we have it. Okay. So once you activate it, friction will automatically
add the keyframes. There's no way to
turn it off just yet. Now, if I playback, so press Shift space bar, friction is going to
playback from the beginning, and then it's going to
cache the entire animation, or it's going to playback
the entire scene. But I only want to playback
this beginning part, and I don't want to have to continuously start the
playback over manually. We could either change the frame or we can simply
use in and out zone. So with the playhead on the
first frame or frame zero, I'm going to press I on the
keyboard to add a endpoint, and then with the Nuxtax logo selected and the
Y value selected, I'll press the up arrow key
to jump to the next keyframe. And I'll move a few
frames forward, so I'll use the right arrow key. So it just a few frames forward, and then I'll press O on the
keyboard to set an outpoint. So, yes, you can use
the up and down arrows to jump between keyframes
of your selected object, and you can use the
left and right arrows to move the playhead
on the timeline. Right. So now that we have
our in and out points, when we playback, Friction
is simply going to playback this section
of our timeline. If you want to eliminate
the in and out points, you can go up to the
menu bar inside of scene and go down to
clear in and out. Now, if ever you wanted
to loop your playback, you can click on
this button up here above the timeline that
says Loop preview. This is going to make it
loop indefinitely. Alright. So we have our first animation, but now let's add a little
bit of easing to it. So some acceleration
and some deceleration. To do this, we're going to left click on the Y value,
make sure it's selected, and then we're going
to click up here above our tracks where
we have the graph. This is going to open
the graph editor, just like the timeline. We can middle click
and we can move. We can middle click and pan
around to move things around. If you hold down
Shift and scroll, it's going to zoom vertically. If you hold down
Control and scroll, your middle mouse
wheel, it's going to zoom in horizontally. If you fit horizontally, it's going to fit the entire
duration of your scene. But if you select your keyframes and then
you fit horizontally, it's going to zoom in on
just those keyframes. Same goes for the
fit vertically. Although if we do that,
it's going to hide the keyframe behind
those buttons over here. So I'm going to simply
hold down Shift and scroll the middle mouse wheel and then I'll do it on the control. So the horizontal axis. Alright, so we're going
to create a curve to add a little bit of
easing to our animation. We're going to do this manually, although there is an
option all the way here to do this automatically. The only thing is, if we
do this automatically, so let's go ahead and
do Ease out cubic, Friction is going to add additional keyframes
to our curve. This is because the
automatic easing is made for web animation,
so SVG animation. And when creating
web SVG animation, you have to have
actual keyframes, so different values in
time that you input. So I'm going to
undo this instead, what we want to do is grab
our keyframes and then change the handles or the
interpolation to smooth nodes, and now it's going to
give us these handles that let us modify
the curve manually. Now, I'm going to left click
on this handle and drag. If you left click hold and drag, you can also press
X to lock it on the X axis or press Y to
lock it on the Y axis. I'll drag this out a little bit. And this first one
here, I'm going to left click and drag it down
a little bit like this. Now if we play back, we get a bit of acceleration in the beginning and then it
slows down as it moves up, going to reduce the
bottom part of the curve. And for this one, I'm going
to drag it down a bit more. Okay, refine the curve
a little bit more. And there we have.
We've just created our first animation
using friction. Okay? Now when it comes to
the in and out points, you can modify these
either by placing the playhead somewhere
else and pressing O or I, or you can simply left click at the very edge under
the in or out. Left click hold and
drag, just so you know. Right. So now that we're
done with the graph, let's go ahead and click
on the graph icon again to go back to our timeline.
I'm going to zoom it. Now, we don't actually need
our scene to be 800 frames, so I'll drop this
back down to 250. Alright, now that we have
our first animation, let's go ahead and
add a bit of text. To add our text, we're going
to go over in the tools, and we're going to grab
the Add Text tool. Once we have it, simply left
click once on the Canvas, and it's going to add
a new text object. Now, it's important to note
that every time you click, you're going to add
a new text object. So even if I were to
write something here, as long as we have
the text tool active, every time we click, we're
going to add a new object. So I'll undo all of this. So let's grab our text object. And over in the
Properties panel, we now get this little
space down here, which allows us to
type in our text. So in here, I'm going to
type beyond the horizon. Then I'll click
somewhere else to deactivate the Text Edit mode. So now that we have
a text object, with a color, we can now see colors inside of
the fill and stroke. The text object is using a
flat color for the fill. You can also choose a gradient and create multiple gradients, et cetera, or leave it on flat. We can also give it a stroke
by switching over to stroke in clicking a flat stroke or
a gradient stroke or none. We have a few options
for the stroke here. I'll switch back to fill. Likewise, if we go to the
color toolbar at the top here, we can left click and
open a panel here which allows us to change the color of whatever we have selected. Same thing goes for the stroke. We could give it a
flat stroke from up here and change the
color. All right. There are some other
neat things we can do like hold down
Control and scroll, which is going to
change the saturation, hold down Shift and scroll, which changes the value or
hold down Alt and scroll, which will change
the U of our color. Okay. So I'll set
this back to white. And down inside of the text box, I'm going to change this to 129. I'll change the
alignment to center, and I'll leave it
at the bottom here. Then we can align our text, so geometry at the scene. And let's go ahead
and change the font. So click on the drop
down over here. And I'm going to go for pop ins. You make this a
extra bold pop ins. Now that we have our text,
let's go ahead and animate it. To animate our text, we're
going to do the same thing. We're going to expand it, and now you'll see that we have a few more options in here. So whereas for the logo, we only had transform. Here we have
Transform, fill, text, spacing, and a few more
that are grade out, okay? So we'll go inside of Transform, translation, and
we're going to add a keyframe to the Y value. But before we do so, let's
first look at our animation. And let's say around here after the logo has
finished sliding up, so frame 24 should do. Let's press Escape to break
out of the playback mode, go back to frame 24, and I'm going to
add a keyframe to the text. I'll move forward. Let's say we're going to
give it 1 second, as well. For now, we can adjust it later. So I'll jump to frame 40 48, and I want to add
another keyframe. So we have a few options here. One of them would be to right click on the value
and go to add Key. Alternatively, if you have the insert key on your keyboard, you can simply press Insert
and it should add a keyframe. Now, we could change
the position, but I actually want this first keyframe over on the playhead. Now, I could click it and
move it or we can select this keyframe and
either press Shift D to duplicate it or press escape. Or we can press Control D, which will duplicate it and place it where
the playhead is. So now I can use the down
arrow key to jump to the first keyframe and
I'll move the text. Now, before I move the text, notice that we have a blue
outline over the timeline. And every now and then, we have the same blue outline
over the viewer. This blue outline indicates which one of the two
is currently active. So is it the timeline
or is it the viewer? If the timeline is active and there's a
keyframe selected, if I press G, although the
text up here is selected, because we have a keyframe selected and the
timeline is active, the keyframe that is selected
is going to get grabbed when we press G OpresEscape
to break out of this. So to jump over to the viewer, you can either left click on
it or simply press tab on the keyboard to toggle between the timeline
and the viewer. So now if I press G, I'm now moving our text. So opress G Y, and I will move the
text up a little bit. So now, after our logo
goes all the way up, the text is going to go down. Now let's add a bit of easing to our text animation as well. So just like we
did for our logo, we're going to add a bit of
easing to the text animation. So with the Y value selected,
we'll click on the graph, and now we can go ahead
and modify the graph. So I'll grab both keyframes. I'll make them smooth. And I want a bit of
acceleration in the beginning, and then it eases into
the final position. So so it's going to accelerate and then slow
down as it goes down. Okay. Now, to eliminate that
pause that we have here, there's a bit of a pause. I'm simply going to switch
back to our keyframes. I'll grab both keyframes
for the Y value of text, I'll press G, and then
I'll move it back a bit. So now there's almost no pause between the logo arriving
and text going down. Okay. All right. So we have
our basic movement now. We have the logo going up, we have the text going down. Now, before we address the text, let's go back to our logo. And instead of having the logo visible from
start to finish, we're now going to
animate its opacity. To do this, we're going
to expand it again, go instead of Transform, and a little lower here,
we have opacity. Now this is going to be
a separate keyframe. So on the very first frame, I'm going to add a
keyframe to opacity. I'm going to drop
it down to zero. And then let's simply go
to the next keyframe. So frame 24, and now
I'll set opacity to 100. I'll left click on opacity, go over to the graph editor. If you only want to see opacity, just click on the layer or object that you
want to target. And click on the value again and that should
clear things out. So now I'm going to
grab both keyframes, make them smooth, and I want it to become
opaque very quickly. So I'm going to
really exaggerate the curve to make it
opaque very fast. Let's give it a
little bit of ease in the beginning so that
it starts transparent. Let's reduce this a little
bit. Let's see here. Okay, it seems like an S curve
would give it a bit more, make it slightly more subtle. That should do. That's
exit the graph editor. Okay, so we now have
our basic animation. We have our logo animated
and our text animated. And the next lesson, we're
going to start looking into masking instead
of friction. This is also where
we're going to look at shapes and paths. See you there.
6. Shapes & Paths - Friction Vector Tools: Hi there. In this lesson, we're going to look
at masking and shapes and paths instead of
friction. Let's get started. So we've already made
our logo fade in, but now we need to do
something about our text. We could also make it
fade in to the scene. But instead of that, we're
going to create a mask to make it invisible until
it's time for it to show. So for this, I'll go over to its first keyframe.
This is not mandatory. And over inside of the tools, I'm going to grab
the rectangle tool. I'm going to left
click hold and drag. Or create a shape
around our text. Now, the rectangle tool, just like with our text tool, if we continue to click
with it selected, it's going to add a bunch
of other rectangle boxes. So we have to make
sure to switch tools after we've
created our shape. So I'm going to Control Z
out of the other boxes, and I'm going to rename this rectangle over
here to tagline. Mask, tagline. Okay, press okay. And now we have our mask. Let's move forward to when
the text is all the way down to make sure that the box
is not over our text. I'll move back to
the first frame, and I'm going to move the
box up ever so slightly. Over in the fill and stroke, I'm going to add a fill can be whatever
color you want it to be. And then for the
stroke, I'm going to set it to none. All right. So to make it a mask
over on the layer, let's click on this
drop down over here. We're going to
switch from source over to destination out. What this is going
to do is carve a hole through every layer
that is underneath it, but we only want it to
affect the tagline. To do this, we have to group
our mask with our tag line. So let's select the mask, hold Shift and
select the tagline, and then you can press
Control G on the keyboard or simply right click
and go down to group. This will create
a new group which has our mask and our tagline, and it has its own transforms. Okay, so let's rename the
group to tagline com. Okay. But notice that we still
have the same issue. The mask is carving a hole
through all the other layers. And this is because we have to promote the group to a layer. We can do this by clicking on this little checkbard
over here or by right clicking and going to action and going to
promote to layer. This is going to turn
our group into a layer. So these two work differently. But now you can see
that the mask is only affecting the tag line and nothing else
is being affected. If we move forward in time, you'll see how the text
appears from behind the shape. So that's how you can create
a mask instead of friction. If you wanted to do the inverse, you would simply switch it from destination out to
destination in, and now the text would only appear where we have the shape. Okay? Just so you know, so you have a lot of different
blend modes in here, but in order to
isolate their effects, you have to create a
layer out of them. So let's go back to
destination out. And now, if we were to playback, I'm going to push back the
outpoint a little further. Let's playback and we
have our first animation. Okay. So I'm going to modify the tag line animation
a little more. So I'm going to go over to the Y value and go
to the graph editor, and I'll click on tagline again just to isolate the curve. And here I'm going to left click code and drag
this out of it. So it goes out a little faster. All right. I'll exit the graph. And here we have our animation. Now, if you want to switch
from a layer back to a group, right click, go to action and simply go to
demote the group. You can also ungroup your
layer here simply by pressing Control Shift G. Okay. So what we just did
here with our shape, we could have done with a path. So simply by Left click, Left click, we left click, and then once we're done,
we can close the shape, and we could have done
this with this path. Now, again, for those of you familiar with vector software, this will be very
familiar to you. So if we switch to
the point mode, we can now modify the different points of
the path that we created. If you want to create curves, you can either use this
context menu above the viewer and simply
grab a node and make it, for example, either a smooth
node or a corner node, and this would give us
the controls for it. As such. So if I made this move, we get these handles
here so that we can control our path. All right. I'll switch back to your
object mode and delete this. Now, before we continue, since we're talking
about objects and paths, when we draw either a
circle or a rectangle, these two are objects. They are not paths. So if
I grab the point mode, you'll see that they
have different controls. So they get these
little pink dots, and these pink dots
allow us to change their scale in position
for the circle. So these are objects. So when I grab the
rectangle over here, if I switch over to object mode, we get a few extra options. For example, we have the radius, and if I hold down Shift, left click hold and drag to affect both values
at the same time, you can see that the
radius here gives us rounded corners
for a rectangle. So a left click, right zero, or hold down shift
and press return to affect both values. Press control zero to
Zoom or canvas again. And now, if ever you wanted to convert one of these
shapes into a path, you would simply select
it, go up to the menu bar, go inside of Path and go
down to Object two path. This is going to create
a copy of it as a path. So we still have the
rectangle over here, but now we also have a path
version of the rectangle. So this shape over here. Alright. I'll delete these. And now on to the next lesson, where we're going to
learn about working with multiple scenes inside of
friction. See you there.
7. Multiple Scenes - Friction Compositions: Hey, there. Welcome back. So in this lesson, we're
going to learn how to work with multiple scenes
instead of friction. But before we do
so, very important, we should save our project. Matter of fact, we
probably should have saved much earlier on. It is time to save our project. To save our project, we can either go to the
main toolbar and click on Save or we can simply press Control S. So if
I go inside a file, and see here we have
Control S to save. Okay? So let's save our project. And I'll call this Koctux logo animation V
one and hit Save. So we've now saved our project. So let's go ahead and
create a new scene. So up in the menu
bar, if we go inside of scene, we have new scene. We're going to get
the same pop up. We get to name it,
choose the dimensions, the duration, the FPS, everything that we
got to choose before. We can press Okay, and
we now have a new scene, which is seen up here
in the upper left of the canvas area
or the viewer, and also in the upper left of
the tracks of the timeline. So scene one, if we
left click on it, you see we have the option
to choose scene zero. And if you want the
timeline to automatically switch to the active scene in the viewer, you can
left click on it. And simply check on active. So now, when we switch
scenes in the viewer, it's going to switch in
the timeline as well. Okay. So what I would
like to do is to take our tag line in our logo and move it
to a separate scene. To do this, because we
have a new scene created, I can go over at the top of our tracks over here in the timeline where we
have these two lines. So we have horizontal
and vertical. If we split horizontally, what it does is create
a separate timeline. So we have one on our right hand side and
one on the left hand side. At the top left, I'm
going to click on none, and I'll switch
over to scene one. So over here, we
have scene zero, and on the right hand
side, we have scene one. I'm going to grab our tagline and drag it over to scene one, and I'll do the same thing
for the Nox Dax logo. Drag it over to scene one. So now we can close this second timeline
by clicking on the X, which is next to the 2 bars, and it will close the timeline. We can also split the viewer and view two
scenes at the same time. So on scene one, let's
move forward a bit. And because we activated the
active for the timeline, each time we click on one, so we're switching between
the two active scenes, the timeline automatically
switches with us. So over on scene one, I can see that the tag line
is not showing, so let's go ahead and
troubleshoot this very quickly. So when I left click on it, I can see that it's
supposed to be there, but nothing is showing. So dragging it out and back into the group worked. All right. So that was to de the bug, but simply dragging
them out of the group or out of the layer and putting them back in seemed to fix it. It shows you how easy it is to troubleshoot
things sometimes. Okay, so what we have here is an isolated animation where we have our logo and our text. Okay, so let's go back
over to scene zero, where we have our background. And now what we can
do is right click on the Canvas and go to Link scene. Now we can bring in the scene one that we just created
into this scene. Like such, we can
also rename it. So I'll go ahead and call
this Logo animation Link. And if we want, we can
even rename our scene. So let's go over to scene in the menu bar down to
scene properties. And let's call this
Animation one. Press Okay. We can do the
same for other scene. Go to scene properties and
call this logo animation. There we have it. This
link that we just created also has transform
properties, by the way, and the clip option here has
to do with the background, similar to press
C on the keyboard to clip the outside,
something similar. Okay. All right. Now, because of what we
did, we can go to scene, create a new scene, and
we're going to call this animation two and
over in animation two. And now over inside
of animation two, what I'll do is grab a different video and
drag it into the scene. Now, when we import video, friction can ask
us if we want to change the properties that are
seen to that of the video. I'll just click on No. You can also turn this off
in the settings. And here, clearly, this video is much bigger
than our composition. So I'm going to right click. I'm going to center a line and then I'll press S for scale, and I'll scale it down until
it fits in our composition. And leave it as such. Okay, so now we have
a different video. I'm going to rename our
layer two izon video. Press Okay. I'm going to lock the video as well
so we can grab it. And I'll right click.
Go to Link scene, and I'm going to link the logo
animation that we created. And now we have
our logo animation in two different scenes. And ifever we go over to
logo animation or if we split this view over here and
switch to logo animation. So this one here, it's fit to Genvs whatever we change
inside of the actual scene. So, for example, if I
were to rotate the logo, you'll see that it automatically updates inside of
our animation two. The same goes for the
animation one over here. So this means that you can
create a composition or a new scene and simply link
it to different scenes. So I'm going to
reset the rotation and close this instance. Right. So that is it for the multiple scenes
instead of friction. And the next lesson,
we're going to learn about some basic raster effects.
8. Shaders & Effects - Friction Plug-ins: Hi. In this lesson, we're going to learn about
some basic raster effects available inside of friction, and we're going to apply
them to our video over here. So let's unlock the video, right click on it,
go down to action. We're looking for
raster effects. I have a lot of custom
shaders for friction, so you won't have
this extensive list. For now, we're going to
use one of the built in effects or built in
shaders for friction. So we'll go inside of color, and we'll go down to
saturation. Left click. So now if we expand the video, we now have raster effects, and instead of raster effects, we have a saturation, and then here we
have the different values that we can modify. You can also do all of this inside of the
properties panel. So if you don't want
to expand things too much on the timeline,
you can do it over here. And if you remember,
you can press F on the keyboard to hide
the fill and stroke. That way, you have a
greater area to work with. Alright, all depends
on your workflow, what works best for you. So with the hue and saturation, we can change the yu of sin. We can change the saturation,
contrast and lightness. So, for example, if we were
to drop the saturation, we could have a black
and white background, or we can increase
the saturation to add a punch to the colors. We can also animate these
values, by the way. So anything with a white dot
next to it can be animated. Alright, so I'll collapse this. I'll lock the background. I decrease the saturation a bit. And now the last thing
I want to do is add a drop shadow to our
logo in our text. To do so, I'm going to right
click on it, the link layer, go to actions, down
to raster effects, and I'm going to
go up to shadow. Let's add the shadow, expand or clip, go to
raster effects, shadow. And here we get to choose
the color, the opacity. We also have translation.
So let's expand this. Translation is the
position, so X and Y. So if we zoom in
here, we can move our shadow out from
behind our text. We have the blur radius. So how blurry do we
want the shadow, control the opacity, et cetera. So with this, I can drop
the opacity, for example, to 0.4, give it a bit of a blur radius and
set the position. So it comes out ever so
slightly from behind our text. Let's see. Looks pretty good. And now there we have it. Friction is going to cash in. I'll press escape to
break out of this. I'll set an out point over here, so out and on the first frame, I'll set an endpoint
and no playback. We have the loop turned
on, so it's going to loop. I find that the logo animation
need a bit of improvement. So I'll do it from here. I'll simply split
this over here. Go to the logo animation.
Let's zoom out. So we have to make sure
that active is turned on. So now we can look at
our logo animation. Let's move forward a bit. I'm going to adjust the
curve of the opacity. I want it to be opaque
a little sooner. Or a bit faster, but it has to stay
transparent a little longer. So we can either adjust the curve or simply
move the keyframe, so press Gx and move it forward a bit so that it's transparent
for a little longer. So I'm simply modifying
the curve until I find a bit of what works best for me. I think this works just right. So I can close out
of this again, click on our main scene to switch the timeline and
close the graph editor. Okay. Now, I would like to slow down the
speed of the water, but before we do so, let's have a look at the
preferences of friction. And that's what we'll
do in the next lesson.
9. Preview Resolution - Friction Tips: So in the beginning when we were looking at the user interface, if you remember down
in the status bar, I mentioned the resolution. Now, by default, the
resolution is set to 50%. And if we were to zoom in here, let's see if we can
see this properly, you'll see that we
get some pixelation. This can also happen
with the vector shapes. And this is more of a visual representation and a way of saving memory
for the system. If we switch the
resolution 50-100, you'll see we're getting
a lot sharper edges, and even the drop shadow
is a lot cleaner. So whenever you start
getting into effects and other de fine details, it's highly recommended to
go ahead and switch to 100%. So I'll set this back to 50. Leaving it at 50% takes
less RAM in order to cache what we have because
things are a little bit more pixelated
and less defined. Alright, that's it for this
parentheses, back to it.
10. System Preferences - Friction Settings: Hi there. This lesson
is going to be a brief overview of the
preferences for friction. So let's go over to the
menu bar inside a file, and we'll go down
to preferences. We can scale this window
up and here we have it. Now, the first thing we
have inside of General, this is very important is the enable backup on save
and the enable autosave. Now, you don't have to create backups every time you save
that is optional, obviously. But for the autosave, I would highly recommend
turning it on. Just note that you want to set a timer that matches
your workflow. As for the default directory, I like to set it to
the project directory instead of the last
use directory. We also have some
interface skelling, and over on hardware, we have some preferences
for the hardware. For example, if you want to
limit the amount of RAM, simply check this checkbox
and set your RAM limit. The same thing for the CPU. We also get to choose quite
a few other options in here, and I tend to leave
it to the default except for the RAM that
I had slightly modified. For the canvas, we can choose
the size of the nodes, the control size,
the dissolved nodes, and the colors that they
take on on the canvas. For the timeline, we can set the colors of the
keyframes in here. Next, we have the shaders. Shaders are kind
of like plug-ins for After Effects or filters. The location of the shaders
on your system will depend on your operating system and where it was
installed for you. And here, you should be able to change the path
of the shaders. So if you want to
choose a custom folder, and with this list over here, we can choose to turn
shaders on or off. And lastly, we have presets
where we can modify or create new presets for the
scene resolution and the scene frame rate. You can also reset
everything to default, and if you've changed
anything in your preferences, click on Save if you want
to save it or click on Close if you want to ignore
anything that you've changed. So I'll simply click on Close. And that was it for preferences. All right, so in
the next lesson, we're going to learn
how we can change the speed of our
video. See you there.
11. Frame Remapping - Friction Speedramp: There. Welcome back.
In this lesson, we're going to learn how we can change the speed of our video. Now, this is pretty easy
to do instead of friction. All we have to do is unlock
our video, right, click on. Go down to actions, and we go up to frame
remapping. Click on it. And for this one, we're
going to have to zoom out. Before we do, let's
expand our clip. And over on frame here, if we left click on it
and press the up arrow, it's going to jump the playhead over to the last keyframe, which is on frame 330. So let's expand the
timeline to 400 frames, and we're going to
zoom it horizontally. And now we can see
the beginning frame and the last frame of our video. And this is the length
of our video as well as the speed of it
on normal playback. So if we were to grab
this last keyframe, hold, and drag it in, what we'd essentially be doing
is accelerating our video. Let it play back. The water is moving ever so
slightly faster. If I drag this in
even more, play back. Give it a moment.
Okay. We'll see that the water is
moving much faster. Alright. This means that if
we drag it out and playback, the water should technically
be moving slower. Right. This means that
we can simply drag this all the way out
or alternatively. So let's say over on frame 100 will be at frame 50 over here. And that's frame remapping. Now, if ever you've modified
your video too much, you don't know what's
what where it starts. I show you here, let's
stop the playback, right click Edit duration. You can see that we have
the minimum frame set 250. We have the max frame to 130. Let's modify this even more. So I'm going to left
click called drag. You can see that when
we drag the video clip, the keyframes actually
move with it, drag this all the way
out, drag this in. Let's right click
again, Edit duration. Now you can see that the
minimum frame is -110. The frame shift is 130, and the max frame is 59. And what this means is that
from the very beginning, nothing happens because this is before the video even starts, and then afterwards, it
plays a little and cuts. And to restore the video, what we can do is right click, go down to Actions and
turn off frame remapping. Now, of course, this is going to delete all of our keyframes. So it's going to remove any custom animation we
might have done. I'm going to right click again, go down to actions and
turn on frame remapping. And what friction is
going to do for us is tell us how long
the video actually is, which is 322 frames. And where the starting
point actually is is right here on frame 130. So we can manually adjust this
if you want to to make it match the actual length
of the video clip. Okay. Now, this
is really in case you don't know how long your video is actually meant to be. Alright, so this is
it for this lesson. And the next lesson,
we're going to look at some shape morphing. This is so we can learn about vector animation instead of friction, and I'll
see you there.
12. Shape Morphing - Friction Vector Animation: Hi there. In this lesson, we're going to be learning
a bit of shape morphing so we can learn about the vector
animation side of friction, where we can animate
halves themselves. All right. So to get started, I'm going to grab
the rectangle tool, left click hold,
and I'll hold down shift to make a
symmetrical shape, so that's going to be a square. And then I'll grab
the circle up here, I left click hold, drag, and then I'll hold
shift so I can make a symmetrical circle. Perfect. Now let's go ahead and change the
color of our circle. So I'll press F on the
keyboard to get the fill and stroke and change the
color or better yet, we can use the color toolbar up here and simply choose
a different color. All right. So what
we need to do is convert these two
shapes into paths. So I'll grab both of them. So holding down Shift
and left clicking, I'll go up to the menu
bar inside a path, and I'll go to object to path. And now we can delete the original shapes if we want to and I'll rename the paths. So this first one is
going to be circle, and this second one is a square. Okay, I'll center
the pivot as well just because now for
the shape morphing. Okay, so it's simple enough. What we're going to do
is grab our circle, place it, make it
overlap with our square. If we want to align the two
exactly, just grab the two, go down in the properties panel, say align geometry
to last selected, and now we can align the two. Okay, now they're
perfectly aligned. Let's grab the point mode. Now this is where things
can get a little odd, but don't worry, it's
actually quite simple. For the square, let's expand it, and we're going to expand paths. And you can see here
we have one path. That is actually the
path of the square. We're going to add a
keyframe on the path. Let's move forward.
Let's say 1 second. So frame 24. And now, if we left click on any of
these dots and move them, it's going to add
another keyframe. And when you play back, you
can see the path deform. Okay. So if we want to turn
this square into the circle, left click on this node, hold, then hold down
Shift on the keyboard. And when you snap it to one
of the nodes of the circle, it's going to take the
shape of that node as such. So if I left click, hold, hold down Shift, snap,
it takes the shape. The same goes for all of these. And because we
animated the path, what we have is a transformation from a square to a circle. Okay. Another thing
that we can do. So let's hide the circle for now is when it turns
into a circle, we get this little
spin over here. Now, in case we
don't want to spin, what we can do is identify
why the spin is happening. It's because this
here has to go down, and originally, it
would be up here. So on the second keyframe, we can grab all of the nodes, and press R on the
keyboard and rotate. You'll notice that the points are rotating on their own axis. Hm. So that's a problem. There's actually a fix for this. Over in the tools. Down
here, we have pivot. We can toggle from pivot
Global to pivot Loco. What this means is, when
we're pivoting loco, what we're doing
is pivoting from the center point or the
pivot point of our objects. So when we have
object mode selected, this here is the pivot point. When we're inside of point mode, you can imagine that each one of these nodes is its
own pivot point, which is why when we
grab it and we rotate, it rotates on itself. If we grab two of them, rotate, they rotate on themselves. But if we switch from
local to global, we're going to get this
little green dot over here, and this here is the
global pivot point, which means if I grab
all four of them, we get this global pivot point, and if I rotate,
they now all rotate together around this
one global pivot point. So this works also
if I make a circle, two circles, go to object mode. Let's switch back to
the local pivot point. So when we have the
orange pivot point, grab both of them,
press R and rotate. You'll see that they rotate
on their own pivot points. So if I grab this, put
it down here, grab this, put it up here, rotate, they rotate on their
own pivot point. Now, if I switch over
to global pivot point, so this green pivot
point over here, wherever I place
it, when I rotate, they both rotate around it. Okay, you can toggle between the two pivot point by
pressing P on the keyboard. So P, we are in Global, P again, and we are in local. All right, so I'll
delete those two shapes. And essentially, so let's go ahead and center this
again, center pivot. So by using the
global pivot point, so the green pivot
point over here, we can now pivot
all of our nodes. And now when we play back, it turns into a circle
without rotating, and we now have our
shape morphing. So I'll switch back
to the global, I'll grab the object mode. And now what I want to
do is add some movement to this object as it morphs. So let's go inside of
Transform, translation, and I'll keyframe the X
position, so the left and right. I'll move forward to
when it transforms, and I'm going to grab it, press in GX, and move it to
the other side of the screen. And now we have
this movement here, a little bit of a transform. So this here is very,
very basic morphing. There's nothing too
complicated about it. We can always adjust the graph to add a bit of easing to it, so I can left click
drag the salt away, left click, drag the salt away. And now when we play back, we get this jump
in the animation. Okay? I'm going to move
this ski frame here more in the center where we have
the highest acceleration. So right here, so
it kind of jumps, and by the time it arrives
to the other side, it's already a circle. Let's go like this. I'll
move this one in a bit, so it starts a square. And what I'm trying to do is put the morphing at the highest
point of acceleration, and this is going
to give it a bit of a seamless transition here. Okay, that's how you can animate paths
instead of friction. Now, there's a whole lot
more that we can do. Now, there's a lot
more that we can do, but this should give
you a general idea. And the next lesson,
we're going to learn how we can import SVG files.
13. Link & Import SVG - Friction Assets: Hi. In this lesson, we're going to learn
how we can either import or link SVG files
instead of friction. So over here, I have an SVG, which is a vector file. I'll left click code, drag
it instead of friction. So, so we just dragged
and dropped this. If I switch over to the point mode and I
left click on it, you can see how we have
all of these nodes. I'll switch over to
the object mode. Now if I import the PNG
version, bring this in. You'll notice that when you grab the point mode, nothing happens. This is because this
over here is an image, and this over here
is a vector file which friction can
actually work with. So inside of layer one here, we have this other group, which we can tell it's
a group because it has the data checkerboard over here, which lets us know
that this is a group, not yet promoted to a layer. In here we have our
two different objects. One is an object, one is a path. So let's rename this to logo, and I'll name this to RIM
circle or rather logo. Circle. This one I can
call it logo comp. And lastly, we can go ahead and ungroup
it from layer one. I'll grab layer one, I'll hold down Shift Control and press G, and this is going to
release the logo comp. Okay. Now, just a
quick parentheses. Because this over
here is a group, I'll switch over to
the object mode. So because this over
here is a group, if we want to access what is inside of the group
from the canvas, we first have to
double click on it, and this will allow us to
go inside of the group. If we want to exit the group, we simply have to double
click outside of the group, and we're now outside
of the group. Now, this distinction
really does matter because if I grab the circle tool
and I draw a circle, you'll see that the circle was created outside of the group. So we have logo comp circle. If I double click on the group, so now I'm inside of the group, Okay, I grab the circle two. I left click hold and drag. We've created a circle, but inside of the group. This is because we were
inside of the group. So there's a distinction
here to be drawn. We can just left click
hold and drag this out. You can see that it also
jump somewhere else, and to grab it, I had
to exit the group. If I was inside of the group
and I tried to grab it, I wouldn't be able to because right now I am inside
of this group. So this distinction
really does matter. Okay. Just really want
to point that out, so I can grab these
two and delete. All right. I'll delete
the PNG as well. So this over here
that we have is an SVG that we imported
inside of friction. The other option is
to click on Link. So if you go over to the
menu bar inside a file, we have Link and we have Import. So this time we're
going to go on Link. I'll go over and I'm
going to grab the SVG. Remember we're linking it, press open the Link SVG. Is actually not a path. It's not a group,
it's not a path. It works just the same
as the PNG that we had. So if ever we were to open the SVG inside of
Inkscape, for example, I change the color of
the logo here to purple, and I save when we go
back inside of friction, if I left click on
this and I say reload, it is now purple, right? Now over inside of assets
because this here is the link. We now have it over here. So if I click hold
and drag it in, this is the link version. And the next lesson, we're
going to learn how we can export our animation
out of friction.
14. Export Animation - Friction Render: Hi there. In this lesson, we're going to learn how
we can export our videos. Basically, we're
going to render out our animation into a video file. But before we do this, let's
address the word beyond. Take me a while to notice, but there is a D
missing in there. So let's switch over to
the logo animation scene, and I can go ahead and
add the missing letter. Now, in this particular case, because my text is
already aligned center, by adding the missing letter, it is not going to
shift on either side, but you can always correct that simply by going to
your alignment, set groometry to scene,
and align horizontally. Okay, so with that
out of the way, let's switch back to
our animation to scene. And the last thing
I'll do before we render is
important audio file. So I'll grab a soundtrack
that I have here, drop it in. And friction doesn't
really give you a lot of options when it comes
to audio files, but you do have the option, for example, to
lower the volume. You can, of course, trim
it and move it around. Yeah, so now if you lay back, we have a track. Tell it loud. So I'm going to
lower the volume, let's say, 230 here and let's All right. So I want the kick here to happen
a little earlier. So I'm simply going
to trim this down, drag it back the beginning. On the very first frame, I'm going to
keyframe the volume. I'll drop it down to
something like 15. So it's not fully quiet. And then a little later, we can have it go back up to 30. Alright, that's pretty much it. Now that we have audio
inside of a track, we can now go ahead and render. Now, the audio is not
mandatory, obviously. So to export, we're
going to go over to Q. And at the very top top left, we have a little
plus. Click the plus. It's going to add this
over here that's expanded, and we can change the
scene properties. So essentially, from here, you can choose the scene
that you want to render. So right now, we're
rendering animation two. So this is the scene, so
I'll leave it on this. Then we have our frame range. So we can set what
to render from the timeline directly inside of our scene property
for the render. Alternatively, we
can also click on the gear and switch from
scene range to in and out. And the in and out
range is going to be our in and out
that we set ourself. And let's click on Okay. Next, we want to
check our profiles. Now, it really depends on
what you're exporting for, but MP four or mp
four with audio, if you have audio like we
just added a soundtrack here, should work just
fine, but you can also go for something
like ProRes video, ProRes video with Audio. And if you want an image
sequence, there you go. Note that ifever you want to render an image sequence
with transparency, you have to make
sure that the canvas is actually set to transparent. So you'd have to go
inside a background and then set it to
full transparency. Okay. So for this profile, I'm just going to go with
ProRes Video plus Audio, and we get all of the
little details over here. We can go inside a format
and change things up. So you can go from
QuickTime MOV, switch from different
formats, if you will. We can also choose the Codec. And we have the
different profiles. So quite a few things that
you can change in here. This is also where you
would go ahead and fine tune if you want a video
with transparency. So once we have
all of that check, we also have the audio
options at the bottom, okay? You can press Okay. And lastly, let's choose our destination. So click on this
little icon here, next the location
or destination. I'll navigate to the folder
where I want to export to, and let's simply rename this. So I'll call this
here, Nextax Logo. Animation vi dot mov press Save. And now we can hit render. You should know that you can
also add extra cues here. So you can cue other
animations to happen. And once you're ready to
render, you hit render, you can also uncheck them if you don't want
them to render. Okay? Just so you know, I have ran into some issues, though, when going
with that method if the scene is not open. So, for example, what I mean
by this, explain it quickly. If I wanted to render out the animation one, let's
say, animation one, and I say the in and out range, and okay, once it's done
rendering the animation two, it would then try to
render the animation one. Almost forgot. Choose a profile. Anyhow, I'll go ahead and uncheck the second one
and let's hit render. The rendering process
kind of looks like what it does when
it's caching or seen. Once our render is finished, inside of the render panel, we have this little play button
next to the destination. And if you click on
it, it should open your render with
your default player. And there we have it. We
have our animation here. Alright, and that's it for
rendering our animation. I'll see you in the next lesson.
15. Class Project - Friction Exercise: Hi there, we meet again. Now that you've
completed the class, it is your turn to make your
own project using friction. I encourage you to share
your work with the class, either to get feedback or
simply to show off your skills. If you have any
questions or doubt, you can express them
in the discussion and I'll get back to you prompt. Now, each one of you is going to have different set of skills, so I recommend going with what feels the most
comfortable for you. Take it step by step so you can gradually get comfortable
using friction. With that said, go ahead and
add some motion graphics.
16. Thank You for Watching! Friction Graphics: Hi there. I see
you've made it to the very end of the class.
Congratulations to you. By now, you should have
a solid understanding of the basics of friction enough for you to jump on your own projects and at some point on client
work as well, if that is what
you're aiming for. If after this class you're interested in learning
more about friction, you can always check out the Noctux Creative
channel where I have lots of tutorials that dive into more aspects of friction. Again, my name is Jonathan. This was an introduction
to Friction Graphics. Thank you for watching and
I'll see you next time. Now, without any further ado, let's get started with friction.
 Nuxttux Creative, Motion Graphic Designer