Transcripts
1. Trailer (Skillshare): Hello. My name is
Kendyll Hillegas, and I'm a full-time commercial
artist, and illustrator. I spend most of my time
making work for magazines, and for packaging using traditional media
like watercolor, colored pencil, and gouache. While, I illustrate
everything from landscapes to animals
to portraits, food illustration is probably
what I am best known for, and I absolutely love that. Because food, and eating are almost near-universal aspects
of the human experience. As such, food is like this
really rich, meaningful, symbolic through-line
to emotion, and stories across families, and communities, and
even across cultures. Try picturing any one
of your favorite foods. Try picturing it right now. [LAUGHTER] Imagine it right now. Chances are when you
do that it brings to mind lots of specific memories, and meaning, and associations. Some of those might
be uniquely personal, like if you're
picturing some kind of very particular coconut cake that your grandma always
makes for birthdays. Some are way more universal, like s'mores or ice
cream cones or bread. Regardless, food as a subject has incredible
symbolic potential, whether it's for
a small audience or a very wide audience. You can communicate
so many ideas, feelings, and stories
through the lens of food. In this class, we're going to unpack a process for
doing just that. For creating a food
illustration that communicates a specific emotion or
tells a specific story. We'll cover the basics
like materials, and media. Then we'll also take a deep
dive into food imagery, and feelings, and
how you can use food illustrations
to tell stories. While, I will be working
in my usual style, which is fairly
realistic as you can tell by some of the
examples that I've shown. You really don't have to
take that same approach. The theme of this class, food and feelings, can be translated into any stylistic
approach or medium. If you do want to
follow along though, and work in a
similar style as me, and something closer to realism, you'll probably want
to have some basic familiarity with
drawing as we're really not going
to get into things like proportions or perspective. This class is for
anybody who likes food, and want to you
explore food in art as a symbolic lens
for telling stories, communicating emotions, and
connecting with others. I cannot wait to see you
in the class [MUSIC]
2. Connecting to Feelings with Food Imagery (Part 1): Welcome to the class. Before we get into the specific, some general groundwork, I wanted to go over a
few materials, things. I will be working on Fabriano
Artistico cold press paper with a combination of
watercolor and colored pencil. As I mentioned in the intro, I will be working in realism, but you really can do any stylized approach and work in any medium
that you want to, whatever you're familiar
with, comfortable with. In fact, some of my
favorite artists and illustrators who use food a lot in their work are not
really realistic at all. Two that come to mind are Elizabeth Graeber
and Maira Kalman. I'll put a few examples of
their work up on the screen. But as you can see,
they really stylized food pretty heavily
and I feel like they are some of the
most skilled at using food to communicate
a story or to communicate an emotional idea. You really don't have to do this in the form of realism
if you don't want to. Feel free to approach it from
any style with any media, and we will be talking about all the ways in which the image that you choose to paint can
communicate those feelings, can communicate those emotions, and then the actual style and approach that you use can
communicate feelings too. Definitely keep that in mind. All that being said, if you
do want to follow along with me and work in your own
version of a realistic style, all the materials
that I use will be listed in the class description. Check that out if you
want to see what I'm using and you want
to follow along, otherwise, just use whatever media and method you prefer. Now we're going to talk a
little bit about selecting your subject and how to decide the content
of your painting. Now, maybe you already
have a specific food that you want to paint in mind, or maybe you have
no clue and you're completely open-ended
at this point. Either way, we're
going to review a bunch of different examples and unpack the things
that you need to consider when you're
choosing your subject, or even if you already
have a subject in mind, thanks to consider
in how you depict that subject and how
you show that subject. The three basic considerations
are the purpose, what the illustration
or painting is for? The audience, who the
illustration or painting is for, and those two are connected,
and then the content. The emotion, idea, or story that you
want to convey, the meaning that you're trying to get across
in your work. For purpose and audience though, what and who this
painting is for? Some examples, like if it's
for a commercial project, it might be used to accompany
a recipe in a magazine, or maybe to make some food packaging look more
appealing, more appetizing. On the other hand, if it's for a self-initiated project
and non-commercial project, maybe it's a gift or a personal
reflection of some kind, it's also totally fine
if the purpose of making this piece is your
own enjoyment in making it, it doesn't have to be for
anybody but yourself. Regardless, take a minute to
think about this question, the who and the why, and we'll also come
back specifically later on to the
audience question with a little bit more in-depth insight after we
talk about content, and emotions, and ideas. What emotion do you want
to convey with this piece? What story do you want to tell? Whether it's sentimentality, or nostalgia, or deliciousness, or an emotional throughline
to some specific event, these can all be conveyed with the actual food that you choose, or by the way that you choose
to show it, or by both. We're going to dive into
some specific examples, I'm going to show a bunch
of different food photos. These have mostly all
been taken either by myself or have been pulled from public domain image sites. I think there may be
one or two that were from like a Wikipedia page, but there are a lot of them here and we're going
to go over all of these different
feelings and talk about how they can come across
in these food images, and then we'll make
the jump to talking about how to actually
do the illustration. Let's dive into it. Just a
little heads up that you all might see me looking down
at my computer here, I have all of my
visual examples, all my photo references in
a little slide deck here. I'm going to be
looking down at those and then you'll have them
on the screen as well. If you do really see me
looking down that's why. The first emotion story idea that I want to dive into is the most straightforward
and in fact, that's what I'm calling
it, the straightforward or direct perspective. As you can see, some of these images
are very simple. The food is just there, it's in a little
bit more of like a head-on direct perspective, sometimes an overhead
perspective. It's fairly simple, there's not really a lot
going on besides the food, and you probably have seen a lot of these types of
illustrations out there. I myself have produced many of these types
of illustrations. At one level, I think you could be looking
at this and almost say it's not really that emotional or it doesn't
really communicate a feeling, but I think it actually
does communicate a feeling, and especially with things with subjects like food that
we're used to seeing day in, day out, they're
almost ordinary, not almost, they
literally are ordinary. Seeing them in a
context like this where it just isolated, there's not anything
else going on around it. Especially if it's in this
more like direct perspective, it can give you a sense of
almost all about the food. It can put you into a different perspective
as the viewer, it can force you into more
of an appreciation and a stance of appreciation
where you're looking at the food and you're seeing
it in this way that you don't typically see it. Maybe it's not
something that you often take the time to step back and really appreciate or feel grateful for or
notice the beauty in. I think a lot of us in
the social media age have become pretty
comfortable and familiar with looking at a
beautifully plated piece of food or meal, and taking a moment to say, "Oh, wow, that looks so
cool, that's gorgeous." But how often do you really just look at a banana or
looking at the head of cauliflower and feel that sense of awe and appreciation
for what it is, and whether it's the beauty, or the pattern, or the fact that it can
nourish you or whatever it is. That sense of awe and
appreciation for this food that is brought on by seeing it in this larger-than-life
context. That is especially
true if you do it in a larger-than-life way. It can be really powerful
if you take something like a blueberry that's super tiny and we usually aren't examining it really
closely at something. It'll be tossed into
the cereal bowl or into the blender or into our
mouth, whatever it is, but if you see that
blueberry in a much larger than life size, it forces you to
think about it in a different way and to appreciate
it in a different way. The next emotion, I don't know if this actually
qualifies as an emotion, but it's a feeling response in the viewer and that
is deliciousness. It's a feeling that
you can evoke, a response that you can
evoke in the viewer, whether it's yourself
as the artist who is doing the appreciation and feeling that delicious feeling, thinking that something
is delicious or the person who's looking
at your finished work. There are a couple of key characteristics to keep in mind, needs to be taken
with a grain of salt because some of this
is going to be subjective. We don't all think of
the same things as delicious and I'm coming from the perspective of a
commercial illustrator. Somebody who does a lot of work to be very frank
helps sell things. A large part of my job in commercial
illustration is making food look delicious because nobody will want
to buy the food, or make the recipe, or try whatever approach it is that's being
explained in a magazine. Nobody's going to
want to do that unless the food
actually looks good. The food has to look appetizing
or delicious in some way. There are a number
of key factors, one can be the perspective
that you show it in. Whether it's the
perspective that indicates that you are
the person that puts you in the position of the person who is
about to do the eating, the person who's
about to experience the deliciousness in this
cake image, for example, like there's this
bite that's just been taken out and you can almost just feel
that you're going to take that bite of
chocolate cake. Showing a bite taken out of something that can
really indicate, "Oh, this is appetizing. This is something that's in
the process of being eaten." Something that I personally think makes something
look really delicious and does tend to get used quite a bit in commercial
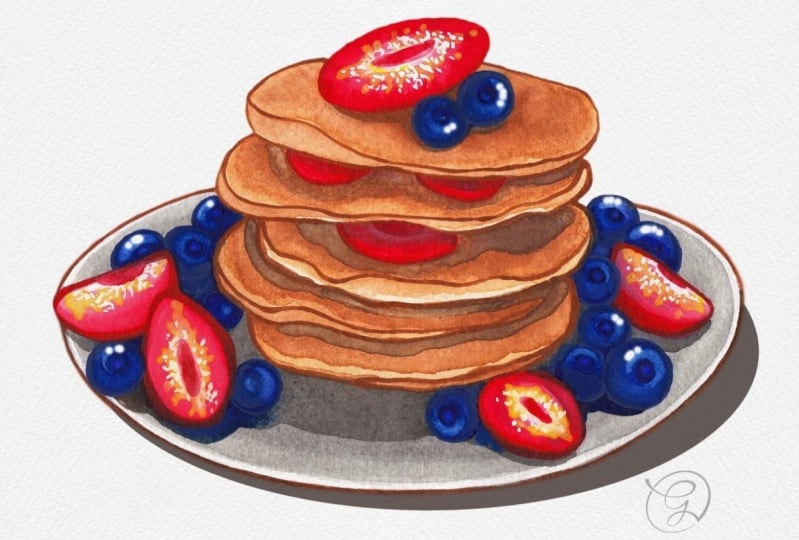
illustration as well, is a sauce being poured onto it, something that looks like
it has just been poured on, like the syrup or honey that's just been put
on the pancakes, that makes it look ready to eat, it also makes it look like
it has just been prepared because we all know that
with drippy syrupy things, they don't stay
on for very long. So it makes it feel
fresh in a way. Freshness is another element
of deliciousness as well. Looking at some of
these things that are the polar opposite of what
we've just been looking at, just I'm looking at
these really sticky, sugary, appetizing things. Something being really
fresh and really green, looking like it's at its peak
in terms of ripeness and yumminess that can add deliciousness to the
illustration as well. Anything that makes it seem
crisp, fresh, colorful, probably higher
levels of saturation if you're doing something
like fruits or vegetables.
3. Connecting to Feelings with Food Imagery (Part 2): Sometimes wetness or juiciness, so like in this
grapefruit image here, or even in this
grapefruit cocktail, or I guess that's
blood orange cocktail, seeing some of the condensation on the outside of
the cocktail glass, seeing some of the juiciness inside the blood orange slice, the light catching on the ice cubes in the
grapefruit here, seeing all of those
little segments within each supremum, I think that's what
they're called, within each piece of the grapefruit. Seeing all those
little individual segments catching the light, which really
communicates the fact that wow this has
just been cut open, this is really juicy,
this is delicious. You want to have that
freshness, it's just been done, it's at its peak, those cues that indicate
that it's about to be eaten or in process
of being eaten, those are all really
good ways to send the viewer a signal that
the emotion or the feeling that you're trying
to communicate is this appetizing feeling of the food being really delicious. Next up, this is more of like
a straightforward feeling, this is definitely an emotion
and that is nostalgia. Food is fantastic for
communicating nostalgia, because so many of us
have memories that are, as we're talking
about in the intro, memories that are really closely strongly tied and associated
with specific foods, especially foods that came
from childhood or maybe specific events or things that would happen
over and over again, like certain holidays or maybe weekly rituals with a
family member, or a friend. Nostalgia can be very effectively
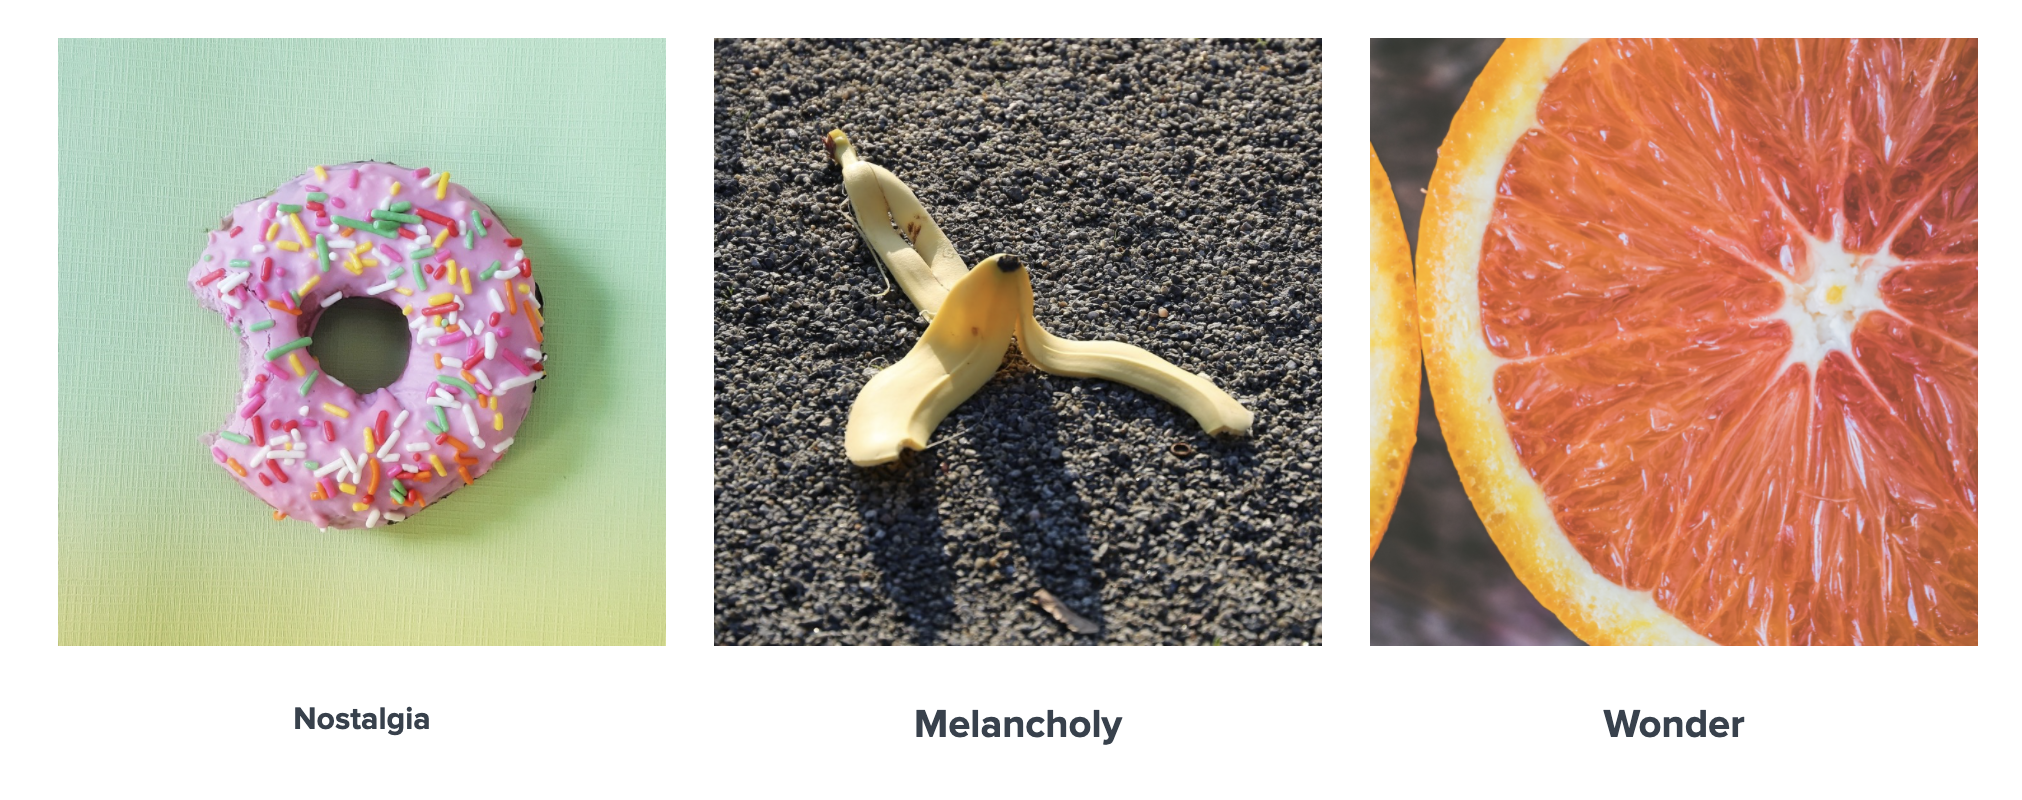
communicated with food. Not surprisingly, most often, what I find in nostalgic
foods that will have more of a universal nostalgia are some of these foods that
so many of us like, like donuts or ice cream, even things like watermelon, something it's like
really strongly associated with a
particular time of year, we often will eat watermelon or tomatoes
in the summertime. Other foods like maybe
specific candies or baked goods that go
around holiday times, ice cream, I think I already
mentioned ice cream, but these foods that a lot of people like
that were probably a part of a lot of people's
childhood and they can communicate nostalgia
really in unique ways. I might see an ice cream cone and it's going to remind
me of my brother and sister and I cutting
through the woods to get to this ice cream shop
that was close to our house, but you might see that
ice cream cone and remember how on Thursdays your grandma would pick
you up from school and take you to get an ice
cream cone, whatever it is. It's powerful in that way
because it can really connect to these
specific memories that individuals have, but it's a universal symbol. An ice cream cone is something
that we're all going to read our own
meaning onto that. Or it could be something
that's much more specific, like a very particular
brand of hot sauce that you and your best friend
always really liked to get whenever you went out to get Vietnamese food, like that was the hot sauce
that you always used. Of course, there will be other people that relate to that, but the more specific the food, probably the smaller
the audience, but by the same token, the broader it is, the broader emotional
appeal it will have, the more people will
feel that nostalgia, but the more specific
it is when it does connect with that
right audience who also has that feeling, who has that association, it will be an even
more powerful one. That's nostalgia.
Actually one other note to consider on nostalgia here, you want to be
careful when you're picking nostalgic subjects like this one for example,
these rocket pops, this is one that a lot of
probably American kids had, especially American kids who
grew up in the 90s like me, who will have some association with these because this was something that a lot of us ate, and it's really that like
summertime out of school, maybe you got it from
the ice cream truck or maybe you got it from the big box that
your friend's mom got from Costco or wherever. A lot of us will have
an association with these so there's the subject itself that brings
up that association, but then there is the
way that it's shown. This one is an
interesting composition here with the
different popsicles, but it's very sanitized and the color even is a little
bit on the cooler side, it feels a little bit less bright and vivid than some of these other
colors that we've seen. Keeping that in mind, especially if you're
aiming for nostalgia, nostalgia for a lot
of people can be like a rose glasses type situation, where you're looking
back and remembering the feelings in a
warm light almost. If you are picturing a subject that is
really nostalgic in a lighting or setting
that's not as nostalgic that's like more sanitized
and cooler like this, there'll be an element
of dissonance, and that doesn't mean
that that's a bad thing, just be aware that every choice that you
make in your piece it impacts what you're communicating in terms
of the story you're telling or the feeling that you're eliciting
in the viewer. Next emotion we're
going to talk about is wistfulness or sadness, longing, something that fits in that
family there and you might not immediately think that food is a great way to
communicate that emotion, a lot of us associate
it with happy feelings, but it can be a really great way to communicate some of those
emotions and feelings. Take for example,
this ice cream cone that has been knocked
over upside down. Maybe this never
happened to you, but I feel like as a child it happened
several times to me, you get the ice cream cone, you've been so
excited to have it and then right as
you get it boom, it falls over and lands
face down on the ground. To me, seeing this image is
an immediate connection point to that experience and to that feeling of like
excitement and yes, finally got it and then oh, no, it didn't go the way
that I hoped for. If you're wanting
to tap into that, you can pick something
very specific like this ice cream cone that will have that association
for a lot of people. Other ways that I
have found to create that wistful feeling
or a little bit sad, melancholy type
feeling is food that is it just looks a
little bit out of place, a little bit different
than it should, whether it's the
ice cream cone on the ground or something
that is spilled. This banana peel left on the
sidewalk like this all by itself out in this evening light that has a very melancholy, wistful feel to me. Another really good one is the last bit of food on a plate, so like the last piece of cake, the last cookie, maybe it's like a single partially eaten
cookie on a plate, a spilled drink of some kind. These images are going to
evoke those feelings of like, oh, this isn't quite right, or like something has
been interrupted here, something was going one way and now it's
gone another way. knew the isolated piece
of cake on the plate, I think some of that, yes, the piece of cake might
look still perfectly fine, but it just feels a
little bit sad seeing that lonely piece of
cake as opposed to like a whole cake or a
cake that has one piece, one slice taken out of it, or even a single
slice of cake that's on a plate with a
fork that's ready to eat as opposed to like
this one cookie in this harsh lighting that has bites taken out and
has been left there. Again, since we're
talking about feelings, this is all going to
have quite a lot of subjectivity in this
and some of this, maybe it doesn't
bring up some of those same feelings for you, but you could think about these as some broad entry points and ways of accessing those
emotions if that is something that you want to
communicate in your piece. Next one is disgust. Now, I'll be very honest here, this is not one that I
spent a lot of time working on because as a
commercial illustrator, my job is to help
avoid this feeling. We want to make the
feeling of anticipation and delights and something looking delicious and you
really want to eat it. You want to avoid the
feeling of disgust, but there are some really interesting food painters
and food artists, especially people who work maybe more in the fine art space, who do create artwork that's based off of food that
has an element of disgust. This is probably not
going to be very surprising here,
what this includes, but food that is spoiled
or rotting or molding, food that is just passed
it's peak that you would not want to eat that
when you're looking at it, it makes you feel a
little bit of like a oh, gross, I don't want that. There are a lot of
reasons that could be behind wanting to
include this in a piece, but historically, food art was much
more a part of like the still life genre
and so artists would use food and particularly
food that was passed its peak or flowers would also fit into
this category as well. Flowers that were fading, they were used to communicate
the idea of mortality, that we all are going
to die at some point, boy a curveball or a low key
food illustration class. But yes, if you are wanting to reach into some of
those deeper emotions, think about some of those
darker feelings disgust and using food that
has spoiled or is past date or doesn't look
appetizing can be a really great entry point and a way to communicate some of those
feelings and emotions.
4. Storytelling in Food Illustration: Now I want to chat a little bit specifically about how you can increase the
storytelling element in your piece, in your artwork. We have already been
touching on all of this, throughout everything
we've been talking about here with all these
different emotions, that adds a narrative element, even if you're just
doing this giant, 12-inch blueberry,
that does still have, it communicates a feeling. It's a very short
story that it tells, but it does communicate
that feeling of awe, and appreciation, and
wonder for this thing that you don't usually
look at in that context. It is telling a story. A very, very short little story, it's eliciting this feeling. But if you want to add a
deeper element of narrative, you really do have to start
considering including other components or including the food in a different setting, in a different context than
just the food on its own. For example, if we're
looking just at this apple, we saw this image earlier
when we were talking about that emotion of awe, and you wonder when you're looking at food out of
its normal context. This could be a beautiful apple and it would communicate
that feeling, but if you compare it
to this next image, which is two apples
being held by two hands, each with a bite taken out, and you can see
grass in the ground, some other apples
scattered on the ground. If you compare those two images, which one tells more of a story? Definitely the second one. The one where they're in an orchard, they're
eating apples, like there's much more
narrative content in that than there
is in the first one. Another example would be
an apple being cut up. Looking at this now, I
think this is probably a pair being cut up. This is one of these images I found on a public domain site. A pair or an apple being
caught up to go into a pie. Here, this one's an apple. This tells more of a story than just a
single apple as well. When I say telling a story, I don't necessarily mean a
super, super long narrative. If you're going to tell
a really long narrative, you probably need
multiple images or something that is a really, really big painting
which you can do. I would be totally excited to see somebody
tackle that for this class. But even just a little window where there is some
action happening. It's not just the food, an apple sitting there. It does evoke the feeling
that we've talked about, but an apple with a bite taken out. That's a little bit more. An apple with a bite taken
out in somebody's hand, even a little bit more. An apple cut up,
that's something. An apple that's in the
process of being cut up on a cutting board
with someone's hands, that's even more
narratively rich. This specific example, we're not going to
do this with every one of the food examples, but just to get you thinking
about how to tell a story, if there's a particular story
that you want to tell with the food in addition to the emotion that
you want to convey, and pulling those two things
together can be really, really powerful if
you're considering both the specific
emotion that you want to tap into and the story
that you want to tell. That's just something to
keep in mind as you're planning your concept and
choosing your reference image. Just a few more examples
really quick of some images that show the food more in a context which then communicates a story rather than just the food on its own. This one right here, we see these jam jars, and an overhead view of one of these jam jars could
be pretty cool. But the fact that we're
seeing this jam jar with the lid on and there's this bowl of rhubarb
over on the side, that tells a little bit more
of the story of this is just jam that has
just been made as opposed to if we see the jam from a
different perspective, maybe just a direct
perspective where the jars right there, we're
looking at the side of it, that has less narrative value, less story is being
communicated. Similar here we have the donuts in the box and
there is some story here because the donuts are in a
box and the hands are pushing the box forward so we
can see that content, we can see that story of
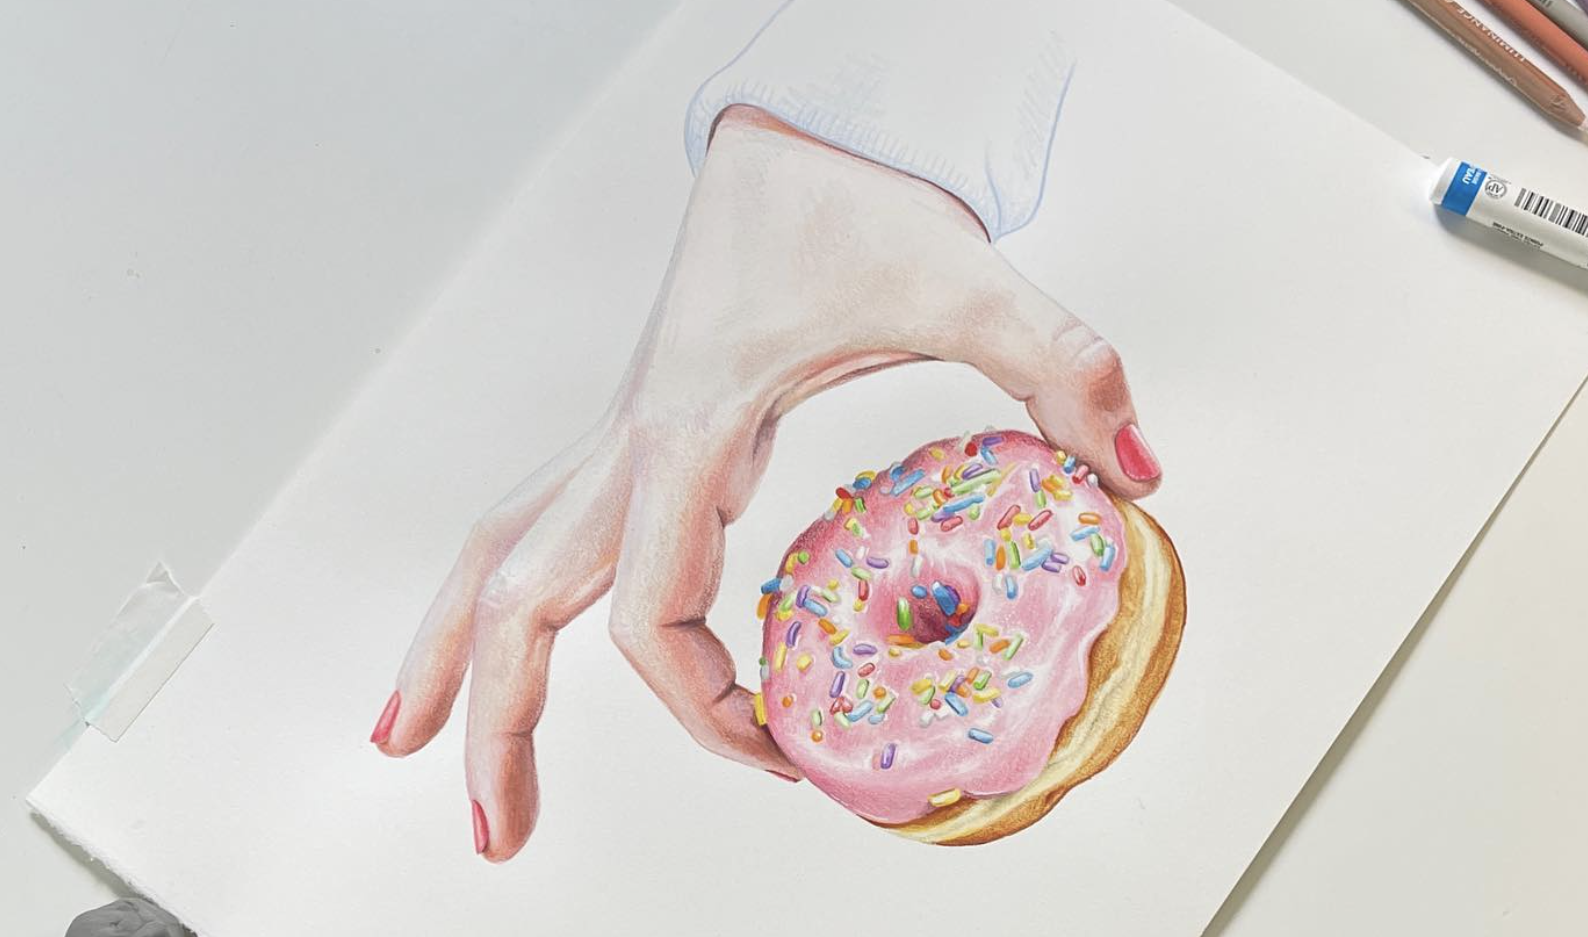
the donuts being presented. But then we had
this other image of the donut that is being picked up and it's
about to be eaten, and we can see
that the person is holding it in this
very particular way, trying not to get mess up the icing or get the
stickiness on their fingers. You can almost just
feel the anticipation of being about to take
a bite of that donut. To me, this one has a little bit more rich narrative content. Here's another great example. This coffee that's in the
process of being poured, I've done several latte
paintings where I'm capturing that really beautiful
swirl artwork that happens on the top of a latte if it's made by
really skilled Barista. But this one tells
even more of a story because we see the cup is being cradled in
this person's hand, the pitchers in the
process of pouring, you really get a
sense for how this is something that is
crafted by somebody. There's much more
narrative content here, much more storytelling
here. Last one here. Just so you don't
get the idea that it has to include
somebody's hands. Hands are a great way to give a narrative
component to a painting, but it can also just
be the setting. If we saw just a bowl of oranges or bowl of citrus
sitting on the counter, that would be one thing and it could be a
beautiful painting, and depending on the
specific associations that you have with
citrus fruits. But seeing this
here where we have this reusable grocery bag, it's casually tossed
on the countertop, the fruit is tumbling out of it. This to me taps into
a sense of like, okay, somebody who's just
come back from the store. These are fresh, they've just
been gotten from the store. Again, there's just more
narrative content there. Paying attention
to those things, being aware of the
way in which they impact your final piece, and whatever it is you're trying to communicate
with that piece. Now, one last note on audience and being
specific to an audience. We talked already about the
importance of audience in the beginning when we were
talking about the what it is, the purpose of the piece, and then the who it's for. But just keeping in mind when you are aiming something
at an audience, I think I already
touched on this as well when we were in talking
about nostalgia. If you have something that's more focused on a
narrow audience, it's probably going to elicit, or it may elicit a stronger
emotion than something that is aimed at a wider audience
that everybody can say like, "Oh, yeah, I get that." The example I have here is something that's
very specific to me. [LAUGHTER] Maybe there'll be a few of you out there
that get this, maybe not, but I think the
example will still work. Here we have this very
specific ice cream picture of these scoops of ice
cream that look different. They look like these
little cylinders. I'm from Southern California
originally, and there, the place that we
would always get ice cream was this
place called Thrifty, which is just basically a grocery store
slash drug store, and they had an ice cream
counter and they had this very specific kind
of ice cream scoops. This image, I could see a painting of this ice
cream cone anywhere, and immediately I would think Thrifty's, like California. Being in San Diego going in and getting an
ice cream cone like that will bring up all of
those associations for me. I'll remember the specific flavor that I would always get, which was malted milk ball, [LAUGHTER] grosses me out now, but that was my
favorite at the time. As opposed to
something like this, which is a much more
generic picture of an ice cream cone, if you take the
Thrifty's approach, if you do something that is really specific
to your audience, you're going to have
that closer connection, that tighter connection because those people are like, "Oh, wow, that's a weird thing
that I experienced." Maybe some people in my
community experienced, but not everybody else gets that as opposed to the more
generic ice cream picture, which will still
bring up feelings for me because I actually
like ice cream a lot, [LAUGHTER] and had it in a lot of different
settings growing up. This will still tap
into some of that, but it's not going
to be as powerful of a connection as
the Thrifty's one. I'm not giving a specific
right or wrong answer there, saying you should make it really broad or you should make
it really specific. I'm just saying to keep in mind that difference
when you're making your choices, and to decide, do you want to aim
for something that is really specific
that's maybe going to hit that note a little closer to home for a few people, or do you want to aim for
something that's broader, that's almost like this canvas that a lot of different
people can read their meanings onto but may not have quite as deep of an impact. Just keep that in
mind that audience differential when you are working on developing
your concept here.
5. What Makes a Good Reference Image (Part 1): Now that we have unpacked quite
a bit in terms of what to consider when you're deciding on your concept when you're
developing your concept, I want to take a minute
to talk about references. A reference is
something that you look at to work from
and base your artwork off of and whatever
style you're going to work from if you're
going to work in a more realistic style like me, or if you're going to be
really stylized or maybe even more of icons like
flat stylization, there's just a whole spectrum, so many different ways
to approach this. Whatever approach you're
using you probably are going to want to include
references at some level. I have talked about this at great length in different
YouTube videos. I think I probably
have already talked about it in other
classes as well, so if you have
taken a class with me you will already
know that I am just highly in favor
of using references, whether you're looking
at an image or an actual thing in real life and that is because we
all have this tendency, human brains have this tendency
to simplify things and flatten them and when we
put them in our memory. You may think to
yourself, okay, yeah, I'm going to do ice
cream, I totally know what an ice cream
cone looks like. Why do I need to look it up? Especially if you're going to do more of a stylized approach. But one of my friends, another Illustrator who has more
of a stylized approach, I was really just
reminded recently of how impactful and
how important it is to have references because we're in a group
together and she was talking about how she had really enjoyed this one
drawing that she had done, really enjoyed the
process of it but then this other one she just
didn't like it at all, she didn't like the process, she didn't like how it turned out and then when
we dug into it, she realized this is because I used a reference for this one that I loved doing and I loved
how it turned down. I love the process and I didn't use a reference for
this other one. While they were both in her
style and they were both stylized and it was really pretty clear and pretty
astounding at a certain level, like how these
subtle differences between the two of them, one where she had these
just little tiny nuances in details that even though
it was hyper-stylized, they cued you in onto
the fact that they made it look more believable,
real isn't the right word, but they made it look more believable and those
little details, those are the things
that tend to get lost if you're not looking
at reference at all. Of course, the caveat, nothing is ever universal. There are of course people
who make artwork without constantly looking at
references but they are by far the minority, most people you know, most as you know are using
references in some way. If there are realistic artist they're using them
pretty heavily because you need that information to make something
look realistic. You can't just pull
it out of nowhere, if they're stylized artist, an artist who has some
level of stylization they may be a little bit
looser with the references, but they're still
looking at them. There's my soapbox,
I will get down now, but I strongly believe that
you should use references, and now we're going to
talk about what makes for good reference images and how
to spot those three things. There are three characteristics that we're going to talk about that I find make for a
really good reference image. Number 1 is that the image, the subject is
immediately recognizable. This is probably the most
subjective of the three although I guess these
are all somewhat subjective at a certain level. Let's take this
image right here. This is a piece of pie and maybe you couldn't tell that
by looking at it. It's actually a pie that I made that I was very proud of, the crust was sturdy enough
that the pie stood up on its own so I wanted to take a picture and
I thought like, oh, this would be maybe a
cool angle to show pie at and I had shown pumpkin pie at this angle before and
it worked really well. I grabbed this reference image, but I never have ended up
using it because looking at it it's just not clear right
away. Like what is that? I can tell it's something, but it doesn't immediately
cue in for me. Yes, this is a piece of pie
compared to something else. This is another pie, the one on the left is
another pie I made that also had a
very sturdy crust and I was also proud of it. But that is much more
immediately recognizable, I was like oh yeah that's a pie or even this one on the
right which I did not take that is also very clearly a piece of pie we can immediately see what it is. Another example would
be this here which is a pastry and if we
were to look at that, it's clear that it's
probably some pastry but it's not really
clear what it is. It's going to be a little
bit more of a barrier for the viewer as opposed to something like this where
it's just so clear, there's a chocolate croissant. Ice cream, a few
examples of ice cream. This is a really pretty
picture I think, a really interesting
picture but just on its own this one, or this one, or even this one, these are all a little bit more abstracted in a way like
it's not going to be, well the first and
the third are. Because of the perspectives
that they're in, it's not immediately
clear what that is and then even the
second one that has all that stuff on it that's
going to be hard to make that look like an appealing
ice cream cone because it has all
this dust on it. You just have a lot
more work to do in making that as something real, as something
recognizable right away. Just compared to an
image like this where it's like very clearly
the two ice cream scoops, we can see the cone,
we can see the things that cue us in to
that being ice cream. This one as well it's
a more unique cone but it's still very obviously
ice cream and of course if you wanted to
include the hand there'll be an even bigger clue that yes
this is an ice cream cone. Just keeping in mind that
element of recognizability, [LAUGHTER] how immediately
recognizable the subject is when you are deciding whether or not
you want to paint it. This is probably a mistake I see a lot of newer food illustrators make all the time is picking something that they
like the picture, they like the reference, but they're not
actually thinking about how well that's going to communicate once it's
in a finished piece. The next thing to
consider is whether the food is more realistic
or stylized already, so any image that you make there's the actual food itself and then the photo is one step removed and then
the illustration is one more step removed
than that and then if you're doing a really
stylized illustration that's one more step
removed beyond that. Especially considering
that fact that you're already having this
removal from reality, this is subjective but I find that it's much
better to choose foods that are realistic
and not hyper-stylized. We have this cake here. This is a beautiful cake. Obviously, the person
who made this is an extremely skilled
cake maker and I see newer food illustrators trying to draw this food all
the time because it is like, wow, that's so gorgeous,
it's really impressive. You have this feeling
that you want to spend the time appreciating it
by making a drawing on it. But when you have a drawing of food that doesn't
really look like food, it doesn't communicate as well. Something like this,
in my opinion, this cake here we can see the rough texture
of the cake, the icing, the frosting
in-between the layers, the fruit that's on top, this would be much
more effective at communicating the idea of cake and some of the feelings
that go along with it. This is another one,
another less perfect cake. We've got the birthday candles on it which are of course like a really good clue into the fact that this is not just any
cake, this is a birthday cake. The icing has a lot
of imperfections in it that I find some of the
most interesting things to look at and then circling back to some
of the notes that we had before of the
different feelings that we would want to evoke, that desire to eat it. The appetizingness,
the deliciousness that is going to be lessened
if it looks like food. If you're painting
something like this cake here that is just so perfect it almost looks like
it's made out of glass, or plastic, or something, that's not going to cue in, they are like, with that
brings up at least for me, is more like wow, that's
impressive, that's amazing. Look at that. That's gorgeous. But I'm now like, wow, I can't wait to eat that. If what you're aiming for is wanting somebody to think
that it's delicious, keeping in mind that
if it doesn't look as much like food it's not
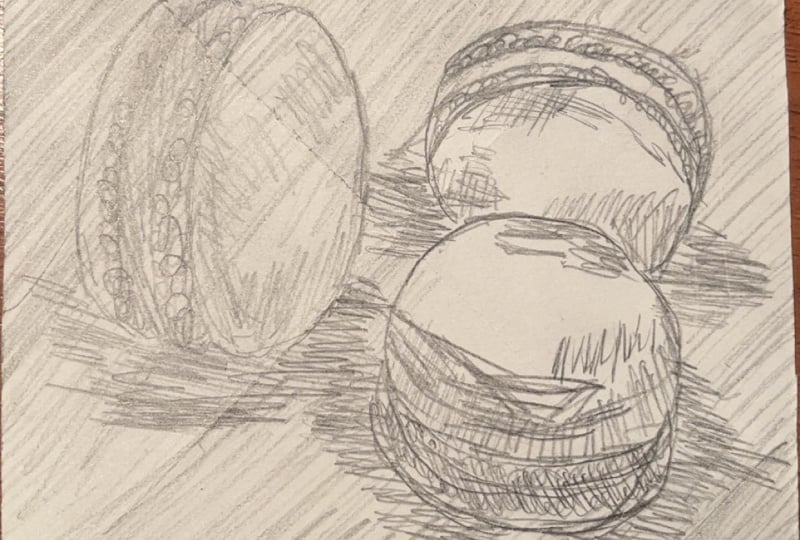
going to look as delicious, is going to be really helpful. Just another quick
example here of the stylized versus the
more realistic. These holiday cookies,
these are gorgeous, these are just
absolutely beautiful, the icing is almost perfect. These would be a fun thing to draw but both because of the
perspective that you're at, the direct overhead, and the fact that they have
this perfect stylized look, it's going to be harder to cue people into the
fact that it's food. They'll be quite
likely to think it's just a little icons or
maybe it's ornaments or some decoration or
something that you're drawing compared
to something like this where the icing isn't totally perfect
but I think isn't done. We can see hands are involved. Either one of these images would tell more of a story
and would probably convey more feelings
related to the cookies as opposed to just the super perfect finished
cookies themselves.
6. What Makes a Good Reference Image (Part 2): All right, last quality. This one I think probably the least
subjective of the three. This is the most
important if you are wanting to do really
realistic work, and that is to work from a reference image
that's all in focus. We have an image like this. Well, either one of these
first two actually, these two donut images, where they're great images, the images are just fine, but there are lots of places in the image where
there isn't much in focus. These are images that I took quite a while ago when I
very first had a DSLR, and I was trying to
take reference images, and I learned this
lesson the hard way that taking these
reference images with the DSLR with a
wide-open aperture and having quite a lot out
of focus is just not ideal. Nowadays, I take reference
images mostly with my phone. So yeah, just comparing
something like this where quite a
lot of it is out of focus to something like
this where the whole thing, it's an equally nice photo, probably a nicer
photo in many ways, but the whole thing is in focus. We can see it all
really clearly. That's just important
for the amount of information that
you are going to be able to extract
from the reference. Those are the three
major things you want to consider when you're choosing your
reference image, and of course, all of those other things
that we talked about, just a couple more
considerations here and then we'll wrap up. These ones aren't
the major ones, but just good things
to keep in mind. The reference image that you choose does not
have to be pretty. Circling back to
this image again, this donut stack here. This is a nice enough photo. This is a pretty photo compared to this
one if the peach, I think we've seen both
of these earlier on. This photo, it's got
all this crazy stuff going on in the background. It's not like a nice
photo on its own. This photo of the donut stack is a much nicer photo on its own, but the peach has way
more helpful information, and especially if you're
just doing the peach, if you're going to put it
on a white background or a coloreds background
and you don't have all this other stuff going on, the peach is an uglier photo, but it's much more helpful in terms of the amount
of information that we can get from it versus the donut stack where so
much of it is out of focus, even though it is a
nicer looking photo. Then, of course,
those things like the angle that you
choose to show it from, where do you want to
do something that's direct overhead like this or off to the
side like this, keeping in mind that that is going to impact
some of what you're able to communicate in terms of the feelings
and emotions, the angle, the perspective that you choose to
show this piece from is going to tell the
viewer what to focus on. That's going to impact the feeling that
you're communicating. On the same note, the lighting. Having something like
this, this popsicle where it's out in
broad sunlight, you can see that the popsicles almost
sweating a little bit. You can just almost feel
the heat in this image, there's a bite taken
out of it as well. It just feels there's action, there's heat, this is being
eaten on a summer's day. That's just all
immediately communicated, versus this next one
where the lighting is really stylized,
it's moodier, it's more romantic in some ways, the popsicle is whole
and not bitten into, there is some
condensation on it, but it's much more
controlled and stylized. Again, neither one of these is right or wrong, or
better or worse. Just keeping these things
in mind, the lighting, the angle that you
choose to show it from, and the fact that you don't need to have the most perfect, gorgeous photo, like this photo here is a gorgeous photo, but you can work from a photo that's less perfect on its own. That's part of the
magical things about making a painting, making an illustration,
is that it doesn't have to be from
this amazing photo. Probably, I don't know
the exact percentage, but by far and away, the majority of the
photos that I worked from are not great photos. They're not photos that you would want to
print out and put on your wall that you'd
want to have as a piece of work on their own. They're just photos that are helpful for the
information that they have. Last note on the
references before we dive in to the actual demo and get started on the
drawing and painting, and that is whether you
should work from life or not. Working from life is great, and If you can, it's a wonderful exercise, especially if you're
just learning, especially if you wanted
to do realistic work. Working from life is wonderful. However, there are a
lot of limitations when you're working
from life with food. You could pretty
easily do something like an apple that's
going to be okay. Sitting out on the counter
for quite a while, or even a few days on end if you're not able to do this
piece all in one sitting. But something like
an ice cream cone or even something like a
piece of cake or a donut, they're going to change
significantly within, if not within a few hours, ice cream cone will change significantly within
a few minutes. But even something
like a piece of cake, if you can't fit that
all in one sitting, that cake is going to look
a little bit different. The next day, it's going
to be dried out more, the icing may have changed shape depending on
the temperature in your room. These are all things that
you have to consider. If you know that it's going to take you
more than one sitting, if you know that this isn't going to be something
you're going to be able to just sit down and do, if you know you're going
to be working from a subject that will
change with time, it will probably be preferable
to take a photo yourself. If you are going to be
taking the photos yourself, of course, the considerations
that go along with that. You really don't have
to have a fancy camera. As I said, I just
use my smartphone, but you do need to have
some decent lighting. So putting it in,
you always want in, well, I shouldn't say always, but generally, indirect
lighting is good. If you choose to put
it in direct light, you'll get a certain feel, you'll get a certain vibe
from that like you've seen in some of these
different images like that popsicle image that we just looked
at one of them was in pretty much direct
sunlight and that has a very specific feel to it. Generally, if I'm
taking reference, I try to have it
like mirror window, but the light isn't
directly on it, so I'd like to do it
in the morning or in the later afternoon,
and then, of course, goes without saying you
have to actually be able to get your hands
on the food itself. I can imagine a situation
like if I was trying to do a painting of
Thrifty's ice cream cone. I'd have to wait till the next time I take
a trip to California, take the reference myself,
or I'd have to look at some different
references from online. If you are going to source a
reference image from online, you want to keep in mind other people's intellectual
property rights and not infringing on those.
That is super important. If you decide you do need to source reference
images from online, you want to try looking first, this is always what I do, try looking first at public
domain image sites. Something like Pexels, or Pixabay, MorgueFile,
there's a lot of them. Making sure that it's
not just royalty-free. Royalty-free just means that you don't
have to pay royalties. It doesn't mean
that you don't have to pay the artists to use it, you want public domain. Look for public
domain image sites and start your image
searches there. If you are just going to do
an image search on Google, just keep in mind that
every image that comes up could have a varying
degree of usability. Some of those are
going to be licensed, some of them are going
to be copywritten, some of them are going
to be public domain. If you're on Google Images, there's not like a
super easy way to tell. You can sort the images by the license that
they're under. But even so, that's a little bit [inaudible]
it's not as easy to do. I really just recommend
going to one of those sites I just named Pexels, Pixabay, or MorgueFile,
and searching there. Or if you are going to do
something from Google images or from Instagram or wherever, don't rely only on
that one image, look at several
different images and probably my favorite
thing to do is to find a public domain image
that is maybe not ideal, and it has some gaps in terms of the information
that I would need from it. But find a public
domain image that I can rely on mostly for like
50 or 60 percent of the image and then supplement it for little tiny things
from other images like a specific color or the way
that the lighting looks and the shadows on the inside of the pastry or whatever it is. But if you're not going
to go solely with a public domain image or solely with an image
that you took yourself, then making sure that
you're drawing from lots of different references
so that you're not infringing on
anybody's copyright. That is a tricky area. It's an area that
brings up a lot of anxiety for a lot of people. If you're one of those people
that's like, "Oh my gosh. I don't know how I can do this or I want to
do it the right way." Then just stick to the
public domain image sites and don't mess around with weaving together a
bunch of different images. But yes, I think that is all we need to
say on references. Now it's time for the best part, the actual drawing and painting. I'm going to pull myself
together and then we'll dive in.
7. Demo (Part 1): Welcome to the demo. Here, I am just putting
together my palette. I'm going to be using
hydrous liquid watercolor. I'm putting a little bit of
cobalt blue into the palette. I like to arrange things with
warm colors on one side. The way you'll be
looking at will be warm colors on the left side, and cool colors on
the right side. My cool blue there was
some ultramarine blue, and then for my warm green, I'm using sap green. If you don't have
all of these colors, you can totally do this with
a more limited palette. Cool green is viridian green. The most important things
to have would be a warm yellow and a cool yellow, and then a warm blue
and a cool blue, and a warm blue and a cool red. Those six, you don't have
to have all of these. My warm yellow is
cadmium yellow, and then my cool yellow
is Hansa yellow light. I'm also using cadmium yellow deep with that
orange color that you see, and for the red it's, I believe, scarlet, and then the cool
red is crimson. Then I'm also adding a couple
of different purples here, one is quinacridone violet
and quinacridone magenta, and then another one, I believe, it's called imperial violet. Here, I have my reference image. I have it pulled up on my iPad, which is plugged into
a power source since this is going to
take a little while, and then I generally just like
to keep it off frame here, propped up on a little
easel, a little stand. Then here are the brushes
that I think I will use. I've pulled off a
pretty big selection. I tend to just like to
grab a bunch of them and whichever ones I think
I'm most likely to use from my brush drawer. This one here it's
a size 6 quill. This is a half-inch Oval Wash, it's really nice for blending. I probably won't lay down
a ton of color with it, but it's great for blending. Then I've got a bunch of
smaller round brushes here, not sure which of
these I'll reach for. I have a lot of brushes because I'm a
professional artist, you do not have to
have this many. Part of why I pull so
many is because I like to be able to use different
brushes for different colors. It's just a little time
saving hack that I do. I think the ones I
would be most likely to use are this size 6 round and then a size 2 round. Those will be my most
versatile brushes of this set. I think I mentioned this in one of the
talking head videos, but I'm working on
Fabriano Artistico cold pressed watercolor paper. One other quick note
before we dive in. Since I showed you the reference image
I wanted to mention, I'm going to be making some
different color choices than what we see here
in the reference. I will probably be
making the frosting more of a pink color like the
frosting on the doughnut. I will also probably
make the sprinkles more of like true rainbow sprinkles as opposed
to what we have here, which is just a few
different colors. But the information
that we have here about the lights
and the shadows in particular is going to be really helpful and I
will rely on that. I'm absolutely
using a reference, I'm just making
some changes to it. If you're super new to
this, if you're a beginner, I would start off by trying to follow the
reference image a lot more closely rather than making some of those more
creative color choices. Getting started here, I
have a plain piece of printer paper that
is just to protect the surface of my working
paper from my hand, and then I have some test paper, which is just the back of
old throwaway painting. I hate even saying that,
because I know people don't like to hear that I
would throw a painting away, but that does happen
sometimes and I like to use them as test swatches first
just to save some paper. I've got a couple of different
colors of pink here. I've got a warmer
pink on the left, and then a cooler
pink on the right. The warmer pink is just a
super watered-down version of my warm red color, and then the cooler
pink is actually quinacridone magenta. I think I'm going to
go with a warmer pink. I just like the feel of that, it feels a little bit
more edible to me. The cooler pink feels a
little bit too purple, and I definitely want
a pink doughnut. I'm a fan of pink
[LAUGHTER] myself, so I'm just testing out here to make sure I
have the right consistency. I want it to be
really watered-down, I'm going to try
to go super light initially here as I get started. Just moving things around. Going in here with my number
6 round brush, I believe, and just a super
watered-down warm pink, and I'm going to be
going across pretty much the entire surface of the
frosting with this color. I am going to try to
leave a couple of areas where there's a
really bright highlight, I'm going to try to
leave those untouched. Jumping ahead here, I
have finished laying down that first
layer of the pink all over the entire
surface of the doughnut, and I've zoomed in a
little bit so you can see more closely what I'm doing. Now I'm just continuing
to describe some of the lights and the darks of the surface of the
doughnut of the frosting. I'm doing that by
just basically adding a second more intense
layer of that warm red, and I'm also starting to
slowly mix in some of the cool red into
the shadow areas. Now, once I have the frosting on the surface of the
doughnut pretty much finished I need to let that dry, so I'm moving on to doing a little bit of
work on the hand. I'm deciding to do
a hand in this, because I wanted to increase
that sense of narrative, increase a sense of action
of something happening, of depicting an actual moment rather than just
the food itself. For me, hands are really
great way to do that, because they are so often part of how we
interact with food. I wanted to have the
hand included in this just to increase that
sense of anticipation, that feeling of
anticipation of having just picked up a doughnut and you're right about to take a bite. Starting with that, I am
doing some of the cooler, the more shadow colors first, which for me is like a muted purple that's the skin
tone I'm going with here. That's the color that I'm
using for the shadows. I'm trying to block
most of those in first, just to help keep me clear on the anatomy and what's where and where all of the different edges and planes are going
to be in the hand. I don't always start
out with the shadows, but especially in this
type of situation where if I do just a single wash of color over the entire hand, I feel like I'll lose
some of my sketch lines. I have pretty light
sketch lines here, so I just want to block
out those shadows. While those dry before I can
add another wash on the top, I am going to start working in the actual dough
of the doughnut, the bready part of the doughnut. For that I'm doing a
warm muted yellow. I have some of the
cadmium yellow in here, I have a little bit of
the alizarin crimson, I believe, and I think I have a tiny bit of ultramarine
just to knock down intensity. But basically, I don't want this as it is still pretty saturated. But I don't want it as saturated as the frosting on the
top of the doughnut, because that's really colorful and super bright and I want that to be the
star of the show. I have just added that
initial yellow golden color. Sorry for the phone
peeking here, I was recording a
little bit for reels, I think. Here we go. I have done the top and the bottom part of the
doughy part of the doughnut. Usually doughnuts
have that middle band where it's not quite as golden, so that one I'm
doing much lighter, basically just a watered-down
version of that gold color. Then I'm coming back in here to the hand to just lay down one
top coat over everything. Again, since this is a
pretty fair skin tone, I'm doing this fairly light. I've gone with something that's in a similar color family, it's still got a
lot of pink in it, not as much gold, but it's way watered-down
I've got it super light. I'm just doing that with my number 6 Oval brush in a wash over the entire
surface of the hand. Now with the hand still wet, I am going in with a
slightly more intense also pinker version, slightly pinkish orange,
more like a curly color, and I'm doing some
wet-on-wet to try to bring a little bit more
color to the fingertips. You don't really see it so
much in this reference image, but if you look at your own
hand a lot of the time, especially if you
have fair skin, you will see that your
fingertips are much pinker, they have a lot more visible red in them than the
rest of your hand. The palms of the hand in general have a lot of blood vessels, so they all tend to be
more in that color family, but you see it especially
in the fingers. It's something that I think looks really interesting
and I like it, so I tend to amplify that
a lot whenever I do hands. Just working some
of that in here, trying to blend it as I go using that
wet-on-wet technique. That helps give it a bit
more of an organic feel too, it does some of the
blending for you. I'm planning on not working
too much on the hand, so I want to have that be loose and more natural
and organic feeling.
8. Demo (Part 2): Now I'm starting on some
of the sprinkles and you can see I've got my
little test swatch here. I've just tested out a bunch of colors trying
to figure out what I want the different colors
of each sprinkle to be. I wanted to test them and see them all as a
group before I put them on the doughnut just so I could get a sense of
how they would look together and how
balanced or not balanced they would feel in the painting. I'm basically just going
to do one color at a time. I'm going to go across
the whole surface doing first the green sprinkle, then the blue sprinkle, and finish it off that way as opposed to working
section by section, and I think I'm using,
what do I have here? The Number 2 round brush. That's just going to
keep it nice and small, really easy to control. I'm trying to keep these
fairly light as well, since the watercolor is really
functioning like my under painting and I'm going
to go on top with colored pencils which
are semi opaque, but they're not a
perfectly opaque medium. I want to avoid getting too
dark in any of these areas, which if you've taken a
class from me before, is a common theme when I'm
doing my under painting. I'm always trying to keep it
light, keep it saturated, and then bring in those
rich darker tones and deeper shadows later on
with the colored pencil. Just working my way across
the whole surface of the doughnut filling in each and every one of these
little sprinkles. This is probably one of the most satisfying
parts of the process. I just enjoy those
little details and it's really fun to see. For me, working in
anything that has a rainbow color
palette is just really fun. I love colors. I love getting to
bring it all into a single piece and that
was part of the appeal of this as a subject was
that rainbow color palette. These have ended up being pretty much the
only brushes that I have used for this
part of the process. I'll use my Number 6 quill, my Number 6 round, and the reason the Number
6 quill is so much larger than the Number 6
round is just because it's from a different
brand and that it's a different type of brush and I honestly don't
understand it. [LAUGHTER] But nevertheless, that's what they
say on the sides, Number 6 quill, Number 6 round, and then a Number 2 round here's the small brush that
I've got at the end. Switching gears, moving
on to colored pencil, I'm starting off
here with deco pink, which is very similar in tone and in temperature
to what I already have down and the
reason I'm going with that first is because
I just want to even out the surface
of the doughnut. I want to get into some of those little areas that
I might have missed with the watercolor layer and
just make everything look in general a little bit
more smooth and polished. I'm not covering
the entire surface, but I'm pretty much working
through that whole area, looking for those
little holes or areas where it feels a little
bit more rough and I need to fill things in and smooth
things out a little bit. I'm pulling over my
test swatch card here. This is what I used for
the watercolor obviously, and it still comes in
really handy when I want to see how is something
going to look if I lay a particular
color pencil down over this color
of watercolor. Here, I'm just testing out how I want the shadow to work. I lay down some
of that deco pink on top of the pink
watercolor that I had used and then I've
added in a muted purple, which is a Prismacolor color. I'm just trying to
get a sense for how those feel together. Then here I'm bringing in the
Luminance colored pencil, which is, I forget the
name of this color, but it's like a corollary pink. A lot of the time
in this shadow, I like to have a line
between the mid tone and the shadow where there's a supersaturated little
strip of color. I'm just experimenting and seeing which pink
I want that to be. Then here I have a whole bind colored pencil which is like a muted pinky purple and I
just snapped off my little, [LAUGHTER] my peach
colored pencil off of my pencil extender there. This is Prismacolor's carmine, which is a soft cool red. I'm just checking that as well with the combination
of my shadow color, you can see how many
different iterations I go through here trying to get exactly
the right combination. I don't necessarily do this
in every part of the drawing, but this is going to
be my overall strategy for the whole of
the frosting area. I just want to spend a little time testing
it to make sure that I like it because
with colored pencil, you can't really do anything
about it if you lay down. Well, no, you can, there are some things you
can do about it, but we're not going
to talk about it in this course and it's definitely way easier
by far to just lay down the colors that you want
to start with as opposed to getting 25 percent of the way
through and then realizing, oh gosh, I went way too dark or way too pink or way too
blue or whatever it is, and then having to figure
out how to fix that problem. I like to take a little time, especially if it's an important
element of the drawing or a key element
of the drawing and figure out what my color and value strategy is going to be. Just adding in a little bit
more of a muted pink here. I think it's called ballet pink, it's Prismacolor, adding that to some of
the softer shadow areas. Then here I go with the
Prismacolor carmine red. I'm using this in the way that I mentioned
where I like to have some of the transition from
a shadow or maybe like a shadow that has
some reflection in it. I like to have a lot of
saturated color in that area. It's something that naturally
happens if you look around and if you're looking at a reference that has
a lot of color in it, you'll notice that pattern
in real life all the time, especially as you get more
tuned to looking at color. But in this instance,
my reference image has white frosting, so there's not a ton of
color in there to pull from, so I'm inventing some of this and it's a way to make it
look a little bit more interesting and a
little bit more like real life as opposed to
something that is manufactured, which is because I'm
making it up as I go. Now I'm working along the
back edge of the doughnut, and this is going to have quite a bit more of
the carmine red in it because I want it to have
that sense of intensity. I have laid down some of the more muted purply
color underneath just a tiny bit of
it but I'm working this over the top
to give it more of that vibrant sense and make
it feel like it's a shadow, but it's still has quite
a bit of color in it. This is another element
that I think for me makes a food illustration look not
only a particular emotion, but makes it feel appetizing or makes it feel like something that
you would want to eat, it's like really vivid color. It's a fine line, it can't be over saturated because then it looks fake and that doesn't
feel edible either. But I find there are a lot of realistic food illustrators
that have just so much gray in their paintings, and they can be beautiful, but to me it makes it look
not like food anymore. It makes it look not like something that I
would want to eat, and that's just a taste issue, that's my personal preference. If that's what you really
love in food illustration, then of course go for it, but for me I like to have
some of that vivid color. Again, not like crazy saturated, but I like to have things
look fresh and colorful and that's part of what
makes them feel interesting and also
potentially edible to me. Moving on to the sprinkles, I've pulled out the
different colors that I'm going to use. I basically got like a dark
and a light for each one. This is what I'll
use for the yellow. My yellow is importantly
a cool yellow. This is golden red, I believe it's from Holbein. It's like one of the only cool yellow colored
pencils I have found. All of the Prismacolor yellows that are darker are warmer. I've got my orange down there as well,
that sunburst yellow, and then just Prismacolor
orange and then I've got a couple of
different blues here, and then a couple of
different greens. This is a Holbein
lettuce green and then I think I have apple green
and spring green as well. I grabbed three greens
because I'm not sure which one I want to
use for the dark color. Then for the reds, I have Holbein scarlet red, which is just like a
really nice vivid red. Holbein colored pencils are
very crumbly and they're like twice as expensive or maybe three times as expensive
as Prismacolor. They're never going
to be my go-to, but there are a couple of colors that they
make that you just can't really find
in Prismacolor, so I do like them
for that reason. Then I also have parma violet
for my purples and lilac, which is what I am going
in with right now.
9. Demo (Part 3): Lilac it's a bit pinker. It's a little bit
more saturated. It's definitely the
warmer of the two. Then parma violet,
which is what I'm using right now is the cooler, so it'll make for a little
bit better of a shadow. I'm just going to
more or less go around the edge
of each sprinkle, and then probably
add a little line of mid-tone shadow on
the top of the sprinkle. If you look at the
reference image, you'll be able to
see that there, maybe you'll have to zoom in. [LAUGHTER] But I have a
reference image included, so you can zoom in
if you wanted to. That's a pretty common light pattern with
these sprinkles, is like a little bit darker
around the edge and then a little bit of a shadow on the top and that's
because they are shiny. Even though they do curve down and have the shadow
as they curve down, there's some bounce light from
the frosting that'll make the sides look a little
bit lighter than the top. Switching up the
angle again just so you can see a little bit better what I'm
working on and how I am going over the
surface of these. Again, I'm not completely
filling them in. I'm more tracing around
the outside and then adding some of those shadows where I can to increase
the sense of dimension. It's really easy
when you're working on tiny stuff like this to end up making it look
more flat than it should. That's something I'm
very conscientious of, and try to make sure that I still leave enough
of the watercolor, enough of the lighter areas that they'll read as a highlight. You could say, well,
why wouldn't you just put the highlight with
the colored pencil? You can, but it just never
looks quite as bright, quite as true as it does if you have the watercolor
showing through. I do tend to try avoiding. My aim is not to try to cover up the entire surface
of the piece or the entire surface of
any particular area of the subject with
colored pencil. I usually am trying to use the colored pencils to describe more of the mid tones
and the shadows, and then leaving the watercolor to shine through
as the highlight. Of course, I will use a white colored pencil
and other stuff to add highlights if I need to but
my preference is just to have the watercolor
showing through. Moving on to the
doughnut itself, this is called ginger
root, I believe. It's another prismacolor
and it's like a grayish, yellowish, greenish. I don't know. It's a
very interesting color. I use it all the time. It would probably be in my top 10 colors
[LAUGHTER] in terms of what you would need
for food illustration if you're doing breads
and pastries a lot. This one that I'm switching to you right now is
also in the top 10, that's prismacolor golden rod. Those two colors, the ginger
root and golden rod I use all the time in pretty much
any baked good illustration, that is what I will use. The two of those, the golden rod is
really good for, as its name suggests, like more golden areas. Parts of the baked
good that would be the top or the crust,
something like that. Then the ginger
root is awesome for those little shadows that
are also in a light area, like the inside of a loaf of bread where you have all
the little holes in it. Ginger root is awesome
for those little holes. Then I'm also bringing him
little bit of cadmium orange, just like a tiny, tiny
bit to those corners. It's very saturated
and very vivid, but it's also pretty dark. So it works well, is like a little tiny
corner shadow color. Now switching gears to the hand, I am using a peachy pink color. This is from Holbein, but there's plenty of wonderful prismacolor peachy
pinks as well. I'm just going over
the transition area, the light to dark
transition area, again trying to keep it pretty pink and maybe
even a little bit over stylized pink because this is on top of the pink
frosting from the doughnut. If you look at the
hand reference, this color really isn't there. But I'm imagining that
this would be there because in my image
there's pink frosting. The light that's bouncing
off of that pink frosting is going to impact the color of the shadow on the
bottom of the hand. Whereas in the reference
image the frosting is white, so it's not really going
to change the color in the shadow underneath the hand if [LAUGHTER]
that makes any sense. That's why I'm trying to
push this even more towards the warm and pinky
neighborhood of colors because it is
not just a shadow, it has some bounce light coming up from the pink surface
of the doughnut. I'm working in lots
of different pinks and brownish pinks to
create this shadow. This is prismacolor peach, and then this one
right here then going over the edge of the hand that I'm lining the
back of the finger here is another
really nice color. It's salmon pink, it's prismacolor color that I
really enjoy and use a lot. Then going back in with peach, I'm not going to narrate every [LAUGHTER]
single color here, but you get the idea. I'm using mostly
peaches, mostly pinks, since this is fair skin, and then also we have all of that bounce light coming
up from the doughnut. Then for the sleeve,
I'm going to keep things really simple. [NOISE] Not only because
it's a little bit of a change from the drawing or
from the reference image, but I just I want the hand
to fade into the background. I don't want to
have a hard stop, so I'm just doing
a little bit of this sky blue outlining
the sleeve here. Then I'm rendering the
hand and rendering the shadow as it's
going under the sleeve. But I'm not going to fully
render the sleeve itself. I have the suggestion
of the sleeve there. Then now, as I finish up, I think I want to change the color of
the fingernail polish. The blue is really
fun and I know [NOISE] I do like how that
looks in the reference, but I just want to keep
going with this pink theme. I'm going to pull the pink
from the doughnut itself. Sorry about my hair in the frame here guys, I was
growing it down. Anyway, I'm going to make
my fingernails pink. Well, they're not
my fingernails. I'm going to make the
hands fingernails pink. I'm using basically
the same colors that I did in the top of the doughnut, except a little bit more vivid. The carmine red is
going to be, yes, it's still my shadow color, but I'm using it a little
bit more liberally. Then I'm going to
finish off with some highlights in the skin. This is called pink white, I believe. It's luminance color. You can also use just white. Luminance has a few
colors that are truly almost white with just a slight amount
of color in them, and they're really
nice for highlights. Then I'm coming in with my prismacolor sharpie paint pen, and I'm going to add
just a few little dots of bright opaque white on
the top of the doughnut. Pretty frequently when I
do this sort of thing, I'll go back and forth between my white colored pencil and
my white sharpie paint pen. Really building in
those highlights and then finishing off with
any little tiny details, places where I feel like the shadows haven't quite gotten to where
they needed to be. Just giving the overall
sense of value, what it needs to look realistic. Pretty common for me
to go back and forth between the super,
super dark, darks, and really brights
at the very end, which is where we
are in this piece. Just a tiny bit more of this parsimony orangey-red color here as a shadow underneath
the frosting of the doughnut. I really want it
to look like it's dripping over the edge, and we are done.
10. Class Project (Skillshare): Now it's time for you to create your own food and
feeling illustration. Number 1, start by
selecting a subject, being sure that you consider
the purpose, your audience, the emotions, the story
that you want to tell, the feelings that
you want to convey, all that stuff that we talked about at the beginning
of the class. Number 2, you're
going to take photos or source your reference
images in some way, keeping in mind all
those things that we talked about in the
reference image section. A little process note here. Sometimes I'll have
a few different ideas for what I want to paint to communicate a
specific idea or image. I'll do some thumbnails, and then I'll decide which
one I'm going to turn into a finished illustration
based off of whichever reference
image works best, and that's especially
if I'm having to source reference images rather
than taking my own. Just keep that in mind. You might have a concept
that you could execute a few different ways and then
you can choose based off of whichever one you get the
best reference image for. Step number 3, you're going
to create your sketch. Again, if you want to create
a realistic drawing and you're still working on
things like proportions, I would really recommend
taking my class, draw anything realistic
proportions for beginners, that will give you a really good foundation
to be able to create a realistic drawing based off of any reference or even from life. Step number 4 [LAUGHTER]
once you have your sketch, work in your media of choice, whether you're going
to do watercolor and colored pencil along with me, or really any other
media to develop your food illustration
and then be sure you're taking photos
along the way. Share your process and
your finished piece. Whatever you decide, I
hope you'll share what you make in the class
project section. You can also tag me
on social media. I'm @kendyllhillegas
on Instagram, and you can use the hashtag
SkillsharewithKendyll. I love seeing and
sharing student work. Thank you so much for
taking this class and for spending
your time with me. I really can't wait
to see what you make.
 Kendyll Hillegas, Artist & Illustrator