Transcripts
1. Introduction: Hi, I'm Nadine. Thanks for joining
me for listen. Today we're gonna be
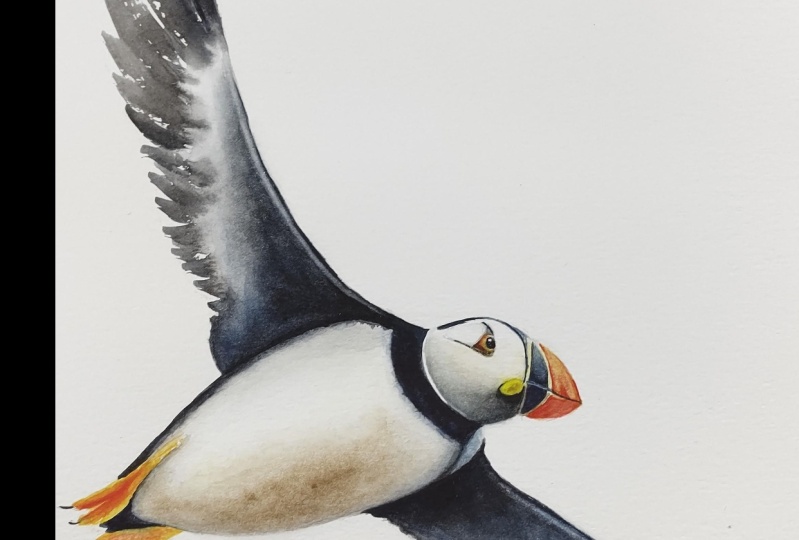
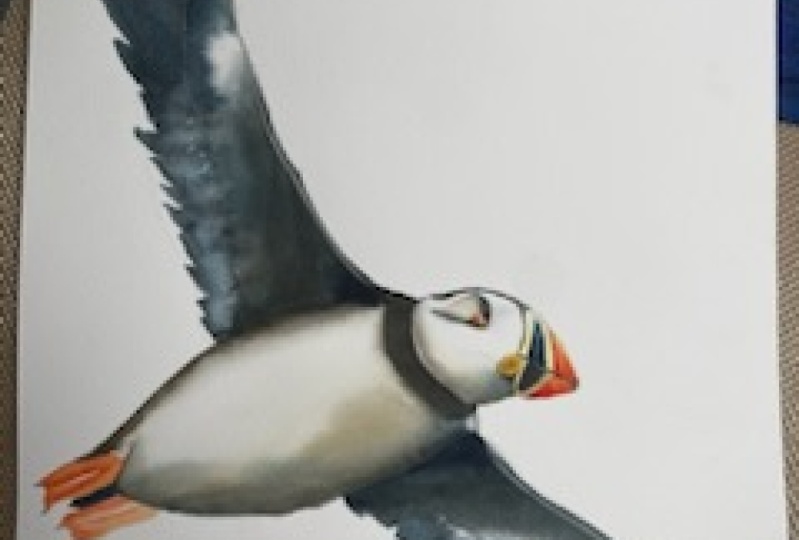
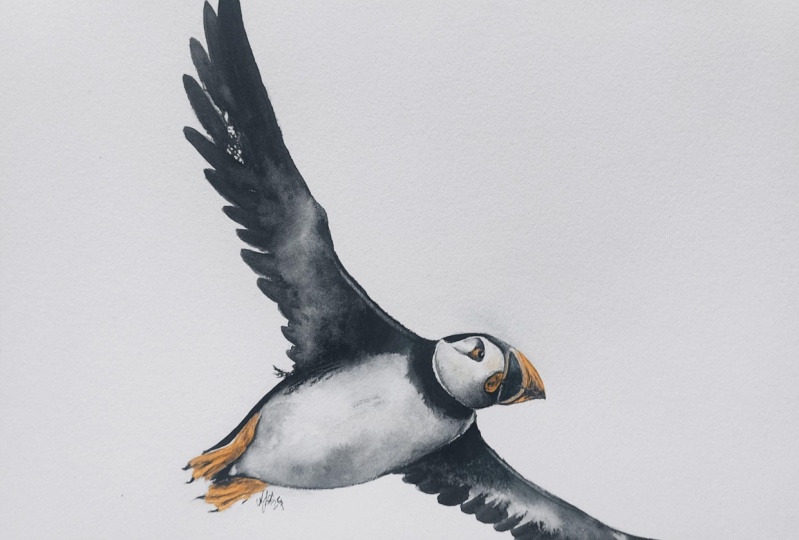
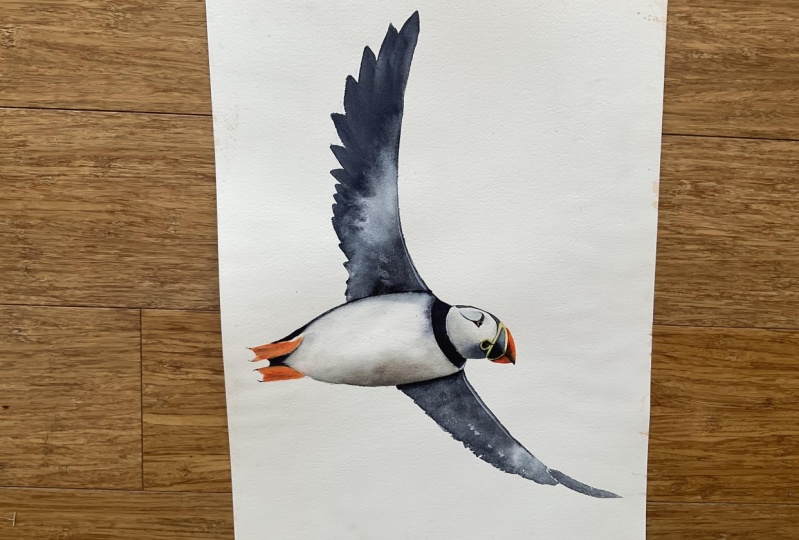
doing a flying pattern. I love to incline, but it's so much more fun than painting something
sitting on a branch. What I want you to get out of
today is learning how to do really simple wings
without worrying about counting how many feathers
there are all different, all the different layers and
retaining a lot of a lot in the wings so that you keep that feeling of
movement in the pace. The other thing
that I want you to practice today is getting
these really soft, wet and wet shadows that are
really useful for building up the three-dimensional
feel of your work. So that's layer upon layer, waiting for it to
dry and going again. So what we'll do is we'll
go through the materials, the sketch, and then step-by-step
through the painting. And hopefully by
the end as always, so you end up with something
that you're happy with.
2. Materials: So we'll go through
the materials that you'll need for this class. First up, we've got
the reference photo. This one's from Pixabay
and you can download that from page from the side. I'm painting on. She's cold press 300 gram paper. I'm painting flat for
the whole way through and I'm not typing
down to a board, I'm on a board, but I'm
not actually typing it. You can mark in
terms of brushes, I've got four brushes here that I've got
listed in the materials. Really, it depends on
how big your drawing is, but you need a
reasonable size one. The Jiekun get
these feathers in, in a single stroke. So this is a size 12 neck
that I've got here to that and then a medium brush for getting into some of
the tighter spaces. And I've got a little
synthetic as well for the tiny details
around the face. The only other one I'm using and you don't really need this, but I've got a bright, stiff synthetic and
all I'm using that for is lifting out these
two highlights here. So it really doesn't
matter if you don't have that intensive paints
I'm using for the black, I'm using Daniel Smith indigo
and some Daniel Smith, Van **** brown, orange. I've got some, again, Daniel Smith's and
Hansa yellow medium and some pyrrole, red. And I've gotten a little
bit of Winsor Newton, yellow ocher, or you could
use some raw sienna. And that's just for
the little bit of warmth through the chest
here and in the face. I am. I do also have just
achieved with gouache, but this single little
highlight in the eye here, if you don't have that,
don't worry about it. You don't you don't
especially need it. But if you've got
it, you can use it. I would use a couple of plots because because
there's so much black, you get dirty very quickly. So a couple of pots
of water is good. Normal eraser, normal HB pencil, and of course, whatever palette
you're choosing to use. So we'll get onto the sketch
3. Sketching Up: Okay, we'll start
off with the sketch. So it's my reference photo. Enlarge that to make it
easier for me to paint. It easy, easy to paint
larger than smaller. I don't want you to
get too hung up on any of the detail
in the wings here. So don't count the number of feathers, anything like that. I just want to give myself that the outline and
show myself where the wing tips and do take a little bit
of care in the beak. There are quite a few
different colors in the bank and you want to
make sure that you're clear where these
lighter areas are so that you don't paint
paint through them. If you don't want to. Do the sketch yourself,
I have included a template that you
can download from the site and it's just two A4 pages that
you can stitch together. I think we're ready to paint
4. First Wing: All right, So we'll
start off with, we're going to do the
swing as 11 place first, and then I'll stop
and let you break. So we're going to use some Van **** brown and some indigo. And I take my larger brush
and also my medium brush. And I've got a couple of pots
of water here just so that in case I get too
heavy and too dark, I can clean my brushes off. Now, I want to retain
lot through here. I don't want to get
really, really heavy. So what we're gonna
do is we're going to wet harder for wind down with clean water first and
take my big brush, make sure it's clean. Clean ish. Yeah, alright, here with that
sort of secondary, well, the first row, feathers here, I'm just going to paint
that down with water. All the way to the edge and coming to where it hits
the tummy there, the chest. So that's all. I'm not sure if you'd
be able to you guy, not saturated but reasonably. I'm leaving it dry here. Now what I'm gonna do
is I'm going to pick up a combination of
my blue and brown. I've got two
different wells here. I'm going to take some indigo
and some Van **** brown, and I'm just going to
test her dark bodies on a piece of paper first. Get a bit more brown in there. I want reasonable
amount of pigment, but I don't want really chunky. That's probably okay. So then I'm going to start
at this first value here. The shape of this feather
is the shape of my brush. So I'm going to
come on, push-down an into that wet next stroke. I'm just going to keep coming. Then as I come around, I'm going to change the angle of my brush to change the
shape on the edge there. So I want to flip that edge there and I hadn't come
quite far enough here. So while that's still wet, I'm just going to drag
that through a bit more. What I want to use to
try and come and touch. It doesn't have to
be the whole lot, but a little bit
on that wet edge. Now I've got a bit
of a gap here. I'm going to take my brush onto some tissue to take off the excess water
and it's got t's. Just want that to come just slightly right now because
I'm not wet there. I've now got a bit
of a hard lines. I'm just wetting my brush again. I just want to mess up
that little edge there. Okay, now, while that's wet, I'm going to switch
to my smaller brush. I'm going to take a
little bit at the same, the blue and brown weaker. And I'm just going to touch
a bit of paint that wasn't enough into that wing to
just start the color. And also keeping an eye, say I've got, I've got a
really distinct heritage. They're washed my brush. Just miss it up a bit. Now I need to be
careful here that my brush doesn't
end up wetter than my page because I will introduce a whole lot more blooms in
there that I don't want. I'm going to add just a
little bit more color in here and then I'm going to step away from that
and let that dry. Keep not picking
up enough pigment. Okay. Wash my brush that's
a bit more than I wanted. So I'm just going to
spread that around a bit. And I just want to
wait and see what that does because we will
come back into this. I'm just dragging it
to my pencil edge. And I'm just going to tidy up the shape on the
edge of the body here. To me all the way to the neck. I don't want to come out of
that and I'm going to let that fully dry before
I touch anything else.
5. Second Wing: Okay, now, I'm fully drawn here. You don't actually
have to wait for that to dry before you
do the second one, but I am dry out there. So now we're going to come in
and do the same thing here. Now, this only swing
we've got this little bit here that is thinner
than my big brush. So I'm going to switch
brushes partway through. I'm going to just disclaim
both of those larger brushes. Always do the same thing. I'm going to wet down
a little bit in here with clean water and
leave this edge dry. I'd actually use,
I'm going to use my smaller brush to it this down just because I've not got
quite the same area. Yeah. Alright. So I'm coming up
when keeping dry on the edge, actually my brushes to be
dirty so you can kind of see where I'm wishing. Okay, let's start
with this little bit. I'm going to pick up my
blue and my brown again. And I'm going to come down, push on the page and do a little flick the tip
of the wing there. Then I'm going to
switch brushes. Good. Now my larger brush on the site and the more blue
I'm trying need to match, needs to be a bit similar to the color combination
I've got up here, so I've got to try and get
a bit of blue and brown. I'm just using the edge of the brush to come
into that wet area. Right now I've got a thing that person might
be big to get in there, but overall, I've got the shape. I'm just going to switch to my little brush and just
mess up those edges. And here I've got a hard line, so I'm just clean, damp brush. Now I actually want a bit more
color along the edge here. So now with my smaller brush, I'm going to pick up
my blue and my brown. And into that wet area. I'm just going to run some
pigment along this wing. I'll end up a lot
darker under here. But initially, I
would rather start lies and add darks to it, then go to dark initially and then I
can't get any light back. I am going to put a bit
more just under here. So I've just picked up
really solid paint there. Just to come up to
the chest. Okay. Okay. So now I'm
going to come out of that bin and let that dry. And then we might do, we might start on the beak next
6. Starting the Beak and Eye: Okay, So if you aren't dry here, make sure you keep your hand
out of it. I'm quite dry. It's been like 5 min or so. We're going to
start in the beak. I'm not gonna go
into my small brush. I'm going to make sure
I've got clean water. I start on this top bit here, I'm going to take some,
I've got some Hansa yellow. Yeah. I'm going to paint that
top part of the baking. I'm actually going
to wet my brush and flood a bit more
water up the top. I'm going to keep it a little
bit lighter at the top. Pushing that pigment around bit, then I'm going to do same
thing on the bottom, but I'm not going to join the top and the
bottom at the moment. I'm just going to
leave a little bit of dry paper in-between if I can. It doesn't matter
if you've done it. Right now while it's wet. I've got some red in there. Well, here I'm just
going to drag that. I'm going to start
from the bottom. I'm going to drag
that up a little bit. So I'm, I'm kind of making
my orange on the page. Rather than mixing
it in the palette. Do the same thing on the bottom. Now it's nowhere near
strong enough yet. But I just want to get
this started that in. Now I'm gonna come over me. I stay out of these little lines of kind of lighter
yellow in here. I'm going to come
into this bake. Now. I'm going to
paint this first with claimed less
color yellowy water, but it doesn't really matter. This triangle here, I'm
just painting with water. Then I'm going to drop in. Just damp but it's not
hardly got any water, but I'm going to drop
in then some indigo. And I'm just chiseling
out the shape. I'm going to leave
that last TLA. While that's still wet, I'm going to put a little bit more indigo down the bottom, so slightly more pigment
and less water in my brush so that it teases or I've got more light at the top
and down the bottom. So I'll just drag my brush
and I'm just teasing that. Mean. All right, now the bottom
part, I want darker. And so because I want
the bottom darker, I'm going to go
straight onto straight onto the dry paper. I'm not going to wet it first. And then I'll drop in more pain. Again. We can come back to
this and strengthen it later. Just about getting
these first washes on and the shapes chiseled out. Then while I'm still
on the small brush, we're going to have a
little look at the eye. We're going to start and
put the first little orange wash around the eyes. I'm going to start
with the yellow. And I'm going to paint
just a touch of yellow in the reference
around that area. And then when did
that same thing of now I'm just going
to drop a little bit of red into the yellow. Let it drip a little
bit more red. I will end up darker at the back here is I'm just going
to add a bit more red. Just add to that a little bit. And then 1 mol, I'm going to paint
the yellow here. Straight Hansa yellow. Just painting the
shape or worry about the wrinkles and
things in later. But at the moment,
I just want that shaping and be careful. What I don't want to do is
touch to make sure I don't touch to that indigo. I don't want to bleed in there. Okay. So that's yeah, you can see already it's
not strong enough, it's not vibrant enough. But I've got that first washing. I'm going to come
out, let that dry. And then we'll keep
moving on with the dots around the face
and joining into the wings
7. Starting the Neck and Tummy: Okay, We're going
to start to put, to join these shapes together. We're gonna put the
document neck and the dark over the top
of the head here. So if my small brush, it'll be the blue, a
little bit of brown. Coming onto the page,
not enough water. Coming onto the page. This is a bit of a tricky
shape because it's so small. Over the top. Brush now I'm just washing
my brush and I'm going to tease this down. I want a little bit
more light probably at the front of the head here. And also don't want too
much pigment in there. Well, I'm trying to
work out this shape, so it's quite small
and tricky in here. And I'm gonna drag that track, that line, just **** it. So I can kinda see where the
edge of my yellow will be. Wash my brush. I'm just gonna put a bit more. Just making sure I've not got much pigment in
here. I want more light. The front, so I've
just cleaned my brush and I'm just lifting
that pigment a bit. So that I've got a little
flash a lot at the front end. If I don't like that, later, I can fill it back in again. Okay. Probably comes a little
bit further than that. Could be seen first and then
see if I just joined about. Now. I'm going to switch brushes, brushes
part way through. I'm going to start with this little brush
just because I'm worried about getting
the wrong shape in here. So I'm just going
to bring that down, wash my brush and just
rough that edge up. So I'm trying to get that up to meet into the
wash of the wing. It's a bit more blue and brown. Just just want to work out where that join is to the back of the
head and probably needs to come up a
little bit there. All right, Then I'm going to
switch to my bigger brush, my medium brush, pick up a
bit of a blurb in my black. And now I can come in and paint that shaping without
having to worry about these brush pushing
over the edge there. Okay, coming down. Now I'm gonna go in here. I'm going to switch
back to my little brush again to do the same
thing on the other side. Switch my brush a bit more
blue, bit more brown. Just figure out where
I want to go there. Now, very tight in here. So I want to make this
a little bit looser. So now what I'm gonna do, I'm gonna watch
this medium brush. I'm just going to get a
little bit of a blade. I'm going to paint some
water just along the edge. Just haven't quite
touched the pigment yet. I'm going to just touch so I've just the pipe is just damp. Just want a little
bit of movement. Rather than having a
really full on hot edge. They're just missing
it up a little bit. And joining him, his joining
that little gap in there. When I look at the reference, it's a little flash
of light there. I'm not sure whether
that will work there, but I'll leave it
in for now. Okay. Now, while I'm mucking
around with this stock, at this point, this is
already drawing to life. I can see funny, but I can see that I'll
have to darken that off, but I'm going to think about the dark underneath
the tummy here. I've just listed the cauliflower extra work out what
that black keys, but I will fill that in later. So I'm gonna get
some clean water. I'm going to paint along
the edge of his tummy. Touched to the swing here. You see the pigment still
moving from that wing. I'm just going to
let that t is in a bit because I let that bleed rather than take a bit more
blue and a bit more brown? And just softly waking
up, wash my brush. Coming on that edge of
that foot, bear the leg. Now what I want to do is I
want this dark to this, well, it's not very dark
yet, but I want it to disappear coming up
so to taper off. So just keep cleaning my brush, running my brush
along that edge. Keeping it really nice
and soft initially. Now I will, I do want
a bit more here, so I just picked up a bit
more blue, bit more brown. Just touch it in. And we'll build up to this. We'll do a few rounds
of this because again, I don't want to go really hard and they discover
I've put too much on. I can't get it off. And then we need a little bit
on the other edge as well. So same idea. Waiting down. Damp, not saturated
and I'm just going to drop of blue, a
little bit of brown. Just to start me off
in there as well. Yeah, I need dots on that wing, but I don't want to do that yet. So I'm just washing my brush, softening the edge,
letting it bleed down. And then I'm going to put a
little bit of that color, this blue and brown. I'm going to take
a beat up there and just touch it back off. That is a bit too much light there in that little
flesh that I left. Right now while that's drying, knowing that I'm going
to have to go in and strengthen Docs through there. I'm going to put the
dark of the ion. I'm actually just going
to use them straight into go and paint in the
oval of the eye there. And while I've got
that on my brush, I'm going to also do dark above. Yeah. So really keep it quiet week
initially. So good weekend. The guy coming up
with that shape, it probably comes
down a little bit in front there and we'll
do the little line. I mean, the guy and the dark
just underneath that orange. I think it probably comes up, so I don't want to
touch into the, I don't want to run
everywhere teasing that out. Lots more to go in there, but that'll do for now and
come out and let that dry
8. Feet: Okay, We're going to put
the potluck feeding. Now. Now, I should
really clean my water, but I'm living on the edge. So you had duties some terrible. So I'm going to damp brush. I'm going to just pop a little bit of water
on the top of that leg there and little bit of water
on the top of that foot. Just to help me not run into the tummy for you
and I'll do it. Now. This time. I'm going to pick up
a little bit yellow and a little bit of
red at the same time. So we've got some Hansa yellow, some of my cad red. Just test it on a
piece of paper first. I'm not mixing it, just having it, I've got a
bit of both on my brush. I'm just gonna pop
brush down and come up. Down and come up. Probably need to join that up. And I probably need to
just tidy that shape. That's got a bit of a
clue to come on up. I'll come out of it. Then I'm gonna do the same
thing with the bottom one. Push down, come into that. So I really just want it to
be a couple of brush strokes. I don't wanna get
too hung up on that. This one doesn't have as
much red as a top ones. I'm just going to
pick up a bit of red, drag that into the wet paint. And I'll come out event now. I do have I've got the
little claws and I've got some black to go around the EPA. I'll let that dry
before I do that, I want to come back
and work in the darks, strengthen the
dots in the wings, and probably around the neck. So now I'm cleaning
my brush off. I need to strengthen the
doc in here and underneath. So I'm going to wet
my page down first. So I've got my my medium brush. Dab, not soaking wet come
all the way to there. I'm staying out of the slide. But I wanted to
strengthen up along here. So picking up a bit
of blue and brown. So my indigo and my
band dark again. Brown, blue, pretty
thick paint now, I'm gonna still not
quite that thick. Starting in here
and wash my brush. I want a reasonable
amount of water. I want it to be wet
to the pigment on. Now I'm washing my
brush and kind of teasing it around
into that wet area. Wash my brush. I'm just making sure that this edge is soft
so I just have to keep washing my
brush it hard when you got fresh for
living the guy. Just make sure it's
not too heavy. Now that's quiet blue. I got a lot more of
the indigo than I do love the Van ****. I'm just going to pick
up a bit of my brown and put that in. The same thing while that's
drying to the other side. Come on wet. Underneath here are my
brush is not clean. So coming to the
edge of the chest. Now, I am going to drag a highlight through
each of these wings, but I'm going to lift that out rather than leaving
it at this stage. Okay. So I'll probably come meant to be clean
water all the way down. I want to leave a lot along
that bottom edge there. So glutamine to go
up into my Van ****, I'm going to come
in and drop that in here and let it bleed. While I'm sitting here I can sell recognition is a bit dark. I'm just going to wash my brush. I want a little bit
more light there. The name here, so I've just
dropped a bit more water. Sorry, not dropped
a bit more water. I've cleaned my brush and I'm just waking up a little
bit of that pigment. So I don't end up too heavy. All right, back to this one. Just watching where it's going. And again, I've probably used
more blue than the brown, indigo than the Van ****. So I'll just grab a
bit more Van **** Well that's width
and check that. In. Right. Now I have all these pigment now on this page
that I can make. You sold my shadows and
my dark along here. So I'm going to clean my brush. I'm probably I'm
going to have to go and change some water. I'm going to pop the
little dark along here. Clean my brush. Feet of flu. Even you go good of a Van ****. Try not to touch my orange leg. Come on. And I've got a lot of that
was a very dry brush, so I've got a lot of breaks out. I'm on a few, but
probably a few too many this so I'm just going
to close that in a bit. And while that's old
dad playing each brush, I'm just going to
run my damp brush just along that edge and again, get a little bit of bleeding. The beat of a shot there. Okay. Good a softness. And then on the bottom here, I'm going to dirty water. It wasn't intentional,
but doesn't matter. I'm just let that
bleed a little bit. So from the wing I've got
mine but it can bleed. The pigment can come
through the chest here. I'm going to adjust this one's maybe getting a
little bit heavy, so I'm just washing my brush, drying off the excess, just softening that back. And I'm gonna pop
the my feet are dry. I'm going to pop a bit of
a dark in-between here. I'm going to clean my brush. And again, tease that around. Clean, clean brush,
damp, not saturated. Jazz slit that laid. So I want that I'm
bleeding down there, but I don't want to lose that
middle triangle completely. So while that's pleading, I'm just washing my brush, drying it off, just pushing it around to where I
actually wanted to go. Keeping it nice and soft. Okay. This it's drying pretty solid. So I'm going to take
it's three-quarters dry. So while they still have
good moisture on the page, I'm going to say I'm
going to check a bit of water in just a small amount, just see if I can force a few
cauliflower ears, blooms. Both sides actually just
leave it till it's too dry. Nothing will happen when
you put this border on. Just adding a bit
more interests. Bring that. And it's just timing. Five-minutes,
nothing would happen. So it depends. And it depends. It might yours
might know, munches dried a little bit too solid, suggests want to mess
it up a little bit. Now I will have to address
that. Can I do that now? I'm just getting a damp brush. I don't like this little mine a little bit of light there, but I don't want it too light. So I'm just placing that in
just with a clean brush. Now. I'm starting to fetal,
so I absolutely have to stop that dry. They're going to
come back in and do the face and say,
how are we going?
9. Face: Okay, so I have actually cleaned my border now because
we're going to come back into the face. I'm gonna pop in the yellow
around the dark. Yeah. So I'm gonna pick up a little
bit of my Hansa yellow. I'm just going to
paint around now. And again, wash my brush. I'm going to keep it a little
bit lighter at the top. But I'm now in here. I'm gonna just dampen down. The yellow that I have here. Has all these folds and
things in the in the yellow. I don't wanna get
too hung up on that, but what I'm gonna do
with that damp IN pick up a little bit of Van ****, really light pink, my brush, pack, my tissue Other and then I'm just going
to get enough. Then I'm just going to paint some wiggly lines through that. Wash my brush just around my
damp brush over the yellow. And if it gets if
you put it on and it's too heavy on us
a little bit heavy. Just touchy tissue to
it to pull it back. Going. I picked up more
blue then I'm really after the Brown gonna go. I keep picking up too much pain. That's more paint than I want. So I need to back that off, but it just needs to be
a little bit random. So just flying around in there and I'm
leaving the launch, I'm leaving that rim
around the edge. I just want a little bit of
stuff happening in there, but I'll come out of that now. I can always add more
if I need it after, but I've played in there a
bit, so I'll come out of that. Now we need to start to think about getting this
three-dimensional. I need this also to be darker, but we're going to
start here first. I'm going to take
my medium brush because I want this soft. I'm going to wet
down the page first. Damp, not saturated so
long that neck injuries, cheek, under that yellow. Right to my pencil edge. Then I'm gonna go back
to my small brush. I'm going to pick
up a bit of my blue and a bit of my brown, my indigo bit of my Van ****. And I'm just going to come into that wet and t's that through. Now I'm going to leave a little flash of light along there. I'll probably stop another beat. But initially, I'm going
to leave that little flash their washing my brush
and teasing a through. Coming right up to
underneath that yellow. Now I've run out of paint. I'm going to grab a
bit more pigment. Just setting wallets to while
everything is still wet. Now I'm going to type my
bigger brush damp claim. Just run that along that dry edge to get
that soft transition. Still to lie. Another round pigment,
little bit of blue, a little bit of brown. Coming in. Here is where
it's gonna be the darkest. Just letting it
do its own thing. And I'm trying to use, each time I'm adding pigment, I'm trying to use
less water because I've got a lot of
water in the page, so I don't need to
introduce water, I just need to
introduce more pigment. So I've just picked up
really solid paint now. She's a little bit around that yellow dry paint my tissue, and just tease that
dark little bit around. I'm going to put a little
bit in the front here. So you've saved the small brush and this wet on this edge. So above the yellow. And do the same thing, drop a little bit of that. Dark in not too much water. Just want a soft shadow, the front, clean my brush. If the pigment disappears
on you because you've diluted in
a bit too much, just grab a bit
more and put it in. Okay. And I'm also going to put one, I've got more dots
to go in the eye, but I am going to put a soft
shadow just behind the size. So I'm painting could have a
triangle behind that shape. A little bit of my dark
and just softly drop their washing my brush
and just soften it Okay. I'm looking now at my bake. So I want I'm going
to put a bit more of a yellow wash on this bottom one strongly right now and
drop some all pyro writ. I think I called it cad red
before you could use cad red, but I've got power already. Yeah. Just strengthen up. I'm gonna do the same for
the top. Grab some yellow. Let's start in the
middle of the bait because they keep
talking about I want to retain that lies on the
top so I'll stop middle, drag it down, wash my
brush, and tease it out. And then again drag
a little bit of red, the base, wash my
brush and just let it makes him with that yellow. Okay. And then while that's drying, I'm going to take a little
bit of red, stripe red, not much water and
just drag it if I can actually get some
paint along the edge. And the same on the bottom. Give myself a little bit
more definition there. Okay, now I want to darken. This. Didn't go dark enough. So I'm gonna get
straight indigo and just restate that shape. I'm gonna do the same, exactly the same process at the top that we did
the first time. So wetting it down first, I'm going to take
blood at the top. Grab a bit of boring to go
down in the bottom there, tidy up my shape, and just let it transition up. Okay. When that's all dry, we'll drag it dark through the
shelf and the bottom bait, but I'll stop there for now. Come back into the shadow. I'm not fully dry there,
but it's dried too large. So we'll give that a nova. So same process. I'm using my small
brush because I don't want to introduce
too much water here. Don't touch the indigo in the
bottom of the beak there. I'm just going to
that's pretty too dark. So flush that a bit. I got too big what Jeff? Pigment on my brush then
I'm just going to grab some water and dilute that out. Still use that pigment
and it's don't want it all in that one spot. And that's quite blue. So I'm gonna grow
a bit more brown, my Van **** brown
and drop that in. Switch to my bigger one. Now just to deal with the age. T's that exactly the same thing as we did the first time
around, just strengthening it. All right. I'm going to probably
come back into the now. I need to strengthen orange. I am going to pick up a
bit of my pyro red and a bit of my Hansa yellow and
make a bit of an orangey. My, well, this time I'm going
to strengthen the back. They're washed my brush that I've got a clean brush and I'm just teasing
that around. Now I'll leave a
little bit more light. Maybe on the side bit
rather than the top. So little fleshy blot and
then maybe close in there. And I'm going to strengthen
the dots around there too, but because I've just
put that orange on, I don't want to bleed
the indigo into there, so I'll leave that for a minute. And I'm going to strengthen. Look at this dark here. So this is, this too
much light here. So I'm gonna take
my bigger brush, grab my dark mix, come onto dry paper,
and just re-state. Now I'm starting in
the middle and pushing out because I don't want to make this shape
bigger than it eats. And if I try and start
on the age guaranteed, all end up pushing further
than I want to go. Now gotta be aware that
there's water in that shake, so I need to be bit careful. So I'll switch to my
smaller brush now. And just bring that in. And around the top here. Now because I want
it to sit into the wash underneath just with a clean brush and
my God, they go on. I just wanted to put some water. Clean brush, not dirty
brush along here. So that that pigment
has got some way to run to lose its intensity
as it leaks out. And the same on that edge. I want to rough that up a bit. Okay, Now, I also want just one more time a bit stronger
under these swings. So clean brush just in here. I'm just going to throw a
little bit more pigment before I lift that
highlighted the wing. Just going to pop a little
bit more underneath here and re-state the age there of where that joint. So I've put that line in there. I need to wash my brush and drag some water along
that to soften that back. And then I'll do it on
the undecided as well. Keeping my still want to keep the soft launch,
save soft edges. And before I let
you have a coffee, I'm just going to
strengthen up now, but that's oranges dry. I'm going to just
restate my pupil, my eye because it's
dragged quite a lot. And I can now,
because that's dry, I can put a little bit
of dark over-the-top, wash my brush and just let
that bleed that entropy. So I've got a hard edge at the front and then it's softer. Maybe back. Wash my brush. I want a little bit of
variation in my dark there. I don't just want a
solid black shape. So I'm a little bit darker
on the front there. Then on the back, I'm going
to do a similar thing. Underneath here, the
one underneath here. I'm going to paint it in. And then I'm going to
lift some paint out of the center that shaping
and wash my brush. And then in the middle of it, just lift a bit of paint so
you get that little light to a dark line on the bottom and then lot through the middle. Okay. So I'm going to now
come out and let that dry. We'll come back in and
lift some highlights to see what other shadows
and dots we need to
10. Finishing Off: Okay, So we're at the point now, you know the basic
paintings there. We just need to do a few
little funeral tweaks. So the first thing we're
gonna do is I'm going to lift a little bit of a
highlight in each ring, so good that I'm gonna take
my flat brush, clean water. I have gone and changed
it. Clean brush. I'm going to get some water
on the brush, dry it off. And then we're
going to come onto the page and I'm
going to push down really hard and just
leave some pain. So each time I do that, I
mean, I've done it wants now, need to wash the brush again
to get rid of the pigment. Drag it through, and you need to keep washing the brush
so you don't make an S. Bring that up just
a little bit, Kyle. And then I'm gonna
do the same thing. Decided, I'm going
to lift a little bit of a highlight here. Pushing, you gotta
push pretty hard. It might take a little
while to start to move. But you just again, as I said, just keep washing your brush. Okay. So I've got two little
highlights in there. I'm going to come back in and really chisel out this shape. Now, I want this to be
stronger this time. So I'm going onto dry paper, picking a bit of indigo, bit of my Van **** brown. I'm going to just take the
x. I just want to make sure I don't have a whole
lot of water on my brush. So I'm just going
to paint tissue. I'm going to come
underneath the yellow. Just a want a need that
dark underneath it. Just have a bit more. Washed my brush, drifting
water everywhere. Wash my brush and t's that into the wash
underneath it's dry. And then I'm going to drag it along the edge
of the forehead. Yeah. So gone straight into my
indigo onto the dry page. Just want to strengthen that little joined between
the black and white. I want to put a line between
the top and the bottom bait. So I'm going to grab some
indigo coming in here onto dry paper and just put that little bit
of a dark underneath. And I also don't want the yellow down here to be as bright
as a yet on the top. So I'm gonna take, I'm gonna actually take some
Van **** brown, really milky wash
November plan **** brown. And I'm just going
to paint over that yellow I really milky. Go easy. Just to back off the lights. On the bottom half
of the bake there. I can still tell
that it's yellow, but it's just that down. Now, I'm going to darken off just in the back
of the eye there. So again, I'm going to stick
with the Van **** brown. And I'm just going to touch it up a little bit of paint just in the back
of the eye there. Alright, Now this has ended
up a little bit too light. So I'm just going
to wash my brush. I'm just going to soften
that edge is just a little bit too high underneath
my yellow bit there. So I'm just going to soften. Sorry, I'm having a hard in some places but I don't want to outline that shape too much
like the hallway around. So I'll just back that
off a little bit. So next thing I need
to have a look. I probably need to
close in this latch. Need to strength, not my dark. Put a little bit of warmth in
the face and on the tummy. So we must stop. I'm going to come in here to
the tummy on dry paper with some yellow ocher,
overall, sienna. Milky puddle. Just into that area where I've already kind of got
a shadow going and a little bit up so that I get some of the yellow ocher
on white paper, some on the new brand shadow Didn't need to wet it first. But keeping it really milky. Come all the way to the edge of my tummy management first wash. And then I also need to
add some of that warmth. Probably little bit touch underground pit there
and a little bit into the face so that the body looks like it
belongs to the face. Little bit behind the eye. So again, coming onto dry
paper, I'm going over that. Wash. If you get too heavy, just debit with a tissue. I might put a little
bit in the front. Yeah. A little bit more. That shake. Okay. So I'm gonna now I
want to strengthen. I've got the yellow
ocher drying the app. I'm going to come down to the bottom of
the tummy here now. Still just adding a bit more, but what I'm making
sure all my pages damp dark into that web page. So keep building it up. And then I do want
a little bit around this leg and just keep an eye on the hard edges. Make sure that you like any
of them are forming if you don't just soften them
off with the brush. Like bit more in here. Damp page, working on
a bit more pigment, sitting back and if
it's drying too light, just adding a bit more,
but you need these nice. I'm trying to talk him. Tukey Amanda. Hey, Rhonda. I don't really know
how you tell. Okay. Just making sure
each time I do this, I'm not introducing more water. I'm just introducing
little bit more pigment. And then you find that
sign place to settle. She going around a bit. The top there. Okay. I might just put a
touch of that same brown just to just to match it, just to make sure that the
face is talking to the body. I've just wet that down and I'm just it was a little bit
down from the yellow Erika, just touching the brown, the Van **** brown to that. Shake. So nice. Soft blades. Now in here, I want, I probably want, I'm
going to just do another couple of
strokes of orange. So I'm going to pick up
my red bit of my yellow, making a bit of an orange in my palette, didn't
have enough bread. Okay, and then I'm just going to put a couple of strikes
just for a bit more interests. Without having to
really paint fate. I just want a bit more
variation in the wash there. Then I'm going to
pop the chloro. So back to my small brush. A little bit of indigo might actually have a
look at my reference. Just a little of
this brush isn't. If you've got one
that's got a nice tip, that will be better. This one's a bit today, I'm not sure how
it's going to go. That really. Just go easy. You just
want for suggestion. Few towns here, but don't
have to be really dark. Now I don't mind that I've
got a hard edge forming here, but I don't really mind if it's forming too hard and you
want to back it off. You can just get your brush. Dry brush, damp, clean dry brush and just
worry it along the edge. I quite like I'm going to leave some guys I don't mind them. I think I want to have a bit
more dark underneath here. I'm just going to grab I
even started underneath. Squeeze up that light like that. Close up that gap. Really careful when you're
working all wet in wet. Don't introduce a
whole lot more water. Much. I'm just looking
at sort of thing. I probably want a little bit
of dark on these right now, but those feed of dry now. I'm just going to take a
little bit of Van **** brown back that night off. Just a touch. And maybe on this one as well. I'm sitting back and
I think I just need a little bit more yellow
ocher just in the front. Which might it might not show up too well actually on the VDI. Then I'm just deciding. I think a much I'm going to just strengthen the dark in
here and then probably rookie company will be done. So i'm I'm gonna go on this
time we onto dry paper. I'm just going to bend
it to fund shaping here. Well onto dry. Then I'm going to switch that. I'm going to clean my brush and just smooth it so
it's not so hard. I think I probably need to do the similar
thing just under here. Just that little bit a lot. I think I probably need to
back off just to touch. So I've gone onto dry paper just chiseling out that shape. And I'm just, I think probably that underneath
the tail away. Last time. I'm just
going to strengthen. That's dry, probably a little
bit lighter than I want it. Normally, I put a
little holler at me. I'm not sure because he's
painting so small it's a bit till I'll put one in and if I don't like it,
I'll take it out again. So I'm just going to take a
little bit of white gouache and just put my brush
threatened tube. Just see whether putting
a little spot to know. Maybe unlike a color that
back in when it's dry, just a fun highlight on the eye. And the eye. I think that's probably where I need to walk
away from that one. Now, I would encourage you to do it this size and see
how you feel about it. But honestly, if
you're feeling brave, I would scale up and go bigger. It's much easier to paint bigger and getting all the nice
details in the face. It's much, much simpler when you've got a bigger
painting to work with. So if you've got the
paper lying around, normally this I would paint
on a full sheet which is 56 cm by 76 cm. So if you're feeling brave,
go ahead and give that a go. I'm happy with the
painting in the end, uploaded onto the
Skillshare page for me, if you've got any questions, I'm always happy to
answer them alone. Always delighted to see, to see how everyone
goes with the lesson. Thanks for joining me, and I
hope you enjoyed the lesson.
 Nadine Dudek, Professional Watercolour Artist