Transcripts
1. Introduction: It doesn't matter how
many paintings I paint, I always have to concentrate
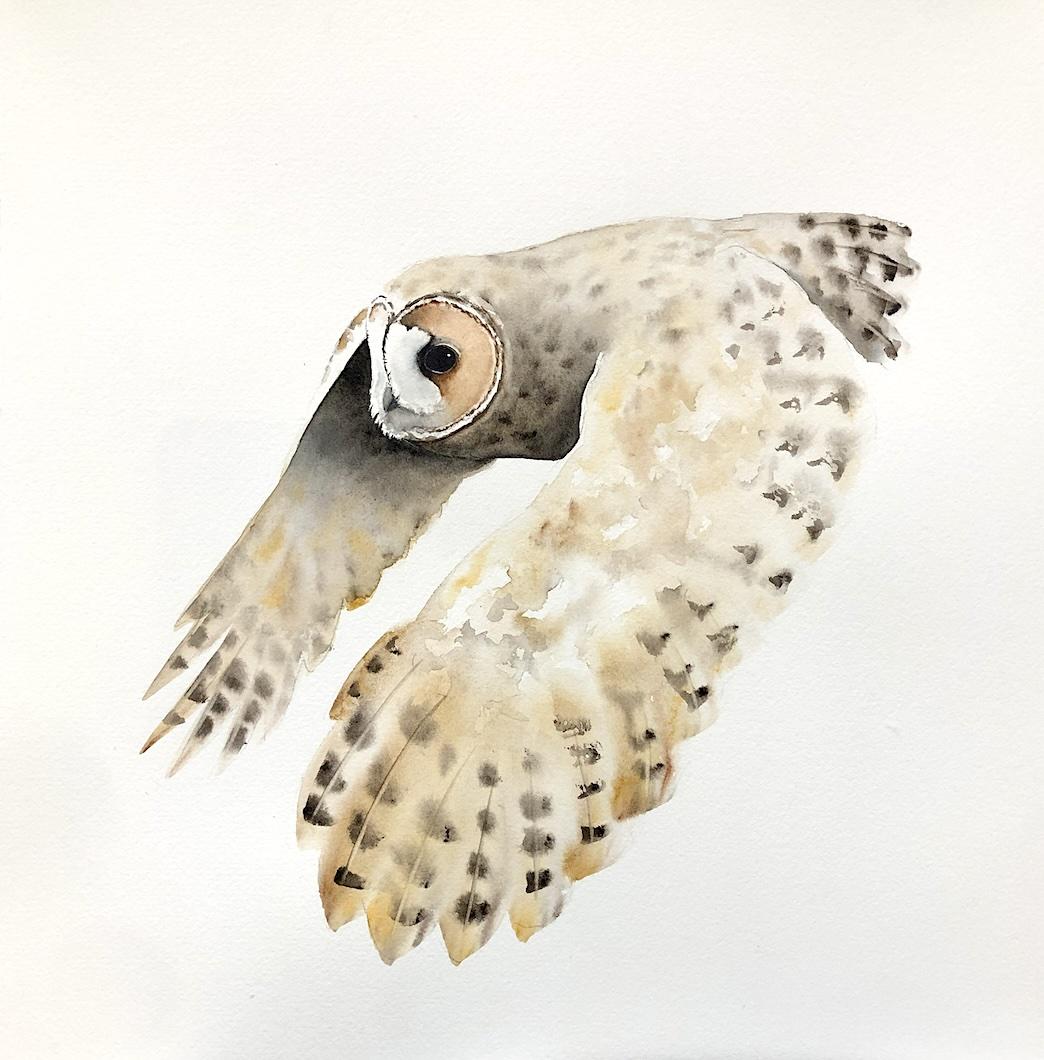
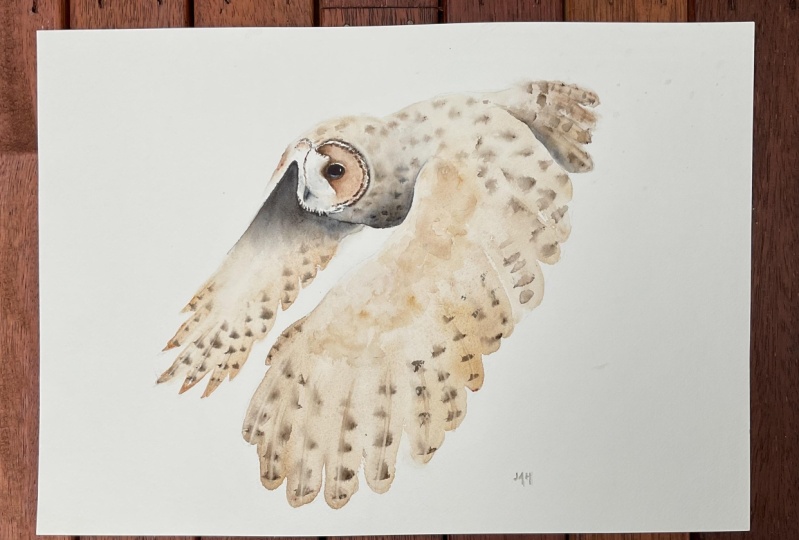
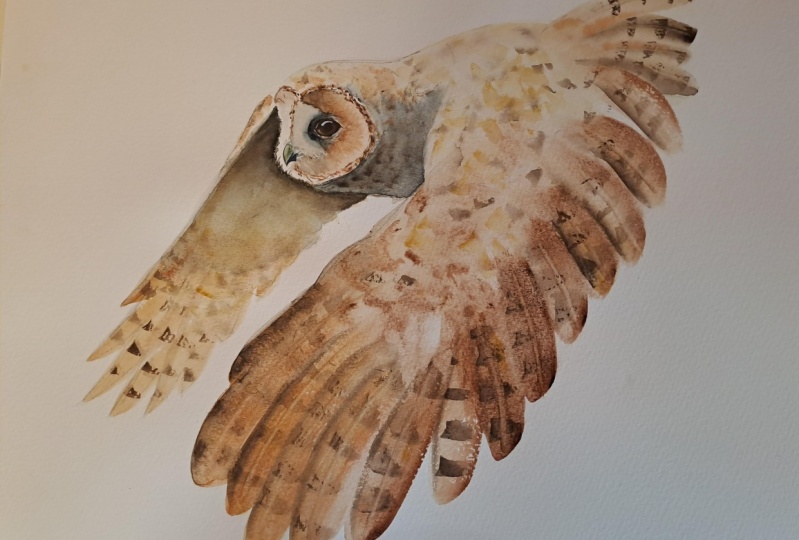
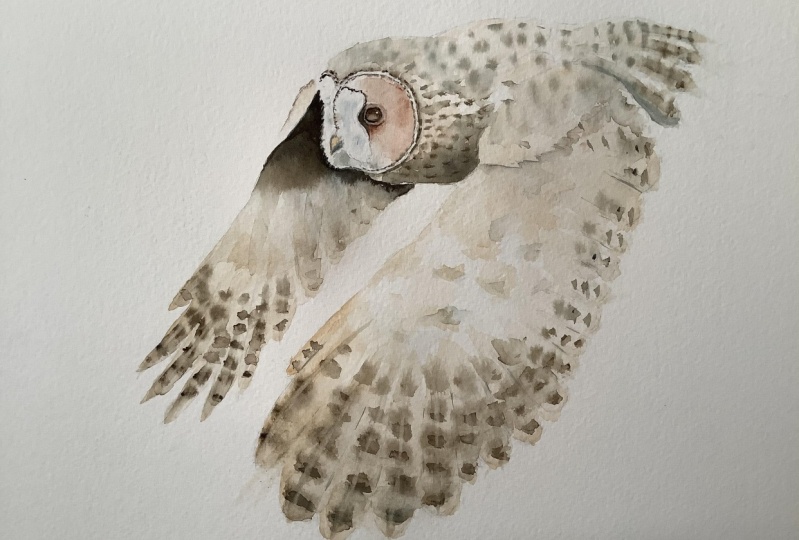
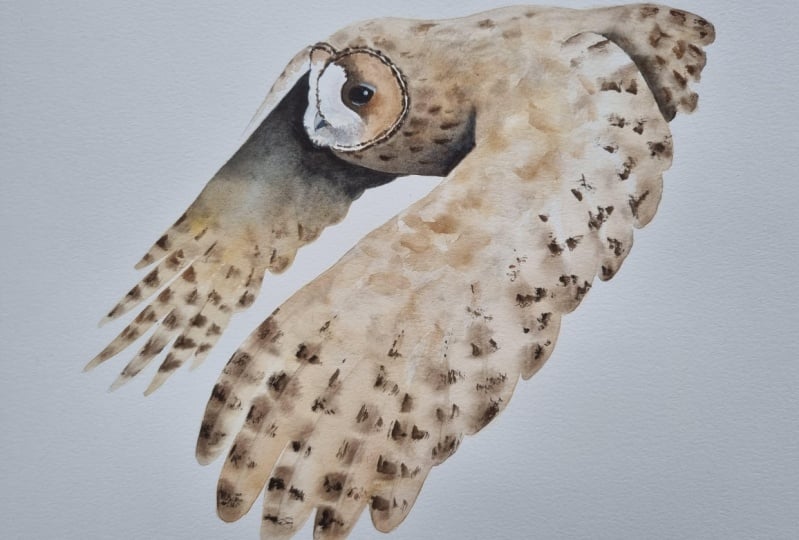
on not over painting. Hi, my name is Nadine. I'm a watercolor artist
from Melbourne, Australia, and one of my favorite
things to paint, I feel like I start every
introduction like that, but one of my favorite
things to paint, a flying birds, I think I like the
challenge of keeping the transparency and keeping
movement in the work. I think the challenge with that is not thinking that you
have to paint everything that's in the reference photo
and not getting too caught up in the solidity of
color in the photo. Today's lesson is about
retaining the light and using really long clean strokes to get the feathers of
the bird in wet and wet. And really focusing on just a few small darks
and leaving the light. What we'll do today is we'll go through the materials
and the reference photo. We'll go step by step
through the painting. And this one, there are a
lot of steps, actually, I've tried to break
it down so that it's not too overwhelming, but it means there
are quite a lot of little lessons in it. If I were painting
it for myself, I would probably move through it more quickly than I've
done for the video. If you feel incomfident, you certainly can tackle
more than one step at a time when you finished
with your painting. Make sure you upload
a photo for me on the project section on Skillshare so that
I can have a look. And I'm always happy
to answer questions. Always happy to give feedback. Let's get into the materials.
2. Materials: Materials for this class
to start off with. I'm using 300 gram arches paper. I ain't cl press paper, I am painting on a board,
but I'm not taking it down. You can see it is a
little bit wobbly as well because I don't
tend to prestretch. If you want to
prestretch, that's fine. Wet the whole page, take
it down to the board. What I tend to do is if I like the painting,
when I'm finished, I will spray the back
with a water bottle. Put it down on a clean piece of paper and put some
boards on the top of it. And flatten it that way rather than prestretch
because I'm lazy. All right, so 300 grams. Call press paper, the
references from Pixabay. And you can download that
from the Skillshare site. In terms of paints, I'm
keeping really simple. Now, this reference,
actually you can see it isn't very similar
to the reference. I've taken some liberties. But this reference does
actually have some nice, it can lend itself to
some purples and blues. Violets. If you
like those colors, by all means put some in. I've decided to keep it super simple for
this and I haven't, I've kept with the
brows and yellows, I'm using just the four paints. I've got Van **** Brown
from Daniel Smith, which are these dark spots. I've got yellow ocher and burnt sienna from
Windsor and Newton, which is all the warmth
you see through here. And I've got Indigo
from Daniel Smith. And you can see that
for the strong darks. The only other thing
that I'm using is I've got a little spot of white gash in the eye and FI there any brand
for that is fine. Doesn't matter in
terms of brushes. I'm using a bunch just because we've got different
shapes of the wings. This shape here with the
really pointed tip here. This is a Naf size ten brush
just because it comes to a nice tip for these
ones that are fatter. I've then moved to a size 12. I've got the details of
these particular brushes and the materials really, you just need to play
with your brushes and see what shape they
make as he decided. Because it also
depends on how big your sketch is there
for the wings. Then I've got a couple
of little synthetics. I've got a little size
three in the size zero, just for getting
around the detail. The only other brush I'm using, it is a bright, stiff synthetic. And that's just to
lift a couple of highlights through the painting. All other than that, you need a palette pot of water. The sketch is just with a regular HB pencil
and a regular eraser. I've also got some tissues, and I think other than that, we're pretty much right to go.
3. Sketching Up - Keep it Simple: Okay, we'll take a look
at the sketch now. As always, I want you to
keep this really simple. I don't want you to
get caught up in all the patterning or the
stripes here on the feathers. Leave off the leathers
at the back here. Now, I do want you to pay some attention in the face here. Make sure you get the
shape of the beak right. And I realize it's a little bit tricky to see on the
reference photo, but take some time in here
also the shape of the eye. It's quite oval. Don't make
it a great, big circle. Squish it down a bit. Now if you are worried
about sketching it, I have actually
included a template for you that you can download
from the Skillshare site. Actually, this will download as 24 sheets that you
can put together. I think we can start painting.
4. Starting the Eye and Beak : I'm going to make the first
step really easy for you. We're just going to paint
into the beak and the eye. I'm taking my little synthetic. This is a size zero. I'm going to just
paint a little bit of yellow ochre in the
top and the bottom. I'm going to keep a bit of a gap between the top and the
bottom of the beak. So a little bit of dry paper so that they don't
bleed into each other. I've got in my palette
that needs a clean, this is some yellow act, really light milky consistency, then come straight onto the dry paper painting that I've a bit much
water on there. So just dry my brush off a bit, paint onto the dry page, keeping it really nice and
light. Then the bottom. Now, it doesn't
matter if you end up touching the top to the bottom. I'd just like to
keep them separate so I can see where that join is. I may have touched
there, I'm not sure. All right, then
I'm going to pick up a little bit of indigo and swell up the top
here. Just to touch. I dropped that into
the boom of the beak. Again, this brush, hot
YacaI did touch that. You can see that
that's running up into the top beak, but I
don't mind that effect. So I might run with that, just dropping a little
bit of nd going in. Just so I want the
bottom half of the top beak to
have indigo in it. Right now, while that's wet, I'm going to take a touch of
indigo and I'm just going to drag a few little lines into this feathery bit at
the front of the face. Now, I need pretty dry paint because I don't want it
to bleed everywhere. Not much water on my brush. And I'm just going to d just
a couple of little flicks, I don't have to do much. Maybe another one there down the bottom just to start to give myself an indication
that these are feathers sitting over
the top of the beak. That's all I'm going
to do there for now. I'll come back to it later. And now I'm going
to go into the eye just to say that if you had done what I asked you to do and keep the top and
the bottom separate, then I'd drop the indigo in the bottom and then do the same. But just keep the
indigo in this part. All right, in the eye. I'm going to start
with just a wash of, I think some burnt sienna. Van **** brown is what
I've got in this. Well, really just a dark brown. I'm just going to paint
again straight onto dry paper and feel that shape. I tend to put in a high light at the end with some white gas. If you're paying attention, you certainly can leave the white paper for a little
highlight in the eye here. Go ahead and do that if
you're thinking of it. I tend to not worry about initially and
deal with it at the end. Up to you what you
would like to do. Now I know in the reference that there is a whole lot of dark in here in the
corner of its eyes. Just could start to give myself
an idea of where that is. I'm going to take plain
brush, a little bit of water. It's not a saturated brush. I just took off that little. Sometimes you get a little
drip sitting here on the handle and fat drops onto your page.
It can be disastrous. Just make sure you haven't
got some water hanging around to paint down
the page outside of the pigment edge listing that little crescent
around the eye. And then I'm just going
to come up and just touch to that pigment,
just let it bleed. Just starting to get
a feel for where that dark is really. It's just helping me get my eye in so that when I'm
painting bigger areas, I don't paint the wrong part. Now you can see that because I'm talking paper started drying, that water is pushed
back into the eye bit, I'm going to just
a bit more pigment while everything is
still a bit damp. And just restate how much that bleeds out and
how much it stays put. Depends really on how warm your room is. My
room is quite warm. It's drying pretty quickly, so I haven't got a
lot of bleeding, but I can see where that shape is so that
I know that I want to keep out of this white here. All right. Come out of
that and let that dry.
5. First Wash in the Small Wing: All right, so we're going
to start in this wing. Now for this, I'm going to use my bigger brush.
This is a size ten. And the reason I fit
this one is because it fits the shape of these
feathers perfectly. The tip, I want to go onto dry paper here so that
I form a nice sharp shape. But I want it to come softly up underneath the Mpit
here towards the face. To help myself out,
I'm going to grab some clean water and I'm
going to paint with water, maybe 23 down the wing, not saturated, just damp. Now, I'm going to stay
out of this little bit of the shoulder coming up
to that pencil edge. I'll hold it up and show
you how wet when I'm done. I don't have to quite come
all to the pencil edge just in this central bit. Okay, so I'm damp. Not absolutely soaked right now. I'm going to pick up a
little bit of yellow otro, a little bit of
my brown mix from the eye, but I want it milky. I'm touching my brush
to one, then the next. If you worried, you
can test out on a piece of paper first to see
what you're going to get. All right. Then I'm going to start
here, brush down, brush up into that wet area. The idea is that I'm coming
around to touch the wet. Now as I come here in the, the wing shape changes. I need to change the
shape of my strokes. Right now I've got a bit more yellow Oca
here than I do there. So I'm going to just
balance that out and touch a bit more yellow Oca
and let that bleed.
6. First Wash on the Big Wing: Okay. I've been out of there
probably 10 minutes now. It wouldn't matter
if it was still wet. I can stay away from it, but I'm completely dry there. Now what we're going
to do is start the second wing keeping
the sim, same colors. Now, I didn't get a lot
of Vandyke brown in here. It's mostly the yellow
and burnt sienna. That doesn't matter,
but I need it to balance up with the other wing. Now I'm switching to
my bigger brush here. I've got this beautiful brush that forms these nice
big feather shades here. Again, I'll be
changing the angle of my hand and the brushes that come around the
top of the wing. Now, I don't want to
get all up in here yet, but I don't want any hard edges. As I come up to the top of the wing, what I'm going to do, I'm going to do the same
idea where I'm going to wet down with water first and come probably again down two thirds of the
way of the wing. Clean brush. But importantly, I want to keep the idea
of light in this wing. I want it patchy wet. I'm not painting the
whole thing with water. I'm just roughly throwing on a little bit of
water at the top here. I'm going to fill
that in a little bit just so that if any pigment runs it just softly
dilutes up the top. Changed. I'm actually, I'm not worrying about this extra
overlay of feather here. I'm just making
that all one shape. If I hold that up, can you see I'm not wet. The whole I've got patches. Okay. This is a bit where you
have to take a deep breath. I'm going to start
with my big brush just to make sure it's clean. I don't know what
I've had that in. That's not too bad. All right. I'm going to do the same
thing of picking up a bit of yellow Oka
and a bit of my brown. I've got Van **** and
burnt sienna in there. So a bit of both
coming onto the page. Up, down, up. Now, by picking up both colors, touching to both wells, I get them mixing on
the page rather than trying to mix in the well
and putting on the color. Now here I've got
to turn my hand and I'm not going to load
up too much there. I've got a different
angle there. All right. Now I'm
going to put that down. I've got all this water in here. I'm picking up the same
colors again and some hair. I'm just going to
messily whack a bit of color through that
join up that shape, soften that one's a bit hard. I'm sitting back and looking. I know I've got a few
layers to go on here, but I just want to have my first washed down
and not too many. I'm just softening back where I've got a
really sharp edge. Just want a little bit of a mix. What you can see is that this pigment is coming
up to the top here, but it's not really heavy. I'm keeping it nice
and light because I want to bring the water up to the penciled because I don't want to
deal with that yet. What I want to do is see what's
going to happen in here. I need to restrain myself, come out of that and let that
fully dry before I go on.
7. Starting the Face: Going to work a bit smaller. Now, I'm going to
come and have a look and start some of the
washes in the face. It's been 10 minutes
and I'm fully dry here. I'm going to take probably
my size ten and also find a smaller brush size
53, little synthetic. And the medium brush, again, I want to
paint wet and wet. I'm dry here. I'm going to wet down again, clean water up to my pencil edge around the patterning on the face painting over that
edge because I don't want, again, to see that I painted
this in sections, basically. All right. Now, while
that's all damp, I'm going to get my smaller
brush pick up creamy vandyke, burnt sienna thing, my
brown Well, roughly, I'm putting some paint
on the edge between the wet and dry paper
so that I get a mix of bleeding and hard edges
coming over the top. Just a touch down in the middle. I've come out a little
bit far on that one. So I'm going to just
wash my brush and soften that back a little bit. Now I need to, there's a touch of that on the
other side as well. Same color while I've got
it on my brush and put a little bit over that
because I just want to suggest where that
other patches. All right. I need a little bit
of this Benciena and yellow worker on
the face as well, but I'm actually
going to keep it down initially in the lower
part of the face, I'm still wet there. I'm just roughly throwing on
some paint because again, after all the soft bleeds
now I am going to tidy up. Bring that right to the
edge of the neck there. Now I'll let that just softly bleed and maybe a little bit on
top of the head too. I've dried off really there. I'm just popping a
bit more water down. Just a touch of my yellow
acre in burn Siena. Just a little bit. That was probably
more than I intended. I've grabbed my wet a bit more water and
just back that off. The reason I'm doing this
is because I want to retain light in the
top of this painting. If I get too heavy with pigment, now I'm going to
paint everything in that's going to end up really solid, which I don't want. Now, while this is still wet, I'm going to pick
up a bit now of mostly Van **** and just drop
it into this wet page where I'm wanting to show that there's a distinction between this is the neck here and there's
the edge of the wing. I'm just chiseling
out that shape, making use of the water in the
page and letting that run. Just wash my brush. Dry
brush than my page. Now, just to soften
off that edge, I'm painting a tissue
with the noise. You can hear, you
can't see that in my, I'm painting a tissue. Washing my brush,
painting a tissue, and then just
softening that edge. If I don't get rid of that
water and I play in here, I'll just form a
great big bloom, which I don't want less
water on my brush. I now have a blow fly
flying around my studio. The joys of painting
in Australia. Hopefully you can't hear that. Okay, now I'm
starting to fiddle. I'm pushing and pulling, so I need to get out
and let that dry. So I'm just going to
let that settle in and then we're going to come
back to the other wing. So get out because I'm fiddling.
8. Shadows, Stripes and Adding the Tail: Okay. Again, another 10 minutes and I'm fully dry in there. Now, what I want to start
thinking about the darks underneath this wing and some of the patterning that
we've gotten here. I'm going to pretty much wet
down again this entire wing. Then we're going to come
in with some ban dark and put some stripes in. And then we're going to start
the shadow underneath here. Clean water, painting down
carefully around the face. Again, I don't want great
big pools of water. I just want to be damp. Now, my pencil line is a
super heavy under here, which is something I
wouldn't normally do, but I just wanted you to be able to see where
I was painting, but make sure your
pencil is not too heavy. Okay. Wedding everywhere. Now, I'm going to test out how, whether my page is wet
enough by starting somewhere that I don't mind
if it doesn't go well. So I'm going to start down low. I'm going to take some really
thick tooth pasty Van ****. I'm going to take
the excess water off the heel of my brush. I'm just going to put
my brush sideways. I'm going to drag a
few stripes through. You can see this one. I didn't get any water there. You can see that one's really
hard. I don't like that. I'm going to soften that
one off just a touch. All right. We can have
multiple goes at this. You don't have to get it
all in in the first hit. And I need them to be
a little bit random. We're suggesting,
we're not trying to paint all of those stripes in, can't keep not
getting any paint. You do need to use
the side of the brush and follow the
direction of the wings. So make sure that you're paying attention to how those
feathers are actually turning. Now, up in the top here, I'm now going to grab
still wet, Chuck on. I've got now Van
**** and Indigo, my blue and my brown to give
me a slightly darker color. I'm teasing that again. I'm washing my brush,
drying it and teasing it down so it meets these
washes mixed together. I don't want to hard indigo edge that freaks
you out doing the stripes. They've gone a bit
funny there, but we won't worry about
that at the moment. If it freaks you out
doing the stripes in the shadow at the same
time, do the stripes. Let it dry, come back and
wet down again and do it. You don't have to do it
all at the same time. Now I'm moving to
a smaller brush. Now that's got more control. I'm going to come
back up into here. I've moved to the smaller
brush so that I can get to the face there. Now when I come down here, I'm going to take my
Van **** and my indigo. And I'm going to drag,
like we did over the beak, a few little feathery shapes, a few little flicks into there, Wash my brush and then
tease that under. Now, I'm already
starting to dry. I'm creating a hard lines that I don't like I'm going to have to get
out of here in a sec. No dark enough, but I have
chiseled out my shape. Blue in the brown again.
And I'm just going to drag that underneath. Soften, I have another layer. I do have another layer to go just picking up some
more blue and brown. And I'm just making
sure I've got that shape where the
neck is chiseled out. Now at the moment that
white doesn't make sense. This light that I've got there, I'm going to have
to back that off. But I don't want to
do that now because this is nearly dry. If I now put more
pigmentic again, I'm going to force blooms
that I don't like. I need to let that settle down knowing that I've got
to come back in there. But while that's drying, I'm going to come and
just the tail in, I'm going to use my
size ten, the same ole. I know it gets boring, but the
same ole wet down a little bit because I want to
go dry paper into wet. I'm staying out of the edge of the back of the wing
there just to touch. Okay. And then I'm going
to pick up my yellow acre, My bet and my same mix that I've used
the whole way around. I'm going to turn my
flat flat on the side a bit and just drag
those strokes through. Whatever you do you
got to live with. I'm just looking at whether
I just might have to tie up, I don't mind a few
broken strokes, but that's probably a bit much. Now I've got this big
Nut Van **** there. What I'm going to do, rather than trying
to get rid of it, I'm going to just try and pop a bit more of that
into the web page. All right. Now I will have more details
to go on there later. But what is obvious to me is
that I haven't picked up. I've got lots of and no
yellow acre ban sienna. So I need to get a little
bit of while it's still wet, I'm just going to
take a little bit of my burnt sienna and yellow acre. A little bit in there. If I don't get it now, I can put it in later. No big deal. But just while the page is wet, I can get a touch that in there. All right. I think last
time I did this painting, I actually used this
brush for the tail, which probably would
have worked better, but I don't mind that. Yeah, just keeping an eye
on see this hard edge. I've just got to
keep an eye on that. I'm just softening that back. Okay. I'm going to
come out of that and let that dry before
I do anything else. The main washers are on now. Gets a little bit
easier from here on in.
9. Working in the Face and Adding More Stripes: Okay, so we're going to spend a little bit of time
in the face now. First thing I'm going to do
is I'm going to wet down the area around here
that's got this nice, warm Bn Sienna color in it. So I'm just going
to damp it down. I'm going to grab
some burn, Sienna. Grab some out of the chub. Okay. Just walk that around
and let it lead. Now, I'm not going
to necessarily come right up to this edge, leave a bit of a gap between the Van **** stripe and
the Ventciena there. We'll see if that stays.
I'm not sure where I actually went to. All right. Now I'm going to tease,
just wash my brush. I'm just teasing it
down a little bit, trying to just reconcile
what's happening in here. It's a bit busy in there. I'll just let it
disappear a bit. Pick up a bit of my
Van **** up here. I'm just going to roughly
whack a bit of Vandyke there and drag that over the eye that bit effectively painted in that bit that we did
before, but that's okay. Drying my brush. Just
teasing that out. I've given myself again
the little flicks into that white to suggest
that there's feathering. Now I'm going to
grab a bit more of my Van **** and I've picked
up a bit of Banc En as well. Actually, just along again, that wet edge, really roughly. I'm not painting a line, I'm giving a broken
edge because I want to get that mix of soft
and hard in there. Now, the other thing I
have to do is to have to remember that the same
color is on the other side. It's easier to do it now. Otherwise, what I meant to do
then was to clean my brush. But apparently,
I'm doing it this way instead you
can do it either. All I was going to wet that down and then
drop the pigment in. But I didn't wash
my brush properly. I've got a bit of the same color and then I'm going
to do the same idea of just dropping a little
bit of Vandyke in the top. Now I'm going to switch to my smaller brush, my size zero. I want to start to think about this dark in between
the ruffles there. I'm picking up
straight Van ****. I'm going to come
with dry paper here. I'm just going to start
to paint in here. And now drag a few flicks to suggest that there
are feathers there. I don't want to get to
patented too predictable. Just want to get a
little bit of something happening to show
me the definition between the two
sides of the face. I haven't come in far enough
there, I don't think. And I'm going to just put a
little bit more over that. Okay. I need a little bit of
that down here as well, but it's quite busy under
here as I said before, so I'm just going to
dampen that down. Popped a bit of water on, and then I'm just going to start to just whack a bit of
messy paint down here. I don't want to get
too hung up in here, but I need some stuff happening. I'm just scrambling my
brush over the page and putting in a little
bit of color again, This is just so
that I don't have to overthink what's
happening in there, but I know I need a suggestion
of the feathers now. This probably isn't
close enough, so I might have to restate, chisel out my shape
a little bit more. This might be a bit fatter, but I'll decide
once I've got a bit more of the face done right now, there is actually
color obviously in here I'm going to stay out of, I'm putting a bit of water, but I don't want to
touch that water to here that's wet or up to here. I'm staying in this
dry bit of page. A bit of water. I'm going to throw
just a touch of indigo just in this bottom part. Just to start to give me
a bit of something there, I'm going to have to put a bit
on the other side as well. A little bit of water here. I don't want to fill
in all that light, but I need a touch of paint. Put that a bit heavier
there on either side. Wash my brush, soften it off, remembering that less
is more so we can keep adding as we need
really hard to take off. We're just going to work up
to it and see how we feel. Now, my eye is currently dry, so I can now put in a really
solid dark for the eye. So I'm going to go
straight indigo. I'm going to paint, I'm going to leave a of the brown just so I've got my black there and then I've got just
a flash of brown in there. Now, I know I need to
darken up under here, but that's a bit damp. I've got water all
over the place there, so I don't want to do
that at the moment. What I'm going to do
is I'm going to come back now and think about some of the patterning
that we have. I'm going to paint my
feathers. Dampen them down. Come up into the back
there a little bit. Now, I want to be
careful not to close in. I was careful to leave that light so I don't want
to close at all back in. Okay, tooth paste consistency. Andie brush on the side and I'm walking some stripes and
I'm trying not to get hair, I'm trying not to overthink it. Remembering again that
I've got to turn, my wrists actually might
come this way now, but follow the feathers. Okay, so soften those two back. Will I might put some
dry strokes on later, but I don't want to many now sit back and then I probably going to put a
little bit of water in here. I think I want a little
bit of Van ****, a few spots just to build up a bit more in the wing, but I don't want to overdo it. Because as I said something, I might need another one there. We can keep adding more. Really hard to take back, soften that shape there, maybe. Just thinking that probably
needs a couple as well. Just that. Don't think I
wet that down initially. Okay. Now there's not enough. I've been careful
to leave the light, but there's not enough
of anything here. So I need to just dampen it down and I'm going to put
in touch more initially, just a touch more yellow Oca, a little bit of my burna a little bit and
let it just softly bleed. Not overthinking it,
just adding a bit more, something on there. Again, we'll probably
have to balance up here, but I don't want to
get it all at once. I do want to put some
stripes in the tail, in a wet down here. My tail where I used the where I didn't really like
the brush that I used. But that's okay because we're going to deal with that now. Too little brush. Same brush that I used for
the stripes there. Brush on the side following
the shape of the feathers. Sit back, That's
probably okay for now. The last thing before I
let you have a break, I need to put a touch of
something on this shoulder. I'm going to pick
up a little bit of my burnt sienna and Van ****
and just pop a touch of something really not very
much onto dry paper. I haven't wet this for a change. I'm just going to drop in maybe some fresh
paint out of my chip. So just a little bit of bent. Na think I had more
band there on the page. But I just want to
suggest that shoulder, bring it up to the face. I can't do it with that brush. So I've got to switch brushes, putting a little touch
of something but leaving that light I'm just
looking at it. Probably needs, again, just to balance up with
everything else. I'm just touching a bit
of yellow ochre into it. While it's wet now, it's a little bit
darker than here, but we'll worry about that later and we'll
balance that off. Okay, so I've been
there for a bit, I need to come out
and let that dry.
10. Strengthening the Shadow Under the Wing: I'm fully dry again. Now, now I want
to get a bit more serious about some of my darks. First place I'm going to
start is around the face. I'm actually going to
wet this down first, like we've been
doing the whole way along over the back of the head, just into that shoulder
underneath the neck here. I'm going to touch a bit of
yellow ochre and a bit of my burnt both here. Wash my brush. Just patally, bring that over the top. Okay, while that's wet, I'm going to take not
quite tiny brush, my size three, I want
some bandike stripes. Now I've got to test
out how the page is, how dry my brush is, how these are going to stick, coming on and touching down low with really toothpastaint. The reason I stayed
low is because if I put that on and it was too
wet and it all spread, I know I'm going dark under here anyway, so it
doesn't matter. Whereas, if I had started up here and they'd really
spread too much, it'd be hard to get off
to come underneath. Okay. To dry my brush, just to touch and just
drag a few darks again. Because the idea is
that I don't want to fill everything up
in, up the top. And it's really easy to
over paint at this stage. Just teasing that
back, softening there. Okay, so those are holding enough that I've got
that patterning. I'm going to come
over here now onto the tail to push that tail back. Bring this forward. I'm going to do something
completely dry here on my tail. I'm going to wet
down along the edge. I'm just going to take
a bit of my Vandyke, a bit of Indigo, and just touch that into the wet page and
let that bleed out. I think I want a
bit more warmth at. I'm going to take a bit more of my burt CN into that.
Just a bit cold. I'm just chiseling out so that I can see where that winding
shape is washing my brush. Something that I haven't
really said this time. When you look, painting doesn't necessarily look
quite the reference, but that's okay because
it's just a guide. I don't have to get
it exactly the same. That's not what
I'm going for us. I got that pushes it back. Now I'm very aware that I need some more
stuff up here while we're thinking about patterns sticking with my little brush. Just for the minute. No,
actually no, that's no good. Go into the bigger brush. Wetting down yet again, just coming up to
the edge there. Now, again, I don't
want to overdo it, but I need little bits. I picked up my Van ****
little bit of stuff. Just watch that. I don't
leave too much of a gap. Sit back. Okay, that's
enough up there for now. Now I'm going to come
back to this side. My stripes have disappeared
a bit on the tail there. But we're going to lift
some highlights in there. So I'm not going to worry
about that at the moment, but I need this to
be much darker. I'm going to start,
I'm going to stick with this little brush,
Not my tiny one, but I'm going to use
my tiny one under here all the way down
because I'm going to keep the light down
here pretty wet now. I've got to be careful. You can wait until all of this dry. Before you did this,
I'm living on the edge. Just be careful. I don't want
to touch under there just yet my water because I don't want to bleed into
that under the neck. All right. Now I
need to really pay attention to the shape
of that ruffle here. See if I want to back that off. I need a fair bit of
water on here because I got to get some
strong pigment. Now I'm picking up my
Van **** and my indigo, creamy and dropping that. If it doesn't move, you haven't got enough water on. So you want to flood it more. You need this pigment to shift and work its own way
around teasing it down. Okay. And I have to
watch this edge. I really wanted to
clean brush then. I didn't really want to do that. I'm looking from that
transition from dark to light. I don't want to hard edge. I want it to dilute out as
it moves down the page. I'll have to keep an
eye on this dry edge. Switched to my smaller brush, picking up some more, my
Indigo and my Van ****. Now, I want to be really careful in here to chosel
out the shape that I want. Okay, so in here I
need to actually now really decide what
shape I want there. And the little flick
for the feathering, so I can chisel it in
a bit if I need to. I'm just dragging
paint from underneath there up into his face, tidying up that shape. And I want to drag that
dark drying a bit hard. So I'm just going
to soften that. Yeah, the important thing here, don't introduce more
water into here. If I'm adding, I can add
more pigment if I need, but I can't introduce
water at this stage. I clean my brush and I'm
softening my hard edge there, but I'm not introducing
more water. If I do, it'll push
all the pigment back. Still not dark enough
underneath the neck there. Solid pigment. Less water on
my brush than in the page. Just dropping that in. You've got a few
minutes to work. Watch the balance
of the color there. I picked up more blue
than I did brown. Just back that off a bit. Still not dark enough
underneath here, so I keep painting my tissue
to make sure I'm drying off. Actually, I don't mind that. Is that little light there
is in the reference? I might actually leave that
there. I don't mind that. Okay. I might need to
close in that light, but I've been in
there too long now. It's starting to misbehave bit, so I'm going to come out of
that and let that fully dry.
11. Finishing the Face: Next place I'm going to go, I'm going to come
back into the face. I'm going to
strengthen the sienna that I've got around the face. I'm going to wet down a little
bit with my little brush. So it will take me a little
while to maybe the bigot, slightly bigger brush
would have been better. That's okay. All right. So I've
put some water on. I'm going to get
some bent Sienna and throw that on the page. Just need a bit more. I can flick that out onto that. I've got another little
line of light there. I'm suggesting that feathering, without really painting it, I'm just leaving whites each time. Leaving a dry wash each time. Now, I need to be a lot
stronger around the eye here. Probably underneath the eye too. I'll get some really
solid paint out of my Eve and drop that in. Now the only reason I'm
going straight into my tube is because
I've left the lid off this one and so I can't
squeeze any fresh paint out of it because I
treat my paints badly. So I have to go straight into
the tube. So don't do that. Don't let you paint dry out. Make sure you put your
lids back on properly. I'm just working that around. All right now. Still not
dark enough in there. So now I'm going to
pick up a bit of my Van **** and a
bit of my Indigo. And come and just now that
that's all wet paint. Straight in? Yeah, maybe
a bit of that dark, the top wash my brush
and soften that back in. That burnt canner is still wet so I can get
it to blame a bit. Drag that that dark
over the eyes. I'll just drag that out a bit. I'm hoping that the paint
will do its own thing, that I'll get some
nice blades and nice separation that I think,
oh, yeah, I like that. I'll keep that
rather than really looking too hard at the reference and
trying to paint it in. Okay, sit back. Yeah,
that's getting there. I think I might put a
bit more strengthen up the Ben Sienna. Preferably I drop. Don't do that. I just dropped a piece of, a bit
of water there. Which might go badly for, because I think that's dry. So be careful when you're coming straight over the page
with the wet brush. All right. So that's a
nice solid sienna there. I'm leaving a little flash
of light maybe see okay, bit more, more color up there. Wash my brush and just running my brush over it
to get a little bit of a messy, messy wash. Now I'm going to darken the bag. I had a yellow ocher
wash and then indigo, but it's just all dried
a little bit too light. I'm going Indigo straight onto the dry page
on that bottom. Then I'm coming into the top. This time I will
try and leave that little I've darker
on the bottom, popped a bit on the top. Bea will wash my brush
and then blend that. I'm going to start I'm
fully dry in here. I want to build up my dark
underneath the neck here. I've got the blue and
the brown in here, the indigo and the Van ****. I want to balance that off and get a little bit
of that in here. I'll go back to my larger
brush paint that down. I'm just popping a bit
of water on picking up my brown and my blue
and dropping that in. If my stripes disappear, that's I can restate. It looks like they're going to. So I'll probably have
to wash my brush. I want it to soften as
we come over the back. I'm washing my brush and
worrying it over that edge. I want it to be really
strong in here. My smaller brush,
really toothpaste, you paint, drop
it into that wet. I haven't come out to
my pencil line here. I'm just going to tidy up the shape that's starting
to round him up. My stripes have
disappeared a bit. While it's still wet. I might just grab a
little bit more vandew, more in just because again,
I want the suggestion. I don't want to overdo it. Okay. Last thing
before I let you stop, I want a bit more
warmth over the top. I've not got much
water up there. I'm going to take I'm not
going to wet it down first. I'm going to take a little
bit of yellow ochre. I'm a bit damp
here. That's okay. I'm just going to move that
yellow ochre around a bit. I just want a little bit
more on the top of the head, Probably in that
shoulder here there. I did just a bit of water on. If Chuck a bit of
water on first it spreads or I can put the pigment on and spread it out like I did on the top here. I've been in there
a few times and haven't quite gotten enough on. Then when I look, probably
that here needs a little bit, it's sitting back and seeing
what needs a bit more. All right. Now I have a couple of
little details to go, but not a whole lot. I want a little bit more
in the face and I'm going to pull some veins
through these feathers, but I need that to dry
100% Before I do that, I'm going to come
out for a good 10 minutes and let that settle in.
12. Lifting Some Highlights and Adding Last Details: Okay, so we're on the
home with stretch. Now, just a few little
bits and pieces to do. First up, I'm going to lift
a couple of highlights with this bright, stiff
synthetic brush. I'm going to wash it, dry it, come onto the page, push hard and drag my brush up, wash it again, clean it, and just drag that in. I'm not going to
do it all the way. Might soften it up
off the top there, but I'm just going
to get a few in. You have to keep cleaning
it or you just drag pigment everywhere
where you see. I don't have much pigment here, so it might not for much
of a vein, we'll see. This is one of the reasons
that I don't take down because I tend to
move the page around a bit, may come this way. For this one I'm going to get less heavy with it as I
come around because I've got so much light
at the top maybe. All right, so that's probably enough on
that side. Might see. I'm not sure if I've got
enough pigment on this side. I'll see whether I
can lift, maybe. It depends how much you've got on as to whether it's
worth doing or not, but it can help you straighten out your direction of the
feathers if you them up a bit, like they got a bit bleedy
there so I can pull it back. All right, and the
only other place I'm going to pull a couple
through the tail. So washing my brush
just a little bit, it's good to do
sometimes if you put too much paint on and you just want to lift a little bit of light in, it's a handy thing. Handy brush to have. All right? So that's probably all
I'm going to do in there. Okay. I probably don't have
enough pigment in there. But again, I want to maybe finish everything else before
I make a decision on that. Coming back into the face, I want to just strengthen
up the dark underneath. I'm going to go onto, this time I'm going to go onto dry paper. I'm going to take
really milky indigo. I'm just going to
come underneath that beak and just
speckle around. Put a little bit
more paint in there. Then I'm going to
come now that I've effectively wet with indigo, I can just touch a
bit more pigment in. Objection. I want to strengthen up the ring of feathers that I've
got around here. And again, mine isn't exactly
the same as the reference, but no one's going to
have the reference next to the painting,
so that doesn't matter. I'm going to paint
down a little bit of water just around
that inside edge and around this edge as well, I just want it a bit stronger. Then I pick up my Ben, Sienna and Van **** and just whack a little bit more
around both edges. And again, roughly, I don't
want to paint a line, I just want broken strokes, mix of wet on dry, wet into wet. All right? I want a little bit darker in the
front of the face there. Wet that down like
we did before. Bit of my no, bit of my bandke. Just a bit stronger. I'm just going to touch my
tissue to the top of that. Actually, I've lost.
It's a bit messy there. Let me see if I can
tie you that up again. I've got my hard brush now, that oil brush that I
used to lift a vein, softening the wash
that I just put in, then I might just run it on this edge too because I've got a little bit heavy there. So it's a clean brush and I'm just lifting a bit of paint. It was a bit too patchy. I've just lifted that in
there to settle that back in. Using that brush in there helps me define what's
going on in the face there. A couple of other
little things to do. I'm going to put a little high light in the back
of the eye with some Gus straight
out of the tube. This is where you could
have left the highlight. I'm just going to pop
just a little spot there. Sometimes I've got
a little flash of light under the eye
there, but not much. If I dry my brush, I've I've had the gash on and I've just
pulled the excess off. You can if you
need then just run like a little bit of
a light underneath, wash the brush and just
soften that in the G. Depends whether you left much. I hadn't left much light there. Now I need to darken off
that because it's again, still too light,
straight indigo. I'm dry in there now. I can strengthen up the
bottom of that big. Okay. And I'll show you. I don't really have a
lot of pigment there, but something that
you can do it if it's a little bit
boring in here. Again, with this flat brush, what you can do is we did
like I did underneath here, is you can come and
lift the pigment. And push it to push it to the edge so
that you end up with a little line of pigment just along the edge there
and pull that through. This is one spot where
you can push and pull quite a bit without
getting into strife. This is Archer's paper, so it will take a fair
bit of punishment, some others won't take as much. But this is pretty good for
mucking around like that. The other way place that
you can use it for. You're not going
to be able to say, I'm going to turn my hand, let me see, paint out
that way as well. You can use this brush to tease pigment if you don't have
one of these in your kit. Recommend. I highly
recommend getting 11 more. I keep saying that
I'll get to finish, but I just want to show you
things that you can do to help something else you can do. I'm a little bit
heavier around here. If you were too heavy
around the face, I can also come and lift a bit of that pigment
anywhere where you've got a lot of you can use to help
put a bit of interest in. And you don't need much to really make quite
a big difference. So I can just get a little bit of a highlight around there.
13. Finishing Off: Okay, We've been at
this a while now, and I think it's
probably finished. Except every time I look at it, I feel like maybe I
need something here. And this is one of those points where you can really
ruin your painting. Because probably what I should
do is wait until tomorrow. But I'm going to do
it now and just see. I'm wondering whether
maybe I just need a few more Andy Stripes here. But I'm going to do it as a dry brush stroke rather
than wet and wet. I'm going to take my
size three synthetic. I'm going to keep
some tissues close by in case I need to change my mind that I want to take
it off really thick paint, but I want to make sure it's not too much
water on the brush. I'm just going to put a few dry strikes on
just to balance up. That one might be a bit heavy, that's what I want
the tissue for. Just to give myself a
little bit more there. And then potentially
I need something a little bit more in here.
Dangerous territory. Now here I am going
to do wet and wet. I'm going to throw a bit of
water on what do I want, Maybe a bit of burnt
sienna. Have I got that? Just a little bit more paint that's too heavy so
I can use my tissue. I like those that's wet and wet. And just soften that back a bit, maybe a bit more here. Okay. And I'm officially saying
to fiddle one more place. I don't like that the
stripes disappeared there. I might see if I can do that. Same, just a touch more officially in
dangerous territory. Now that is where I'm going to stop Now when you get to
the end of the project, if you're happy with what you've done or even
if you're not, feel free to upload a photo to the Skillshare page
under the project section. I'm always delighted to
see what people have done, and I'm always happy to give feedback and answer questions. I hope you've enjoyed the class and I'll think about what
we'll be painting next time.
 Nadine Dudek, Professional Watercolour Artist