Transcripts
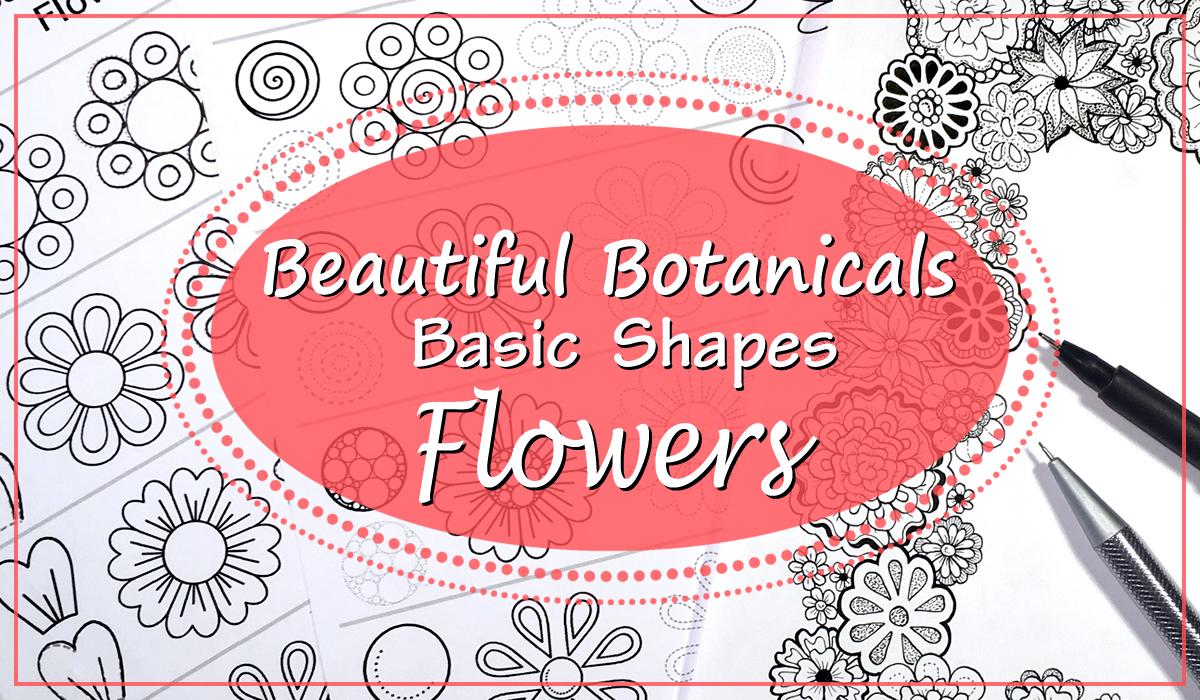
1. Trailer: Hey everyone, my name is Jane [inaudible] and I'm an illustrator, author and pattern designer with a passion for teaching others fun techniques in drawing. In this class, I'm going to share with you my simple techniques to drawing beautiful geometric styled flowers. This is the first in a three-part series of botanical drawing, where I'll show you how to draw using my popular basic shapes method. Our focus in this class will be on the flowers and how to achieve beautiful designs with simple shapes. I love finding new ways to make drawing fun and easy for everyone. My techniques are based on breaking things down to their simplest form and then creating beautiful results from these simple ideas. I provide you with lots of practice worksheets so you can easily follow along with each lesson. I walk you through the techniques step-by-step. In the end, we'll make a beautiful hand-drawn floral frame using the techniques we've learned in class. You'll be drawing beautiful flowers in no time. It's a great way to relax, distress, and all you need is a pencil or pen and some paper, easy, portable, fun. So come on in and join the fun. See you there.
2. Getting Started: So thanks for joining me in this class today. I'm going to share my techniques with you on how I draw my geometric style of flowers. I love shapes and patterns and often, I just play around with these to see what comes up. If you look around you, nature has an unlimited supply of inspiration. I don't settle to draw a particular flower, but I definitely use real ones to inspire me or just spark ideas. So I encourage you to explore gardens, go for walks in nature, take pictures. All of this will definitely help you get ideas. I provided worksheets for each lesson in this class so you can use those to follow along with me. We'll explore petal shapes, sizes, petal fills, and flower centers and then, we'll experiment with combining and the layering them together. I'll also show you how I draw my rosette style flower and once we have the symmetrical practice down, I'll give you a speed drawing demo of how I use these ideas in my freeform drawing. Finally, we'll complete a floral frame project that we can use to color or frame our pictures. Let's go have some fun and print out your downloads, which you can find under the your project section and grab some pencil and blank paper. Let's get drawing.
3. Petal Shapes: Now to start, we're going to work with petal shapes. So follow along with me on worksheet number 1. We're going to work through five different petal shapes. The first one is a circle, very simple, very easy shaped to start with. I've laid out a circle for you to trace. For each of these worksheets, I've laid out clean, symmetrical shapes, so you can get the feel for them. But I will show you later how I do free-form styles and you'll develop your own style for the shapes and flowers the more that you practice them. For now, the flower, you're going to place the circles all the way around the center, and you've made your first flower. The second petal shape we're going to work with is one of the more common used in geometric flower shapes, an upside down U. You can practice drawing the petal itself, and then we will add it to the center to make our flower. I've added a bottom curve line on the petal to represent where it sits on the center, but when you draw them on the flower, you won't be drawing that bottom line. A lot of us have been drawing this shape since we were a child, it's very much the look of a daisy. The third petal shape is a heart shape, but without the pointy bottom on it. Just like the petal shape above, except it has a dip in the center. Again, you're going to draw these shapes all the way around the center, just as we did above, and you're going to end up with your third form of flower. Now moving on to the fourth variation, the fourth petal is similar in shape to the second petal that we did, but this one has a point at the bottom. In this case, I'm making the point touch the center, but these can be used as floating petals so they can float above the center as well. I've played with a lot of these floating petals in many of my other classes, it's one of my favorite shapes, and it also gives you a very similar look to a daisy. The last shape that we're going to work on in this class is similar to the shape that we just did, except it's upside down. Again, I'm going to join the center section to the petal, but you could let the petal float above the center as well. This style of flower is going to be similar to a lily or a poinsettia, there's many flowers that take on this shape. Now that you have the five petal shapes, you can practice these. I've included in your worksheet number 7, a set of practice grids for your flowers. I've set up the different size centers and I've divided the grids up by six, eight, or 12 sections, so you can play around with different styles. With your page of petals shapes beside you, try some of the ideas out on the practice grid. The grids are going to help you stay symmetrical until you get the feel for the shapes and how you want to place them around the center to create the flower. Practice on this grid for a few tries to get the feel of the shapes before we move on, and later on in the course, I'm going to start to show you how I do more of a free form style.
4. Petal Sizes: Now we're going to move onto worksheet number 2. In this worksheet, I'm going to use the same five basic pulse shapes that I taught you in the first lesson but we're going to change the sizes of the petals. So in order for me keep all the flowers the same size for this class, is I want to create a consistent look. It's the center that's going to have to change sizes. So you will notice the center changes sizes based on me changing the petal sizes. You can keep the same center when you're doing the free form, even though some flowers come in different sizes and that's okay. The first one with the round petals, we're now going to make the petals smaller round petals. This of course means our center will be larger. We're going to work our little round petals all the way around the outside. I'm using a marker so you guys can see what I'm doing but please feel free to use a pencil, as this is your learning phase and do whatever feels best for you. Now in the next flower example, I'm still using the round petals but I've stretched my circle petals out. I'm still getting the same amount of petals around but this time they are stretched into ovals and of course, my center is smaller to compensate and keep my flower size consistent. Now in the second example, we're going to use the petal shape that we used in the first one, the U-shape, but we're going to squish it so they're thinner and I'm placing more of them around the center. They have a very similar look to the ovals we just did but these are attached to the center, so they are just long, thin U-shapes. This is a very familiar petal shape, like we said, on the daisy. This is the go-to shape that we've been making since we were little in all of our drawings. In the next version, am going to alternate the sizes. I'm going to place long thin petals next to short thin petals. This gives us yet another unique look from the same shape of petal, just by playing around with the sizes. Now our third shape, which is our heart-shaped petal, again, I'm going to make them narrower. This allows me to put more of them around the center. So right now, we're working with very symmetrical shapes, it helps you get the feel for the difference in shapes and sizes, if we're working with symmetrical shapes, and placing equal numbers of petals around the centers. Once you get the feel for this, then you'll be able to do your free form flowers and perhaps you don't want them to be quite so perfect and symmetrical, and each of your flowers will have your style and unique look to them. In the next version I'm doing here, we'll have short wide petals. We'll place fewer of them around the center and this gives us yet another look using the same shape as the last two examples. Now we're going to work with our fourth shape, which is our teardrop. In the first variation, I am going to vary the sizes of the petals and I'm also going to alternate a large tear drop shape with a small tear drop shape. The large tear drop shape I have touching the center but the small tear drop I have it pushed up a bit and it appears to be floating. I don't have these tear drops touching but with this thick pen, they kind of look like they are touching. In our next version, I have used the same configuration but I have thinned out the petals. This creates more space between the petals, so now they're not touching. It's the same idea as the last one but a different look. In our last flower, we're going to use that upside-down tear drop petal again and in the first version, I've thinned them all out, so I can place more of them around the center. They are just beside each other but with this thick pen, they tend to look like they're overlapping. That's okay too. In the second version of this flower, I am going to alternate thin one and a thick one and I'm going to have all of them touch the center, although they could be floating as well. In this version, I find it easier to draw this flower if I move the paper around, so that I'm always drawing the petal upright but for the purpose of this demo, I don't want to make everybody dizzy, so I am keeping the paper still and I'm learning to draw these upside down. So you draw however works for you.
5. Petal Fills: Now we're going to grab worksheet number 3 and we're going to start to put fills into our petals. So now we're getting fancy. We're going to start to play with what is inside the petal. I'm going to start with our first basic petal of the circle, and our first fill will be a smaller circle. So around the flower we add the petals and inside the petals we add a little circle. In our next version, we're also going to add a circle, but we're going to set it off to one side. First we're going to draw the circle, and then the center circle will be touching the bottom of the circle. We're going to add our circles around the center, and then our center circles inside are also going to touch the center. Same shapes, different looks. When I'm doing my designs, I like to lay out the basic flower shapes first and then I come back, I add in the petal details like these fills after. I like to work in layers like this, constantly coming back and forth, adding in more detail as I work the design. So here's a second version of the basic U-shaped petal. We're just going to add an inset to our petal. So we must draw the petal all the way around, and then we draw the inside petal. This is just a geometric style. We're not really worried about realism here, so we're using basic shapes and strokes to approximate and trick the eye in to seeing what you want. So on our next petal, we're going to add in a vein or creases in the petals. So once I've added in the petals, I can add in the lines that are going to represent the vein, or they represent creases in the petals as they fold over each other. These go in best if you work them with a quick stroke from the center outward. The pen usually starts thick and tapers off with speed and pressure. So if we start a stroke at the center, that's where it will be thickest and then move quickly outward and ease off as we go. This gives us a subtle but definite taper to our stroke. The next shape, the heart shape petal again for my first version that I'm going to add in those strokes again. So the longest part of the stroke follows the longest part of the petal. So in this case, the long strokes are going to be on either side and the short stroke will be in the middle. In my examples, I have the strokes all touching the center circle, but some of them can float away from it as well if you'd like. You can experiment with all of this. Another option is you can dot or dash the lines instead of solid lines. It's all up to you. In our second version, we're going to add a slight inset on just the top part of the petal. It gives you a layered look to the petal. So first, add all your petal shapes all the way round, then work the inset lines in next. You can do this with a thinner pen as well. Your accents can be done with either a thicker or thinner pen. Again, dotted or dashed lines. This all gives your flower more interest. You can add more fields to your petals. You can even add veins in here as well. So our next batch we're using our teardrop petal. So we're going to add a complete inset enclosed inside the petal this time. First we add the petal all the way around the center, and then I'll work a complete petal inside the first one, totally enclosed in space so they don't touch. Again, this can be done with a thinner pen or a dotted line. The next flower I'm going to do a half inset that gives you the look of an inner shadow or raise section that catches the light on the inside of a petal that is rounded. This hook, I'm making a solid line. I often like to make this partial solid with a few dash and dots on the curve part as well. Again, I encourage you to play around with these ideas. They are geometric shapes approximating what you see in nature. The last one we're going to work with are pointed petal. In this one, I'm going to add a solid line, like a solid vein that runs right up the center of the petal. I'm going to add a slight curve to it as well to create some movement and interest in the petal. You can make this a double line for interest as well, or add stippling into half the petal to make it look like half the petal is facing the light, and then the other falls into the shadow. On the next flower, I'm going to add a tip like I did on the above heart-shaped petal. So after I had my petals all the way around, I'm going to add just to draw a line inside the top portion of the petal to give it a layered look. Once you get going on these, again, the ideas are limitless and it's all up to your preferences.
6. Center Fills : Now the last part of the individual flower parts that we're going to explore today are the centers. I've used a circle for all my centers so far. So there are many different shapes you could use, but I'm going to stick with the circle and show you different ways that you can fill it in for different looks. A lot of the fills you think are going to be really similar in idea, but because I apply them differently, we're going to get quite a few different looks. I'm going to start with the spiral. Inside the center, I'll draw the spiral and get the fill for it and then I'm going to add it into the flower. I've chosen to use the flower shape with the circles. The next one that I'm going to do is this stipple fill. In this fill, I've left an unfilled ring just inside the outline as space buffer, so to speak. But you could feel the entire center was stippling as well. I've also made the stippling evenly filled, and I've chosen to put it into the stretched oval flower. The next center's just going to use concentric circles, which is just circles within circles. You can use the same thickness of pen or you can make alternate circles thinner, thicker, or dotted lines to achieve different looks. The next center will be half concentric circles. This gives the illusion of roundness to your center and the light bouncing off of one side. Again, these are geometric representations of realistic features. In the next design, we're going to fill our center with various sizes of circles. In this case, I'm keeping the circle border around the fill. But you could also leave out the outline so that you just have a group of various sized circles in the center of your flower. In this style, you can just fill in a few large circles randomly and then fill in around them with smaller circles. When choosing a center style, you can choose one that mimics or similar to your petals and their petal fills, or you can choose one that contrasts the style with something very different than your petal shape and your petal fill. Now, our next center is going to be another stippled center, similar to what we've done above, but this one is more about the shading. I started with a dotted curve line just inside the outline. Then I fill in stippling following this curve to not quite halfway. The stippling gets more sparse as you approach the center. The next inner fill will simply be a dotted line that follows the curve of the circle. This could go all the way around, but I'm just doing a semicircle here. Moving on, the next one's going to be a randomly shaped oval. This gives the look of a reflective bubble that catches the light. I curve the oval with a curve of the circle outline and give it a random warped look. The next center fill is going to be very small circles that form an inner circle to the center. I've kept the circles all the same size, but you could alternate the sizes as well. In this fill I have a space between the circles and the outline of the center again, like a buffer between the two of them. In the last fill, which is similar to the previous fill, I have an inner circle of small circles but I lined them around the inside of the center outlines so they are touching the outline. So you can see how many of these are very similar ideas, but with slight differences that in the end can produce very different results. That's the key here. Slight variations mixed with other slight variations, create a whole new style.
7. Combos Layers & Outlines: I've given you five different shapes of petals. We've explored variations of sizes of these shapes. I've shown you two different fields for each petal shape and finally 10 different centers so that adds up to literally hundreds of possibilities for flower ideas. Let's explore some ways in which we can put all these ideas to use. Grab your worksheet Number five and we're going to work with flower layering and outlines. Now we take one of our center fills and we're going to add it to one of our petal shapes with a fill and create our first flower. Then we're going to choose a second pedal with a fill and we're going to add that around the first flower for a second layer to our design. Then we're going to add an outline around the outer edge of our design. Outlines can add a lot of interest your designs and can be added anywhere. Then I added a second outline around the first one, in this case, to complete our first layered flower. Now in our second scenario, I chose a different center and a different petal shape and we created our first flower using these. I alternated the size of the petals in this case. Then I added an outline around the outer edge of the first flower shape. Then I chose a second pedal shape and a fill, and I drew that in around the first flower. This gives us another nice layered flower style. Now you're getting the idea. In our third floor, I've chosen a different center again and a pedal shape with a center fill. I've created my first flower using these. Then I've added an outline around this first flower. You can leave out the outline as this would give yet another variation on this style. Then I chose another petal shape and used it around the first flower. As you can see, it only plays to equidistance between the petals of the first flower. Then I finished off with another outline surrounding the entire flower. Let's do one more combination before I let you go play with all the different ideas you may be dreaming up already. I've picked my center with a fill and a petal style with a fill and I've made my first flower. Then I add an outline around this. I pick another petal style with a fill, and I place it around the first. As you can see, I choose a point that they will all start from. In this case, the second petal starts from one of the points of the first flower and ends on the point next to it. This keeps some symmetry in my flowers. I'll also do styles where the second layer has no relation to the first and is randomly placed around it. Either style works, I finish it with another outline. You could keep going and add a third and even a fourth layer to your flower. The ideas are only limited by what you can dream up so go have some fun inventing new flowers. In the next lesson, we'll change it up a bit with a new style of flower.
8. Rosette Flower: Now we're going to try a bit of a different style of flower that you can combine with the ideas we've already learned. This is called a rosette style, which is very common in roses, but can also be found in other styles of flowers with ruffled petals. I'll break it down into steps and it's really a simple process, simpler than the end product looks. You end up with a really pretty ruffled petal style of flower. It looks different each time you do it because it's a very free form design. We'll start with just a simple spiral, and then we'll add on our first petal. I start with the spiral ends and I move in a bit along the line. Now we create an elongated petal similar to that heart-shaped petal we did, but much wider and smoother and more free form. Wonky is good in this style. Now our next petal, we start again just up from where we ended and end wherever you like. You can mix it up and start where you ended as well. Just keep adding petals in this manner, getting bigger as you move outward. You can end at any point in time. Use your eye to decide if your flower looks balanced or if you need to add a few more petals to get the balanced look. You can make these flowers as small or as large as you want. You can keep going around and make a larger flower with lots of ruffled petals or you can make one or two rounds for a small flower or use it as the first layer of another flower and add different petals shapes around your second layer. It's a fun flower style that just comes with practice, so have fun with this one. I'll give you a few ideas of how I do it free form. It's one of those styles that is really fun to just doodle. You can do them anywhere. You don't need any structure to them. The more you do them, the more they make sense to you and the better you get with practice on these. It's hard sometimes to know where to end because you can make them huge or you can just do a small one. I always like to add an outline when I'm finished at the end. That gives it a nice finished look. But every one of these that you do is going to come out just a little bit different. Because it's such a free form style, that's the way they come out. Then you can have little add-ons to your petals, just like we learned in the other classes.
9. Freeform Sketching: Now, we're going to try some free form style. So get rid of that grid, and let's see what we can do with what we've learned. I'm going to stop talking in this one and I'm just going to let you watch me do some of my free form and hopefully it'll inspire you to get practicing on yours. Your style will develop as you do it and you'll come up with some great ideas of your own. I'll see you in the next lesson where we're going to talk about your project and get you going on that. So have fun with this.
10. Creating Your Project: Now let's try creating a design with the many styles we've been experimenting with. It's always fun to create something we can use with our new techniques. In this class, I've provided you with a square framework in the download section. You can use this to place under a blank page and we'll create a floral frame you can use the color, cut outs, scan it, and if you like, place a picture in it. First, I'm going to place it under a blank piece of paper and secure it with tape so it doesn't move. Then I'll just start to fill in some basic flower shapes. Use different sizes, scatter them around inside of the two squares, and use all the different techniques. This is the place where you can experiment. Once you have your flowers placed with your basic shapes, you can go back and add even more detail in if you would like. You can just add pen and ink detail, or you can leave it so that you can color it in yourself with colored pencils or markers. Initially, you can place the flower so they don't touch each other and as you get more familiar with it, you can start to overlap the flowers with each other as I've done in my example. The fun of creating these flower frames is they will be different every single time. It's a great way to experiment with different styles and there's no right or wrong way to do this. Just play with it. When you're done, you have a great coloring page. You can cut out around the outer edges of the outer and inner frames. If you have overlapped the frame as I have, you can create an outline to cut on. You could scan it in and use it to digitally frame your pictures on social media. Go and have fun with it. Create and then share your projects in the project section. I'm really looking forward to seeing the many creative ideas you guys can come up with. Thanks so much for joining me here. Will see you soon with the second part of this class, where I'll show you how the many styles of leaves, vines, and everything that will complement our flowers can be drawn. Until then, create, inspire, and share your beautiful work.
 Jane Snedden Peever, Living the Creative Life