Transcripts
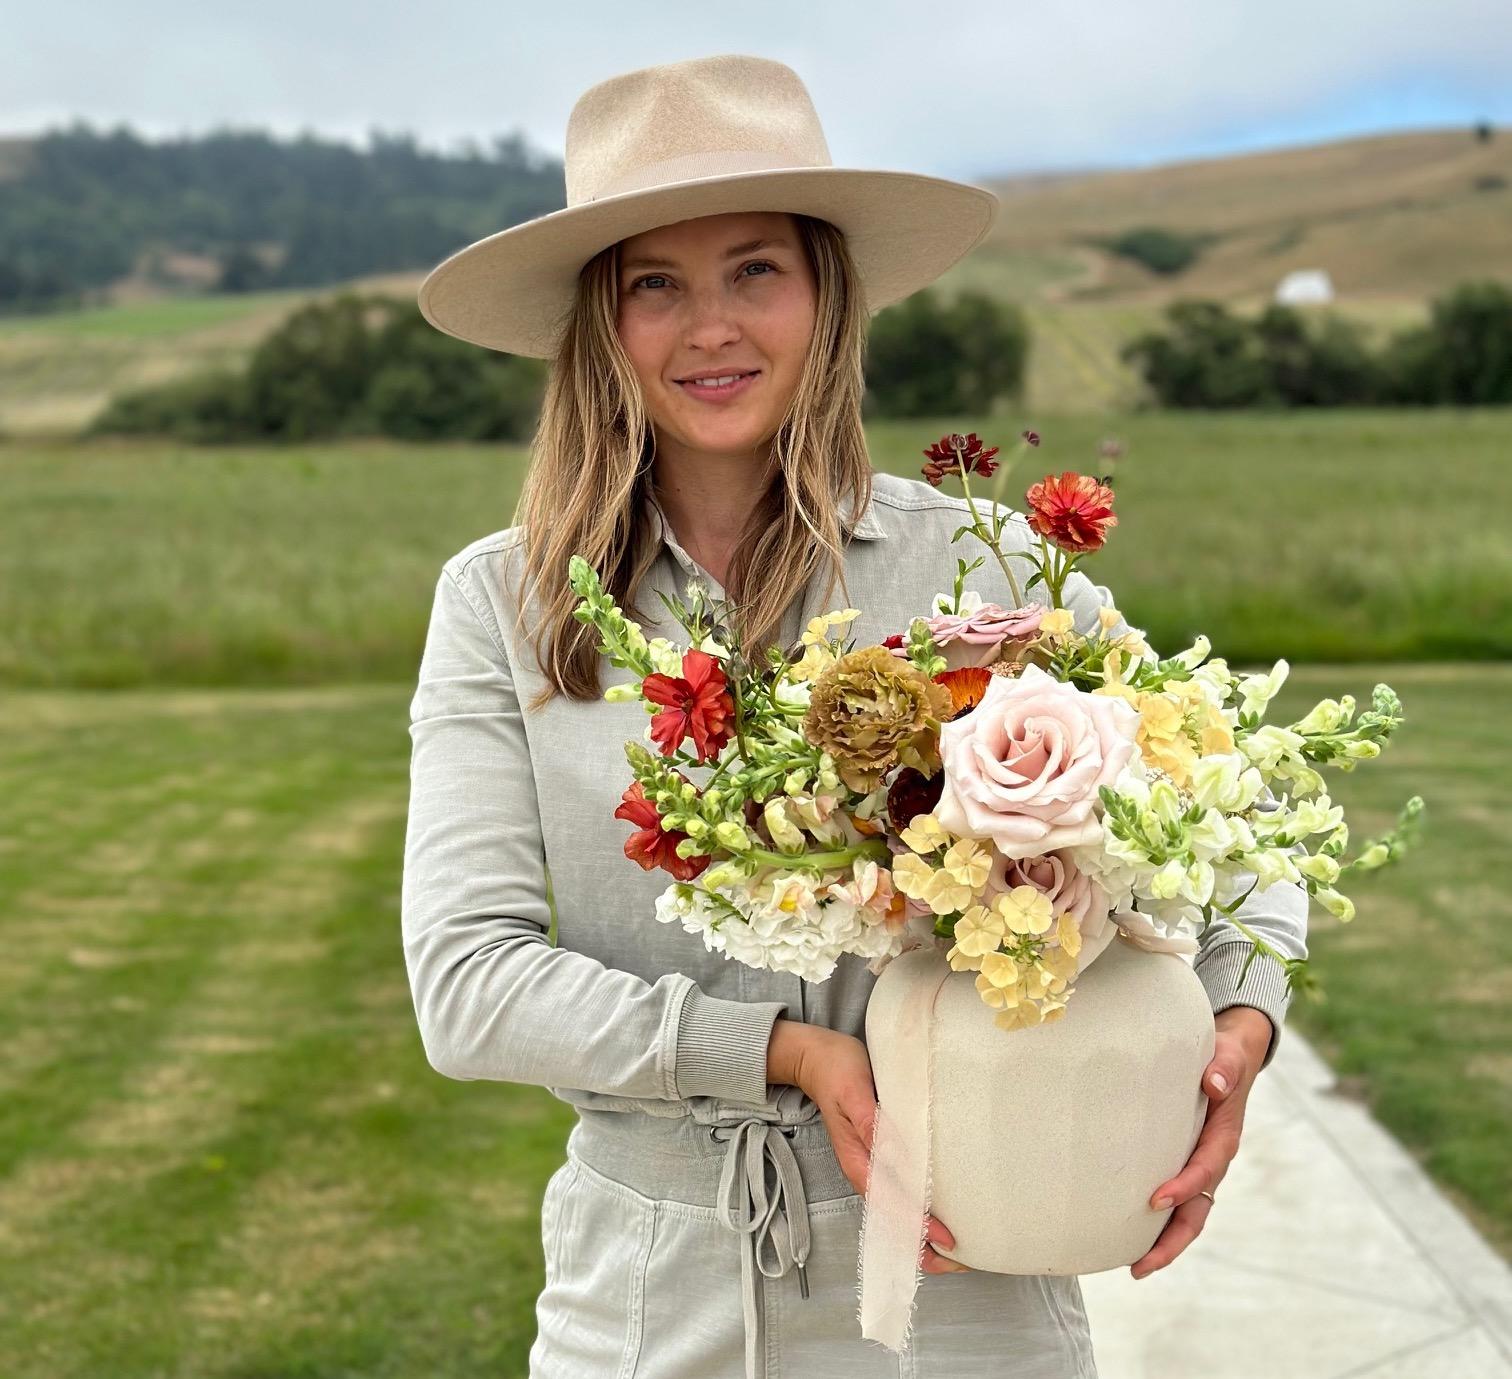
1. Introduction: Hey there, I'm Colleen
of Career Floral. I'm going to teach
you in this course, how to create flower
arrangements. Whether they're bud vases, center pieces, large
scale arrangements, and then even fruit styling. I'm going to really
teach you the basics and foundations of
creating something really elevated in design. It doesn't really matter where
you get the flowers from. And I'm going to
show you some tricks of how to source them. What's important is to have
fun and get experimental. And once you follow the basic principles that
I'm going to teach you, this is so approachable
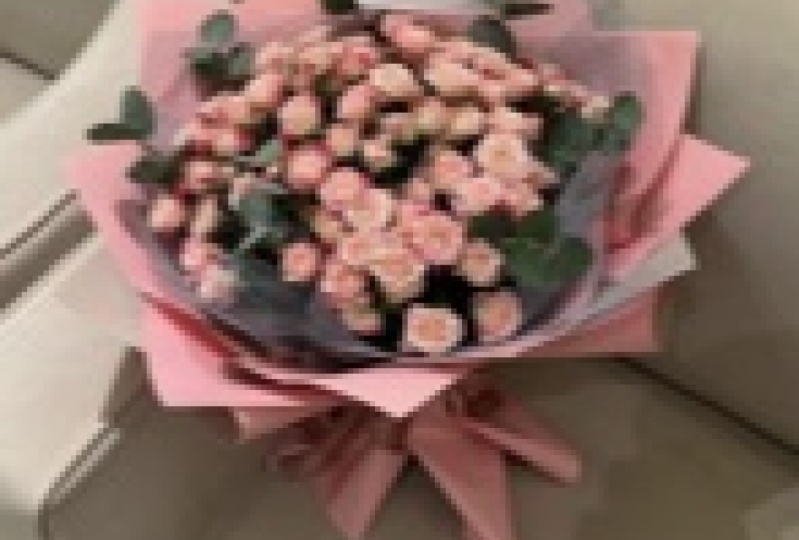
to anybody. You're going to learn
how to make this. And I know that it looks
pretty intimidating. It's really big, but
I promise you by the end of the course you're
going to be a natural. It's a smooth flow
from start to end. I'm going to teach
you products that you might want to have
on hand tools. How to set up a vase, where to source
your flowers from, where to look for flowers, how to create a color palette. And then we're going to get
into the designing portion. Once we get into the
designing portion, I'm going to show
you how to make a smaller centerpiece step
by step with some basics. Then you're going to
take that knowledge and you're going to translate it into making a large scale
arrangement. Just like this. The principles are
pretty much the same and it's so much fun. After I teach you how
to do the designing, we're going to end our course by learning how to make a
beautiful table scape, including all the principles
that we learned previously. The person who's going
to benefit from this is somebody who is really
excited to learn, has always wanted
to learn floristry, or maybe they already
know a lot about floral arrangements and
they want to learn a little bit more or see how another designer chooses
to tackle arrangements. I hope by the end of
this course that you're feeling really comfortable
in your skills. Because I wanted to make
sure that I'm taking floristry and making it
approachable to everyone. So this course is for
absolutely anyone. You don't have to have
any prior skills in floral arranging or
anything of the sort. It's really just
for fun and it'll help you feel really competent when it
comes to designing.
2. Vases and Supplies: Let's talk about all you might need to
complete this course. We're going to start
with vases and vessels and things
to hold the flowers. Right here I have a large
scale centerpiece compote. These are shallow bowls for creating smaller
center pieces. This is a small scale
centerpiece bowl, which are fun to put frogs in. Sometimes you can fit
chicken wire in here, but these are nice
for individual stems. I've got a water pitcher, and this can be used to
fill vases as you go. These are bud vases. I have a tall vase for our large arrangement.
Another tall vase. This is a small glass which
you can put smaller stems in. Then this is a large bucket that you'll use to put all
of your flowers in. I like to have about five
or six of these on hand, along with about five or
six of these glass cups, because it's nice to just put like one stem at a time in here. Also a lazy Susan
or a turntable, which makes it so
that you can see your arrangement from all
angles as you're creating it.
3. Where to Get Great Vases: Sourcing, hard goods
and vases is one of my favorite
aspects of floristry. I chose a pretty neutral
palette for today's project. And a lot of these
items I've linked in the course notes so that if you're interested
in any of them, they're accessible
to you as well. For example, a lot of items that I will find will either
be from thrift stores, home goods stores,
local ceramicist, or even designers
that I find on Etsy. My favorite thing to
do is to track down some vase that I'm really interested in and add
it to my collection. On two years ago, I was so inspired that I
started to do my own ceramics. And I made all of my bud vases that I use for
a lot of different projects. If that's something
that interests you, there's so many different
ways to go with pottery, but my favorite vessels to
use are often made out of ceramics or natural materials
like marble or stone. I don't often use wood just
because it's so porous. But that is a rundown of where you can find
these and like I said, I will be sure to link them for you so that if you want
anything that's here, I'll try to source it for you.
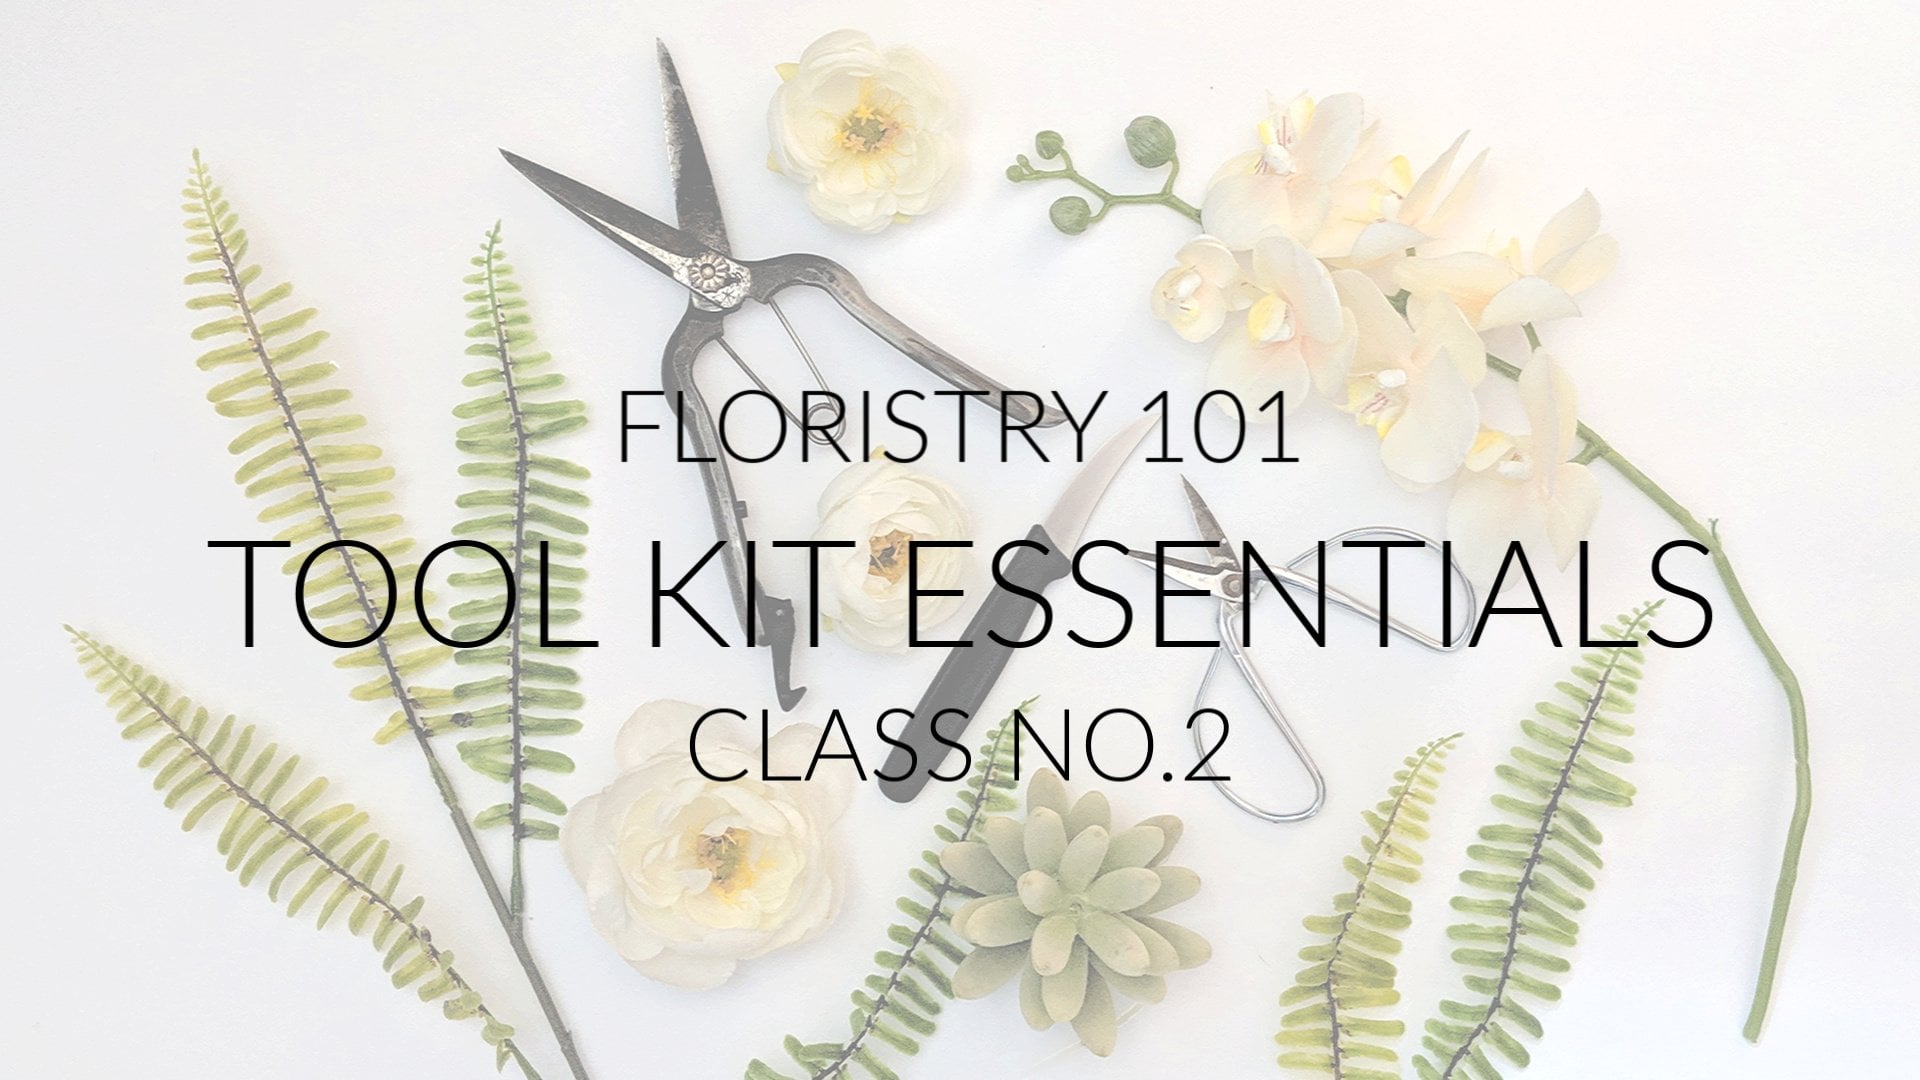
4. Other Essential Tools: I'm going to introduce
you to some mechanics, tools, and items that
I use quite often. When it comes to floristry, I like to keep everything
organized in a tote like this. This is actually a diaper bag. I find that it comes in
really handy on jobs. It's easy to take along and it keeps all of my
things together. Let's start with some mechanics. I primarily use chicken wire. Chicken wire comes in
either green or silver. Depending on the project
I will use either. I tend to like to
use the silver more then it's really nice to keep them even after
you've used them. So I'll store them in like a Tupperware or
something like that. Other mechanics that
you can use are frogs, which this is a metal poky plate that you would stick
inside of a vessel. To use that, you
need a sticky tack, which this is not a
very good bag of it. But this gives you a general idea of how
you would stick to this. It's almost like
earthquake tack. It comes in rolls
of green or white. There's that, those are
your basic mechanics. And then of course you're
going to want to have some wire snippers for
your chicken wire. Then I have some
traditional garden hears, you can get any type. I tend to go through
these pretty quickly. Other things that I like to use, I always have gloves on hand, especially these Nitril ones. These keep my hands
pretty clean. I find that from working
with flowers for so long, I started to be really careful about touching a lot
of the flowers just because of possible
pesticide use or other contaminants
on the flowers. Then I have these gloves, which are heavy duty and
these are my favorite. I use these when I'm cutting the chicken wire to
protect my hands too, otherwise you can stab
yourself really easily. Let's see, what else
do I have in here? Okay. I have three
different types of tape and I use these
for taping on top of either like I'll do a grid
with these tapes or I will use these for keeping the chicken wire
intact in the vessel. And I'll show you that
step when we come to putting the mechanics
within the vases. But this is a clear tape, This is my favorite to use, and I find it
extremely waterproof. These are two waterproof, thin duct tape types
in green or white. And then along with the
tack that's important, that's for the frogs. And then the other
things that I like to keep are you'll often get these when you get flowers from the supermarket
and I keep them. They help keep the water clean and keep a nice environment for the flowers within the vase. But if you are also interested, I use this a lot of times in my buckets to keep my
flowers hydrated and fresh. Especially like when I get the flowers from
the grocery store, I'll snip them off, I'll
put them in the bucket. And then I'll put just a
very small amount of this in the bucket and I find that it is good food for the flowers. This is floral life
crystal clear, and I'll link this for sure. These are all the
things that you'll need for this
course and they can get you by for just
about anything within basic floristry.
5. Preparing Your Hard Goods: Before we get started designing, we're going to put the
mechanics in the vessels. I'm going to put this
large one aside and I'll show you how to do it
with the small ones. First, I have my bowl
and I'm going to take my gloves and put them on first because I want
to protect my hands. In essence, you will take a
section of chicken wire and then you will ball
it up and you'll stick it within the bowl. Then after you put
the chicken wire in, you take your tape and you're going to make a
cross pattern over the top. I might lose the turntable
because I feel like it's being a lot of movement.
There's one half. Then you'll go the other across the top that secures the
chicken wire in place. This is a basic way to do
a mechanics within a bowl, and this is primarily what I do. I'll ball up the chicken wire. I might even save
my chicken wire, but I can use it multiple
times in a vase. Then from there, if I really
want to add more security, I can go around the whole
edge of the That just makes sure that there's
no shifting with the chicken wire balled up. Chicken wire cages
are so nice for holding stems and they create
a really good structure and base for all kinds of
flowers and really secure. However, if you want to add
a little extra security, I like to use a frog for that. You can get a frog
in different sizes. I'm going to use this one
for this bowl because it fits really nicely
down at the bottom. Then with the tack that you
purchase for your frogs, you're going to take it around the edge of the frog
going all the way around. I don't usually
stick anything in the center and push that
down with my fingers. Then I'm going to
stick it in the bowl. Then pushing with the edges
of my fingers to secure it. Sometimes I'll even
take my scissors and just on the pokey part, you can either leave
it like that for a really fun Japanese
ikebana style, where you get to really
see the stems and it's very minimal and you
can put water in there. Or you can go above and beyond so that you
really are secure with your flowers and put
chicken wire on top of it. You would just do the
same thing again, put tape this way and that way. Let's move on to
the large scale and I'll show you about how
I cut chicken wire too, putting my gloves on,
because I can't tell you how many times I've stabbed
myself with chicken wire. You're looking for the end. This is a really nice roll
of chicken wire because it's fairly small
in side to side. Sometimes they come in really, really big rolls that are
about like that wide. I can get a little complicated. I'm going to just take
enough where I know that I'm going to be able
to get into my vase, but also have enough overlap so that there's a lot of
grooves for the stems. I tend to pack my
chicken wire in. Some designers like to use less. I find that the
stems shift more and my preference is to
have more than not. I'm going to take my
wire cutters snip along. You can also use pruning shears. I wouldn't recommend
it because it'll destroy your scissors
really quickly. But if you have
old garden shears, those work just fine. Okay. Now that you have a that's how much
I'm going to use, really no real science to it. You're going to try to
look at the size of your vase that you're
putting it in. And I like to just smush around. There's always different
ways to do this. This is just how I do it. Not sure if it's the right
way or the wrong way. It's just what I've
done over the years. Once I get that in there, I'm going to smash it in so that there's a little bit of a
dome in the center. But that coming up too far on the edges because
I don't want to have to worry about covering this base with flowers, foliage, anything. I want to be able to have the
flowers get showcased and not need a bunch of filler
just to cover a base. Same technique,
again, with the tape, you will take a tape
piece across snip it. It is also possible to
use those other types of tape that I showed you earlier that are
more like duct tape. My preferences is clear tape. I just find that it really
holds up super well and very waterproof and
then you don't see the tape on the base base. Again, I'm going to go
around the edge just to make sure that it's very secure. Maybe take my hands in here and just move the
chicken wire around a little bit so that
I get closer to the edges of the
as close as I can. Then that is how you do it. We have the large scale
with chicken wire in it. We have a smaller one
with chicken wire in it, and then this one has chicken wire and a frog
in it for extra security. Those are the three
basic techniques that I use for my mechanics
within my bases.
6. Sourcing Your Flowers to Tell a Story: Before I start designing, I always start with
a vision board. A place that I like to
do this is on Pinterest, or I'll take magazine
clippings and I'll put them on a piece of
paper or in a portfolio. I take these with me when
I go to purchase flowers. Because what I'm trying to
do when I create a design is I'm trying to convey a
feeling or an emotion. Just like a painter's palette, flowers are a wonderful way to convey meaning and emotion
through their color ways. With all of my designs, I always try to pick a color
palette and stick to it. It makes it really helpful when you have a
vision board that you take with you to either
the Farmers or the mart, or the grocery store,
because you know that you'll be creating a cohesive look. With this project, I chose to go with colors that
I work with a lot, which are in the apricot sunset, almost neutral way
of creating a mood. And I feel like this creates
a very serene atmosphere. When I went to go
source these florals, I had a vision in mind that I wanted
something that was going to fade from being like an apricot sunset to having
little pops of yellow in it, and then a little bit of
purple and some whites. I work with this
palette a lot because I feel like it's really
easy to work with. But it also has
good depth to it. And it's not just your
typical white and green. Let's talk about where
you can get flowers from. There's a lot of
different places that you can source
flowers from, from either your backyard. Oftentimes, I'll use a lot
of backyard clippings or garden clippings or talk to my neighbor if they're
pruning a tree, and I might get some really
great greenery that way. You can see here that these
are some tomato vines. Now, this was grown by A. However, this would be something that would
be really fun to play with if you have a
vegetable garden going. Other places that you can source florals from are
the grocery store. I have some grocery flowers that I will show how
to process later. And we'll turn those
into something that looks very different
than what you see here. Places like Trader
Joe's or Safeway often have a really good
selection of flowers, and they're easy to find
and easy to work with. A lot of the flowers
that you see up here are flowers from local farmers. They're pretty easy to find
and they often have the best, most fresh looking
flowers that you can find from heirloom qualities. Also, I feel like a lot of
the farmers these days are getting so savvy with what florists actually
want to design with, and they're moving
towards growing flowers that are in color
ways that we like. So like this Flox
over here I found from a local farmer and I
found her through Instagram. A great way to search
your local area is either to do like
hashtag farmer, florist and then
put your area or hashtag flower farmer
and you can find a lot of different floral
suppliers that way. Otherwise you could go
to your farmer's market, that's another wonderful
resource for flowers. And then if you're lucky and you have a flower mart near you, just check in to see
what those hours are for non badge holders and that's a great way to find a
lot of flowers too. I know that sounds
really overwhelming. There's a lot of
different places where you can source
flowers from, but I want you to
understand that you can create something
super elevated, beautiful, luxurious from
just about anything, whether you're
getting the flowers from the grocery store, their clippings
from your backyard. I'm going to show you some
very basic principles and techniques that'll
make it so that you feel really confident
when it comes to putting some flower arrangements
together and creating some really high
end looking center pieces.
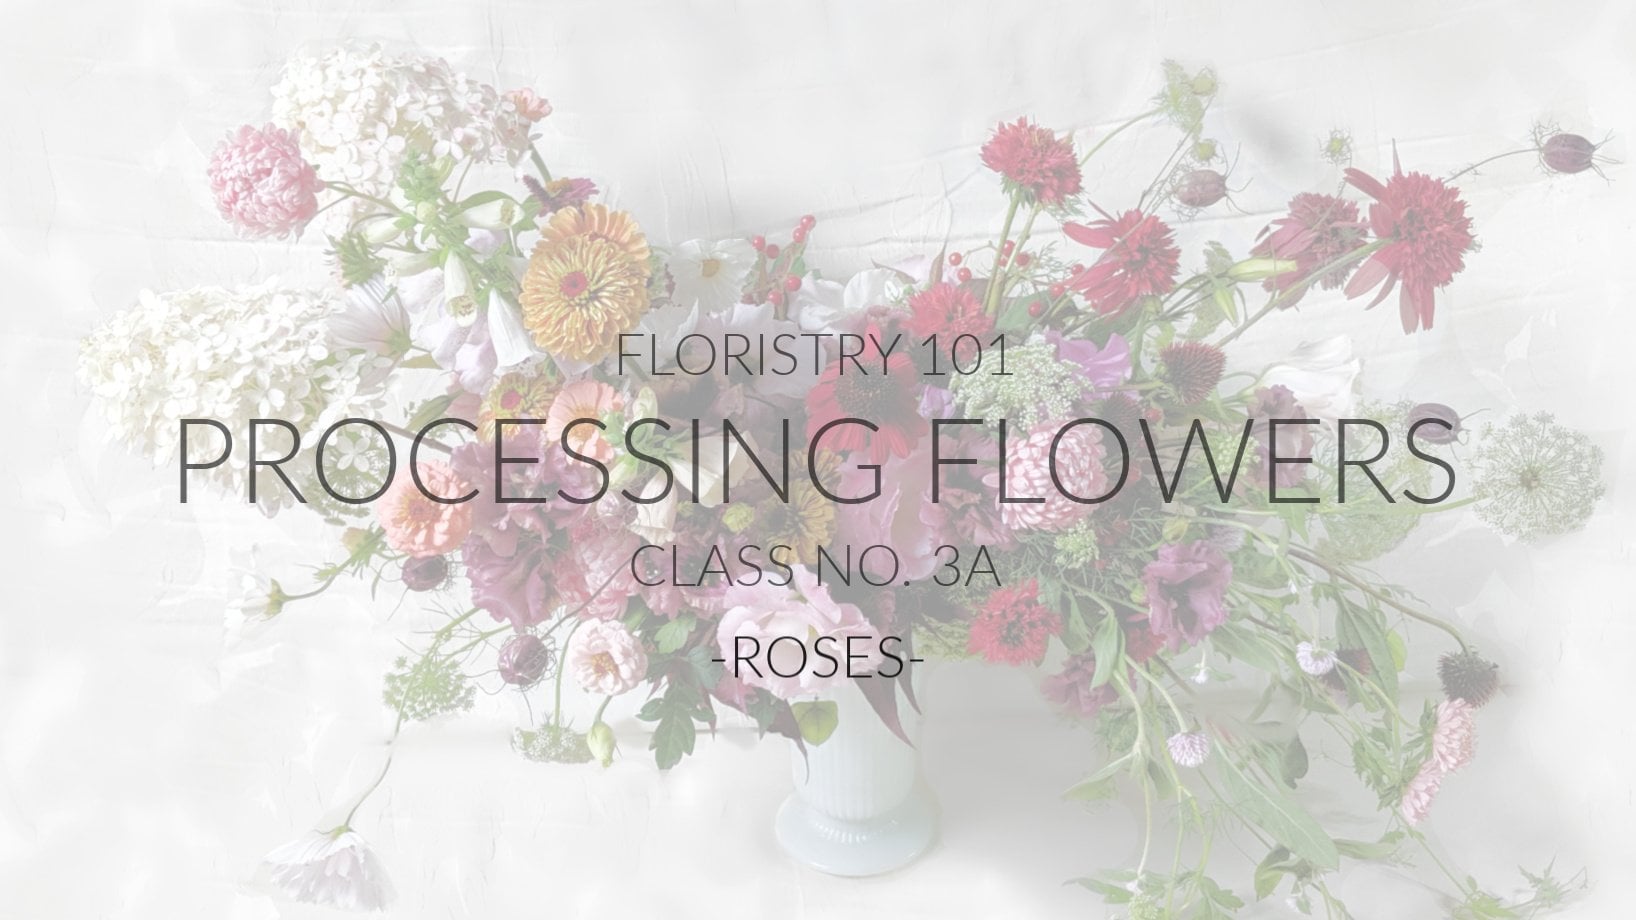
7. Caring for Your Flowers: All right. You've picked up your
flowers, you've headed home, and now I'm going
to show you how to process them and ensure
their longevity. There's a couple
different techniques that are involved in that, but it's truly not
rocket science. I remember when I got
started with floristry, one of the main
questions I had was, does every single flower have a different way that it
likes to be treated? And while some of the
flowers have a little bit of a different technique
for cutting them and prepping them,
for the most part, you're good to go with some of the most basic principles which are cutting off the stems, giving them a good
drink of water, and then making sure that maybe you're treating
your water with something like the floral life or the crystals that you can
get from the grocery store. Before I step into these, these are a little bit
more of specialty flowers. On how I like to process them, I'm going to put
them to the side and I'm going to show you how to process maybe a bunch that you got from
the grocery store. Let's start with this one. These are beautiful flowers. And before I do this,
I'm going to put my gloves on because I don't want to get
my hands all messy. And also, I just feel like it's a good practice
to get into. I've already treated this bucket here with a little
bit of floral life. But let me show
you how I do that. You're going to take a little
bit of this, shake it up, any of out of the crystals, you don't need a
whole one of these for a bit of water like this. You almost need
maybe like a pinch. And then I save them
and I put them in a little plastic bag for later. But I'll show you what,
this, you shake it up. You need very little of this. I will take a little
bit into a cap. Maybe just a couple of drops. Put it in the bucket. Don't
even really need to swirl it, but I will and then
swirl it around. Now I already put some
in this pitcher too. And I've filled this container, which I'm going to use
for putting cuttings in. All right. So this
is Altra, Maria. This is just a good
workhorse flour. These last for weeks. Sometimes I've had them
last even up to 23 weeks, but you're definitely
guaranteed to get a good long run
out of this flower. And what I like to do when I get it home is I take
it out of the plastic. They give you one
of these. I save it and I will leave the
plastic on my surface. That way the cuttings that I'm putting I'm just
going to put straight into the plastic and
bunch it up and toss it if you're composting
the greenery. Easy to also separate out that I'll take the whole bunch altogether if I'm just quickly trying to drop
it into a bucket. And then you're
going to give it a good cut at a sharp angle. I'm cutting it a little
than say right here because I know how tall my
bucket is and I don't need this much
length on my stem. Something else that
I like to do with the ultra Maria before
I'll put her in the bucket if I have time is I'm not a big
greenery person. And as you can tell, this
greenery looks a little shot. I'm just going to come in and
I'm going to pluck it with my fingers. Get that over there. Then sometimes if I'm
doing an arrangement, I might pluck off all of
them or I might save some. I will go through and do that
with every single stem just so that it's ready to go When I am ready to start
designing with it. Right now though, because we're going to move
on to the next one. I'm just going to take these and put them into that bucket. Like I said, this is
super easy to separate. I might take the
greeneries and I might put it into one compost bucket, and then I'll put the
plastic in the other. I'm going to keep the plastic down and then just
move on to my next. Okay. I got these at the grocery store this
week, which is amazing. That is a seasonal flower. This is a dahlia. These are really easy to find
at farmers markets. They're great and
easy to grow in California if you're in some
of the different areas. I know that they can be a
little bit trickier to find. We're fortunate over here
in California though, they grow kind of
like a weed, so Okay. She's not somebody that I even
want to bring to my party, so I'm going to just go
ahead and discard that one. And that's a good note, actually, is that when
you're picking out flowers, you can kind of take a look in the plastic and take a look at how many heads
you're getting, and then kind of compare it
to how many stems you have. So if I was to have
taken more time on this, I would have noticed
that I have 12344 heads, but I actually have five stems, so I sort of got cheated. All right. So I'm going
to carefully separate this because I don't work
with a lot of greenery. My tendency is to always take
off even these side stems. I know some people like
to work with them. If it's something that sounds
fun to you, keep them on. If it's something that you
don't want, take them off. Sometimes if I have
little bud vases, I might keep these
little guys for that. And I'll put them over here into like a little
container like that. But I'm going to process her all the way
down to that point. If I was just bringing these home from the
grocery store and I knew I wasn't going
to be working with them for a couple days, I would leave on more greenery. Like this and just
give it a good cut on the bottom because that'll
allow her to drink, but it's not going to
create too many cut points. I know I'm going to be
designing with this very soon. I'm going ahead and taking
off the greenery because I know that I'm going to want it off once I start designing. And it's hard to
do using two hands to be able to cut greenery
and put it in the base. I just want it to be where I
want it to be. That's that. We'll just go ahead and give
these guys a good cut at the bottom flying bud. Okay. The last one that I
got from the grocery store, I think it's a really cool
idea to show you all. This is a mixed bouquet. And the reason why I pick this is because if
you're short on time or you don't want to go and source a bunch
of different flowers, or maybe you only have
one centerpiece to make getting a pre
made bouquet for. I think this was $12 This allows you a lot of different
ingredients in here. I mean, we've got greenery, we have some focal flowers, we have a little bit of color, and then say I had some
really neat yard clippings, or maybe I had a couple of Dlllias that I had
gotten from somebody. I can mix those together and make something
really special. Let's see here. Here's
a good example. Here's a rose. What I like to do with roses is I give them
a good snip at the bottom. I'll probably take off more of this greenery when it comes time to working
with the flowers. So I'll go ahead and
show you that now. If I was waiting, I would
wait to take these off, but I'm going to go
ahead and take them off. Then also, these are
called guard petals. If you look around the edge, you'll see that there's
a lot of time on a rose. They'll be petals that are
a little bit chopped up, chewed up, or maybe they look a little bit greener than
the rest of the petals. You're just going to go
ahead and pop those off. Then a couple of different
techniques with a rose. You can turn her upside
down and give her a little twist that'll open
the rose up a little bit. You can go up here
and blow air into it. And it'll open up
a little more too, then something that
we like to do in floristry that makes it
have a very modern look, is reflexing the petals. You're going to take a
petal and you can push your thumb and push it back. I might go and do that all
the way around the rose, either one row of petals, or I might do two, depending on what type I'm working with. Take a look and see. Yeah,
there's that that's a rose. This one. I'm going to go ahead and take off
most of this greenery. I don't need it,
it's unnecessary. Give it a good snip
at the bottom and plug it into the water
for the rest of that. This is all pretty
straightforward, but the basic thing that you always want to
remember is to try to get any greenery that's on the area where the stem is going
to be in water of. The reason for that is that
you'll keep your water a lot cleaner that way
It'll make it so that the flowers can drink properly and it will
keep it so that they're not getting each
other infected with bacteria. Keeps the water from
stinking a lot. It's a good practice to get as much greenery off the stem. In the water section as you can. You can see I've got
my stems in there, there's not any greenery. And that's how I
want to do that. I'm going to put
these aside and then move on to some
specialty flowers. Okay, this is a Lazanthus. This is a flower that I
like to work with a lot. And you'll see a Lazanthus sometimes at the grocery stores. Oftentimes you can get them
at either a floral market, or I was lucky enough to
have a local farmer grow. And this is how I
picked them up. When I'm working
with these flowers, I like to use them
as a focal flower and they're really
great splash of color. They're absolutely one of the most versatile flowers
that there are. But they come to
you like this and I personally don't
prefer to use these. I like the flower
to be just this. And if I'm going to use these, they'll be in a little
bit larger of a state, which it doesn't
look like there's a good example on here, but this one is a
little bit bigger. I might keep that, but
for the most part, I'm going to go along the
stem and I'm going to start clipping off anywhere
where I see a side shoot. And then cleaning off the
leaves again up here. Make sure to look,
because sometimes I'll accidentally snip the head
off and then that's a bummer. Okay. And then I
like to pick off my leaves rather than using
my snips all the time. Okay. That's how
that would look. I'm going to give her a
nice little clean cut. Now that I've cleared the stem of any of the leaves
and side shoots, I'm going to turn her
upside down and spin. This will open up the
flower a little bit more. Sometimes people will take their fingers and
push a little bit. Flowers are a lot less
delicate than I think people think they can
take a fair amount of, I think we call it
like reflexing. That is what I'll
do with that one. I'll show you an
example of another one. Here's another one. Looks like a little petals falling off. All right, so give her
a snip at the bottom. This one has a massive side
shoot going to take that off. Also going to take off this one. Turn upside down,
give a little spin. And I'll keep processing
a Lazanthus through the whole bunch because they're a little bit sensitive
in that they can snap, their stems can snap when
you're working with them. So I like to go ahead
and make sure that I get all of this
off ahead of time. That way when I'm plugging in, it's just the flour
and it's ready, so I don't have to
be using my hands to try to take off stems
while I'm doing it. All right. Next we have a couple of flowers that I like to
use as focals but also bass. As you can see in the water. There's some greenery on here. This is yarrow in such
a beautiful shade. This one isn't too bad. I'm going to give
it a fresh snip. Any of these little guys, I'll take my fingers
and pick them off. But I don't mind the
greenery on Yarrow as much. I love the way that it
has a little bit of a apricot to yellow
and green hue into it. I think that's really fun
and I feel like it plays well with of the other
colors in the flowers. Do another one, right
here, here's some brown. Here's another method is if it's like a soft enough little stem, you can just take your hand and squeeze it down,
as I would say. Okay. And then the so I've
already processed these ones. When you get a slosia', get it with a lot of
amaranth varieties too, like love lies, bleeding, they'll have a lot
of greenery on it. The leaves super easy, just pluck them off and then
you have the focal point. And then you don't have a lot of leaf that you're
having to deal with, and I already
processed these ones. So you can see, oh,
here's a couple more. I did snip most of
the bottoms of these, but I'm going to go
ahead and do that again. Sharp angle snip place, those are some basics
in processing flowers. Let me think if
there's any other ones that have special techniques. Okay. Poppies, poppies, or Icelandic poppies
or anything of that variety can be a
little bit sensitive. They like to have their
bottom snipped and then you take a lighter and you
score the bottom of the stem. I don't have any
examples to show you, because poppies right
now aren't in season, but you would take a lighter
and just until you hear a little singe and you'll see the little dark ring on
the bottom of the stem, then they're good
to put in water. Another flower that
is important to take care of properly
is a ranunculus. Ranunculuses are often available
at the grocery stores. They're beautiful,
they're worth looking up. They're flower I use
all of the time. People often will make
a mistake of putting ranunculus in water that's
filled up all the way. A ranunculus prefers to have a little bit of
water that it can drink, and then you have
to keep filling it and keeping an
eye on the water. If you give a ranunculus
too much water, it'll absorb all of the
water that you've given it, and then the top of the stem
will just like wilt over. That's a problem because you want your stem to
be really strong. There's ways to avoid if you do get a weak stem that
I can show you, but it's important to take
care of those up front. Other than that, if you do these basic principles
of snipping at an angle, making sure the
water is clean and fresh with a little bit
of maybe solution in it. You should be good to go and your flowers will last
and look healthy. Changing the water frequently
in the vase is important, but for the most part,
they're really hardy. They don't need as
much tender care as I think a lot of people
think that they do.
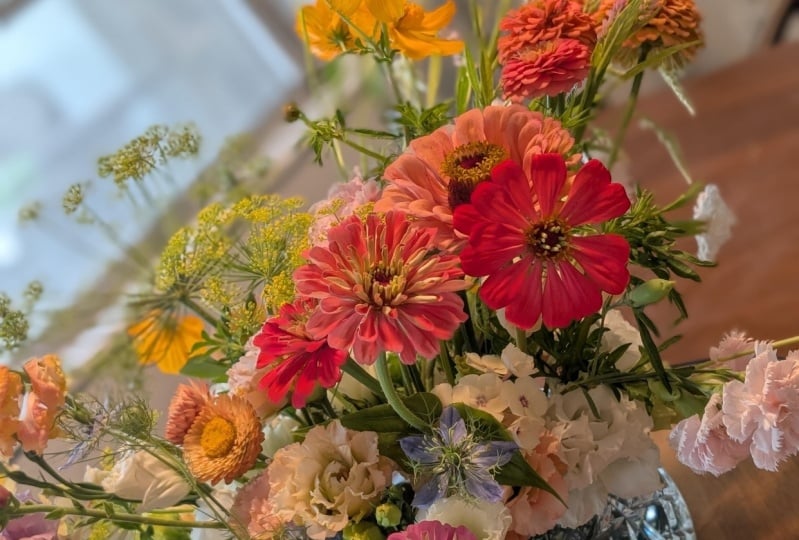
8. Small-Scale: Intro: All right. In front of me, you see a centerpiece completed. This is what we're
going to make together. I'm going to tell you how to
create this for yourself. And what I want
you to remember is that be gentle with yourself. The first time that I
made a centerpiece, it looked different, but I
was super pleased with it. As you go and as
you're learning, you're going to get the
hang of it and you're going to have some
tricks of the trade that you'll start to get to know and flowers that
you like to work with, better places that you like the flowers better
within the arrangement. And so just make sure to
be gentle to yourself because just like no two
people are just alike, neither are any center pieces. You're all going
to make something that looks different and unique. And one of my favorite
things to do is to see how my students are making arrangements and how they
put the flowers together. So please, if you feel like it, share your progress,
share your final product. You can find me on Instagram
at at Career Floral. You can tag me with
hashtag, Career Floral, or you can upload
some of your photos into this course here
and on this platform. We all would love to
see what you're making. And I know for me personally, I adore seeing what
my students make. So please if you feel like it, share before we jump
in and make this, I'm going to give you a little
general lay of the land. What you're seeing here
is a finished product, but what we're going to do
is we're going to break it down to you in a
few different steps. The first will be taking your vessel that you
have, your centerpiece, your bowl, your vase
that's been filled with the mechanics and we're going to cover the base with flowers. I'm going to teach
you which type of flowers are the
best to use for this, and this creates a
really nice backdrop for the rest of the arrangement. It also covers mechanics. The next we're going
to do is we're going to come in
with focal flowers. These are things like your
Dahlias, your echinacea. I have some lasanthus
on this other side. These are the ones
that draw your eye into the arrangement
and they really create like foundational support for everything else
in it as well. After we put the
focal flowers in, we'll come in with these
more delicate pieces. Pieces like the cosmos over
here or the corn cockles. These are the items
that add the movement and add a little bit of whimsy and play to
the arrangement. After you've got
all those in there, we'll go back, we'll
take a final look. Add any more pieces where we
need to plug something in. If we see any spots
where there's missing flowers or
spots where you can see the mechanics after
you've plugged all the flowers in and you feel like you love your
final product. This is the finished look. You're going to
be able to have a beautiful centerpiece
to place on your bedside table maybe for a dinner party wherever
you would like. But I hope that you will share your progress along the way with us and enjoy the journey.
9. Small-Scale: Base and Mechanics: Okay, now that you
understand sourcing. Picking a vision going
with a design idea, we're going to go ahead and get started and make our
first centerpiece. I chose the low bowl and I chose the one that has the frog in it. It's not important if you
have the frog or not. I just figured that
I would use both. So that you could see that this is a good amount
of chicken wire. You don't need the frog. The stems will hold
really well in this. So from here I've
already prepped my vase. I'm going to fill it with water, and I'm going to fill almost
all the way to the top. This is because it's
such a shallow bowl that the flowers are going to drink a lot of water over time. And so you're going to need to keep making sure to
check the water levels. Handy thing to
have on the day of the dinner party or
wherever you have these centerpieces is to
have a little watering jug so that you're sure to keep filling it throughout the day because you will be surprised at how much water they drink. So I'm going to put
my gloves on and a special trick that I
have started doing is I take a oil based or a
coconut or a lotion sha, butter something really rich for my hands and I'll put it all over my hands before
I put my gloves on. And then when I take them
off, they're baby soft and it's kind of like a fun little spa
treatment for your hands. A really good practice to get in the habit
of wearing gloves. And these ones are thin
enough that you can really use your fingers well and they don't get in the way. The first step of any centerpiece
is covering your base. That is covering your mechanics, making sure that you have
your base layer down. And then from there we're
going to build out. I just have a couple
of flowers up here. Right now, I don't
have my spread of flowers because what I'm going to do is start with the bases, So you can see I have yarrow
and then I have flock. I'm going to fade from
putting the yarrow over first and then maybe having one small section with
the flox in it, reaching out a little bit more. Other plants that are
really good for this are things like greenery
really works well. I choose not to use greenery and I find plants that have mult stem for covering my base status is a
really great option. Baby's breath would
be a great option. Other flowers that
are great are things like stalk or lilac, something that has a
little bit of drape to it. Because basically what you're
trying to do is just get a good coverage before
you begin designing. On top of that, I'm
going to start with the yarrow going to go in low because this has
so many different stems. I'm going to go
ahead and snip off the side shoots because I'm
going to use all of it. You'll begin by plugging in
pieces all over the base. This is, as you can see, very low and very close
to the chicken wire. It's good to have some that
are a little bit taller, so I might that one up
a little bit higher. And this is not
something that takes a lot of design forward energy. You're just basically getting that base covered
and your edges. So over here I had like
a pretty large piece, so I'm going to have
that cover the edge. That way I know part of
my vase isn't showing regardless of the
size of your vase. If it's a bowl type or compote, the same principle
applies and you'll do this same idea of covering
your base for everything. One of the reasons why
I like to use stock and yarrow is because I can get
away with using two stems. And I'll basically have
my entire base covered. Which means that later when I
go to build out the design, I don't have to focus so much on covering whatever
the mechanics are. I can focus more
on having flowers get to stand alone and show off, as opposed to being
worried about, ooh, you know, I can see that
chicken wire over there. And as you can see,
this is just two stems and it's already doing such
a good job of covering. You can even break down some of these bigger ones and
just plug them in. I can see I've got
some coming out, got some tucked in low, got one in the middle there. One of the things. I always try to do, and it's important
for the design of the floral arrangements
that I'm teaching, is that keep your center low. You wouldn't want to
stick something like this per se right in the
middle, coming out tall. And I'll show you why later. But basically we're going
to build something that has like a mountain with a
valley to another mountain. Making sure that this is
really low is important. In fact, I feel like
this one's a little too high and I'm going to cut
it down just a little bit. All right. Now that I've got the base
pretty much covered, I'm going to come in with
a few pieces of Flox. I adore this flower. It lasts such a long time and I love to keep
the greenery on it. It's one of the few flowers that I actually will
keep the greenery on. I might take that leaf off, I might not just because it's delicate and it has
such good movement. So I'm going to choose
one side to put some on. I love the way that this one
has such beautiful movement. I might have this one
going a little bit above. The good news is that
I can cut it down later if I want it to be
tucked in a little deeper. I'm going to spin this
round to look at it, then I will turn it
back around for you. But I took a spot
where I saw a hole. I'm just tucking it in
between the yarrow. This one I'm going to
keep nice and low, the colors they play off
of each other really well. This also can be done
with something different. Like you can use
two tones of white. You can use just about
any color combination. But this will create
a really nice, just clean looking
coverage that will also add a depth and uniqueness. Okay, whatever I do here, I've got the front
already started. I'm going to just put
one over here also. And this one I'm going to
really need to tuck in. The reason why I'm
doing that is because I see a little hole right here. It probably won't be
important in the long run, but I just like the way
that that adds dimension. Okay, that's a great start. From here, we're
going to move on to building out the arrangement, but that's a basic way to get good coverage over the base. Makes it so that
from here you have a great starting point
to build off of. And you're not
focused on covering the mechanics or
adding in later.
10. Small-Scale: Focal Flowers and Volume: All right, now that you've
got your vessel covered, you've got your base layer down, we're going to work on adding in the focus of your arrangements. These are the focal flowers. As I mentioned in
previous module, focal flowers can be things that are either they're big
or they are petal rich, they're a pop of color, they have a lot of structure. Something that I like to use a lot is either a
dahlia or a lizanthus. For this, I'll talk you through the supplies
that I have here today. But other types of focal
flowers could be things like roses that has a lot
of structure to it. I've got some Dahlias, this is Echinacea,
this is Lizanthus. They're both double varieties, but Lizanthus also comes
in a single petal variety. And that type is equally
great for a focal, I have some slosia, xenia's, and some cosmos. As I look at this, I'm going
to bring in that principle that I was talking about earlier where we're
going to start to build out from the center. And we're making
sure to always keep the middle of our
arrangement clear. What I like to do is I like
to work off of the sides. I have so many different focal flowers that I'm
going to work in, usually an odd number. I think what I'm going
to do is start with my Dahlias and plug those in and I'll show
you how I do that. And then I might add
some solosia as well. Actually, I'm changing my mind. I'm going to start
with the Solosia. The reason why is
that it can also be used as a base and
it's just going to kind of get tucked in here and maybe add a little dimension
and a little bit of depth. I see a pretty big hole
over here and I'm going to take, it's a
really pretty one. I like this one because
it has some color in it. And you'll see what I'm
doing is I'm basically taking it and I'm placing it along before I
cut the stem off, along the arrangement to see like maybe there's
a yarrow where it's going to pick
up a little more of that pink than if I was to put it next to a
different yarrow. And that is how I like
to play with color. And that is one of the
most beautiful aspects of floristry in general, is the fact that there's
so much color just in even a single flower,
just alone in this. I'm seeing yellow, I'm seeing
green, I'm seeing pink. There's even this polescent
hue coming off of it, which I don't know
if you can see on the camera that's picking up. Just like the tiniest
bit of violet or purple. Okay, I've got my height here. I know I want a little bit there and I know I want
a little bit there. So I'm just trying
to decide where I want to put the pink
that it's going to make the biggest impact because
this is my clear front. I'll cut the stem
down pretty severely. It's a really special flower, that's why I'm taking
so much time on it, I normally wouldn't, but
I want it to be special. All right. So I put it
over here and I think I'm going to take
another smaller one and put it in the front. But I love how this is
giving it sort of like a CN enemy vibe. I almost feel like
this is acting a little bit more like a
base than a focal flower. But you'll see when
the arrangement is finished that it will have
kind of like a focal effect. I like that. So you can kind of see what
I'm looking at is I'm kind of seeing like we've
got out something here, what's going in here and here. But I also know that
I'm going to want to build my Dahlias off of there. I think I'm going to take it out and I might put it in later. Okay, so let's
start with the As. I'm going to take
two of them, right? Here's where I'm going to
start to build out my depth. One of the tricks that I use often and maybe
what I'll do is I'll come around to the
front, that's helpful. Okay, so we've got
this height here. I'd like to place this so
that way it's tucked in. And then the next one. I'm going to have
coming out much further and I'm going to switch back to the
other side here, and then I'll turn
it around for you. But basically before I do that, I want to explain why I'm
doing that when we look at an arrangement there that we can get it to
come out at you. This is not only
for photography, it's also a way of
catching your eye. You'll get a better effect
with your arrangement than if everything's plugged
in all at the same level. This gives it a really
gardening effect and it adds depth and
movement to the bouquets. So I took this one out because I'm seeing, now
when I get closer, I'm going to, I'm going to
tuck it even further in. I mean, that is a short stem. Don't be afraid to
make your stem short. All right. So what I'm doing right now
is I'm playing with where I have it placed. As you
can see, it's like this. But what I'm a little concerned
about right now is that there is this channel through the center that I like
to keep pretty clear. So that way it has an effect over here and
has an effect over here. So I may move this
to the side a little bit if you're really tall like me or even if you want to have a
better perspective. Sometimes it's nice to
put your arrangement on a bucket that way you can
see it up towards your face. Because what we're looking
at is we're trying to make an arrangement that
will look good when you're sitting at a table. That's why these low
ones are so beautiful. Is that the low and cascading. But when you're at a table, I'm not sitting at a table up here, I'm sitting at it down here. When I put it on a bucket, it's elevated so that you can see what the guests
might be looking at or whoever's eating at the
table will be looking at. Okay, so there is that I
like to work in threes, so I'm going to experiment with what that would look like, adding a third Dolia in
probably right around here. I've got one that's coming out, I've got one that's
tucked in now. I could either go
two directions. I could have one
that's really coming out at you like that, or I could have one that's
tucked down low to the side. I think for this I'm
going to have it coming out at that direction. I always like to think
of it as a trumpet. Okay. I've got that side with
the focal flowers now. I'm going to go onto the other
side of the arrangement, back here and put some focal
flowers here, and some here. I'm also going to
come back in and probably put more focal
flowers over here. I'm going to test, do I want
echinacea or do I want to use the Lazanthus thing? Is this thing? I talked to myself a lot while
I'm doing this, Pardon me. Okay, I'm going to use
these bright pink ones as the focal on the other side. Again, same principle. I'm going to have a group
of three on the other side. So you can see I place
that one kind of like that and you don't have to
worry about these stems. We're going to come
in with so many other really fun flowers and sort of delicately get them to integrate
within the arrangement. Lazanthus often, I like to do a pretty
big grouping of them. I'm actually going to
take that one out. Checking my work as I go and I'm going to
decide if I want, I'm going to show you
what I'm doing so far. So over here you can see that this is coming
at the camera. The problem, however,
is that these two are in the exact
same plane of field, so there's no depth here. They're both on the
exact same line. I can see that when I turned it, so I'm going to go back
and shift something. I'm just not liking
the way that that is. That might just
keep it in three. I can always go back
and add more later. So you'll see we've got
basically the focal over here, now we have a focal over here, because these are round vessels. I'm going to work
with two sides, but I'm also going to
be very mindful of these sides as well because there may be guests
sitting on the side. You can make it totally round. I tend to make mine more
of a rectangle in shape, but then have some
highlights on the sides. Okay. I'm going to go
back to my A section, start in with some Eucalyptus
or this is not Eucalyptus. Just kidding. I'm going to
start with some echinacea. Same thing. I'm playing
with depth here. I'm having some going
in and some coming out. You can see I'm starting
there making sure that this one's not on the exact
same plane as this one. We've got a little step down. I'm going to take off all
the greenery on this, okay? So I've got two here. I'm going to decide if I
want to add a third or not. And I'm kind of
seeing a little spot here that could be kind of fun. Something that's a cool idea
to think about when you're making an arrangement is
that you always want to make sure that everybody
has a little bit of space. And I've heard some of the
designers that I work with talk about having a butterfly
be able to fly through. So if you're a sweet
little butterfly, you want to be able to fly around and hop into
flower to flower, and you don't want to
have it be too crowded. We're giving everything
the proper space. I think what I want to do is, because I love the
way that these petals are flowing downwards, I want to highlight
those as opposed to aiming it this way like
I've done with the other ones. Okay, So those are tucked in. Now over here, I'm going to work on the back
side and I think I'm going to add
some more echinacea. I may just add one, and I'm seeing a good place now
for the Sosa to cover this. Gap. So I'm gonna go ahead
and stick that in soon. We kind of see
where it did look. All right. I'm working
on the echinacea. You can see how this one, I had it aiming upwards. So we've got 123123. I did take an
echinacea and I put it on the back side
of the arrangement. I'm sticking with just one now. I'm not committed to it, but I feel like that is almost enough. I don't want to overwhelm the eye because it's time for me to start
working on the back side. I'm going to pick
another focal flower to get going with over here. That one might be. I think I'm going to do
a little Cosmo moment. Cosmo is really fun because
it can be a focal flower. It can also have a
lot of movement. And add some height
and a little bit of what we call armature
or architecture to it. So I've got this height
with this Flox over here. I'm going to add a little bit of that height over on this side. I'm going to go in between this Solosa that is here without making too much more
on happened up front. Okay. So I'll show you
as I go placed one in and that one I can tell in the front is
totally dead, snipping it. Take out another
little guy and place that one in a little deeper.
We're toppling over. A lot of this is playing around. Sometimes I will just simply
snip a stem and go, okay, well now I have to
work with that height, Where am I going to put that? I think I'm being a little
more careful than I usually would because my process
is usually to snip a stem, see where it works, plug it in, it doesn't work, move it around. But I want to make sure that I'm explaining things as I go here. Okay, we have a little bit
of drape over here now. I'm going to come
in with some Z. This is where I'll pick one out. I've got two colors
here, really beautiful. I've smaller P and then ones that are a
little more apricot. What I want to do is play with the echinacea and also
play with the dahlia. Try not to take away from it. I feel like this site
is just so good. I don't even think I want to
add any more focal flowers. I'm going to add some more
focal flowers on this side. What I'm looking at here is that in the middle of this Losanthus, do you see that
little bit of yellow there in the middle
of the losanthus? I'm going to try to play off of this with the color
in the echinacea. And that because I have a lsanthus that's
pink on that side, I can either have two choices. I can either go in
and have a little bit of pink mixed with a pink, or I can choose to echo the pink over
into the other corner, which is exactly what
I'm going to do. I'm going to take this
pink and I'm going to echo that lsanthus over here, which is also picking
up off of that. Keep calling it eucoyptus, it's echinacea, but I'm
going to play off of that, Put the orange back in
favor of some more pink. I love to cluster the zinnias, they're so fun to make look
like they're little patches. And I think that's
what I tend to do with my floral arrangements
in general is I like to make it look like a patch of a single variety of a
flower growing right here. We have the Dahlia
patch right here. We have the Echinacea patch. I've got the Lazanthus
and the cosmos. But together they're
making an arrangement. Rather than putting something all over the place,
I'm grouping. Okay, As you can see now I
have the grouping of the Zia. I'm going to try to see
where I'm going to place these more orange toned ones. And I may not put
them in at all. So that's the other option too. As I might come back
later and add those because we have a lot of
really beautiful flowers to add in, I might hold off. Okay. The other
item that I have is this beautiful brown kind of apricot sunset Sanths as well. If I'm going to put her in,
where am I going to put her? I'm just going to cut short one just to pull with that color. Let's see if there's
anywhere that I want to put. I don't think so. I think
I've put the amount of focal flowers that
I want in for now. In the final step that I'll talk about after we do the next step, there is the opportunity
to come back and add more. But for now, I feel like this is a really great start and
I want to start adding some movement into
the arrangement and filling in some ******.
11. Small-Scale: Delicate Flowers and Dimension: Now that we've got
our focal flowers in, we're going to go in and add some delicate and
dimensional flowers. Flowers for this can be
anything from scabiosas, maybe even zinias can be used for them if
they're tall enough. But things I like
to think about for these flowers are things
that are delicate stemmed, they have a lot of movement. They can dance above
the arrangement. They can also drape down, basically anything
that's going to add some really
delicate dimension and depth to your arrangement
without being like a punch, like a dahlia over here. I've got Clematis. Fine. I've got some petunias. I've got some of these which
I cannot remember the names, but I will add to the course notes some fiber optic grass. A little bit of
fever, few and then I brought back in
the cosmos again. Because I really love the way that cosmos play
in arrangements. I'm taking a look here. I think what I'm
going to do first so that I can show
you some draping, is I'm going to add
in some vine moments. I know I was noticing that this end of the arrangement could use something
trailing down. The reason why is because we've
got the height over here, we've got the valley, we've got more movement
and focals here. I want to have it flow outward. I'm going to add some
petunias for that. There's a lot of purple
in these Dahlias. I'm going to hold off on using
the clematis on this side, and I'll tell you
why in a little bit. But basically because
I'll pull the purple over here and
I'm going to use some other purple over here piece that has some
really good movement. Might be out of the frame here, but one of these ones
that I'm seeing here has a fair amount
of drape to it. One of the things that's
really cool about these low base center pieces is that you can have flowers that will drape all the way down and they may
even touch the table. Okay? So this guy is clearly not going to
work because, okay, and I'll explain why I
wanted to drape here, but I don't want it to
be such a sharp angle. And as you can see, like
once I cut that stem down, it's such a sharp angle, that looks so silly. It would be better if I wanted to, but I
don't think I do. It would be better
if it was over here, because then it would
be facing outward and having a little bit
more of a dance to it. But yeah, that's not
going to work there. I'm going to move on
to another piece. This is all part of that trial
and error with the stems. It's also pretty tricky to
be doing it in filming. So you'll have an easier time when you're doing this because you'll just have your products
looking straight at you. These really made a choice about which direction
that they wanted to go. They decided with their
movement of their clear choice. All right, I'm going to show
you what I'm doing here. I'm building this out. It's going to look like it's
sticking out pretty far. It may take it down a little bit or I might choose to
make this side much larger. So I'm going to leave it
for now because I think I'm going to want to do that is
add some more movement here. Coming in and blending the area with the dahlia,
with this petunia. These are incredible.
These were grown by a wonderful floral
farmer in the area. You'll notice that the
stems are really long. A lot of the times the
petunias that you'll get a nurses have much
shorter stems. But this is apparently an heirloom variety
and this is what they are traditionally like
and they smell divine. Never seen them like this. Another flower that looks
similar to this is Nicotenia. I'm not the best, I'm going to be perfectly honest with you, with all of the technical
or Latin names for things, a lot of people are
really into that and it's a super fun part of florals
and horticulture in general. I have never really
gotten that into it. I've always just been like, oh, that's, it's a cone flower. Pardon me if I don't know
the technical terms. All right. So I've
built this out. You can see that we've
got that vines done. Let's put in some clematis. I love this stuff. It's
so fun and purple. Tons of greenery on this. I, we'll sometimes keep the greenery on for
certain things. If there is
arrangements that have a lot of greenery in
it, I'll keep it on. I know you can tell right now there's not a lot of
greenery in here. I don't use a lot of it.
So I'm going to take off probably all of
the greenery on this, even even the little
leaves by guys, I like to make arrangements that are forward and have a lot
of color be the focus, and less focus be
on the greenery. Unless I'm choosing to
make an arrangement that is mostly greenery
or green white. And then I'll keep it, but there you can see the
clear difference. Here, we're going to
really be focusing on the flower itself. All right, on this back side, we've got the focal over here. And then I have the cosmos. I'm going to blend in the
purple in with the cosmos. Same creating the draping effect over here, but a little shorter. Because I want to
make sure that these do not get interrupted
the petunia. Okay, I've got another one, and I know I said I take
off all the greenery. I am playing with it a
little bit right now just to see if I might
like this greenery. I feel like it's so cute. It's got the little
buds in there too. We'll see and see if she
stays or if she goes, oh, she's getting to stay. Okay. So there I've got
Michael Mattis section going. I want to go here. I'm going to add these very last because of how
small they are. They're just so
perfect and delicate. I don't want to interrupt
anything right now. All right. Grass, Something I love about fiber optic grass is that in person I know it's
hard to see on the camera, It is so soft. It's similar to a
smoke bush in that it creates a little C and it
really adds a lot of texture. I'm going to go
in with this area here and see if I feel like
I want to add it there. The other place that
it could go is right here next to this
Flox tucked in. But I don't want to interrupt
the valley too much here. You don't need a
whole lot of it. Okay, so I put a
little bit of that in. I'm going to add
some more height right here with
some more cosmos. As I hope you're starting to understand
that a lot of what this is is starting
out with the basics, but then you're just layering, You're adding a
little bit over here, you're adding a
little bit over here, you're moving it around. And you're really
layering it and getting a really fun look where things have their
individual ******, but it all starts to look really like something that was meant to be together. See, have to turn that around. I'm adding this in because it's going
to bounce off of the white of that petunia. I've added some height
there with the cosmos. I think I'm going
to add another one. Right there got tucked in. And I actually changed
my mind because I don't want to interrupt
the head of the echinacea. So you can see that's
pretty upright. I put that stem almost
reaching straight up. It's off to a little
bit of an angle, but don't be afraid, especially with
these delicate ones, to add some serious height. I love seeing an
arrangement where there's somebody coming
out above the crowd. All right? I've got a couple of different products left
that I may or may not use. I'm going to pull the fever fuel and just check a feeling
I'm not going to use it. But we're going to look anyway, taking off all the
leaves of the fever. Definitely. I'm going to show you why I
wouldn't use this. On this side, we have the most beautiful
colors going on right now of the purple
with that butter, cream, yellow, that's
bouncing off of the Flox. It's also bouncing
off of the echinacea. This flower right here,
gorgeous. Love her. She even goes a little
bit with the cosmo, but even still, I can
tell that there's a real difference within
that color of yellow. And it interrupts the colors
that are happening here. I'm not going to
use it on the side, doesn't mean I can't use it
on the other side though. Let's check in over here. All right, So I'm taking a look right now to
see if it's going to look cute with the clematis. I just don't really
like it in here. I think I'd rather
flush it out with some more cosmos rather
than add any of that. We're going to just
put that to the side, grab another little cosmos
and add a few more in here with the clematis there. Okay, Now I'm going
to start going in. I want to say that these
are called corn cockles. I'll definitely be letting you know what they
are officially, but for now we'll call them
adorable little pink flowers. And purple is obviously, I think this is my clear front. I'm really enjoying this side, so I want to make sure that I'm using the right pieces for that. And it seems like I go back to that spot every
time to start, I'm going to pull out some of these smaller purples which really similar color
to the clematis. A little more delicate
though and not as focally. And that's why I think that
they're going to go really well with this Dahlia
on the other side. Okay. Because I have this butter
cream happening over here. Seems like I have faded it to being with the purple
and the pink over here. I'm going to go
ahead and place this over here towards
the Dolla side. And I'm going to do the
same thing that I did with the Cosmo on the other side. I'm going to just place it
very upright, intrusively. Everyone else is going out a
little bit and I just want somebody to take a stand
here in this arrangement. Oh, I love these. Oh my gosh. Okay. So just two of those already. You can see it's really
bringing that purple. And I might tech one in deeper. I'm holding back a little
bit because I want to make sure to finish it off and then we'll come back at the very end. And I call it the final touch. And that's where we
can add a little bit more here. A
little bit more there. I really want people
to notice this color. So I don't want to add too
much to the point of where your focus gets taken away from it because there's just
so much to look at, but okay, fire that one. All right, I add it a
little bit right there. All right, on this other side, let's try playing with
some of this pink, right? Okay, I have two options. I can either soften the Lzanthus or I can
go in with zines. This Lzanthus really is going to need something in
here to soften it. I'm not sure quite yet
what it's going to be, whether I'm going to go a
little bit more with the cosmos so I can bring another thing
of Flox in and add it later. I just need to make
a decision right now as to where I'm
going to put these. I think I'm going to go
in with zinias over here. Same thing as over here. Just kind of putting
some really fun, extra delicate moments in there. I'm trying to get
the right height here and the right spot. I've got a pretty
big, so just kind of blocking the edge of the
rangement. That looks nice here. I'll show you breaking up
that little spot here. Don't be afraid to keep things
longer than the rest of the arrangement to at this
point is really the further that you can go out
forwards and upwards, the more depth that's
going to bring in. And it's going to really be
fun to look at on a table. I'm not placing it here. I keep thinking I want
to put something here. But every time I do that, it just looks like I just
threw some flowers in by grouping it lower and really letting this be a channel
I think is the right move. Otherwise, I feel like
it's like you're taking a blank piece of paper and just sticking a flower
in front of it. It doesn't feel like it
belongs in that spot, honestly. It's a bit
of a focal flower. It's not super delicate. I feel like it can
actually get away with. I think I try to decide if
I want to do two or if I want to put three in there.
I'll show you what I'm doing. There's it without it
placing it there to see. Okay, if I tucked it in
really close to the base, does that add something or
does it create too much of a color block and interrupt
the Zenia and the echinacea. Another trick that you
can do for that is making it so that the face of the flower isn't coming
straight at you. It can be going the other way or even better is
that I will can use a bud that has just like a little
bit of the flower in it, but is mostly Trista bud. I think that's actually what do I get a little bit
of movement there, but yeah, that was it. Okay. That extended that
out to the side. All right. I have this petunia spot, but I think what I'm
going to do instead is add in some flock over here. This is looking pretty good for this portion of
adding the delicates. Then now I'm going to go
back to the final step, which is taking a look, making sure there's
no dead spots. Making sure that
there's no empty spots. Making sure that
everybody's in water, tucking in and checking out the balance of the
arrangement as a whole, and plugging in more
flowers as needed.
12. Small-Scale: Final Touches: All right, we've
covered our base, we've added our focal flowers, we've added the
delicate touches. Now it's time to go back
into the arrangement. Check for any holes where
you can see chicken wire. See if there's any dead leaves, any dead flower heads. Just overall finish
off the piece. Right off the bat, I'm looking up and into
my centerpiece, which you can't necessarily
see from the camera, but I can see a couple spots where there's some
chicken wire showing. I brought back the original
base coverage flowers. I didn't feel like
I needed to add any more focal flowers,
so I didn't bring any. But you certainly could plug in more here if you felt
like you needed to. I'm going to take this Solosia.
You'll see right here. I'm going to add it in. I know this seems wrong, but
I'm going to do it. I'm going to split it.
I don't need that much. Cut it down. I thought I wanted
it to kind of come up a little bit more but
actually changed my mind. I want it really nice and deep. Oh, that's perfect.
Okay. That totally covered the chicken
wire that I could see. I don't see any spots where
I need to add more yarrow. I did see over
here on this side, there's a little bit of a hole
in where the petunias are, so I'm going to flush that out with another petunia. Okay. And in there, while
I'm in that location, I'm going to add some flocks. Perhaps I'm really getting down low so that I
can see what it looks like down where I'm seeing
a little bit of a gap. Do I want that
there? No, I don't. Okay. Sometimes you'll get
the back side of things too if you add it where you're seeing spots on the other side. So I'm going to take some, put
some in with the clematis. I was no sing, I wanted to add a little of the flock there. And hopefully from the front
side you'll kind of get a little bit of the
effect of it mixing in. Okay, you can see I softened
up this edge over here. Now I want to figure out how
to soften up these lsanthus. It might be just
as easy as adding even just one little
section of flox. That one has too much pink
in it, which is gorgeous. But it's not going to
work with the lysanthus. It's too similar color wise. I really want to
see if I can find a real butter,
creamy colored one. Yeah, like that. Had a little bit of contrast. Okay, so I've added a little bit more dimension, you can see made it growing out a little
more to the sides. Now I'm going to add a few more cosmos coming
out over here, snipping off the dead pieces. Let's strike that. Awesome. Maybe one more, maybe not. I'm going to check out
the fiber optic grass too to see if I can bring
it onto this other side, even if it's just a very
small section of it. Oh, see if I can. So I'm moving flowers out of the way to make room to
make sure that these are getting down into the water in the added little
bit of action there. All right. One of my
Lazanthas shifted, and that was actually why it
was looking kind of funny. So I'm going to fix
that. All right. I'll show you what I'm seeing
here, the focal flower. There's a little spot down
here that I'm seeing. A little bit of a space missing or a space where
there's some flowers missing. Trying to decide what
it is that I put there. And I think that it's going to be just a little bit of yarrow. I'll take a, a stem of
it that's a little bit longer and then just place it. Yeah, snipping. I'll hold it off just covering the edge of
the center piece, but also softening
some of the stems. I'm seeing, okay,
that should do it. What you'll do from
here is you're going to add more water into your centerpiece
when you're going to take it wherever you're going
to put it and place it. You'll add more water once
you get it to the table. And then you can do another double check to make sure that everybody is in the spot
that they're supposed to be. And I'll show you how to what we call the flowers once we
get them on the table.
13. Large-Scale: Intro: Well, we've made our
center piece that is the perfect size for
a dining room table. And now I'm going
to show you how to make something large. These are perfect for bars
maybe by a fireplace. They're supposed to
be a high impact. It's really fun to take a vessel like this and
fill it with greenery. During winter time, you
can add pine cones. It's just a really fun way to bring the season inside and have a really big impact
we're going to do is follow the exact same principles that we used for
this arrangement, but we're going to
use more product and it's also going to
have a bigger impact. Something that I want
you to keep in mind is that this is how
large this vessel is. We're going to think of making the flower arrangement
that's coming out of it to be coming out almost like either the same
amount on each side, but you're thinking about
of a one to three ratio. So there's one to three. I'm going to try to make
it pretty big impact with the product that I have. This is the final product and I'm going to take you
through the steps, just like I did for the
smaller centerpiece. Don't be intimidated. Sometimes I find these larger scale ones actually much more simpler to do because they take more product and they're
a lot more forgiving. Plus they give
such a big impact. Let's go ahead and get started.
14. Large-Scale: Base and Mechanics: We've prepped the
vase ahead of time. And that's the chicken
wire with the taping. I'll show you the inside. That's what that looks like. I'm going to fill it with water. Just like with your
smaller center. Same principles apply. We're going to add
enough water in here to fill it
almost all the way. And we're going to definitely want to keep checking on it. Now that you've got
the vase filled, we're going to go ahead and
start covering the base. I'm going to use the
same products that I use for this centerpiece
because basically I want to mirror the same vibe as our smaller centerpiece, but just make it a
little more loose and a little more large scale. But first, we've got to
cover the mechanics. While I'm doing this
large scale design, I'm going to go ahead and
just make the arrangement. I'm not going to do a lot of
talking while I'm making it. The same steps are
going to apply. And I'm still going
to break that step by step into different sections, but if you need to, you can totally rewind. Slow down, pause the video if you want to watch
what I'm doing. Otherwise, you're
going to follow around the same steps as the
centerpiece that you had, the more in depth
tutorial of before. All right, so I've got
pretty much this covered now. My bases covered. I'm going to work a
little more on the back, but I'm not going to
put as much energy as I will towards
the outward facing. One of the things to keep
in mind when you're making a bar arrangement
or an arrangement like this, it's a large scale. Oftentimes where
we're going to be placing it is against a wall. The backside is
less important as much as the front
side is important. Unlike the centerpiece
that we've made over here, which is viewed from all angles, we're really going to
focus more on the things coming out towards the
front of the bouquet. And put our energy and
our flowers there. Focus a little less on the back. Okay, the base is
completely covered. There's definitely a lot of ****** where you can still
see the chicken ware. But overall, the
impact is there. I've got most of
the base covered. You can see I kept stems a lot longer than I did
with my shorter, more compact center piece. I have a couple of
statement pieces such as these solos coming out. I like the way that
this covers the base. It also gives it some shape. And it's a really great
foundation for the next step, which is adding in
the focal flowers.
15. Large-Scale: Focal Flowers and Volume: All right. We have
covered the base and now we're ready to start
adding our focal flowers. And adding some volume, now's a good time
if you're using something that has a
lot of greenery in it, like branches, those are
really great to put in right now for structural
elements within the bouquet. I don't have any of
those with me today. We have some stuff that we're
going to add on at the end, but they're very delicate stems, so I'm going to place them
in more towards the end, rather than doing
them right now. I'm going to start
with some dahlias and I'm going to
start plugging in some focal points coming
out towards the viewer. One thing to note when you're adding in your focal
flowers is that keep the stems a lot longer for these large
scale centerpieces. It's even fun sometimes to just start placing
them in and see how they land because really it's meant to have
a really big impact. All right, so what
I realized is that I'm basically designing
all on that side. So what I'm going to do is I'm going to come
around the front of the table and you'll see
most of the back of my body, but you can see where I'm making my placements and whys by just the movements that I'm making and putting
them in, I'll explain. Right now, I have a
lot of these coming out at the viewer. This one is looking up, this one's looking
that direction. This one's coming
straight out. This one's looking down at these too. So I like to think of them as having a conversation
in their grouping. So I'm gonna come
around the table now and keep designing. Oh, 0. Okay, so I've put in all the
focal flowers you can see, just like I taught you
with the smaller one, it's all about grouping the
different varieties together. We've got our echinacea
group over here, which looks like it's
growing out from the middle dahlia patch. We've got the cosmos
over here in the corner. And then we have Lazanthus and then some more
Dahlias over here. And then I echoed the white
coming down over here just to give a mountainous
effect going downhill. I really didn't do
much back here. I didn't put any focus in here because this won't be seen. And when it comes
to putting in like the extra things that
we'll do in the next step, I might add a little more here, but the focus really is
coming out at the viewer.
16. Large-Scale: Delicate Flowers and Dimension: Now that we've covered the base, we've added our focal flowers, it's time to come into this large scale arrangement and start adding the
delicate flowers, the items that add texture, and then some of the other
items that are going to add some height, some bulk. And just really finish off this arrangement and make
it super dimensional. Before I move on to do this, I'm going to take away
the smaller centerpiece. I loved having it next to
me, and I'll tell you why. I was able to take a
look at it as I was creating this and
make sure that they were two cohesive items. So because these are going to be at a dinner party together, I wanted to make
sure that they both had a really similar vibe. But I'm going to take them
off now because we're going to make this pretty big,
and I need the space. I removed the
smaller centerpiece, and in its place you have got
this beautiful tomato vine. I'm going to use this towards the end because it
is so delicate, The stems are very brittle. I've got a little
clematis over here, and then some grasses. You can go a little
more greenery, rich in a bar piece or a
large scale arrangement, because it's not going to be so focused with a color scheme
necessarily on a table. I love to keep
them mostly flower forward on the table
center pieces. But with the bar ones,
they're just a really fun, wild moment that you can
have a lot of fun with. One thing to note is
that as I'm snipping off these smaller pieces
of Queen Anne's lace, I'm going to save them
because these are really fun to put in bud vases. I know I said I
might wait to put the tomato vine in
towards the end, but I'm going to do
it now because it is genuinely in my way and
I keep bumping into it. So I'm going to make a
moment with that now. And I think it'll be
good because then it'll add the structure and the
movement that I'm going for. And then the final touch can be adding in these
last little guys. 0. All right. I'm
feeling like this is a good place to stop
adding a couple of reasons why I don't want
to keep adding some more that I really am having a good time
with the flowers that are in here,
getting to be the focus. Sure, I could add more greenery. And one of the things
that you can do with these kinds of arrangements is that you can go really big, you can get them even
almost as tall as a person, especially if you're
in a really big room. The bigger the impact, the better for the sake
of this video, because I am limited to a frame, I'm going to keep it like
this so you can kind of see, you can get a
really large impact with a big vase and a bunch
of flowers just like this. And you don't need
to add much more. I think this is a
great place to stop. And then what I'm going
to do is come back in and just do a double check over
the whole arrangement. Make sure everyone is in water. Make sure that the stems are
where I want them to be, and then add anything
that's needed.
17. Large-Scale: Final Touches and Comparing: I did a quick scan and while I think that
she's pretty much done, I just want to try
maybe adding some Queen Anne's lace coming off on this side to sort
of balance it out. I might take it out later. The other thing that's great,
is that you could get it on site to the place
where it's going to be, like the bar or the fireplace, and you could say, ooh, I don't like that there and take it out, but I'm going to try it for now, 0. All right. I pulled both of the center pieces here together. We've got the large
scale arrangement, and then we have the
smaller centerpiece. This is going to show you a really great
comparison of how two completely different
sized arrangements can have the same impact. While this one's much, obviously grander and bigger in scale, it's definitely a shout
out to the littler one. This one and this one
both have touches of apricots and sunset colors blending into a
little bit of purple. I just wanted to bring these
out to show you both of the different scales of the projects that
you were working on.
18. Other Designs: Tall Vase: Right here. I have just
a few ingredients. We have some yarrow,
some chamomile, some fibroptic grass,
some alstromia, Queen Ann's lace,
and a little frasia. I chose the freesia
for the smell. I chose the Queen
Anne's lace for some bulk the alstromas
because they're easy, the yarrow for color. And these two, just to add
a little bit of whimsy, I'm going to start with
my hand in a claw shape. I'm going to move this to the
side so that you can see. Take your hand, make
it into a claw. You're going to take your
stems, place them through here. Pull through the bottom
of your fingers. I'll start with yarrow. I'm building a frame for
other flowers to go in, tucking some in,
keeping some tall. Next I'm going to
take the Ulster. Maria, remove the greenery going
in from the top, pulling through the bottom
snipping stems as I go. As you're pulling
the stems through, make sure to take any
greenery off the bottom. Now, I'm coming in with
the Queen Anne's lace. Next, I'll add the meal, because I want to bring some of this over to this section. I'm going to take
a little bit off of the side here and add it on the other side to
balance out the arrangement. Next I'm going to add
some fiber optic grass. This gives the arrangement
movement and texture. I'm going to take
the fibroptic grass and place it through the top, and bring it down through the
bottom of the arrangement. As I go, I'll hold
the arrangement further away from me and
maybe make some adjustments. I'm rounding out the
arrangement around the sides to cover any stems that might be
showing and removing as I go, any greenery that looks
like it's past its prime. Taking a look, I'm ready
now to add my Fresa, again, taking the Frisia,
going through the top, pulling through the bottom, keeping it a little taller so it gives dimension
to the arrangement. It looks like there's
an empty space here. So I'm going to add one more now. I'm going to take a look and add the last
piece of yarrow. From here I'll cut my
stems so they are even. I've transferred my grip from being a claw to holding
the arrangement, bringing my vase over, taking with both my hands and holding these ones tight
down at the bottom, then slipping it into the base. From here, I'll check and make sure there's no places where somebody needs
to get tucked in. Give it that once one
final look and she's done.
19. Other Designs: Bud Vases: Now that you've gotten
really comfortable with the flowers and the
materials that we're using, we're going to take the leftover
flowers that you didn't use in the center piece
and the large arrangement, and we're going to turn
them into bud vases. These are smaller
little tiny vases and they're perfect for
putting in bathrooms. They're perfect for adding to a table that you're putting
together for a dinner. They're also just a
really great way to take the leftover flowers
that you have and make little
tiny arrangements. Here are some of the
leftovers that we didn't use. And I'm just going to show you the basics you can use,
just about anything. Sometimes I'll use
glass bud bases. These are the ones that I made. They're little ceramic ones and I've already filled
them with water. There's not a real
rocket science to this, which is amazing and awesome. It's one of the
easier things to do. Sometimes it's fun to put younger children
on this project, they really enjoy the
miniature aspect of it. Well, let's take
the leftover flock and one of the things
I'm gonna do is I'm gonna stagger heights, so I'm gonna have
some kind of taller, some a little bit shorter. You'll notice that
I'm not working on any specific one at a time. I'm taking one single item and I'm adding it to
each of the bases. It should be a quick
little project with not a lot of
thought put into it. All right, I got a little
piece of leftover silos, Let's go to stick that one. Sugars snark. I'll note I'm putting
two into some of them. Sometimes it's nice to just have a single variety in a bud base. Cosmos are a great opportunity for bud vases to
add some height. You can also do this once you
have a table already set. You can place the
bud vases along the table and then just
plug in flowers as you go. That way you don't even
have to move them around. And then you can see what
they look like in this space. But I'm going to add a
really tall one to this one. So by just taking
some leftovers, we were able to make a bunch of different little
tiny arrangements, that'll be great to stagger
along a table scape.
20. Other Designs: Fruit Styling: Next I'm going to
show you how to use fruits as part
of floral arranging. I love to take fruits and I like to put them
on the tablecape, along with floral arrangements. And also at events, I like to put them
around because technically they add
really good color and they are part of styling
in terms of floristry. Also, I'm going to explain to you what
the fruits are that I chose and then give
you a quick demo of how you can place them along
the table, in a tablescape. And you'll see me also demo this later when I do a Tablescape. Um, all right, so
let's get into it. So, I've got a bowl of fruit and I think
what I'm going to do is move this center piece to the side so I can show you. Or let's see, can I get
in there and show you? Just like this, Maybe
I'll come up front. All right, let's see if we
can get that in the frame. The reason why I want to move the centerpiece quite yet is
because I want you to see how these colors are playing off of the floral
arrangements as a whole. I don't really want to
move them out of the way, just so that you can
kind of see how that is. Maybe I'll move this to the side a little bit. Bring that in. Okay. So I went to the grocery store and I
went to the fruit section, and I just picked ones that
I knew were going to go along with the floral
arrangements that I'd made. So I knew I had a lot
of apricot tones. I knew that there
was a little bit of hit of pink in there, some greens and even just
a little splash of purple. I found these pluots,
I think that they are, and I like these because they have a lot of yellow
and they also have a little bit of orange
or burnt orange even lending into kind of like that apricot sunset
color that we used for. Pretty much the whole theme
of these arrangements. I chose those, I got
the cherries because I felt like they would
bring out some of the colors of the zinias, which I think they
really do, don't you? Then these are
some little plums. These I thought would
pull in some purple. There's not really
quite this color in any of the arrangements, but it also works as
defining for shadows. Shadows within the arrangements. It's just a darker
color in general. It's going to pull
out some elements and give depth to the table. Within this also, there's
some grapes, mangoes. The grapes are a great choice
because I love how small the fruits are on them and I'm actually going to
show you how to put these in the arrangement. Also we have mangoes and
then a good honeydew melon, which if you look at
the honeydew melon, let's pull it out. Actually, this melon almost like encompasses the colors
exactly of this arrangement. If you compare it over
here to the Queen Anne's lace or even
the echinacea, it's pulling the colors straight off of the petals pretty much. There's a little tinge of
rusted apricot in there. There's a little bit darker
green just like the stems. There's a lighter green,
there's a little bit of white. And then the shell of the melon itself has
that white tone in it. And it's just really pretty. This is a great idea to have
one just in cut in half. You can buy them in the
grocery store just like this. I can add fruit into it, and I'll show you how I might
style this on the table. Another option that I
love is the grapefruit. It is so bright, it's going to be one of the brightest things
on the table, which will kind of make
your eye dance around the table if I take this away. Pretty muted besides the
cherries that I put there. Now, if I add the grape
fruit in down here, it's just going to make
your eye travel around. So I'm going to go
ahead and I'm going to take the fruit and I'm going to start
to place it around the table and be a little bit quiet probably
while I do it. And you can kind of see how I might start incorporating
fruit into a table scape. It might be a little bit tricky to see it within the frame, but it gives it a really
Dutch still life perspective and makes the whole
atmosphere feel very alive. Next, I'm going to take
some grapes out of the fruit basket
and show you how to insert them into
the arrangements. I'm looking for a little
space that might be nice, and a lot of times
I'm going to use fruits more around the
base of an arrangement, less up top, unless I was taking it and draping
it all the way over, but more just right tucked
in around the base. That way when I
have it in there it can relax and drape
down onto the table. This one's much
larger and it's not important that these
get put into the water. I'm going to stick
this one right here, carefully making sure
that I'm tucking it in, but also that it is draping, but it doesn't look like it's just flopping out
of the arrangement. And that might involve cutting off some of the fruit itself. But for now, I'm just
going to tuck this one in, rest it, and then you can see it's coming down off the
side of the arrangement. It's a really great accent. I feel like it pairs beautifully with these tomato
vines that I stuck in here. And it's just so much fun
to add fruit to florals. Let's see, do I feel like
tucking any more into this one? Maybe I'll demo how to
stick a little bit. Going over the top, I'm going to have it just
draping with that solia. That was a quick
demonstration of how to add fruit to
flower arrangements. Also a quick
demonstration on and sourcing fruits that will match your table scape and your
florals really nicely.
21. Tablescape: All right. You can see that
the center piece that we made earlier is now in
the middle of the table. I went ahead and set
the table for us. And what I will do
from here is I'm going to just do a double check
on the centerpiece. And that's what I was
telling you about earlier which was what I called Jing. This is where we
go in and we check all the different angles and look for anything that was dead. As I placed this earlier, I saw a couple of dead Pa. I went ahead and took those out. I think it's looking
pretty good right now. Just adjustments that
might be needed. Like maybe you want to have something that's reaching up a little bit more like I think I'm going to place
that like that, doing a quick double check. And then I'm going to go grab the bud vases that
we made earlier too, and show you how
you can set those before we then add the fruit. All right, here's all
of our bud vases. I'm just going to set
this over here for now. They are so cute. As I go around the table, I like to group bud vases
in groups of three or two. Sometimes I'll do
a little cluster, like I might stick
one over there to balance out the table. It's a really great way of
getting your table to feel really full without needing a bunch of really
huge center pieces. And I'm going to come
around to the front. Also, it's a tight table. I'm going to take a step
back and take a look. I'm seeing a gap right here, so I might try to take playing. All right, I've got
my fruit bowl here, and as you can see, what we selected earlier really plays with
the flowers nicely. Some of these items
are really big, and I'm probably not
going to use them on this smaller table because
this is a demo table. But if you had a
larger table and you were entertaining
more people, these larger pieces
of fruit would be perfect candidates to throw
around on the table as well. I'm going to come over on the other side and start placing some fruit in a couple
of different places. Just so you can see what
that might look like. To do a little fruit
styling on the table too. I'm basically playing
around with putting the fruit at the bases of the candle holders
of the bud vases. Avoiding the plates, because obviously that's where
guests will be eating. Keeping clear of
those and making it really part of
the table. Scape.
22. Conclusion: The table set, the
candles are lit, it's time for us to
conclude the course. I hope you had a
really wonderful time. I know I had a great time
teaching this course. I hope that if you
took this course that you walked away with a little something that
you didn't know before, whether it's your first or your 50th arrangement
that you've done. I would love to see
what you've made. If you could please,
please please share on Instagram
on this platform. You can e mail me
if you want to. I would just love to
see what you create. Thanks again for
taking the course and look forward to teaching
you in the future. Bye.
 Colleen Carrère, Floral designer and educator