Transcripts
1. FILMMAKING BASICS: Hey there. So thank you for tuning in. I just quickly want to let you know what you can expect in this culture. So basically, we're going to cover everything that you need to start out your freedoms for the opera, few business or your YouTube channel or whatever you want to do with video. I give you the pure basics. We're gonna talk about camera settings. We're going to talk about basic lighting techniques. We're going to talk about how to use a microphone so you can have proper audio. We're gonna talk about framing and make sure your image looks professional. So maybe my favorite story from the soul skates your class is the story of how a upgraded my camera just because I thought I need a better camera and it literally changed nothing like I didn't have any clients that I didn't have before. I couldn't shoot any videos that I couldn't shoot before. Of course, it's easier. Of course, the image looks better, but that's not the point, because the point is the camera that you have is the right one. The point is that the best camera is the one you have, and usually it's enough. So of course, there's times where you should upgrade your gear and that time will come. But especially if you start out. Everything that can make it work is already enough. You don't need fancy gear like that's actually part of the fun in the beginning that you have to make it work with what you have. You know, maybe you don't have the $500 light. Maybe you need to use a cheap flight for Mikey and put some things on it to make it diffuse or whatever. Like the point is, get crafty. Don't allow yourself the excuse off. Oh, I don't have money for the right gear. Oh, I don't have 10 years of experience. Learned the basics. Get the best stuff you can get. And if it's your got them phone, that's fine, too. Like like I said, I started out with this camera here. You know, that's like a point and shoot. That's a traveled snapshot Camera. Yeah, creates good looking image, but it's not at all what I have right now. If you feel like you want to create videos, whether on YouTube or whether as a prion answer, it doesn't really matter. Don't allow yourself the excuse off. I need better gear or I need more anything. Just start. You know, in this case share class, you get all the basics you need to start. You could literally start getting clients tomorrow. You can start going out for free, shooting free videos for people because you don't have a portfolio yet. Shoot for free. And if it's your phone, doesn't matter that you're gonna have to have some looks. Whatever. Like. If you create a good video afterwards because you follow the basics, nobody's going to ask any questions. You know you have to, you know, get through it, pushed through it. If you want to start creating tomorrow, go out by the best camera that you can get by. Use camera on eBay shoes and pre videos. Come back, make a video put on your portfolio, get clients, get money, get experienced by better cameras, get better, get better, get better. And that's how that works in this culture class. I want this to be the start of your freelance videography career. I want this to be the start of your YouTube channel. I want this to be the start of whatever you want to do with video and just make sure to not allow yourself. Ever the excuse off my gear is not good enough. Oh, I don't have enough experience, you know, get their learn grow. And that's basically what all this about Sorry for the rant, but I really want you to create. And so I'm going to stop talking right now. Have fun with the Class C inside. Greetings from Germany.
2. About camera gear: Okay, So before we go into the details of how to create a great image with a camera, let's get something out of the way first. That by far most common mistake that I see every filmmaker or YouTube or doing on definitely no exception here is constantly obsessing about having a batter camera about having that better gear. Talking about gear has somehow become more popular more, you know, fund then to talk about actually how to use that gear to achieve. You know, the image that he wanted, chief, or make that video that you want to make. So when I started out just a few years ago, my first camera waas with Sony Rx 100 this is a tiny little point and shoot camera with pretty, you know, with pretty limited function. So this camera does not even record 24 or 25 friends per second. It only records 50 which is not really enough for a great slo mo. But it's also not enough to have the normal based Raymond off 24 25 francs per second. It doesn't record four K, and most importantly, this thing cannot even change lenses, so There's definitely more off a snapshot, you know, travel kind off moment, capturing camera than a really professional tool to make great films or great videos. But I got my first paid plant with his camera. Only with this came in I actually made a video, and I still remember it was pretty crappy. But the point is, I made the first step with this camera and it was possible, and it worked. So then pretty fast from this camera, I upgraded to the Sony A 63 100 which I don't have with me anymore. But I'm gonna show you a picture. This was a totally different world. Suddenly I could change lenses. I could record those 24 or 25 friends per second, and I could also record up to 120 frames per second, which enables me to make really smooth, beautiful, slow motion. The image quality overall was pretty nice. I was really happy with that camera, and it basically had everything that I needed to make professional, great looking videos. And then the Sony A 73 came out, and if you are even a little bit interested in filmmaking or making videos and you have watched YouTube at all in the last kind of, like one and have years, then chances are, you know, about that camera. Pretty much any filmmaker tried it out. Most of them recommend the A 73 It's a great camera. They praised. You know the features, the great image quality for this little money to full frame camera. It's about 2000 I think. But right now, 2000 euros, $2000 on it's like this great camera that everybody needs to have its like the new thing tohave right. They kind of made it easy to talk yourself until I really need this camera to make good videos and, well, what should I say? It worked. I actually did buy that camera upgraded to the Sony I 73 which I'm filming on right now. Actually, what can I say? It is a great camera and is a good value for the money, and it is all those things that everybody advertises really great camera. But the point is this. It didn't have any magic effect on my freelance and career. I did not get any client that I wouldn't have gotten also with the soniya 6300. I cannot record any video now that I couldn't have recorded before. So in some sense you could argue that the you know, the upgrade was kind of like maybe too early, maybe the wrong decision. The point I really want to make here is not that it's a bad idea to get the soniya 73 especially if you have the budget. So the learning is the following the camera. It's not even remotely as important as the person who uses it. Let me say this rumor time the camera is not as important as the person who uses it. So that being said that you want to give you a few recommendations and a few you know, minimum requirements that you need, in my opinion, to start making good looking videos and even do some maybe beginning freelance work. If that's what you want to do, so the first thing First, it needs to be an interchangeable lens camera. So other than the Sony Rx 100 you should be able to change lenses, really, just to adapt to different kinds of situations with different focal lengths, different kinds of lenses, different kinds of looks and generally every camera where you can change the lens has already like a certain kind of quality that is, on another level than usually. You know, something like this, you see the difference, and it doesn't need to be an expensive one. Just if you can change lenses, that's already great. So the next thing is you should check the video features off the camera. It should be able to record 24 or 25 frames per second, depending on if you're living in the Pell or the NTSC region. More on that later. So it should be able to record those space frame reds at at least 10 80 p. And that's full HD, and that's usually still enough. Most freelance work that I produced right now would be technically enough to export and deliver in 10 80 p. Obviously, that depends on where your client wants to use the video. But if it's one of the usual things, like embedding it on a website or posting it on instagram or, you know, even on YouTube, you really don't need more than a good looking 10 80 p picture, which you could actually technically export as a four K video. And then, you know, chances are nobody will even see the difference. So the next thing a big bonus would be to be able to record 60 frames or even 120 frames per slow motion in also at least 10 80 p, I would say so. You can, you know, match it to the footage that you got already and have the ability to use slow motion in your videos, which is always a nice tool to use. So and then there's a bunch of other little things that you really want toe pay attention to if you purchase your new video camera, which is definitely the battery life, so you want to check that the battery doesn't die after one hour of shooting. Second thing is, some, especially older cameras, have a recording limit on them, so you cannot record more video than you know just 20 or 30 minutes. That's something to look out for because that could be potentially very annoying to have to restart the camera after 20 minutes or something like this. And then finally you can. You should definitely have a microphone. Input Jack and a headphone output, Jack. So you can, first of all, record audio and also monitor your audio if you're recording it. Okay. So far, so good. I will give you exact gear recommendations for all kinds of different budgets lights, microphones, cameras, all kinds of equipment, all kinds of accessories that you might need that you will need eventually. And so you can really, you know, concentrate on the lessons right now. Later on, I will give you all kinds of recommendations that I think are good choice. But for now, the point really is just you do not need, like a $5000 set up to really start making great videos. You will get there eventually. But for the beginning, really, I really, really want you to understand. It's not important yet it's not. It's not the most important thing. Like people will look at you and ask you, what camera do you have? People will like to talk about gear, and people will probably tell you that they are better videographers of better filmmakers because they have the newest camera they have. The cannon eras are they have the soniya 73 that have whatever but Trust me, that's not the point. You can make great videos with pretty much any camera with basic video functionality, and you should not get discouraged or, you know, waste money in the beginning on camera gear that you don't need and that focus on developing your craft.
3. Camera Basics: Okay, so now that we've established that you don't need a fancy and expensive camera to get started, let's make you into the filmmaker that actually knows how to use the camera and get the best possible image out of any camera. So for that, we just ask one simple question. What exactly effects the image coming out of our camera? So let's take a minute and talk about how camera actually works. In the most basic sense, the camera captures light. That's why when you want to see your subject better, you put a light on it, right? Some simplistic but makes sense of far right. So that's why most of the important settings in your camera that effect your image the most are actually settings that change how your camera behaves or interacts with light. So whenever somebody leaves the comfort off the automatic setting on your camera and goes into manual mode, they are welcomed by maybe confusing sounding terms and options and functions such as Aiso and white balance and shutter speed and aperture. And what what does that all even mean? So that's what we're gonna go through right now, because, except for white balance, which we're gonna talk about in a second as well. Eso aperture and shutter speed are all direct functionalities that change how your camera interacts with light.
4. ISO: All right, So let's start with ISO or so whatever you wanna call it, I s o is basically changing the light sensitivity off your camera sensor. If you imagine that the lighting situation stays the same if you change, so that changes how strongly your camera reacts to the light that comes onto the sensor. So, for example, if you shoot in a very dark location, you might raise your eyes. Oh, because that raises the sensitivity of the sensor, which kind off enables you to tiu see in the dark if you want, Whereas when you shoot a complete daylight, you might change your eyes or down to the lowest possible number in order to have a well exposed image and on have it be too bright eyes always measured in kind of random sounding numbers like 101 125 162 100 up to things like 677,200 very, you know, arbitrary sounding numbers. Lower number refers to lower sensitivity your sensors, now less sensitive to light, and therefore it gives you a darker image in the final product. Ah, higher number increases the light sensitivity and therefore gives you a comparably brighter image with same lighting situation. So now you might think great. That's easy. If it's bright, I just go down with my eye. So to the level where it's well exposed. And if it's dark, I can go as high as possible in order to create an image where I can see enough. And that's basically true. But there's another thing to remember. I S O doesn't only change the light sensitivity of your sensor. It also has an influence on the image quality. So higher levels of I saw introduced noise to the image which looks like this. You might have noticed that before, if you take pictures or especially videos with your phone camera at night and very like difficult lighting situations. So what exactly is high? I so well, that depends honestly on your specific camera model. Some cameras, like especially Sony cameras, are somewhat famous for being great in low light situations. So with this camera right now, with the Sony 73 I think Aiken, I can probably go on isil levels above 10,000 and I still have a somewhat OK picture. While with others you might already get into problems with, You know, I s O between 5000. So that's up for testing. And you really need to see how far you can push your camera. Technically, every camera has a native ice. Oh, under which it works best, which should be always. You're based. I sewed that you don't leave if you don't have to. So for the most part, especially if you are in lower budget cameras which still includes us of the Sony A 73 I would say the basic rule can be the Lord I sold, the better. So in most cases, that means I saw 100. And you really should only leave that 100 if you really have to, because you don't have any other chance to get your image brighter.
5. Aperture: All right, So now let's talk about aperture. So most people will agree that aperture, especially in the beginning, can be a little bit of a confusing topic. Whenever people talk about things like fast lenses or open up your lands and shallow depth of field, what they usually referred to is aperture, So the aperture changes how much light actually enters. The Cameron actually gets to the sensors, so every lens has tiny little blades in them that you can actually see, which you can open up as an open up your lens to leave more light into the camera or close down to leave less like through the lens that hits the sensor, which will then in effect, create a darker image. So temperatures measured in so called F stops and accept numbers are, for example, F 1.4 or F 1.8 or 2.8, going up until numbers like F 22 or something like that. The lower the number. For example, F one point forests extremely low, the more opened the aperture, and the more light comes in, so low number means more light. Ah, higher number like F 22 leaves just a tiny little entrance for the light to go into the lens, which means obviously a doctor image. Low number, bright image, big number, darker image. So one more time and aperture off something like F 1.8 refers to a wide open lands, and that leaves a lot of light into the camera. And an aperture of F 22 or F 14 or something like that means a very tight aperture. And so it doesn't leave very much like a camera and therefore creates a darker image. So there's a few more reasons why you would want your camera to work in a certain aperture number one shallow depth of field that basically refers to how much of your foreground and your background is blurred in your picture. For example, if I do something like this, the camera focuses on my hand, and as you can see, my head of my eyes between my hands are a little bit blurry, right, and the background is also very blurry. If I take my hand away, it focuses back on my face. But my background is still blurry, and the hand that I have, for example, right here It's also kind of blurry, so that blurriness in the background is called shallow depth of field. It basically goes, refers to how much off the image in terms off distance from the camera, it's in focus. So, for example, my ice, my notice and focus my ice are still focused on my ears are still unfocused. If I would go with a more shallow depth of field, that range might go. If I go like this might go a little smaller so that you can actually achieve things like ice being and focused while the nose is not in focus anymore. So that's something to remember and a shallow depth of field like this with a lot of bocas . People call it, create this image where your subject is very separated from the background, even if your bedroom might be very close. So that's a good tool to leave out any distraction from the background while you still see where the subject is. But it basically creates that's very flattering and very pleasing to look at. Look for a lot of people. It's very popular these days. I personally like it as well, but keep in mind this is basically more a creative choice than anything else. There is no written rule that is shallow. Depth of field is necessarily something good. It's just very much in style right now. A lot of people talk about it. A lot of people like it. I like it, too. You can decide if you like it, too. So Number two is the image quality because the image quality actually changes for most lenses, depending on which F stop, you're using the month for very expensive lenses that might be more consistent over all the f subs that are available and for the lens that I'm using Right now, for example, it's at its best at around F 2.8. It's a F 1.8 lens, so it goes a little bit shallower even. But, for example, the sweet spot for me said like 2.8 or something like this. As a basic rule, what you can say is, first of all, because of the shallow depth of field that you might like but also for the quality. Don't go too high and aperture, meaning don't close it up too much to make the picture darker, because at some point and higher aperture numbers. Your image will suffer in quality. And, like I said, in the beginning, you can get away with shooting. But those cameras are definitely also gonna be less forgiving in terms of the image. Which is exactly why we're learning all that stuff so you can use it. Dial in your image exactly how it should be dealt in and therefore creating image that's very pleasing and can definitely compete with a more expensive camera. So keeping my aperture low numbers bright picture big numbers. Darker picture low numbers refer toa wide open apertures and create shallow depth of field and high numbers. You might want to be careful because it might influence your image quality, and that's all you need to know, really, for aperture for now.
6. Shutter Speed: All right, So now let's talk about chowder speed. So when you take a photograph with your camera, you have a shudder inside in front of the sensor that opens up every single time you take a picture, and the time that this shutter is open determines how much light gets into the sensor and therefore how bright or how well the pictures exposed and therefore the shutter kind of determines help write. The exposure will be in the final picture. Take a longer exposure means a brighter picture, and a shorter exposure means a darker picture. In videography, though, there's a electronic shutter assimilating the soul process. But really, the important thing to remember here is how does shutter speed actually influence your image? Your exposure? What exactly do you have to do to get a good picture? Generally, a faster shutter speed means a darker picture, and a slower shutter speed means the brighter picture. Like I said before, if the shutters opening and closing very fast, that means there's less time to get exposure onto the sensor, which obviously creates a docker image. And if you have the sensor open and exposed to the light for longer time, then it creates a brighter image. So but, like a nice Oh and aperture, there's a few more things to remember than just the relation between the number and the exposure. So we shutter speed. There's actually one important rule to remember, and that's the 180 degree shudder rule. So and that sounds kind of confusing or complicated. But what it actually just means is you want the shutter speed to be doubled the value off your frame rate. Okay, so let's break that down. What does that mean? If you record at that standard frame rate off 24 frames per second, you would want your shutter speed to be at least 1/48. Usually it's 1/50 to match that, to create the most natural looking image and the most natural looking motion for our human eyes. If you recorded 60 frames per second, your shutter speed should be at least at one over 120. And if you record 120 frames per 2nd 1 240th off a second, and like I said, that way you create motion that looks most natural, toe our eyes and therefore create a pleasing picture. And that's exactly also kind of the limit out the shutter speed. Because you might be tempted, especially when you film in very bright situations outside. Imagine you are outside the sun shining you already Aiso 100 which is the lowest light sensitivity. You have your aperture at a level where you wanted to have it because you want to have the shallow depth of field. So you're filming at something like whatever f 2.8, which is quite open and lives in a lot of light, which you need to create the shallow depth of field. But then the picture will be very, very bright because of all the sunlight available. And then it might be tempting to use your shutter speed and crank it up all too like one over 800 or something while you're filming in 24 frames per second. So the actual correct way to do it would be 1/50 and you use one over 800 which then might correct the exposure to a level beds, actually. Okay, so the problem with this and why you shouldn't do this is that it would just create motion that is completely unnatural. If you film something in 24 frames per second and you use the correct shutter speed, you will see something that is called motion Blur. Because if you look right now, when I move my hand really fast, you see the blurriness year right. It kind of appears that there's more than one hand because it's so fast that, you know the picture is not fast enough to keep up with the movement of the hand. That is also what makes it look natural, because our eyes, like we already learned, function at 24 frames per second, so to speak as well. So in real life we also see motion blur. When we see a car passing, we don't see it completely perfectly. Every single second, we have a motion blur in there. So what happens if you film at 24 frames per second? But you have a shutter speed that's way higher than 1/50. You will lose that motion blur. So you technically could still film and it's probably okay for some situations, but it's kind of it's kind of like bad technique in bed style, and it will definitely create a worse looking image just for the sake of this motion, bro. That's missing. So in some situations, like I said, it might be OK might actually be even helpful if you want something to look really fast and kind of hectic, maybe, but that should always be a stylistic decision that you make intentionally and not just because the situation is so bright and you don't know what else to do. So remember the shutter speed? Basically, you shouldn't really touch because it just should always be double the amount off the actual frame rate that you're filming. So I do want to say, though, just out of Paris, that some people do ignore this rule. And some people actually do use that trick of just cranking up the shutter to be fast, and it just to a situation that might make sense in some situations. For example, if you're out and kind of like running gun shooting, maybe you're blogging or you're filming someone that's outside and the scene is changing fast. Maybe the documentary style work that you're doing, and you might have to adjust to a light to a light change very fastly, and you cannot use and D filters, which we talk in the second about don't get confused and D filters kind of make the image darker, which then enables you to use the normal shutter speed. If you don't have that and you have to adjust to the situation very fastly. And it's the decision between no picture and a in perfect picture. Obviously, you should use the shutter speed, so it's good to know that when you crank it up by cranking up, I mean, when you raise the value of the shutter speed, if you make a pastor, won over 800 won over 1000. Whatever. You can use that to make the picture less pride, you could make a darker, but it will suffer an image quality, especially in the motion. Be aware of that only do it if you really have to, and if you can help it, then use the other tools available in your tool kid to create a pleasing and good looking image. So now, quickly, I just want to mention again what is actually an nd filter. So there's certain filters and things you can screw on your lens in front of the lens to change the picture or to change the to change the light that enters the lens right and and D filters are called neutral density filters, and what they basically do is they can make the image darker. They can, like block parts of the light that enters the lens and therefore enable you to shoot at something like 24 frames per second at 1/50 shutter speed at a low aperture, even like 1.4 or one point aid, even if it's extremely bright outside because of dampens down the light entrance. Been therefore, enables you to, you know, keep the shutter speed, keep the aperture and keep the exposure exactly where you want it to be and still have a great looking image and not totally overexposed. So there you go. Those are the three elements off light that we have at our disposal to change the picture to the way we like it. And I know it can be a little bit overwhelming to remember all those things, especially in the beginning to remember which number refers to what and what it's again. An open aperture and shallow depth of field and 1.8 is that dark or bright or I remember was very confusing for me. And I know every time I talk to someone who's new to it, who was super excited to have a new camera but really gets a let's get when they change to manual mode, I know exactly how overwhelming it could be. So I actually prepared a little downloadable pdf for you with an overview of all the important things, you have to remember how they relate with each other and how you can really create a good looking image without, you know, have your head burning. So head over to Danish radha dot com slash skill Share again. That's Dennis Trotta dot com slash sculpture, and there you can actually download it. I hope it helps you and gives you a little overview when you need it.
7. Frame Rates: All right, So now let's talk about frame rates. So what does frame rate actually mean? What is a frame rate? So if you think about every single video, every single second of video contains a certain amount of still pictures to make it appear like it's moving pictures like its motion picture right? That's where that comes from. So, for example, human eye perceives pictures as motion picture as soon as you see 24 pictures per second or more. And that's where this typical 24 frames per second comes from. Because it's the closest toe how actually are human. Nice work. So and that's exactly why 24 frames per second or 25 frames per second, depending on if you're living in the Pell region or the NTS you region. Because there's some regions in the world where 25 frames per second it's the norm. Like, for example, Germany, where I'm from and meanwhile in the U. S. 24 frames per second is it under? But basically wherever you are, 25 or 24 frames per second should always be the basic frame rate in any video that you shoot because it just creates the most natural looking image. So when should you change your frame rate? The answer to that basically, is only when you have a stylistic choice or specific effect that you want to reach by raising a frame rate, for example. So, for example, soap opera TV or news shows in TV, often a recording 30 frames per second, which creates a faster looking in which a little bit more, you know, dynamic if you want. And then obviously there's the big thing, which is slow motion. And if you want to create real smooth and like rial slow motion, you have to shoot at a higher frame rate, so you can then later slow it down back to 24 to match the other footage, which then will naturally create a slower appearing image without losing the effect of motion. So this is what it would look like if you actually slow down 24 frames per second footage and slowed even down a little further. It looks a little choppy, right? So now if you record the same thing with 60 friends for second and slow it down to 24 it looks like this. And now If you shoot 120 frames per second, shoot the same thing and slow down to 24. It looks like this one second clip off 120 frames per second. Footage can be stretched out to five seconds off slow motion in 24 friends for second you get the idea, so that will be basically be a slow motion at just 20% of the speed of the original clip. And that's quite something to work with. It's a now little anecdote. When I was starting out, I told you I used the Sony Rx 100 right and the Sony Rx 100 could shoot 50 frames per second at 10 80 peak. So I thought I was really smart. I just started recording everything in 50 frames per second, and whenever I needed it, I just slowed it down to 24 friends per second in post production. And so I could always have the option to use anything that I recorded and put it into slow motion off like 50% which is also already something to work with at least and the rest. I just leave it like that on have a good video, right? So the problem with that is, as we learned before, you should have a specific reason to deviate from the basic frame rate of 24 or 25 frames per second. If we recorded 50 frames per second like we learned earlier, we're going to lose the motion blur that we have 24 frames and therefore the picture will appear unnatural. You don't exactly know what it is if you don't know like if you're if you're an amateur, you don't have anything to do with filming. You look at any like something is weird. It appears a little fast, a little too dynamic, a little robotic even. And that's exactly the effect that you get and that over time when you start shooting things, you will even see the difference between 24 30 let alone between 24 50 or 25 50. So that's was there was a cooling loop crafty idea that ahead, but definitely doesn't turn out to have the best video quality that you can have compared to shooting a 24 25 1st per second and Onley reaching to that higher frame rates when you really want to make a slow motion sequence inside of your video. So again, that's just another thing where you can be a little bit lazy and slack off a little bit and makes, um, you know, make it easier for yourself. But the image quality will suffer. And that's one more thing you want to remember. Because, like I said, if you want to start out, you really want to learn the craft, then you want to make sure that you do things right and learn them right so you can later, you know, make an educated guess about which rules can actually break and which rule is okay to break without, you know, suffering a worse image. So since we're here to learn the basic and we want to start out really learning stuff, how you should learn it always remember, shoot a 24 or 25 frames per second and only use higher frame rates when you know you're going to use it later to create slow motions
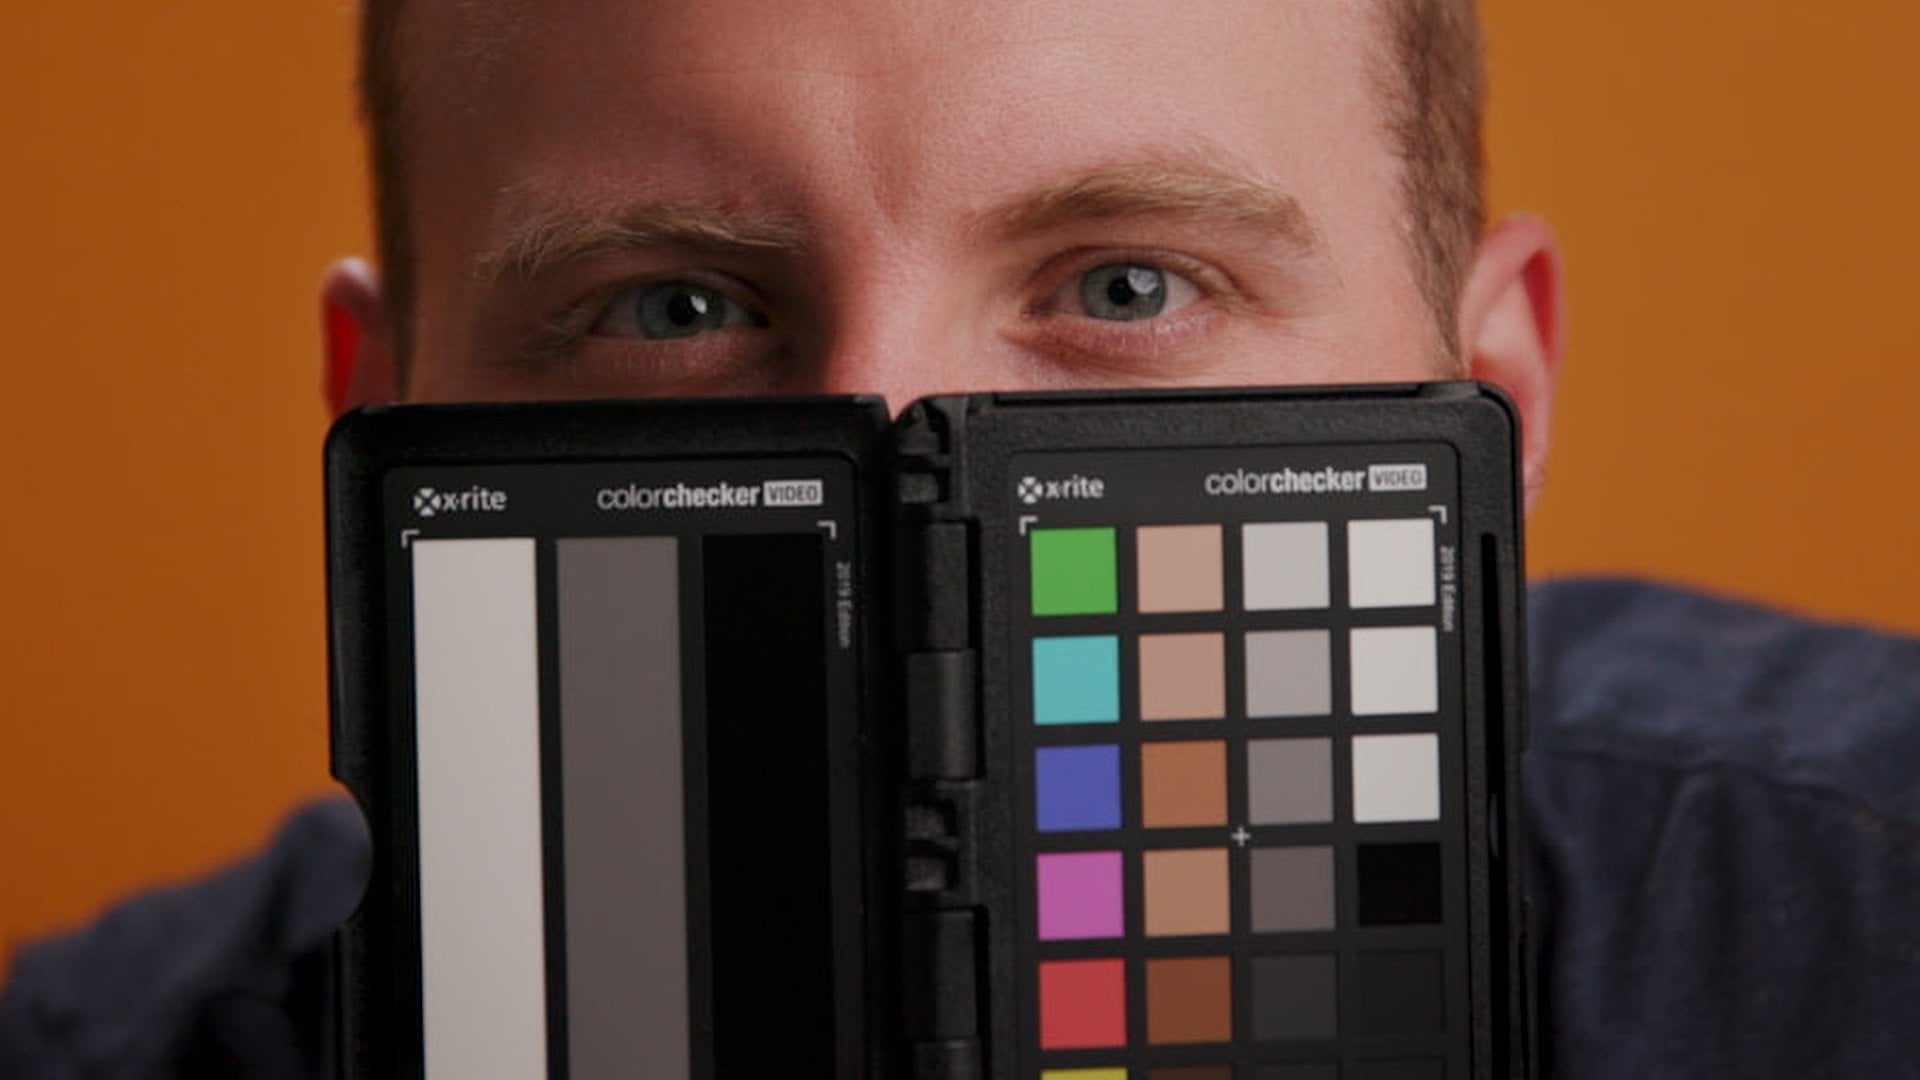
8. White Balance: So now let's talk about white balance. What exactly is white balance? So you have probably noticed that different lights can have different kind of temperatures and different feelings to it, right? Some lights or more bluish and or very like very white and very cold. And other lights might be more warm feeling and more orangey, More red or something like this. And different lights in your image make colors appear in a different tone off the color. So basically, white balance is the setting in your camera that tells you camera. Okay, what is exactly riel white in your image and coming from that basis, how did the colors actually appear in your video? So if you have a changed white balance setting, it might be looking something like this or this or this. So if you have a correct white balance than all the colors in the your video appear exactly the same way as they also appear reality. So that doesn't mean that your wife is always perfectly white, but it means that your white should appear in your video like it appears in reality or the way you wanted to appear in your video. So again. Lights have different color temperatures, and those color temperatures are measured in Kelvin. So this life, for example, has a collar. Temper. Sure, off about 5600 Kelvin, which is something like bright daylight. Basically. So now the question becomes, How can we help our camera? Exactly. Detect what's the correct white balance? And how can you cannot correctly expose all the colors like they really appear? Your camera has an automatic white balance system in it, and some cases it actually performs pretty well. If it's a very controlled environment and you can check it once and you can see that it's on point, you know you check your screen and you see that it works. Then you can just leave it like that because it's a controlled environment. And if you just want to make it easy for yourself, that's a way you can do it. In most cases, though, conditions can change. Lights might change. The sun might go down. There might be clouds coming up. Whatever's gonna happen, you want to have a certain control over your image, even if the light might be changing. So there's a few ways you can do it. Number one. It's obviously like I said, the automatic white balance system Number two is presets that are built into your camera that actually represent different kinds of light, different times of the day. Different lighting situations that are common, for example, you know, daylight setting or evening setting sunset settings or sunrise settings, whatever. And they represent different lighting situations. You can just switch through them and see if some of them actually works well. So those presets can be a nice little help. They don't always work, because after some time, if you keep scrolling through the different pictures, you might be wondering what is actually now the rial white balance. What is actually what it looks like, so you might get a little confused from that. So what I do is I recommend number three, which is using something called a great card. So let me explain. Your camera has also the option, obviously, to make a custom set up what kind of white balance you want and one way of doing this, you can open the setting and point the camera at your subject, or especially at the scene, to get a feeling off the lighting that you are gonna have when you shoot. And the camera's gonna look for the great parts in your frame to calculate from that grey how every color should look. And that's sometimes pretty difficult if you don't have something especially big or gray in your frame. So that's where the great card comes in nicely, because you can put the great card in front of the lens in the exact same lighting. So in this situation right now, I would just hold the great card in my hands close enough to the lens so it feels enough of the frame snapped the photo. And then the camera actually has the perfect surface to calculate because this is a very specific gray, which for some reason gives the camera the exact kind of information that it needs to calculate the correct white balance. And that's actually the best way to not only get the best possible in camera white balance , also, especially in the color correction later on, if you have to make even, like little tweaks, you know that don't destroy the image yet because it's not completely wrong. But if you want to make little tweaks, you always have the exact same gray in your frame, and you know exactly that will always match. Because if you use the great card for every single shot, you can be sure to have exact same white balance with every single shot. And it's always perfect. And that's pretty much the only way to always have your white bones on point. So obviously, you don't always have the convenience of having enough time to set up everything and use the great card and make a custom profile for white balance and all that stuff. So it sometimes, like I said, if you're on the goal, if you're a shooting in the event or if your documentary videographer or something like that, you might not have the time to do that all the time. So in that case, you can keep using auto. If you need to be fast. Auto is probably your best bet, because it will adjust constantly to the changing situations. That's obviously kind of part of the style of filmmaking that you're doing. But whenever you have the time, I really suggest Take the time and really dial it in perfectly with the great card and you will have great results and don't have to do so much work in the post production, which is obviously possible to help with a little bit. But you should really not rely on I'll do it and post because first of all, every single color great that you apply to your picture that is not necessary. We'll make it all break apart easier. It's gonna look worse, is gonna not look perfect. So you want to really get that perfect picture in camera as much as you can? Yeah, break heart. It's a great way to achieve that with white balance.
9. Resolution: All right, So now let's talk about resolution for a bit, especially as a newbie, you might be thinking, 0 10 80 p four K six k eight k. The more the better. Give me the best camera ever. And first of all, for most people, if they talk about cameras, especially photo cameras, obviously the first measurement that they always mention is the megapixels. Right? Has 12 megapixel 16 24 42. So megapixels, something that gets thrown around a lot. Mega picks. This is basically a measurement for the resolution off pictures or photographs. If your camera has a resolution off 24 megapixels like mine, for example, that doesn't have anything to do with the video resolution. In fact, because video resolution gets measured in things like 10 80 p or four k or eight K something like this, and it obviously relates to also the amount of pictures that will be in your picture and also the aspect ratio at which you're filming. So usually filming happens at 16 by nine. If you don't have any special setting or special camera or something like this, you will film 16 in width and nine and height And so the basic full HD picture, which is 10. 80 p, will be 1920 pixels in this direction and 10 80 well, 1000 and 80 pixels in this direction. So that's why it's called 10 80 p, because it refers to the vertical pixels that are in your aspect ratio in your in your image. So the most natural thing to think would be probably that a four K image, which has 3840 times 2160 frames, which has in total four times the amount of pixels compared to a 10 80 p. Picture that four case obviously always a lot better than 10 80 people. And that's not actually true. So whenever you see pork a or 10 80 p four k in 10 80 p is not always the same. Something interesting to note here. This camera here right here that I'm shooting with Sony I 73 I'm recording right now in four K. So that's Ah, about $2500 camera that can actually record four K, some of the most expensive cameras in the world where people shoot Hollywood blockbusters with that, you all know and probably saw in the movies, some of them and the most expensive ones. Actually, we're talking way about 50 or 70 or $100,000 are not even able to shoot four K because they're I think it's 2.5 K images so good it's so, so good. Then you can upscale to four K, and it still looks way better than the four K image that my camera could ever record. So don't get too hung up on the numbers here. Like I said, in the very beginning, a camera that records 10 80 p minimum is enough for today's world to record a lot of video for different kinds of purposes, even for working as a freelancer, especially if you consider where your clients might use your videos. So that's often gonna be uploading it on a website or posting it on social media and especially platforms like YouTube. There's a lot of compression happening whenever you upload a video, so the four K video that you exported on your computer will always look much better on your computer than on YouTube because YouTube is compressing it a lot. So 10 80 p video has a lot less compression if you put it up to future, so the difference gets even smaller. And now funny thing that I've heard about the other day, which is you can actually record in 10 80 people, upscale it to four K in the export uploaded to YouTube in four K. And then, if you watch the 10 80 p version on YouTube, it looks better than if you only upload a 10 AP Virgin. Smart little trick here, but basically the thing to remember here is resolution is not everything. If your camera doesn't record four K, that's not the end of the world. And if it records for K, that's not that it's not necessarily the same. Four k as the one of a red camera are the one of the more expensive camera, So four K s core. It's nice to have its useful, and it obviously gives you a little bit off more little bit more range of possibilities, especially in post production in terms of cropping and whatever. But 10 80 p s fine in 2019 especially if you're a beginner. You can do a lot of damage and a lot of cool things, and a lot of cool videos, intimated people
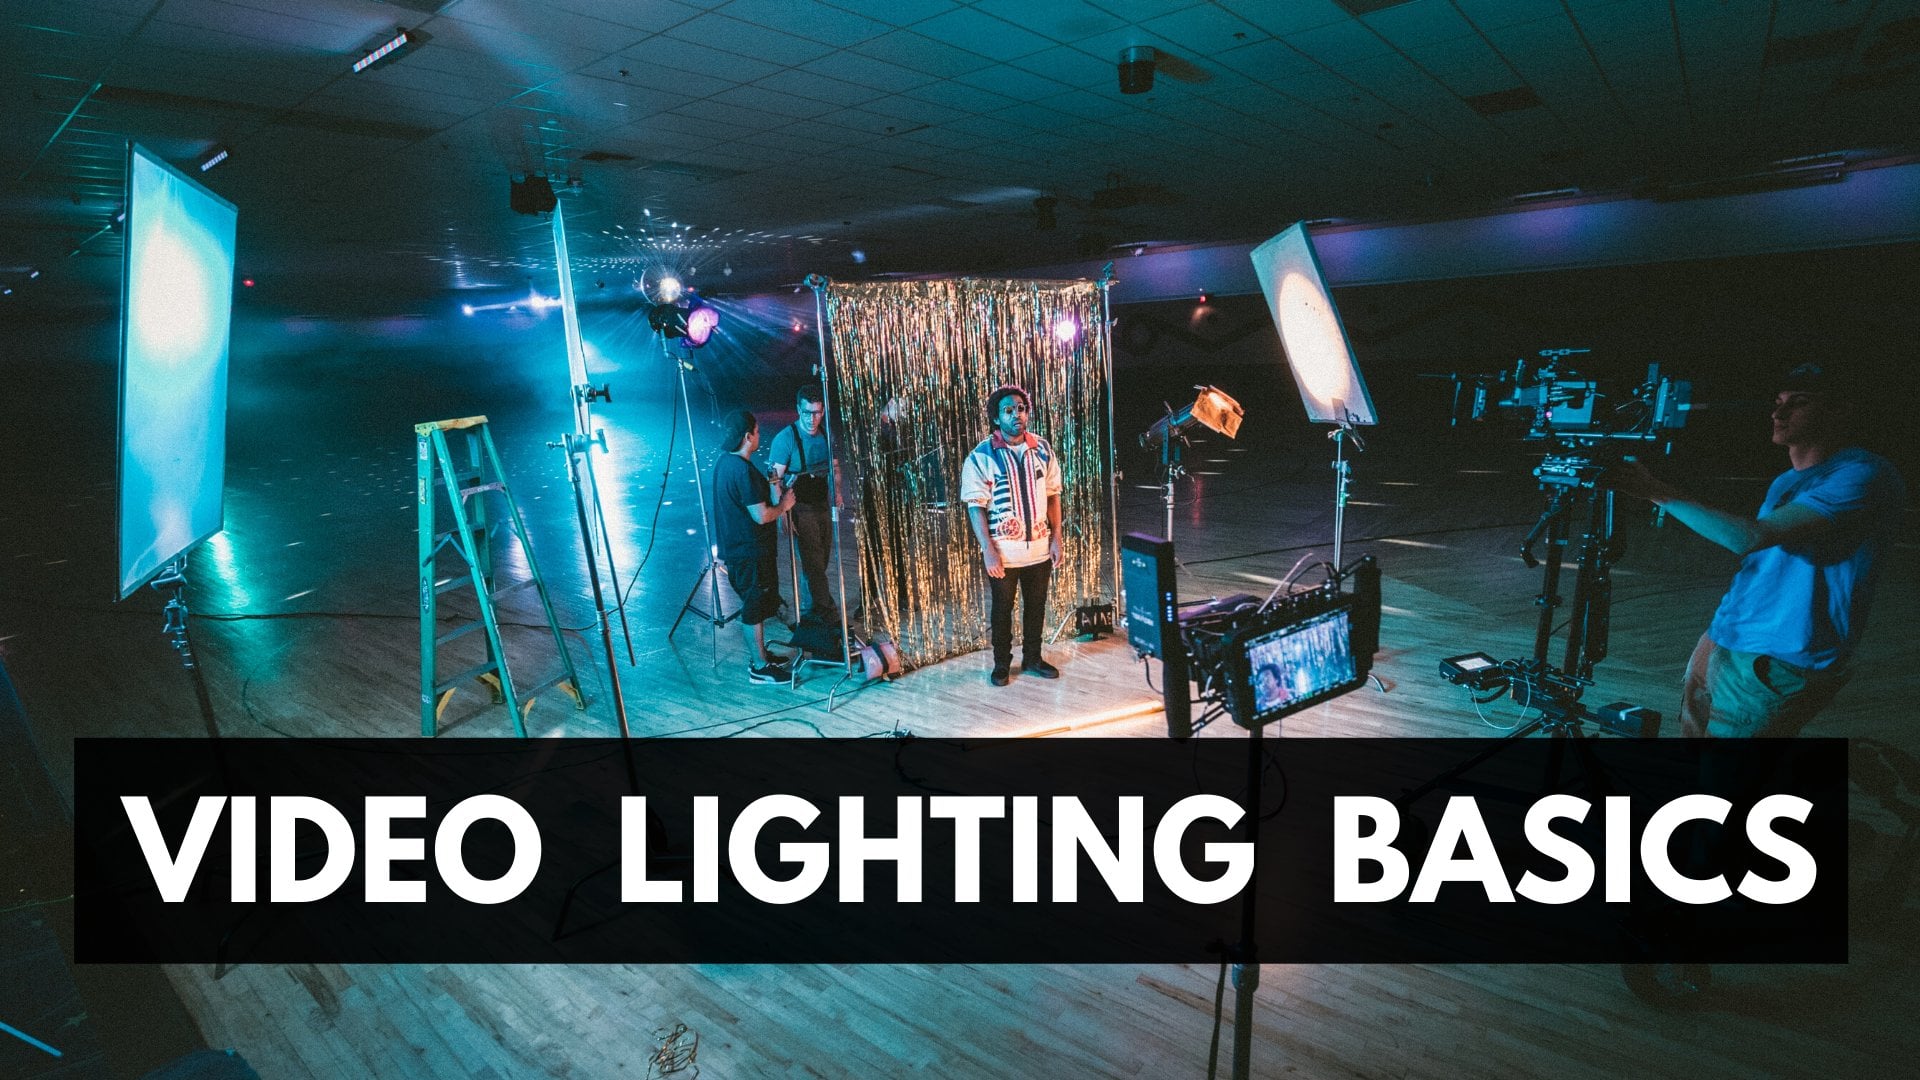
10. Lighting: Okay, so now let's talk about lighting. Lighting is probably the single most important factor that influences the image quality of your video. And in this lesson, I'm going to show you how to get from something like this to something like this. Looks better, right? So in this lesson, I'm just going to show you a few basic lighting techniques that basically are a safe bet in most situations to make sure that your image looks more something like this compared to the one before. I want to say this is not an in depth lighting tutorial. I might do a class on this in the future, but like I said, it gives you all the necessary tools to really start out and have your image of realized without having to learn a bunch of complicated stuff. So let's talk about what we can do to achieve a nice lighting situation. So first of all, you want to consider using natural light that's available. So depending on what your project issue might not even have access to artificial lights like those, you might have to work with daylight, you know, and that's fine. And a lot of situations that you can get great looking pictures with that. You obviously have less control. But the first thing you always want to do, depending on the project again, is trying to use the natural light and see how far you can go with that. All right, so the first perspective we're going to look at is the one where I'm looking directly at the windows. So right now, literally, the window is directly in front of me. I'm well lit. I also don't have any big shadows in my face because the light is coming direct from the front. It doesn't create any dramatic look or any shadows on my face. It's a very clean look. So now the window is at a like about 45 degree angle on the site. And as you can see, it already creates more. Maybe more interesting image with the liver of shadow on this site. That's generally also how I use three point lighting have the light coming from approximately 45 analysts agree, have the light coming from approximately 45 degree angle and also live it from the top. So that's what that would look like. Okay, so now we have the light coming from exactly 90 degree angle from the right side creates more shadow on the left side, Almost kind of split the face in some sense on Yeah, that's even more off the dramatic look. You can use that three point lighting. You would have a fill light right here. And in this case, you could, for example, put a reflector on the side or something, and that would also create a more balanced image. So now this, as you can see, is the light directly behind myself. And you can already see why you shouldn't do this. Because either the camera exposes for the light outside, which is gonna be more something like this. Now it's kind of exposed for outside, but you can't really see myself. You cannot see the subject, which is obviously not helpful. So if you want to expose for the subject, it would look more like this. All right, so now you can kind of see my face, but obviously it's completely blown out. And that's also not a picture you want. We much rather go for something like this. Well exposed looks good. Window is ready for myself. And it's not even a very sunny day, which is actually helpful because the clouds in the sky right now actually having the function of kind of a diffuser, so it makes the light softer. It makes the light more more, you know, less harsh. The shadows that come on my face, even from the cider from some angles, are not as harsh. And that's very flattering. That's just, you know, to give you a little bit of inspiration. Try to change the angle of the light and how it hits your subject to get different kinds off. You know, moods and exposures and different kinds off energies to your image, another effect that you get when you have those shadows on the side. It makes the whole thing look more three dimensional. Give it more depth. You know, this is kind of like the thing that gives it this cinematic look, as everybody says right now, and so keep that in mind when you create your image. So now that we have used the example of natural light, let's talk about a little bit about what you can do with even some cheaper, you know, basic video lies that you could buy for probably under 50 bucks and what kind of image you can create. And in most cases, one lighting set up that pretty much always works and is very classic is three point lighting. So how does that work? Three point lighting. So, as the name says, it basically consists out of three different light sources that create this kind of look that you see right now. So the first and most important light is the key light, and that's basically this one right here. And its job is to illuminate the subject and just, you know, make your subjects stand up from the background, make it bright and visible so you can place the key light at different angles to create different scenarios, like we talked before about the situation with the natural light. Like I said in this case, I have it at a 45 degree angle coming from above and a 45 degree angle coming from this side. So it's kind of like this diagonal upper left corner for me right now, where the lights coming from, which again creates this kind of drop shadow on the right side. Here I have a shadow here like a triangular shadow, and my right side is generally more, you know, the Shadow decide This lighting actually has name. It's called Rembrandt Lighting, and it's named after a Dutch painter who actually used this kind of lighting in his paintings, too. So that's Rembrandt. And like I said, if you move this key light, you can create different scenarios on different lighting patterns. If you have it more coming from the front, obviously, without standing in front of the camera, then you have more flat lighting. Again, this beauty style look more consistently illuminated a little, a little bit less dramatic, a little bit less cinematic looks a little more like, you know, like a news show or something. Everything is very bright. So then we have something that's called the fill light. The fill light, as the name suggests, fills up the shadowy side of the face. Usually the fill it would be them positioned, obviously on the right for myself on the side here. But even in three point lighting, the fill itis kind of optional. What you can do is you can use obviously a little less bright of a light. You can also use a reflector that bounce suspect the light coming from here against the reflector and then on your face. That's a possibility where you can still then kind of play with the kind of dramatic look that you want 1/2 and how far you want to go. Because if it's coming from from a reflector rather than from a different light source, it's obviously gonna be a little weaker. And it creates the soft chatter on the on your right side. What you might like in this case, I didn't use any flight at all because I kind of like this shadow on the side. I want to have this cinematic dramatic look and I really like that. So now we come to my favorite light, which is actually the backlight. So the job of the backlight, like the name sounds again, is to light your back. But the question could be wise. It interesting to light your bag, since the camera music comes from the front. So the reason you want to do that is so you have actually a little bit more separation off the subject from the background. What you can see in an example right here If you look at the right side of my shoulders and my arms and even my head, you see a very sharp separation. Very sharp edge to the background, right? I'm going to switch out the backlight right now. Then you will see what I mean. Alright. So not only is it quite a bit darker right now because obviously the backlight also lights a little of the room in general. But you can see that the right side that was so perfectly separated from the background now kind of gets mushy and and, you know, melt into the background. There's no sharp corner anymore. There's no light that comes on the right side of my face, even a little bit from the back. There's no backlight and it just looks a little bit different, right? So now let's switch it back on and see the difference again. The edges back and I have actually for the longest time ignored the backlight. I thought, Why is it necessary? Is just, you know, it's just an extra. I don't really need it. And then when I, for the first time really used it properly, I was like, Wow, that's actually what makes the difference. You know, that's actually what makes it look more cinematic, more, more high quality, in some sense compared to the image without it. And that's basically what makes three point line. We have the key light. We have the fill light, and we have the backlight that you can also call rim light, for example, like layers, you know, every single light. Technically, if I had to film, I can film just with the key light and in many situations that might be okay, and that might be actually what you want to do. But building up the layers of lighting is going to create a more, you know, more depth into your image. And it looks just more professional in the end. And knowing three point lighting will be enough for you in the vast majority of situations that you will ever encounter in the beginning of a freelancing career. Definitely for YouTube setups, Obviously, something like this would work. And yeah, it's like everything else after that, you know, do some research on YouTube. Look at some lighting tutorial. It's play around with the positions of the key light of the backlight off the field. life and just find something that works for you. But this basic set up right now, it's very easy and will always create a good looking image for you.
11. Assignment: all right, That's gonna be the Simon for the class. I want you to create a three point lighting set up with any subject. Subject needs to be person. Put the subject in the middle of the frame, give them some three point lighting with key light, backlight and fill light, and then take a photo. Or it's Emmitt's green shot or a screen grab of your video recording and uploaded into the Simon section. I'm gonna answer every single assignment, upload your assignment. Show me how cinematic off lighting you can create. Let's go.
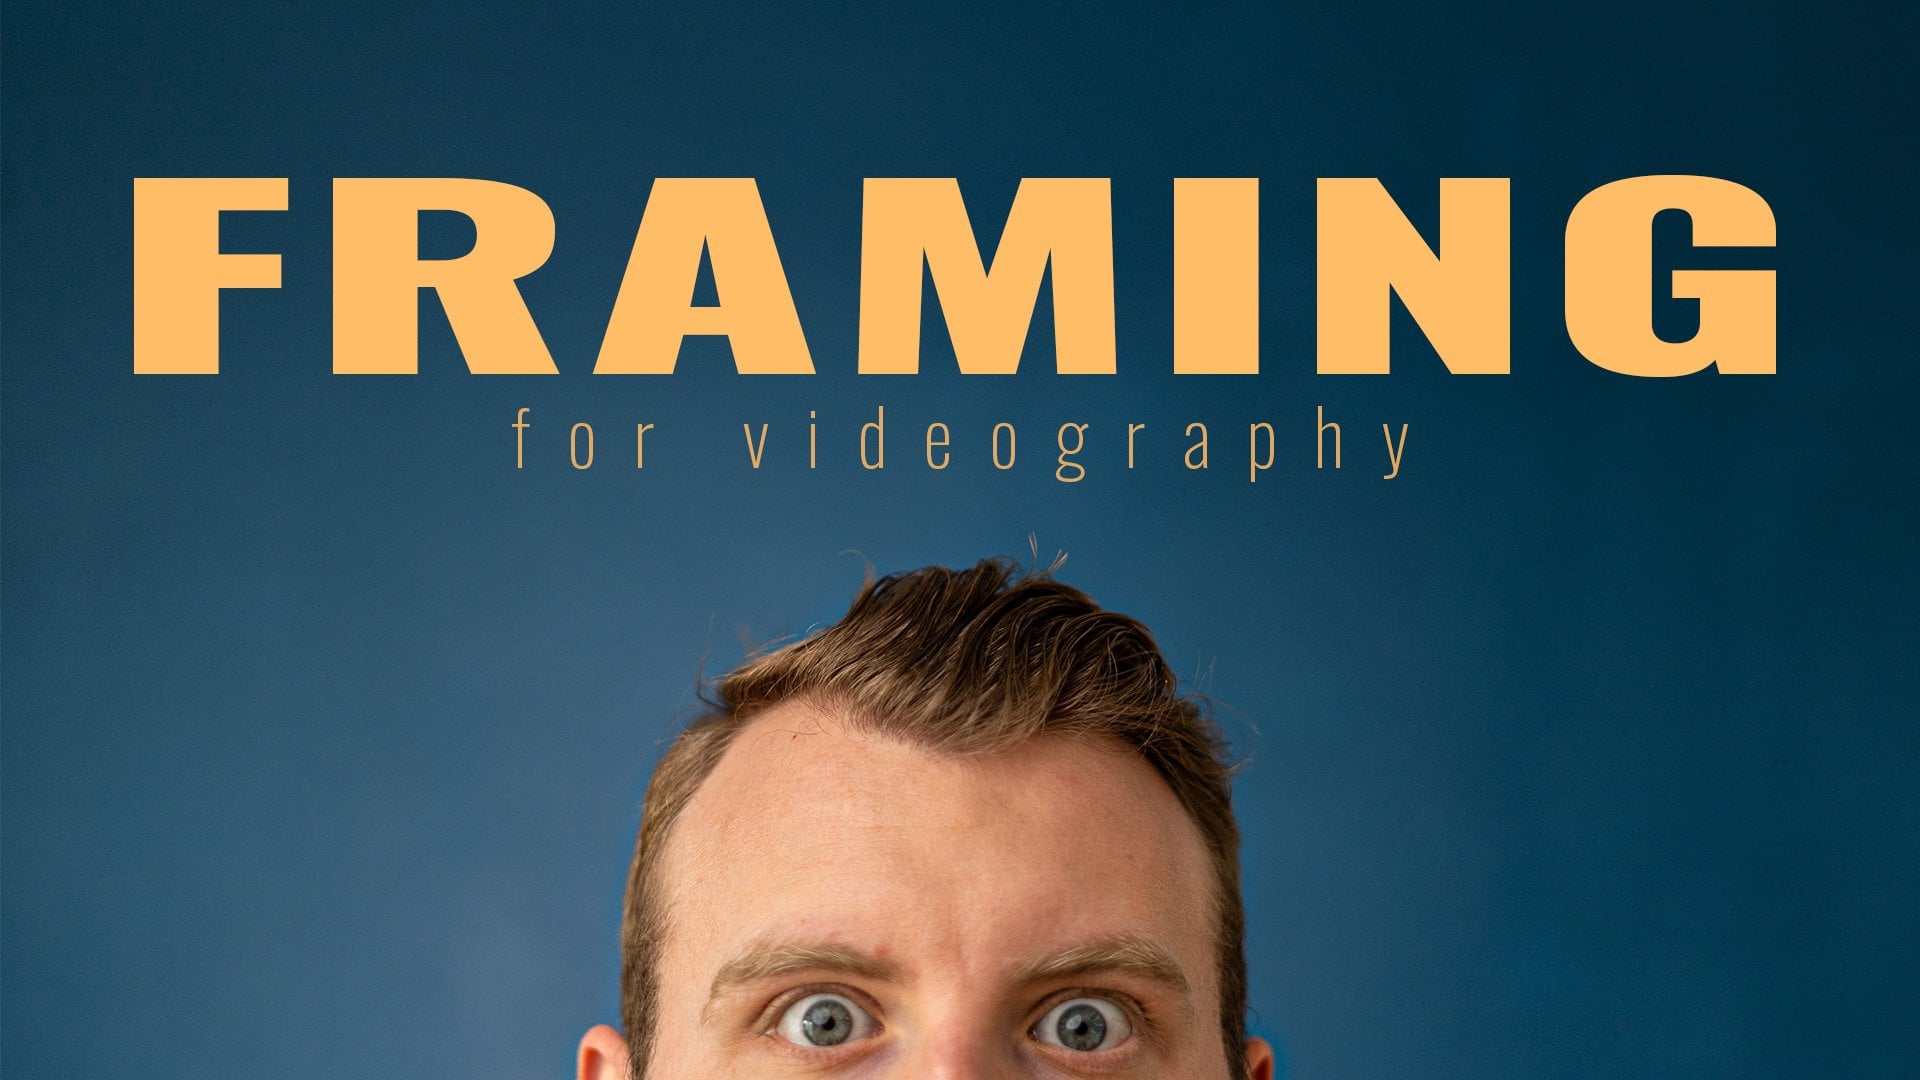
12. Framing: all right, so now let's talk a little bit about framing. So I think framing is actually one of the easiest ways to create a good looking image or create a terrible looking image, depending on how you actually use it. So let's take a look and how you can make sure that your image doesn't look like the image of a complete amateur, and you can achieve professional look. So, first of all, one thing needs to be said. There's a ton, 1,000,000,000 million. There's so many different angles and compositions and framing is that people can use. And there's, you know, really an unlimited amount of opportunity out there how you want to frame your shot. That being said, there is obviously some classics and some basic rules that make sure that it doesn't look crazy. You really want to run those and master those before you really intentionally start breaking rules for stylistic reasons. So that's why, in this lesson we're going to cover the most common mistakes that I did many people do in the very beginning. If they don't know those rules, and that brings me to the first topic, and that is headroom So what? Its head headroom is basically the difference between the end off the head of the subject until the end of the frame, which is right, right here. Right. So that part here, not where is it? This part here is called the Head Room. And the most common mistake that people do with headroom is either, you know, putting too little headroom, which would look something like this looks kind of weird. If my head is chopped off, right, that's not coming, are very professional. It kind of looks sloppy, because why is it like that? Like, why is it cut? You know, it's unnecessary and the other extreme obviously being something more like this, which also looks a little bit weird, you know, it's like, Why is there so much headroom like? It kind of looks like looking down on someone. It doesn't create a very flattering look. It just looks and feels weird, right? So even if there's no exact specific rule, how much headroom is enough, or how much headroom is too much? You can kind of go with your feeling of like looking at it. So, General, you can say that you want the ice of your subject to be pretty much on the line. That marks the beginning off the upper third off the frame. I'm gonna put a little line here so you can see what I mean. But if you put a grid on your on your camera screen, it should be on the upper line. That usually will give you kind of a safe bet, especially also if you come closer and you actually might have to cut off parts of the head to really, you know, keep the important parts in focus. So the next thing to consider is something called Lead Room. Let me give you an example. I'm filming myself typing on my phone for whatever reason, when when I record that, let's say I am sitting like this and the action that is happening right now, it's happening in front of me. And I'm texting into this direction, obviously, and I'm texting and texting, and that might look someone natural, right? So now let's think about the same kind of situation, except for I changed the framing toe where I'm sitting like this. I'm still looking at my phone. I'm still technically somewhat in frame, but It's kind of weird because the whole situation place in this direction right here and we have all this free room right here, and it doesn't really make sense, you know, it's not congruent if you have some action that happens in your image and there is some kind off lead energy going off the subject into some direction, you would want the lead room to be in that direction to in this case, I'm sitting here, need energy, goes in this direction. So you want the lead room to be here because that feels just more natural in the final image. And yeah, that's basically how you can imagine lead room. And that's actually how a lot of composition works. You know, you kind off don't really know what's right until you break the rules and then you notice how it feels weird that that is not how it was before, you know, like breaking the rules makes you aware of the rules. So you noticed like, oh, it looks weird and you might go back to the first picture and they were like, Yeah, that looks kind of good. So thinking about those two things and then in addition, just following your intuition and you're feeling and looking at the frames and you know, changing things and just decide for itself. What you think looks natural will always bring you closer to having a good framing and a good image in the end. So even if those kind of rules and guidelines put you more or less on the same site, they are just really guidelines. So as soon as you feel safe with them, definitely remember that you have the permission to break all those rules at any point if you think it makes stylistically sense or you just want to try things out. So I'm the last person to tell you that it's the best thing to always stick to the rules just, you know, figure things out. Make sure you know how it's supposed to be done and how you can safely create good looking images. But as soon as you know that and you want to try yourself out, go ahead and, you know, try different angles. Try weird things, try different perspectives and you might just find out a great shot that you wouldn't have gotten in the first place if you would stick to the rules
13. Audio: All right, so right now, let's talk about audio. So audio is obviously one of the most important parts when you want to create a video where you know, people take it seriously and the video has the effect that it can have. An audio can be a huge source of distraction if it's done wrong, and a huge source of support for your, you know, for your idea with your film or video project to support what he wanted to do if you use the right type of audio for it. So let's talk about how we can achieve good audio even with a beginner budget. And even if you don't know a lot about how that works, first thing is you need a microphone. If you just want to rely on your in camera audio, just, you know, take a listen and hear what that would sound like. Okay, so this is an example of in camera audio with Sony. Three. Let's see. OK, this audio is coming from the T bone and be aid you, which is directly plugged into the camera. Let's see how that performs against the other Mike's. All right, here we go again this audience from the road video might go, How does it sound all right? I just checked the footage. And obviously, whenever you record with the roads smart left You want to make sure that you use this little adapter cable that comes with it. So one more time, this is the road smart left. So not compare that to the only $50 road video might go. That's actually right now hanging right above me. If you want to see it is actually right here. It's right above, out of frame so it can grab my my voice in the best possible way. But the way I'm actually recording this right now is through a lovelier microphone that I've actually put under my shirt right here. It's actually right on this height. As you can hear, collect like like test test test. And this runs actually directly into my phone. The set up that I'm having here, it's basically have that run directly to my phone just because it works. That's a very affordable way of achieving good audio level for this cut off private work, so to speak. It's more than enough, you know, obviously, on bigger productions you always want to make sure, depending on the needs of the production, you have better microphones, professional microphones that caused, you know, 1000 years and more, perhaps that you just rent for the day. So you have high production value, and you still don't need to buy super expensive microphones, especially in the beginning of your career. So here's my recommendation. Basically, it all really depends on what kind of videos you want to produce. So if you, for example, have a lot of run and gun shooting, you're outdoors. You have to move fast and move around a lot and just want to capture what's in front of your lens. Like blogging, for example, something like this. A road video, my gore, a normal video mike or video. My pro is a good choice for all kinds of situations where you really want to capture what's in front of the camera. So second option that would give you a little bit more flexibility is the set up that I'm having right now. So if the subject moves around a lot and you're may be stuck in one place or you cannot move as fast of subject turns around. There's all kinds of reasons why a shotgun mike would not give you sufficient audio in different situations. So you want the mike to be close to the person that you actually recording. So if you're recording a single person, are you more people? You put the level you make on them. You put it into a recorder, which can be their phone, which can be your phone, which could be some kind of external recorder if you want to make sure that it really works perfect. And, you know, then sync it up later on and Premiere Pro. And this kind of thinking is pretty easy. And since I have to do it for this whole production here to let's take a quick look into Premiere Pro the editing software and yeah, I'm gonna show you how it works, All right? We here in Premiere Pro and I have already clip in here is you can see that I just recorded with my Sony Rx 100 and I'm gonna go ahead and drag the audio recording that it did at the same time with this little microphone. I'm going to drag it on here. Basically, you just select both off the audio clips, the one that is connected to the image as well. And the one that is just an audio recording. Mark them both. Right. Click and then you go to synchronize audio. Okay, Boom. There you go. And it actually just swallowed the old clip. But for the sake of this example, that's not so important. So we can trim it right here. Oops, Chairman. Right here. Trim it right here. And then we can give it a listen. Let's it all right, I'm actually just test recording this right now. Feel me Get home in stony Hearts and I'm recording it, all right? And that's it. That sounds good. And that's basically how you synchronize audio that we record in camera with audio that record externally, all we need for that is a in camera recording that we can match the external recordings is so if, for example, if you wouldn't record any internal audio at all that is already like glue to the image and connected to the image. In this case, this kind of method wouldn't work and you would need something like time code. But for most purposes where the camera's actually recording even crappy audio where you can pick up what's being set. Then that's gonna work. All right, then that's it. This is how you basically, very easily and affordably get a good quality of audio that you could definitely use in most of your productions. And like a set for any bigger productions. I definitely want to rent. You know better Mike's that give me really clean audio exactly in the kindof level and production value that I want for that production. And you know you can always rent, and that's until a certain level that you reach in your business or in your project, whatever just makes more sense. Instead of just buying this huge one purchase might from when you don't even earn that much money at that makes it worth it. So So that all being said, the combination off shotgun mike and level your microphone that you may be put directly into your phone or an extra recorder usually puts you on the safe side
14. Outro: So, first of all, thank you so much for giving me so much of your time. So much of your attention, toe watch. Really? This class I know it was not the shortest. I hope you learned a lot and it was definitely fun to create this And give me some feedback about topics that you want to hear about. Do you want to hear more about lighting? You will hear more about audio side of things. Do you want to have some tips about how to shoot videos or whatever? Just let me know in the comments, let me know. I don't know how that works in Scripture. How does it work? 10. Your message. Give me some comments or give me a review. Whatever you want. Let me know what kind of content you would like me to have. And yeah, exactly. That brings me to the point. Lead me some reviews. If you like this class, give me some reviews. You know I want I want This class will be seen by more people. So make sure to give me five stars. Three stars, everything below three. I don't want five stars only please And only positive for its I hope to see you guys in the next one
 John D., Freelance Videographer and Creator