Transcripts
1. Introduction Video: Hello everyone. My name is Robert Murray Zuo and welcome to my class figure drawing the benefits of gesture. In this class, you'll learn how to look through the figure and pay special attention to various rhythms and flow to the body. By practicing gesture drawing, we can learn to simplify the human figure and also learn to draw more organically. This allows our characters to seem more lifelike and expressive. You also work along with me through these exercises and learn the bean-shaped method of drawing the torso. This is a very useful technique for twisting and controlling the body. If your fingers are a bit too stiff, then lesson should be very useful to, I hope you find this class to be very informative and please share your are in the project section below. Good luck with your R and I'll talk to you soon.
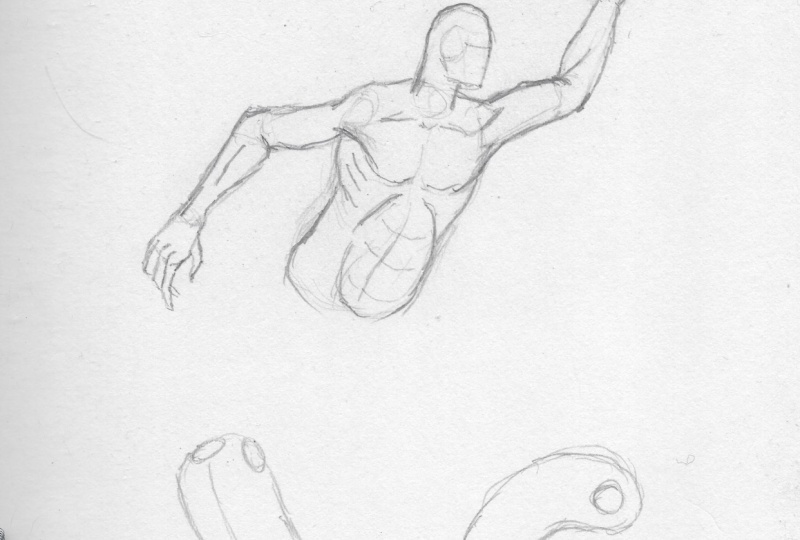
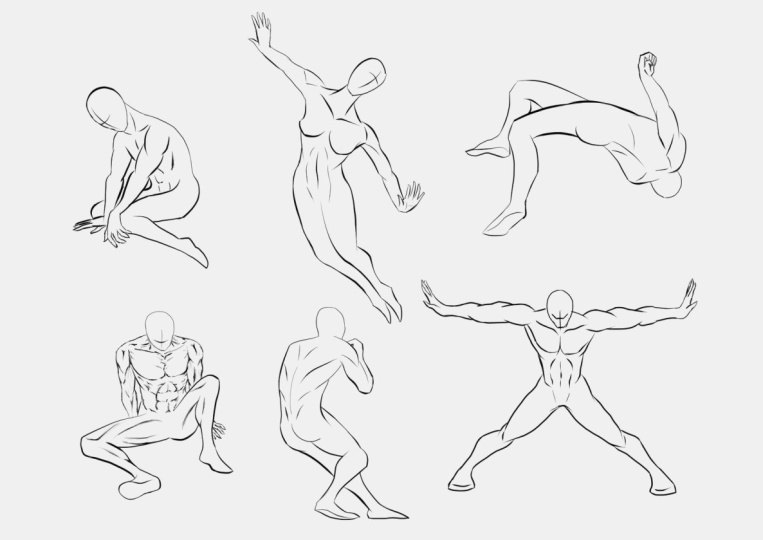
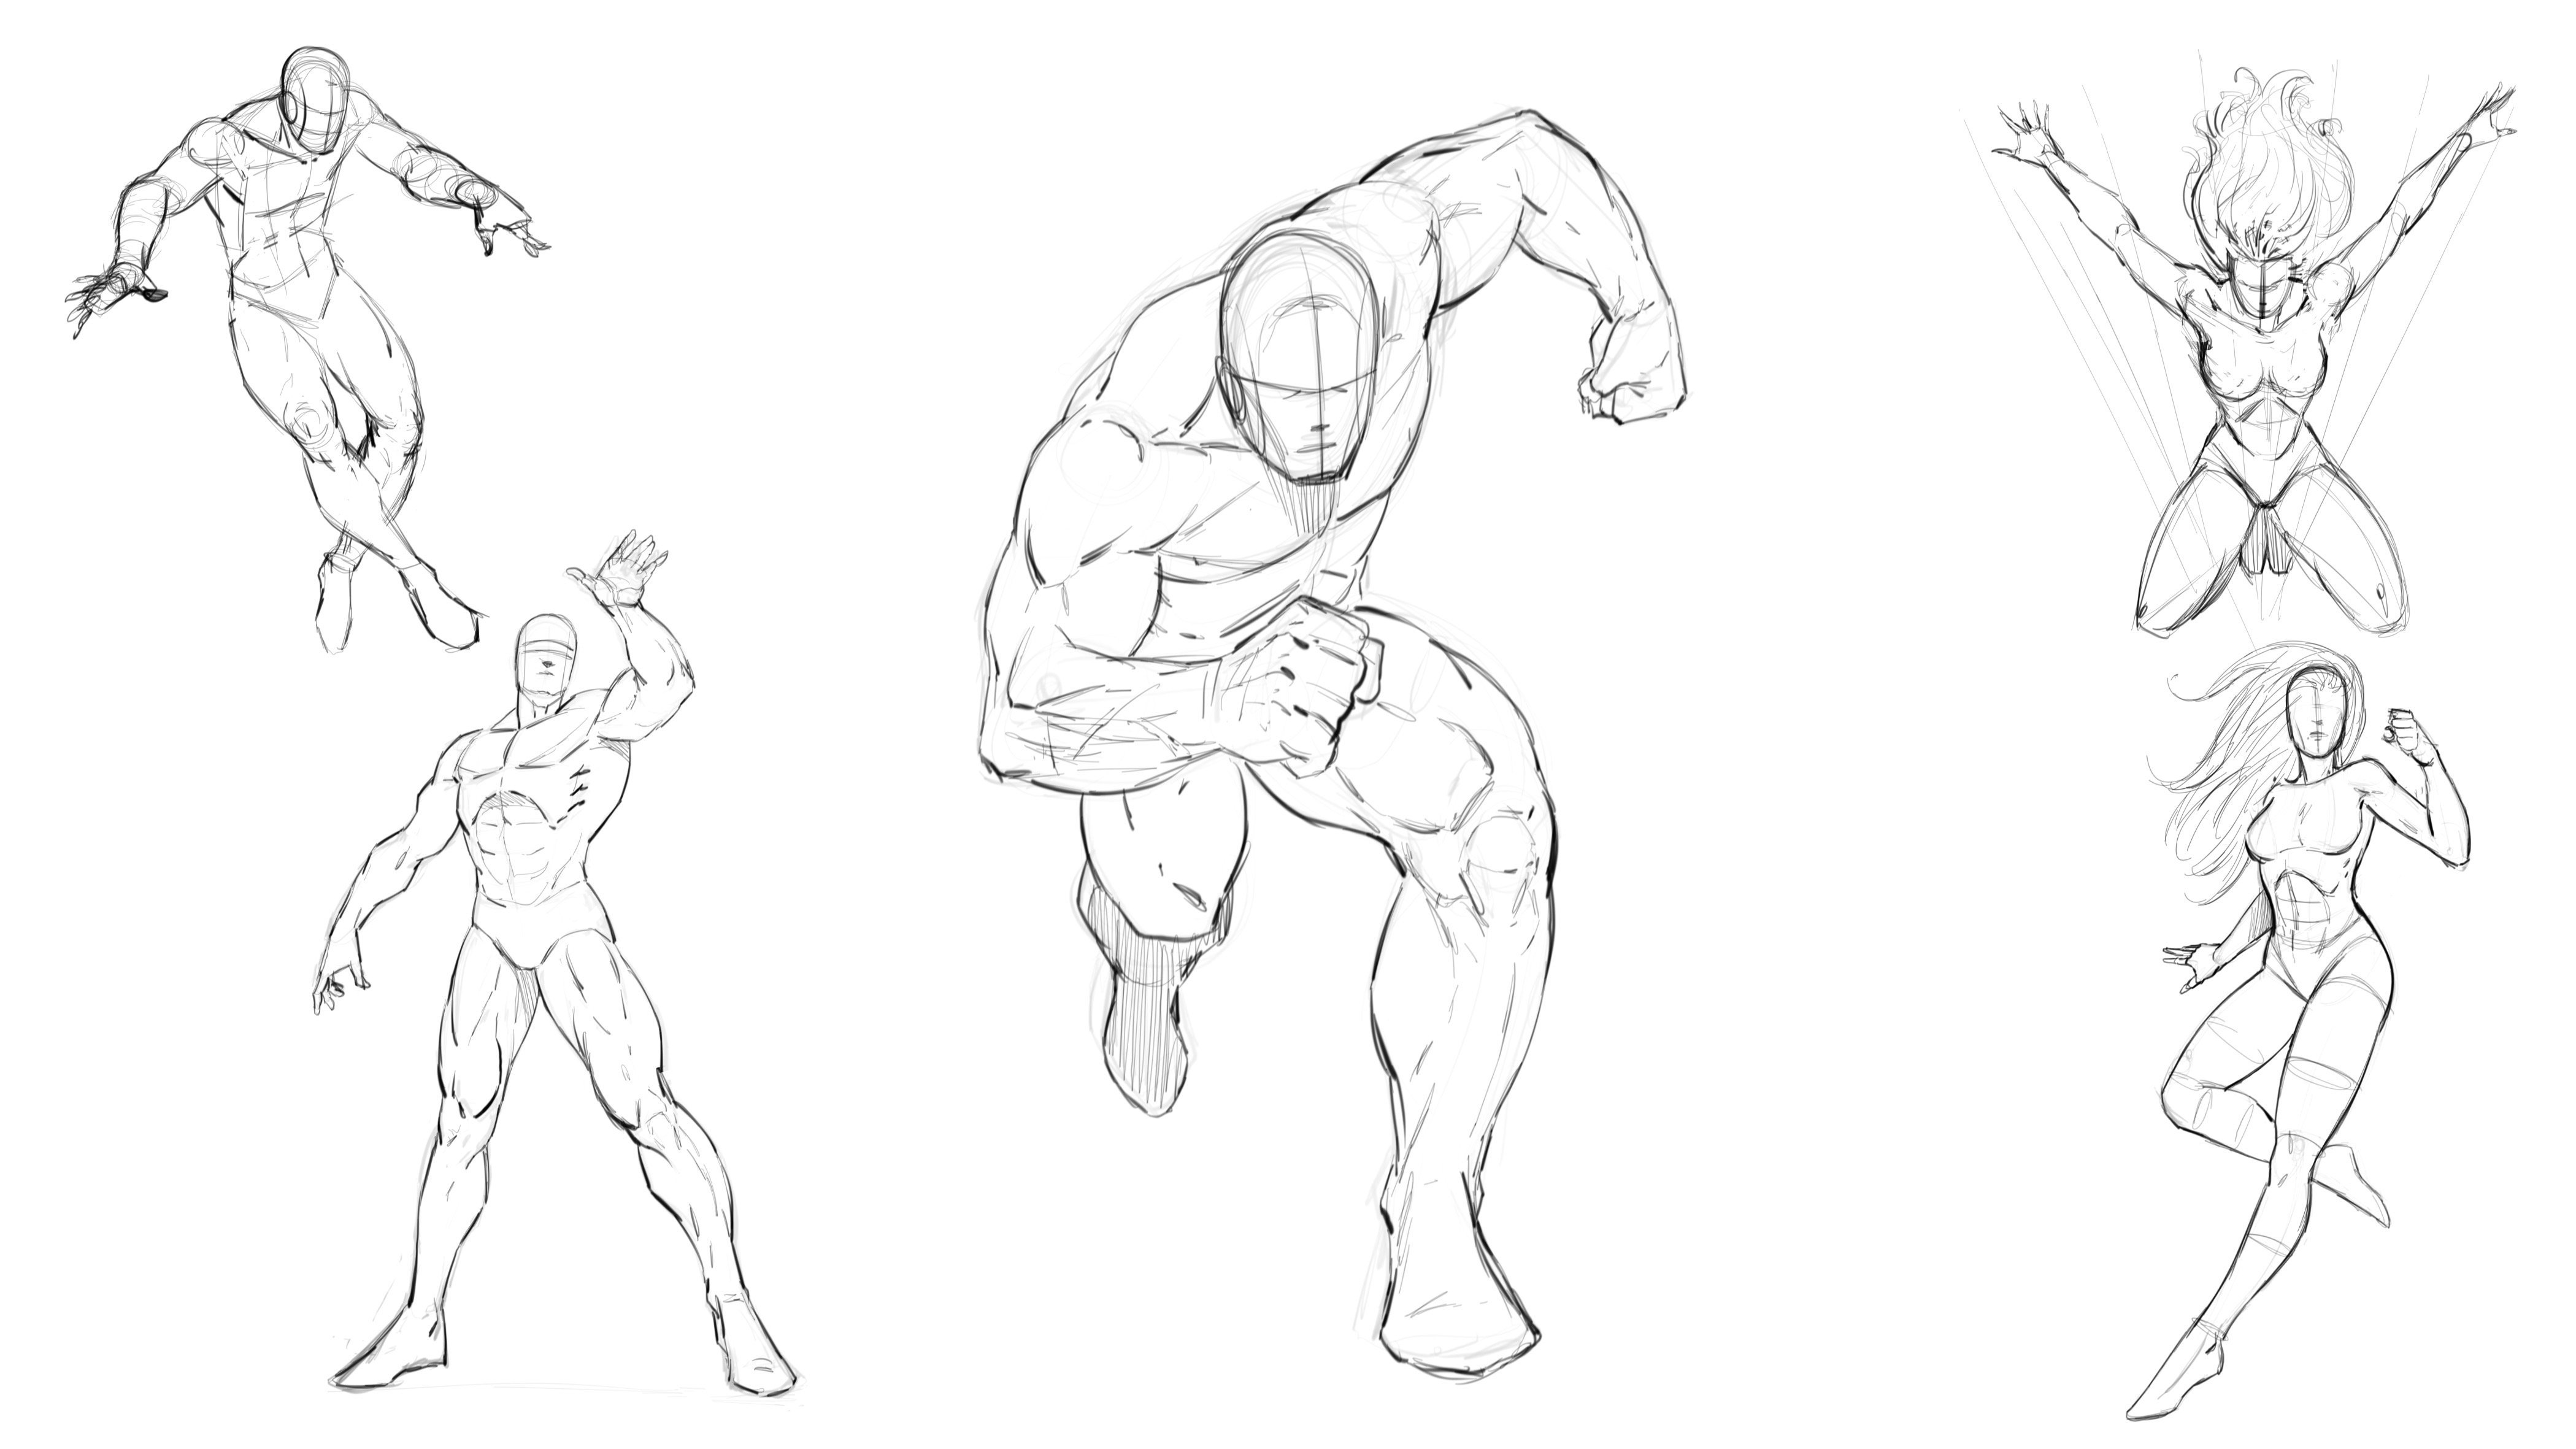
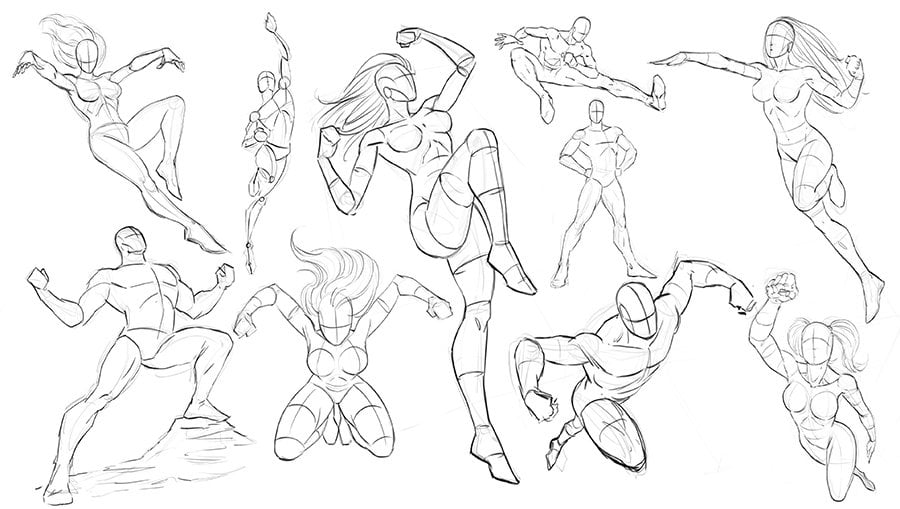
2. Benefits of Gesture Drawing: So now I want to talk to you about gesture drawing. So gesture drawing is basically laying in the action and the form and overall poles of whatever it is you're drawing, you know, the model or the figure from your imagination. It's kind of getting all this n with sweeping quick passes. So the way I like to think about it as if you were trying to draw a character with the least amount of lines as possible, that would more likely be your gesture. Also, throwing these n with quick curves and polls, lifting your hand off the page and off the canvas. And just generally trying to almost animate the line a bit more as. So another way I like to think about it. So I'll find the center line to the back. And if I want to throw an arm up, It's a series of quick polls. I'm not looking to get a perfectly drawn arm with all the anatomy and just the right place. It's not really about that. I'm just looking to get the direction of the limbs. And again, a sense of sense of movement as I draw these. So something like this. Even the NAC or use a quick like little c curve, kind of a backward C. And then I'll draw in the head primitive version of the head shape or bending the neck, things like that. But again, I'm trying to capture energy here. You can see the proportions are oddly skewed, things like that. But I can always go back and I can correct things like that. But for now I really just want to capture the sense of energy. So another technique when doing this is to draw lightly and you know, you're still kind of using some searching lines. And I've seen people that definitely go in and they do a lot less searching. And they, they kind of mimic the line first over the page, and then they throw a line with confidence in that area. So they've kind of imagine the line. I think it's referred to as ghosting. But you can also do that with light sketching. So just lightly sketch a bit of flow. What I would say is really try to avoid angles. Somewhat. At this stage, you are going to use some angles. So you can probably see I've got some in here. You typically will use those more for your bony landmarks, things like the knee, the collarbones, elbows, things like that, you're definitely going to be more prone to use angles for those. You see I actually use angles for the foot because I just do this very simplified folk for now. So there are some angles, but I tried to think, as, you know, uses many curves as possible. I think interconnecting curves are overlapping curves. And also I tend to throw the line right off the form. I think that adds energy as well. You can all again, you can always go back and clean this up. That's really not what this is about. So let's do a couple of these just so you have a variation of what you could try to do here. So again, you could draw through. So a lot of times artists will put in a line of action and they'll go from where they perceived the head to be right all the way down to the foot. Okay. And so that would be the overall gesture of the entire body. But then you have to kind of look past that and draw in the other, the other shapes. See, where's, where's this slag coming out towards us for this loan back? How are the arms draping down to the side or Zoom maybe one arm coming out and then back towards the head when I'm driven to the side. And then as you work into the interior forms and restarts a detailed just a little bit. But again, not trying to refine too much. Now I do have the character leaning too much, kind of off balance. So I'm just going to kind of correct that a little bit as I go. And you really do want these to be relatively quick. Again, you're going to get more energy and your lines by doing that. By again, not trying to be so overly critical because we have to remember that the edit come later. So at this point, you're trying to really stop thinking about all the details and all the complexity of the body. And do a shorthand version of the pose, skipping through it. And instead of stopping at different areas and trying to draw what you know about a bicep or knee or whatever part of the body or at. Instead you combine all that into a big sweeping line. See hook or as or an eye on. And again, you're just trying to flow through it. And then you take this and then do your More structured approach over the top. But you have to remember if you start to draw things to Angular like this, it's a very different process. And it stiffens write out. Let me see, there's just a big difference, but that's really what I'm thinking about even as I draw this basic version of the arm. But I'm letting myself kind of flow through these larger masses with some more organic lines. You can time yourself. That's really important to do different variations to see what choices you make. So rho, popular ones are starting with 10 minutes for beginners working down to five or come down to thirty-seconds. And there's only certain things you can catch her at that speed. I have a really tough time doing anything and thirty-seconds. But you do see that you make some different decisions which can be very, very informative. Also challenge yourself to do ones that you're just not used to thinking about. So for instance, a character leaning over. So we might use a bit of a C hook for C curve and figure out the placement of the shoulders. A lot of times I'll use little circles or ovals kind of start the placement. Flow those down into where the pelvis would be if you're out the orientation of the pelvis and then legs, and just take the four Ben and backbone. So I use this method a lot. This is, this is generally a little bit more of a rhythm of the way that the shape of the legs occur. But it can be used in the arms and legs. And I'll explain this in more detail later on. Let's look a little too out there. So let's bring one arm, bring it down, and back over to the body. Remember, don't want a bit of a leaning over and, and gratitude. So then as I go through here, I've already established some length. So it's a little bit different method of gesture drawing, but it's definitely one that I, that I do quite a bit. And so now I need to draw through this. And again, I'm trying not to stop right at the very edges of each area. Even though that's kind of tricky for me sometimes because it's letting go. Basically, I'm saying wall, this isn't going to be right if I, if I throw the wine way off this form of lei, how could it possibly be right? It takes practice to let yourself make those sorts of decisions like you just want Giving, you're trying to draw everything so correct. Right. So you're trying to stop the line where it needs to stop. But they can actually hurt the the fluidity of the organic nature of what you're trying to capture here. So hand, we'll get into some hand gestures as well. Very important to practices because hands are so expressive and it's always noticeable when you don't have a good hand gestures. So just like the ones here, they seem a bit weird. So I'm just quickly thrown those in. But just like that, we've got another one where it's kinda awkward pose, but again, there's a sense of curvature and bend. Another thing is just really allow yourself to bend the arms and legs like within reason obviously. But a lot of times that can be the problem if your illustrations look overly stuff. It's because you're not, you're not putting enough curvature that they're just not straight. Arms and legs are just not estuary in the anatomy. Obviously is, has lots of bends to it. So allow yourself to actually incorporate bands to these parts of the anatomy. And sometimes that can fix your overlay stuff. Renditions. Okay. So we're about almost 10 minutes into this and we've got a few of them Illustrator, we'll do another one. So again, I want to try to express different ideas through easy to get caught up in the same kind of posing. Let's even try this where we have a bit of kit we're looking at but a character. So with this one we will take and say, let's put the action line on a bit of an angle. So further draw this line of action right? Like this. And then we'll, we'll have torso up here. So now I'm going to couple this particular gesture drawing with thinking a little bit more deliberately about the torso. So there's my center line, There's my torso. I'm going to bring an arm up and over. I'm going to have the head kind of tilting down a little bit. And this arm coming and over again, this little zigzag they like to use. And then one lay down, something like this out and back. We're kinda looking up at this person jumping in the air. And they're kinda looking down to the side. And so now again to glance through this and try to establish this with quick lines. Connecting, connecting and not connecting. So connecting in the sense that they're intersecting. But then throwing past the actual connection points, think is very important so that you capture that energy. I've definitely seen some two or they'll just even draw one side of an arm or leg and leave it at that. So those might be studies where somebody is running out of time and it's possible, but it's kind of neat how you can still make it out. I'm going to go and there's another, another pose. Given some of the hair here. Just remember everything has gesture. So hair has gesture, clothing. There's an energy and a flow to everything. Except maybe things that are very stiff and mechanical, but anything that's organic and you want to convey a sense of life. So there we are. So there's another one and, you know, and again, this is something that we would add it and scrutinize and change. But at this stage is not about that, it's just about capturing that sense of movement and really working out a quick expressive idea. So let's work through some more of these, talk more about gesture. And with that, let's get on to our next lesson.
3. Gesture Drawing Examples: All right, so now I want to share with you a few sketches, gesture drawings that I didn't under five minutes. So basically I want you to pay attention to what I'm able to capture in five minutes. And I don't want you to hold yourself critical to this. I just want you to be aware of where, you know, what decisions you might make it that, that amount of time. So first I'm establishing the lengths of the forums. So it's almost like a glorified stick figure. And you see I'm still using some of that Chris crossing of the lines, a little bit of the almost lightning bolt method, but really pretty straight and stiff at this point. Except for the curvature of the spine, which I would consider that coupled with the back leg, more of the action line. So now I'm placing the torso like shape of the upper torso and the pelvis, doing it with like a bell-like form. And then attaching the shoulders and the bras and then working up to the head. But essentially, what I'm trying to do here is established this with I don't know about the lease amount aligns possible, but a relatively small amount of lines, as I mentioned before, you want to throw the lines. You want to work a little bit more from your elbow to shoulder and try to kind of cast those lines. Just envision the starting and stopping point and then throw the line. It takes some practice, not always going to hit exactly where you want. And it's hard to kind of stop yourself from going back and wanting to edit it. But just remember that the real idea here is capturing flow and movement and the lines. Another good thing to think about is that you're drawing guidelines. So instead of you trying to draw the perfect figure, you're establishing guidelines and designs for the figure. But you can throw in more of these to find center on the different forums. I did that with the sternum and the abdomen there. So we'll talk more about using wrapping lines to develop your forms to look a bit more three-dimensional. But again, see you now we only have so much time on this one. I tried to do it as quickly as possible so that one was roughly about little over two minutes. And so I took that further, but my part of it is I'm not actually timing the exact amount of time. I just generally know that I can sketch these poses in the range of under five minutes. Now sometimes I will time Myself specifically for two minutes and under one minute and under, I don't really do thirty-seconds, but they say that you can learn more about the overall action line because you're not going to have much time to really deliberate and think about much of anything. You're going to have to get into just a couple of broad strokes so you'll learn more about the action line at that smaller animal. It's up to you what time intervals you feel comfortable with. So I can tell you when I first started doing this, even 10 minutes was hard for me and then I ultimately did not follow them where I got to where it could do five minutes and then down to two minutes. And I can do one minute studies. But like I mentioned, they're actually pretty difficult for me to capture what I'm looking for. So I find that my comfort zone is in the range of three to five minutes for what I like to see. And you're going to learn different things at different time intervals. But the main thing is that you're realizing that you don't need to fix everything. It's a hard habit to break. But that's really what you need to learn in gesture drawing, is that you have to throw the lines and move on to the next. And the more important aspect of it is to catalog a lot of pauses. If you get in the habit of stopping and refining all the time, you just don't get the amount of poses that you need to add to your visual library. So again, just letting yourself be free with that idea. Like even at this one, I felt that it was tough for me to not getting here and do some refinement. So the leg and the looks weird and, and I want to fix that, but I have to silence that in myself and say No, I'm just learning here, I'm just trying to capture the pose. I'm trying to capture the broad strokes, you know, the bigger forms and think more about the curvature of the spine and the head orientation to the head towards home pelvis, lifting that leg up and seeing it from a different view. Not worrying about let me make a perfect leg, let me make a perfect representation of this arm. So even that arm, the hands lift it up. And then I tried to angle it back and away from our view. It doesn't really read well, the hand looks funny, so there's parts of it I could definitely criticize and become negative about it, right? And then also, and I don't want to finish it or keep drawing them. I think that's counterproductive. What you wanna do is appreciate the fact that by doing these smaller time studies, again, whatever you're comfortable with, ten minutes, five minutes, or under, you're getting so much information logged in that you're going to get better so much faster. You sit down and do these every day. I guarantee you you will see a tremendous amount of improvement and even a month. But the hard part for most people is doing it and staying consistent. But then also thinking, well, I've got it. I understand the figure now and I want to move on to something else. It's not really that simple. The figure is so complex, the body is so complex that even when we think we understand it, we're missing some things. And that's why Figure Drawing us so coveted and so appreciate it. Always has been, always will be because it's, it's so difficult to get really, really good. But repetition time studies a hard work ethic and you will get there. You just, you can't give up and you can't expect anything too soon. So at this particular one, I really wanted to focus on the spine, the curvature of the spine. I did throw it in with some angled lines. We're going to talk about the difference from pinpointing things with angles and curvatures and organic lines. And as I've mentioned before, I think that it's better, especially teaching new students to really get them to focus on using organic lines, which I call rope drawing. I've heard referred to as rope drawing. And I think it's, it gives you a better sense of fluidity. But there is a lot to be said for angular lines and the ability to use those to pinpoint certain aspects of your work. I find them to be very helpful for even the negative drawing where you're trying to look at the negative shapes. And I'll maybe an opening, a pocket or an opening from an arm and a leg. So we'll talk about that as well. How angular lines can help you pinpoint things. Overall, I just feel like they give you more structure so there is a time and a place for him, but I really want you to focus on the sweeping curves. The Ss, the C's, the bended line, just a curved lines and get used to throwing those. So what this one, the feet are really odd at this point and they don't get much better. And it's one of those areas where I felt uncomfortable a little bit as I was drawing that part, I felt good about other aspects of it. And that's another thing I want to talk to you about is that you're going to have those areas where some areas flow and you're in a sense of flow, state of flow, and then other areas, it feels like you're almost wanting to stop. Like you're you're you're just you're kind of stiffening up a bit. All right. So what I want you to know about that is that's just something to be appreciative of that you're you should be happy that you're seeing these areas need more work on and to be delivered about approaching those later. Okay. So don't feel bad if it's hands of peak. Guess what? Every artist and the beginning struggles with hands and P and I've drawn for over 30 years and I still have a tough time with hands and P. Just be ready for the long haul in the journey and appreciate the fact that when you do see those tough angles that you don't quite get as well. That's saying something to you got to listen to it and then approach it. And then you gotta figure if you spend time correcting those areas that are really difficult for you, what do you think it's going to happen to your illustrations are going to look magnificent, right? Because you're going to attack those things that had been holding you back. We're gonna get into hands and gestures and stuff like that and try to simplify that for you as well. But again, do not feel disheartened if you hit those stumbling blocks. That's actually a good thing. It's really hard to grasp that concept into accept that. But I wholeheartedly believe it. I want to know my weaknesses so that I can improve upon those. Because if I only focus on the things I'm good at and then I'm going to be enrolled trouble if I ever have to address something that I'm not good at, you know, possibly for a deadline or client. Okay, so for this next one, again, establishing the lengths first, just getting a sense of proportion and scale. And I could really draw through this a lot more with a longer line, longer sweeping line. And this particular one, I didn't, it's more like I'm trying to grasp the ground plane first. And then once I have that imagery in my head or that concept of the ground plane, then drawing out the rest of it is a bit better but easier. So sometimes it's drawing even a series of lines for the actual ground plan helps I joined need that reference point. So a lot of these marks that I'm making, our reference points and each one that I introduced becomes another reference point to what's there on the page. And that's just something you have to practice. You get used to looking at an upper leg bone wall. The upper leg is roughly the size of the mid-section from the collarbone to the pelvis. You know what Then reason it's it's probably the hip to the knee is about that distance and we'll get into proportions as well. So again, it's hard to teach any lengthy amount of this without wanting to talk about another aspect of it. But I felt it was important for us to hurry up and get to gestures here because you really have to start here. So it was really hard for me to figure out should I start with gestures or should I start with sterile metric drawing? Because both are beginning techniques that you're going to need to get into the more advanced stuff. A lot of times I start with just the gesture. But I felt like for beginners, we need to talk about how to really get the sense of dimension on the page. Or maybe your gestures. Because it could negatively impact your gestures coming out good if you don't have a good idea of how to make something look dimensional on a blank white canvas with some basic ideas about perspective and primitive shapes. Then it can hurt your gesture drawing because you're not, you know, you need that technique to help you feel like you can see depth on the page. Once you start to feel more comfortable with that. You really don't need as much as it's sort of like I always compare it to taking the training wheels off your bike when you're a kid, is that once you get enough of us under your belt, these various fundamental techniques start to really come together. And then all sudden you naturally organically will take certain things out of your process. You might just go from like right here, I'll go from just the length of this leg into the perimeter shape. I didn't do that in the beginning. First I would have to use some cylinders in that area. But the beauty of gesture is that you're, you're not trying to think too specifically about the exact forms. So in this particular one, I feel like I did actually kind of break that rule. I did go a little bit more for a cleaner look to the forums and I think I needed to, in which case it would hurt a little bit of the gestural feeling to that. So be aware of that. And you can tell you can see where when I stop the lines shorter, I'm not flowing through it as much, right? It's a clear sign that when I throw that line and it goes right past the end or it's one sweeping pole. That, that's a more gestural line, a more energetic line. Sketches, sketch lines, do have some energy there obviously. But it's not the same energy. It's almost like a sporadic energy where a gestural line is at long sweeping flow. That quick poll that gives you that nice organic bend. So now for this next one, I'm gonna go back to a male character. So as you can probably see him going back and forth male to female. I'm not always so deliberate in that approach, but I think it's important to do because you don't really want to be a lot better at one versus the other. Obviously for storytelling purposes, I think we all naturally are a little bit better. One of the other, I've seen that with many artists, they talked about it and you can see it in their work. The SUM have a better sense and ability to draw females and some have better sense to draw males. In. That applies to all sorts of things. Some people are better at drawing animals. We all have our things that we can do a bit better. But at least if you're again using this as a practice activity and you're challenging yourself to go for the things that you're not good at, or at least dividing up the time equally, then I think that's really good for your progression. So also, I went for another pose where it was more contorted. The limb coming up over in front of the body in one hand, resting on the leg. You have to try to make time for poses like this because they teach you a lot about foreshortening depth perception. You'll notice that generally when I start to do that, I start to draw a little bit more shape-based. And even though I didn't use cylinders here, I was I was almost there. I was about to do it because if I feel myself struggling with bringing that leg towards camera, That's what I'm going to go back, back a step or back to those fundamental principles. And again, for me, the easiest way to do that if I'm not getting it in a way that looks organic and it looks like the anatomy that I'm after. And I can tell it's a lack of the perspective being incorrect basically. Then I'm going to go back to sterile metric drawing primitive shapes and then try to work out from there. If that doesn't work, I'm going to pull more reference. I'm going to do specific studies of that certain area. Now, obviously for gesture drawing, I'm going to let a lot of that slide, all right, I'm going to let a lot of that fall to the wayside and I'm just going to throw in some lines and either call it a good or bad gesture. If there, if there is such a thing really you don't want to be that critical about it. You just want to say, Okay, I see something here, I see something I need to work on. Or wow, I got, I did really good on this particular pose and I didn't think I would. But this other one really tricked me up. You know, what is it that I need to learn from this? And then move forward. And again, you gotta think that if you're not going out ten of these, 20 of these a day, you're gonna get so much better. I would love to see you do 20 of these a day for a month straight, and then look back at your first day. I mean, I can't promise anything to anyone, but I'm pretty sure that you are going to look back and you're going to be amazed by the things that you learned in that month's time. So again, it's having that work ethic and being ready to put in the time that really gets you there. Figure drawing is not an overnight. Easy thing. I wish I could tell you it is. I wish I could tell you that, you know, you're going to be a great Figure Drawing artists and just a couple months. I mean, you'll definitely get better in that amount of time. But it takes years to be great at this. And what you wanna do here is just allow yourself to grasp the broad strokes of the pose. Proportions, but even proportions can be skewed. That's fine. Just get yourself to start thinking about what a leg looks like. This pose, what an arm might look like. How does the hand position that looks natural? And if you draw it, it looks unnatural. Try to pinpoint what, what about it looks unnatural? And then go back and try to do more of these that address that situation. Okay, so we'll go ahead and stop this lesson here. I'd love to see what you come up with. And so with that, let's move on.
4. Rhythms of the Arms and Legs: So now let's talk about some of the rhythms of the body. And so one that I already kind of pointed out a few times, but we'll start here because I think it's really the most popular is being aware of the spine in the divide and the back. So as I draw head here, connection point here, it becomes pretty easy to start to see the back of a character. And we're going to get into the anatomy and talk about all the V triangular shapes of the back. And if we do something like that, start to see it. I'm going to get the lats little late place there. But so say we do something like this. Now, the actual spine as it comes down will also give us the divide of the glutes, right? So if you bring this all the way down, you don't really want to put a line all the way down. Obviously, it looks kinda weird, but it gives you the divide for the glutes. So that's a good reference point, right? And you just usually going to races bag because you're going to have some fat mass and tissue there. So we're not going to show it as a line all the way down, but it does give you that relationship. If we were to connect that line, it's there as a point of point of guidance. Basically you can see that there would be a connection point there. So something like that. So I'd say this is one of the first ones that anybody really learn and figure drawing. But then there's a, there's a lot more guides to pay attention to and I'm gonna show you a few of those. Okay, so those are first one. I'll illustrate these in more detail for L. Okay, so let's bring that out to the side. And so now another one that I think is really important that I use quite a bit is this one right here. So if I'm drawn an arm, I will use a lightning bolt kinda method like this. And so what this is, if you've seen this method, you priority recognize that it's a deltoid here, bicep here. The peak of the form here. Lower portion of the form here. As we think we've already talked about this cylinder for the wrist area going into form tricep back here. We can see that rather quickly we can construct an arm. Would just that lightning bolt method and attach a hand. You can use a simplified shape here for the middle knuckle is taller, so you can pick that up and then attach a wedge for the thumb. But anyways, just like that, we've got a kind of a superhero mosque arm or something. And again, it's just sat back and forth, zigzag lightning bolt that you see there. Now that also applies to legs. Now from a side view, you're going to see it more like this on a leg. It's going to go, you're going to afford bend here. Back, bend here. Back then for the lower leg. And then you still want the foot to attach below the mat and the main masses of the leg. So something like that. And then you got to remember that the pelvis is tilted. Right. So there's this back and forth. The zigzagging and distribution of weight is really what it is. It occurs all through the body. But if you were to draw over this, you would establish that. So let's just pick a different color so it doesn't get too confusing the loci here. Okay, So now as I go to draw the anatomy and get the forward bend, the lay here, the NEA bow here. The back bend of the calf back here. The hill would meet the ground plane. This isn't completely straight, is a bit of a curve here because there's some muscle mass on the front of the leg and that wraps around. But we'll draw it relatively straight there. And so there's another thing that I had 0, but I'll give it a second. Let me just first draw this m, But the back of the leg is relatively straight again, nothing straight on the body, but by comparison it's more straight. Leg glutes, hips. Okay, so something like that. So now what we have here is that back-and-forth, that zigzag pattern basically just gave us some cues and some guides to the way that the anatomy kind of zigs and zags. Okay, so that's why I think it's so important to practices that really kind of helps you. Draw arms and legs faster. Now the other thing that you can pay attention to you here to make this larger is there's, there's another relationship that you can see in the leg here. And hope I've illustrated that already, but I'll, I'll point it out a little bit more clearly. So there is the fact that it's basically curved here, right? Curve there. Curve here, curve here. And again, not completely straight, but relatively in comparison, each one of these areas are straight. So we'll see that back and forth and a right down to the heel. So right here, it's a little bit more of a curve here. And the other side is more angled but not straight obviously. But sail that distribution of weight occurs and it's set back and forth that zigzagging that you can pay attention to. So another example would be, actually while we got this here, I'm going to bring out this. Make this illustration a little bit easier to visualize. So like bam and throw an error as well. Okay, so now the other thing is from a straight view of the leg, we start to get a little bit harder to see, but you can still use the pill lightning bolt method. But you have to shift it because you're looking at this leg prospectively or, you know, you're here in front of it. And this is the, as we looked at the side view, this is the part that goes back. All right, so this ends up getting hidden by v, the anatomy. But the thing that you can pay attention to, the outside of the leg is more curved and the inside of the leg is more straight. So let me show you that. So I'm going to establish this first line. Again with a red. Let's just draw through it. So severe starting point, just to give us a guide that a bit larger. And then over top of that, I will draw the leg and explain what I mean. There are. So the leg generally is thicker and more boat on the top comes down to the side of the knee, curves out again. I should have probably a little bit straighter there for short. Now, curves out again. It comes back down. And on the medial side it's wider. Tapers n gets to the side of the mean. Usually you see a noticeable band right here for that Bono's. Then you see the calf muscle. Pretty distinct line right there. The more of a diamond shape. And then you see the medial side of the ankle, higher on the medial side, more on the outside lateral side, and then bring the foot down to the ground plan. Okay, so something like that to me. And here's more. Let's try that again. These are always a bit tricky to place. And they've got the vastus medialis here, rectus femoris here. And we'll get into the anatomy and more detail, but vastus lateralis here. And these all kind of come up together. Or they look like they're doing anyways, they're really coincide like this. Visually. They look this way and they kind of point up to the ASIS, anterior superior iliac spine. And you've got the sartorius here. Okay. So just like that, when we get the gastrocnemius here, there's another Muslim, it's alluding me at this point. Those crosses over down to the medial side of the float, somewhere in there. But let me get this in place and show you what I want to show you here. So and that actually kind of staggered out a little too much. So forgive me for that. Okay. So again, there's, let's go back to the relationship of it. So more curved here, more curved to there, and then relatively straight here. And not entirely straight, right? I could set it widens out here, tapers in and get a notice will bend the medial side of that part of the leg, the calf muscle, and our ankles higher. I mean, there's a lot of things going on here, right. But overall, it's relatively straight compared to the outside of the leg. In fact, you'll see illustrations where maybe we'll do an example. This is well, where you will actually take a triangle. And use that for the inside portion of the legs and varying angles in degrees. But it's kind of a neat technique because again, it's something else to look for what the stance of the characters. So just like that, we've got the, you know, the difference from the inside to the outside, right? The other thing that I want you to pay attention to is there's kind of a neat relationship here with the muscles where they look like teardrops. Okay. So that looks like this. The bottom to the vastus medialis and lateralis look like regular teardrops. The other one looks like to drop upside down. And that actually happens all through the body. All the muscles kind of resemble a bit of a teardrop. And some just remember our look a little bit more like chicken bones will say chicken, chicken legs. So you kinda see you if you taper this n, you can almost find a chicken life right there with the calf muscle and the ankle. But but the other thing that I want to show you that's kind of neat about the quadriceps, is that if you look at all of these together as one big shape, it almost looks like a bit of an upside down hard. And so I like doing this because things like this just make it easier for you to visualize the leg in different ways. Different angles become easier to draw, in my opinion because you're like, oh, okay, I remember it kinda looks like a heart from a street view. Well, what's a heart look like when you tilt that back into perspective, right? It's easier to kind of visualize a heart and perspective as something like this. And then attach a knee up here and you start remembering what the bottom plane change of the mean looks like. And all sudden you start connecting all this with shapes. Shapes that are a little easier to remember. So that's, that's my reason for showing you this anyways, I know. Might seem like, well, what's the point of all this? But so just remember that the calf muscle is a little bit like a diamond shape like that. The upper quadriceps together are kind of like individually. They're like teardrops to go there like a upside down, heart-shaped kinda. And again, and you just kinda cert pinpointing these different areas and what they look like to you in a simplified set of shapes. And that coupled with the rhythms that I'm showing, you, should start to all kind of work together and make it a lot easier. I know this is a lot the processes on as I'm overlap and all of this, it gets a bit confusing. So at private helped to take the read out of there for the underlying image. Yeah, that's probably a little bit better to visualize and out. So let's actually, let's just bring that on the one over. So I do want you to think about all these concepts together, but I don't want to confuse you. So let me know if that makes sense. Again, try these out, try the lightning bolt method for the arms time and different perspectives. And I think I explained that one in perspective, but let me let me make sure. So they arm if you were to draw that and perspective is still works so you can go the lightning bolt back and forth. I'll just do a little one here. You obviously have to make the forum piece longer because it's prospectively coming out foreshortening, right? But then you have to also, the tricky part is really just to hide the right parts. Remember the risks is like a cylinder right there, bring that back. Biceps here and the shoulder connects around the upper arm, right comes around and down into it. It doesn't it's not stacked and it's not even to the upper arm. So that's where this really helps you to visualize that. It's how that works. So again, even in perspective, this little technique works and that's why I think it's so, so powerful. I don't think it works as well. Per sale works as well. And perspective for the legs, I don't use it much there. So it's up to you if you can find a way to make that work, That's awesome. Me personally, I don't I don't do that for legs so much, but we'll talk more about legs and perspective and legs squatting and a squatting position, things like that. But just remember these different relationships and rhythms. They can be a real lifesaver. There probably complex at first, I've been using them for a long time, so I I go right to them now. But I did want to give you a lesson on that. Hopefully that helps you. So with that, let's move forward and continue on.
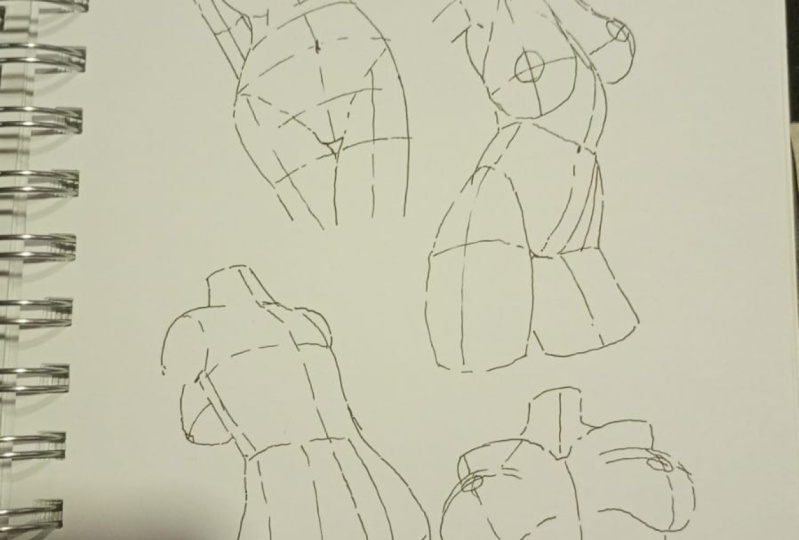
5. Using the Bean Shape - Torso: Okay, so I wanted to talk to you about another way to twist the form. So there's lots of ways to think about this, one of which is the bean shaped. So this is a pretty simple method for thinking about the mid section in a bit more of a organic way and getting that twists. Okay, So you can draw a few different bean shapes. Kind of a fun little exercise actually. And I think the tricky part is really just how many ways can you draw this little beanbag or B and been like shape? But it's, This is tricky to think of how the body could contort and bend these different ways, but then relating it to this basic shape. But it's a neat way to do it. And neat approach because we tend to stiffen up our characters, right? So this is one that I think really helps you to alleviate that. So we'll just start with these right here. So some are somewhere and we'll try to make those have some variation as we go here. But first what I like to do is think about a center line. So for instance, if I say okay, this is one where the character's leaning back, this would be the center line. So the sternum would be right about here. We could also draw spine through there if we wanted to, but I'm going to forgo the spine and this particular one and focus more on the front and the front center line. So I'm going to drop in that sternum and going to immediately go to the ribcage. So there's that W like shape that I like to throw in there. And then from here, I really want to get right to the hip section here. So thinking about the pelvis like this, something like that. And I'm not going to worry about drawing through like that because I'm just going to cover it up right now anyways, but I want to also talk to you about utilizing these curves to connect these, okay, so we're gonna talk about that a lot as we get into drawing these different figure drawing versions are examples, but it's not just drawing the three main masses and getting the twists and the sorting and the pinching and all that good stuff. It's also utilizing the right types of ways to connect them in these little curves. These little like C curves can be very impactful way. They're just softer, right? So it's better than sitting there and trying to attach a straight line, straight line. And I feel like that almost goes without saying. But then again, I see that in people's work where they'll, they'll look pretty nice, but then they will kind of connect things with very rigid lines. And there is a time and a place for that. And we'll talk about that. You know, angular lines are great for defining bony landmarks. It's great for showing masculinity and an illustration. It's great for stylization. There's all sorts of great things to use. Angles and organic lines for curves versus Angular. But there's kind of a balance and then there's a right place for certain things. But so just like that, we've got a little bit more of the rolled back, upper torso like this. We can put a shoulder back here, deltoid, collarbones, maybe raise an arm. Note this was a male form. We would show the pectoralis muscle coming down like this. And then on this side where the adult is coming up, it's going to plug into the chest muscle kinda changes the shape here where on this side with the adult down, it's going to ball around more. So you could show that I've kind of established that these are wider hips. So I'm gonna make this a female torso. Place the brush right about here. Could start with these kind of ovals, kind of position and get the start of it. And I tend to try to use some curvature at the bottom, but not big spheres. I have to soften them, update. I think it's better to think of them like teardrops. Then, you know, then spheres and spherical or something like that and just get those in place. And obviously we could bring those closer together or just depends on the type of brush you're trying to draw. And then for the center line, I'm going to bring this back more now like this. And I like to draw the stomach muscles as one big shape and those kind of curved area and then soften that up. I won't leave us so well-defined. Just like if I draw the divides here, like to position them something like this. The belly button right about there. But I won't I won't leave those divided lines obviously, just kinda the way I've started. So just like that from our beanbag we have this start of a female torso. Can add just a little bit of arms here. Like that. Position the Mac appear. Okay, and let me softer races of clean it up. So from here, what I would really stress is that, you know, we're tracing out the forms that you want to see in your illustration, right? But at the same time, you want to kind of what I consider rope draw and pull it all together. So as I mentioned, there's areas of those where you wouldn't want to trace every form. So for instance, you wouldn't want to trace every form of the rib cage because you get something very unnatural looking. So you have to kind of pick and choose those areas. So if you want some definition, then you get in there and kind of show a little bit, but others points, you want to soften it up and make it not so well, so in your face, so visible. So subtlety can be a good thing right here. And then with breaths will draw and talk about these more. But that's basically one of the things I tried to think about is having them look like they sit against the ribcage and at certain points will flatten out so that they don't appear to, you know, to solid too stiff against that form. So we just have to kind of flatten a model a little bit on the bottom here. It's kinda hard from this angle because this isn't really narrower, shows, showcases that better on this side. And sometimes bringing this line up. And then showing some of the reverse bend of the actual rib-cage right there is a good way to do it, but I think, I think less is more right there. And I'm over here, delta square here. And it has deltoid. I feel like from this side, we're going to possibly see two of the head. So you've got the front head, anterior head, and then you have the medial head, and then on the back of the posterior. So I think we would see the two heads there. Just keep in mind, you're never going to see all three heads at once. That's when you know, you've done something wrong and I don't think there's an angle. You can see all three maybe from a top and I don't I don't think so. Generally, for the most part, your journal and just see two at once is just like that. And just from our placement for the nipples, one of the easiest ways to do it is to find the center of the collarbones and then draw a triangle outward. And this usually will give you a pretty good alignment to where you can now place the nipples. Remember to use your wrapping lines if you're trying to get the forums figured out the direction of the forms and a feeling of depth and dimension there. Okay, so just like that, we've used that bean shaped to get us to the torso rather quickly. So I was gonna vary based upon your competence at drawing this particular area of the body and, and all that. But it's a very effective method. So what I challenge you to do is take this and another way to look at this is to say, okay, where do I want to put the head opening and the shoulders? So you could say, well this is a body leaned over and kind of doing a bit of a bow. So you could start with saying, Okay, there's one opening to the shoulder on this side, this is opening for the neck. This is opening for the other shoulder and use a dotted line because it's on the opposite side from where we're viewing it at. And then you establish your center line, and then you go from there. At least that's the way I tend to do it. So you could start with that. And you can really, you know, give yourself some initial guides to how you can get this going. So these two, the bottom two are the same, right? But we could say, well, let's, let's bring that neck opening here. Let's put the arm openings here. But now this is the back of a character. Now that's a bit much of a back bend, but some people are pretty pretty flexible, right? So they could pull it off. So do that. We're going to take this and work out these examples like this. But you can also find your cross-section that really helps with place in the ribcage, right? So we could do something like that. And then so this be in the back. I would probably start with figuring out the scapula. The spine of scapula, it comes down like this at an angle and I start there. And that's where I'm going to explain that as we progress through all of this that bony landmarks are really helpful. Just like finding center is helpful, just like placing the head and the neck openings that finding the ribcage, which again would be a bony landmark but that W shape or W like shape that I like to throw on there as almost like one of my first go-to shapes. And then it gives me something a hinge upon and then I added something else. And pretty soon you more comfortable at the bony landmarks and the other features of the body that you have a lot of connection points. You know, it's like a constellation and you can start to see the cancellation because you have these other stars to connect the dots, right? So, so let's do this. We'll time-lapse this part and I'll show you how it worked through a few of these is work long. Remember that throughout any of those cores, any of the portions that are time-lapse, slow, or stop the video. Take your time. Don't feel like you need to go with the time-lapse is just merely a way to show you a progression. Some people more advanced so they can obviously move through a little faster. Stop it as much as you need, not a big deal, catch up, and then move through it. And I'll obviously try to explain any key points as we move forward. So with that, let's talk. You can ended time-lapse and render this out.
6. Rendering the Torso: For this lesson, I want to show you how to take one of these bean shapes and just draw from here. And so this is sped up a little bit about double the speed. And I want you to be aware that you don't have to jump to this level of refinement yet. So this is a little bit early in the course, and I'm doing this intentionally because I don't want you to get too bored. So drawing a lot of the basic shapes and forms, it's a little bit less exciting, right? We've talked about that and I don't want you to get bored and I don't want you to think that, you know, that you can't have a little bit of fun here and there, you can jump in and try to do your best. So we're going to use some of the things we've talked about, but I'm also going to carry a Passat and I'm gonna land some anatomy. Now, don't worry, we're gonna get into anatomy and more breakdowns of specific areas of the body and really delve into the connection points. And also the more into the landmarks, so the bony landmarks of the body. But I think the connection points are really tricky one. So even with this illustration, you can see once we get to the anatomy that the shoulders are probably one of the most difficult aspects to get right. And then also the compression of the ribcage and what it does to the abdomen. So we're going to delve into those things in more detail. But again, I wanted to give you a working example of how I would take something from, at this point, we've now went from the bean shape to a little bit more of the gesture placement to now previously to that, to the sterile metric forms and now to the anatomy. So all of those techniques that we've talked about have got us to this point where we can start to lay in the anatomy with more confidence. We've completed some structure and some forms that have worked up to that. And, and I just want you to know that these things are, are confidence boosters. Okay, so at first we just start drawing a cool pose on this blank white canvas. And it becomes very frustrating because we don't always know where everything goes. And I've been drawn for years and it's still tough for me to visualize where everything goes in the right proportion. It's an ongoing battle and we keep studying that. But what the fundamental principles in place and the structure in front of us, it becomes a lot easier to kind of let go and make some decisions on the fly. And again, I challenge you to work through this and you can pause as much as you need and obviously and do your best. It doesn't need to be some great work of art. But the good thing is, is if you have some noticeable flaws, take note of those, that's important, valuable information. And the more you can start looking at the areas of your work that don't look the best to you, or did even get the most critique from other people and you share them wherever you'd like to share them in your portfolio sites or whatever, that's valuable information. And the more you can look at it like that, the faster you will progress in your work, the less you attach a motion in your feelings to your your work that gets criticized. You really want to separate yourself from that. It's very hard thing to do because this is something very personal to all of us. We use a lot of our time and energy to develop our skill sets as artists. So when somebody criticizes it, can be hurtful. But I assure you, the more you can separate yourself from that way of thinking, the better you'll get. And then you just start to realize, like I was kind of a silly way to place the lats are, the belts are too small and the one arm is too long. You want to get into that critical way of thinking in a way where it's productive for you, okay? And again, like I mentioned before, don't be too harsh on yourself. Too soon. You've gotta be very patient with your progress. Takes lot of time. Also, I did want to point out right there, I just used those wrapping lines again, so we'll get more into those as well. But those wrapping lines can be great for even at this stage of the work. Going back and checking, okay, Are those forms heading in the right direction? And if I have a better visual representation in my mind of the way those forms are going, then it becomes easier for me to know where to overlap the anatomy. So a big part and we'll get into this as we talk about foreshortening in more detail. A big part of making this work is having the overlaps in the right place. And then obviously it goes into some other things like with extreme foreshortening, you have to know when to increase in decrease the size of various elements of the body or doesn't read as well. So we'll get into all that. But again, those little wrapping lines actually do a lot more than you think. And I want to do a few breakdowns with you where we really delve into that and draw them in a way where they almost look like three-dimensional grids. Now right there, I did flip the artwork and I know for those of you that are working traditionally, that seems like I've had people, students mentioned that. That's a bit off putting for them. That's why I immediately flipped it back. But I do recommend that you flip it in a light box or up to your window. If you're working on paper, it's very important that you use to spotting the flaws, even flipping the artwork upside down. No light box, just turning it around on your page generally will help you to see. And consistencies are problems with things like proportions. Just a weird piece of anatomy, a skewed head just happens. And also remember that the center lines are the other way to really keep checking that as you go. So now here placing the anatomy, what I want you to pay attention to here and again, keep in mind this is early on for the anatomy. We're going to get into anatomy a lot more. But one thing I want you to pay attention to here is that I'm purposefully making breaks and the lines. So instead of me tracing, for instance, the pectoralis, the chest muscles, or the serratus. I'm, I'm not drawing all those as, as connected lines. I'm intentionally picking the pencil up, or in this case stylus and dropping it back down and making line breaks. It gives for a more interesting look to the liner. There's different ways of heard it explained. One of which is that you want the the your fan, your, your visitor that's viewing the work to be able to connect the dots and their mind, it makes them more interesting picture in that regard, I would say for anatomy, it makes sense in a different regard though. The anatomy just isn't that chiseled. In fact, I've made this person pretty chiseled as it is, and I'm trying to pull back from that. So I think that in the beginning we tend to over trace every bit of the anatomy. One part of us I believe, is trying to say, Look, I know what I'm doing here. Let me show you exactly what this muscle looks like. And you have to let go of that because that's, that's actually just think of it like an overcome over compensation for something. Sometimes confidence comes with less is more, right? So by drawing this, letting the line fade in and out, capturing just the right components of it makes it look more confident. So I would look at it like that. And again, it's just because you don't want there to be definition every component of your, your picker because it loses its luster if you do it too much and you do it everywhere. The impactful areas that you're trying to get the viewer to take notice of become less impactful. So again, there's a few different ways to think of that. Now generally heavier lines to the shadow side of the form. So if this was just going to be a liner illustration, which this one actually is, we'll do some more. There's going to be more value to them. By value, I mean shades of gray. But in this case it's just going to be the liner. But when I do the liner and I have no intention of adding value, I tried to be a little bit more aware of things like line weight. And line weight generally is going to be heavier on shadow sides of the form. It's also going to be heavier where you're trying to get the viewer to look. And this case, maybe we're trying to show more definition to an area of the body that's closer to the viewer. So you could, you could use it as a way to draw the eye as well. You generally want to think of the areas that are receiving light as being white. So for instance, if you're drawing a pretty heavy shadow on one side of the tricep. You're probably going to really lighten that up on the other side where you have the light hitting. So there's there's times you go against that a little bit, I think because you, you know, you look at it, it doesn't look right without there being some definition. And again, if you know you're not going to place value, then you kinda want to imply a little bit more edge work. That's what I did here, but at the same time, just keep in mind that generally the line weight is just going to be darker on the shadow side. But I have seen artists that use it heavier on curved sides as well. So when they're trying to show a Boeing and a dimensional feeling to something coming out and away from the rest of the body. They'll put like a heavier line on the curve and that seems to look good as well. So there are different style choices while with that. So just look at different art pieces that you appreciate. Try to pay attention to that. And like I said, we will be doing some value studies in which case you can really let some of this go. You can in fact do some with the line weight is pretty consistent all the way through. And then you can let the value do the work and bringing out the forms. So this one, I think was roughly about 20 minutes. Do their entire processor you're seeing and I thought that would be a little bit long and rural time for you. So as I think I've already mentioned that a doubled the speed here. But I just wanted to give you the information on what the role time is. And you can always slow down the player, I believe so. You can just watch a half the speed or just stopping catch up. But I do want you to know it was about a 20-minute render. That's nothing to hold yourself accountable to. So I just want you to be aware of it. I don't want you to think, Oh, Rob did it in 20 minutes, so I need to do it in 20 minute notes. That's not the way it goes. You never want to compare yourself to other artists in that regard. You never know what it took them to get to where they're at. And you're comparing one of your bad days to one of their good days. Even the same artist you look at, hazard, good and bad days. So there's definitely days where I draw better and I draw faster. And there's days where I have to do a lot more sketching and trying to find my rhythm. So again, comparisons those out the window. The best thing I could tell you is if you want, you want to look at your favorite artists and people that you inspire you. And you want to grow from what they do. Be amazed and inspired by what they can do, but not a direct comparison. Rather, what can I learn from them today? What can I incorporate into my way of thinking and the way that I do things? Move on. Because comparisons can be ultimately can lead you to a negative way of thinking. And I don't want you to do that because again, you have no way to know how hard someone has worked to get to their level and their skill set. And we all excel at different things. So you might be much better than, than somebody else at another given area of your artwork. So you'll be comparing the wrong thing anyways. So that completes this one. Hopefully this was informative for you. We're drawing this and doing this observation can give you some ideas. Again, we're going to get into the parts of the anatomy and a lot more detail. So thank you for watching this lesson and let's move forward.
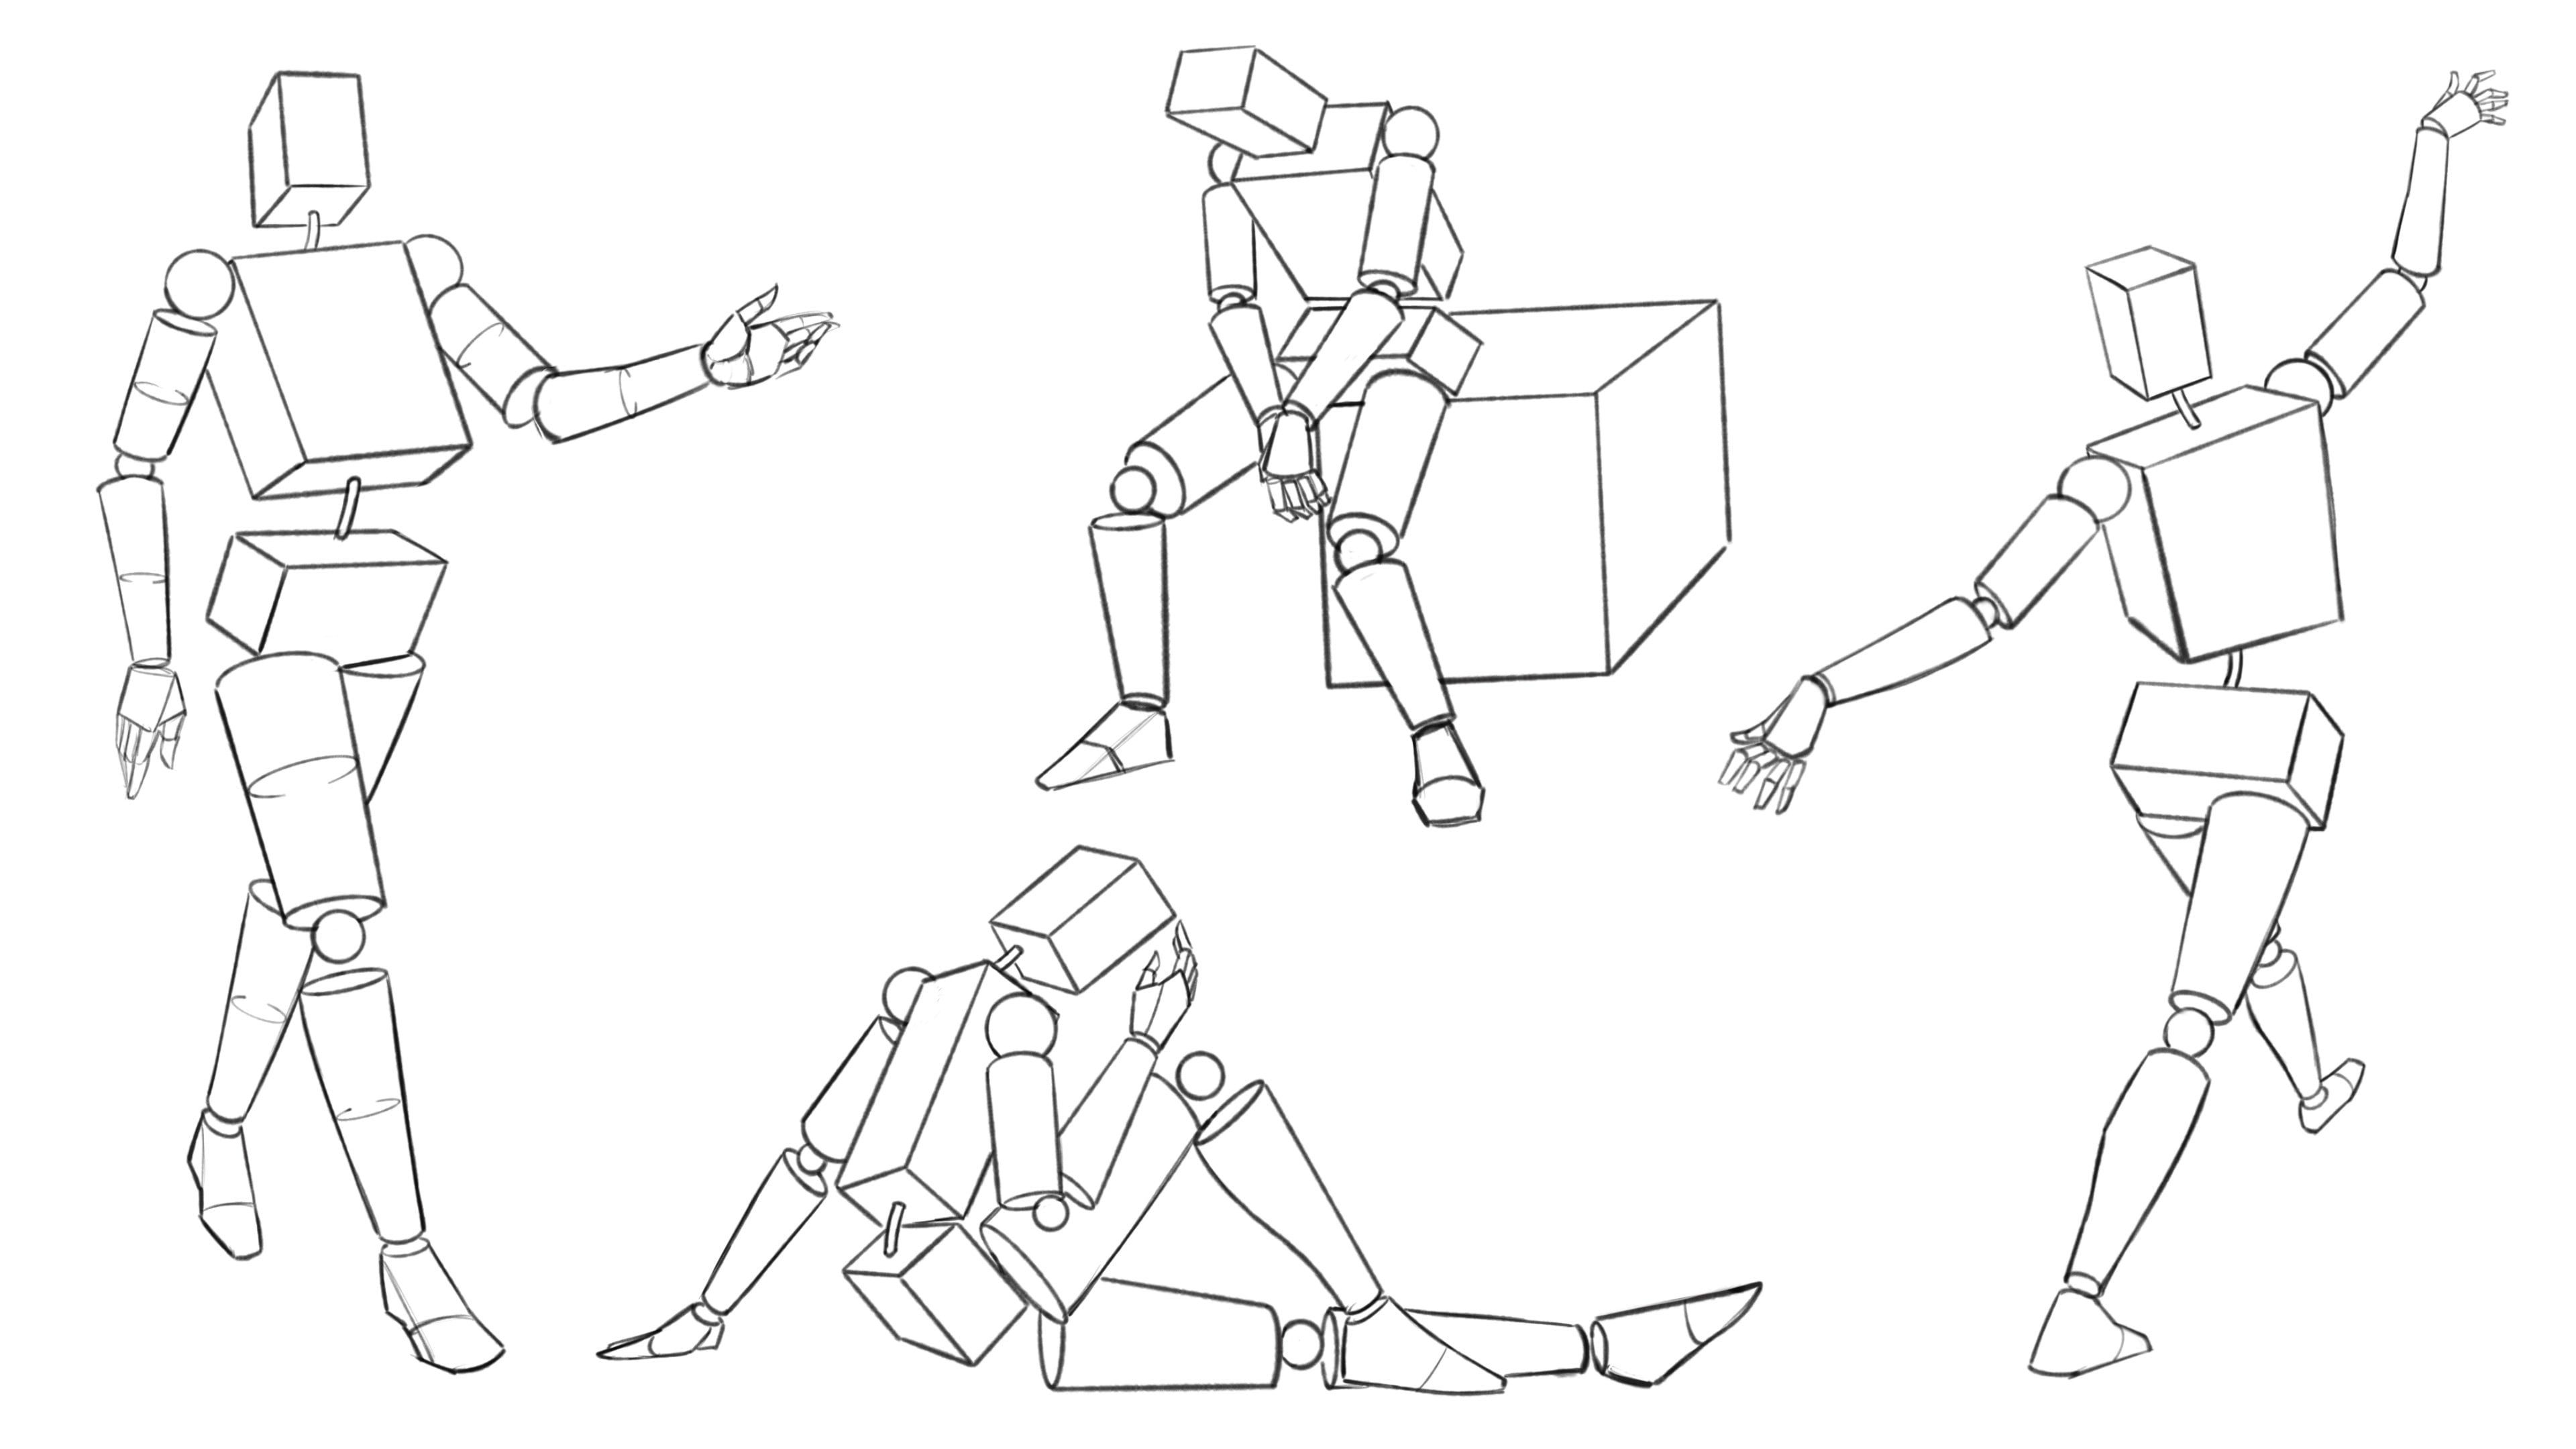
7. Gesture Drawing Arms / Legs: Okay, so for this exercise, I would like you to practice drawing arms and legs and a more gestural way. So I think this will be really good for you to loosen up and just remember none of these particular exercises or methods replace the other. They're meant to be used in unison when needed. So I'll try to explain that a little bit. So for instance, if we draw our pelvis like this, and we draw the upper leg with a cylinder near area, lower leg. And the foot. All right. Comes across as very stiff. But there's a time and a place for those this is going to lend to you being able to draw perspectively like we've talked about. It's going to give you a sense of strength and rigidness. Nice, strong forms on the page. But then you also want to be able to draw this same area of the body more like this. And although it's going to be less accurate, and some ways might skew more, something like that. Proportions might go off a little bit. This is a more gestural way to think about the leg. And if you were to simplify it even further, you might do something like this, really animated. And they all serve a purpose. They all have areas within your work that can really help you. It takes a little bit to get used to being able to throw lines and have it look like much of anything. But as we already talked about the rhythms, you know, you've got to remember that there's this overall relatively straightness on one side, curve on the other, and that goes back and forth. So you use that to your advantage. And then ultimately you just skip over some of the details or all the details when you're thinking gesturally. So again, time and place for each of these methods. And then also keep in mind too. It doesn't have to be all curves like this. You can do a very gestural version over here. And you could use angles if you feel more comfortable with that, we're gonna get into angles in a more detailed overview because what I want to show you, there's angles can be really great too. To align things. It's more of a like an architectural way or something I've drawn the body. So it's kind of a mix of this technique over here. But it just basically, it can still be used in a gestural way where you're really trying to spot maybe the perimeter shapes that you're looking for rather quickly, expressively and again, foregoing details. You want to really get the details out of your mind for a bit and go for the big forms. But I do really recommend that you do it with more curved lines. I just want you to know that there's a couple different ways to go about it. So what I wanna do now is show you how you could draw arms and legs with the more organic method, but in ways that are in different poses. So for instance, we'll do a couple arms here. And I'm just going to try to throw in the lines as much as possible. So even the fingers are grouped those together in some instances. And I want to just try to get this in as quickly as possible. You know, an arm off to the side, but then bending back towards the body a little bit. Might be something as simple as that hand on the hip. I be as something as simple as this practice, different gestures of the hands. And again, we'll do some more detailed studies of those as well just because hands or, you know, there's a lot to home, right? A lot of reasons to study them. Well, it's just kinda log a punch. These ECT is you're going to be really quick and that's, again, that's the purpose. Are they perfect? Not at all. And that's fine. They're not meant to be there, just here to get a sense and a flaw, Vaidya. And what I'm still thinking about, as I explained in previous lessons with that lightning bolt kinda method, you're kind of jetting through this and looking for these quick expressiveness. Expressive forms winds through the forums. So let's try another one. Let's bring the arm. Let's see. Let's say, let's just do a couple that come to mind as far as like easy ones and then we're kinda the harder ones of us is something typical. You might have to hand over the hair, kind of reaching down for the hair, something like that. I'm not going to worry too much about the hands. Something that kinda looks like a hand at this point. There's another one. Yeah. I just want you to think about. Maybe a little bit of foreshortening. And this is where I typically have to usually rely on the primitive drawing, the primitive forms and sterile metric drawing to get this right. But again, you can throw this n with something a little more gestural and then you can come back with the other method. In which case I really, I start though, I do that the other way around, but it doesn't matter. You can use just want to get used to using these when you need them, not necessarily in a specific order. I don't like to box anybody in their way of thinking. So let's do one where the arm is kind of coming towards us a little bit and then away from us. And we're going to be doing some specific areas of study for the elbow as well. So very important area to study. So you can find that in the section for specific areas of the body. So something like that. And so hopefully you can see that these are really giving us a nice range of arms very, very quickly. And yes, sir, not clean, precise, pretty drawings. But they give us these ideas. And I've kind of went with everything that looks a little bit feminine, but that doesn't really matter. I, I feel like you really want to get used to being able to take feminine qualities, convert them to Moscow and vice versa. So I typically, when I'm doing something a little more gestural, I'll usually err on the side of a thinner arm anyways. So it's not really that big of a deal. It's easy enough to get in here and start chiseling it out and add some muscle onto the frame. But at first it's more about the fluidity and the flow of the forms. And so for me, I think it's important to do this in a way that's kinda thick, lighter and more airy. And then you can always add onto it. There's no one there. Make sure I'm not repeating this because it's pretty easy to do. Yeah, it's kinda like that one on the lower left, doesn't it? So let's try something else that I'll see we've got pretty good assortment here, but what else could we do? Let's put the arm down and back. So here's the deltoid upper arm. Make sure to connect the form behind the upper arm for that sense of foreshortening. Same thing with the hand. Let's bring the hand behind the rest of the sons. Well, something like that. Now let's do the same thing with some white poses. Again, try to look past the details and just get it in a quick representation of a leg samples. And I really have to fight the urge to not want to detail these further. And also, as I mentioned, the thing that I'm fighting the moles as correction. You know, it's a bit of your pride involved. Like you want, you want people to see it and go, Wow, that that's a good leg. Oh, that's a good arm or good, it's a good illustration. And this is, this part isn't about that. So it's really tough because we spend so much time trying to impress people with how well we can draw a certain thing. And again, this part is about realization of your workflow and what you know about a certain area of the body, and how to, how far you can push certain things. And getting it to look more expressive and life-like all these things. It's not about, you know, these refined drawings a lot times in our refinement, we tend to stiffen things up too much anyways. A good example of that, as when you draw a very small loose sketches, the energy is so much more prevalent. And retaining that is a lot harder than people might think. And just trying to get in old things. And I'm getting a little bit too much into the details for these. And they don't need to be this refined. I know it doesn't look very refined, but And actually, you know what? Let's add one more line here. The upper leg would be thicker and compass the lower leg. The other neat thing about this is once you do enough of this, you really start to realize how much you can get done rather quickly. So even though we've drawn, I don't know, punch arms and legs here at this point and count them up. We're probably into the neighborhood of 12 minutes or something like that. I'm not looking, but, but again, that's, that's the power of this. Like this is where the magic happens. If you can draw these sayings and very simplified versions of them. You can log a lot of different poses. You can get a lot of different things going on the page. And you see it's very simple, it's just few connected lines. And again, I'm not being too critical. Want to fix these four, I want to make them look awesome and I want you to be so impressed by my heart work, but that's, again, I have to fight that urge. This is more about you learning a series of steps that are going to help you draw whatever you want to draw from your imagination and still draw from life obviously, but this is all purely from memory at this point. And because of that there'll be less than perfect, but that's okay. Let's tricky part is trend to think of different poses. Now you also want to do this same thing with studying from life, right? So we want to find some really great poses. And you want to do the same simplified approach to looking at them and putting them on the page. That's very important as well. One thing is I like to do is when I see an illustration or a photo that really says something to me that's like wall, that's a really cool shot. Love that camera angle. I stop what I'm doing at least to a sketch of it. So important. I always keep a sketch pad with you and always take a picture or whatever you gotta do, but come back to it and capture it. There's a reason it looks really captured your eye, right? So you've gotta take advantage of that. So let's stop here, head over to the next lesson and continue on. So with that, let's move forward.
 Robert Marzullo, Online instructor of Figure Drawing and Comic Art