Transcripts
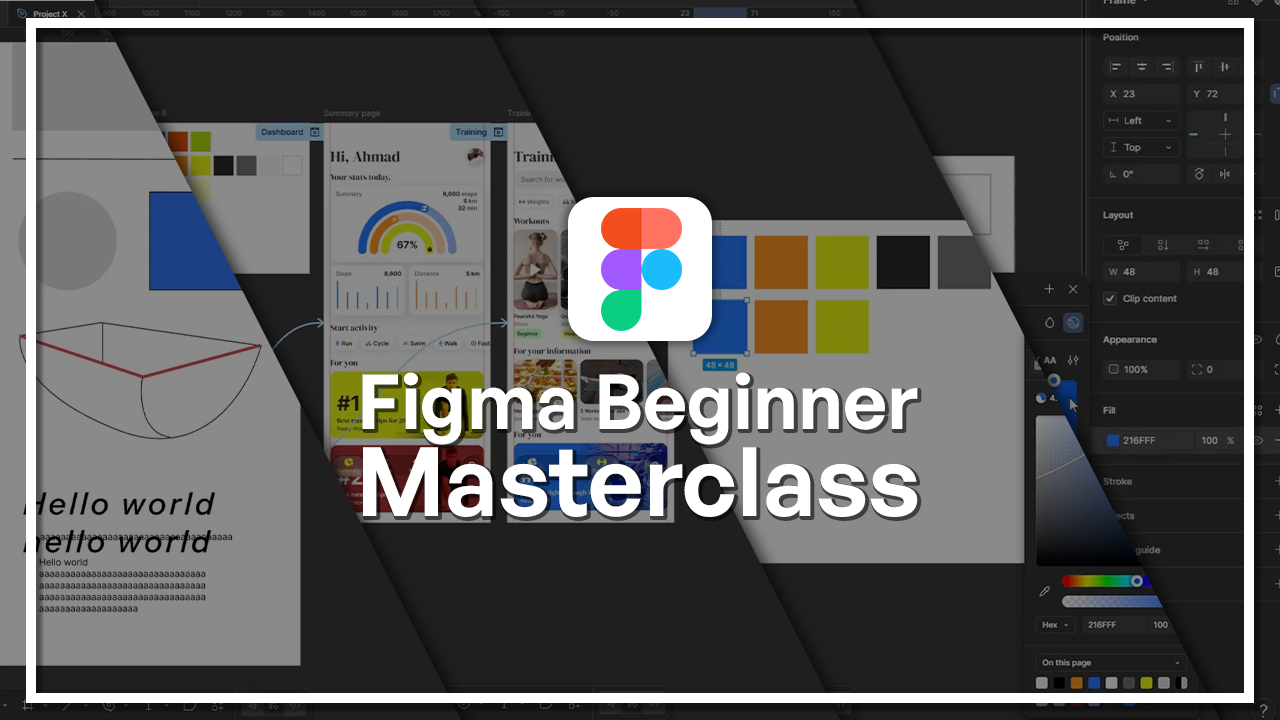
1. Welcome to the Figma for Beginners Masterclass!: Welcome to the Figma
beginner master class. If you've ever wanted to design a website or a mobile app, but didn't know exactly
where to start, then this is the course for you. Hi, my name is Ahmed l Hassan, and I'm a UIUX designer with
more than five years of experience designing
digital products, interfaces, and experiences. Throughout the years, I've
designed everything from the simplest app concepts
to full design systems. And I'm going to
guide you through the exact same beginner
friendly workflow that I wish I had
when I first started. This course, we'll
create a complete UI design from scratch. While doing that,
we'll be learning the fundamentals of Figma
step by step together. We'll first get started by
familiarizing ourselves with the basic interface of Figma and then creating
our first screen. Then moving on,
we'll learn how to use the most basic
elements such as text, shapes, we'll learn
about colors, typography, spacing, and a
lot of the basics of Figma. As we progress, we'll learn more about more complex
tools like auto layouts and components that really help us keep our design scalable and
organized at the same time. You'll also be learning a lot
more about prototyping and connecting different
screens together and creating simple animations, things that really make your design functional
and interactive the end of this class,
you will have created your own UI design interface,
and at the same time, you will have understood the fundamental workflow that
is used by designers Figma, whether you want to become
a designer yourself or you just want to improve
your creative skills, or maybe you just
simply want to learn a modern and powerful
design tool. This course is the
perfect place to start. So let's get started.
2. Introduction: What You’ll Learn and Build in This Course : Hello and welcome to the
Figma beginner master class. A course in which you will be learning the foundations and building blocks that
you need to get into the world of
design using Figma. Figma is a wonderful and up and coming as well as very
foundational design program in the field nowadays, I say up and coming
as if it's brand new, but it's been here for a while and it's taken its place
in the design world, and it is one of the
leading companies and leading design programs right now that many designers use, especially when it
comes to the field of product design
or UIUX design. Um, but it's also
expanding, right? So, you know, welcome
to the course. So whether you're a
beginner, a complete, absolute beginner or whether
you have some knowledge of Figma already or not
figma necessarily, but maybe other
design programs like adobe programs, this
is the course for you. I'm going to walk you through this course in the most
simple way possible, but also giving you tips
and tricks to get ahead, not just learn the basics, but get a little bit ahead and become more of a
professional designer and have a great foundation of so what are you going
to learn in this course? There are a few things that
you're going to learn. First thing is the
design basics. So we're going to learn
about design basics, how to create the most
basic design elements, frames, objects, shapes, as well as using
pen tool and whatnot and understanding how
you can use these to create different
components and so on. As well as understanding
colors, typography, these basic foundations of design. We're going
to go through them. If you already have
some background, this is just going to be
a little bit of a review. We're going to use all
of that and build upon it and start
creating UI screens. So these are user interfaces
that we're going to be creating to using
these elements, what we've learned so far,
what we've built so far, to build something bigger. This is going from cells to
organisms to complete bodies. This is one of the first steps. From there, we're going to
be exploring prototyping. Now the way to think
about prototyping, in case you're not
familiar with it, it's basically what you could call animations
and functionality. So designing a button,
that's design. But the button being
clickable, usable, having a nice little animation when you hover on
it or click on it, that is prototyping, and we're going to be
learning that as well. Then one of the last things
that you're going to be learning is sharing your
work because after all, that's one of the
most important steps and one of the last
steps in the process. After doing all of that,
want to share your work, whether it's with clients, whether it's with users or with your colleagues as
well, that is part of it. Sharing your work and
understanding how you can use it to collaborate
with coworkers, that's something
quite essential, and we're going to be
learning that as well. Now, a second question is, what are you going
to build with it? This is a question that you
should have clarified so far. I mean, taking this course. Why did you come here? What
are you trying to achieve? Or what do you want to learn how to build and perhaps build here, you can come up with a
couple of misunderstandings. When we say build here, we mean the designing process. We don't mean building
an actual product. We don't mean actually building a website, programming it, but rather designing how it would look like and how
it would work like. So what are you
going to be building or be able to build
with this course? Websites, that's one thing. Being able to build websites, something that you're
going to be able to think of any website in mind, that's something you're
going to be able to do. You want to make
the new Facebook, the new Instagram, you want
to make the new Google. That's something that you can do that you can wireframe and prototype within this course or after learning
from this course. Another thing is mobile apps
that can be for phones, for tablets, whatever product
that you're thinking of. You can create apps or design
these apps through Figma. Another thing is graphic design. This is something
like a use case that is more and more frequently seen on FIGma What
a lot of people are using Figma for is
graphic design, whether it's for making
posters or creating visuals, brand identities, or maybe
social media content. That's something that you
can now do with Figma. The amazing thing
about Figma is that it's continuously
expanding itself. It's growing with the designers. That's something that
maybe personally, I feel like other design
programs didn't do very well. A lot of the times it was
just like, every year, there's a new version of
whatever XYZ design program, and it was just almost the same. They just added a
couple features for the highly advanced users, but the program didn't
really change much. It didn't offer something new, it didn't revolutionize design. But Figma keeps on
growing and changing. And you see a couple of
things that I've highlighted, I mean, that I wrote down here, but blurred out because just to give you a
feeling that there's a lot more use cases
that you're going to be learning and that you
can build using Figma. We're not going to
be discussing all of them within the scope
of this course, since it is a course
for beginners. But just to give you
a glimpse, I mean, you can see half blurred
is like presentations. You can create
presentations with Figma. Can actually build websites. Without programming, you can publish a website with FIGMA. But these are other tools within Figma that we're not going to be talking about
within the scope. Just keep in mind, Figma is
a whole universe in itself. They keep expanding, adding AI features, plugins, whatnot. That's why it's something great
that you get started now. This is what this
course is about. This is where you're going to learn and let's get started.
3. Getting Started with Figma: Hi there. So this is the
first lesson getting into Figma exploring and
understanding how you can get your workspace setup. So I'm assuming that you've
gone ahead and downloaded the app or at least opened the web version just
for your information. You don't have to
download the app. You can just open the website and use it from there
from your browser. I'm assuming that you've
also logged yourself in. I don't think I should lead you through that process, but
it should be pretty easy. So now that you have
your Figma already installed set up and you
are on it right now, this is how it should look like. Maybe you have a light version. Maybe this is dark mode, but it's basically
the same thing. You have a lot of
things going on. He to let you know, there's
reasons, community. So don't get distracted
by all these elements and go ahead and
click on Create, and go on design. Now, you might see
this differently, you might see these as
different services. So just go ahead and
click on design, and it's going to open
up a new tab for you. This new tab is basically
essentially a new project file a project file can contain
multiple pages within it. Right now, we are in this file. It's untitled right now and
I'm going to go through the different elements here on the screen with
you one by one. First thing we're going to
look at is the left hand pan. Now we have, first of all, here the logo Figma. When you click on it, you
have these regular tabs, the standard tabs
of file, edit view. These can offer you a
lot more options to edit things as well
as set up the file, set up some things, export, and so on, change
your preferences. But these are
pretty much hidden, because you don't need
to use them so much, so they're hidden here under this Figma logo.
Then you have the title. You can go ahead and give your
project a name Project X, for example, it tells you
this is a team project, so you can also change the
name of the team project, and it says that it's so we
have these options here, and below that, we have
two different tabs. We have file and assets. Now, assets relates to design
assets that you can borrow. But this is a little
more advanced. But let's say you have
here these libraries. So you have, for
example, IOS design elements that you
can borrow from here and add onto the page. But right now, let's
stick with file. Now, under File, you have pages. So here you see page number one, and it says there's
two free pages left. This is if you have
the free version like I do for this account. And you can add another page. Now you might say, what's
the point of pages? I mean, is this you know, are we writing a book here? No, it's not about that at all. It's kind of completely
different documents here. So when we go to page one
and we create a rectangle, and you go to page two, this rectangle is
nowhere to be found. Okay? So just keep that in mind. Pages are kind of
different documents within the same project. This is kind of like a file
or you can say a folder, right, and it has
multiple pages within it. So let's go ahead, right
click and delete this page. And then we have layers. Now, with layers, you can just see the layers, the objects, the groups, the frames, all types of elements that
you have on your canvas. If we create another
rectangle here, we can see rectangle
one and two. If we make a rectangle
with a different shape, you can see the shape also
shown here a little bit. It doesn't show
the color, but it shows the general shape of
it just to give you an idea. So this is pretty
much to give you an overview of what's
happening in your file. You can also search
for things within it. So you can search for
different text or you can search for names
of files and so on. You can also replace, you can choose what you're searching for
exactly is an image, a shape, and so on. There's a lot of options and you can also
collapse this menu or this panel here just so you can have more space
to see a project. But I would recommend
that you keep it here. You can minimize it or you can expand it if you have
a bigger screen, for example, and you
can afford that. Just get a general grip
on what's going on. On your design file. You can see the layers all here. That's really useful.
Then here on the bottom, we have a toolbar. You might often maybe
assume or expect the toolbar to be up there or maybe on the left or
something like that. But no, on Figma,
it's here below, and you can't do much
to it, to be honest. You can't move it, you
can't do much to it. A lot of people see
that as limiting, but to be honest, I find
it simpler is better. I don't want to be able to
throw my tools all around, but rather have them in one place and I know they're
always going to be there. We're going to talk about the
tools separately later on. But for now, let's look
on the right hand panel. And here we have design. So under design, you have
design and prototype. These are two different views. As I said before, prototype relates more to animations and how
you show the project. So when you want to
show it to a client, how it would look like,
and then you have design. Design relates I mean, when you don't select anything, you can change the page. So the color of the background, you can make it white or you can make it dark. It's up to you. You can also change
variables styles, but these are things we
haven't talked about yet, and they are a little
more advanced, right? So don't go just there. But when you click
on any object, this rectanel starts to
show you the properties. So from position, you
see the Xs and Ys, you have the
rotation, as well as a couple of quick alignment
buttons and things. You can mirror the object,
flip it, and so on. You also have layout, so this
is relating to the size, the height, you can
change it, the width, you have appearance,
the opacity, rounded corners, you have fill, stroke, effects, and export. In case you want to export
this as an image as a PDF, you can also do that.
A lot of options here. And you might ask me, what is this little button
here or there or whatever? We're going to talk
about them in due time. But yeah, you should get a general understanding
of your file. Where is what and
how do I use them? That's what I'm trying
to give you now. As we mentioned,
the left hand panel is your file and your layers. Here you have your toolbar. Where you can choose
different tools. You can also use shortcut. So here, it says
rectangle R. For example, you can just press R to get it. You can press V to get the
normal move tool, and so on. On the right hand, you have
the design specifications or properties of whatever
object you're selecting. There's a very, very important button which is right here, this is the play button. When you click on this button, it's going to allow
you to see what you're working on from the
perspective of the user. But in order to do that,
you need to have a frame. Let's talk about what frames
are in the next lesson. Oh
4. Setting Up Your First Screen: Frames, frames, and frames. What are frames actually? So frames are your canvas. They are the tool
or the material, let's say, that you
are painting on. It's not the brush, it's
not the color palette, but it is your window
to the user, right? This is what the final
product is and what the users what is going to be delivered in the end.
That is what a frame is. You can't draw on air, but you can draw on a wall. But in that sense, the
wall is your canvas and that's exactly what
frames are for figma. Right here, you select
the frame tool, and what you can do is you
can simply just create any frame of any size and just like that,
you have a frame. This is the screen. This is the screen. It
could be a computer screen, a phone screen, whatever it is. When you hold it, when you
click on it and go to play, you open up a new tab on Figma that allows you to see how
this frame looks like. Frames are unique because you can put things within frames. You can put rectangles, you can color them or copy, paste them, put them
somewhere else, and you can see
how it looks like. This is the screen that you're creating and that you can view. Now, there are a few
things to keep in mind. You can have frames
within frames. Create a frame here, give
it a color, make it. So this is a frame
within a frame. It looks like a
normal rectangle, but it's actually a frame. But the outer frame
is the canvas, and this is becoming
like a container within a canvas within a canvas. We're going to discuss why
you might want to do that and what the difference between a rectangle
is and a frame is. But for now, let's
understand what frames are and how to use them
to create screens. Okay. Now one thing
to understand is you can create frames
in different sizes, and FIGma already
helps you there. So when you click on the frame tool and you go
to the right hand panel, you're going to see
different frames. So there's a frame
of an iPhone, right? IPhone 17, 15, P max, whatever you want, different
sizes, as well as Android. You have tablets, you have
desktops, MacBooks, TVs. So whatever you want to create, you can create a frame of it. So just clicking
on a MacBook Air, we can create it and it
shows you the actual size. This is the dimension
of a MacBook air. When we click on it
and we click Play, we're going to see
what's in that MacBook, how it looks like. That's basically how
you create a screen. You can create a frame
of an iPhone or you can create a frame of a TV
or an Apple Watch even. All of that is possible. One thing that you
can do as an extra. When you create this frame,
deselect everything. Don't choose anything,
click in the wild, just here, and then
go to prototype. Figma allows us to show
a frame of a device. Since we chose MacBook Air, you can choose MacBook air
right here as a device. Sometimes it does it
automatically for you. What's going to do
is it's going to add an image of the MacBook
to show your design as if it's in an actual Mac that's a really neat thing because
it's very immersive and it gives the user experience or the feeling that they're
actually using a MacBook. This is an actual website
being shown on a laptop. Now, compare this with being
shown on nothing, no device. It looks very dry. That's one thing that you can do that I personally recommend. But the whole idea of this lesson is that
frames are your canvas. You can't just be
designing in the wild. You have to have
a frame, a canvas and put your paint on it. Everything that is
outside of this frame, if I come and create
here a rectangle, and we put it here,
it's not going to be shown because it's on top of it, but it's not inside of it, if I put it here, it's
also not visible. It's just there's nothing. But when I drag this
and I put it here, now it is within the frame. It is visible and you
can see that here. You can see the frame can
contain things within it, once you remove
that outside of it, now the rectangle is outside. Even though it's on
top, you can see it here, but it's not visible. This is how you can use
frames as your canvas.
5. Adding Text and Basic Elements: Hi. In this lesson, we're going to be creating or learning how
to create shapes, text boxes, vectors, and more. First things first, let's start by getting to know
this tool bar a little bit. Now, we already have
explored the move tool, and this is the
default tool that you use that you should be using when selecting
things and whatnot. So always keep that handy and then you have
the frame tool. This is a tool that
we've also been familiar with that we've
learned how to use, basically creating
frames, and then we have this rectangular tool. And each of them, they
have their shortcut. So you can click
R to choose this. You can click V to
choose the move one, so you can just switch between
them with these letters. Okay? You just have to memorize
it. Then you have this square or rectangle tool. You can create it just
like that and you can create a rectangle.
It's as simple as that. You can do the same
thing with line tool. Right? And you
have ellipse tool, arrow tool, many
different things. Now, one thing that
you should know that's quite important is holding shift while creating a shape basically allows you
to make it straight. It makes the dimensions equal. So 154 by 154 are
the dimensions. This way, it just stays
the same exact size. The same thing when you
want to create a rectangle. So this way, it becomes a
square rather than a rectangle. So that's very handy. Another thing is when creating
something like a line, holding shift allows
it to be straight. I I remove shift,
look what happens, I can create it in many different degrees
in all types of degrees. But if I hold shift, it becomes
straight right and left, or it can go up and down, or it can be diagonal. So we and down, okay? So that's one thing
to keep in mind, it's very handy because
most of the time, you want to keep things
straight and clean. But if not, it's
totally up to you. So you can go ahead and
try the other tools as well and create
things with them, but they mostly work with
similar principles, okay? And then we have the pen tool. Now, the way that the pen
tool is also quite simple. So you click once, and then
you create a point, okay? So click, you have a point, and then you create
another point. And you hold if you
press and hold, you can basically create curve. You can make it curved. You see? Just like that, I
created this curve. Now, I can create very nice shape or whatnot
with it by playing around. So just to show you what I mean, I'm just trying to create
this three D shape. I'm not sure what
type of shape it is, but it looks like a bathtub. Yeah. Just like that, you can create different shapes, with different lines and so on. Now, you can edit these, you can change them, you
can switch them up. Of course, if you go to design, you can also change the
stroke to increase the lines, and this is something you
can do with all of them. So once you choose a line or
a vector just like this one, you can come here and
you can see the stroke. It's at one now, you
can make the weight. You can make it
have more weight, so it becomes thicker. There are other
settings you can change the color and the same
thing with these shapes, you can also change the fill, choose a different color, give it a different
opacity, and so on. Because as we talked about it, this right hand panel this
helps you choose and change the properties of your shapes or of your other
elements like frames. You can add a stroke to
it, you can make it black, you can make it red, and
you can also add effects, but that's a little
more advanced. But this is essentially how you can create different shapes. With these shapes, you're
trying to create your UI. What we also have is text tool. With the text tool, there are two main
ways to create text, so you can just click anywhere and start typing.
You can say hello. World, and then just type
as long as you want. What's going to
happen is it's going to keep getting as
long as you want. It's not going to go
to a second line, because it has no defined shape. I mean, you can
see this outline, but it keeps expanding. It expands and contracts based on the size based on the
amount of text that you have. There's another way which
is by creating a shape, hold, click hold
and then leave it, then you can say hello world. And then when you type many A's, you're going to see it goes
down to the other line. So there's a break, and that's basically
one difference between these two different
ways of doing it. If you know the shape
that you want to create, so if you say, Hey, I want some textbox
right around here, you can create it
this way, of course, we can change the
settings later, but most importantly,
that you set it up in the beginning in the
way that you want it, and then you can
tweak it later on. But let's write here,
I mean, Hello world. We can go highlight this and then in this little
section here, we can change the typography. We can change the font,
choose something funny, change the size of the font. Is it regular or if there's bold version, we can
also choose that. Let me show you there's these versions that
we can choose. We can change the
letter spacing, for example, we can
make them closer together or further apart. If there's multiple lines, let's make another line. We can also switch up the spacing between
them to line spacing, or we can write Auto and
then it becomes automatic. Then we can put this
back to zero to make a normal we can change
the paragraph alignment as well from aligned
to the middle or it could be to the
right to the left. We can also choose in
terms of the text box, is it more down or is it to the center or so kind of
horizontal and vertical. Both of these things you
can set up and change. I would definitely
recommend you to go ahead and try to explore
these options and try to figure it out on your own to understand how
you can manipulate objects and shapes and text boxes to come up with
something that you want. Okay? Just take a few minutes to try to understand and
get a grasp, okay? So as I mentioned, the nice thing is
that most elements, they have the same settings. So whether it's a
text element or it's a rectangle or a square,
they're mostly the same. Only text objects, they have the section
called typography. But everything else is
the same. You have fill, you have stroke, you have
effect, you have layout. You can increase or
change the size. You can change the positioning
as well and so forth. So now that we
have that, we have understood how we can
create different shapes. We can create lines. We
can create text boxes. But there are a few
things you know, more. One thing very quickly, Lines. Lines are great. Lines are nice. But one thing that
you should know is when you increase the width, you can see that
this line is very square like or rectangular. It has sharp edges as well. We can change that by making the edges round. That's
one thing you can do. Another thing is you can turn
one end to an arrow or to a triangle arrow or to a reverse triangle or circle arrow and so
on and so forth. That's one cool thing
to keep in mind is you can play around with
these settings as well, especially when it
comes to lines. They're very
versatile and so on. Now we've learned how to create objects and how to
change the properties. In the next lesson,
we're going to talk a little more about
how we can have different relations with
these objects and how we can work with groups and frames. I'll see you in the next lesson.
6. Frames vs. Groups vs. Shapes : So groups and frames, what are they and
how can we use them? So, oftentimes, as a designer, you're going to come across
a situation where you're going to want to put a
few elements together. You want them to be held
together, going together. You know, you don't want
them to be separate, but rather forming
a single shape. And just to give you
an example of that, we have this tub here. We can take it back to normal,
and we have these lines. But the issue is these
lines are all separate. So what we normally do in the design world
is we group them together to put within the
same shape, the same group. This way, we know to take them together and to move
them together and so on. Now, the way to do
this is to hold, drag and select all of these. Now you're dragging
your selection and you can see these
selections from here. You can also do it from here, hold, and then go down
and hold Shift and click. It's going to select everything
between this and that. Then you can click Control
G or you can right click, right click and then you
have group selection. And just like that, now
you have group number one. Now, of course, you can create another group on top of
that or on top of that. But I mean, it's not
going to do much, not going to help you much. Now, this is one way to do it. This is a group.
Now, the nice thing about a group is that
it moves together. So if the dimensions, all of the lines, they come
together, they move together. But sometimes that's not great because it can give a
very distorted look. Maybe that's not what you
want. An alternative to this, I just went back, I undid it. Now they're just
separate vectors is to right click and
choose frame selection. Now, the interesting
thing about a frame is that it doesn't
stretch things out. When you move it, it just opens up and it
might move with it, but it's not going
to stretch it out. As you can see, it's
not stretching it out unless you go into
deeper settings, but that's not what
we're doing now. That's one difference
between frames and groups is that they
work differently. The objects within them
move in a different way. One thing with frames is you can have a lot of space
that is not being occupied. But with groups, it only
contains the actual item. If we group this now, I'm going to group it
instead of frame it. You can see there's
no empty space. This is coming right
to the border. So if I stretch it out, it's going to stretch
out the whole thing. But sometimes you want to leave a little bit of empty
space and whatnot. So that's one difference. Now, coming to another question, what is the difference between
a frame and a rectangle. So let me create a
frame here, okay? I can put it here as well. Let me just put it here
and give it another color, give it red, give it a stroke. As you can see, they're
not very different. They do not look
different at all. They look almost identical. That's why we have
to ask ourselves, what is the difference? The difference is that frames can contain things within them. To give you an example,
I can bring this circle, and I can put it within this
frame by dragging it into. Now when we look at the
layers, the ellipse, the circle is within the frame and you can see it gets cut
off when it leaves the frame. If we hold it, drag it and drop it outside, it
leaves the frame. That's one thing
that frames can do. Try to put it in a square in a rectangle, it doesn't work. Doesn't work the same way, and that's one main difference. Whenever creating any shape,
you have to ask yourself, if I'm creating a rectangle, do I want it to just be a rectangle or do I want
to put something in it? Do I want it to
contain other shapes and text boxes and whatnot? In that case, then maybe
you should create a frame. I understand this is a
little hard to grasp, but I think with practice, it's going to get a little
easier to understand. Just to wrap this up, groups
are great when you want to group multiple elements
into a single shape, especially if you want that
to become a shape of its own, that is stretchable,
that is resizable, and frames are good to contain things within them
in opposition or in contrast to rectangles
or other shapes that cannot contain
things within them or have elements under them. That is one main difference. I'll see you in the next lesson.
7. Creating Frames: So we've talked about shapes. We've talked about frames and groups and the
differences between them. But now let's get to it. Let's try to create
a nice little UI using these elements that
we've learned about. So what I'm going to
do is ask myself, I want to create something now, but is it going to
contain other things? What am I going to create?
Well, I want to create a card and I want this card to contain
other things within it. I'm going to use a frame. I'm thinking of
creating a fitness app that shows you a dashboard, shows you other
information as well. Think of it like Apple Fitness, having an app that tells you
how many steps you've had, how many calories you've
burned, and so on. And we're going to try to
design it in a different way, but it's going to be having more or less the same principles and that's completely
okay because the focus here is to learn and we can learn from copying from trying to imitate and get inspiration from
other good products. Now I have the frame tool. I'm going to create a frame here and I'm going to make
it rectangular like that, and I'm going to give
it bit of color, very slight color, okay, great. And then I'm going
to give it 16. This is the radius, the corner radius, okay? So now I give it 16, so it has these nice
little round corners. Then I'm going to
add text here and I'm going to write steps. Okay? Keep it simple.
Nothing too fancy. You can choose a different font. I usually like to use
a medium instead of regular when it comes to weight because it's a little
more readable. Okay? Now, let's make sure
the text is readable. 12 is okay, 14 is better. So yeah, that's one
thing to keep in mind. And then we're going
to go ahead and create some something to show
us what these steps are. I'm going to use rectangles
because as I said, when I ask myself, do I want this to contain other
things within it? No. I'm going to create
this rectangle and I'm going to give
it also 16 radius, that's going to make
it fully round, and then I'm going to
make it blue or bluish. Now it's blue, and then I can copy and paste by
using Control C, Control V, and bring it
here, change the height. I can also just hold out and then drag it,
and then drag it. It's going to copy it. It's
going to make a duplicate. Now, I want to show
the full week. We have one, two, three, four, five, six, seven. Okay? Now you can see the spacing between
them is six, it says. Now what we can do is
we can hold these. Choosing I'm holding them
all by clicking Shift, okay? So click Shift, hold shift, and then click on them each. Then if I do this, they're all going to basically
have more width, which I'm not sure is what I want because now
it's too chunky. But what I can do is I can hold this space and add a bit of
more spacing between them. Now, this looks about
right, I would say, and then I'm going to I'm going to try to make
them vary a little bit. Then I could make
the current one, I don't have a different
color or something like that. To show that this
is being calculated now or it's current, or
something like that. Not sure. This is a very, very simplistic UI
showing the steps, right? But there's something missing. I mean, how many steps did I have for the day?
We can do that. Maybe we can show it here
to the right so we can say, I don't know, 8,600. And we can also
switch up the colors. I mean, I can make this
a little more dark gray and give this number a
little more importance. I can do that by making
it bold as well. Maybe I could make
blue or maybe not. But this is a nice little
UI and just like that, we made a card and
as you can see, it's a frame the frame has a color and it's containing
these other elements. You can see it here. Frame number two, it has all
of these shapes together. It has the text boxes and so on. Just like that, you can create a very simple frame
and with this frame, you can add elements to it. I hope that made sense to you, but go ahead and try it out for yourself and see what
you can come up with.
8. Effects : So I've played around a little bit with this
element that we have here, but there's something missing and I can't really
put my finger on it, but maybe we can see what we can do when it comes to effects. So today, I'm going
to show you a little bit how you can play around with a couple of effects
when it comes to figma. What you're going
to do is you're going to click on the frame or the object that you want
to add the effect to. So here we have a
lot of objects, but we want to apply
it to a general frame. So what I'm going to do is I'm going to go to effects here. I click Plus. What that's going
to do is it's going to add a drop
shadow immediately. Now, drop shadow is
interesting because it already has a couple
of values already. But when you click here, you
can change up these values. You can change how much the shadow is going
in terms of X and Y. Vertically and horizontally,
is it being displaced or a little bit removed or
further down the right, whatever direction
you want it to go down depending on
the light source? And then you can
also add the blur. Now, I really like to
use a lot of blur, maybe 24, maybe 16,
maybe even more. Then you have also spread. Spread just spreads
out the whole shadow. I would not recommend using that to be honest. Let's
do it like this. I'm going to add 16
and I'm going to make the color a little bit
fainter, so maybe 15%. Then I'm going to make the
background fully white. And then here's how
it looks like now. It looks a lot cleaner,
a lot more modern. And the shadow is very low
key, it's very subtle. It's not very visible and that's exactly. We don't want to make. They focus too much on
the color of the card, but rather on the content. Okay? So that's one effect
that you can apply, and you can play around with it till you find the right value. I mean, you can make the Y, you can make it 16 as well. You can make it go down that much or you can make it eight. You can make the blur 36 and then you have a
lot of shadow here, and it feels like the background is gray, but it's not actually. There's just a lot
of shadow here. But that's one thing you can do. There's also other effects. When I add an effect, it's
automatically drop shadow, but there's also inner shadow, and it has the same things, the same specs that
you can change. Now, this one makes
it look as if this card is embedded
within the canvas, within the wall. It
feels like that. That's one thing
you can try out. There's layer blur. This
blurs the whole layer. There's background blur, this blurs the background of
it if there's something, but you need something for
the background for that. There's noise, texture
glass, and so on. Go ahead and try them
out and see what works. But to be honest, I would say that when it comes to Figma, the most used effect is drop shadow because
when it comes to web, shadows are very central to stylized layers and they're
also very easy to implement. This is basically
how you can make your elements look
a little nicer.
9. Layout, Alignment, and Spacing : So now that we've created our design elements and we've started designing this
neat little screen, it's time to get a
little more exact. As designers, you
know, we're artists. It is our job to create
something beautiful, and we're in the midst of
that. We're trying to do that. But it's also our duty to be exact when it comes
to making measurements. We're not supposed to
create things willy nilly. We're not supposed to just
create things and just, uh, guestimate the
distances in the spacing. It's very important for us to actually be exact when
it comes to spacing, when it comes to
aligning things. We can't have things be
a little off even by one little pixel because it can look very bad
for us as designers. It can be very disturbing for the users looking at our design. That's why we have to take
measures to make sure that our designs are properly aligned and they're
not off even by pixel. Now, there's multiple
ways to do this. One way to do this is
through what we call grids. So when you click on the
frame that you have, the whole frame,
you can come here, navigate, and you can navigate
here down to layout guide. And when you click on the plus, it's going to create a grid. It's like that middle
school notebook that you had basically makes it
all into little squares. Now, there are different
things that you can create. You can also create columns
or you can create rows. It really depends on what
you're trying to do. I would personally recommend
that you work with columns because they're usually more standard and easier
to work with. It's going to split up
your screen into columns, but you can set up
the settings for it. So you can set up
a margin and say, I don't want the screen to
be on the edge right here. I want the content to be a little in the middle
in the center. I'm going to give it 24 or
you can say 16 margins. Let's say 16. Then you can decide how many
columns you want to have. Let's go with four. I think four is a good number and then there's
also the gutter. The gutter is the amount of space between them
between these columns. You can make it
very small or very big that depends on the spacing that you want
to have between them. Let's make the gutter
right now just ten. And then we can also
change the color, by the way, if you want. I often find it nicer instead of red because red is so alarming. I make it black and
I make it 10% or 5%, just so that I can see it,
but it's not annoying. Then we can go ahead and
start aligning our elements. The nice thing is, you know that this should not go
anymore to the left. This is perfect from here. On the right, it
needs a little work. We can try to resize
it like this by hand, I'm going to move these
elements a little bit by hand. And then I'm going
to choose all of these and decrease the spacing. Now it looks a lot neater. When we come to the second
one, now it's also off. I'm just going to copy this holding Alt and Shift and I'm going
to align it here. I'm just going to
copy the values from here and the colors as well. That I'm going to
delete it here. That is one way to do it. As you can see now when
we turn off this grid, it's a little it can be
disturbing for the eye. You can see that they are
now more properly aligned. That's one way to do it, and I find this makes
a lot of sense. It does involve a
lot of looking with your eye and guessing
or not really guessing, but just judging with your eye. But that's something
that you're going to do a lot as a designer. Another way to do it is
to do it with a ruler. Now, you probably have
noticed here on top, we have these
numbers, and all you need to do is hold and drag. You're just going to drag
just like that pull, and then you get this ruler. So when you put it here,
you can try to set up, you can align it to the edges and make sure that
things are aligned. Now I'm going to do
it from this side, horizontally because
it makes more sense. This way, we can ensure that these two elements are
on the same level. You can do the same
thing with the text just in case
something goes wrong, and you can just make sure
from all sides, it's all good. And yeah, so that's
one way to do it. You can also do it vertically and so when you're creating
other elements now, you just need to make sure that they're within these bounds. That's another way to do it, but this one is nicer because you have a
little more control. You can control
the little thing, you can say, what about these
columns, the ones inside? What about this one? Is it
properly aligned or not? That's another way to do it,
and there's a third one. A third way. Okay. So
the third way is to kind check within the shapes. So when I choose these, for example, these two shapes, when I hold them,
when I select them by holding shift clicking
on both of them. You can see I instantly
see here a spacing, I can switch up
the spacing here. That's one thing
that you can do to ensure that
everything is proper, we've already done
the same thing to these columns. You can
also do this like that. You can choose them and make sure the spacing
is proper or not. That's one thing
that you can do to better align things to give you another way as
well, another feature. Let's say we copy this paste
it here and put that there. But now you can see the
spacing is a little off. Instead of creating columns
and rows and rulers, what we can do is we
can choose all of them. I'm choosing these
three and then we get this button here.
You see it? Here. Usually, it's in the
lower right corner. When you click it,
Figma is going to make the spacing
equal and from there, you can switch up the spacing
to however much you need. We had ten there, you can also
make ten here if you want. It's totally up
to you. But yeah, that's one thing
that you can do. Another way to align things also directly from the
objects themselves. You click on the object
that you want to align and then you can
choose these positions. You can say I want it centered. I want it to be aligned to the left of
the frame to the right, to the top, to the center, to the bottom, and so on. What's neat is you can also, I mean, let's say
this is a little off. You can also choose
multiple elements and make them align to be
centered together. Horizontally, they're
centered now or you can say, I want them to be
vertically centered. Now they're on top of each
other and so on and so forth. These are really neat things
that come in handy so that you can get your
objects aligned. Because as I mentioned, this is an essential
part of designing. We're in the middle between artists and architects, right? We're not creating these
buildings that are super exact with their numbers
and technical and so on. We are creating something that
should have exact numbers. Not too much. It's
not that serious. We're not building a skyscraper, but we are making a website and it should have some
accuracy to it. But at the same time, we
do have an artistic part. We should be artistic,
we should be creative. We have a little more
freedom than architects. We're not bound by physics, we're bound by other
design guidelines. But again, we should be in
the middle, not too artistic, not too exact, but have a nice
little balance in between. So these are just a few
ways in which you can manipulate your objects
to align them together. So we explored doing
that with guides. We layout guides in columns
with grids and so on. We've explored how to do
that with rulers and yeah, what you could say, these
are ruler lines and whatnot. And you can also do these through these helping
buttons here. They help you align
things together. You just have to figure
out how you want to do it. Or as we mentioned, when you pick multiple things
that are not aligned, you also get a here, if you want to align
multiple objects, you can just choose them to
like them and then you get a nice little button
here that you can click on and then just
like that, it's aligned. Go ahead and test this out and see how accurate you can be. I'll see you in the next lesson.
10. Colors: Hi. In this lesson, we're going to be
talking about colors. Now, when it comes to colors, it gets a little difficult. It's not a very easy
theme or task for most designers because we all have our own approaches
when it comes to colors, about how we pick the colors, as well as how we make sure
that they harmonize together and how we actually make
them used in the design, how they take place, let's say. Because often we have a plan, and then when we come to actually implement the
plan and use the colors, it's not exactly as planned. Let me explain what I mean by just straight
up diving into it. Now when it comes to colors in a design in an app or website
or whatever it may be, you usually have a
number of colors that are staying consistent
throughout the design. Now, I made these squares here just to show
you what I mean. We can pick out, for example, six colors that are the main colors that
we're going to be using. So let's fill out the
colors that we want. Now, first things first,
I like to go ahead and start with black and white
because most designs, at least modern ones, they usually have
a white background unless you're using dark theme, but yeah, usually a
white background, and you have some use of black. What we can do is we can
pick out white or you can have off white depending
on what you're doing. But I'm going to pick out
white just straight up white, and I'm going to give it a border just so
that it's visible. Okay? So this is our white
that we're going to be using, and then we can also have black. Now, we can either have straight black or sometimes you can use a very off black
kind of dark gray. You know, it's not
visible or it's not distinguishable that
it's not fully black. But sometimes it's nice to do
that to soften the contrast because between white and
black, there's huge distance. So picking off
white colors or off black colors helps reduce
this strong contrast. That's what I'm going for this
252525 right around here. Then what I like to
have is also some gray. There's different shades
of gray that I use. There's usually dark gray that is dark enough so
that it's readable. And then, for
example, this gray. I'm going just to
take this here, copy the hex code, and paste it. This is dark enough
so there's readable. But then we can also use a gray right here
like these lines. It doesn't need to be visible. It's this one. So it
doesn't need to be visible. It's not that
visible, but it's not an essential element so
that it has to be visible. Does that make sense? In a
way, this is great to have. If you can see it,
you can see it. If you don't see it, you're not losing any real information. Now, we can reorder
these, to be honest. I'm going to just reorder them just so that it
makes more sense. Let me see. Just
going to put this here and take these
up. There we go. I think this is good
enough. You see from white and then light gray, dark gray, and then
this off black. Then we can add one more
color to be honest. Then we have these colors. Now these are usually primary,
secondary, and tertiary. Usually people start with
these, to be honest. But basically, the
idea is whenever you have an app or a brand identity, you have colors that
repeat themselves, and these colors, some of them are more
repeated than others. For example, I may use red here to have an
exclamation point, and it's like red to show that there's a
risk, there's a problem. But that doesn't
mean I'm going to be using red throughout
the whole screen. Same thing here, I have
blue, I have orange. It doesn't mean I'm
going to be reusing them all the time. But to be honest, it
is good to make sure that these colors that you're
using are being repeated. Let's say this blue and orange, maybe they could be
essential colors that we use within our design. Usually, when it comes
to fitness apps, you don't just have one
color that repeats itself, but usually have does
that make sense? For example, we can
take the blue here. I'm going to click I, I opens up the eyedropper tool, and then we can
take this orange. Now I have this blue and orange. What we could do is we can use the blue for the buttons as well and we can use the
orange as well for buttons. That works as well, and we
can pick out another color. One of the first colors. So it could be a red sort of we could try to
soften it like that. We could pick out
something different. Now, usually yellow is a little bit harder to read or
harder to see in general. I would often avoid it
or I would make it dark, but once you make
it dark, it gets to this dirty ish color. Is this khaki color or
something like that. But it's not very often used, at least not in modern designs. We can have green, but it doesn't exactly
fit these colors. This is a place where you have to judge for yourself
as a designer. There are theories
on how to do this, but you can also
do it on your own. We can pick out a dark blue
to fit these works out. We could get a purple
or pinkish color. Yeah. These are our options
that we're stuck with. I feel like I'm leaning towards
the red because then we have the selection of very basic colors that
still work together. I mean, it's a fitness app, so it doesn't need to
be something crazy. Now, one color
that is often used this neon green is often used
actually for fitness apps. This is something that
we can also go for. But I wouldn't pick this
as my primary color, and I would try to
adjust it a little bit. We like this. I'm not sure. You got to make sure
it looks good on a white background as well.
That's quite essential. Then I would move up the blue here and I would make
this one our primary, this one our secondary, and this one would be our tertiary. But I'm still not fully
convinced with it, to be honest. I feel like I want
to check out tone. Now it's more towards yellow. Okay. I think this is
good enough, okay? So now we have this palette. It doesn't have to be
the best palette ever, but it's a palette that
we can try to stick to. Now we have a general
color palette, and we're going to try to
integrate it into our design. So throughout the next lessons, as we are creating different components,
different elements, I'm going to try to include them more and you're going
to see how it looks like we may go back
and review them and reorder or change the colors that we have just to
make sure all is good. One thing that you
can do as well, and this is optional is you can pick out a
shade for each color. So for example, here
you have the blue. We can pick out a darker blue just to make sure that we
can use that as an effect, as a hover effect or
something like that. I mean, we already have
the light blue, right? So we could also
have the slight blue as different tones
of what we have. When you do something like that, you kind of become
more professional. You have a better system because then you have a backup
for everything. So in case you need
a darker version, you already have that setup. And same thing for orange
have a darker version. You can even make it
a little more red. I find that always nicer to change the hue a
little bit as well. We can make this looks dirty, but once you take it
more towards orange, yellow, it's better maybe
more towards green. You see? Now we have lighter versions of the colors as well as darker versions
just in case we need. Right? But these are the
main colors and these are the sub colors just backup in case we need them
for certain effects. Okay? So that is how you can
pick out your color palette. As I mentioned, there are
different ways to do it though, to make sure that your
colors are working together, but this goes more into theory. And to be honest, as a designer, with time
and with experience, you should be able to have
an eye for these colors, to understand when they work together and when they don't. As a note, just because we
picked out these colors, doesn't mean we have to put
them on top of each other or right next to each other. It doesn't
have to be that way. It could be different elements and different spots and so on. Just keep that in mind. Now we have the colors done
and we have to pick out the typography as in the font and that we're going
to do in the next lesson.
11. Typography: So now it's time to pick out typography to pick out
proper fonts for our design. Now, as always, I'm going to do something more simplistic. This could be a much
more complex problem, but we're going to try
to take it easy now. So first things first, let's
just type out something here and write headline
or something like that. And then we're going to copy
this and write subtitle. You can have one font
for all of your app, or you could have
two different fonts, one for the headlines and
one for the subtitles. So for the headlines,
usually they're bigger, so it could be, 24,
it could be bold, and then you could have this as something smaller, maybe 16, just not bold, medium
or regular, okay? So right now, we're using Enter, and it's totally cool to stay
with Inter as a typography. But maybe you'd want to
explore different options. Now, of course, there are some basic options like Montserrat. This is my go to, to be
honest. I really like it. There's also a railway. Now, you can see each one has a different vibe or
atmosphere to it. I'm just going to go
back a little just so you can notice some of them, this one is differently tilted. The E, you can find the D has a little
flare with the railway. A letters actually little
flair to the right. Some of them look like they're smaller, some
of them are thicker. You can see here, the thickness
here changes. It varies. From here to here is different.
Here it gets thicker. The line gets thicker,
while Montserrat maintains almost unequal width throughout the whole thing. Small little differences can
affect it, can affect it. You can have a lot
of different fonts. I there's impact. You could
have impact as a font. You could just check
out different fonts. Some of them are
harder, bigger and each font has a connotation,
let's say, right? So this font is
something you wouldn't expect to see in an
app, probably, right? Same thing with this one.
I mean, maybe actually, it could be depends
what type of app, maybe a note taking app, maybe a little app, but not a sports app. So here, you're doing fitness, you're not going
to see this font. I mean, for one reason, this is a font for something else, maybe for dictation,
for book writing, for something like that, but
not exactly for fitness. Plus, it's a little
harder to read. So these are two things you
have to pay attention to. Does it fit the theme, right? Is the style properly harmonizing with the
idea of the app. The second thing,
is it readable? Is it something
that you can read and properly understand? This one is cool, but for example, it's
not very practical. If I'm going to write
this eight letter word, is it going to take
up the whole space? That doesn't make sense. So try to find something
that is in the middle. It's not too playful, but it's also not too fancy. Not too cursive, not too handwritten, something
in the middle. As I said, right now, we're going through the
fonts one by one. But usually each designer
has tested and tried fonts, tried and tested fonts
that they tried and succeeded with and they fit
most themes pretty well. Okay? So we can, for example, try to take impact
and maybe we could write everything in
capital capital letters. Maybe let's see how
that looks like. So we can try it out and write
here, for example, stats. Let's see how that looks
like just to get a feeling. Right now it's at 24 and it
looks a little too huge. What if we switch up the color? It still looks too big. It doesn't fit the theme
that we have here. I personally wouldn't take it. Now let's see what something like railway would
look like. Let's see. I'm here. Okay. Not
exactly exactly my style. I mean, because it's
a capital letter. So what if we write your stats? This looks more like
it, to be honest. This looks a little nicer. Let's compare it to Montserrat. I feel like here, railway
has a lot more character. What about let's take
there's Geist, for example. In this case, I feel like Geist is a little
more standardized, it's not too flared
up, not too fancy. So it fits, but let's see, is it that different from Inter? Yeah, I mean, to be honest, it's not that different.
We can keep looking. We can choose something
a little nicer. Okay, so this font is really interesting because I
feel like these types of serif fonts are getting more popular and they don't
exactly fit the vibe, but they introduce a
break in the style, but one that's interesting
that I feel like works, I just works really well. So I would want to go with this even though I
feel like I mean, it's not fitting 100%,
but let's try it out. Why not? We can
change it, switch it out later? No problem. Let's just take it
and write it here. DM serif display, DM display, and let's just write it
with normal letters. Then the other font, we could take railway
maybe, to be honest, test it out, or we
could just take Geist or Inter to be honest, Inter is very standard. So we can just take it for
now and not overthink it. So these are all Inter,
and then we have DM Serif. And just like that, we have
your stats and you can see, I mean, it's pretty interesting. We can try to make these
also serf display, and they look nice,
but not that nice, to be honest, so we
can revert that back. So only for the big headlines, for the headers like this one, we can use this, but
for the smaller text, then we can leave it with Inter. Just like that, we
picked out a font. As you can see, it's
not that complex. You don't have to decide 1
million different cases. However, however, there
is one more step to this, which is defining
the different levels or hierarchy of fonts. You don't have to complicate
that too much for yourself, but it's just about
staying consistent. For example, here
we have your stats. When you want to
add another section here and you want to
say your activities, your activities, or you can
just call it activities. Just keep it simple.
Then don't make this 36, because then how does
that make sense? Why is this different size? Because the size means that this has a different level
of importance, right? So yeah, when you do that and when you have
a font before this, saying, for example,
I'm not sure. You can say your stats or your health today, and
then you can call this. Then this one is
including everything. It's containing all of
these different sections. So yeah, this one, you
could make it 32 or 36. That makes more sense. It's
about having a hierarchy. I don't want to overdo this because this is a
beginner course. But it's just the idea
is, different levels. So when this is a big headline, it's containing everything else, you can make this
32 and then this is a smaller area just stats, then you can make this 24 and then another area of
equal importance, then this would also be 24
and so on and so forth. Don't complicate
it for yourself, but this is generally
how you should be working with typography. Thank you for listening, and I'll see you in
the next lesson.
12. Introduction to Auto Layout : So since the last lesson, I've done a few tweaks
here and there. I've added this card
to show a summary. This is quite something standard that most fitness apps do. And yeah, I just messed
around a little bit, made the typography hierarchy. But in this lesson,
I'd like to talk about a very important
feature of Figma, a feature that I
very dearly love, which is called Auto layouts. Now, it is a little bit difficult to understand how it works and to get used to it, but it is super helpful. Now, auto layout is a
feature from Figma that makes it easier to organize
things horizontally, vertically within a layout. Instead of having to figure
out to align everything yourself in terms of texts
like these texts and stuff, autolayout makes it easier and helps you do that
in a different way. Let me explain. So basically, an Auto Layout is
something that you can apply to a frame
and only a frame. So the way to do this is
to select multiple things. So what I'm going to do
is I'm going to apply an Auto Layout to, for example, right here, I have these cards and I want to show them to be in
the same section. So first thing, I'm going to add these together
to an Auto Layout. Now, to do this, I
can hold Shift A, which does it automatically, or I'm going to undo that. What you're going to want to
do is you're going to right click and click on
frame selection. Now this is a frame. And then you're going to come
and click this button, which says toggle Auto Layout. And when you do
that, it's going to automatically detect what
type of layout it is. It's already understood
that it's horizontal. So you have these two together
and it has here an auto. So this is Auto spacing. That means when I
stretch out the frame, it's going to auto space
it until it reaches it. Okay? This is a nice
little feature. If you want, you could
give it a number here, which I believe is
ten, for example. Now this is not Auto, so this is just ten, right? So this is something
you can do to you and based on your design. But now we have this within a layout or an auto layout
to be more specific. It is not that easy
to understand. Now, here you have the spacing, the horizontal gap
between objects, so you can set it up and
here you have the alignment. Do you want it to be
aligned to the left, to the center, wherever? Let's say we make it
aligned to the right. That means if the auto
layout gets expanded, it stays on the right,
or we say to the left. Okay, so you understand. Now, the same thing
when we do it for up and down, you know? So you're basically saying,
once this is stretched, where should the
items basically go. Okay? And I'm going to explain later on
why that's useful. I mean, in this case,
maybe it's not clear why that's useful because
it's already I mean, we already have everything
aligned very nicely. So we're going to just
make the spacing ten, and then now I'm going to choose this and make it an
Auto Layout with this. But this is going to be vertical because it's up and down. So as we said, R click, frame selection, and
then add an Auto Layout. Here see the spacing is 15. We can already say,
Hey, why is it 15? Let's make it ten to make
all the spacing equal. That's already making
our lives easier. I mean, we didn't pay attention to that
spacing beforehand. Now we pay attention to it. Then we can go ahead and add this also to
the Auto Layout. The way we can do
this is we can just drag it here and you
can see here a spot. And just like that
became part of it. Now we have this
whole Auto Layout. We can mess around with
the spacing later on. It makes it really
easier for us to do that if we want to. But one other thing we
can do with it is we can mess around also
with the alignments. For example, I put it center. So now we can see
how it looks like. I mean, when we align it to the center and we can
see your stats today, it looks pretty
nice in the center, but let's take it back. So Auto Layout allows you to do things like that to make it in a way where you don't you can't misplace
something by mistake. You see, it's bound
to the same place. You can switch the order of things, you can
move them around. But the nice thing
is that there's no little alignment issues, because oftentimes what I
noticed especially working with teammates is that
sometimes by accident, you'd move the text a
little bit like that. Then later on when you'd come, you'd see maybe your colleague
did that by mistake, and then you have to go
and align it and say, Hey, where was this actually?
That is a pain. That's why Auto Layout
makes that easier because it determines everything
with exact numbers. So the next step here would be to make the whole
thing an auto layout. That's what I love
doing. Now we're going to go here and we're going
to toggle Auto Layout. What that's going to do
is it's going to make the whole thing an Auto Layout. All the items in this
frame an Auto Layout. And this is inception in a way because you can see this whole thing
is an Auto Layout. It has an Auto Layout within it. This Auto Layout also has
an Auto Layout within it. This is the bigger one and then this one and then this one. This is how FINMA works. And when you're working
really efficiently, you're working
with a lot of auto layout within each other. But wait a minute, there's something interesting
I want to show you. Now we've made this whole
frame an Auto Layout, right? There are some more interesting
settings here which are basically the padding. That's
what we call it, right? Here you can see the padding
from the left, from up, top padding, right padding,
and bottom padding. It's telling you basically this distance right here,
this is the padding. That's what's cool about it
is that keeps everything away from the sides
by 24 or by 16 here. We can always change
that. We can say 24. Let's make tight or
margin or whatnot. That's something you
can always change. You have padding here 60, we could make it
100. Make it 60. Now, this padding in the bottom, we don't actually
need it because we already have it aligned
to the top, right? So this whole thing is
being aligned to the top. We can align it to
the bottom like that or to the middle to the center or as we had it
before, align top left. That's the best way to do it. I mean, when you're doing an app like this, or it's up to you. It's completely up
to you, but for our purposes, this
is the way to go, and you see this
padding works out well, 16 from the right, 16 from
the left and 60 from above. Let's see how that looks like. Perfect. So make sure
that nothing goes and overlaps behind the camera because normally
apps don't do that. But there is one issue
which is the spacing. So I guess Figma went ahead
and it did 21 on its own, thinking, you know, because
it tries to estimate the space before you
made it an Auto Layout. But we're going to go
ahead and make it, for example, I don't know. 16. Now, one important
thing is to make sure that the spacing within an
area like this one, it's ten. That means the spacing
between other elements between other areas
should be more than ten. The reason for that
is to understand that this is a completely
different area from this, which is a completely
different area from this. Even if it's a small difference, for the eye, it explains
the whole idea. Now we have Auto Layout
within auto layouts. Now we've seen how auto layouts work in terms
of the whole canvas. What about creating one element as an Auto Layout?
Let's try it out. I want to make a card,
not for activities, but after that, let's say, let's make another title here
and let's say read more. Or might be interesting for
you or something like that. Now I click F and
then I'm going to create something directly
here within this spot. I'm going to give it
16 radius carnoadius and then I'm going to color
it with this color here, it's basically should be an element that tells
people read more, here's an article, whatever. I'm going to write
down an article. I'm going to copy this text and this text box and
paste it here inside, and I'm going to write best running tips for 2026
or something like that. And then I'm going to
hold Alt, drag it down. I basically duplicated
it and I'm going to make this inter and 16, and then I'm going
to write Read Me. Okay. You can make it even
14 or something like that. We have this kind of card, and what I want to do is also go ahead and pick out a
royalty free image. So I'm just searching
for something here, maybe something with a human
on it that might be good. Let's choose a nice
picture of someone. I mean, maybe this picture
or this one. Why not? You can download this or
sometimes what I like to do is I would we
click and copy image. This is how sometimes you
can bring images to Figma, but the issue is sometimes
they're very bad quality. I'm going to delete
this and I'm just going to do a free download
of the image. Now that I have downloaded,
I'm just going to drag it and drop it into Figma. This is basically
how I always do it. So now we have a huge image
here with good quality. Then what you're going to
want to do is you're going to want to bring this
image here into it. But before we do that,
before we enter this, let's make this an Auto Layout. Right now, it's a frame, and we're just going to
click on Auto Layout. And FIMAs smart because it goes ahead and
organizes things, but it also gets rid of
space that's not used. So it figured out that these
are the objects we want, and it added no
spacing between them, but we can put eight
maybe or actually, we don't need that much
spacing between them. So we're going to go
ahead and stretch it out how we want. This is the size
that I want, and I'm going to make it align
to the bottom left. Then I want to put
this image here. Now, one way you
could do it is you can just drag it
and drop it here, and what's going to
happen is it's going to be part of the auto layout. But one cool thing about Figma when it comes to
importing images and videos is images are actually
fills, just like a color. So you can copy this fill and you can just
paste it here, right? So what happens is
you have the image as a fill on top of this. But when you click on it, you can also click
on here and go crop, it's filling the image now, but the image is not showing
up well. I can't see it. I will crop it and then I will move the image
just like that, and I'm going to resize it or let me
just keep it like that. Okay. So now we have the
image in the background, not perfectly placed,
but it's good. But we want it to be readable. I mean, right now, we can't read anything, can't read much. One thing to do about this, we can bring this color here, and then we can click
on this little droplet, which is called blend
mode on this icon, and then you can choose
these modes that allow you to change how
the colors mix together. I'm going to try to
choose something kind of neat and artistic
at the same time. But that doesn't ruin his face. I think multiply is really nice, but it's still causing
issues for the readability. What I'm going to do is I'm
just going to take this guy, resize him, put him
here on the right. Just like that, he's
out of the way. This is looking like a nice
little artistic guard, but I want to go a step further. I don't like how
this here is here. I'm going to add another one and I'm going to
make it a gradient. This is normal fills and
this is gradient fill. I'm going to rotate the gradient here, bring these points here. Then what I'm going
to do is I'm going to color these with
the same color here. I believe it's this
one, copy pasted. We're going to make this
point transparent right here and then this point at 100% or actually the opposite. I'm just going to
reverse it here. Then I'm going to give
this 100% opacity. And just like that, now
we have a fate effect, which is really
neat, to be honest. It looks okay. It looks good. This way, we have our little card and it's
telling people, best running tips, read more. If we ever decide to put the read more on
top, we can do that. It's an Auto Layout. Just
make sure that the values that you have in terms of
padding are not random. Right now, they're
little random. You know, from right
and left, it's 14, from up and down, it's
20 y? I'm not sure. We can make this 16 and 16 or something like
that or 24, 24. It's totally up to you, but
I'm just going to make it 16, 16, and there we go. That's how it looks
like. Very simplistic. I would say, though, this area is a little
empty right here. So maybe we could
add something to it, and I'm not sure
what it would be, but I'm just going to copy
this here, it could be, I don't know Number one, then I'm just going
to resize it. Then it's just article countdown
or something like that. Just as an example, I'm not really totally in
love with this idea, but we can try it out, no. Maybe it's too big.
Yeah, it's like Netflix, how it chose number one, movie number one,
movie number two. I'm not sure if hashtag
is doing it justice. Maybe it could be like this. A lot of design is
about trying things out and seeing what works
and what doesn't. So yeah, take that from me. And yeah, I'm going to call this might be interesting for
you or something like that. For now, maybe I'll
change it later. Another thing, just make
sure the hierarchy here is making sense if activities
might be interesting. This is the same size
which makes no sense. So maybe you could make
it a little smaller. And just like that, it
looks a little nicer. This is basically how you can
use auto layouts to better organize and align your design elements
within the design. Thank you for listening, and I'll see you in
the next lesson.
13. Creating Simple Components: Hi there for another lesson
of the Figma beginner course. In this lesson, we're going to talk about what
components are, how we can use them in a very simple way to
support our designs. Let's first of all, define or try to understand
what a component is. A component is basically a reusable reoccurring
element in your design. And I know I might have
said this before that I described things
in that way before. But a component is basically an element, a design element. It could be a
button, it could be a card like the cards
that we made here, and it's something that is
going to be used and reused. So it's not a one time thing. And this thing that
is being used and reused has a specific structure. For example, if
we take this card as an example, you
have a number, and then you have a title, and then you have a in action, read more, and then
you have a picture. When we have such
a structure and we have it recurring
in the same way, but just with a different
picture, different title, different text, then that becomes something that we
can use as a component. What's really nice about
components when it comes to Figma is
that components, they all go back
to the original. They're still somehow connected. Let me explain that by doing. Let's go ahead and first of all, create a a component or
let's create a button, something that we can
use as a component, as an example for a component and then see how
we make use of it. I'm going to do that by
doing an Auto Layout. So in case you haven't taken
that lesson, then go back, make sure you've got that right, you've understood how
that works because this is going to be more and more essential throughout
the lessons. Okay? What I'm thinking of adding here is something under
activities because I want to make this whole thing become complete
this whole screen. We have our stats,
we have summary, your steps, and then
you have your distance, and I'm thinking we need
to put for the users, they should be able to lock their times or their
exercises very easily. That's something that
I personally have a struggle with some apps, because some apps, they want you to
actually go and click, I'm going to go on a
run now, click Start. If they want me to do that,
then they should make it very clear on
the first screen. That, you know, there's
a button that tells me, Hey, you want to take
a run? Click here. Hey, you want to go on a walk? I also don't want to
go through and filter all the little different
exercises, if that makes sense. So it's really important
for us to show the users an option to do
that on the first screen. So what I'm thinking about is maybe keeping it minimalistic. Maybe we can use a pictogram or what we might call an icon. You know, more commonly
known as an icon. And it's basically just like
a drawing or something, just like these ones that I used here that shows you
what is being done. So if someone is running, then, you know, you show
this running icon. And if someone is I don't know, using a timer, you'd
use this, right? But we're going to
focus on different types of exercise, okay? So let's get started doing that. So I'm going to add
a text element, so you can click here
or click T and then go ahead and write Run, right? So I'm going to copy
this by holding Alt. I already have a font
here called Font Awesome. So in case you don't know it, I mean, it's not very known. It is an a font that basically
shows you different icons. It's a really cool concept. So you download it as a font and I'm on the free
version right now, and then you would go ahead to a website where they
have all the fonts, and you just need to copy and paste the fonts or you
can write them down. Sometimes you can just write
something like I don't know, clock and then it would show up. You could write bicycle
and it would show up. That's something that
we can do. I mean, here, it could be running. For example, it came
as a pictogram, or you could simply
go to the website, just go on awesome
font and then you'd find all the icons
that they have. But being familiar
with this font, I just type in whatever
word comes to mind, and I usually have a
couple of icons memorized. Anyway, enough showing off. So we have here inter, so I'm just going to
set up this font. I'm going to make it medium, and this should be let's say 14. Now we have this and that and we're going
to choose both of them and then just
click Shift an A, either that or you could
take it the longer way and you could go ahead
and click on Add Auto Layout. Choose them both,
right click and click Add Auto Layout
and just like that, it makes a frame and
makes it an Auto Layout. I can see the spacing is eight, I'm going to make it four,
bring them closer together. And now we're going to
go through the process of creating a button. So it is probably
most likely a button. The way to do this is we
need to have a background. I mean, buttons usually have
a specific look, right? They look similar to cards,
but they're much smaller. So how do we do that exactly? Well, the way to do it,
at least in this case, is to go ahead and add a fill. But we have an issue because now the fill is white,
the text is white. I'm going to choose the text and the icon and I'm going to
make it black for now. But now it's too
close to the edges. You see the text here, there's not much spacing, and
that's why we need padding. So I'm going to experiment
with the padding and add four. Now it looks pretty good, but let me add some
rounded corners. I go to appearance
and I write 16 here. Let me see how much was
the radius here, 16. Yeah, that's about right.
So now we have it at 16, and it looks like a nice button, but I'd like a little
bit more padding. Usually to the right and left, we have more padding
with buttons. I mean, it's a design
style design decision, but you could do that just to make it breathe a little bit, especially with text, right? And what we could also
do we could even give it more space from up.
It's totally up to us. We can experiment
with it. Let's go ahead and decide
on a general look. I'm just going to
give this some color. So I'm going to make
it blue, for example. Now we're going to name
it Exercise button. This is specifically for
exercise, not for anything else. Now I'm going to turn
this into a component. Now, the way to do this
is you can either right click and click on
Create components, or you could come over here and you have this button
here, create components. You click on it, and
then it becomes purple. Purple highlights things
that are components. But there's a very
important thing to know. There is a parent component and there's a child component. If you're at all
familiar with coding, then this is probably a
familiar concept for you. Basically, this is
a parent component because it is the original. It's the original piece
that we just created. We gave birth to, when you copy this and you
go somewhere else, and you paste it Control V.
This is an identical version. But if you noticed this
has the title over it, this doesn't, but that's
not the only difference. I mean, they look completely
identical otherwise. But the thing is this here, as you can see, there's
four little squares here. This is the original,
the parent component. While this is an instance. I think that's the actual term. It's an instance or you could
call it a child component. And there's an
interesting relation here because just
like having parents, the children take on the
qualities of the parents. If a parent has blue eyes, the child is going
to have blue eyes. If the parent has
neon green eyes, then the child is
also going to have neon green eyes,
let's undo that. If we switch up things around, they're both going
to switch it up. When we go to the child
and let's say the child goes and wears lenses
or I don't know, goes and does something, gets something changed
in their appearance, or let's say something
inheritable, and let's say they change
the color of their eyes, as we said, they
put on some lenses. Well, when that happens,
nothing parents. It's the same exact logic. That's why I love this label or this name that it's
the parent component and child component
because it perfectly portrays the relation
between these elements. So children or instances
are allowed to some extent to break apart from the qualities
of their parents. You can come to
this instance and you can change the word here and say fun instead of run
you could change the color. You can change the icon as well. You could write
bicycle. That's why awesome fanta is pretty cool because you can
just type things, you can change the whole
color of this thing. You can change the padding. There's many things
that you can change, to a point where it looks like
this is not even related. You can even delete the icon
or the text or anything. Let's undo all of that. But once you do something like
that, let's redo it. Then you come and you say, Hey, I want the icon to be a orange. Then that's not going to
translate to your design. The reason is because, I
mean, you deleted the icon. It's not there anymore. There is a rule to it. There
are some rules. The qualities that you
change in the instances, no longer they become
disconnected from the parents. Now that we change the
padding, for example, and we say, Hey, let's
change the padding. You know, it's not
going to change, right? It's not going to change. But some things, for example, the radius, the corner
radius, I just changed it. It's still connected.
And unfortunately, there's no one way to know this. Figma doesn't tell you what's still connected to the
parent and what's not, which can be confusing
a lot of the time. But you have to think back to it or think
logically of it. For example, here,
the word was changed, the color was changed,
the padding was changed. So they're obviously no
longer connected. Okay? So keep that in mind, but that's just a
very general overview of how these things work. I can delete this, no issue, but once I delete the parent
component, that is an issue. So try not to do that, okay? I mean, it wouldn't be a
big issue, but it's right. Copy this, paste it
anywhere you want, and then you can
copy and paste this. You can copy and paste it. And that's what
we're going to do. We're going to create
different versions of it, o we're going to say go on a run and bike or let's say
cycle more official term, and then we can write cycle
or maybe cycling man um, bike man, person
cycling. Biking? I'm not sure. That's
why it gets difficult. Oh, see, there you
go. Person biking. So it gets a little difficult
sometimes to get these. And let's do another one. I mean, swimming, right? Swimming person swimming. Swimming. Yeah, there we go. And we're going to swim. So we're trying to keep
this as short as possible. We don't want to
make it swimming. Cycling, going on a marathon. That would be a
little too much for the small screen
small phone screens. So what can we do? I mean, so you can run, you can walk as well,
I guess, go on a walk. So walking. So no person
this time, walking. And then we could put some
other all right we could just put one more just so
that we can fill it up. Copying this and let's say
football maybe, hopefully. Okay. Soccer Soccer ball. Yeah. All right. I'm just going to
call this football. I'm sorry, if there's
any Americans watching, it's football. Anyhow. Now what we can do, I'm just going to
add these all of them into an Auto Layout, okay? Just shift A and then I'm going to here and I'm going
to put it under activities. Now I have this and I'm noticing something that the
background is already white, even though it feels gray,
but it's actually white. We have to remember
to add the shadow. We can just take it from the effects here,
we'll paste it here. Now we have a little bit of
shadow, but it's too strong, so I'm going to
pull it back just a little just going to pull the
values a little bit back. Or alternatively,
what we could do is we could just add a stroke. As you can see, what's
really cool is that I'm just editing this one instance and it's changing all of
these things together. That's super amazing. That's what I love
about these components. Now let's check out
how it looks like. Yeah, it doesn't look too bad. I would personally add a bit
more, let's say, padding. And the reason is I would
want to allow people to click on them because we have to account
for the fact that people have big fingers. I mean, all of us do,
to the phone screen. But there are also people among us who also
have fat fingers, and that's actually
something we have to account for as designers. I think there was
something called a fat finger rule or
something like that, which is the fact that
you have to make things, objects big enough so that when people are
clicking on them, they miss click and
click somewhere else. We can do the same thing
here by adding a little more spacing just to make sure that
people can differentiate. Just like that, we have
different types of activities. I would go ahead and maybe
even change the colors, to be honest, but not in
a very intentional way, but rather a little randomly, just to make them
look different. In a way. Or we could just
keep them the same color. I mean, it's easier to do that, especially since we picked out
this color as our primary. But yeah, that's one version of how we could do the buttons. We could also do them, as we
mentioned just with shadow. But I would say, if you want
to do something like that, then make sure the shadow
isn't all crazy like that. I mean, it's a little
crazy for these cards. But here, with the cards, they're not exactly clickable, or you can click on them, but it's a different story. But here, the whole function of these is that they
should be clickable. So we want to make them as
visible as possible, okay? So just keep that in mind. So yeah, this is basically
how you can use components, create different types of design elements
throughout your design, and make sure they
stay consistent. And that's actually, you
know, the whole purpose in case I haven't talked
about that directly. The whole idea of components
is we don't want to, you know, have different
designs all over. We don't want to have ten
different types of buttons. Instead, we want to have a
consistent design system. A design system is a you know, a collection of
design elements or components that will
be used and reused, and they should account
for everything. If you say there's
going to be an icon, let's put an option
to have an icon. If there's going to be shadow, if there's going to be outline, you know, stroke, whatever, then we should account
for that. So go ahead. Test it out, try it out, try to make your own components and see what you can do with it. It's really fun and it
makes things a lot easier. And it's never too late if
you feel like, Okay, hey, this is a cool
object that I have, you can turn that into a
component pretty easily, and then you can
use it and reuse it and make a different version. And what's even cooler about it is that later
on when you say, Hey, I don't like how
this design looks, you can go ahead and
just switch it out once. You don't have to change it in every single screen
because to be honest, one thing that I can
tell you as a designer, seasoned designer who's been
working in the field for quite a while is that
oftentimes you get to a point where you have so many different elements
and sometimes the same elements all
over your screens. So the thought of going to each and every one of
them and changing them is just a
complete nightmare. It's impossible, oftentimes, we end up
with so many changes, so many different elements that are slightly
different from each other, and the consequence of
not starting out clean. That's why I would advise you
go ahead, start out clean, learn how to use components
and use them so that you don't regret it later and have to do a lot of manual labor. Thank you very much
for listening, and today we just
learned components. I'll see you the next lesson.
14. Refining the UI Design : Welcome back to another lesson. In this lesson, we're going to do a little bit of reflection. We're going to take a look at
all the work we've done so far and we're going to critique it a little bit
and see what's missing. You know, the whole
idea, and this is a good exercise for
you as a designer, you should learn to
look back on your work, you know, in a more
objective way. It's impossible to be
completely objective, but try to look at it
from another perspective, especially the perspective
of a potential user, okay? And critique it and try to come up with feedback
for your own, something that you can use to improve your product
or your design. That's what we're
going to exercise today and then we're going to go and make it
better. All right. So now, don't worry if you feel like the ideas are
not coming to mind. Don't worry if you feel
like this makes no sense. My teacher is my instructor
is absolutely amazing. He's catching on to
everything that's missing. How am I ever going to be like him? Don't worry about that. Obviously, I have a couple
of years in the field, so it comes to me a little
bit more naturally, but this is something that
you can just practice. With time critiquing
more and more, you can get to a point where you can spot these things
immediately right away. There are other things where you can't say
there's right and wrong. It's simply a matter of
opinion, subjective opinion. Or maybe we need to test it. We need to do a lot of tests
until we figure out what's the right way and we don't
have time or money for that. Right now I'm looking
at it as a user and I'm checking this dashboard and I might don't like.
Looks pretty nice. There are some things
where you say, Instead of blue,
I'd like purple. Instead of orange,
I'd like blue. But we didn't have
much to go with. So that's why we came
up with these colors. Yeah, right now, we're thinking though more from the
perspective of usability. So how is the user viewing this? What is missing for the user? What could be potentially
optically annoying, disturbing for the user, as in what looks good, not so great for the
eyes, and so on. So first thing that I
would personally say is, I'm a big fan of this type of speaking to the
user and saying, Hey, Ahmed, and just speaking to them directly
calling them by their name. It differs from app to app. A lot of people don't use it. It's not super common. But when someone does that, I do expect to have an
area where I can go to my own personal data and
see hi Ahmed, who is Ahmed? Where can I change my name?
What if it's the wrong name? Or I want to see my profile
settings and so on. Oftentimes, it's
usually a circle right around here or here
on left or right, where you can just
access your own data, open your profile and so on. That's one thing I would add
that's already missing me. A second thing, and by the way, feel free to stop and
just think for yourself. I wanted to give
you time for that, but you can just pause
and do that on your own. The second thing is the spacing is a little bit off I feel. The spacing between
your stats today and the cards under it is
a specific spacing. Then when you look between activities, the word activities, the title and the
actual activities, the spacing is not there yet. I mean, what could be potentially confusing
here is the fact that you look at activities and
you don't know if this belongs to the area
before. Or after it. Because it has equal spacing, and that's when you think, that's why spacing is important because it gives
us subconsciously, it tells us the relation
between different elements, and that's exactly what's not
being told to us right now. That's why I'm personally
noticing it more. That's why it's good
to look back on your designs. You might
have missed something. So what I would do is I would
either decrease the spacing here and basically I would
add these two elements, the text and all
of these buttons. I would add them
into an Auto Layout and I would decrease
the spacing. Same thing might be interesting
for you and this card, or I would do an Auto Layout. I would put them
together, but I would increase the spacing
between everything else. I'm doing an Auto
Layout either way. I'm grouping these together or let's not say grouping
because groups are different. I'm putting them
in an Auto Layout and I'm increasing the spacing between or decreasing the
space between these two. It's going to make more
sense later. All right. That looks pretty cool. Now
we have this information. Now, of course, we can fill the first screen with
much more information, but I want to keep
it simple for you. That's building upon the point of having a profile
picture here to click on. That serves for navigation
and we need that. What is this page that I'm on? Is it home? Is it
dashboard? Is it summary? What is? Are there other
screens that I can see? That is actually the topic of the next lesson is
adding a second screen, and that's exactly what
we're going to do. The question here is, how
can I view my profile? Is there a social
part to this app? Is there a tips part, an educational part of this app, or maybe there's a friends part where you can compete
with your friends. All of these are ideas
that other apps do. When you're not doing that and you're not even
accounting for it, you're already missing out. Okay? So keep up and
keep that in mind. That's one thing we're
going to do as well is we're going to add a Navbar. That's what we call
a navigation bar where we have multiple buttons, maybe three, four, five, up to you and you say,
here, this is home, this is summary,
this is friends, however you want to call it, that's something
we're going to do. Other than that,
I think I'm okay. I do think the spacing here
between High Ahmed and your stats today might be a little too
much. I don't know. I feel like it, but let's see how we can
figure that one out. Let's get to it. Now
first things first, I want to get done with
the spacing already. I'm already putting these in an Auto Layout and putting
these in an Auto Layout. I see the spacing here is 16, and that's the spacing
for the whole frame. I'm going to see how much spacing we have
here. That's ten. I'm going to make it
eight, and I'm going to make this also eight
and this also eight. Let's see how it looks like now. Now you can see here the
spacing is now double. It's not that noticeable. That's what matters. Your
brain already figured it out. Your brain said,
Okay, activities that is connected to
these activities and nothing else might
be interesting for you is connected to this
card, nothing else. Your brain figured that out, so you don't need to do
anything for it, okay? So now we're done
with that and now let's go ahead and take
care of the profile thing. I think the issue
that I have with this is that maybe it's having this text is a little too high. It
has too much height. So now I'm lowering it to
see if it's going to get, you know, any closer,
not that much. All good. I mean,
sometimes with spacing, one thing you have
to keep in mind is that you have to be more
methodical about it. So as you can see, we put up specific numbers
here and whatnot. Then here it looks off, and maybe a graphic
designer would have said, yeah, just put
this, closer to it. As a screen design,
you can't do that. Okay? You can't just
go ahead and say, you know, just for
it to look nicer. No, you have to keep, you
know, stay consistent. If you said 16, 16, this should also be 16, okay? So you know, get your
hands off of that. Okay? Now, let's go ahead and
create our profile button. Now, I'm going to create
it by just clicking O, which gets you the
oval, I'm guessing. Then holding Shift, you
just make it bigger, and then I'm just
comparing right now it looks around
like a good size. And then what we're going to do is we're going to get
an image of someone. All right. So I
just got an image. I'm not sure if this
is AI actually, but I just got an
image of a person. So I'm going to copy the fill, paste it here, and that is
our profile picture, okay? So I'm going to add
it to the layout, and I'm going to choose
both of these elements, the picture and the text, hold Shift and A, make them an Auto
Layout, basically, and then I'm going to make them horizontal and I'm going to make them centered or actually
maybe more lower. And I'm going to make
them aligned to the left. Let's see how it looks like when the picture
is on the left, it feels off, so I'm going
to put it on the right. But I'm going to make
the spacing auto. As I explained before, this pushes both elements
to the other sides. It basically makes the
spacing as much as possible. That's what it does. Now we have this profile picture here and I have a feeling
like it's not enough. I'm going to give it a shadow, just going to copy
the shadow from here and paste it here. Make it a little less blurry. And bring it closer. It's not that visible,
to be honest. I'm just going to
make it more blurry. This looks about right. Or what you could do is, you
could make it a lot smaller. You could also just remove
the blur completely. It's totally up to you and we could also make it a lot bigger. That's also an option,
something we can do. But I'm just going to make sure this is they are
centered together. All right. So now we have that. I'm still not super
happy with the shadow, but that is all right. So what we could do
is we could try to add a stroke to make
it look better, differentiated from
the background. I think that solves our
issue a little bit. Now, we're moving on
and we're going to create our navigation element. Now, I'm thinking of
doing something a little similar to what we have going
on here with these buttons, nothing too different,
adding an icon, adding some text, and
keeping it simple. And most navigation bars
are just like that. Okay? So what I'm going to do is
I'm going to create a frame, so press F and bring
this frame and I'm going to try to
make it fit here, okay? Yeah, something around that. Then I'm going to make it round. And I want to add
different buttons to it, but creating buttons can
be a little bit difficult. So let me copy this. I just copied it, and I'm
going to create a button. Now, let me just borrow
these elements here. I'm copying them and
pasting them here and let me see
what my vision is. I'm going to put them like that. And then I'm going
to say this is home and this is your home, and I'm going to make
this a little bit bigger. So I'm going to
make this an Auto Layout now to bring
it all together. And this does not look
too bad, to be honest. I'm not sure if it's too
big, but let's test it out. I'm going to add it here and I'm going to make
this an Auto Layout. I'm going to give it a
different color just to see. Okay. Resize this. I'm going to resize it and
give it proper padding. Here's just random, so
I'm just going to make it eight by 12 or something like
that. Now I'll take it out. I'll make this a component
and I'll say Navbar button. I'll copy this now,
paste it here, and copy it and paste it
again cup and paste it again. I'll make it horizontal, and make them have
eight spacing. With the padding, I'll
make it also eight. And I'll make it eight from
above two or maybe let's see, maybe we'll make it four, four. I'll remove the color
from here for now. You see now they're very nicely spaced out because we worked
with consistent spacing. We worked with consistent
padding all around, and now it looks
very well balanced. I'm going to make this
into a components. I'm going to make it a nab bar. I'll take this nab bar
and I'll add it here. And I'll try to get it centered. Now, the way to
do this, there is one way that I haven't
taught you just yet, but now I'm teaching it to you. When you have an Auto Layout, everything is organized
in a specific way, here we have an Auto Layout. Everything is aligned
to the top left. Things have 16
spacing and so on. But there is a way for you to tell Figma to ignore
the auto layout. And to do whatever you want. This way is to choose
the element that you want to take out
of this whole thing, and then you're going to go to this button here and it
says, ignore Auto Layout. Then it's just going to
allow you to move it however you want in whatever direction
and whatever place, whatever spacing,
doesn't matter. So that's what we're doing. Now we have these elements, and to be honest, it's not fitting
the whole screen. If something is up, maybe we could add another one. Maybe that could
solve our issue or we could add a lot more
spacing between them. But that creates an issue a little bit with the
spacing, as you can see. The padding here is four and then the spacing is 16. Yeah. Maybe we can just work with this type of small Navbar. Okay? Just for now, we can work with this and we can change it later. I'm going to copy and paste this to make it seem as if
there's more content. I'm just going to add
different colors. Make it seem as if we have more content
in the background. Now, here's one
thing I want to do, which is quite common, just to show you as an example, is to make this more
in the style of Apple. We're not sticking exactly to their design style and whatnot, but we're trying to imitate
the style a little bit, that's what a lot of apps do. When they're running on IOS on the Apple system,
they imitate it. And what I want to imitate is the glass effect because
we do have this Figma. It's not exactly the same,
but it's pretty cool. The way to do this is
you're going to go ahead and give your object, your Navbar, you're going
to give it the color white. And then you're going to go
ahead and go to effects. And instead of drop shadow, we can also do drop shadow, to be honest. Let's
do that. Why not? Instead of just that,
we're going to also do glass and doing that on its own, it's going to give you that really nice glassy effect,
which looks really neat. There are more settings to
it that are very complex, but it's really nice
to try out anyway. But in order to do that, let's also make the colors
more appropriate. Let's make them white for now and see how that looks like. And of course, I would always recommend that when
you do such a thing is that you go and
you compare it to the actual thing that
you're trying to copy. In this case, we're
trying to copy apple, so let's go and see
how they do it, and now, they don't do white. I mean, they do black.
The color black. So for buttons like
that, they would do color black or maybe
not exactly black, but we can take our off black here and
use it. It's adaptive. If the background is colored, they make it white, if it's
not, they make it black. In this case, we have a
very dark background, so we're just going to
go and make it white. See what I did
there? I went ahead, I checked, I saw what they've
been doing and I said, Okay, let me a Okay, so now let's go ahead and
create the different sections. So let's say we have home, which is not that descriptive
nowadays, to be honest. Like, you have to specify,
is this your feed? Is this your summary?
What is this exactly? So maybe let's just
write here summary. But if we do write
that, then we need to have a nice little icon. And I just wrote an pie chart, which worked pretty well. For now. I'm just going to
call this summary. All right. And then I'm going to come here. So instead of home, maybe we have friends or something
like that or social. I'm going to write users and I'm just going
to write here. Friends. Profile, we
have the profile up. We could do an educational part. So maybe dumbbell. Yeah. And we could write
here training. Now we messed it up a
little bit because now the names or the buttons all have different sizes from
what we normally have. To be honest, I'm
also noticing that the text is a little
too big to be honest. We can go ahead and change
that and make it 12 maybe, what we're going
to want to do is also give them all one size. I'm going to pick up the size of the bigger one, which is 79, so I'm just going to give
them all 80, a width of 80. Just like that, they're
a little more equal right now. They look nicer. But this blur effect is
a little too strong, so we can try to adjust it. We can do more frosting, which ruins this whole
effect, to be honest. But as you can see,
without frosting, it's really transparent. We do a little bit
more frosting. I'm just going to leave that. Frosting allows it to have
not so see through effect, and then you can see the
colors a little bit better. Yeah, this is really nice. If we want to go the full
way of imitating apple Oops, then we have to make
this really round and we have to make the whole
thing a little smaller. Should maybe make the
icons a little smaller. And here we have
padding of eight, so we can make it four maybe.
See how that looks like. I would say this is a
little more like it. It's a little harder to see
with the whole glass effect. I mean, when we do
this, it's a lot nicer. But yeah, I mean, right now, it looks a little more
legible to a lot better, but maybe I'll make the the icon a little bit bigger again, and then it looks much nicer. So what we could
do is we could add also a nice little
search button. So what I'm going to do is I'm
going to take an instance, a child of this component, and I'm going to delete these. Now there's only one instead
of it being multiple, so we don't need
to write the word. We'll just have the icon. And then I'm going to
make this 60 by 60, I guess, or 54 by 54. I'll take this here
and I'll also make it ignore the Auto Layout
and align it here. Let's see if the
height here is 54, it should also be 54 here. Let's check it again.
There's a little issue here with the
rendering, I believe. All right, so here's
how it looks like now. So we have these icons. We have icon for search as well. So we have our Navbar
looking pretty good, to be honest, I have to say, it's not exactly
perfect for Apple, but it's serving us well for the design
that we have here. Okay? The next step is going to be to design a second screen, which is going to be
a challenging task. Don't get too cocky, but we're going to go
through this together. So also don't be afraid. We're going to try to
create another screen. Using the same principles, using the same ideas
that we learned, we're going to create
a second screen. Thank you very
much for listening and I'll see you in
the next lesson.
15. Adding a Second Screen: Hi there. Today, we're going to be creating a second
screen for our design. So in this lesson,
we're going to try to understand how
we can expand from designs that we've already
started that we've already made in a way that
expands on it, that builds upon it and maybe enters new
elements and so on. But at the same time, other than introducing
these new things, we want to maintain consistency. And this is why this lesson
something to consider. This is why we made sure
to include this lesson. Because reading one screen is one thing, and
it's a great skill, but then going ahead and continuing that screen
into another one, making sure that they
look the same as if they're in the same app,
that is a challenge. So today, we're going to be
taking on this challenge. For the purpose of this
lesson, I'm going to, I've chosen to create
the training page. So we're going to
make a second screen, and it's going to be
the training screen. And in this screen, we're going to create a page or a section of the app that is specialized to
help people train. That includes giving
tutorial videos, maybe articles, possibly, but keeping it very light, maybe some helpful tools for training. I'm
not really sure. But let's keep it
simple because, again, part of actually thinking
of what the app should have and the features and the functions, that's
something else. That's something that you should definitely invest time into. But for today's purposes, what we're doing is
we're practicing how to bring these
ideas to life. So not how to come
up with the ideas, but how to implement them
into an actual design. So let's get started.
Now, normally, you could go ahead and choose the frame tool and get
a whole new frame. But I like to work on
what we've already had. So I'm going to name this here like I'm not sure fitness app, and we haven't decided on a name or branding or anything,
and that's okay for now. I'm just going to
copy and paste it. FINMA is just going to make a second screen here for
me and I can call it, I mean, instead of
just fitness app, I could actually call
it summary page. This whole thing
is a fitness app, but this and this
is training page. Okay, or you could call it screen, you could
call it whatever you want. Then I'm going to go ahead and remove the
sections that for me, are not interesting or not
really usable or reusable. So let's see. I, I want to keep this kind
of I'll put it up here. We'll keep this first line or maybe actually
we can delete it. So this is focused on fitness
or let's bring it back and let's call this fitness
or something like that. And then we'll remove this. We'll align it to the left. Here we have activities, your stats we're going
to take the stats away. Maybe we want some
of the articles to take shape like
this or I'm not sure, but let's keep that in mind. Now we have an issue is the fact that these buttons
are not adapting, they're not color adaptive. We need to figure out a way to not look too bad
when that happens. Maybe you should just
make it grayish. I think this is much better. The fill here is white, but here it's black
interestingly enough. I mean, we just changed it. We can make this also black. Yeah, I think that is
good enough just to make sure that it is to
an extent readable. One thing we want to make
sure is we want to make sure it's also clear before
we get started, which one we are choosing, which page is being
chosen right now. In order to do that, what we
can do is we can come here. We have this element that
we've already created, right? So now, this is an extra feature
or an extra thing that you need to learn. So when you make a component, a component can have
multiple variations of it or what we call variance. So you say, this is the Navbar button, this
is how it looks like. But we need to also make sure
that there's a version of it that is somewhat highlighted, When you're on the
page of summary, it should tell you that you're
on the page of summary. Right now, it doesn't
tell us. So we're going to go ahead and
click on this button here, which has add variant, and that's going to add
another variant here. So what we're going to do is
we're going to add a fill. We're going to make this
fill maybe 5%, maybe 10%. That's what we're going to do. And then when we come here, we're going to
choose this summary. And we're going to
choose variant two. We can give it a name as well. Now let's see how that looks. It looks a little off in
terms of the padding, and maybe we should adjust our padding to
make sure it works out. So what we could do here is instead of having
the padding B eight, we can have it B four, and
then it would be consistent. And yeah, now we
have it figured out. Now we just need to make sure that this button
is also resized, make it 55 by 55 and
we'll bring it here. Now I'll delete these and
I'll just add them back. Let's see how they look like. There we go. Now this is highlighted and we can mess
around with the highlight. I mean, should it be lighter
or should it be darker? Again, just to give you an
idea, we are, as I said, not taking into account the actual design colors
and whatnot of Apple. We're copying it with
the glass effect, but everything else, we're
just doing it very quickly. Yeah, no need to focus
on that too much. So what we could do
is we could also make it in a way where when
it's highlighted, it would also have
a certain color. So here, for example,
it could be this color. Or this color that we had, but this is as you can see, not mixing very well. I would choose this color
as it's very bright. So what we're going
to do is we're going to come here
and we're going to make this default and
this page is training. So we're going to choose the
second variant for training. Okay? And it looks like that. Now, as I mentioned, we don't have adaptive elements. When you're coding,
you could say, when the background is light, then this should have
a lot more opacity, 50% or something like that. That would ensure essentially
that it would ensure that there wouldn't be any issues
in terms of of visibility. But now because we
can't really code that, we can't really do that logic, you end up sometimes with elements that are not
very readable. Okay? So you can either go
ahead and do that manually and say,
well, in this case, there isn't the
background is too light, whatever, or you could leave it to the developer
and they can decide that. Okay? But that's a
story for another day. Let's now get back
to the design. Now we have it much clearer that this is the summary and
this is the training page. Perfect. So now we
have to ask ourselves, what does one expect
normally on a training page? So me personally, I would
expect to an extent that there buttons that help me choose something
very quickly, right? I love these little buttons or chips or whatever
you call them because they're very
easy access and they help you access the content
that you need. Okay? But we might have an issue
here because in this section, it was clear that you were
starting an activity, and maybe we could even make
it clear with the title, start activity or
something like that. But here, it is sounding
more like a filter. So maybe we should
be a little bit careful with how we
word these things. I mean, are you
starting an activity? Or are you filtering, you know, the lessons or the
videos that you want to see? Maybe we could do this
in a different way. So let's create a
different variant here. And so we have this component. We just made another
variant of it. But instead of it having
shadows and whatnot, we're going to remove the shadow and we're going to
remove the fill, and we're going to
keep the stroke, okay? We had a stroke design, so
we're going to keep that. And let's see how it looks like. And in order to do that, we just have to select every single chip that we have and then go to variant two. So now you can see
the difference, the main difference
between them is that these were
filled with shadows. Now they're more
like filter chips. They're used mainly
for filtering. And we can try to do other things to make
sure it's, I'm not sure. Understandable that these
are just for filtering. Maybe we could change the
colors of the icon as well. To not make it seem that interactive. But
that's just an idea. Okay? That's in my opinion, something that we can do to
try to achieve that effect. Now that we have that done
so we have activities, we could actually just
remove that and it's self explanatory that you can
filter according to these. Maybe here we can make it
extra clear start activity. Okay. So start activity. You can run cycle,
swim, whatever. And here you have
the same activities, but they're just separated. But I would say, though, it makes no sense that
you're trying to watch a video about running. I
don't think that's a thing. So what would make this extra clear is to actually find
the proper categories. So I would say the
proper categories would be weight training, right? Like weights. And then here
we could write dumbbell. We could write yoga as one. So let's see if they have yoga. We're just searching
for meditating. Make sure to filter for free. So you can have a person
praying but it doesn't really fit hands praying,
something like that. Maybe um, relax or
relaxation, spa. I'm not sure if that
really symbolizes it, but let's say hands praying. But as I said, this
is the free version. So right now we don't
have the best icons, but if you want to
actually develop an app or design it or if you
work in a company, I would recommend that
you get the full package, the subscription, so you can get all the icons and they
have a lot of great ones. Okay? So what else can you do? You have weight? Have
yoga? Let's see. I mean, I'm looking on my phone. Let me check my fitness app
and see what they have there. Or maybe let's call this
meditation instead of yoga. And I'm not sure what is there. Let's say cardio, and then
let's have someone running. And let's find one more thing. Yeah, let's just say yoga, but then we have to
find something for it. Yoga, mat, mattress,
pillow, stretch. I mean, is there really
nothing symbolizing yoga? I mean, they have
person meditating, for example. That could be good. So these are all the types of exercise types
that they have. Let's pick something different. Let's just say let's
just say running. Okay, so here we have it. We didn't change that much, but we have weights and
meditation in the beginning. And so we're going to put the might be interesting still down, you know, at the
end of the design. I like having such elements because they're kind
of nice highlights, but they're also extra features or extra content, let's say. When the user doesn't
find what they want, there's always, you know, that might be
interesting for you, might interest you or it could be just for
you, to be honest. Like, that's also
a nice way to say it is to give someone, like, an interesting
topic and say, Hey, this could be a thing for you, something
that you could do. So yeah, let's keep that. But as I said, it's
extra content. I mean, ideally, it should be filtered according
to the person, according to their interests,
and according to the page. Here it's a fitness page. I mean, the whole app
is a fitness app. I just realized it's
not a fitness page. It's a training page. Here we could say training. Now we have these types
of trainings for you. Now let's create an element
or component that has video. Clicking F and making
a nice little box. Let's create something to watch. But the thing is this format
that you see here is very much a regular format
for computers. This is the format for
computers. It's landscape. But nowadays a lot of apps, a lot of things are
becoming vertical. They're becoming a portrait, and this is because of phone. That's one thing that
you could do with your designs is to make
sure that they're vertical instead of horizontal because that really is more
optimized for phones. So what we could do is we
could give this I mean, how much corner
radius do we have? 16? So we could give this 16. And I'm going to take
this image for now, the same image we had
just as an example. I'll click on it and I'll choose instead of
crop, I'll say fill. It's going to figure out the dimensions for me
and everything. Okay, so now we have
this here, right? Now, the challenge is going to be let's make it a
little bit bigger. The challenge is going to
be is writing text, right? So when you have
something horizontal, writing text on it
is going to be hard. Let's see this is Inter Inter and we're
going to make it 16. Anything below 16 is usually
harder to read, okay? So these titles should
be very much, short. So I'll make this black, even though we can't really
see much of it right now. So we have two options,
so we can either write on the actual image or
we can write below it. For readability purposes,
it's always better to write below it or besides because you don't know what type of image is going to come. So make sure that it's it's properly done so that you
account for all possibilities. You know, This way,
I know that there's going to be black
text and under it, there's going to be
white, so it works out. So I'm going to make
this a component, and I'm going to
say video, okay? So now I'll copy this, and
this is what I like to do. I like to go ahead and paste it already
and paste it again. And then choose them and
make them Auto Layout by holding shift in A and then
I'll make them horizontal, and then I'll copy
paste, copy paste. Or we don't need I
mean, this is enough. So now we can see how it looks like and we can
judge for ourselves. Hey, maybe this is
taking too much of the screen, let's change it. Let's change it up a little bit, and let's see what we can do. Maybe we can decrease the
spacing between them, or maybe that's a bad idea. Only time will
tell. So now let's try to figure out a
nice little title, something that is minimal. Again, I'm looking on
an app just to see how Apple has done
it, for example, um, and I'm not doing this
for any specific reason just because my phone
is an ample phone, so it's just easier to
access that from there. I see that they have strength with Kim, strength with Jen. Like, these are the workouts
that they have, right? Like, they say HIIT with
Jamie Ray with Brian. So it's really cool
because when you think of it from the perspective
of user experience, I guess they're trying to
connect you with the person. So it's a human connection. The only difference between
this or that lesson is that this is with Brian and that one is with Bakari, for example. So that's something
really cool, but it also makes it easier for
them because you know, are they going to write HII
T one and two, and three? That also makes no sense. But let's try to
test that out and see how that would
look on our page. So if I say HIIT
with Brian, right? Too long. The text is
too big to be honest. So let's make it 12. And let's check
how it looks like. So I'm going to choose
it, press play. Okay, there we go. To be honest, the text is not too small, and it's pretty good.
It's pretty cool. And yeah, as you can see, we're making use of
this space very well, and we can even add another one. This way, you can add
a nice little teaser. You can see, hey, there's
something else for you there. I'm just going to bring
this element down. This right here. Then I'd
like to take this text, copy it, paste it. I'm moving with the
touchpad up and down. To make it go through
different things. So now we're making it here, we're putting it here, and we
have to call this workout. And I'll add them both
into an Auto Layout. So the distance here is eight, so I'll make it
eight as well here. So again, just the
same principle, right? And this is where consistency is quite important is
to understand, hey, the spacing between
this and that and whatever should be
equal to an extent, not completely equal, but
it should be consistent. So here eight, eight, eight, but between all of these
different sections at 16. So make sure that you're still following these guidelines
that you set up earlier. Okay? So let's keep going.
Now we have this setup. Let's keep the title right
now empty or default, so we're just going
to write video name. Then we can fill
these information in. So we can call this
Yoga with Matt. Funny because you have yoga mat, and then we can say
HIT with Brian. So we could go this way or we could go a different
way, to be honest, because now I'm thinking the
way that Apple did is cool, but hey, we can do
something cooler. Now let me brainstorm
what to do. One thing that we can do. I'm going to copy
this and paste it. So now we have an extra line. So we're editing directly onto everything onto all
of these elements. Now I'm going to hold Shift
and A just choosing this. I made this into an Auto Layout, including only the text. Now I'm going to add
four and four padding. I'm going to add a fill. I'm going to make the
fill a little bit gray, or maybe you can give it
color a little bit blue. Then I'm going to give
it 24 rounded corners. Then I'm going to write
in here to write tag. This is a tag of what we're
going to want to say. Let me add a little bit more padding from
the left and right. I want to make sure
that it's also just fitting in the text itself. I don't want it to be
taking up the whole space. Let's see here it was medium, this should be medium. Okay. And this should be semi bold, I guess. Or we can I don't know. I mean, this is bold, so
we can stick to that. We can keep things bold, but also having a lot of bold
text is a little bit bold. Let's keep it all medium, okay? And then let's have an example. Here, instead of
saying yoga with MP, we could say beginner, right? So levels, adding levels maybe or adding goal,
what is the goal of this? And we could say here pro. Say here mid I don't as in medium or middle or something like that
or I'm not sure. I mean, mid can also have a
bad meaning nowadays as bad. But let's say medium. Medium difficulty,
beginner difficulty pro difficulty or Max or
whatever you want to call it, it's really not that
crazy important. So what we can do, we could have taken this tag and made it its own component. It's something that
we can already do. I'm going to take this
out, make it a components, call it tag, and I'm going to create three
variants of it. One is going to be beginning. One is going to be mega, one is going to be hard or pro. I mean, instead of saying hard, we're going to say you're
pro, this is pro level. Then we can mess around with the pros red medium is yellow, beginner is green, maybe. It's really up to us. I'm
just going to add this as a default being beginner and then whenever you
want to switch it up, you can choose medium, pro, and so on. Again, you can go back
to the colors and say, Hey, I didn't really like this. Let's keep it bluish
or maybe the red sometimes can be seen as
a negative connotation. So when you make it blue, it becomes more positive. But also maybe we can make all of these colors a little more having a little more saturation just so that they look clear. So now let's check.
Okay, looks a lot nicer, but now I'm thinking
we could make it regular just so that it
doesn't stand out too much. And in terms of spacing, maybe you can make an
Auto Layout with the tag, like the title in the
tag and make that four I feel like they
could be closer together. Now we have yoga
with Matt beginner. Alternatively, what we
could do is we could brand each yoga session into
a different thing. So for example,
peaceful yoga, right? And then you can say HIIT, you can say, um, quick HIIT. You're kind of giving a little
branding, this is yoga, but the goal of this yoga session is to be
super peaceful or relaxing. I mean, yoga is supposed
to be that anyway, but you could say intensive
yoga for the pros, right? So here we have P. What type of exercise could be
hardcore running? Um, Okay, or marathon
marathon marathon run, right? And so you're adding a
little bit more into it, you're adding some branding, and you're making people more interested because I
find what Apple did is very friendly but not
crazy, interesting. Like, here I would be
like marathon run. Whoa. Yeah, I watched
the Marathon Run video. I saw the challenge they did, and I followed through. Maybe it's like a
video that you put on you put on your
phone and then you go on a run and you're
listening to them. It's like having someone like a friend running with you
or something like that. I don't know, spitballing
different ideas. But remember, when
you're creating such a thing, creating tags, for example, you are creating guidelines for whoever is
going to add the content. You are most probably
not going to be adding the content
yourself, right? So you have to
keep that in mind. When you're making
such a design, you're laying out the foundation for someone else to come
in and fill the content. If you didn't have
the beginner tag or the difficulty
tag included at all, it would have probably
not been done. Whoever filled it
out would have said, this is not something that's necessary and they
wouldn't have done it. But that would have been
negative for the user. Okay. So another thing that
just crossed my mind is time. You know, how much
time do I have? If I want to go on a marathon
I'm none? Is this 2 hours? 5 hours, 1 hour? I don't know. Like, what type of video
am I going to watch now? That's really important to add. So I would say, like, copy
paste here and add duration. So you could say you
could either say, like, this is 20 minutes
or something like that, or you could, you know, give in the duration
more exactly and say, you know, this is 1020, right? Something like that. Thing in that way. But let's try to see how we can format that in the best way. Let's pick out a color
here. Maybe this one. I don't want to
edit here anything, so I don't mess up with the components so I'll edit
everything directly here. Okay. So now we have the time, but I'm thinking maybe it's just easier if we write 10 minutes
or something like that. Because it's harder for
people to say 1057. Oh, that's technically 11. No 10 minutes, 11. So you're having them
calculate things. No, just say 10
minutes, you know? And even better if
it's 11 minutes, don't say 11 minutes,
say 10 minutes. Just round it up so that it looks like a
nice little number. Okay? Again, as I said, here, you're adding more value. There's a lot of value here. For whoever's going
to fill it out, now they find a place
to add the title. They have a place to add the
time and the difficulty. What else could someone need? I mean, I'm not really sure. Now let's go ahead and let's add one for this last thing here. We could just say
intensive HIIT. HIT and make it a pro badge. I mean, it's called a badge or a chip or whatever
you want to call it. Then let's try to
find some pictures. I usually go to Pexels or there's another
website called Free PIC. We could just type in
Yoga, for example. I'm just going to take the
easiest pictures I can find. I mean, this doesn't look
like the lesson very much. Now, as you can see, you can add that directly
to the instance. I've showed this before, but
you just copy it as a fill. Instead of copying it here,
don't make that mistake. If you copy this here, it
doesn't always work out, copy the fill and
then paste it here. Then you can delete the
other fills before it. Now the same thing with HIIT, I'm not sure what it
is, to be honest. I think it's intensive high intensity workout
or something like that. But let's take this guy here. Another thing that's important
when you're doing this, as you can see, we're
doing things very quickly, but it would also be
great if you can set up a specific style for whoever's
going to fill the content. You know, choosing
images that are bright, for example, choosing
images that are, I'm not sure images that
have good lighting, good quality, and this
could really go a long way. So I'm going to replace this image here and
I'm going to put the intensive one here because her workout looks
a little easier, even though they're
doing the same thing. But he has his shirt
off and he's sweating. I feel like he's really going through
it and it's also dark, so I want to keep it
out of the UI here. The marathon run actually fits, but let me do a better one. So right click Copy Image. Way, the image doesn't come
with the highest quality, but for me, that's
okay. There we go. Now we have these images. It's filled in, not great. As I said, you should
try to set an example. But here we're trying to
do this very quickly, but ideally you should set
an example for what type of pictures should be added here and which ones
should not be. The last thing I
want to talk about is maybe adding a play button. I usually like to
do this on my own. I just hold shift and I make sure they
have the same angle. And then I mess around
with it a little bit, stretch it out, and
give it a fill. Now we can copy
this and come here. This is the benefit of adding
this image not as an image, but as a frame
because then I can add things to it
like a play button. Now, adding a huge play button takes a lot of the space there. I would recommend resizing maybe making it a little
bit round cornered. Nowadays, this is
more the style. You can add it in
a corner maybe, give it some shadow
a little bit, just so that it's visible. You could make it
transparent as well, slightly not too much. You could put it in the middle. It's really up to you, but you should see kind of what works best because different
platforms do it differently. And this really shows people
that this is not an image, but this is rather a video. So we could put it in the
middle, to be honest, but try not to take too
much of this space. Okay, so what could we also
do here in this section? One thing that I'm thinking of doing is maybe we could add articles or
something like that, tips, I'm not sure. Maybe it could be
about nutrition. I mean, here it's training, but we're going to
talk about nutrition. Is this nutritional
app? I don't know. But let's add the title. Knowledge for you
or articles for you or we could just say
for your information. The important thing is to
keep the tone interesting. I mean, sometimes, you know,
here it's conversational. Your stats today start
activity for you. Here it's workouts,
it's kind of a little bit more formal and then
here for your information. It's not that formal, but it's also a little
bit, conversational. But it's all good.
Just make sure that the tone is not
all over the place. So now we're going to
make a different element because we want
to make sure it's understood that this is an
article not just a video. I'm just going to
create it and not make it horizontal,
sorry, not vertical, but rather horizontal because that's more understood
as not video. This is a real, this is a Tik
Tok format, and this isn't. Now I'm trying to
I bring it here to see the size just to make
sure the size is good. Then what I could do is I can
copy these elements here. And I'm going to just
bring them here. Put these in an Auto Layout and then put this in an Auto Layout, and then we could do it this way and I'm going to make this component and going
to call it article. Same thing, copy it. Bring it here, paste,
paste it again, make them an Auto Layout, make it horizontal,
and let's add it. Now, let me just put
these menus and stuff, put them on the top so
they don't annoy us. We're going to give this
a different color so it's clear and I'm going
to put this down. Now we can work on this,
make this an Auto Layout, give it eight spacing. Now it says video name, but it should say article name. We're going to change that
article name, duration. I realized here the durations
we didn't vary them, so Do it like this and
then for your information. Here we have multiple articles. As you can see, we're keeping it simple with the elements. You don't have to go all out, but it really depends on
the design and the style. We used a lot of shadows here. We could try to integrate them. We could try to integrate
them to our design. So let me add them here to
these it adds some depth, adds a nice look to
it, to be honest. But I'm not fully
fully convinced, but I think it's okay
because this way we can add some of the elements that we already had, so why not? Here we have multiple articles, so we can write down
just some examples. But before we do that, just make sure the
spacing is similar. Here it's eight. We could
also make it eight here, and then we can just
write down protein diets. I don't like meal
prepping one on one. Make sure the text is
already stretched out. So meal prepping one oh one, and we could say 5 minutes read. I ate this information
that a lot of people give 5 minutes read. It's not going to take
too much of your time, so don't worry about it, okay? So that's really cool. Here we have meal prepping. Okay, so maybe we can just
say apps or workouts. Okay. Workouts for abs. Five workouts or abs,
and then we can say, this is a 10 minutes
read or 3 minutes. I don't know. Then here in the end,
we can say cardio or saying cardio tips from
pros. I don't know. I mean, people can't
read it anyway, and then we'll say this
is a 10 minutes read, and then we'll go ahead
and pick out the pictures. So we can just pick out
a picture of someone running so I can just
take this picture. Now, because this is vertical, you've got to make sure it's going to be cut a little bit. You got to make sure
that the focus is in the middle so that when it gets cut or resize that
it would look good. Here we have cardio tips. I mean, it's not visible anyway, so it doesn't matter that much. Workout for abs, say abs. Ab workout or let's see
someone training their abs. Okay. There we go. And then we have meal prepping. Mo prep. This looks really good. Looks delicious, too. Okay.
So you're going to take this, put it here, and voila. This looks really good. So
now we have a filled up page. Last thing we could do
is maybe we can replace, like, the image here because we've already
used it many times. So let's add a
different article. Let's just write work
out so copy this, paste it, and you
can put it here. We can go and crop it
just like we did before, and I'm just going to resize
it while holding Shift, put this guy here
just so that he's visible. Delete the image. And now I'm just going to make
sure he's down under here. As I said, there's fills. You can have multiple fills, so you're going to
make sure they're ordered in the right way so that you can get this linear gradient in the right way
that you want it. And what we can do here is we can change this
whole color anyway. Blue and just paste
the hex code here. But I don't like this. I don't like how it looks
like right now. We can make it hard
light, but maybe 50%. Then we can make all
of this text white. Look how well it turned out now, we switched a few things and
now it looks a lot better. Then instead of, I don't know, maybe we could put numbers. But let's put the
number here too. I'm going to say best
way or losing weight through lifting through weights. That sounds good.
Then we're going to put it down like that, now we have a second screen
filled with information, filled with content with
all types of possibilities. It's a completely
different thing. Here, what we have
is a dashboard. It gives you some information. It suggests some
content for you. It's great. But here we
have a lot more included. We you know, tags
where you can filter. You can pick out
certain workouts. You can have for
your information. You have also content for you. You know, there's a lot
of things that we can improve to this just
letting you know. Like, for example,
with all workouts, we can have a button that says all workouts or more workouts. Same thing with for information. We could have that.
We could also have a search function
right at the top, actually, we can add
a search function. Let's do it. Why not? I
mean, it's very easy. We'll just add a
frame like that. We'll give it a
color, give it 16, um, corner radius, add it here. We can make it more than 16, we can make it 36, and
then it's fully round. Then we can add some text here and say search for workouts, articles, videos, I don't know. Make this enter and make
it a little lighter. And just like that, we have
a search function here. And yeah, it's as easy as that. It doesn't have to be
super duper complicated. But here we have a
really nice UI going on, just like that, we
have a second screen. Thank you very much
for listening, and I'll see you in
the next lesson. In the next lesson, we'll be
talking about prototyping. So that means connecting the first screen
to the second one, as well as making
a few interactions here and there to make
it feel like a real app. I mean, right now, you
can't on anything, you can't view anything,
you can't even scroll. So we're going to have to figure that out in
the next lesson. Okay.
16. Prototyping Basics: Hi. In this lesson
we'll be talking about the prototyping
part of Figma. Now, we've talked a lot about the design
side because it is actually very filled with
features and flows and whatnot. The prototyping part can be a little bit
more complicated, but it's not as extensive
as the design part. So it should be easier
or faster to explain, but you need to practice a little bit more to
get the hang of it. So when we talk
about prototyping, we mean different things. Now, this design
that we have here is technically
called a prototype. You could call it a
wireframe or a prototype. But when we talk
about prototyping, we talk about playing with interactions and
micro interactions. So when you click on a button or when you hover on a button, and it has a different shape or a different color or
a different whatever, when you click on a button and it takes you
to another page, all of these are interactions and micro interactions, okay? When you scroll or
things like that, when you scroll down and
you scroll to the right, left, whatever,
you open a video. All of these are interactions. That means the prototype or the design stops being
a static image. Right now, it is just an image. You see it, it looks nice. You could have designed
this on another program. You could print this
out and that's it. But what makes us different
is that maybe you can click around and click on
something and get a menu. You can click on training
and go to the training page. That is exactly what we're going to be talking about today. So first thing that we
want to talk about, have to know that on
the right hand panel is where you find the
prototyping settings, okay? So when you click on any item, that's when you get some
prototyping options here. And we're going to
be talking about three main things
interactions right here, position and overflow. So let's start with
interactions because this is the most used feature.
So let's talk about that. So as we said, interaction is when you click on a
button and it does something or you hover
on it or you interact with it in whatever capacity,
and it does something. Okay. So we can do this
just with the menu. Okay? Let's start with the menu. We have summary,
friends and training, and the simplest thing that you should be able to do is
you click on training, and then you go to
the training page. So we can do this directly here, but I would prefer that you
do it on the component side. So it gets connected to every single page,
every single instance. So what you're going to do
is you're going to come to the component or
to the part that you want to be interactive. So in this case, it's
this Napbar button. So you can go and click from here to Interactions to add one. Or what you could do
is you could just hover on it and you'll
find these buttons. I would suggest that you
do that and then you hold this and then it's going
to come out with an arrow. For training, you're
going to bring it to this frame and you're
going to let it go. As soon as you does
that, it's going to set up information a few
settings for you. The first thing is the trigger. That means when
you click on tap, when you tap on this, it's
going to have an action. That action is navigating
to there's a destination, which is the training page. Because we pulled
this arrow here, it's already input all
of that information for and then it's just asking you what type of
animation do you want it to be? In this case, it's instant
and we can live with that. Let's try it out. Let's see
if it actually worked out. Right now, we're going
to open this page up. So we're going to
click on training. And as you can see,
what happened, they immediately took us to the training page,
let's repeat it. Training BAM, easy. That's it. If you click anywhere else, it doesn't do anything. If you click on Nowhere, it shows you which items are interactive and in this
case, it's just here. You click here, you're there B. Now there are other
options, let's come here. You can set up so that
the trigger could be drag when you
drag this button, when you hover on it or while pressing only
while pressing, if you do a key or gamepad, like if you press a button, if you press the letter S or
R or something like that. There's more options here, but I would suggest
that you stick with these first ones because
they are the most common. Untap drag, while hovering, and mostly the first three are very relevant
and very much used. When it comes to the animations, there are different animations. One of them is
dissolve and Figma gives you a preview
of how it looks like. When you click on
it, it does this. They add some more
settings when you put animation, which is easing. This means the flow
of the animation, but this is a little more
advanced and the duration. This is now 300 milliseconds. There's also let's see
how dissolve looks like. So when we go here,
we click on it. As you see it's kind of like a fade out fade in animation. It just dissolves into it. And then there's Smart animate, which is really cool because it takes care of a lot of things. If there's a text or an object
that went from up to down, it's going to take it with you. Let's see how it does that. As you can see, this
card went down because it recognized we're using the same element and
these chips went up. See. But this is a
really hard animation to actually put to
develop into an app. So I would advise you
to not overuse this. I mean, in such a case,
when you're navigating, it's really hard, and
it also makes no sense. I mean, why do you want
people to see that this element went down
and these chips went up? Because they are technically now different design elements. They shouldn't they don't have
any relation to it, okay? So I would not suggest you
do this when you're doing it between going from
one frame to another. There is another option, which is there are other animations, move in, so it moves in
like that, move out, push. Now, in this case, I would really recommend
push animation because you are going from the left side
to the right side. So it is being pushed, but you should set it up so that it's the
right direction. In this case, it's left,
so it's going like this. Let's list it out now. You click on it, and it takes
you like that. Okay. So it's really cool. It works really well and
logically it makes sense. It makes people understand that oh this is on the left,
this is on the right. But as you can
see, even the menu is also being taken away,
which is not ideal. But that's why
there's this little button here, this checkbox. Click on it and it will
animate matching layers. That means if there's a
matching layer like this one, it's going to animate it. It's going to do
smart animate for it. Let's see what that means here. In this case, you click on
training as you can see, everything moved other
than the matching layers. In this case, the
matching layer is this right here.
I didn't change. But also, again, this
card and these chips, which is unfortunate, but
there is a fix for it. The fixes, you're going to go to the frames and you're going to change their name because here, this frame is called frame 24 and here this frame
is called 24 as well. What you're going to
do is you can just say 24 X and the same
thing here for you, 25 X, or you could give it a different number.
Now let's see. Perfect. Absolutely
perfect. As you can see, everything pushed, how to push animation, other than the menu. That's exactly what we
want to be happening. And yeah, just like that, we have a really nice
interaction going on for us. Now, we can apply the
opposite animation, and if you want, you can set it up yourself or you can just copy it from here, click on this element
and paste it. But instead of the arrow coming here, you can
make it come here. So now let's test it out. Okay, there's an issue. I hope you've noticed it
and it's the direction. We're just going to reverse the direction, and
now let's see. Perfect. What's cool
about it is that now there's a logical flow. I mean, preferably,
we should have a friend's panel in the middle. But right now, we
haven't prototyped that yet. We haven't
designed it. You just go from summary to
training just like that. And there's a lot
it makes sense. It's a logical flow from left
to right, right to left. And at the same
time, the menu stays there fixed and that
is absolutely perfect. Okay? So that is one
way to animate things. There are other things to do, other things that you
may be able to do to animate or to
prototype, as we say. So one of these things
is the scrolling. Okay? So when we
come to these pages, what we can do to enable scrolling is we can
just bring this down. And then when you
go to this page, you can just scroll down. Okay? So there is
another way to do this. When you bring this
back and you say, this is the size of the iPhone, so I want to keep it
the exact same size, you're going to go to
the prototyping panel. You're going to choose the page. Like the whole frame, go to the prototyping panel and
right around scroll behavior, you're going to see overflow. Overflow means the
content that is flowing over the frame like
this one, for example, you're going to
decide right now it's as default set up no scrolling, but you can decide if
you want horizontal, vertical or both
direction scrolling. Think to yourself, is the person supposed in which direction
are they supposed to scroll? Well, vertically. Then
when you do this, you go down and now
you enable scrolling. You can scroll down. Not really up. You can stretch
it, but it doesn't scroll. But what's cool
about this is you can have a lot of
different things, but they're hidden and then
you can scroll down to it. But that's one way and as
I said, if we reset this, a simple way is
just to extend it as long as the frame is, and
then you can scroll down. Let's practice the same
thing on this right here. We kind of like a slider or a carousel here where you're
supposed to go to the right. We can do the same
thing with scrolling. So just pick out the frame
that contains the items, and you have the
same thing here, overflow, just make
it horizontal. Now let's see if it works. Now we're trying to scroll,
but it's not working, and there's a reason because
this overflow setting only works if the content
is flowing over the frame. It's becoming too much, it's flowing over the limits. As you can see here, the limits, all of the content is
within the limits. I mean, you can't see
the rest of this, but it is within box. The easy solution is just
to minimize this box, make it smaller so that it fits the frame that is visible. Now this is considered overflow. It's flowing over it.
Now you can scroll, left in whatever
direction that you want. You can practice this
for different ones. I can do this here as well,
horizontal and then make it smaller and then
we're able to scroll. Same thing here.
Same thing here, horizontal and make it fit. Now everything is scrollable. Then as I mentioned, we can make this
whole thing also bigger and then we
can scroll down. Everything we're able to
scroll through perfectly. But there's one issue. One little issue. Well, this
is a little more advanced. But if you notice the menu is being scrolled
through as well, right? And you probably have an idea of when you're on the
phone and there's a menu, some things don't
actually scroll down, some things stay fixed, and that's what you'd
normally expect, not that they'd go up like that. They should stay
in the same place. There is an easy way to do this, the easy way is to come to
these elements right here, and then you're going
to put them in a frame. I'm going to add them together, and I'm going to put them in an Auto Layout holding Shift and A. I'm going to make them
ignore layout again. Because they got
put in their place, but we don't want that we're going to bring them
back to their place. You're just going to go
to prototype to position and then click fixed.
Now let's test it out. Now we have it here,
and as you can see, it's now fixed in place. When you go up and down, it stays in place and it has this really cool glass
effect all over the place, just like that, you decide
where it's going to be and you make it fixed. You say the position is fixed. Now we can do the
same thing here. We're going to make
it an Auto Layout. And then we're
going to tell it to ignore the Auto Layout and then we're going to bring
it to the same position. We can copy the Y position
here and just past it here to be exact and then go to prototype and then
make it fixed. Now it's messed up. The reason is now it
works as a let's see. It works when you go there, but we messed up the animation, and I'll tell you why
and how we can fix that. Okay. But now they're both
fixed, which is perfect. But what got messed up is now these are not considered
the same layers. They're not considered matching. And the reason is because now
they have different names, so you have to really
pay attention to that. Here it says 38 and here's 37. So a quick fix is you just
give them the same name, which is frame 37 or you could call them Navbar
or whatever you want. And then now they're identified as matching layers by Figma, it works perfectly. And as I mentioned,
you can scroll through everything,
everything is scrollable. These are the microinteractions, the animations that really make an app super immersive
and engaging. So make sure that you try to practice that on your
own, try to understand it. We didn't want to
overcomplicate things for you because prototyping is not
the easiest thing to learn. That's why I made this
as simple as possible, but there are a
lot more settings, a lot more possibilities that
you can learn on your own. And they could really bring
your game to the next level. Go ahead, try it out, try
different prototyping, animations, interactions,
whatever you've got this. Thank you for listening, and I'll see you in
the next lesson.
17. Previewing Your Prototype: So now we've learned a lot about the basics of design
of prototyping, colors and typography and
a lot of different things. But at the end of the day, what we really want to
do or what we need to do is properly
preview our designs, to see it for ourselves, as well as to show
it to other people. There are many different
ways to do that, but they're all
simple, so no worries, and I'm going to
show them to you. Now, throughout
the course, we've already seen a couple
of these ways, but I just want to do a
little bit of a review. So the easiest way and the quickest way to look
and preview your prototype, is to click on the
frame that you want to see and then go ahead and
press display button. This allows you to present the
design that you have here. It doesn't matter what
type of prototype, what type of frame
you're choosing, it's going to show it. That is the main way to do it. But there are different
ways to go about it. Now, one thing that you can do, especially if you
have a bigger screen, you can choose the
preview option. What that does is it opens a
phone screen right next to you for you to be able to view the design
as you're doing it. As I'm designing here and you
can resize this by the way, and you can even try to make sure I'm right now putting
my phone in real life. I'm putting it next to the screen to make sure
that the design fits. Now I can imagine as if this is my phone and I can
try it out and say, can I read the text? Is it legible, are things
proper, nice, whatever. And at the same time,
I can change things directly on the design
file, which is pretty cool. That's another way to do it. But there is also
something called flows. When you click on a frame and you go to the prototype tab, have something called
flow starting point. Right now, this is considered by Figma a flow and it's
called flow one. It's a starting point.
When we go to preview, we have this little panel here that you can take out and it says,
Here are your flows. This is the first starting
point that we chose. There's another one right here, but I think this
was made by mistake or Figma maybe wrongly
identified it. This is most probably here. The Navbar, we can
delete it from here. But in order to create a flow, you go on the page
that you want to show and you can click on here. You can have a flow
starting point and you can call it Training
page, for example. It tells you what frame this is. You can switch it
just by choosing from here and you can also give
it a bit of a description. So you can say here,
users can inform themselves and watch videos or articles relating
to training. Okay. So when you go here,
you can click on it, and then it tells you exactly gives you a description
to explain it to you. This is obviously
not meant for you, but maybe for teammates or
for users who are testing, people who are testing this design for them to
be able to understand. But I think the best
testing is done without giving description,
without giving information. I mean, you want
people to go in and experience this first hand without extra
instructions or anything. Okay? But this is
how you can create these flow starting points,
and you can edit them. And when you
deselect everything, you'll find your flows here. You can also change
the names and say, well, this is dashboard
or summary page. You can switch up the positions, and you can also
preview them directly, copy the flow link, frame. You can see which frame is that? Oh, okay, this one.
That. All right. There are a lot of helpful
settings and options here that help you figure out
your way around your design. But these are the
main ways that you can preview rear prototype. Don't forget, of
course, we've talked about this, the
prototyping settings. We have it here set
up as iPhone 17, but you can switch up the frame or you can
just have no device. There's only one
issue when you have no device is the
full length will be shown that in a very
bare way, just like that. This can be a little
bit unappealing. So make sure that
if you're showing this for mobile phones
that you have a frame, and it's immersive anyway
to show it that way. But in case you have to or
you want to show it this way, there are some additional
prototyping settings when you're here in this view. So just click on this button, and it's going to give you
some different settings. So there's actual size. So this shows you, you know, with the size or the supposed
size of the frame, okay? There's fit width and height. So this makes it so that you can see the whole frame
from start to finish. I wouldn't really
recommend this. What I would recommend
is fit width. So this is very similar
right now, in this case, to actual size, but it would fit the width in a way where it's
not, you know, overdone. There's also responsive but if you haven't designed your
prototype to be responsive, then it's going to look
very distorted like this. I wouldn't recommend
this either. Only if you've done your
design in a responsive way. There's also fill screen, and again, this
doesn't look great, but it all depends
on your purposes, what you're trying to do, and
how your design looks like, what size it has, and so on. I would recommend
just play around with these and just see what
works for you best. For me, right now,
this works pretty well because you can
see the navigation. You can see a little bit
below it, but not too much. But I wouldn't
recommend the fit width the night. That's not great. So these are just a few different prototyping settings
that can help you properly preview your designs because that is one of
the most important steps. I would say previewing your
design and sharing it. These are important
steps because if you have an amazing stunning design, and then you don't
show it properly, and people see it
in a distorted way like this view that we just saw, then it's not going to
come very well across. So I would say, make sure when you're showing it that
you're well prepared and everything
looks like it's in the proper sizing and not
stretched out like this image. So this is basically how
to preview your prototype. Thank you for listening, and I'll see you in
the next lesson.
18. Sharing and Exporting: So aside from previewing
your prototypes, another important step is sharing and exporting your work. As we mentioned, this is an important step
because this is when you get to show
your work and you share it with people, clients,
with colleagues. So it's important that
you get this right, you get the exporting
right, you know, you give them a sharing
link that they can view properly and doesn't look bad or unintentional in any way. This is how you can
very simply do it. Now, let's start with sharing
because it is a little easier as you have a very
big share button right. So there are two different
types of sharing. You can share a
project to be edited, and this is why usually
Figma has an editing file, and there's an editing tab, as you can see this icon here, and then you have a
viewing or previewing tab. So when you click Share here, you're sharing the
file as a design file. So be careful because you might be sharing it thinking you're giving it to
the client to view, but then they're going to see this whole complicated view. They're going to be overwhelmed
and they're going to see things that maybe they
shouldn't see probably. Okay. So this link here is
to share it with people to view the file or maybe even become
collaborators or comment. You can see the settings
here, so who has access. So only those invited. Or anyone, be careful when you're changing
these settings. You can make it set it
up so that anyone in team project and you can see
the people who have access, for example, here,
I have access. Then they also show you
some other handy options like copy Dvmodlink you can send someone
just a DevMdlink. This means if someone
is a developer, they only see the things
that are relevant for them. They don't see all of
these design options. You can also copy
the prototyping link or the prototype link. This is for them to preview it and you can publish
it to community, get embed code, but these
are a little more advanced. But here's all that you need. You can copy the link from here, change access or copy
Dvmodlink or prototype ink. Another thing to do is to
go to the preview tab, and this is what I love doing because here I can't
make mistakes. You just click on
Share Prototype. It's not share just like here. It's Share prototype
specifically. Here's where you
can decide, okay, copy link and is it only those invited or is
it anyone with a link? And here you can't really
make any mistakes. Put how you can share a project, but you
have to keep in mind, you're not sharing a file here, you're not sharing it
in the form of a file, but rather as a web link. It's a web based link, so they have to have Internet. They have to have a browser that they can surf
the Internet through. I mean, let's see
how that looks like, I'm going to share
the prototype, and I'm going to make it anyone. You can also have a password, set up a password for it, copy the link, and
then you paste it and then you have access. I think it's going
to work because I'm already logged in as myself, so I have access and view it with the settings
that were saved. Make sure that the
settings that you had were proper and that you're
on the right flow. Now we're done with sharing or more specifically
sharing a link. Now let's talk about exporting. Now there are different
ways to export. Now, you can either
export an element or a full frame now there are different ways
to export your work. Now, you can either export
an element on its own, or you can export a full frame, or you can export the whole
project, all of the screens. Let me tell you how that works. It's super simple. You're going to go to the design tab and then you're going to click on a frame
when you go down, to the end, you're
going to see export. When you click on it, you're going to be given a
couple of options. You can switch from PNG
to JPEG, SVG or PDF. You can choose any one of them, what's cool is when
you click on it, you choose PNG, you can
also choose the scale. Do you want it to be
the exact same size or do you want it to
be double the size? You can see the size
here is 402 by 963. You can do one point X, two X, four X, and all of these
different options, they basically allow
you to make it much bigger because
sometimes when you export something as an image, the quality is not exactly
there, it's not that great. You just to be safe, export it 1.5, two X, three X, just to make sure
the quality is great. And if you have something like a design a logo or something, then you might
want to export it, you can make it bigger. You can bring the design and
just make it a lot bigger, or you can just export it from here as if it were a
much bigger design. Okay? As I said, these are the file types
that you can export it as. And with PDF, you
don't have anything. So with PDF, you don't
have any scaling option. You can also have more options here if you're well
versed in these settings, but I would say that's a little too complex for you right now, and just go to
Export Summary page and you can just
paste it like that. And then you can
just click Okay, and then it is exported. You can also do multiple
exporting settings. You might say, I
want this as a PNG, but also as a JPEG, one X, I want this
also as a PDF. And what's even
cooler about this is you can choose
multiple frames. You can even choose
different elements. You can choose anything,
any layer, and export it. And you can say, I want to
export all of these as JPEx. Then when you click here,
it says Export five layers. So it's going to do it for you. You can export any type of
file, any type of frame, any type of group, frame, whatever it is, it's possible and you can
do them together. I really like that feature because it makes things easier. You don't have to do
things by hand every time. It's just made simple for you. This is how you can do you know, specifically through
the layers that you can export layers separately
or frame separately. But there's also an
export function here. So when you come here, you
can export the whole project. So let's try to do this and
do it with Export Project. So we can switch the settings, like I said, and it gives you
here a nice little preview. Now, the negative thing
about this is it's going to export everything, including these little details that maybe are not
that important. So you see here when
you click on Export, it's going to say
one of one selected. So are you sure you
want to export this and a, I want to export it. It's going to take a while, but eventually it's
going to work out. This is how it would look like. It exports the whole thing
as one canvas as one page, which is obviously not ideal. I'm not sure what's
the use case of this, why you'd want to do
this, but it's not ideal. No one can look at this
and be like, Oh, yeah, this is a cool app because
it doesn't look like an app. I wouldn't recommend
you to do this. I would remove this from here. There's another way
to do this is to go through here and go to file. And export frames to PDF. Now, this is a
much better option to do because it's only
going to take the frames. Now this is how it looks like. It just exported the frames, but it exported them separately instead
of a whole canvas, but they still exported the components and
everything like that. So these have been the main ways in which you
can export your frames. Now, of course, there are other more advanced ways
in which you can do it. Simple is always better. So try not to overcomplicate this process for
yourself and for others. Just make sure that you
export your designs in a way that makes them look
good and easy to view, and that's all that matters. Thank you very much
for listening, and I'll see you next time.
19. Class Project : Create Your Own UI Design in Figma: And now it's time
for you to create your very own UI design. For this class project,
you'll be asked to create a very simple user
interface Figma by using the techniques you learned throughout
this course. You can create a mobile app or a landing page or any simple
interface that you'd like. Let's start by first creating
a frame and a structure, and then begin to add some text, some colors, and then
create a few buttons. Make sure that you're paying
attention to the spacing and the general layout
to make sure that the design looks
modern and clean. Next, use Auto Layout
and components to organize your design file a little bit better and
more efficiently, and make sure that
you're creating at least two
connected screens so you can build a prototype with
some basic functionality. Once your project is complete, go ahead and export
your screens as PDFs, or you can just share
the export links, just make sure that they're publicly viewable
in the settings, and go ahead and share them
in the project gallery. You can also add a
short explanation to talk about your design, explain what you did, and maybe defend a few of your
design options. This project is all about practicing the beginner
workflow Figma, from getting the
idea to going and making an interactive
prototype out of it. So go ahead, try things
out, experiment. Don't be afraid of messing
up and have fun with it.
20. Congratulations! What’s Next?: Congratulations on
finishing the class. You've now learned
the fundamentals of Figma from navigating
the interface and creating basic
layouts to creating components and
interactive prototypes. That's already a huge step into the world of
UI and UX design. The most important thing to do now is to keep on practicing. Try recreating interfaces
that you like, experimenting with different
layouts and styles, and just simply building designs to continue on working
on your skills. You haven't already,
please go ahead and upload your own projects to the Project Gallery so I
can see what you're up to. I'd really love to see what
you guys came up with. As always, if you've
enjoyed this class, please feel free to
leave us a review. It really helps us improve and create even better
courses for you. Thank you again for joining and I'll see you in
the next course.
 Skillademia Academy, Creative Skills for the Future