Transcripts
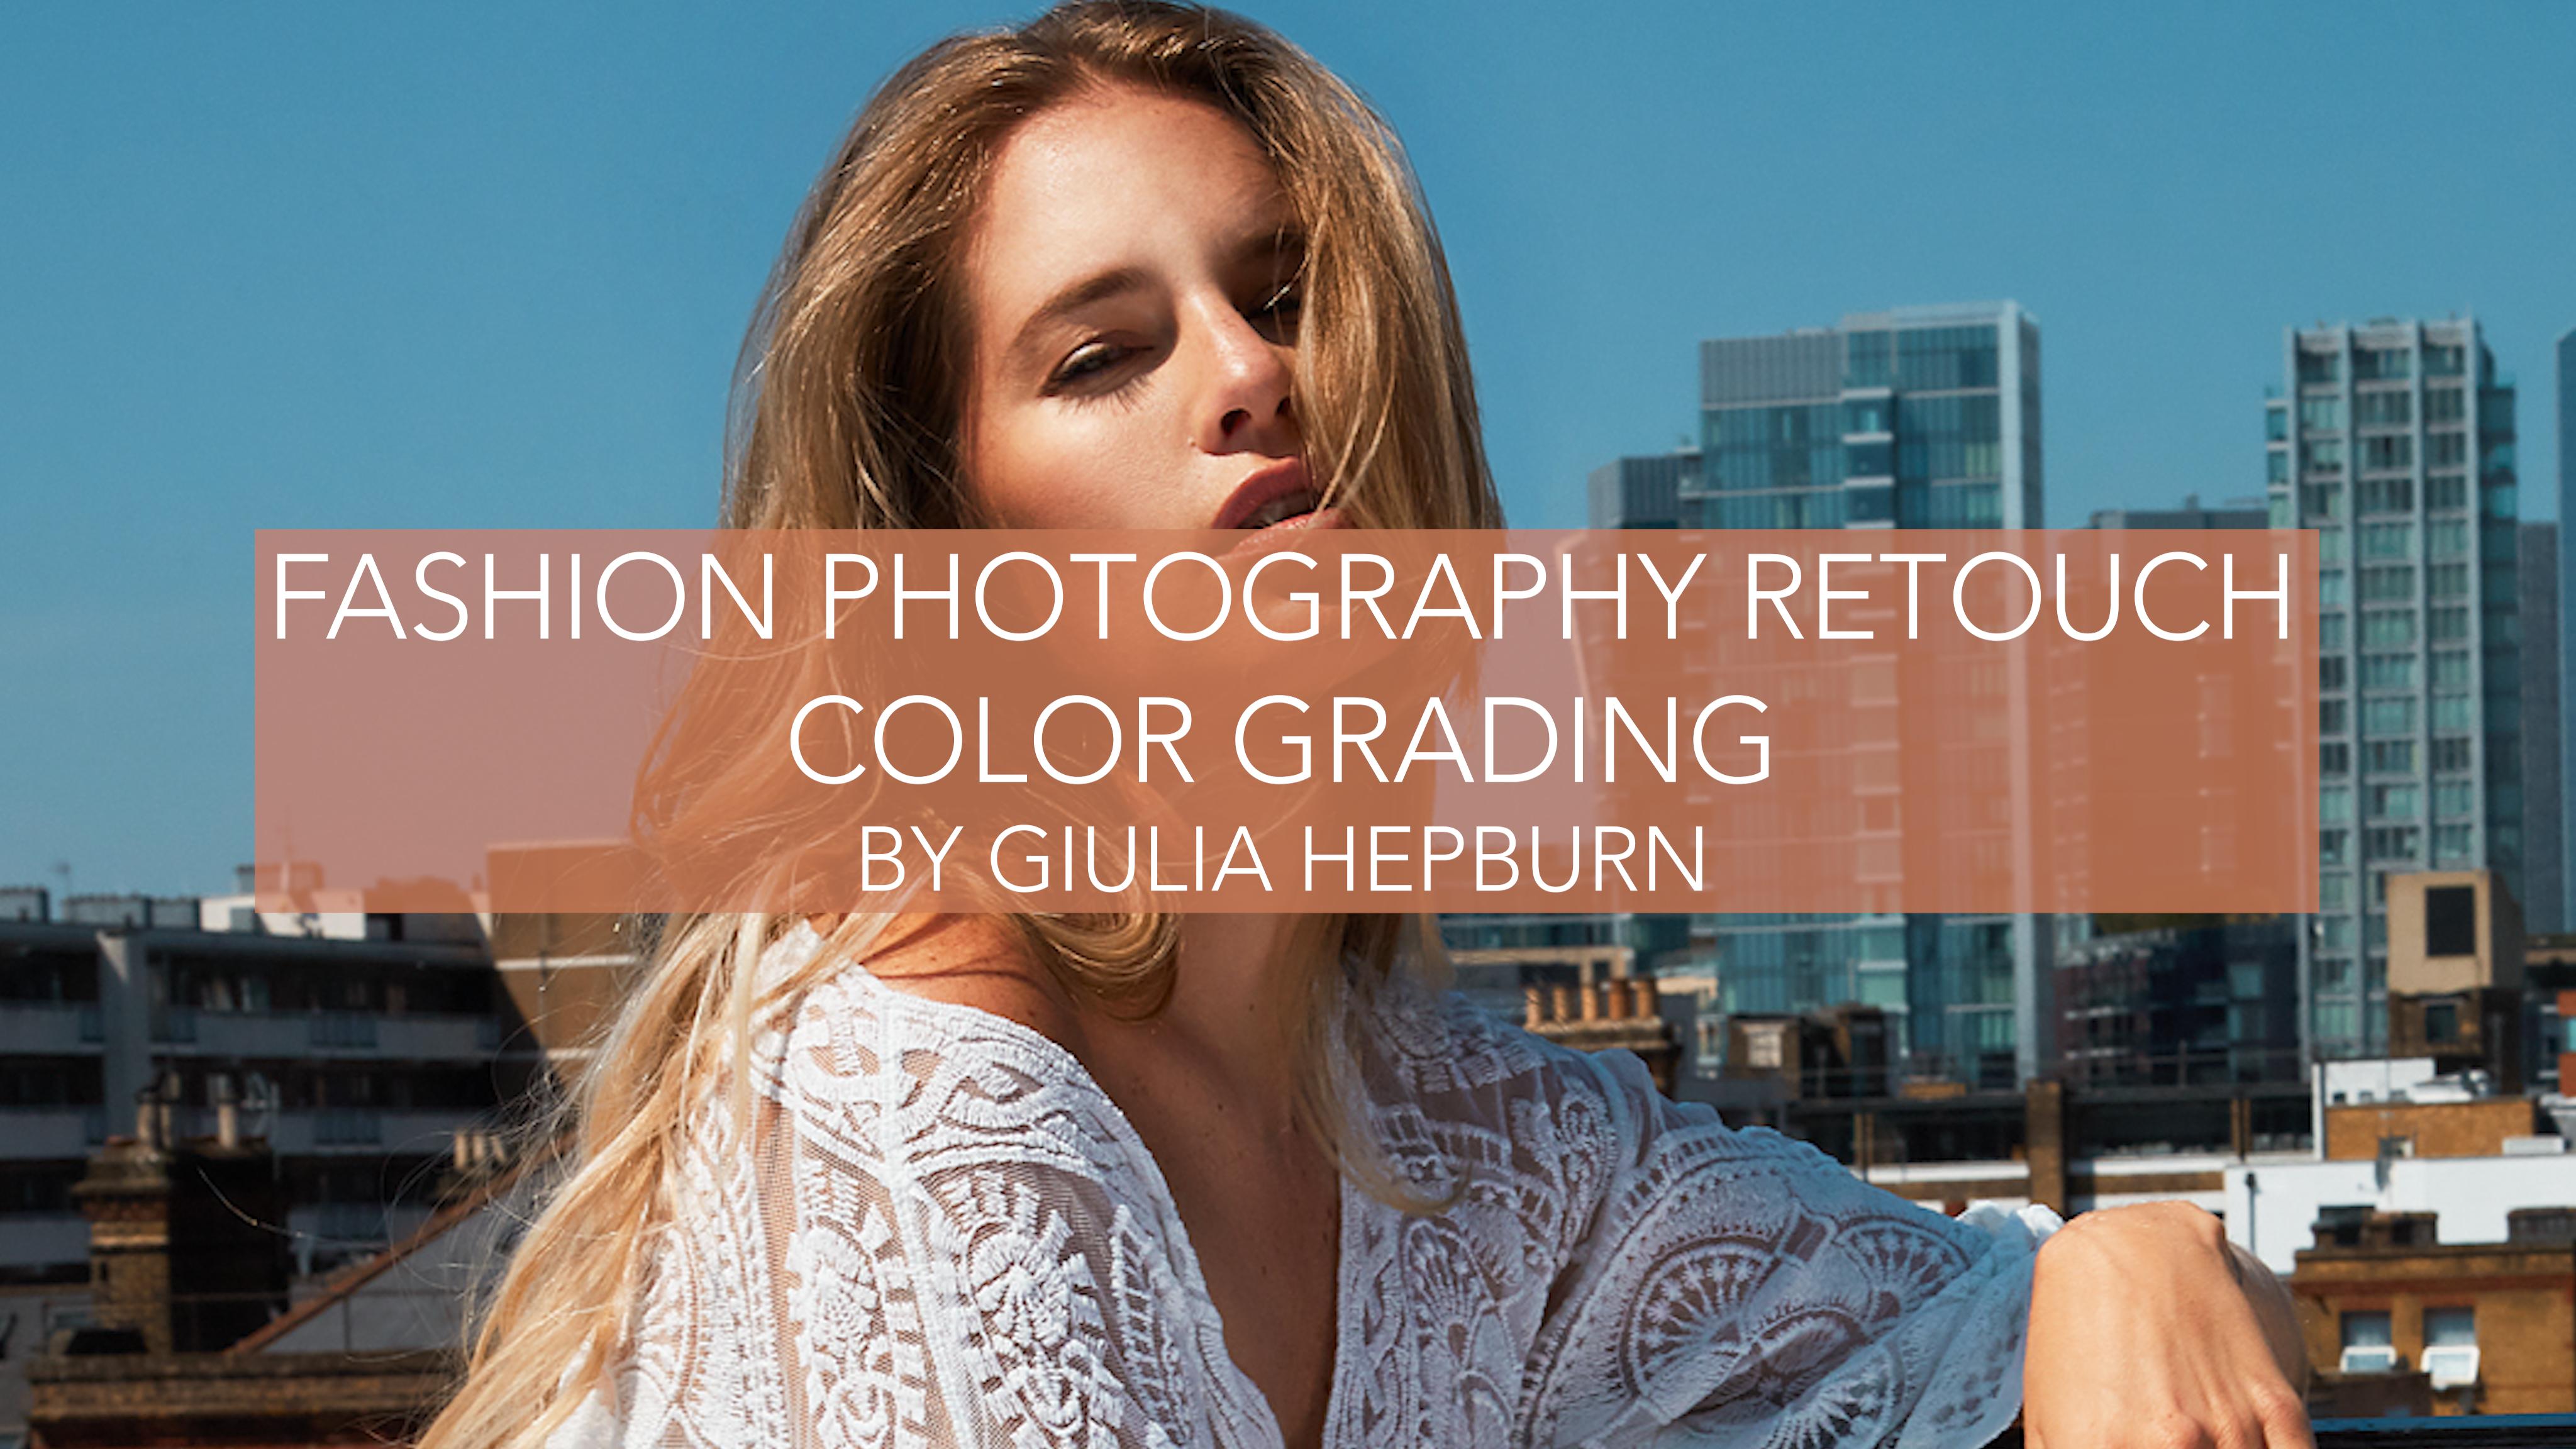
1. FASHION PHOTOGRAPHY RETOUCH SKIN TEXTURE COLOR GRADING BY GIULIA HEPBURN INTRO: I Everyone, this is Julie Airport. And welcome back to my skill share class. They are gonna teach you how to aid it in a professional work profession. Photography picture. This course is for people that have already on a year out to use the photo shop. So this course is for intermediate level. What we're gonna cover is I frequency separation, skiing, a reconstruction, general cleaning and colored reading. So let's go.
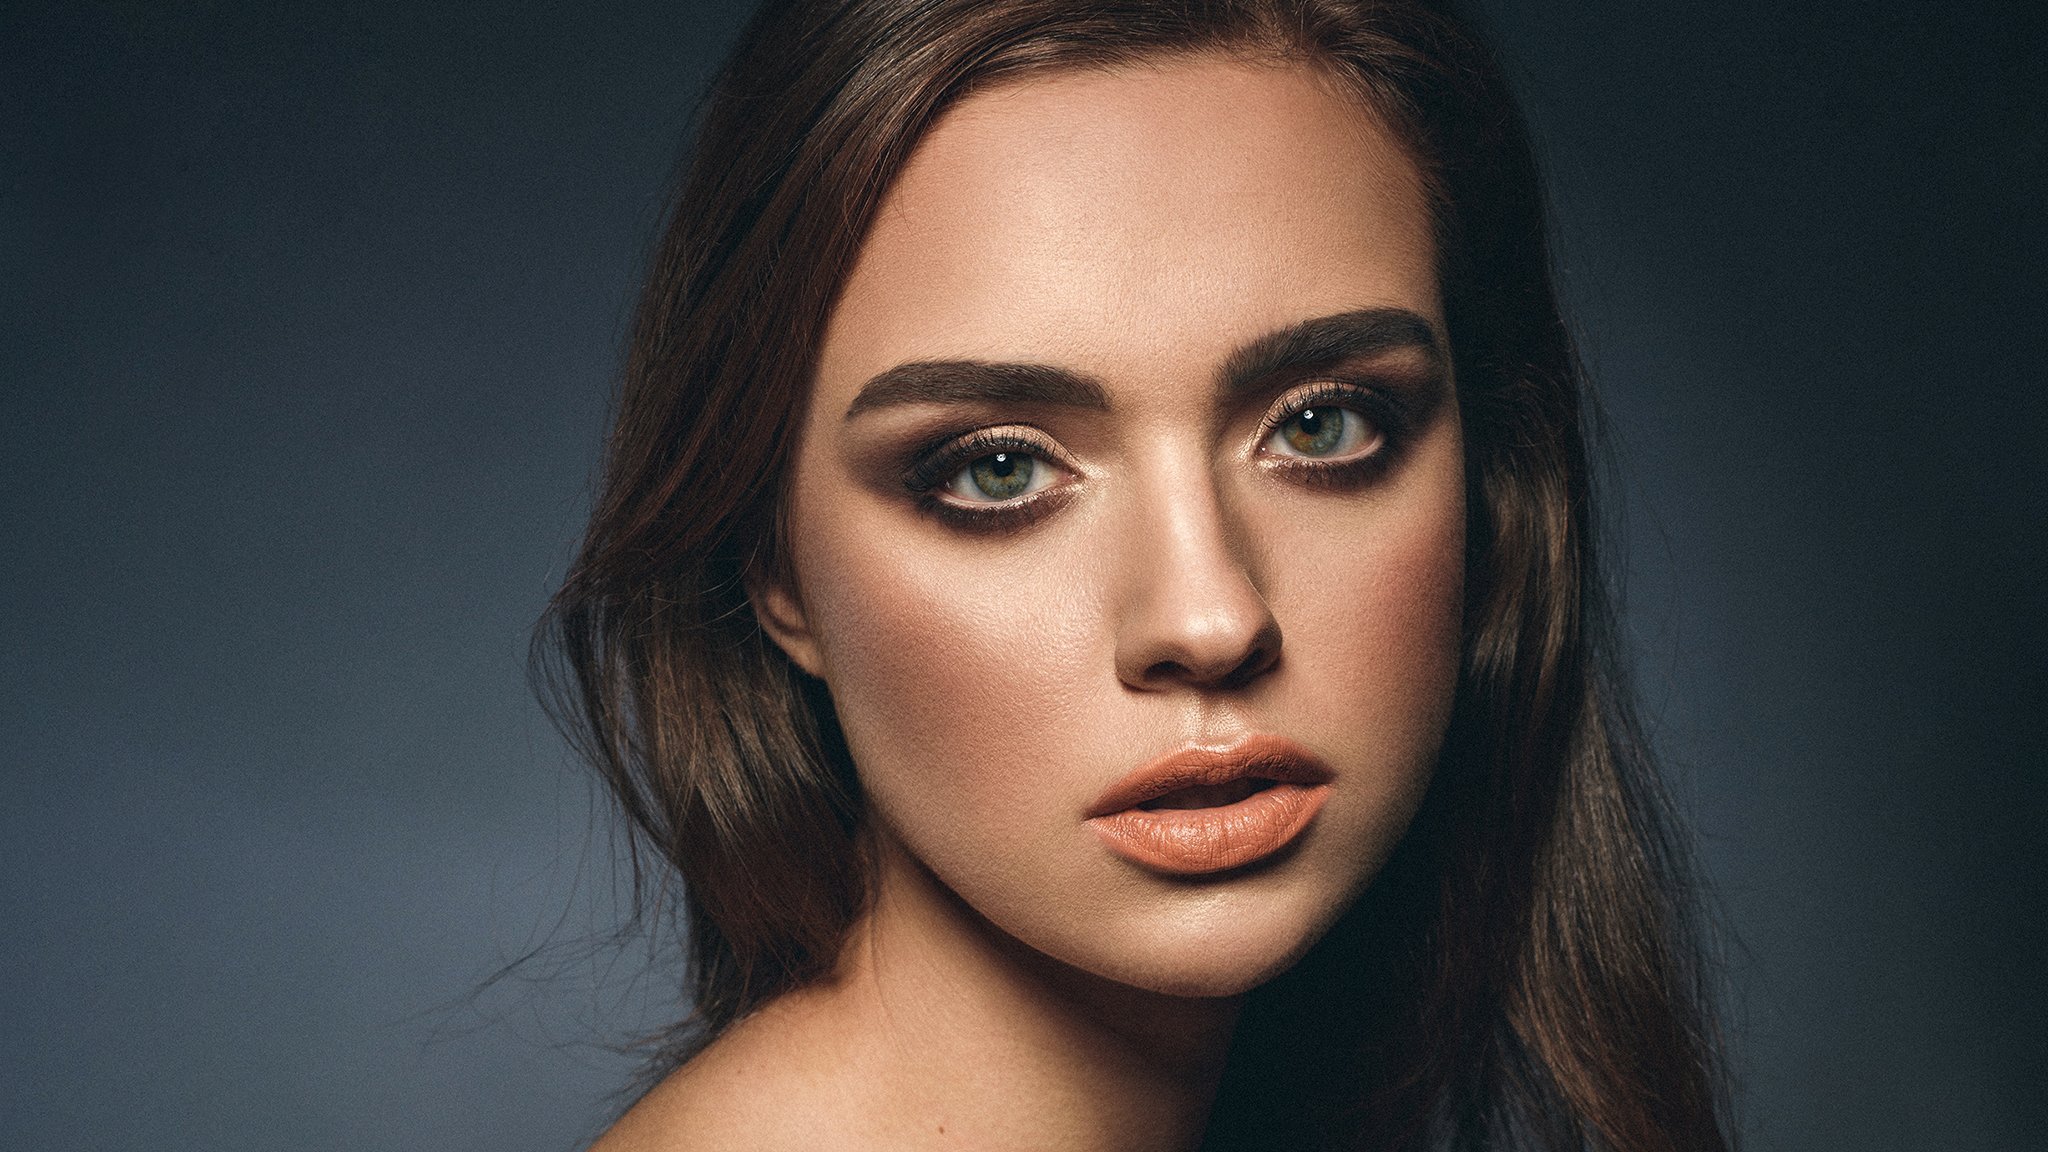
2. FASHION PHOTOGRAPHY RETOUCH SKIN TEXTURE COLOR GRADING BY GIULIA HEPBURN HIGH FREQUENCY SEPA: I Everyone, this is Julie Baboon, and welcome to my class. Today I'm going to teach you how to do I fashion retouch. So I've got this beautiful picture off Charles say that I made a couple of weeks ago in rooftop in Humble as you can see the light, it's my strong we can achieve great results. So what I normally do at my very first step is to duplicate of my background in this way with common J and go close to the face to see where there are, like little imperfection with my Parcher tool, this one or the brush tool. I'm going to select the first thing that I want to move. And with the patch tool, I just create a selection and dropping drop in the nearest area and let's say, is kind of a clone but is better than a clone because they is not like a Parcher without no with no consideration off the light off the shadow. But is Larry creating like a medium between them apart? So, yes, you can see I go slowly, slowly, like in the little spots that I don't like to show, but it's one to retouching is something that you need a lot off passions and you need to see the picture not always lie. So close is I'm doing at the moment that you need sometimes just zoom out to see the entire portion about what is going on this way. And when I don't want to. When I want to this select like in this way I'm moving. I want to select years and then with common de de select my selection And I'm not going to retire for the simple. For example, these lines or this line year knows a or also not the hairs. So let me see. And personally or so lie birthmark. I don't want to retouch them. I don't want to cut them because, like makes the person ria And in the sky we can see there are, like dust in the sensor. So, yeah, now we can actually delete immediately this part. Let me see if because you other stuff there are not life birth? Uh, no, I think maybe here on the legs, but we can work NATO body. So I don't you to create another level above the background because you can actually see what you did until now. Melouk. More clothes we can see. Continue a little bit, but not too. Not too much, actually. Okay, Just selfie. Ladies. Bertha. No! If we are satisfied, we can merge our two levels with comment E And now everything is all together. And now let's start with I frequency separation. I frequency separation is the advance. A technique to skin A toucher is the one used by everyone and the mustard and I I frequency separation is great. You can use it every before. The skin is amazing. In the greatest result, you can do it with this technique and the first thing that we're going to do is to duplicate two times our back we can call diesel ever I High frequency and reaching called these other level look like low. Let's put the eyes off all from the AIF pregnancy and let's were with the low frequency on the low frequency we need to apply on a filter and this blur Gosha blur and you don't need to go alike Too much stronger. It is because you know you cannot seem but you need to find a way where you can still see like the shape The no so precise likenesses is a good media, but it depends on the kind of picture that you have. So we say, OK, reactivating gain our I frequency and heaven. Let's go toe Imagine And let's go to, um and let's go toe apply image. Okay, so now we have t to select which layer we go not work with and is the low fragments sea level and then the blending insert some tractor. Okay, As you can see, we have, like, this kind of off grey effective off our entire images, and we need to put them a specific number. That is, that the scale is going to be too. And the offset is gonna be 128. These are fixing number. You have to put these one because it doesn't work if you change it. So it's giving the okay. And here in the blending area, we need to under the being there. So at the moment, you can see it seems that nothing had been to our picture. But the manager is gonna happen right now between these two levels, so I pregnancy and low frequency, we can actually add another nature and in this one we're gonna work a little bit. We are in our new layer is where is gonna happen Everything. When you do the healing brush tool and we need to put the size up Not super big, but we need to have the hardness zero and spacing like very, very Sometimes I also use the size the shades off my patch in this way. So I think it works better. So, yes, you can see a preview if you go outside. Perfect. Yes, of course. So now we need We need the two fine area light light area if I want to make dark area light . So in the moment we have our layer We need to create a new one. They're gonna fall in between the IFE pregnancy at the low frequency we need to work with. Our brush is so dispersed at the moment is too big. Let me put it there like, kind of this way, and the capacity should be very low. And what we're going to do, we're going actually to paint above the picture and working just on the tone off the picture. So, for example, this area as you can see is a little bit dark, so we need to make it lighter and or so maybe these area isn't it to be dark? We need to make it lighter. And with I and we've I dropped her too. I'm just cloning like the caller, the closest color with this area. Let's write, like with this one, let me put any to be stronger. So you can see now you can see Really? What's is if I put stronger, you can see better. But I think you can get it. So, like this part there is a lot of light and I wanna like a little bit more flutter leads to in this way. No, again. Is no light one on the person. Perfect. But we're still working. Just you can see on the lights and on the shadow. So here, I don't want these to need me too much, so you can see immediately what is going on. So this part needs to be more work in these parties, only to be to live I'm going to do in his okay, lets go get that. And then we go in again on the cheek, Bond. Okay. To make it a little bit more. Just Doctor, you can do off course and not only on the face. I'm just more focus on the face. But we will. You can do whatever you want, wherever there is ski. So? So maybe the legs. We can do a little bit. It's you. See you. It doesn't work when you still need to think about the shadow region Shadow area light. So it would be weird. And second shit. Something is already changing. What we can do now in I fragment See, this is like the touched texter off the skin. Now we've in the high frequency with the much tool. I'm just going to make, like, this line a little bit. Lights off, turn. And here we're working on the texter off this king. So, like, maybe these one I needed some, like, is a a little bit now, maybe in this way. And I just wanted to remove this line because I there are hairs, so I don't really like like it a little bit too messy. Okay, so if you forget some spot, this is the era that you're going to work shared on a decently. Strange. Okay, So disease is nice. Is a dead big sentence. Fine. Maybe these lines the trials in life isn't to be strange. Just remove it. We see the here. I was not super precise because we still have, like, shadow and lines. This is okay. Yeah, it's fine. Uh, I need to be from the neck to No, he's just a hair. So it's fine in this one. It is sometimes. So So you have to stop because you can go very deep Indies process and it could be a little bit like, too much. Let me show you. I can actually make a goal to with our eyes pregnancy separation. So this is the before, and this is after so is already much, much better. What do you think about it? And let's move on today Sehgal section
3. FASHION PHOTOGRAPHY RETOUCH SKIN TEXTURE COLOR GRADING BY GIULIA HEPBURN DODGE & BURN: Let's move on to the Dodge Ember for Durjan burn. Normally we usually when the skin is very nice, we're gonna just apply a little bit just to show you what is going on. So breasts out plus clicker or option plus clicker on crane layer. By this, we're gonna make this soft light wafer 50% Ray and we would just above our frequency separation. So we really are going to duplicate our lever, and, uh, we gonna quality just for house burning And the other one is gonna be Dr. I'm going toe worry only on Dodge. Never. And I'm going to work with the Dodge Tool, this one and, um or that actually, the thesis shouldn't be white. The brush you to be white, and I'm going to apply in the air that I want more light again. My exposure is not too high. So just to give you an idea like this feel something here above the nose on he beat under the eye, even if initially super strong. But we can still get some need. Okay, here we have a lot of fly so we can actually intensify a little bit. Maybe is too much at the moment I'm applying these effects like, very strong. So maybe still much stronger by we can put in life different. Okay, Just a year. Thank you. So and then we're going toe Activate our burning one And we've they burn tool again Exposure work week in our brush We're gonna just intensify the darkest part. Maybe now is notably too much, but we gonna shame our opacity later. So I really like when the cheekbones are darker. He's part two for So we needed to for look like what's happening with the lights on here. OK, we have a strong shadow. So we're gonna apply our strong have you rash exit so we can work a little bit on the hair too Great to give to them a little bit more valuables days. Let me go back to Dodge. Just I'm gonna have some more lights. More lights in the eye. Yeah, as you can see is very strong. That's great. Ah, folder here. Okay, person. So we can change a new capacity, as you can see it before I'm gonna keep it in this way. Okay, So what we did until now. So her the first cleaning off the face, then our frequency separation is you can see is already great. I can still see something that I'm going to change in a bit. And then our dodge and birth. So what? I'm just going to fix Sunny to be here because they think it's not nice on the forehead. Okay, Okay. Let me see. You have to zoom in is, um, out to see if something is working or not from sample here now is too dark. And I'm going back on my Dodge one to put some life, as you can see now is more like the same. Like whole or maybes. Much like a line. I mean, we need to be like these. Okay, just accept it to be all right. Cool. So in the next session, I'm gonna teach you how to recreate the texter off this kid.
4. FASHION PHOTOGRAPHY RETOUCH SKIN TEXTURE COLOR GRADING BY GIULIA HEPBURN SKIN TEXTURE: unisex. I'm gonna teach you how to create a texter. So we're going to create you never gonna Kohli skin next year. So we're going to be Ali to be like painter end with our brush. I'm going toe, like, just speak some color off this king And we my, uh, on a passivity, like 60% because we needed still need to see Sally to be below. Maybe we need to see what's going on just below. And we need to just to pick the corner off our poor Celeste. Say so. Especially where we cannot see the texture off this scheme. This part he's part two. This part we create kind of a mosque. Is this to here? It's just okay, let me around like the Laffer, and they know that you need to be extra careful, So just don't go. Exactly where is the line? But Ali to beat around and we are done. So we need to goto our blending in soft light. Okay, we're going to add a filter and we need toe add noise and we're going to add noise. Okay. So you can see where we apply our our brush. We need to they go shown one, and we need to take monochromatic. And we need to change the intensity that will, like, make it like no crazy ladies. Okay, Like, don't go like crazy. I like 20% despite perfect. And then we need go again on Filter, and we go into em, boss. And the numbers we need to see where he's coming. The lights is coming in this way. So little purse is gonna be, like, more on the stick and not fake. So let's put the amount like I need to be stronger. So now you can see what's going on, Isn't it Me too much warm over in this way. Okay, so we need to go in filter, noise and media. So many also to move their ride, usually to be down. So it looks like more like, really stick. He's like, just a perception that this something is going on. We can do it also in a different way, and I'm going to show you we can also create like a neutral colder off the skin. Let's say that thes thes one gonna create our new layer. This is the option we're gonna put everywhere. So we need to create also a Mosca a soft light as we think everything is suddenly the same as we did before and filled there at noise. Gosh, a monochromatic is Indy's way perfect. And then we go into, uh, still eyes and boss Night is still coming on. That was perfect. And then we go again in our filter and we in noise media in the reduce. He's quite it's likely to be higher. Okay, let's keep it in his way, as you can see, is very, very strong. But I'm going to create a mosque with option and add a layer mask. So is a black one. So I'm just going to add mine mascot in the area that I want to. He's not everywhere now. The affect is super strong, but just to show you what's going on, okay, and now we could down capacity because it's not really stick Olympic pool like 36 but it depends on the picture that you have, so we are like, in a very good result, we can decide if you like these of these. The skin Dexter is the same or the other one for me is exactly saying so. what I'm going to do next. Just a matter off cleaning everything that I don't like, especially their flying hair in I think these area to Yeah, the majority off next part is gonna be just clean. Let's go.
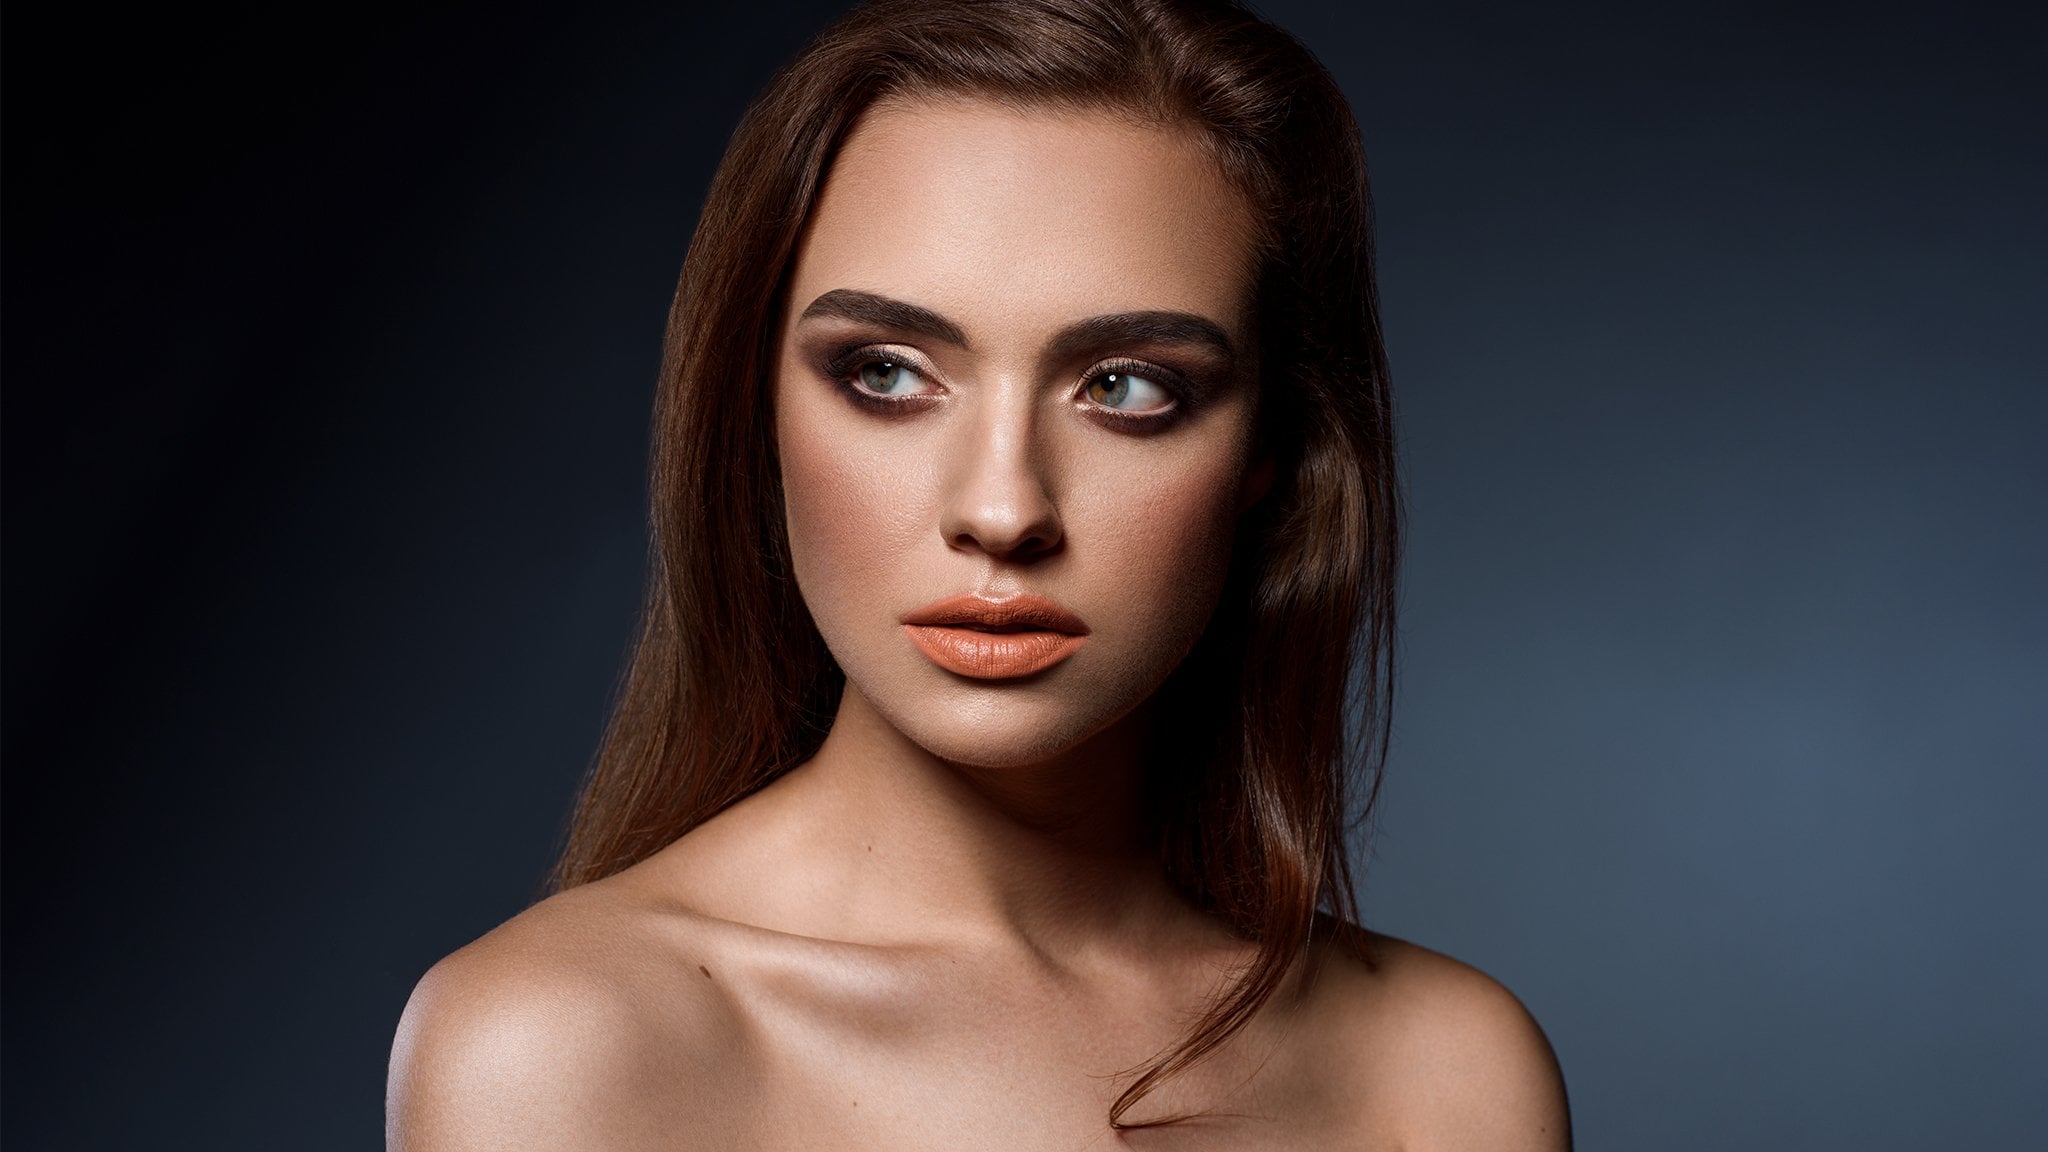
5. FASHION PHOTOGRAPHY RETOUCH SKIN TEXTURE COLOR GRADING BY GIULIA HEPBURN BACKGROUND RETOUCH: we have now everything and then shooting again. What we need, Mr Key from this one way at the hour, I frequency separation, dodging burn and skin touch. That is great. Now I'm going to create a new level, and I want to delete this part for in this case, I'm just going to use the clone stuff. I've used a bigger one brush option. Click on the area, off the sky. Close. Where are they lying here and then just actually copious sky. And you can see already in some ereditato Arnold to, like, perfect and is visible that we did something on the with the hair. But I'm gonna show you out tow. Avoid this part. Okay. I probably hate probably very close to the edge of the hair that I don't like particulary, but we're in a new levels, so we can always delete and started and with the patch tools are just going to, uh, yes, they create a medium off the color in this way. The patch is you can see if I want to. Come on here doesn't work because it just using around the area off my levels so I can not going out. Um, if we want to work with on entire portion off the sky, what we can do is like, normally, I work in this way. I select all my lovers eye duplicate with common J and I merge everything. So if I want to go back, I can go back. Except But if I'm happy with all the first part, it's OK, so I can actually let's merge everything Okay, so now I can just could be the entire sky. So as you can see now, the blending these opinions more correctly, it's more precise. It's I can still see I normally just move on my bus tour. Not very crazy, because if you're doing all the time, is gonna be physical. So, for example, then you go close to the hair here only to be too weird, and I go with a different capacity. The picture anywhere is gonna be not look like this distances. So it is okay to be like, not crazy, precise and thes hair in this case. But it depends on what kind of picture you have. Okay, so let's use again our fairies much, dude. And here we go. Okay, so I think It's pretty cool. Now, this guy, let's work around thes I don't want to know what is a but is disgusting. And I'm just coping again with my my glasses stamp here. Here is not necessary to be, like, incredible press size that the world is fine. Little one. We can be in this way. Yeah, it's fine. Okay. We are almost done in in the next section. I'm gonna teach you out of color grade the picture.
6. FASHION PHOTOGRAPHY RETOUCH SKIN TEXTURE COLOR GRADING BY GIULIA HEPBURN COLOR GRADING: we are almost, uh and we need to call a great picture. So we needed to give our point of view off our picture. Our our taste, the mood of the picture. Let's duplicate our level because we're going on to probably change it capacity and let's go toe filled their camera. Ro filter. Okay, Perfect. So we can see our picture if and I'm going to go straight to the age as our adjustment, I'm going. I already have in mind and a tested already what kind of corner I would like to use. And I like a very warm feeling that this life more my light more than London. So I'm going toe that writes anything stronger. And this these things depends all on your pictures. So it depends like here we have no green, so it doesn't affect our picture. But maybe you have green. So it depends where you put the request more strong. And now you can see the sky. I want this kind of sky. No, not like this, But more light blue lie like blow when dreamy. Maybe it's getting more like this part. Okay, now, easily, too big, like orange. So she's probably coming from Mars, but we can work around the situation. We can put down saturation off the orange Anderson off the all right? I'm not too crazy. Let's put hide these. Okay? And the luminous is the light in the light era, as they were. Say, you can see you can have more this year. I'm gonna change this part because it's not OK to keep the resin loops as much as possible . Okay, so after either why I test these one? No, we have our color. Great. Is very, very, very strong than on the orange, especially in and work around here. It seems like orange about changes. Okay, I said, OK, you can see before and after at the moment. I agree is very strong. So I'm going to change a little bit of putting the capacity, like, 60%. So we still have our core grading and is still working. No. What I would like to do or so is to change. I need to be them. The brightness and contrast. I think we need a way to be more brightness. Just I need me more contrast. Not crazy. I don't like crazy contrast. And, uh the wrestling. I'm going to do the same as they did before. So, like, um, copy. This is my last three levels coping with common J merging together. And I want to do something for the government because or so the government is part operates in this picture. And infielder, I'm going to I passage, I guess so. You can see everything's going to be weird. Normal and overnight so easily is incredibly strong. We're gonna create a musk, okay, inverted mosque, and with my brush, I'm going to, um, just select the era off the shirt. I'm going to do this because this affected is especially good for leather or for stuff with butter. So, as you can see is already that seems more in front of our eyes. We can create a proper mosque with a pen or weaken, just work without war brush as we refer. So he's very strong is like, actually too strong. If we want to point the accent on self indices date, the fact that you need to do what we can also do is like to point a little bit here on the lips, just tiny I browse less stronger. So the face is our main point. This and I'm going to put the opacity down below to 40% so we can see. Okay, so it's quite fun. The last thing that I'm just going to do is again to create a new level. We've soft lied fear of stuff. Flight. We're going to work just on this level. With our Dodge tour. I want to create more life. It's a white area. Yeah, it's And that burn. Okay, maybe I'm or effect is only to be too strong, just a tiny be. But I'm gonna keep it okay easily. Let's make our picture more straight. I'm gonna just cut over here. So my cutting is not, um, like a final cut is You can see it's not deleted. Crawford pixel activated, so I can still go back and managed to change my my selection. Okay, let's see what's going on. What I think is gonna work. Let me show you again one last time, disease where we started. And these were well, thank you guys to watch these Editorial. I hope you enjoy it and you find useful for your next fashion photography retouching. If you have any questions, you can just drop me a comment in the comment section below or drop me an email content me on my social media that Julia Ebbert. So thank you again and see you next time. Bye.
7. FASHION PHOTOGRAPHY RETOUCH SKIN TEXTURE COLOR GRADING BY GIULIA HEPBURN OUTRO: I Everyone is your upper again. Thank you so much to watch my classes. I hope you enjoy it. And if you have any questions, just contact me on the comment section below. You can also contact me by email or on my social media. Thank you for today and see you next time by
 Giulia Hepburn, I am made and remade continually.