Transcripts
1. Dynamic, Expressive Figure Drawing: Are you a figure drawing artist, but you feel that your
figure drawings lack life? Do you long to be able to draw dynamic and expressive figures
in your drawing practice? Well, you're not alone.
The biggest challenge that I hear from anyone
who does figure drawing, whether it's at home
in their sketchbooks or even if they're going to regular life
drawing sessions, is that they would
love to be more loose and expressive
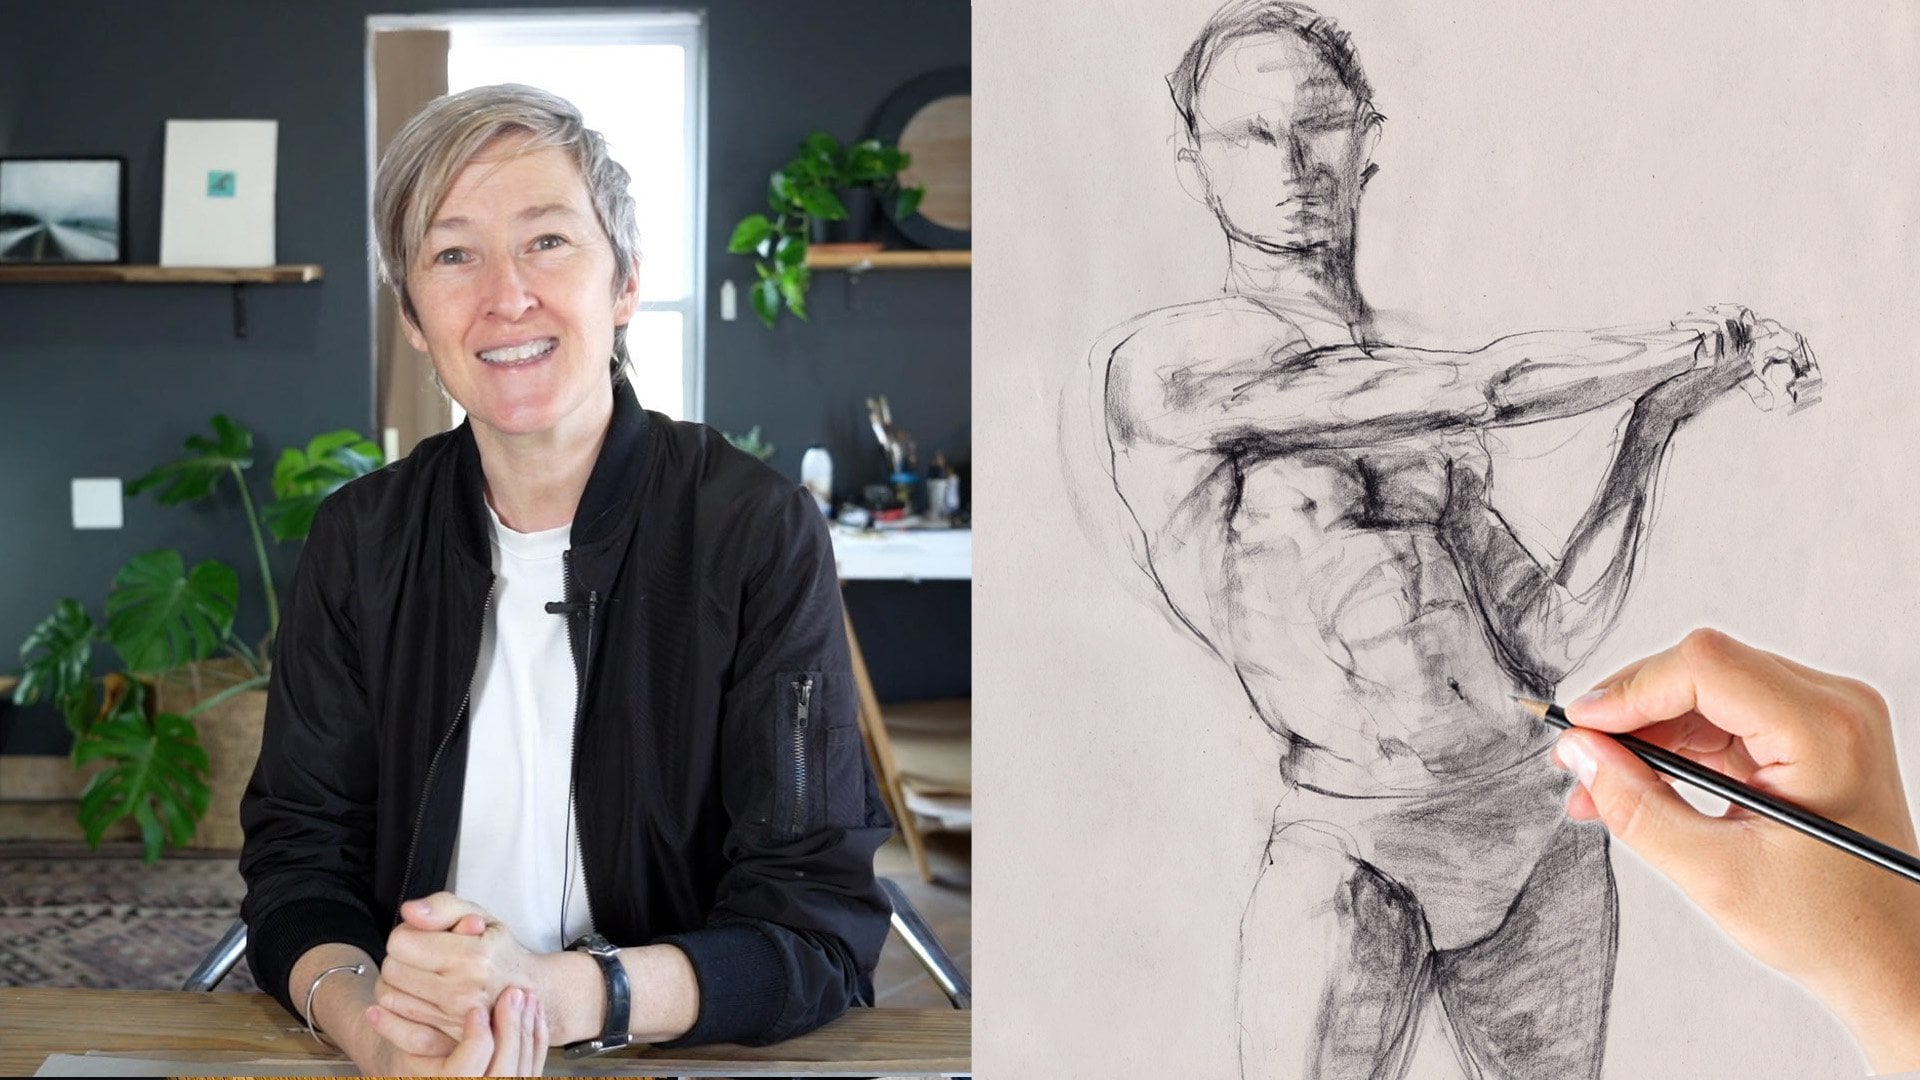
in their work. My name's Shavon. I'm a top
teacher here on skill share, and I've been drawing the
figure for close to 20 years. I help students to
break through blocks in their work and to uncover a dynamic and expressive
approach to drawing. So in this class,
you're going to learn four exercises that work effectively to improve
your line quality. Line quality and mark making are the foundation for expressive
and dynamic figure drawing. Through these very
simple exercises, you'll discover how
you naturally make marks in a way that
no one else can, and this can be developed into your unique and personal
drawing language. But this class also addresses so much more than just
improving your line quality. You will learn about
the one reason why you don't normally make dynamic
marks in the first place, and it has to do with engaging the right kinds of
processes in your brain in order to be able
to draw and in order to be creative and
intuitive as you draw. So you'll learn how to turn this creative process on
whenever you need to. And once this is activated, your creative expression and your unique drawing
language can be realized. I'm so excited to share
this knowledge with you because it will have a
profound effect on your work. And on you as an artist. So if you're ready to dive in, meet me in the next lesson.
2. Your Class Projects: For your class project, you're going to get to work on four simple but very
powerful drawing exercises. Now, you can draw alongside me, or what you could do is watch the demo that
I do for each one, watch it all the way through,
then pause the lesson, and then make your drawing. But either way,
when you're done, head over to the projects and resources tab of this
class on a desktop, and from there, you
can upload your work so that I can review it
and give you feedback. You can also check out other
students work there as well. Now, for each of the exercises, I've left you the reference
images that I use, and I've also left
you a PDF guide about how to research getting good references for
figure drawing, because that can be
a bit of a challenge when you are studying
figure drawing on your own. I'll explain exactly where
I get my images from and specifically what
I look for when I am trying to find
good reference images. So all of those resources can be found in the Projects
and Resources tab. Now, just a word
about your drawings, I'm going to be
asking you to draw in a very loose and
intentionally messy way. So for this class, just
allow yourself to explore line and explore creative
processes when you're drawing. I know we're figure drawing students and our subject
here is the figure, but we're using these images as a reference to work
from, not to copy. And that's a really
important distinction. So don't worry or concern yourself in this class
with things like, you know, accurate
proportion or anatomy. If you have any questions at all or if anything is unclear, head over to the discussion tab and drop me a comment there. I'll be able to
reply to you then. Before we dive into
the exercises, I'm going to explain
a little bit about the approach behind them in
the next couple of lessons. So when you're ready,
I'll see you there.
3. Drawing is a Creative Process: Drawing is a creative process. As I said in the intro, the problem that you
face as a figure drawing student is not
that you can't draw a Nashmeal proportion or that you need to learn it
in order to draw better. Because even as you draw
correct anatomy in proportion, you sometimes feel as
though your drawings lack life and are a
bit one dimensional. Or it could be that maybe
you continue to draw the same drawings over again and you can't really
move beyond that. Well, a lot of figure
drawing students reach this plateau where
they can't improve, and the issue is just
that your lines and your marks are too limited to fully express
all that you see. Focusing on your line work and your mark making will have a dramatic effect on the
quality of your work. And it's something that
you can continuously work on and improve over a
lifetime of drawing. So as you develop as an artist, your personal drawing
language will also refine and improve the
more you practice. But first, let's break
down the process and understand what exactly is the issue around
improving your drawing, and it has to do with using
correct brain processes. So when you're
engaged in any task, whether it's driving a car or doing your taxes or
drawing the figure, your brain is handling that
task with specific processes. Now, generally
speaking, there are two distinct types of processes. They are sometimes referred
to as left brain right brain, although that's not the exact
way that your brain works, but you can think
of them as being either logical or
analytical processes or creative intuitive processes. So as I said, it's slightly
more complex than that, but we're not in a
neuroscience class, just for the sake
of learning how this works for the
sake of learning drawing it's extremely helpful and beneficial to
understand it in this way, especially when you
see the results of the two different
modes of drawing. So like I said, when
you're trying to control any task that
you're engaged in, whether it's driving
a car or doing your taxes or
drawing the figure, what's happening
in your brain is that you're using very
analytical processes. These are the kind
of, that's right, no that's wrong
sort of thinking. And I bet you can
relate to this. As you draw, maybe you're
thinking to yourself, well, oh, that line
doesn't go there. I better erase it out
and put it over there, or maybe you're thinking I drew that muscle
shape perfectly well. This drawing is
going to be awesome, or perhaps you're thinking, Oh, this model has a nose. I know what a nose looks like, and everyone else knows
what a nose looks like. So I'm going to make sure
that I draw what I know is the correct shape and then this drawing
will be awesome. Thoughts like,
Yes, that's right. No, that's wrong, those are indicative of
analytical processes, and it's very useful and
helps us get through the day. But these processes are
focused on analyzing, naming and categorizing and their logic driven ways of
approaching the task at hand. Okay, so sometimes this can be very useful
when we're drawing. But I want to explain
why this kind of process can also
more often than not, be very unhelpful
when we're drawing. And it's for one simple reason, and that is that your brain, when it's in this mode of continually self judging
and self correcting, it has one and only
one objective, and that is efficiency. So it will substitute
shorthand or quick symbols or, you know, stylized placeholders for what's actually
being observed. When you see this,
your left brain will substitute this for efficiency and expediency in order to handle the task
at hand very quickly. You can see how problematic this could be when
it comes to figure drawing and especially
if you want to draw the figure from
observation and extremely especially
for anyone who wants to develop a unique and
personal drawing language. Now, let's leave aside, modernist or abstract art that intentionally
stylizes forms because that has a very specific
conceptual framework that you would need to
take into consideration. We're talking about here is simply drawing from observation, like we do in life drawing. So on the other hand, creative processes that are much better suited to the
task of drawing, they're focused on discovery
through exploration, curiosity, intuition,
and feeling. And when these
processes are engaged, then when you see this, your brain revels in all of the shapes and
lines that it can follow. And it enjoys drawing and
following that with a line. Now, what does all of this
have to do with drawing messy? Because as I said in
the previous lesson, for the class projects, I'm going to be asking
you to draw Messi. Well, by drawing
messy and loose, you're simply letting
go of control, and as a result, analytical, logical, left brain
can take a breather. It can literally have a
coffee break, I can relax. All those logic driven
thought processes quieting down while your creative brain takes over the task at hand,
and that is drawing. So this is when you
enter flow state, and you can literally feel it. You feel calmer, quieter, time passes and you might
not even notice it. Drawing feels easy. It doesn't feel difficult
or frustrating. So that's what we're going
to focus on for this class. Exercises to engage or literally turn on the
creative brain activity.
4. Why You Should Draw with Less Control: In the previous lesson, we talked about how drawing with less control engages
your creative process. Now, you might very well argue, but when I draw messy, the drawing looks
nothing like the model. And this is the
biggest resistance that people come up against. When I mention draw
loose or draw Messi, they get super frustrated
because they claim, well, that's not what I see. So my answer is this for anybody who's
doing life drawing, learning to draw in an
expressive and dynamic way or unlocking your
expressive creativity, that's as much a part of drawing as is a rigorous
academic skill set. Isn't expression what
makes an artist an artist, you know, their particular
style or flare? And wouldn't it be crucial
to understand and develop that alongside academic things like anatomy and proportion? So I'm not saying that for the rest of
your drawing career, you need to draw
messy and loose in order to draw well,
but simply put, once you have experienced
and understood this aspect, then you will see the
dramatic improvement in your drawing sessions where you are trying to
control the outcome. Now, it's very important to note that most people who
are very skilled at drawing are already engaging their creative processes
unconsciously. These artists that make
realistic drawings look so easy, they've already spent a lifetime playing with lines and marks. They've gotten to
know and understand their own personal
drawing language through experimentation
and practice. So it's second nature to them
to draw well and to express creatively while also being very careful and
considered in their work. On the other hand, beginners
and a lot of self taught artists are very often not
just new to figure drawing, but they're new to
drawing itself. And they haven't had a
lifetime of playing with marks and being
comfortable drawing with different and
varied styles. And so as a beginner or anyone who wants to
improve their drawing, step one should be to discover what lines and marks
can do for you. So drawing with less
control is just a way to experiment and
push yourself into a more creative flow state. You can approach
the exercises in this class simply
as a drawing drill, and you'll see the
profound effect that it has on
your line quality. If you understand and experience
your creative process, you will naturally inform and enhance your analytical process.
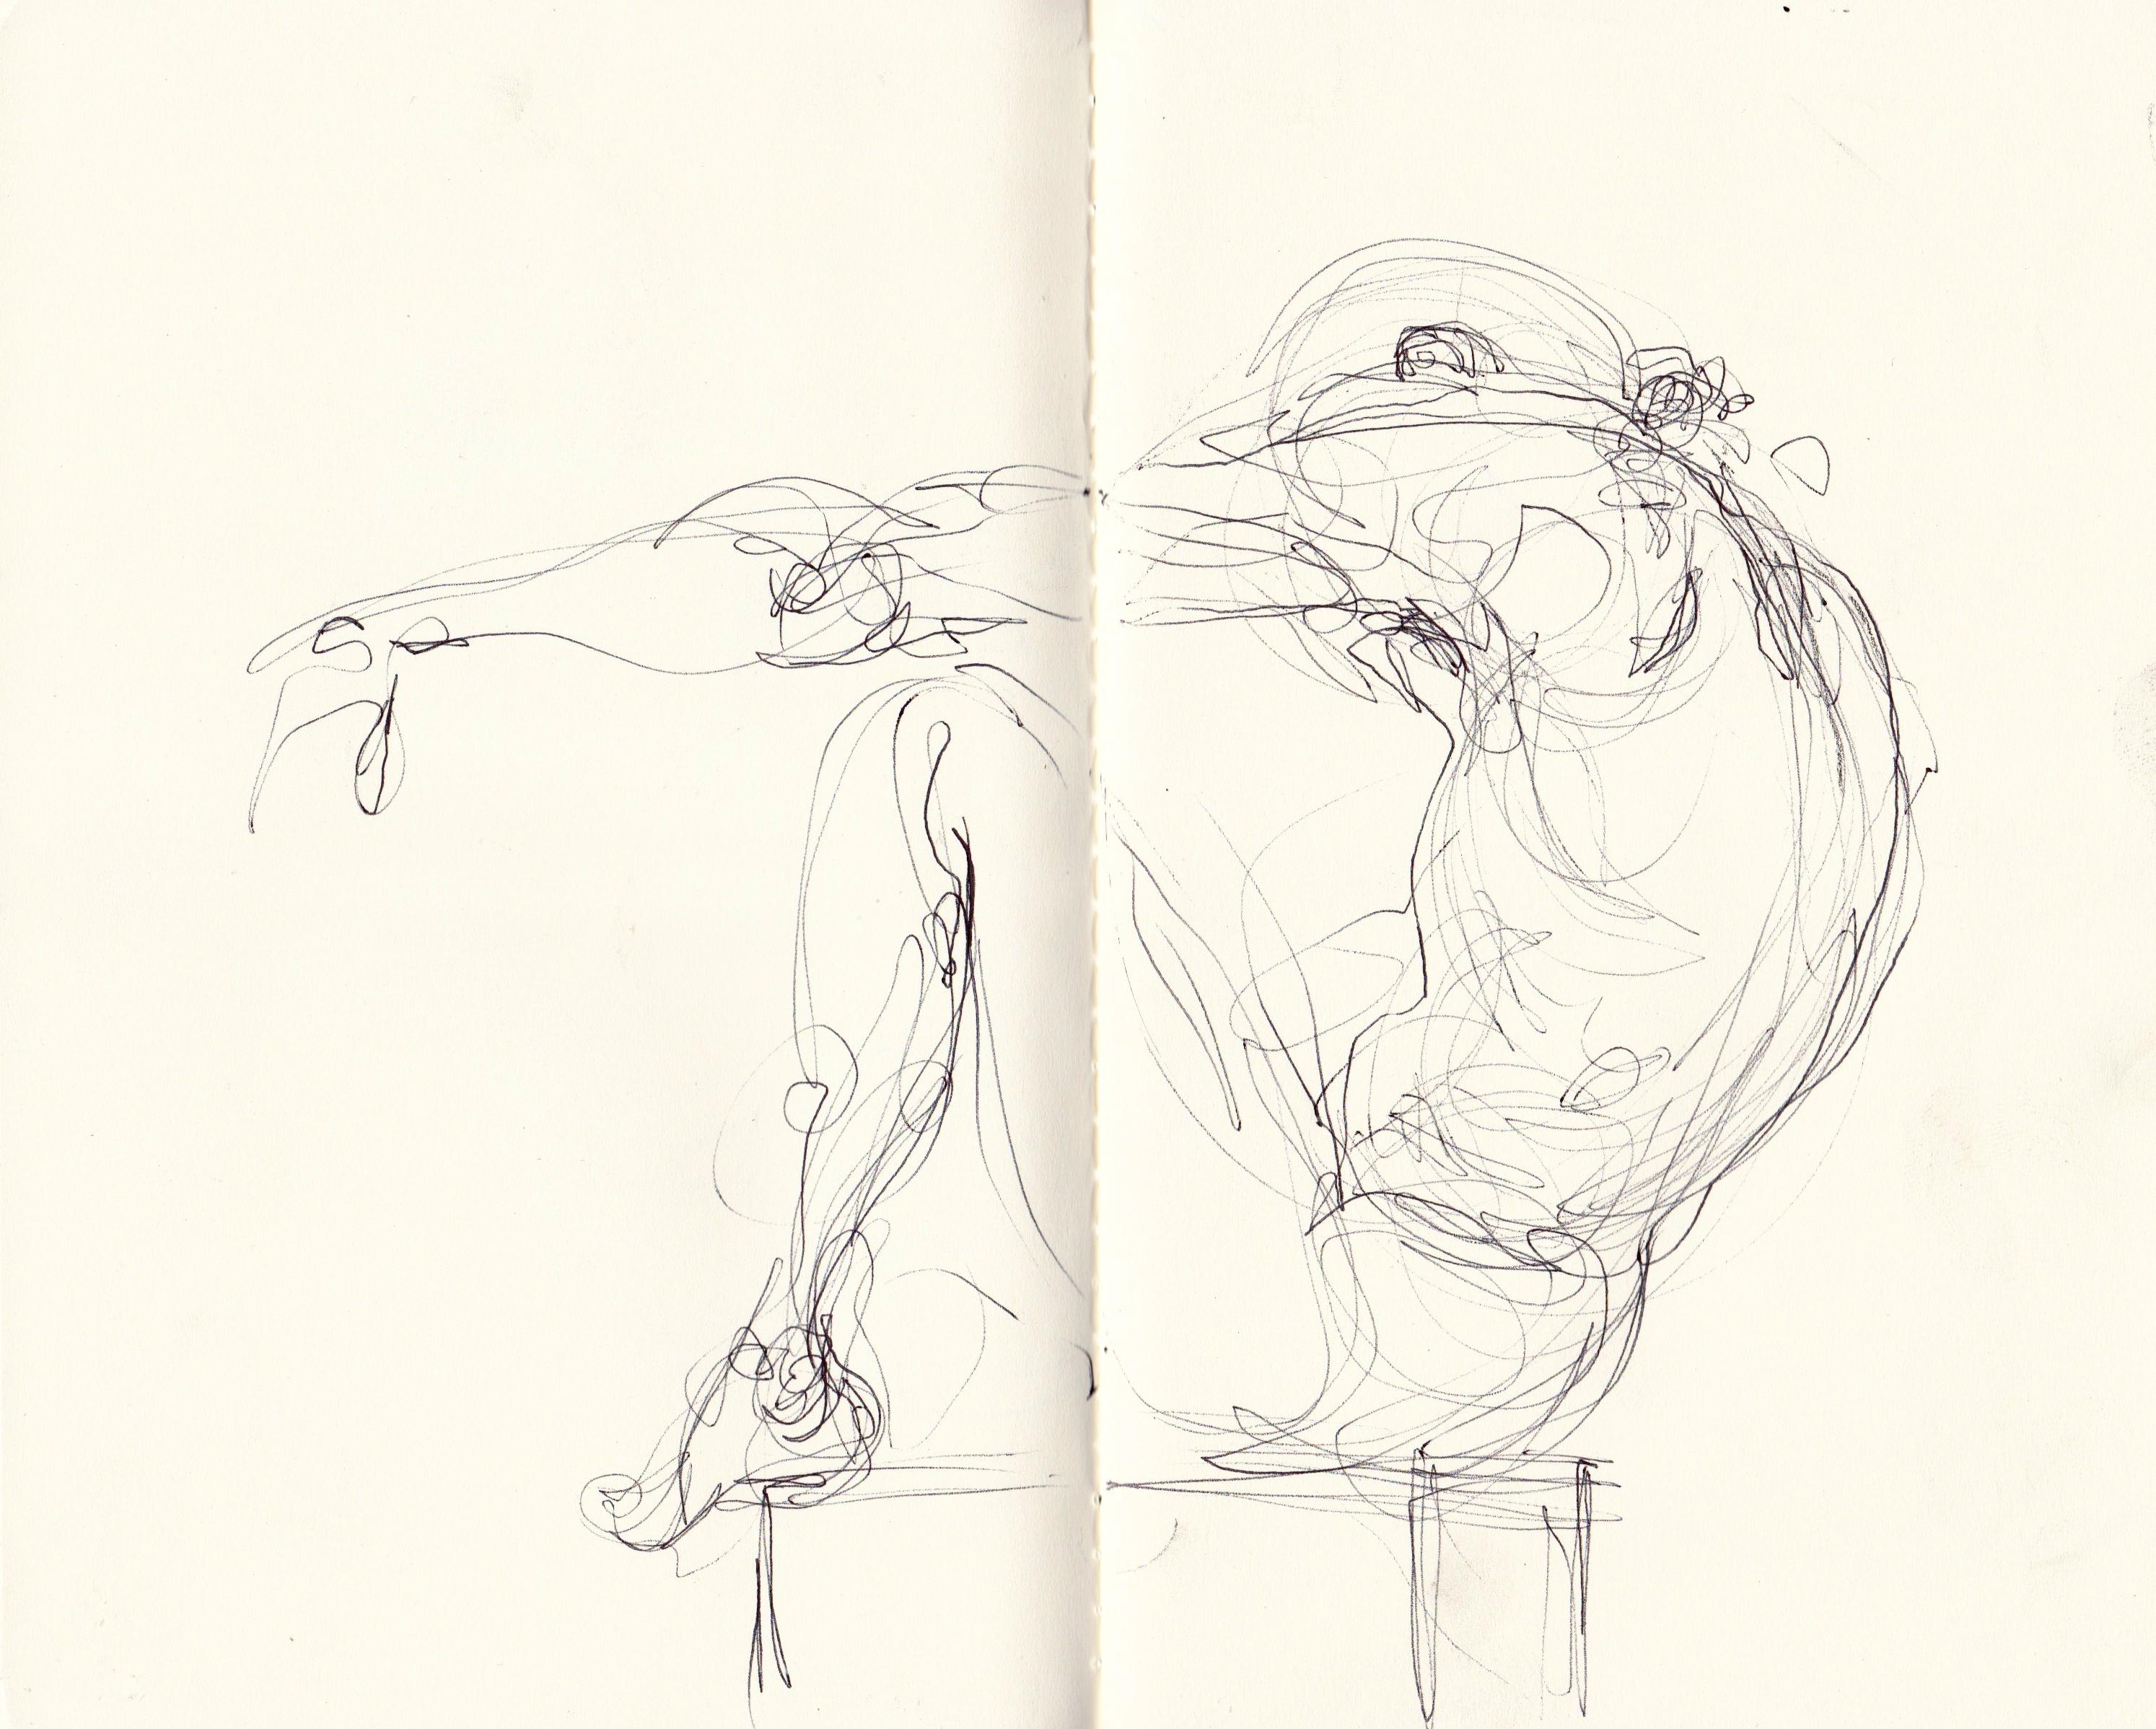
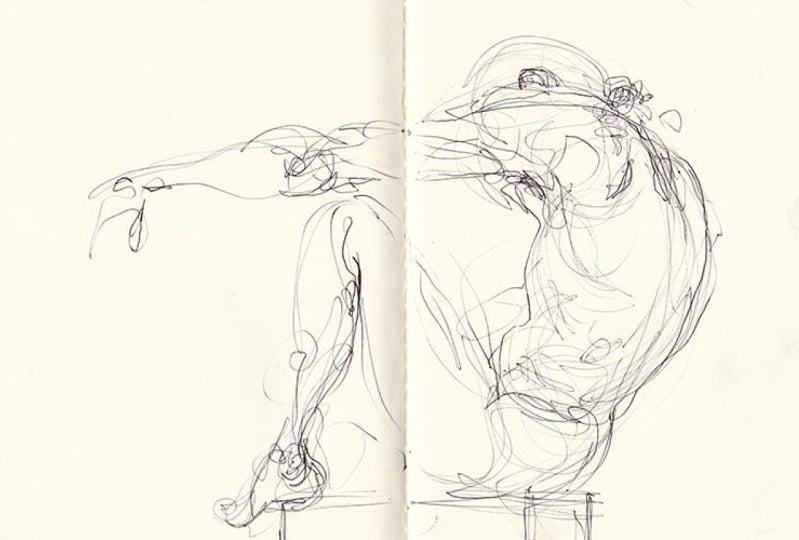
5. Exercise 1 - The Continuous Line: For this drawing, use either your sketchbook or
a loose sheet of paper, and you can either use
a pen or a pencil. Anything that you're really
comfortable drawing with. Personally, I like to
use a bullpoint pen for this exercise because it has
a very free flowing quality, and that helps to keep the
line moving continuously. But a pencil works
fine, as well. So what you'll do
is first pull up the reference image and then
while you're looking at it, place your pen onto the page. Then try to keep that
connection going, that connection between
your eyes and your hand. And as you move your
eyes around the image, as you're looking
at your reference, move your pen at the same time. Now, don't try to draw
the model or the figure as you think it should you
know, it should be drawn. Just simply allow your
pen to follow your eyes, no matter what your
drawing looks like. So what happens is that you will follow outlines and edges. You will also start following lines that
go across the figure, and these are called
cross contour lines. And you might even get your
pen or your pencil to move from one section to another
without lifting it up. And that will also create lines that go all over your drawing. But most significantly, this
is what's going to help you to start drawing the forms as sort of rounded three
dimensional shapes, which will give the impression
of three D feeling to your drawing because
you'll start to use your line to wrap
around the figure. Now the key is to keep your pen fully on the
page as you draw. Don't lift it up for the
entire drawing session. Go forwards and back over the
same area if you need to. That's totally fine. And you
will find that by doing so, you're actually
giving emphasis to specific areas of the figure
where you want to imply, let's say, weight or heaviness. And just note in those moments when you are making that kind of an emphasis. So the pen is literally tracing your eye movements
and your response to shapes that you see. Your drawing will become
a map of how you look and how you react to certain
parts of your subject. I believe this is a
really critical skill to learn for any figure
drawing student, whether you're a beginner or you want to improve
your drawing. Your unique way of responding to anything in life is what
makes you an artist. And as simple an
exercise as this, it's going to show
you immediately how you respond and react
to anything that you see, especially to the
subject of the figure. It shows you where you like to place
emphasis in your drawing, what you think is
most important, and how you look and
observe in general. As well as that, drawing
with a free flowing line helps you to let go
of creating stiff, cut out or, you know, cardboard looking
figures because you're able to bring
in this sense of three dimensionality
of the rounded forms by circling around the
figure with your linework. It can really help you
in the long run to create very solid
looking figures with weight and presence. Now, what I don't want you
to do in this exercise is to try to describe shading
or shadow in any sort of, let's say, academic way. So treat everything that you
see in this pose the same, using the exact same
line to draw it, whether it's the
outer contour line, whether it's a cross contour, or whether it's an
area of shadow. Everything is going to be described with this
searching line. And another incredibly
powerful side effect or side product of this exercise is that if you
practice this over time, you'll actually start
to learn proportion intuitively for
the simple reason that by drawing like this
with a line that goes, forwards and back,
a searching line, you're actually constantly
and continuously comparing one section of
the figure to another. With your line work, you're
constantly comparing one part of the figure to
another almost continuously. And this is how you can measure
proportion intuitively, how you can judge your scale and judge composition overall. This is a really useful exercise to do at the start of any
live drawing session, particularly in the short poses that people do as warm
ups at the beginning. Very often, you'll get short 1 minute or two minute
poses to warm up. And this is exactly
when you can use a continuous line to
help you to warm up. So have a go at this exercise,
and when you're ready, I'll see you in the
next lesson. Y.
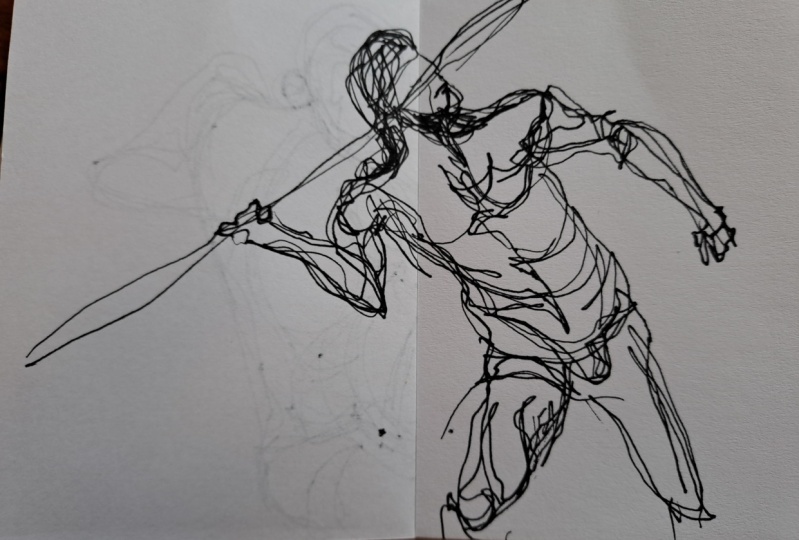
6. Exercise 2 - NDH Drawing: For this exercise, use a pencil or a pen, and you can use
newsprint paper or any kind of paper or
even your sketchbook. Pull up the reference
image and then switch your pen or your pencil to
your non dominant hand. So non dominant hand means using the hand that you
normally don't use to draw. For me, that's my left
hand. I'm right handed. So for this exercise, I'm going to switch
over to my left hand. If you're ambidextrous, I think I would suggest that you skip this exercise, really, and just go on to the next one because you'll likely find that an exercise like blind drawing is going to be much
more effective. In fact, this drawing
exercise for the rest of us is as effective
as blind drawing, and we'll do that later, and you'll see it has
the exact same effect. It's a really powerful way to immediately switch over to a much more creative
way of observing. And that's the key here. This is what we're trying
to train ourselves to do is to really
look much more closely and to look without sort of judging
and categorizing. Obviously, your drawing
is going to look quite wobbly if you're
anything like me, and it won't necessarily be the most controlled drawing that you've ever
done because you simply don't have the
same kind of control over your non dominant hand
as you normally do. In fact, I tend to use a continuous line for this
exercise simply because I am so wobbly on
my left hand that having a continuous line is
a lot easier for me to draw. So if you're struggling
with this exercise, try to use a
continuous line where you keep the pencil in
contact with the paper. Either way, though, this is
all about your observation. This is what's going to
change so dramatically here. You simply are not going to be able to make those logical, analytical judgments that you normally do when you're
drawing the figure. You're not going to be able
to preempt your drawing with prescribed shapes because you're in a different
mode of thinking. And the result of that is that you simply follow
the shapes that you see without needing to
simplify or stylize them. This is so powerful
for your drawing, and it's something that I
really want you to experience, especially if you're
doing live drawing regularly or if the figure is something that you really
want to learn how to draw. I think it's much more
powerful to be able to draw what you
see at any time, no matter how complex it is instead of always trying to
simplify what it is you see. Very often if I'm stuck
when I'm drawing the figure or if I just can't seem to
get something drawn right. This happens to me with things
like foreshortened limbs, if the pose is very
foreshortened, or if, you know, I'm drawing the
features of the face, I really struggle to get
those shapes exactly right. Well, what I'll do
is in that moment, I will just swap hands and start drawing that area with
my non dominant hand. It has a very a surprisingly
successful effect. My left hand always plots the exact shapes in
the exact right place. So if I can at least make some sort of mark
to plot that out, then I'll swap back to my dominant hand and
continue drawing. I've also had students in my own live drawing
classes who have really struggled to draw
in an observational way. You know, they kept
drawing the same sort of stylized or symbolic
drawing of the figure. And when they switched over
to their non dominant hand, their drawing
changed completely. I've even had students who now stick to drawing with
their non dominant hand because it's so effective at making accurately
observed drawings. So again, this whole exercise speaks directly to
how you observe, and it's going to
show you that not only can you observe the
true shape of things, no matter how complex they are, you can draw them without
having to simplify them. So give this exercise a go, pause the video and try it out if you've never
tried this before. And then when you're ready, meet me in the next lesson. A
7. Exercise 3 - Drawing with a Stick: For this exercise,
what you'll need is a fairly long stick up to, you know, half a
meter in length. I found this stick when I
was out walking with my dog. At the end of the stick, what you'll do is tape either a pencil or a
piece of charcoal. Next, you're going to
attach your paper to a drawing board in order to
prop it up against an easel. If you don't have a
drawing board or an easel, then you could
tape your piece of paper to a wall
that'll work as well. And another option if
you don't have an easel is to lean your drawing board against the back of a chair. For this drawing, pull up the reference image and make sure that you
have it to the side of your easel or your drawing board so that you can
stand back and view both your drawing
board or piece of paper and the reference
image within the same view. So you want to be
able to, you know, sort of flick your eyes
back and forth between your reference and your drawing
and then start drawing. You will find this drawing
very challenging, I think. The marks are going to be
very awkward, quite choppy. It's likely that you'll only be able to draw lines and
marks in one direction. This exercise is the most challenging for
controlling your linework. The further back that you
hold your drawing tool, the less control
you have over it. But this is an important one. All too often, we only ever hold our pencil the same way that
we do when we're writing, but drawing is a very different visual language to writing. So it's super important
to explore what kinds of marks can be created if you hold your drawing
tool differently. As you can see, I'm really struggling to draw
shapes of any kind in a controlled sense or to make normal sort of idealized
shapes of the muscle forms. I'm doing my best to draw the figure in the
pose that I see, but I simply can't rely on my habitual style
or mannerisms, let's say, which
usually help me out. So as a result,
I'm attempting to draw the pose
section by section, like the arm and this
side of the body first. In this pose, there
is a strong tilt in the upper body
compared to the legs. So I'm trying to make
that stand out at this point and sort of hope that it anchors the
drawing for me. Now, one thing that
I did notice in this drawing is that a
method like this where you're using the
stick in a very sort of staccato kind
of choppy manner, well, it just really lays bare exactly what you're thinking
about when you are drawing. I could see very clearly from this process that
I'm focusing on trying to express this idea of the roundness of the forms. It wasn't great. It was difficult to do that, but I suddenly realized that that's what I was
doing as I was drawing. So that was a really
interesting thing to note, and I was very glad
that that was the case because it's a good thing to be aware of and
something like that, even though the
drawing itself is not good in the sense of the outcome or the
finished drawing, the benefit that you'll get
is through this process. It's a really useful
exercise to point you towards drawing with
clarity and observation. So naturally, some of the
drawing is wildly inaccurate. The stick is such a difficult
drawing tool to use, and the marks that you
make are very limited. It's very hard to
make a circular or rounded mark or
to draw shading. So I found that directional
lines seem to be the best and cross hatching like that seem to be the
best thing to fall back on. Following the directions
of the forms, drawing lines in just
one direction like that really helped me
a lot in this process. I will say that this
pose looks, you know, deceptively simple, but it's
not an easy pose to draw. There are a lot of
very subtle tilts and twists throughout the body that if you don't
draw them correctly, the drawing might end
up looking very flat. And I know this because
I've actually tried to draw this pose previously in my normal regular
drawing sessions. And I was really surprised that today
with the stick drawing, I was actually much more successful in
getting that tilt of the upper torso and getting the subtle tilt in the horizontal
axis of the shoulders. Seem to emerge much more
easily for me, again, likely because I'm
not thinking about it and I'm not trying to
control it as such. I'm just simply following the lines and the
shapes and trying to match what I see with some sort of
marks that I can make. As you can see, I'm also
shifting the drawing anytime I see that there needs to be
refinement or correction, but I'm not erasing
out any of the lines. I'm just redrawing
it where I need to. There's so much to be learned
from an exercise like this, and it's probably one
that we could work on multiple times and get better at it the more
practice that we do. Drawing like this
takes you out of your structural
academic, you know, mindset and lets
you really deeply access observation and
connection in your work. So give this a go, and
when you're ready, meet me in the next lesson.
8. Exercise 4 - Blind Drawing: To start off this exercise, what I want you to
do is first place your pencil onto
your piece of paper, your sketchbook, whatever
you're working in, and then look at the
reference image. Try to connect the pencil to the point that you're
looking at your reference. And as you move your eyes across the outer edge
of the reference image, start to move your
pencil really slowly. Keeping your gaze or your eyes firmly focused onto
the reference image. So don't look down at
your drawing at all. Try to keep looking at the photo and start to draw along the contour that
you're looking at. So I'm starting out on
an outer edge here of the upper arm drawing
around the elbow, I'm trying to go as slowly as possible and try to
really connect or match up the speed of my
hand or pencil with the exact speed that I'm looking at with my eyes
along the contours. When you get to
an area like this where the arm is
resting on the knee, you have the option to go down the outer edge of the
lower leg or as I'm doing, you follow the contours
that go across the hand. Now, the hand itself
has loads of lines that you can follow
inner contour lines around each of the fingers. But right now I'm
just simply following the overall outer contour and tracing my line back
up to the wrist. Now, here I'm drawing the
line across the wrist and forearm meeting up with the outer contour
of the leg again. So you can do that
anytime you want to go from one side of
the figure to the other. Simply trace your line across the edge of the
forms that's facing you. Doesn't look like an
outer contour line, but it's known as
a cross contour. And again, keeping your
gaze and your focus firmly on your subject
or your reference image, don't look down at
your drawing at all, because very quickly,
you're going to see that the drawing starts to look nothing like
the reference image. And as I've said
before, that's okay. What you're doing
is just training yourself to really observe. And the reason why
you're drawing so slowly is to make sure
that you're actually looking at every single aspect of the contra line
that you are tracing. Now my laptop went to sleep, so I had to wake it up. But I didn't move
my pencil at all, and I didn't look
down at my drawing. Just keeping my line slowly going down across the inner contour line
that I see there. And right now, obviously, my lines on my drawing are
not matching up at all, but I'm still drawing
nonetheless and tracing my line back up across the outer edge of the torso up to the hand. And here I'm going to make
a cross contour line. Moving slowly across
the clavicles up towards the shoulder. And I'm going to pick up that
outer contour or outer edge of the shoulder and the arm. I'm going to follow
that line all the way down the outer edge of
the arm to the elbow, trying to pick up
every single nuance of curve or bump or
indentation that I see. And then I'm coming
down the lower arm all the way to the hand. Again, you can trace the fingers here individually
if you're really super focused and you're
getting really lost and caught up in all of the contours
that you can see. And hopefully you're
in that zone, in that very focused, almost meditative state
when you're drawing. I'm now tracing a line
across the top of the thigh, coming back again over
around the torso and now picking up an inner
contour line to move upwards through
the abdomen. There's a lot of lines to follow there and up through the chest. And as you can see, the drawing is nothing like the reference. It's not even like the tracing that I've made on
the photo itself. And that's, again, totally fine. So now I'm moving back up
again towards the shoulder. Picking up a line that
will get me over to the head or the
features of the face and tracing a line
up through the ear. Again, the ear has got a lot
of contour lines that you can get very focused and
you can start drawing. From the ear, I'm going to work down on the outer contour of the jaw just to make just to follow the
lines for the head. I So very slowly moving up the profile
of the face around the nose and following
that edge up to the brow, across for the eye, picking up some contour
lines as much as I can. And I can discern the jaw
and cheek of the model. So I'm following that line and then picking
it up again across the outer edge of
the head all the way around and back
to the shoulder. So as you can see, that's a bit of a
deconstructed figure. But nonetheless, that
would be a very good, very successful blind
contour drawing, following outer
contours and edges, following inner contours,
keeping the line going slowly, and not looking down at your page for the
entire drawing process. You'll likely find this exercise
quite tiring because it takes so much focus and so much concentration
to work in this way. And I think you'll also
find that you're looking at the forms and seeing
things that you actually first
didn't see at all. That's the beauty of
blind contour drawing. The more you look,
the more you see. And once you have
that experience and understand that there is always more to see when you're
in regular life drawing, you'll be able to kind of
engage that a little bit more and observe a little bit more closely
each time you draw. A
9. Drawing Review: In this lesson, I'd
like to review and recap the drawings that we did throughout the
four exercises, and to take this opportunity to remind you once again
that this way of working is not focused on drawing the figure as a
perfect neat outline. The point of these
exercises is to actually engage a deeper level of your own natural
drawing ability. Our first drawing that we
did was the continuous line. Now, you should see your lines traveling freely all
across your drawing. Don't worry if
your line picks up on what you think is
the correct anatomy. Instead, just look
and, you know, analyze your drawing
for evidence of where you wanted
to emphasize or explain one section of the figure or one part of the
figure more than the other. That's what I'd like to
see. I want to see that your line is not the
same all the way around. There should be some areas where you went over and
back again again to try and really express the thing that
you're looking at, and where it's clear that you're trying to make, you know, maybe something rounded
or something three dimensional or where you're trying to show
heaviness and weight. Next up, we did the non
dominant hand drawing. Now, your drawing like mine might look very shaky
with a wobbly line. And actually, in my own drawing, I'm noticing that
the overall tilt of the body is slightly off. But what I am really interested in and
what I'm appreciating is sensitive attention to the shape of the
things that I look at. And that's what I'd like
to see in your drawing. I think you'll be
amazed when you do this exercise at how
accurate you can get using your non dominant hand despite the fact that the line itself might be a bit wobbly. Now the stick drawing, which was our third exercise is probably the most challenging and the most awkward of
all the drawings. But as I mentioned, I
really want you to use this exercise to look
out for how you draw. This exercise is going to highlight what you're
focusing on when you're drawing and what exactly it is that you're trying to
bring out in your work. So, again, your drawing is going to have that very sort of choppy linework within
it, that's totally fine. And it's likely that, I
think, in this drawing, you might try to just focus only on the outlines of
the figure because it's so hard to wield this
drawing tool that if you just have a drawing of
outlines, that's okay, too. Lastly, let's review the
blind contour drawing. So I really hope you
give this one a go. Even though it's definitely
not going to result in a nice finish drawing or what you
might consider a good drawing, you might think that
it's very strange. But I promise you, this
is a powerful exercise. This is the best way that I know of to practice observation, which is a skill that really is the foundation for drawing. If you want to get
better at drawing, just try to get
better at looking. This exercise shows you
exactly how to look. And like the non
dominant hand exercise, you'll see how your
attention to shapes is vastly different than
when you normally draw, and the lines are very
sensitive and true to form. So all of these exercises should be practiced
more than once. They're not just once or
things that you can do. I want you to try and work
with these as much as you can. These are exercises that
will teach you so much more about drawing than
learning asm in proportion can. Hope that you find some
way to incorporate them into a regular drawing
practice for yourself.
10. Conclusion: To wrap up this class, I'd like to point out one
very important aspect of drawing that we were
not able to address, but it's something that is paramount to your practice
as an emerging artist. And the reason we
couldn't address this one aspect is
because we are online. So I just wanted to
mention that it's really important to draw
the figure from life. You can get to a live drawing
session in your area, definitely take that
opportunity to do so. It will make all the
difference to your drawing. Drawing from a photograph
only has huge limitations, and a lot of these
exercises will have maximum benefits in the
context of live drawing. Remember that figure
drawing is not always about stylizing or
simplifying the body into easy to
understand templates. That can be very helpful when you want to
create a design of the human form or if you want to break things down to
understand structure. But to draw in a
realistic manner, it's more important to
develop correct observation. You now have four powerful
techniques that you can rely on to draw anything
no matter how complex. The very best drawings
that I've done, I have always felt to me like they're the ones where
I got out of the way, and I just let the
drawing come through. By getting out of the way in a very analytical or
controlling sense, you allow a more
truthful drawing to emerge because truth lies
in what you observe. The connection between
your eye, hand, and your drawing
does not need to conform to anything
simplified or stylized. Because, as De gal famously
said, drawing is seeing. Relying on your observation allows that connection
to happen every time, and it allows for new discoveries
to be made every time. By sidestepping conventional
stylized ways of drawing in favor of
exploration and discovery, you will let go of the need to control the outcome
of your drawing, and you can start to appreciate that drawing really is
all about the process. So thank you so much for
joining me today in this class. I really hope you enjoyed it and that you got useful
information out of it. Please try out some
of these exercises yourself and post
your drawings in the projects and
resources section so that I can review your work
and give you feedback. So thanks so much for watching, and I'll see you
in the next class.