Transcripts
1. Introduction: Hello, friends. Welcome to my class of basics
to advance Macros. Macros saves a lot of time when we have repetitive
tasks on daily basis. It is an automation in Excel. Let me portray an example that I've taught in this
Skillshare class. I have a couple of sheets here, Set one and sheet two. If I enter any
detail on sheet one, it will automatically
appear on Sheet two with the help of Macros. Let
me show you an example. If I type my name, let's say, Am shake some
hypothetical details. And I'm coming for meeting. If I press Enter, so this vertical information is appearing horizontally
on Sheet two. Not only that, if
I add more names, it will also appear
chronologically. It will appear in order
of their occurrence. Let me show you
one more example. Let's say this time Mark is
coming, Mark Zuckerburg. Yes, I know the spelling and some details,
hypothetical details. And he's also coming for
meeting. We have a press to. So this detail is
appearing on sheet two, chronologically as I came first, and he came second.
So this is not magic. It is relative
reference in Macro. When we go to Macro, we see this relative
reference in Macro. So it makes our information appear chronologically
on sheet two. So if you have not learned
all these techniques, please go through
my Skillshare class and please go through step by step to learn
all these techniques. And if you have not
subscribed to Skill Share, please consider subscribing
now and get access to all such valuable
contents. Thank you so much.
2. Basics of Macros: Hello friends. Welcome to my class
of basics of macro. Now what is the macro? Macro records over steps in an Excel file and exactly repeats the same
when we ask for it. It is one command which performs multiple
commands at once. So it records of a moment's. Does it also record our audio
and video that I'm talking? No. It does not record
our audio video just like the other
screen recorders, but it records the
Excel datatypes. Now, Excel data types can be broadly categorized into tax, number, time, date, arrows,
charts, and others. Does macro record all
these things, everything. Let's check it out
in this Excel class. Now, first of all, we'll go to view and we'll
start a macro film here. So it is like Record Macro. It's asking for a name. So we are currently
testing macros, so we'll give test as the name. You can give any name
as per your need, provided there is no
space between the name, so it does not entertain space. Also, it's asking for a shortcut key so I can give T4 tense, so I'll give control shift T. Now, why Shift? Control a to control that all the keys are
already occupied. So in order to avoid confusion, it takes shifting, right? Because control a for
all, select all control, B for bold control C, control V, that's
famous copy-paste. So all the shortcut
keys from a to Z, all the alphabets are
already taken with control. So in order to avoid
confusion, it takes Shift P, Control Shift P will be the shortcut for
to run this macro. Now, what is this
drop-down list? So this personal Macro Workbook. So what is a personal
Macro bugaboo? Personal Macro Workbook
is a hidden boo, boo cannon system that
opens up whenever you open an Excel file.
So what will it do? It will enable us to use our saved macro in
all the Excel files. So once we have selected
personal Macro workbook, whenever you open an Excel
file or hidden background, Boston Macro workbook
will also open. And all the macros that
you've recorded in this, we will be able to perform
in other fields as well. What is the new workbook? So if you record a macro, it will be saved in
the new workbook. And what is this? It is
the current workbook, so we'll take current
for this class. Now what is the description? Description is the detail bit node for what this
macro is four, suppose we have multiple
macros in one file. So it will enable you to
understand what this is for. In fact, if you shift your job, so the other colleague
will also come to them. What this macro
we'll record it for. So currently protesting macros. So we will write VR testing
macro and we'll start. Okay. So now the
recording has started. The macro recording has started. Now we'll type all
the Excel data types and we will see does it
record everything or not? How to verify the recording
has started or not? I'll go to View
tab and see here, it's asking me to
stop recording. So it means it has been
recording has been started. I'll come here. I'll write text. I'll write the number. Right, time and date. John. And I'll put it as bold, and I'll give it a color
also to the headings. Alright. Now for tax, I'll take
my name's Michelle. Phone number, I'll take 1015. Let's add a function
also as some function, the basic function,
and we'll see whether this function also
gets recorded or not. Let's also add a formula. So ten plus 15, if I manually do it,
it is called formula. If I do it with the help
of a existing function, with the help of an
existing function, it is called function. Now for time we have a
dedicated function as now. So we'll use that function. So it's fetching
the time for date. I have function as today. For error, I'll take an average function
with some blank cell, so it will fetch me error. For charts. I'll take
months and four months. I'll take Chan, fab
and March and sales. Sales. I'll take
some random numbers and I'll give it as this data. I'll insert a 3D pie chart. So here I have a small chart. Okay, now to change the design and all that's
altogether or different class. Now we'll come back here and
this entire information, we'll give it borders. We have saved
information like this. We have tried to save all the extra different
datatypes after opening macro recording and let's
close the recording and let C has everything recorded, everything has been
recorded or not. So we'll go to macro again
and we'll stop the recording. Now remember the shortcut
key, Control Shift P. We will come to sheet two, Annual press Control
Shift P. And if you can see exactly
everything is recorded. This function, this formula, this adder, write this
function, this function. So exactly everything
is recorded. So this is how we can record
all the things into macro. Now suppose after recording
you realized there was a little mistake and you
want to add that right now? Shall you have to record
everything again? No, nothing like that. You can add it the macro. Let's see here,
they're in cell B1. There are numbers
and it says numbers. If I want to change this number, two numbers, how can I do that? I'll go to macro. I'll view the macro. So here it will be the list of all the macros
that we have seen. We have currently
only one macro saved, so it is showing us Ascomycota. I'll go to Edit. This is called Visual Basics
for application. It is VBA interface. So if you're
interested in coding, you'll understand it better. But here, what I want to change, I want to change
number two numbers, so I'll put S. No need to press Control,
Save and nothing. I'll just close it. And here we can
see the S will be added in the subsequent
recording of the macro. So like if I press control
shift P on new sheet. And here if you can see, S has been added
to the name here. Likewise, we can add
it the macro as well. Now this was a new Excel file. Before starting
this macro plans, I'll close it and we'll
see how to save a macro. So we'll close it, will close
it to, let's say Desktop. And how do we close it
will go to more options. And from here, we'll select
Macro Enabled Workbook. So it is, it will not be
saved as XLS extension. It will be saved
as XLSX extension. That's a Macro Enabled Workbook. So I'll select this edge as
it was already selected. I'll press save and refresh it. So a new workbook
will be saved here. And here the book
was selected here, and that is our chart. We can see from here. And this is exactly
the same details. Let's go to View
micro and see yes, that's a test file. So it is exactly the same. Now, suppose you forgot
the shortcut key. So again, you can go to Edit. And here is the shortcut
P Control Shift P. That was the shortcut
key we have given you. The list of macros, will show the shortcut keys that now if I want to delete this
macro, so what I can do, I'll go to View Macros, simply select a particular micro and the macro will
no longer function, because now we have
deleted the same. So in the Skillshare class,
what we have learned, we have learned how
to record a Macro, how to add and delete a macro, how to save a Macro
Enabled file. What are the data types
that macro records? So it records everything. So see you in the next
class. Thank you.
3. More of Macros: Hello friends, welcome
to this class. We'll see some more usage of the basics of the
macros in this class. We will also see some
limitations of the basics of the macro and the need for the relative
reference and macro. Now in this class we will type some information in Sheet1. It will appear in
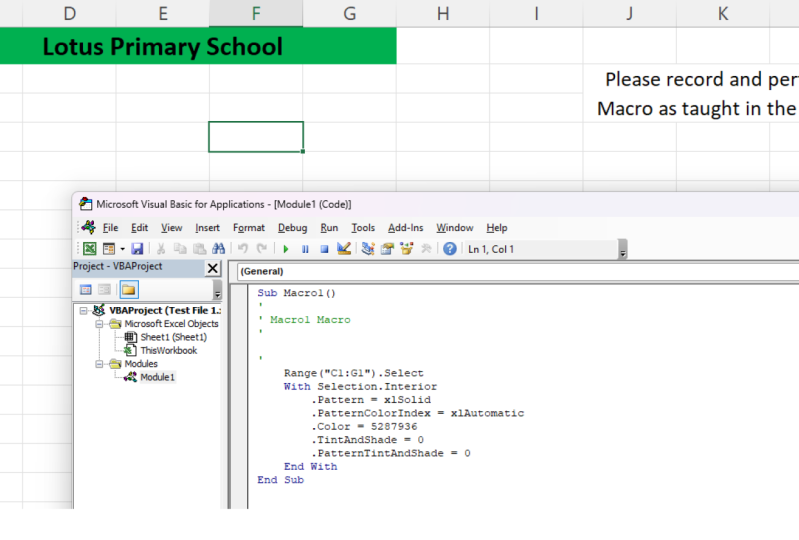
shoot, how to do that. So let's check that out. We'll take an
example of a school, so I'll merge some cell
and then put a name as Lotus primary school. Take a heading as names, surnames, Shawn, number,
and the standard. Make it bold and
give it a color. Palette. Notch this. Alright. And also make
it or all border. Let's see this also. Alright. Now the same information
I want to sort, I'll do, I'll copy this from
here and add it to the second ad copy. Control C. I'll only
copy the details needed and I'll add
it here. All right. All right. What else will I do? I will add, let's take a shape. So I'll add a shape from you. Let me take this shape. Give us an email and I
will select the center. Right? Alright, now I'll add name as, let's say the first student's
name is James Williams, the total number of
trials and standards. Second, now this
information should appear on xi2. How to do that? So for the start of macro, you record a macro when you
take the name of school. Control Shift S, S for school, and I don't know type
in your description, so the macro has started. Now, know what else simply do. I'll copy this entire row. I'll go to sheet two, and here I'll add,
insert copied cell. So this entire row
has been added on sheet to income to Sheet1. And I will delete this information and
I'll close the macro. So I'll stop the macro actually. And now what I'll do, I want to assign the
same macro to this box, so I'll right-click
it and assign Macro. So we have only one macro
by the name of school, so we'll assign the same length. Now let's add another name and
check does it work or not? Now, let's say Robert Smith, the row number and the
standard of three Enter. Now, see the Robert
Smith name is enter. Let's add one more name
and check. Does it work? Let's say from 15 and
the first standard. Yes. So it's getting
added like that. Let's add a title to it. Let me add, let's say I want to add a total n is
equals to count eight. Count a is like recalculate
everything from you alert the entire column and I'll
close it and minus one. So y minus one because this heading will
also names will also be calculated so
far three students. So it's showing me three. Let's add one more name. Let's say Mark and Mark Johnson. And it should turn to fall. Yes, it is done it has done to four and
Mark is also ended. Right? So I am sure that you will
be able to perform the same in one of the
projects in this class. Now, here, what is relative
reference in macro? And what is the problem with the use of this
macro in this class? C, the records of the students are not appearing
chronologically. We added Mark's
name as the last, which is appearing here first. We added James named as follows, which is appearing at last. Table here shows the
student's record is the first and the first
student's record as last. Alright, so records of the students are not in
order of occurrence. That's a big problem. In order to make it
chronologically, we need to use a relative
reference in macro that is of utmost importance that I've
taught in my next class. See you then. Thank you.
4. Relative Reference in Macros: Difference. Welcome to my class of relative reference in macro. If you've watched
my previous class, we had seen some basics
of the macro and some limitations of the
basics of the macro. And the inflammation
was not appearing chronologically on sheet
to in the previous class. In this class we are going to solve that problem with the help of relative reference
option available in macro. Now again, we have two
sheet, Sheet1 and xi2. What we'll do, we'll add
some names here first, some details as name or
by email and comments. I'll copy this information
and I will transpose it here. Now, what is actually
a transpose? It puts up a vertical
information to horizontal and horizontal
inflammation is vertical, so that is transpose. But it is not possible to
do cut paste in transpose. So it is only possible to
do copy-paste transpose. So that's why we have copied. The information, will
take some numbers, let's say up to five. Okay, Now here we will
add some details and we'll see whether does it appear chronologically on
Sheet two unknown. We'll also add a shape. Let's say we take this shape. Alright, so we ordered like
this will increase the size. All right, Now here
let me add my name as our main shape and some
hypothetical details. And I'm coming to
a meeting, right? So this is the
information I have here. Now what I'll do, I'll
start the macro recording. So here the name is asking, so it will be visitors, Control Shift V for visitors,
the macro and Stanford. So what I'll do, first of all, I'll copy the
information from you. I want to paste it here
on xi2 chronologically. So here in order to
find the chronology, we'll start use of
relative reference. So we'll click on
relative reference in macro will put the cursor here and then Control down
arrow button three times, Control up and one more
time down arrow button. So what we have
done, we have found a blank cell in
the entire column. Alright, and that was the
use of relative reference. So it will go to the top, it will go to the down bottom. It will also come up and
it will find a blank cell. We have again click related
reference in macro. So we have, what we have done, we have stopped the use of
relative reference and macro. So that was the
point to be learned while in a while in the meanwhile
of recording the macro. So it has to be turned
on and off while, in the meanwhile,
recording the macro, while recording a macro. Now, before clicking down on relative reference
and turning it off, what we did earlier at selected some information
and see it one, we had copied it, right? We have not pasted it yet. It is still there in the RAM
and we need to paste it. So how will paste it? It was vertical, so we'll
paste it horizontal, so we'll transpose it.
That's the only lever. Will again come to Sheet1. We'll delete this information, will keep the cursor on
the name. So what happens? We again, we have
to we don't have to delete the information
once it is shaved, saved on the sheet. And we can simply start typing D and
other visitors details. Now the macro work is over. So what I'll do,
I'll stop recording and I'll assign the macro
to this particular box. So I'll say Assign Macro and
the visit of host Omega. Now let me add another
name and let's see whether does it appear
chronologically or not. So let's say I am kind is coming and he's also
coming from eating. Let me press N and
let's look at sheet to the inflammation is
appearing chronologically. The first was armoured, second was n. So now
the problem is solved. Now let's add one more thing. Let's take some man is coming hypothetical
mobile number as a Gmail ID. And he's also coming
from meeting. Let me press Enter. So
what's happening here is the information is
appearing chronologically. We have learned how to add details chronologically from
one sheet to another sheet. It's not magic, it's
relative reference in the use of macros in Excel. I've attached the project file, is finished the project
and attach it in the project gallery with other students.
Thank you so much.
 Aamir Shaikh, Freelancer, Youtuber, Trainer