Transcripts
1. Intro: Animation can take illustration to a different level of engagement. When it comes to the character, animation can help bring forth their emotions, acquit us with their personality, and tell their story much more vividly. Hi. My name is Yuliya Osyka. I'm a Ukrainian born Illustrator, Director, and Motion Designer based in New York City. I was originally trained as a graphic designer, a fine artist, and later an animator. In this class, I'd like to show you that you can enhance your character's personality without necessarily using complex rigging systems, a bunch of plugins, and shedding a lot of tears basically. We will start with structuring our illustration for animation and later jump into After Effects and actually animate our character. In After Effects we'll go through some tools and approaches, import and rigor illustration, animated with key frames, and also loop our animation. Then we'll use effects like waywap, grain, and glow. Also, we'll use the wiggle expression and finally export the animation. By the end of this class we'll have animated a slight head-turn, eyes and smile, and edit some minor effects using built-in tools in After Effects. Let's get started.
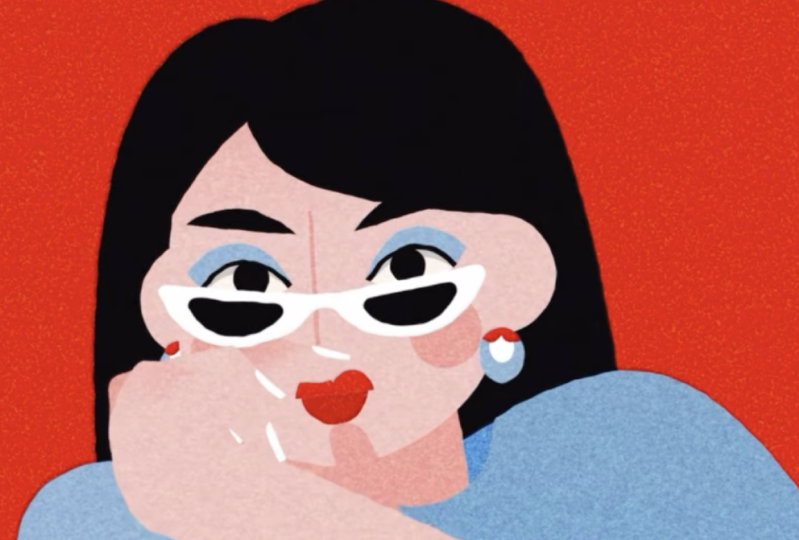
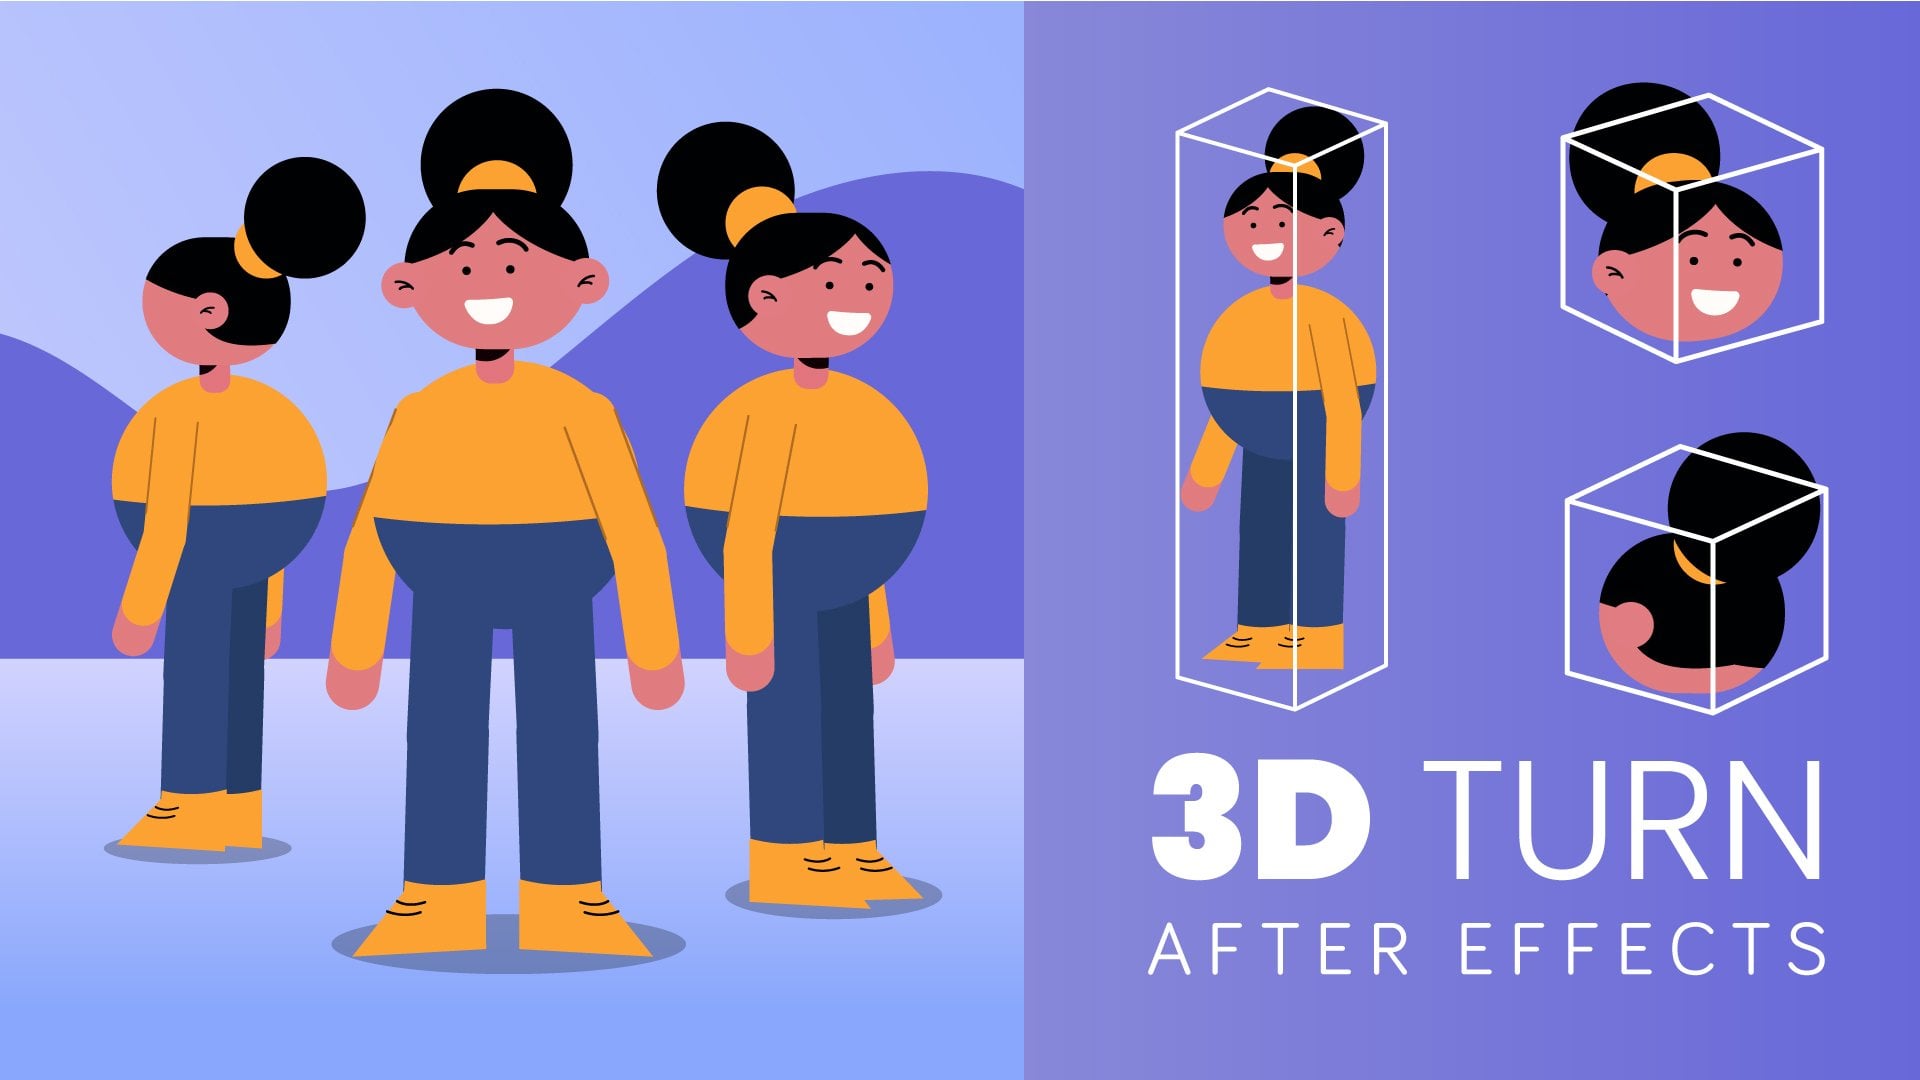
2. Project: For this project, let's animate a character either of your choice or you can animate along with me using the one I provided in the class resources. We'll be animating character's facial expressions going from one state to another. In my case, it's going to be for a look with eyes open and a wide smile, going to three-quarters position with eyes and mouth closed. If you're using the character that I provided, please free to bring your own attitude into it and make it personal. You don't really have to animate it exactly the way I do. Like in this example, I made two animations of the same duration and animated them almost the same way, but with some really slight differences. You can see how each of them gains its own piece and small character variation. You can definitely make the illustration itself your own. Personalize it in the way you see fit and just have fun with it.
3. Preparing Illustration: Let's start with opening your illustration in Illustrator, and structuring your file for animation. Here is my final illustration, all I have to do now is prepare it properly for animation. For that, I'll need to structure all of my layers just a little more. First of all, I want all layers to be named. I have foreground, two cheeks, three parts of the nose, mouth, right brow, different parts of the right eye, different parts of the left eye, head, neck shadow and neck, right ear and left ear, torso, hair, and there is a window and a bg. Let's start merging the layers that we're not going to animate first. It's very convenient to leave the layers you'd be animating and hide everything else as much as possible, so you don't have to deal with a bunch of layers you don't actually need. Let's start from the bottom. I have my bg and a window layer. I don't need these two layers separate because they won't be animated, so I'll just combine those. I'll drag the window layer into bg and make it one layer. Then I'll need my hair separate, I'm going to animate it, and I'll need to have a fully drawn out shape to have it move back and forth behind the torso. The torso is not going to be animated, and I'm just going to keep all of its shadows and different parts inside of this one layer. Then there is left ear with two parts: the inside of the ear and the actual shape of the ear. The ears are going to be animated separately, so I will have the two ears left and right on their own. Then there is the neck. The neck is not going to be animated so I'm actually going to combine it with the torso, just put it here on top; the neck shadow though is going to be animated slightly, so I'm going to leave it separate. Then I'm going to animate the head separately, so it's going to be this one layer. Then let's go into the eye. There is the left eye, then I have the clipping mask of the pupil and I'm not going to need this clipping mask. I'll just open it, grab the pupil and put it back into its native layer and delete the mask. We'll mask the pupil out later in After Effects. Next, I have my lower lid and upper lid. I don't need them separate, so I'll just pull one into the other and call it left eyelids. Then I have these little wrinkles on top of the left eye, and I'm going to leave those separate. After this, I have the left eye highlights, two highlights inside of this one layer, and they're going to be animated together. There is my left brow also separate. Then let's go into the right eye and make the same changes we did with the left eye. Put the pupil back into its native layer, get rid of the clipping mask and combine the lids into one layer. Next up is the mouth. I have two shapes inside it, the actual mouth shape and the shadow. These guys are going to be animated together within this mouth layer. Then I have three parts of the nose. I don't need all three separate, I just need one nose layer and I'll animate those three shapes inside of this one layer. I'll grab nose_bottom, nose_top and put them inside of the nose side layer and rename it to just nose. Then I have left cheek and right cheek, and they will be animated separately. Lastly, I have my foreground. It's not going to be animated so I can actually put it inside of the torso, just on top here. This is pretty much it for this stage. Now, I'll just save the illustration. In the next step, we'll import the illustration into After Effects and prepare it for animation. I'll see you in the next lesson. For now, you can take a look at this lesson's overview.
4. Getting Started in After Effects: Once we've prepared our illustration, we can go ahead and import it into After Effects and also look around. Now we're in After Effects, and this is what we're seeing in default settings. If you're not seeing the same thing, just go to ''Window,'' ''Workspace,'' and ''Reset Default to Saved Layout.'' Let's go to the New Composition, and in the New Composition window, let's call it ''Animation.'' The format will keep at 1080 by 1080, which is the centered [inaudible] square size. Frame rate is going to be 29.97, full resolution, and let's keep duration at six seconds. Click ''Okay''. Here's our composition in which we'll animate our illustration just a little bit later, but for now let me introduce you to basic tools and just basic things you can do in After Effects. We're going to mostly animate using keyframes and let me show you how those work. We have our timeline right here. Let's grab the ''Rectangle Shape,'' click on it on the top panel or press ''Q,'' and drag it out and create whichever rectangle you like. You can also hold down ''Shift'' to make a square. Layers have several parameters. There are two types of parameters. The first one is contents. In contents you have rectangle path, which includes the size, position of the path, and the roundness of the edges. You can also control the stroke and fill. Out of these two we'll use the fill so you can change color right here or on top. There is also opacity. The other set of parameters can be found in Transform, and Transform has several of those. There's anchor point, that we can animate. Then there is position, and you can move your layer by dragging its x or y coordinates. Next is scale, and we can increase or decrease our layers size. We can actually unlink the x and y parameters and only scale one at the time as well. Let's go back by clicking ''Command Z'' for Mac and ''Control Z'' for PC. Next up is the rotation tool, which rotates a rectangle around its anchor point, and the opacity tool, which controls obviously the opacity. Each of these tools you can bring up by its shortcuts, so anchor point is A, position is P, scale is S, rotation is R and opacity is T. Think of transparency, to remember that one better. But let's move onto our timeline and take a look at keyframes. We have our timeline right here and we can use keyframes across this timeline. Let's press ''P'' and animate our position. We're going to click the ''Stop Watch'' and this is going to create our first keyframe for position. Let's say I want to go ahead and move this rectangle off-screen in 15 frames forward. I can go to my position and its x-axis and drag it till the rectangle is off-screen, or you can also just drag the rectangle itself as well. This will automatically create a new keyframe and calculate the distance between the two keyframes. So when we play back, and you can press ''Space'' for that, the rectangle is animating off the screen. There's our first animation. Now let's move on to the basic tools on the top panel. The one we're using right now is the selection tool. Then we also have the hand tool that is going to help us navigate our composition. Then there is the zoom tool and you can click ''Command −'' or ''Command +'' instead. Also there's rotation tool, and it rotates the layer around its anchor point. Next is the 'anchor point tool, so you can move your anchor point wherever you need. Let's go back to the rotation tool and now it will rotate around this updated anchor point. Then there's obviously our shape tool and it has rectangle, rounded rectangle, ellipse, polygon, and star-shaped. Next is our pen tool, which we're going to use a lot. With it we can create all sorts of shapes, and if you switch from shape icon on top to the mask icon, we can also mask layers. Let's undo this, and let's get rid of the shape and finally bring in our illustration. For that, I'm going to click ''Command I'' for Mac or ''Control I'' for PC. This will bring up the finder, and let's select our illustration. In ''Import As'' instead of ''Footage,'' which will import just a flattened layer, you can choose composition retain layers, and this will keep the layers separate so we can animate them afterwards. Click ''Open '' we just add it two things. There is a folder with isolated layers. If you double-click, you can open the BG layer separately, or the hair layer, or any other layer within the comp. Then we also have the whole Composition.'' If you double-click on it, it'll open all the layers we need intact in here. What I want to do is move all of these layers into my Animation Composition. Select all layers by selecting one and clicking ''Command A'' or ''Control A.'' Then let's copy them by ''Command'' or ''Control C''. Let's switch to the Animation Comp and press ''Command'' or ''Control V'' to paste them. Now we can close down the Illustration Composition, we're not going to need this anymore. In our animation comp, here's all of our layers. If you're seeing these extensions, just click on the source Name'' on top here, and they will disappear. What else I like to do is organize my project right away before it gets messier. In this Project Panel, I'll create a folder called ''Assets'' and grab the illustration layers we imported and drag them in it. Also create a ''Comps'' folder and drag the animation competent. The ''Comps'' folder will basically mean all the compositions we're actually animating in, and the ''Assets'' will just store the layers that support our comps. Also don't forget to save by clicking ''Command S'' or ''Control S.'' This will bring up my finder with my project files, and I'll call my After Effects file ''Animation'' and click ''Save.'' Now that our illustration is imported we can jump into raking it, so I will see you in the next lesson. Here's the overview for this one.
5. Rigging The Character's Face: Our illustration is now imported into After Effects so we can start bringing our character. The first thing I want to do is I want to hide all the layers that I'm not going to animate and those are the background and the torso with a foreground. I'm going to select them, and if you're not in this menu, you can go to toggle switches and modes on the bottom panel and click it, and it will take you to the right menu. In this row you will find what is called a shy symbol, which is this little guy here. Let's click on one so they all hide and then go to the top panel in this menu and find a bigger shy guy and click him as well. This will hide the layers from the timeline, but they're still present here in the composition. If you want to see them again, just click on the big shy symbol, but I'll just hide them for now. Next, I want to make some of these layers I'm going to animate adjustable. Right now they are all vector layers, but they're not shapes so there are no paths to adjust at the moment, so I'll need to convert them. That's what you can do with Illustrator files inside of After Effects. We'll convert several shapes so we can then animate their paths manually or with a pen tool. For example, will be adjusting character's face layer path when animating her turn. Let's actually select all layers and deselect the ones we won't need as shapes. Those will be cheeks, highlights, both lids, and the pupil, and the same thing for the left eye. So the highlights, the lids, and the pupil. Also deselect the ears. Everything else we're going to convert. For that I'm going to right-click on one of the selected layers and go to Create, Create Shapes from Vector Layer. This will basically create a shape twin of each of these layers. Now, let's delete vector layers so let's get rid of the nose, mouth, brow, the eye, brow, the other eye, the head, the neck, and the hair. I'll also get rid of the outline word and rename them to their original name. Now, we can say that the layers are almost ready for animation, but I still need to color-code them so I can easily decipher which group each layer belongs to when animating. Let's start with the hair and color it to this one. The ears will be sandstone. The neck, dark green. Head will be red. Left eye and everything that's within this eye, along with the left brow will be, let's say green. The right eye up to the right brow will be orange. The mouth is going to be lavender, the nose will be blue, and the cheeks, let's color pink. Now, everything's color-coded and easy to understand which layer belongs to which group. The green is left eye, the orange is right eye, and so on. Another thing I want to do is mask the pupils using track mattes. I'm going to adjust the mask later still, but I want to mask the pupils now so they're not distracting to me, and so we'll see all of the details around the eyes and so I have a better understanding of what the turn will actually look like with proper looking eyes. Let's go to the left eye layer and duplicate it. Put it on top of the left pupil and rename it to left eye matte. Then click the left pupil and toggle the menu on the bottom two modes, and in Track Mattes in this window, instead of none, choose Alpha Matte, left eye matte. This will basically make a mask out of the eye shape, but I'm still able to animate the pupil without affecting the mask. If I press P for position and move the eye, it will be visible only inside of the eye shape. Now let's do the same for the right eye. Click the right eye, duplicate it, put it on top of the right pupil, rename to right eye matte. In pupil switch from none to Alpha Matte, right eye matte. Also lets Command or Control S to save this. Next step is parenting, and parenting is when you link one or more child layers to one parent layer, and when you manipulate the parent layer, the child layers will also follow. An example of that would be if I take the head and then go to parent and link and press and hold this Parent Pick Whip and drag it to the next shadow. If you go to the next shadow and press P for position and move it anywhere, the head will move along with it. Let's undo that. That was just an example. To animate the turn, I'll need a guide layer that will help me move and rotate all the face features. But I'm not going to use the head layer for that, because it will need to be animated separately. But I'll actually go to Layer On Top. Go to New, and create Null Object. A null object is a blank layer that I'll be using as a parent for most of the layers of the face. I'll press "Enter" to rename the null object and call it face controller, and I'll change its color to yellow. I reserved this color as the brightest one to see the controller better. Next I'll go and select cheeks, nose, mouth, the brow, the eye, the other brow and eye, and then go to the Parent Pick Whip of one of the layers and click, hold and drag it to the face controller layer. Let's check. When I go to face controller and press R and rotate it by, let's say 90 percent, all parented layers move along with it. As you noticed, all layers that are within the eye are not parented so I'll select all of them for each eye and parent them to a corresponding eye. Next finally, I will go to face controller and parent it to the head layer. Then I will grab the ears and the hair and also parent them to the head. The last thing is adjusting several anchor points. So let's say I have this head and currently the anchor point is right here in the center, so if I rotate it, it will rotate from this point. So I'll grab the anchor point tool or press Y and drag it lower to where the head approximately connects to the neck, so somewhere around here. Then if I rotate it again, it's going to move. Well, not that much, but exactly the way it would naturally. I'll do the same for some other layers. The ears are going to be growing out of the head starting here. Let's just adjust the mouth to center as well. You can either do it manually or you can download a donation-based plugin called RepositionAnchorPoint, and I'll have the link to it in the class materials. This tool has become essential to me, so I really recommend it. In here, you can simply choose which side of the layer to place the anchor point in and click reposition. In this case, I need the center. One other layer that I need to manually change the anchor point for is the nose. I wanted to start off right about here. Then the cheeks are at the center so they're good. Now we can save again. Well the rigging is done and we can finally start animating. I will see you in the next lesson where we will go through keyframe animation. For now you can take a look at the lesson overview.
6. Animating with Keyframes Part 1: Finally, let's get to animation. We will mostly use keyframes to animate our character and we'll be animating their position, scale, rotation, and paths of some shapes within the character. Now that everything's set up, we can move on to actual animation, and for emotion, my idea is to have two emotional states for the character. One would be shy, and the other happy. Story wise, I would imagine our character to be a bit theatrical and she puts up a show for the viewer. First acting as if she's shy, but then turning and smiling at us. She will start with her eyes and mouth closed and have her head turned three-quarters down and to the right. Then she will turn facing us, opening her eyes and smiling just like we're seeing her right now. When you decide on the states of the character, I would suggest thinking about character story or their character. It will be more interesting to watch the character if their animation tells us something personal about them. I jotted down a sketch of a sort, or I would probably say a storyboard that approximately shows how I want the animation to go. You don't have to necessarily do that for your animation, especially if it's just a small bit. I sometimes do that to help myself plan ahead and see which layers I'll need to animate and which I can flatten. I went to pull up my sketch and actually import it into my comp to reference it as I'm animating. I'll import it into my project. I'll just drag it into the timeline and press ''S'' to scale it down just a bit, and let's put it on top here so I see the silhouettes. Then press ''U'' to hide the scale parameter, and then I'll go to my Toggle Switches and Modes and hide the sketch in my timeline so it doesn't distract me. This is pretty much how imagine the two extremes in my animation, one with face forward and the other turned three-quarters. Also remember that this will be a loop. In my animation, I'll have the character turned to us, reveal herself, and then go back into her three-quarters head turn. Right now we are basically starting with the middle part of the animation. I'll just go to about three seconds in the timeline. Select face controller, press ''P", and click the stopwatch. This will create our first keyframe. Next, let's go to you about two seconds. Select face controller and drag it to the right and down like this. This is where the turn will start. Let's play it back. Next, we'll go to the ears. Select both ears and on three seconds, press ''P'' for position, and click on the stopwatch for either one. If you select several layers and put a keyframe just on one, all selected layers will be keyframed as well. Then also press ''R'' for rotation, and then also press ''U''. This will show all key in the layer, then go to two seconds. In this case, when she's turned like this in three-quarters, the axis of her face will actually change and create this curve instead of a straight line, like we see when she's turned facing us. As the head turns, the ears will also change position. We're going to see more of the left ear and last, if not none, of the right ear. Let's start with the right ear. It's going to go down and further behind the head layer, and her left ear is going to go up and a bit out to the left. With rotation, I'm not using any for the right ear, but I'll rotate the left ear but about this much, so 18 degrees. Let's close down the ear layers. Next is something that's going to change the way our turn looks a lot and it's animating the head layer. But in this case, we're not going to go to Transform but we'll actually open Contents. Go to Group 1 and Path 1. We're going to find our path here, and let's click the stopwatch of the path on three seconds. If you want to move your keyframe by a frame, you can also hold down option left or right arrow, and then we can go to two seconds. I want to adjust the path points to turn the face to three-quarters. I'm going to start with the top one, which is our hairline and I'm going to click this point and drag it to the right, about here. The face is turning this way so the axis will now be moved to about here. Her hairline is a bit lower and we'll see a bit more of her forehead, and I'm going to pull this other point to the right to open up the forehead just a bit more. To adjust the curve, I'll just pull on these handles. Her cheeks will also be more prominent, so I'll make the curve just a little bigger, and her chin will also move just slightly. The jaw bone on the left will rise a bit but still be rounded, and then the hairline on the left will get raised a little and it's also going to turn in the direction she's turning. This is a very, I'd say, intuitive process. Adjust the face while testing the animation, just scrubbing through the timeline slowly and seeing if her face turns smoothly and if you still have the same basic shape of the face as you would when she's facing us. Her face is generally round. So even with the jaw bone and cheek sticking out a bit, it should still remain rounded, and also you can adjust more later as you go. I think three-quarters looks okay, so now I can save it. Now let's adjust the rest of the features and first I want to slightly animate the neck shadow. I'll close the head layer and move on to the shadow right here, and also open its contents and path. Go to three seconds and place a keyframe, and then go to two seconds, and I can zoom in here. This bottom one, I'm not going to change, but I'm going to Shift click on it to bring up the handles, and lower the top one. Then also grab the other point and drag it just a little, and adjust the curve like this. If I play back, the shadow slightly animates with the head. Now I can continue with the rest of the layers, and next I'll animate the brows. I'll select the right brow, go to three seconds. Open it up, go to Contents and Path, make a keyframe, and then press ''P'', and click the stopwatch. Press ''R'' for rotation, and do the same, and then press ''U'' to bring up all keyframes in the layer. Go to two seconds. First I'm going to bring it down a bit, rotate it by about 11 degrees. I'll also move it a little to the left, closer to the nose and just a little up. Then let's choose the pen tool, and I'm just going to click on the brow endpoint and drag it in, and change the direction of the brow so it follows the forehead curve. Let's see how it animates. Again, it's a little too much in rotation, so I'll just change it to about minus five instead. There we go. Then close the right brow and go to the left brow and press "P," then click stopwatch on three seconds. Same for rotation and paths. Then press "U," go to two seconds, and do the same thing here. Let's rotate the brow by about nine and then with position bring it down and just a bit forward. Also closer to the nose. Then I'll go to the path and start adjusting the same way I did the right brow. I'll just Shift D select and then click and drag this point and use handles to change the curves. Let's try that. Maybe just a little further on this end. Done, close that. Now moving on to the nose, the nose consists of three groups. That's my nose top and let's just press "Enter" or "Return" and call it top nose side and that's renamed to side and nose bottom, and I'll also rename it. Then I'm going to go to three seconds, open each of their paths, and click the stopwatch on all of them. Then move to two seconds and let's see how they change with the term. The top, we're going to see much less off and I'm going to Shift D select and then click and drag this point to the right and bottom. Moving on to the side. This one we're going to see a bit more of. Also Shift D select, then click and drag just to meet this point of the top layer. Then go into the bottom. In this position we're not going to see any of it so I'll just drag the point up and hide the layer. Playing it back. Also, I don't really like where the nose is overall so let's go to three seconds, press "P," click "Stopwatch" and press "R" and click the stopwatch, then press "U". Then go to two seconds and in position, I'm going to move it my x-axis just to the right and rotate it only by a couple percent. Here we go. This is pretty much the nose that I'm happy with. The next thing I want to animate is the mouth and let's open up the mouth's contents. It's got two groups. The first one is the shadow, and let's call it that and the second is the actual mouth shape so let's call it mouth. Let's click the mouth's paths stopwatch, and move to two seconds again. In two seconds, and I'm actually going to hide the shadow right now, I'm going to change the mouth so her smile is very subtle. I'm going to select the right point and drag it in and do the same with the left point so she won't have such a wide smile anymore. I'll move my comp a bit higher and for that, I'll just hold down space and drag the comp to wherever I need it to be. Then I'll adjust the curve on the mouth. Also, I'll drag both mouth corners down a little bit. Let's see how this shape looks. I'll drag the corners a bit more down and I'll play back again. Next, I'll just duplicate the mouth path and call it shadow so we keep all of the animation intact for the shape as well, and the older shadow is needed only for color. I'm going to go to fill in this new shadow, take the color picker, and change it to this light gray, and then just get rid of the old path. Now I have two identical shapes. In the shadow, I'll need to go to path and adjust the curve so it doesn't cover the whole mouth shape. The final thing, I want to move the mouth. I'll press "P" for position, click the stopwatch, go to two seconds and move the mouth a little to the left and down. Let's play that back. There we go. Her mouth should be not exactly under this part of the nose, but shifted a bit, so if you draw a curve from the forehead to the chin, it should split the mouth in half. I'll even move it a bit more to the left. Let me also adjust the head tilt slightly. I'll go back to my face controller, press "U" and now I only have the position, so let's also add rotation. I'll press "R", put a keyframe on three seconds. Go to two seconds. I'm going to rotate her face just a bit by maybe six degrees. Now I'll go back to position and move it just a bit up and a little to the right. Then let's also go to a head, I'll also adjust a point only by a little. Let's play this back. I like that much more. In this position, I'd also want to adjust her right brow. I'll go to its position and move it a bit down. The brows have this little arc when they're animated. We can save. Next up are the cheeks, let's select both. Go to three seconds, press "P" for position, put a keyframe, then press "R" for rotation, put another keyframe, and also press "S" for scale, and put a keyframe for that. Then press "U" to see all the keyframes and go to two seconds. Let's go to the right cheek. In three quarters, it's going to be a bit smaller than the left cheek because it's further away from us so let's scale it down to about 70 percent. Then let's move it to the left and hit that edge of the cheek on the face layer. Rotate it by about 41 and move it just a bit lower, and adjust it so it still hits the edge of the face. Moving on to the left cheek, let's make it scale 85 percent. Rotate it the other way to about minus 58 and I like the position that's in. I might just move it very slightly lower and to the right. Let's see how that looks. The last thing I want to do with the cheeks is make her blush instead of keeping the cheeks visible throughout the whole animation. I'll also press "T" for opacity, go to three seconds and click the stopwatch, then go to two seconds and type in zero for opacity. When I play it back, she blushes as she turns to us. We're also going to work a little bit more on the cheeks and the fact stage, but for now they're done. So save that. This was the first part of the animation. Let's continue in a second part and animate the eyes.
7. Animating with Keyframes Part 2: Now we can move on to the eyes. Let's go to the right eye. Again, go to three seconds, press "P" for position and put a keyframe, then go to scale by pressing "S", and also put a keyframe there, and then press "U" and go to two seconds and scale the eye down to about 75 percent. Also move it closer to the nose just a bit, add a tiny bit up. I'll just move it left a bit more and playback. Then we'll go to the left eye and put a key on position and on scale, on three seconds, go to two seconds and scale it down to 90 percent, and move the eye a bit closer to the nose as well. Basically, the eye will move closer to the nose but wouldn't go past this line that we have the brow create. I'll also move it a bit up. I'll play that back. Based on this, I'll actually make the right eye smaller and scale it down to 72 percent and move it up just by one pixel. Here we go. I'll close this down and save it. Next we'll be closing and opening the eyes. Let's grab the right eye, duplicate it, and let's rename it to right_eye_matte, and I'm going to do the same thing we did with the pupil mask. I'll take this layer and put it right underneath the brow, and I'll take the wrinkle layer and put it on top of the matte layer to get it out of the way. Then I'll grab everything that's under the matte and combine it into a separate composition so my matte layer can affect all of these layers. I'm selecting the highlights, the lids, the eye matte, the pupil, and the eye layer itself, and then right-click on them, choose Pre-compose and call it right_eye. Then I'll go back to the Parent & Link and reparent it to the Face_Controller. Now let's go to three seconds, open my eye matte contents, make a keyframe on the path, go to two seconds, and I'll select the path and use the top handle to close the shape. I see the lid is closing. Now I can close this and switch menus to go to my Modes. In the Modes, for my right eye icon, I'll choose Alpha Matte, right eye matte. Now my eye is closed and opening up on three seconds. Another thing that I need is the lash. For that, I'm going to go to my Matte, duplicate it, turn it on, go to my Fill, and using the color picker, choose the color of the pupil. Next, I'll press "U", press "G" for the Pen tool, and I'll drag that right handle up just a bit, and the left handle down, and just a little to the right so I have this nice curled lash. Now I can move to three seconds. Here I will move the top handle a bit more up, and move the bottom one so it creates this nice rounded shape in the eye. I'll move it up just enough to show this top lid, which is this red color. Let's go to the left eye and do the same thing with it. Next I'll animate these little wrinkles on top of the lips. I'll take the top one and I'll press "T" for opacity. Then go to three seconds and put a keyframe, then go to two seconds and type in zero for opacity. When her eyes are closed, the skin is stretched and we don't really see those wrinkles, but when she opens her eyes they appear. Same thing I'm going to do for the right one. The last thing I want to do for the basic animation is hair. I'm going to do all the same things I did with the other shapes. I'll go to three seconds, open Contents and Path, and put a keyframe there. Then go to two seconds. Then on two seconds, the hair will move so that we have more of it on the left and much less of it visible on the right, because obviously she's turning her entire head. I'm going to start with the center line on top. I'll select it and drag it a bit to the right because we're going to see a bit more of the left side, and I'm going to not raise the left side of it, and then grab the left side and lower it. Hide the hair behind the face. I'll adjust the curves with the handles just to push the hair back and also make it still flow nicely. If I scrub through, you can see how the hairline turns, and the entire head is turning. Next I'll move to the bottom of the hair and move the curls behind the character's torso, so we just see a small portion of it, and also make it a bit more flat like this, so it doesn't draw so much attention since it's now in the background. But also keep a bit of that volume on top. On the left side, I'll do the opposite. I'm actually going to raise the side of the hair because I should see much more of that skull in three-quarters, so I'm bringing it up and out. You can adjust the handles until you're happy with the volume. Another thing that I noticed is that I'd like to fix this little lash. I'll go back to my left lash, and I'm going to press "U", so we're on the keyframe. I'm going to actually drag the edge and make it not as thick. Let's look at the face, and before we go into the next steps, let's see what we can polish right now. Before I go into adding more stuff on top, I want to make sure that I like the movement in this basic animation. Right off the bat, I can see that I want to rotate this eye a little more and fix the right brow, and maybe even tilt her head a little more to the bottom right. I'll go back to the Face_Controller, and on two seconds, I'll move this head just a bit down to about 130. Let's see how that looks. I think that looks better. Next I'll fix the brow. I want it to be just a bit thinner. I'll go to my right brow, go to Pen tool and make the curve bigger so it looks thinner. I'll also bring the left corner of the lash in, just a little bit, so it doesn't create a tangent with the nose. There we go. I will also grab my left lash, matte, and the eye layer, and then go to three seconds, put a keyframe on rotation, go to two seconds, and rotate them all to about minus two. Now I can play this back. We made a basic animation in this lesson, and in the next one we'll make it more organic using easing.
8. Easing: Next step is making our movement more organic. Before I do that, I can actually get rid of this sketch. I don't need it anymore. I'll just click on the shy symbol, delete the layer, and click the shy symbol again to hide the rest of the layers I'm not using. For making the animation a bit smoother and more organic, I'm going to use easing. An easing is essentially the speed with which the animation goes from one position to another. Animation in general has 12 main principles and an ease in and ease out as one of them. If you imagine a second of animation with a square moving from one position to another, which is in our case 30 frames, like this. Its movement will be pretty mechanical. But what easing does, is it slows down or speeds up the in and the out portion of the animation giving it more character. To do that in After Effects, I need to select both keyframes, right-click and find Keyframe Assistant in the drop-down menu, and in it, choose Easy Ease. But to control the movement more, I can also use the graph editor. I'll click here to open it, and it's going to have this curve between two keyframes. When I click it, I have two handles. If I pull this handle, the animation will start slower and speed up towards the end. Likewise, the other way round, like this. Or if I pull on both, it will start and end slowly, but the midsection will animate faster. If you're interested to learn more about animation and the 12 principles of animation, I would recommend a book Animators Survival Kit by Richard Williams, which is basically an essential resource for any animator. In this class, though, we're just using easing. Now let's go back to our animation. Let's select all layers and press U to bring all of the keyframes we have so far. Now I can select all of those keyframes. Then right-click, go to Keyframe Assistant, and choose Easy Ease. Now let's see how the animation changed. Now her turn has a bit more life in it. Next, what I want to use is the graph editor and make her start her turn faster and slow down as she turns. For that, I'm going to select all keyframes and all layers. Go to graph editor, and clicking on the curves, drag the handle of the second keyframe to the left. Here's the position and here's rotation. Now I'll do that for all other layers. Next, I'll go inside of the left and right icons, and do the same on the eye layer. I double-click on the icon, press U select all, right-click on Easy Ease and drag the handle or the second key to the left, and the left eye as well. Now I can playback. So far we covered easing. In the next lesson, we're going to go through the intro animation, where we'll animate her a bit from zero seconds to two seconds.
9. Animating the Intro: Before she actually turns to us, I want her to have a small playful animation of her briefly glancing at the viewer as if she's flirting, with just one eye basically, and then closing it back down, and then going into her turn. So she will start with her eyes closed and in about a second, she will open the left eye, then look at us, and then close it and turn. Let's move the timeline start at frame 0, select left eye lash and left eye matte, open their paths, put a key frame on both, then move to one second, take the left eye matte and pull the right handle up to open the eye, but only slightly, somewhat like this, and then make the lash follow, and adjust it accordingly. Next, let's go somewhere around here and copy paste the position of the closed eye. She holds it closed until it's time to turn. Let's play that back. Maybe just move these two frames one frame back like this. I'll adjust the lash just a bit more. Then also let's select the first two key frames on both layers. Go to graph editor and drag the handle of the first key frame to the right so she opens her eyes slowly, and drag the handle of the second key frame just a bit to add a little ease on the side as well. Do the same thing for this layer. Next, I want her to open her eye in about here so about a second and 10 frames. I want her to actually look at us, but before that I want her eye to look away. Let's open left eye comp, and inside it, find the pupil layer, press "P" for position, and in a second and 10 frames put a key frame and move back to one second and move the eye left and down. Let's easy ease that. I want her to move pretty fast so in graph editor, I'll ease the last key frame much more. I think this move should actually be a bit later. Right right. Let's close all of these guys down, and for that, you can also Select All and press "U, and then save them. Another thing is I want to slightly move the highlights in the eye. I'm going to go into left eye comp, select the highlights, go to one second and 10 frames, press key frame for position, and then go to one second and move the highlight just a little to the left. Also easy ease it and adjust the graph editor the same way we did with the pupil. I want the pupil to be a bit offset so let's go back in it and move both key frames several frames ahead. Also, move the highlights ahead so the last frame will now be at one second and 20 frames. Now let's go here and put the comp at Fit and play it back to see if everything works the way we intended before we move forward. I feel like her left eye should be bigger and three quarters position so I'll go back into the eye comp. In the left eye layer, I'll change the first key frame size to 95 percent, then close it, and change the first key frame to scale, and the left eye matte, and the left eyelash to 95 percent as well. Now we can check it again. That's better. I also want to change some things in the head layer. I want the curve between the brow and the cheekbone and three quarters to be lower, and also move the chin to the right very slightly, but keep the rounded jaw line, like this. Another small thing is when she opens her eye, I want her right brow to also go up. I'll go to the left brow, press "U", and let's also press "U" on the left eye matte so I can see all key frames in the first part of the animation. I want to raise this brow so I'd want to start at about 10 frames, put a key frame there, then go to a second and about three frames, and again, using curves, raise the brow a bit like this. Then move to match the third key frame of the eye matte and copy paste the second key frame for the brow. Let's play this back. I want to actually move this holding key frame a bit behind to about here so it starts falling back down as the eye edge starts to close. Right before the eye closes, the muscles of the brow already start to move. Then let's adjust the easing in the graph editor. I'm going to ease this movement on both ends like this. Now let's see it go. The last thing I wanted to add in this bit is the wrinkles. I'll go to my left lids of 20 frames, press "T", and put key frames at zero, then at one second, make it 100 percent. Move forward to right about here and copy paste all 100 percent. Then we go back to zero, when she closes her eye again. Let's actually move the first frame to 10 frames instead of 20. Another thing is I want the wrinkles to move ever so slightly. I'll press "P", put a key frame on 10 frames, press "U", move my key frame right here to a second, and lower the layer by a bit. So when she opens the eye, the wrinkles appear and move along with the eye ball moving inside of the eye. I'll just have two frames here. I don't need to do more because the next movement will be too fast. Let's just easy ease them and adjust the curve both ways and save. The intro is all done, and in the next lesson we're going to turn our animation into a loop.
10. Looping: Next, let's look at the animation. Let's select all of the layers and press "U" to open all keyframes. Copy paste the last key from three seconds to 4:20. I'll take each layer and copy paste those. Then we'll move to 5:10 and copy paste all first frames. Lastly, I want her to start moving back slowly. So I'll go to graph editor, select the second two last frame, and push the handles of each parameter to give her more ease when she just starts turning back to 3/4 position. Also don't forget to go into the left eye and right eye comps and do the same for them. At 4:20, I'm going to copy paste the last keyframes, and at 5:10, I'll copy paste the first keyframes. Use the graph editor the same way we did for the rest of the layers. Let's check that out. I think I actually want to give her more time to turn, so I'll select all layers and move them to the end. So to six seconds, and see how that goes. Yeah, that's better. I'll also open the eyes and move these keyframes to second six as well. Let's play it back. Just one tweak I want to add as I want the eyes closing to be a little offset. One eye will close just a tad sooner than the other. Let's say the right eye closes a bit earlier. Let's go into right eye comp, grab the last two sets of keyframes and hold and press "Option", left arrow, and move them by two frames. Now I can do the same thing with the mat, the lashes, top wrinkles, and the brow. The last thing I wanted to change before we move on to effects is I want to change the color of her mouth when it's closed. Let's bring up all of the keyframes for the mouth. On two seconds, open and fill in the contents and press the keyframe. That's white fill right now, so move it one frame ahead. Then go to color pick and use the neck shadow color. Then go into the shadow and it's fill create a keyframe, and put it on two seconds and one frame. Color pick the neck shadow. In the palette, just choose the tone darker than the one we have right now. Then I'll move to the last frame and copy paste the second keyframe for the fill. With them selected, I'll move them one frame ahead and choose the first frames of the fill, and copy paste them to six seconds. Then I can move the darker fill keyframes to about 5:10. Another tweak before we move on is, let's have her mouth close just a bit sooner. So I'll select the last two sets of keyframes for the mouth and the mouth shadow, and drag them so they end at 5:20. Let's save. In the next lesson, we'll go over one expression called wiggle and use several effects to polish the animation. Here's the overview for this lesson.
11. Animating with Effects and Expression: We're almost done with our animation, but let's polish it with effects. Now I want to add some effects to make it more lively and a bit more interesting. I want to start with the highlights of the eyes and give them some shimmer. First, I want to use an expression. An expression is essentially a line of code that can be used on the layer's parameters to help automate the animation instead of using keyframes to animate. In my case, I will use the wiggle expression on the highlight scale parameter. It will scale the layer up and down based on the parameters I will give it. Let's open up a precomp for the right eye. Select the layer with the highlights, press "S", hold Option, and click on the stopwatch. This will open up a line for us to type in our expression. I'll type in "wiggle", open brackets, and say, 100, 20. One hundred is the amount of times the animation changes in a second and 20 is the amount of pixels the scale will change each time. There you go. It adds a bit of this traditional animation eye shimmering. Now I can do the same with the left eye. Let's also add a bit of glow to the eyes. I will go to the Effects & Presets on the right, type in "glow", and then double-click on it. Now I'll just select the glow and copy-paste it for the other highlight. Next, I want the cheeks to be blurred out. Let's go to the right cheek, then go to Effects & Presets on the right, type in "blur" and find Fast Box Blur, I'll double-click, and in Blur Radius put eight. Again, let's copy-paste it to the other cheek. Next, I want to add just a little bit of movement in the hair. I'll select hair, then go to Effects and type in "Wave Warp". By default, the waves are pretty dramatic, so I want to dial that down. I'll change direction to 104, so the hair will flow down. The height will be three, and the width will be 300. I'll also change pinning to horizontal edges. Let's play it back. Now we have a really subtle animation in the hair. The last thing I wanted to do is add some texture on top. I will use grain effect for that. I want to add grain effect on all layers. I'll need to have a layer on top that will affect everything that's underneath. Luckily for that purpose, After Effects has an adjustment layer and I will need to go to Layer, New, and choose Adjustment Layer. Then I'll also rename it to grain. Next I will go to Effects & Presets, type in "grain" and double-click on it. In grain, I'll change several things. First, in the viewing mode, I'll switch from Preview Box to Final Output. This will show me grain throughout the whole comp. Then I'll also change the size to 0.6 and go to animation right here and change it to 0.4. Now we have fine grain that moves around really slowly. We're done with the effects and the last stop is exporting. I'll see you in the next chapter and here's the overview for this lesson.
12. Exporting: We're all done. I hope you guys can still look at patterns after this, but we still have one major thing left to do and that is exporting our animation as video and GIF. We're all done with the animation and I'm pretty much ready to export. But before I do that, I want to collect my files to keep them organized. What After Effects does, like Illustrator, is it referencing or linking imported file assets instead of copying them over, like for instance, Photoshop does. Let's say I moved my Illustrator file to another place or deleted altogether, and when I opened my After Effects file, the comp I use these assets in will be missing all of them. To preserve all of those, we'll need to collect the project. Collecting files will definitely help you when collaborating in a team as well. So all you have to do when passing your project to someone, it's just to give them the collected folder instead of manually gathering all assets you used, like maybe fonts, sound, and art. To collect the project, I will go to "File", "Dependencies", "Collect Files", and there I'll choose, "For All Comps", then leave the checkbox checked for "Reduce Project", and say "Collect". In this window, I'll rename my folder to animation final, and save it. Now when I open my project folder, I have my After Effects project and then I can open up "Footage", "Assets" and in Assets, I'll find the Illustration Layers, and then my Illustrator file. Now I can finally export my animation. For that I'm going to go to "File", "Export", "Add to Render Queue", and in Render Queue I will click on the "Output Module" and keep the format as QuickTime. Then click on "Format Options" and change the video codec from "Animation" to "Apple ProRes 422 HQ". Click "OK". Then I'll keep the dimensions the same, so 1080 by 1080. Click "OK". Then on "Output To", click on it and then the new window, find the folder you want to keep your renders in. I have mine already opened, and click "Save", and then click "Render". This will render out a high-res video, but I also want to render a smaller MP4 video I can use for previews and social media. For that, I'm going to use Media Encoder. I opened up my Media Encoder and I'll just drag my MOV file into it. I have the needed format by default so I'll just go through the steps. Let's click on the "Format" and choose "H264". Next, I'll deselect audio, then I'll also keep my 1080 by 1080 size, and keep the rest the same as well. Then I can click "OK", and click this green play icon. The last format I want to have my animation in is a GIF. To do that, I will open up Photoshop and export it from here. Next, I will go to "File", "Export", "Save for Web". Once it opens up, which might take some time, I'll change the preset to "GIF 64 Dithered". Then I'll change "Selective" to "Perceptual". The size right now would be 16 megabytes, so I will downsize the file to make it 720, and now the size will be less than four megabytes. Also make sure the "Looping Options" is set to "Forever", and I can click "Save". Here we are. I have three files: a high res MOV file, a smaller MP4, and a GIF.
13. Conclusion: I finished the project. We've gone through all steps like preparing the illustration, rigging, and animating the final piece. I hope this class will be a jumping-off point for you to create various character emotions in the future and expand on these skills as you get more comfortable with the process. I'd love to see what you've done, so please share your work in project gallery and if you have any questions, I'll be happy to answer them in class discussions. Thank you for taking this class and happy animating.
 Yuliya Osyka, Illustrator, artist, motion designer