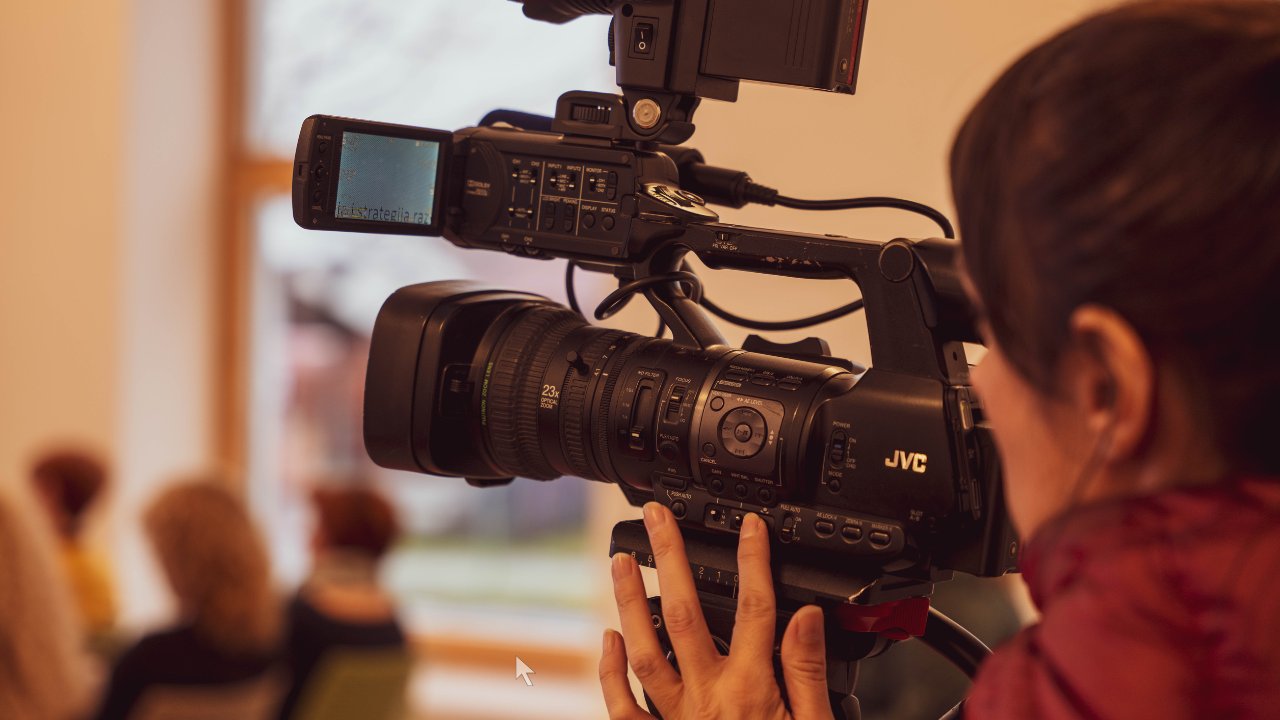
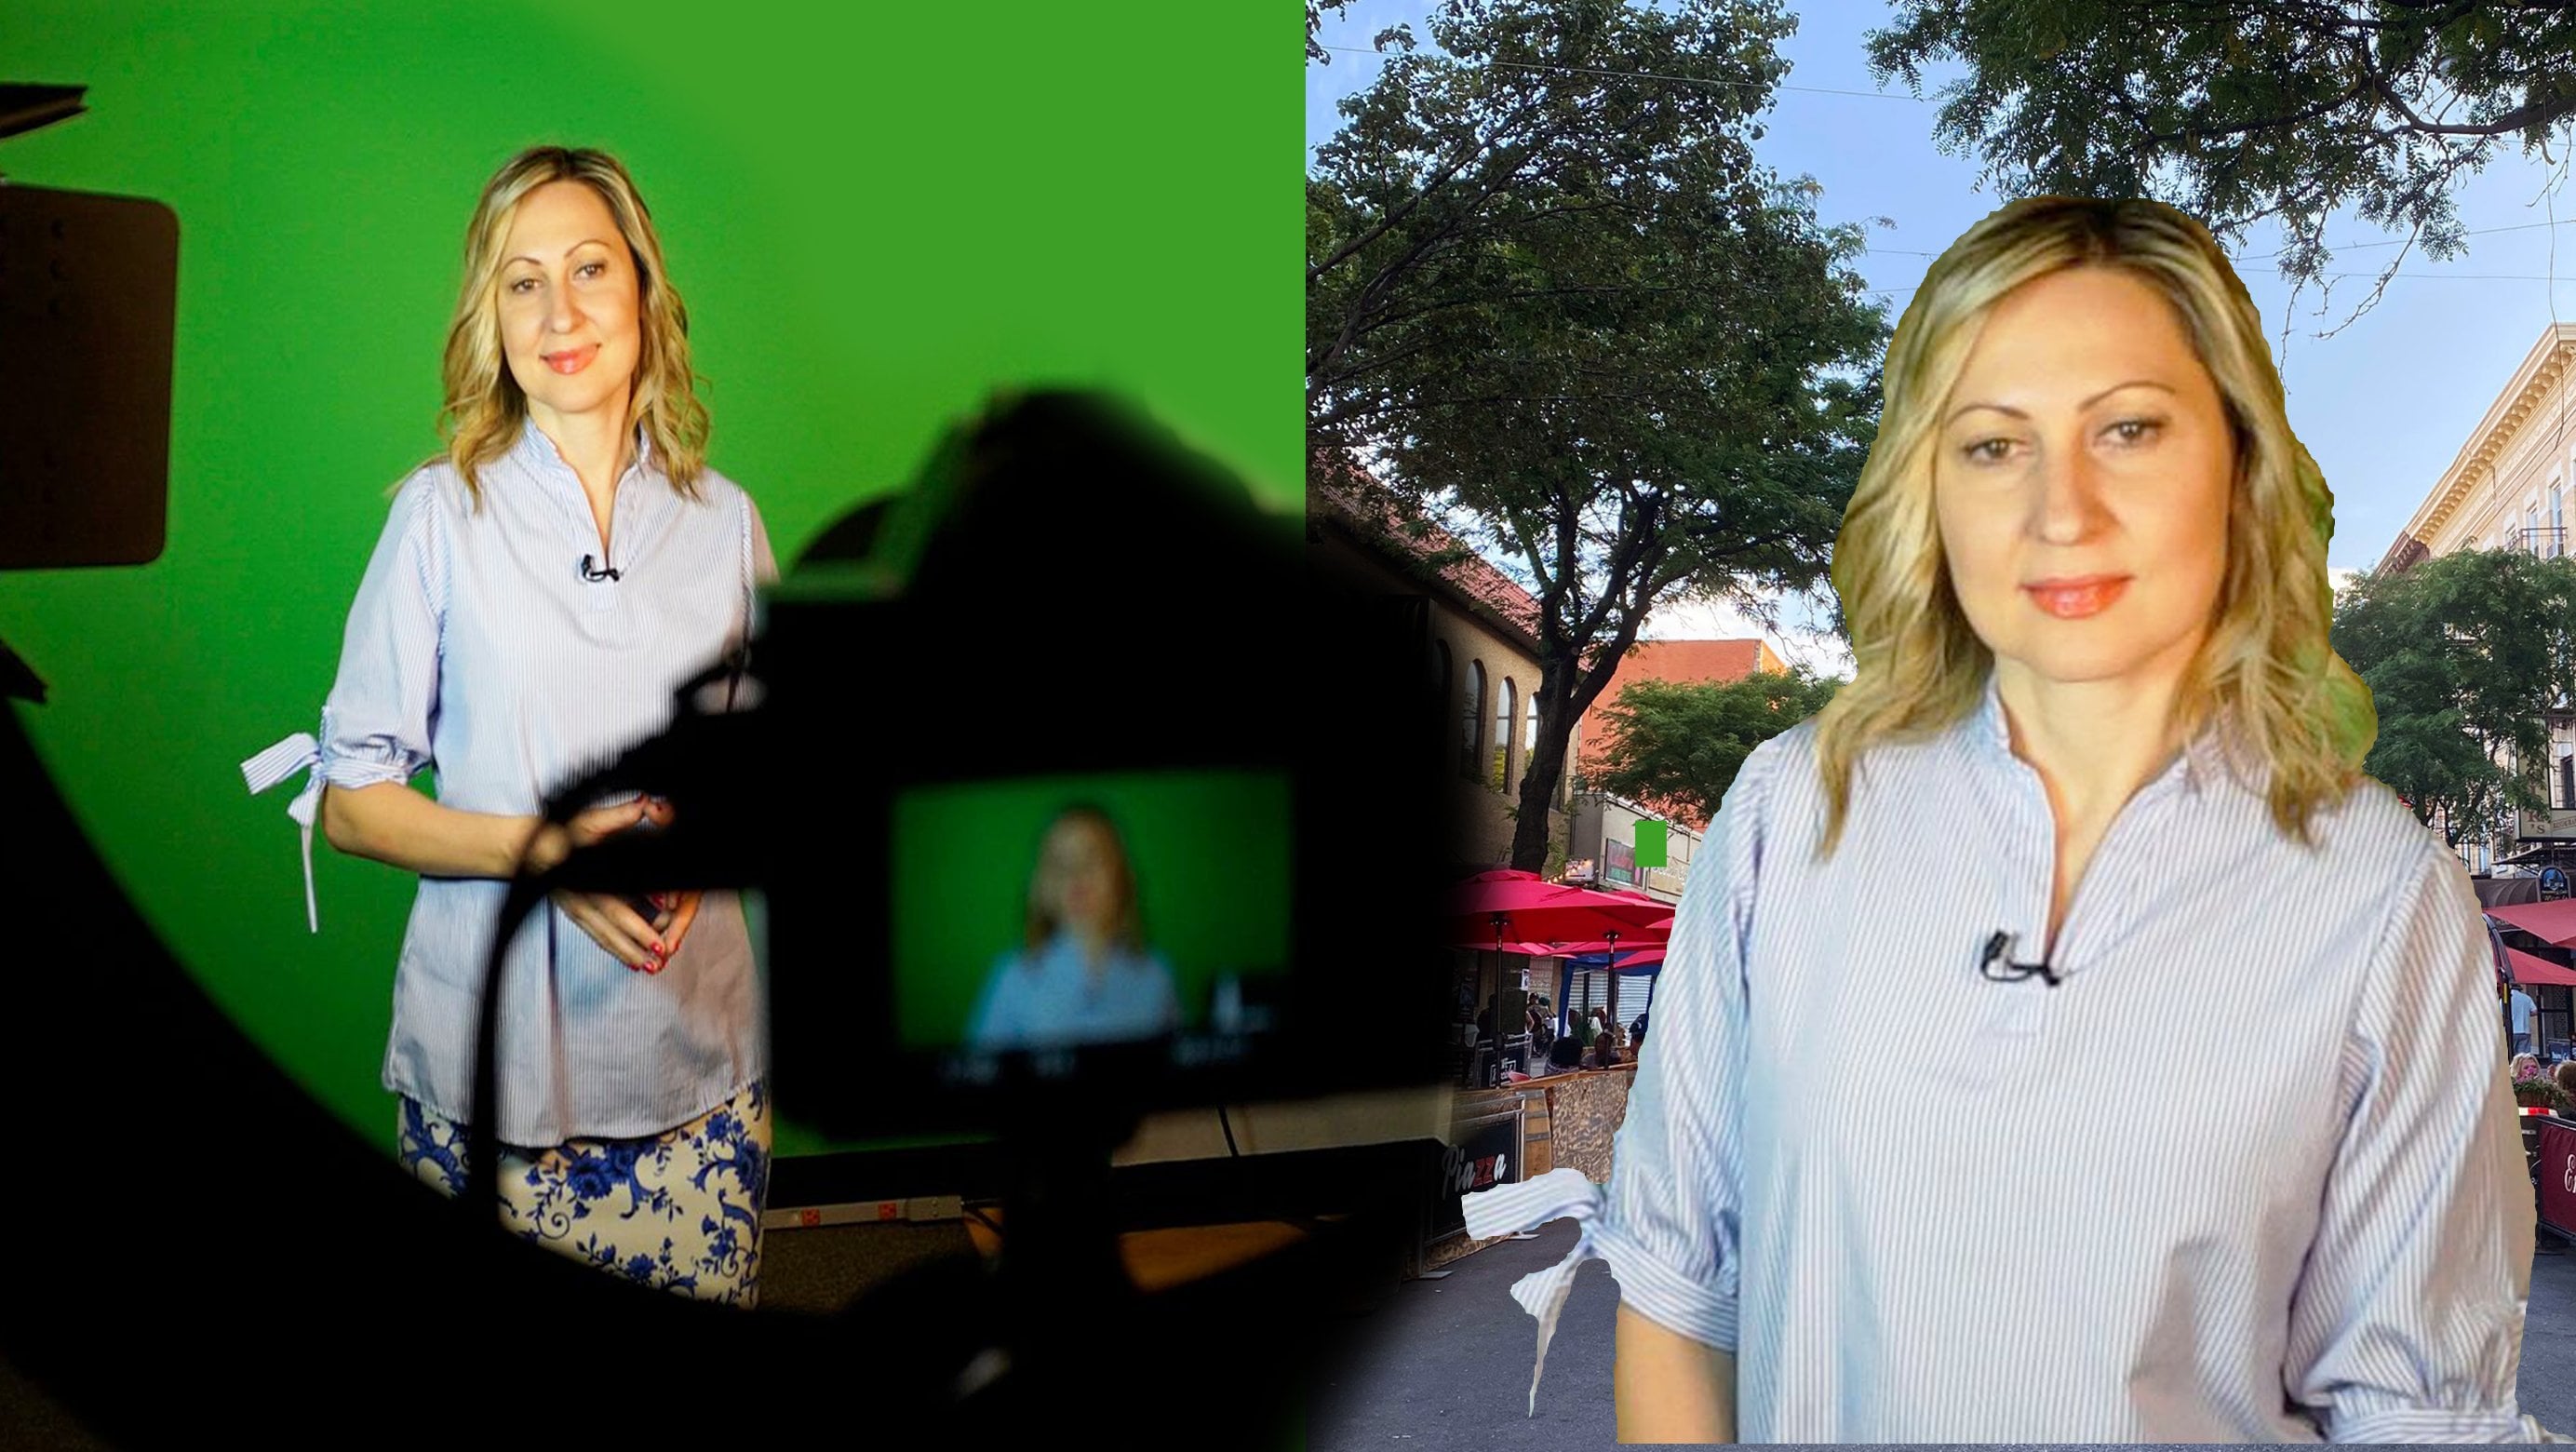
Transcripts
1. Introduction: Hi everyone. I'm, I'm
documentary storyteller. I have nine Emmy nominations, one of which as a video editor, I've been using Premier
Pro for the past 11 years. And the way I learned it was
through a lot of trials, errors and countless
YouTube tutorials. This was extremely
frustrating, time-consuming, and pretty inefficient
because I learned how to cut footage but not tell a
story with my footage, which there is a
huge difference. And this is the class I wish
I had when I first started out because it would have saved me a lot of
time and frustration. And also it would have expedite my career as a
video storyteller. If you enroll in this class, I'll take you through my
entire Premiere Pro workflow. By the end of it,
you're going to have a blueprint to follow each and every time you
edit your documentaries. I suggest for your
first documentary, we start very simple. We use one main interview, externally shot audio,
B-roll, and music. That is all you need to tell a powerful and cohesive story. And that's all we are going
to be using in this class, as well as some photos that I'm going
to show you as a bonus, how to animate and do that. Ken Burns effect editing can be very overwhelming and
frustrating at times. Therefore, I'll be guiding you step-by-step throughout
the process. And everything that
I'll teach you in this class is something
that I've learned in my 20 plus years
career as a filmmaker. The lessons are broken down into bite-size information
and that way you don't get stucked in overwhelmed because when we get overwhelmed, we have the tendency
to procrastinate. And I cannot tell you how
many projects I put aside because I got overwhelmed
and I thought to myself, You know what, That's
just the way I am. I'm a procrastinator, but no, it is because I was
overwhelmed and I had no blueprint to
follow in this class. I'm going to show you my
blueprint in my workflow. Also, I would suggest
when you start following step-by-step and you start
editing your project, export those bits and pieces and post them below in
the project area. So that way I can give you feedback or if you
have any questions, you can ask them and that
way I can respond to you. So it will be so much easier and simple and that way you
can get the help you need. I hope you join and I
will see you in class.
2. Organizing, Naming, Storing Footage and Folders: Welcome to our first lesson. I'm so happy that
you took the course. So let's dive right in. Video editing is a
very overwhelming and stressful process at times. And what helps me, It's not become fused. Why do that? Is because when I'm confused and I don't know what's happening
and what is my next step. Then I spend so much energy on worrying about these
things and figuring things out that it takes me away from my main
purpose to tell a story. What helps me is being
extremely organized. You have to have a
strong foundation like building a house. I will show you how
exactly a setup, my folders, my files, how I name everything. At any given moment, I know where everything is. In this course we'll be
using as a case study, one of the documentaries I did awhile ago for devastation. And it's a short
profile documentary of a girl named Olivia, who is a mosaic artist. We will be using one
camera, interview, biro external audio,
and then a music. So let's get started. First, we have to find place
where to store our footage. You can use external hard drive. I edit on my laptop because
they have a lot of space. Then every night I dumped my last edits on my
external hard drive. First, I save on my external
hard drive all the footage, everything, the complete
project like this. You see folder or live in
inside all my folders, which I'll show in a minute. But then afterwards, once
I'm done with one edit, I'll just update in the external hard drive that
particular premier project. Here's how I organize my
footage folder for audio. This is all my audio here. From here I have the Bureau. The Bureau, It's named Olivia. However, this is a
good idea if you have few subjects for
your documentary. But since it's only one person, we can name it B-roll. As you can see, I highlighted everything
right-click Rename, and then I gave
it a name Bureau, and automatically it
numbered all the files. Images, the artists st me, few images from her childhood, from her work and so on. So everything is right here. Just the weight was named. However, sometimes I go in
and I rename everything so I know which one
is what interview? This is the interview. For the purpose of this class, we will just be working
with the wide shot. However, I shot it
with two cameras. Music. I have one, however, I'm using four different music, so I'll be adding this later on. Output, this is the folder
where all your exports will go or you can name it exports whatever works for you. Screen grabs. The documentary I
did for a brick, and they wanted few
screen grab screenshots. They call it screen grabs. Basically those
screenshots of the artist that can be used for
YouTube thumbnail. I took this screen grabs from the actual color graded
and completed document. This is my project. So just remember one thing from this lesson, be
extremely organized. I'll see you in the next lesson.
3. Creating Premiere Project and Importing Footage: Welcome to this lesson. Let's go ahead now and create a premier
project from scratch. We open the premier app, and here we click New Project. I will name it
Olivia Skillshare, just for his class, browse. Now we have to find the place. We're going to the drive
where I have that folder, Olivia, I just clicked
Select Folder. Now a very important thing
is you scratch disk. You need to set your scratch disk so you
click on scratch disk. The Scratch Disks of all my projects are
saved in the folder of that project
from the drop-down here you can choose
wherever you want. However, I choose same as
project and then I hit Okay. The first thing I do is
import all my folders. I right-click here
and hit import. Some people do it from
here, File Import. It's not right or wrong,
it's just different. I right-click and I
do import. From here. I would find my project, Olivia. I'll highlight it. I
will just click one time and now hit import folder and it's going to
import all my folders and all my media at once. Here this the folder or
leave it was imported. And inside we have all the
folders with all the media. That is how we import your footage and create
your Premiere project. I'll see you in the next lesson.
4. L3 Creating a sequence: Welcome to this lesson. In this lesson I'll show you
how to create new sequence. So what I do normally is inside this project out,
create another folder. We have to click and highlight the top folder and then hit another folder,
creating new bin. And I will name it sequences. The way it creates sequence. You can do it from here. Click sequence. And now we have a
lot of options. Software each project
you have to choose, which option you would like, and those settings has to
match your shooting settings. Or if you want a project to be different setting than you
shouldn't settings. So you create that sequence
with those settings. And then when you
import the footage, it's going to ask you, do you want to keep
the footage settings or the sequence settings? And you're going to choose
the sequence settings for the purpose of this video, Let's go ahead and save it
with the shooting settings. This video was shot AVC HD, and we're going to
choose ten ADP. From here, it was shot
on 24 frames per second. We click Okay, Here's our sequence and we're going
to name it February 11. Every day when I
worked on a project, what I do is I take the
sequence from the previous day, I duplicate it, I rename it for that particular day
that we are right now. And work from that sequence. Because if you work on a
particular version of that edit, and then you decide
that you actually don't like it and you want to go
back to wherever it was. First of all, you're not
going to be able to retrieve that sequence unless you
go into the auto saves. So I named each
sequence bytes date. That is how you create
the sequence right here you can see the
name of the sequence. And in the next lesson
I will show you the interface and how to import the footage in your timeline.
5. Premiere Pro Interface and Tools: Welcome to this lesson. In this lesson we'll go over
the interface of premier. Okay, So in this Premiere, you can choose different
layouts for this interface. Now we have it on editing, so this is how it looks. You can choose color when
you start color grading, and then you can choose effects. The effects, it just
looks different. Audio. When you start
cleaning your audience, working with audio captions in graphics that it's weighing, you are going to create graphics or have subtitles
and so on libraries. This is if you want to
import stock footage and templates for
graphics and all that. Here it's assembling
and learning. Learning is if you
are stuck with something you can
click on and learn it. This is called Project panel, or your project, or your
project data files. Everything will be right here. It's gonna live right here. If we open this and we
double-click on this first shot, you are going to see footage appear right here
on the top left corner. And this is called
the source monitor. The top left corner is
the source monitor. What the source monitor is. Previous, your footage that you have can see preview, show you how to cut it and
import it in your timeline. This is the preview footage. Let's say you want to Start, you want this part
of the footage. You find the part
that you really want and you're happy with it. Let's say from here, we want we want her to enter. As you can see, this
bracket, it says marking, so you can click that
and then play it. I would suggest you
in the beginning, when you start
cutting your bureau to just choose the longer clips? I would let her walk
in right there. So probably I will
not use this grid. This is very long. We see her walking
in and walking and walking and walking
and it gets boring. I would not use this
whole clip, however, I would now cut it right here and drag it to the timeline because I
can later shorten it, but I can see it in all of
its length just in case. Then we mark, mark out. And this is the part,
as you can see, it's highlighted that
we're going to drag it. Like I said, I'll
mark in and out. And if you want to drag
both video and audio, you're just going to
click on the window and drag your footage
on the timeline. If you want to only pull the video when you hover over the icon that looks
like a film strip, it says drag video only, so you grab it in your
drag only the video. If you want only the audio. As you can see here, the spikes of the audio, you can just grab that and
drag it to the timeline. You see this went underneath, under the video because
these tracks V1, V2, V3 and so on, or video tracks and A123
and so on, or audio tracks. And you can add tracks by right-clicking here
and then add trucks. And it's going to
ask you video track, how many and how
many audio tracks. I'll just cancel it for now. Now, when I clicked on top of the footage that we
drag to the timeline, it appeared right here,
the top-right corner, it's program
monitor, and this is where we're going to
see all our edits. So let's say I have another
bureau and we just choose, let's see this part. We drag it. We're going to lay. As you can see, it's received, the lens was dirty. That took now I
remember a lot of cleaning to get
rid of this spot. It just a lot more time-consuming
and post-production. And sometimes you can't even fix things in
post-production. So you got to make sure you take a lot of
time preparation. So this is where we
see all our edits. Just control Z at for now. This like we said,
is the timeline. This is our audio meter. You can see here. And we're going to go over
audio a little bit later. But it's on our audio meter. You see the left channel
and the right channel. This is all your tools. So the Selection tool, the eraser tool, and there
of course, shortcuts. But for now, this is where the tools are and
you can just use those. This, it's called your
working area bar. I use it all the time because that is how I export footage. But we'll go over that later on. Last thing I want to mention before we move on
to the next lesson, each section here,
as you can see it highlights you can
change the size. So if you hover over the edge between the timeline
and the window, the top-right window
that you can just click and drag it and you see
it's going to be bigger. Let's say you're
watching and you want to see more of the video. Maybe you just want to see more of the timeline and you can do this depending on what's
important for you. That concludes this lesson. I'll see you in the next lesson.
6. How to Auto Save Premiere Project: Save your project as
often as possible. So you go to Edit Preferences. From here you go to all
those safe, you click. From here. You can do change
every five minutes, then maximum Project
versions or let's say 50. And then we hit Okay. That's going to save it. Mine are under Olivia safe, so all the auto saves
are right here. And this is at 1143. And that's how you set
up your oldest safe. I'll see you in the next lesson.
7. Synchronizing and Cleaning and Audio: Welcome to this lesson. I want to play you
the beginning part of the documentary that we're
using as a case study. So you can have an idea of
what you will be working from. I ended up in mosaics. By happenstance. I was always interested in art, but hadn't found
a medium where I really felt that
I was good at it. The idea of a blank
canvas was very overwhelming because I
didn't know how to fill it. But with mosaics,
I really love that everything is planned out
and I loved the materials. I think it's wonderful to have art in your home and I have
a lot of art in my home, but I really love the idea of multiple people in a space experiencing a piece of
art at the same time, even if they're all taken away
different interpretations. I think that's a really
beautiful thing. I'm Olivia rhetoric and I'm
a master mosaic assist. What attracted me to it
is the challenge of it. There's a lot of
constraints within mosaic that I think
are really inspiring. It makes it easier for
me to come up with ideas when I'm Navigating size or the material
and how it's going to hold up in the environment
that it will be placed in, or even the fact that you can't go back over
what you've done. I was born in Bay Ridge, Brooklyn and then my family
moved to Italy when I was 11, when I was 16, I went to visit the school that I would
go to in the future, which is the Scala
homozygote GCD of throughly. I ended up attending
there when I was 19. And while I was there, I ended up falling
in love and deciding that that's really what I
wanted to do with myself. Something like this
took about 200 hours. This for portraiture, it's extremely detailed
and the process is you take the image and map every single piece
essentially beforehand, you have to fit each piece
exactly how you planned it. So that the shape of the
pieces themselves help to give the idea of the
shape of the face rather than being an
incidental aspect of mosaic. You're actually using them to enhance the
realism of the piece. This is just part of it. We're going to go
back to our edit. And I have imported
the integral. This is the whole interview
that we'll be working from. I also interviewed
her while she was working and while
she was walking. However, we are going to keep it simple and work on
this interview. In our interview been
I dragged it right here and I know I shut
the audio separately. The interview audio, It's in the folder audio
that we created. I'll just drag it. The first thing what
I do is I always, always match my
audio with my video. Anti fix my audio, but I want it to be clean and nice and
the levels to be set. Because once they start cutting, placing it all
over the timeline, then if I wait till the end, I have to be going into each individual part in each individual cut and
just making changes there, which is a lot more
time-consuming. Your audio levels have to be between minus 12 and minus six. Now if we play it, Let me do you see
how it gets right? And that is because I
dragged this audio here, but let's see now, mosaicism. If you see even now
it hits the red, the zeros, so it
has to be lowered. I'll show you that how I
do that in a little bit. So let's go back to our edit. This is the interview. We placed it on the timeline and we are going to now
match with the audio. So it's called sinking
audio with video. What are we going to
do now is highlight. So you click on the timeline and you drag your mouse down. You can use to control a or Control a or Command
a. I worked on a PC. And right-click, you
can go to synchronize. So you click Synchronize. And it's going to ask you
the start of the clip, the end of the clip, a
time called or audio. I choose Odeo, which means
it's sometimes the audio, it's longer than
the actual video. So if you choose start or end, it's not going to work or timecode if you don't
have the time code, it just not gonna work. But Odeo Premiere
is going to match the words from the video to the external
Odeo. I click OK. I felt that I wasn't good at it. Now that we have that set, I'm going to go ahead and
minimize the audio from the actual video because I want to work only from
the external audio. As you can see this line here, I'll just click on it and
drag it all the way down. And now we are
only going to hear this audio on track two. And we're going to
check our audio levels. Well, I ended up mosaics was always it goes a little bit over six, somewhere around 54. So I'm just going to
lower it just a tiny bit. Also, you see when you hover, you see this numbers that
shows you where the audio it add interested
in art but hadn't found it's still a
little bit higher. Medium where I really
felt this is good. We can leave it at that
control S safe, safe, safe. This is for this lesson. I will see you in
the next lesson.
8. Editing the Interview and Adding Markers: In this lesson, I
will show you how to come the interview
and also how to set up markers to help yourself identify what each section is. Just before we start, I want to mention
sometimes what I do is I have a sequence for biro, then I have another sequence for the main interview,
and then I have a, a third sequence that mixes
both of them together. I do that when there's probably a few people that I interviewed
or a long interview. And then I have a lot
of lot of bureau. In this documentary,
I did not do that. I worked from one sequence. I had the interview and
then I was just placing Biro because it was
not a lot of footage. That is what I'm
going to show you. Now we're going to
cut our interview. Find the spot where she
actually starts talking. So right from here we can
choose the razor tool, which is going to
cut our footage. So we make a cut, we just click and
that cut the video, but we also need to make
a cut on the audio. And then you press on this tool, the selection tool, and you can highlight this and delete. I'm Olivia. I was
born in Bay rich, Brooklyn and then my family
moved to Italy when I was 11. So that kind of put in motion the path that led me to eventually
becoming mosaicism. When I was 16, I went to visit the school that I would
go to in the future, which is the Scala vestibuli, which is a mosaic trade school, as well as Roman and visited. So it's a very
professional course. When I was 19, didn't know
anything about O scroll a little bit till the end of that part of deciding
what to do with myself. Here, she talks about
how it came about that you went to study to
be able to like artist. So I made another cut here and
we'll go to the next part. This is my question. I want to cut this
part two here. So what I'm gonna do it again, grab the eraser to cut it right before
she starts speaking. And grab the selection tool and then highlight and delete. As you can see here,
there's a gap. So what I'm going to do is right-click and then
ripple delete that will move the clip and
eliminate that blank space. So I'll do this for
the whole interview. I'll just cut those hands
and arms out, cut it up. Things that are not important
that I feel like are duplicated or cut
out my questions. And then our group, each section by
question by topic. And hopefully when you were
interviewing the person, the subject, you were doing
it in a chronological order. So the childhood and then this happened and then the
future and so on and so forth. That way it makes
it so much easier. But sometimes when people talk, question pops and then you
want to ask them and that is non-related to the question
that you asked before. Then I will just shift
things in group them. So when I group them, then I will place my
markers on the top so I know what that
section is about. And you can just
leave a blank space a little bit between few frames. So I'm not a minute, but few seconds black space
between those topics. And then have your
markers on the top. As you can see, there
is this marked curve, so I'll just double-click. It will open this
menu, I will name it. So three, let's say
before college, choose red, let's say duration would just
drag it a little bit, few seconds, but we can
extend it and then we hit. Okay. And as you can see, it named it and it appeared
right here on the top. What I'm going to do
is drag it all the way because these two parts
of the interview, they talk about her life
before she went on to study. Now. I'm going to do that
for the whole interview. And that way, when I need
to move parts around, I can see which part is what. I'll see you in the next lesson.
9. Editing B-roll (Supplemental footage): Welcome to this lesson. I cut up my interview, I marked everything, and now
I'm ready to put my B-roll. As you can see before college, interest in art favorite about mosaic professional
life and so on. Now, we are going
to add our B-roll. I double-click on my B-roll. And sometimes I would even
name each biro what it's like. Or I'll go over here on the icon view and I'll
just choose icon view. That way I'm able to see a little preview of what
the Bureau It's like. She talks about
her college life. I mean, before college, her early childhood in
where she was raised, I would probably use
some of her photos, but I wanted to start
with something to give the viewer idea who is she
and what is she doing? Before we see just photos of a child and the viewer
will not have idea what, what is data about the squishy and why they're watching,
what they're watching. So it's important for
the viewer to know right away why they're watching,
what they're watching. Who are they watching?
Who are they? What do they do and so on. And so as much as information in the
beginning as possible. So I'll just go to this clip right here where she see her
mixing the group. I'll end it right here. I'll just drag it
on the timeline. I like to drag it with the
audio because sometimes I use the audio and
if I don't use it, then I'll just
minimize it for now, I'll just lower it a little bit. But I like to hear sometimes the audio and I don't want
to just drag the video. Then I want to see her
actually working on the mosaic so the people would know what does she
actually doing? Because in the first shot
She's just mixing the glue. Here we see her, but I want to start with
her cutting probably. I know I had a shot
of her cutting and then I think
is this one Yes. Yes. I like this one. Right here. Right here. Mark in its too long. But for now, like I said, I like to keep them longer in the beginning and then move on. Right before the camera moves, I will just make it mark out. I'll just end it right
there. I'll put it here. And I like to
preview immediately. Of course I'll take away the scratch when she's
scratching herself. 11. Kind of put it
in motion here. I will also shorten it. But now I just want to see her putting together
oldest elements. So for shooting
mix the glue now, she cut them stone and now I want to see
her taking part of the glue and putting it on
the mosaic right there. That's it. We drag it to the timeline. Now. I'm going to go over in
shorten it, shorten the clip. 11. See right before she scratches
her hand, right here, I will click and just
shift left, drag left. You see this red arrow going to, It's going to cut the footage. I'll move the next one over. Now I'm going to play it again from a little
bit from beforehand. So she starts to move her hands, kind of put emotion. I wanted this to probably start
on a motion to let's see. No, it doesn't work. When I was right
before she leaves it. I think it's better. I like this better. Italy. Right here. To Italy when I was 11. That kind of put in
motion the path. Okay. So that kind of put
in when she cuts it, we're gonna cut that
kind of put in motion. We use it. When I was 11. She leaves in there. Then we're going to
cut our next shop. When I was 11. That kind of perfection, the path that led me to
eventually becoming mosaicism. When I was 16, I went, maybe we see her here. But I want to cut this. Then we can see her. So again, I'm grabbing my
eraser tool and I zoom in. I see where this
arm is, right here. You can now go frame by frame. So we can't this, again, we grab the selection
tool. Perfect. Now repo delete,
so you right-click on the black space
in ripple delete. Let's see. Let's play
from the beginning. And we're gonna cut, of course, when she says, Well, I actually am not going to leave that
part where she says, Well, I'm only there
because we're going to have her name later on. She says I'm Olivia. I'm a mosaic already. So I'm just going to cut
this from the beginning. So same thing. We see the red arrow. You can drag it to
the other side. Remove the I was born in Bay rich. I liked that one. Then my family, we leave
it to Italy when I was 11. That kind of put in motion the path that led me to
eventually becoming a mosaicism. When I was 16, I went to visit the school that I would
go to in the future. So this is how you
add the Bureau. And in the next lesson
I will show you how I come the music in.
10. Sourcing and Adding Background Music: Welcome to this lesson. Now we're going to
talk about music. I use few different musics throughout and I
encourage you to do that. Why do that is because
each section for me has a different feel and emotion that
I want to convey. Some moments, they
are more upbeat. Some moments are more
slower than others. It just the feel
of each moment is different and also
try not to use songs with lyrics when
there's interview because it's going to be very distracting
and overpowering. Also the music for me, it enhances the mood and the viewer should
not be aware of it. If they are aware, probably it's going
to distract them. There will be out
of the integrin and probably in vice versa. If they are aware of the music, probably they're not interested
a lot in emotionally. They're not emotionally engaged in what the person is talking, so it's vice versa. But I tried to blend it
with the interviews, so it just conveys that
the motion I want to show you where I find my music. You can go to story blocks. They have video like stock
footage and templates. They have audio,
images and so on. You can also use
Envato elements. That's one side. I also
use a lot of music from and also you can
use audio network. You have to see
what works for you. I'll show you an embattled
elements how I find my music. So on the left you can
see the filters and you can choose the mood
that you want to convey. You can choose by country
or pop or rock, the genre. For here, I want. Olivia, She's very
feminine and she speaks quietly and very poetic. She has this aura around
her that I feel like very mellow and
quiet and relaxing, peaceful music would be
suitable for her character. And also Mosaic and art work. It just very subtotal. Something very peaceful, I
think would be appropriate. So I'll just click
relaxing peaceful, but of course I don't want
to put my audience to sleep. Times. I also want to
have something upbeat. Go ahead later on and choose a different music
right here also, we can choose what
instrument we want. I like a lot piano, and I like also violin. But for now, I just
want to keep it open too wide range of
music and instruments. And then I'll just go ahead
and use some more filters. Right here you see background
vocals, vocals, and so on. I'll just click No vocals. Let's try. I actually like that. I'll download this one. You can click and see
the spikes where it starts to be a little
bit more upbeat. I don't think this will work. What do you have? Okay, so I'll go
ahead and choose few musics that I
think could work. And I normally choose
more than I use. And then just experiment. Let's now cut our music. Here's my first music. Mosaics kind of by happenstance. And I'll just play
you the actual music. This one. I liked something
that does not have a lot of beats and
a lot of ups and downs that want to overpower the interview
because I will leave you already speak so quiet
in low and peaceful. And so I wanted to just
keep it in that tone. By happenstance, I was always, I always watch my audio meters. Okay, so this is the music
that I chose for this part. Then. Right here,
as you can see, we have series of shuts. Her work. Right here is the beat. And I'll just change from
one shot to the other. Then we started again
with the interview needs transition, which we'll go over to the
air on the next video. Sometimes you need the render because if a project has a lot of a lot of special effects and transitions
and effects in general, and graphics and
footage and so on, is going to show you this
yellow line or red lines. So you will need to render it. So you go to sequence and
then render entire work area. That will render weird
that work area bar is. Then it's going to
play very smooth. Let's play this again. Here's missing a beat. It has to move a little
bit forward here. So we're just going
to move this biro. I can rearrange it a little bit more and play with it more. But you have to find the
rhythm of the music. And then, especially
if you're making a sequence part where if you
have Bureau after Bureau, it's, you have to play with
it and match it to the music. So in the next lesson, I will show you the transitions
and how to smooth out the audio transitions and of course, the
video transitions.
11. Adding Audio Transitions: Welcome back to this lesson. Let's go and smooth out our music and play
with transitions. So we're going to
click here on effects. As you can see on the right
side there, a lot of effects, the precepts order effects, audio transitions, video
effects video transitions. Now we're going to
start with the music. So we have audio transitions. If you open, we have
the constant gain, constant power and
exponential fade. So the constant gain, that is when a music stores or dialogue and you want it to start smooth, it's not abrupt. Right here in the
beginning of the music. So we're gonna, we're
gonna click and drag the constant gain. The music is very low, so it's going to be very subtle. But let me just make it a little louder just for
purposes of the video. So this constant gain, that transition. If you click on it, then hover over the edge, you will see the red bracket. You can click and drag it in. You would extend the time
of the constant gain. I was born in Bay Bridge. You can see here
clearly the gray lines. So how exponentially it goes up. The exponential faith
works in the same way, but the other way around. So it will fade the music. And we're gonna
put it in the end. See, we would want I
don't like how it ends. The audio and the music. It just doesn't sit well. I would actually not use
this and just got it. No. Actually go here. Interpretations. I
think that's a really beautiful I'm Olivia
rhetoric and I'm a Master. I want to show you
one other thing. Sometimes. If you have 0 in the
middle of a music, there's no way to use the constant gain unless
you cut the footage, but then you have the constant power
and exponential fade. It just doesn't work. So we have to do is create keyframes. I'll grab the pen tool. I'll click wherever
I want my music to start being a little louder. I'll go click again on where
I want my music to be. On the lower volume. Now, I will make
two other marks, and I will go back to the selection tool
and just click on this line and drag it. Now keep in mind, you
can change these. You see you click
on the keyframe and you just drag it and you cannot just how
smooth it goes down. You can also do this, extend this part
into it this way. And now we have to listen. That's really what
I wanted to do. Something like this.
About 200 hours. It feels abrupt right here. So I would just move this
keyframe a little bit. When she starts talking. Even this out extends. I wanted to be a little bit more smooth, something like this. I want people not to be aware when the music
comes in and out. That is my way of editing
and I like it like that. I don't want people to hear this music
because if they start different tree in
differentiating where the music starts
and where it goes, there'll be taken
away from the story. I wanted to show you
also the constant power. Sometimes if I cut
into view, like here, I used it Icon the arms and arms in the old other,
the imperfections. And I want to link a
sentence together. I would use constant power
in-between how it worked. Okay, see right here,
getting into how it works. I see how it's how I want. So I'll just put the
constant power, shorten it. Getting into how it works. You see how smooth it is. Huge difference. Again, let's plug in to
how it worked, okay? Now, I will clear how it works. See big difference.
12. Adding Video Transitions: Now I want to show you
how to do transitions. Here we have images. I use the images that she
gave me from her early work. I used from this side
video transitions. I like to use the cross
dissolve and dip to black. And keep in mind, if you use it one time a
transition, it's a mistake. If you use it two or more
times. It's a style. That's what I learned
from an editor, and I use that all the time. So if I start with
one transition, I keep it throughout
or use a few times. So right here, we have the cross dissolve and I'll show
you how I've done this. Italy when I was
11, when I was 16, I went to visit
the school that I would go to in the future, which is the school level thing. I align my photos. Now, I'll grab the
cross dissolve transition and
outputted in-between, right where the cut is. I went to visit the school and I'll also make it
a little bit shorter. I went to visit the school
that I would go in the future. And this one too. And also you can
do the duration. You can right-click
on the transition in the sit transition duration, you can change it, change it, Let's see, 220 seconds. And you do the same to
this one sit transition. That's already 20, perfect. And you do not for
your transitions. That is how you add transitions.
13. Creating Text Graphics (Lower Thirds): Welcome to this lesson. I want to show you how
to add these graphics. This is a website. Like with everything, there
are few ways to do this, but we can just click on this T, and just click on your playback
window and start typing. So Olivia, you can double-click on it
or just highlight it and go to graphics. And choose. Right, we were here at effects. Underneath you see
essential graphics. So you can click on that. And we'll open this menu. From here text, you
can choose the font. So let's see area, area. And then we choose bold. And we can choose the color
since the wall it's white. We can choose black
or dark gray, or you can choose like I had
on the bottom, white width. Drop, another drop shadow. I find drop shadow. I use drop shadows, very rare. I find them cheesy. I had to use them
in the beginning. They asked me to
it so the producer wanted to have that drop
shadow and I used it. I stay away from drop shadows. If I can't, I just do something like that
and I'll show you how. But let's say for
this purposes now we have we choose black. And let's go back to
the selection tool and drag a little
bit of timeline up. And I want to show you this is the title that we created right now. You can extend it, how long you want it. You can shorten it. And now we can just
click on it and drag it. But don't forget forced to have to choose the selection tool. Let's say we drag it right
here and we keep it black. For now. Let's say we want to add just like this highlighted
part underneath. We're going to go back to, we're going to click on it. Align it here, we're
going to highlight it. Go back to our
essential graphics. And then right here
we choose background. You click on it. It's already set on seventy-five
percent transparency. You can do a 100, but
you see how dark it is. And you can use
certainly for something. Let's say you choose white, you click on this color
and you can choose white. Now, we want to extend
it just a little bit. So from this bottom
one seats and 0%, you can just click on
it and make it bigger. You see how big you can make it. You can cover things, you can make it a little less. You can match it to that color. So you can grab the I drop
a tool and then click on this part between
the letters. And it's going to become the same grade as
the bottom one. Now we can change the fill to, let's say this color
and is the same. Now it matches. That's how you add graphics. I will see you on
the next lesson.
14. Exporting Short Documentary (settings): Welcome to this lesson. So before I export it, I want to show you in
the very beginning. Normally I leave
few frames black. And I also do dip
to black sometimes. Again, just like the
audio transition, you drag it right to
where you want it. Or you can use cross
dissolve here. Maybe a little longer. You can just leave it blank. So how we export our video, I use this gray bar on the top. As you can see, you
can grab it from here. And then work area bar is, now it disappears. Work area bar. Drag it all the way
from the beginning. Then all the way to the
end of the project that select which part
of the timeline you want to export
in your final video. Now I have everything selected. This is green, a
green line here. There's a little bit too yellow. When you work on your timeline, you will have read, which means you
need to render it. I render it before
I start exporting. But also doing the
exported will render. So there's no right
or wrong way. There's just different. From here we go to
File Export Media. Let's say it's for you
to Vimeo purposes. I go and choose H.264
from this drop-down menu. So the format. And then the presets I would choose for
all these presets, I will choose Vimeo, ten ADP for ADHD, or I would choose YouTube, ten ADP for HD. Let's say we choose Vimeo. It's 1920 by 1080. And you can scroll here, render at the maximum depth. And now when you scroll over here on the
bitrate settings, I like to do two passes and
keep this between 1520. From here we're going to
choose the folder and a name. So we click on this blue
line and we choose Olivia, and we go to our output
folder and we name it Olivia, due February 112022. And then Save and
then hit Export. This is for this lesson.
15. BONUS: Animating Images (Ken Burns Effect): Welcome to this lesson. In this lesson I
will show you how to animate your images. Here's, this is what it's
called, Ken Burns effect. Ken Burns effect. This is what it's
called Ken Burns effect because welcome to, welcome to this lesson. In this lesson I'll show you
how I animate my images. This is called Ken Burns effect, this document
documentary filmmaker called Ken Burns and
he does documenters. And very often you would
animate his images in this way. So now it's called
Ken Burns effect. The few ways of doing it all
depends on your project. For example, I'll just
show you how this is animated and we're going to recreate something
similar to that. So as you can see, there's moving left to right, the zooming in and out, There's moving right
to left and so on. And they are cross dissolve
transitions in between. So let's start from scratch. Let's first half. I'm just going to
look for this photo. That's how you look for things
like you can right-click. And then reviewing project if you don't know where
it's in Explorer, meaning in the
folders you saved it, you can review and explore. Okay, Let's grab this image. Then let's have this
image, this image. And also let's have one rectangular of her work because sometimes
you're going to have that going to be
a different size. Let's do this. First thing we do. First thing I do is, as you can see, it's so small. Sometimes I will
just different sizes because the sequence is different size and then the
images are different size. So sometimes I'll just
highlight everything and then right-click and go to
scale to frame size. You see it will scale it to whatever size the
original image is. Now also these black
bars around it. They bother me. Sometimes output of background. Let's say like a color that is similar to something
that's in the image. Or sometimes I will just
duplicate this image. Just drag it again and again, scale to frame size. And then I would go here too. And now we're in effects
were not in editing. So I would go here, as you can see, all these different
tabs you can click out, go to Effects Control. And I will do this. The image that is below, let me just give it
a different color. Green. On track one, we have
the green image. Think of, think of it this way. It's like stacking things. So the below one is the base
and it's the bottom layer. So if I move this, you'll see the same photo
because this is the base layer. We're going to work
from this layer. Now, I'll show you one way
to create a different, more interesting background
and sometimes I use that. So if we go to Effects Control and we have
highlighted the bottom layer, we go here to position scale. And if you hover over the 100, you will see these two. You'll see a hand
with a finger and then the two arrows on
each side of that finger. Which means you
can click and drag left or right. That way. You can scale your bottom image. Watch on this other monitor, you see how we can skip. We scale the image. Now, there are no more
black bars around it. We have the same image
but we scaled it. So if I remove this, we can see how this looks. This is a 179. And you can click again and
drag it and make it tiny. Make it bigger again. I'll go this way. Then the position, this, it's left and right. It moves the image
left to right. This moves it up and down. Just move it like that. We're going to move our
top image again back here. Now, I don't like the way
it looks like right now because you can clearly see the car and it just
doesn't look good. What I do is I go
to effects right on the top where the search bar is. On, the effects, I just
click and right blur, blur. And there's so many blues
fast blur and blur out, Camera Blur and all that. I'll just get the
Gaussian blur, grab it. So just like the video
transitions, we click, grab it with the
mouse and drop it until it highlights the green
layer and drop it here. Now if we go back to
our effects control, right here, we're going
to see goes Gaussian. I hope I'm pronouncing it right. Gaussian, gaussian
blur, the blur effect. It's right here. From this num, this is the
number than blurriness, how much blur we're
going to have. Again, I click and I
drag it to the right. You see it blurs the image. I like it like
just about 101212. It's fine. We can
leave it like that. Now what we want
to do is animate our top image so we
highlight the top image. Let's go to editing here, so it's easier to see. Again, we're gonna be working from the position and the scale. Those are the two things that we're going to be working from. This. It says it is a
toggle animation. So this is like a stopwatch where you can be
creating keyframes. There are few ways to
create key frames, but I'll show you how I do it. This image is a 100 scale
and this is the position. What we want to do is from
the beginning of the image, the position in the scale width stay exactly the way this, what we're going to do is click on this stopwatch one time. And you see right here, it created a keyframe. This is called a key-frame. Also, you can create
it from here. It created a key frame. Now I'm going to
click on the scale. The same way is going
to create a key frame. Now, we're going to
go all the way to the end of the image because we want by the end of the image, the image to be scaled up and also to have
different position. So now we're going to
click on the scale. And you see where all the
way on the end of the image, our top images highlight. Our top images highlighted. We're going to click on
the a 100 and drag it. We can see how much
we want this image. Let's say we wanted full screen. However, now when we
did a full screen, the bottom part of the
image is cut and there's so much space on the
top portion of the car. And actually I want this car to be a little bit higher
because that is the focus. So what I'll do is I'll get
the position top and bottom. This moves top and bottom, goes up or down. I'll click and move
it up this way. Now if we go back here to the beginning of our
image and we play, it is going to be animated. This is too fast,
normally outdo slower. And the easiest way to
slow it down is this. Extend the image of course. But let's say I don't
want to do that. The easiest ways is to go. And right in the middle
of two keyframes, you see if I hover over this, notice these colors,
these are white. If I take that
cursor and move it, you see how the
keyframe became blue because I'm right in the
middle on top of the keyframe. Now. I can click the scale keyframe. I'm not, I know that I'm
exactly on top of it. And I can move the
scale to let say 125. And of course I'll need
to do the same thing for the position because we see here the bottom and
we don't want that. So I'll just bring this
a little bit lower. Now if we play it is
going to be slower. Seed is so much slower. Now, Let's animate this
photo in a different way. So again, we're going to click on the image
until it's highlighted. I want to do
something different. I want to start from scale up. Then zoom in. Zoom out. First, what we're
gonna do is scale the image with the
beginning position. And actually it's
a very good idea. And actually, I want to animate
this in a different way. And the easiest way to animate is to start
with and didn't mind, even for this image, it would've been easier to
start with the end in mind. Because sometimes it's
very hard to predict how fast the zoom in and
zoom out will work. So it's easier to start
with the end in mind. What I mean is this. So let's say we go
to the end of this, our second image, this image
there is on the screen. Let's say the end, we want to be on Olivia. I couldn't even see her here. Again, figure it out who
she she's right there. So let's say we want to be, actually, we want
this to be the end. The way the image ends this, we want to be our end
of our animation, so we position it. And then we click the stopwatch
is of position and scale. Now we're going to go
back to the beginning. And we're going to find
what beginning do we want? How do we want the
image to begin? Do we want it from
zoomed in or zoomed out? Then as the image progresses
to go to zoom in, let's say we want to
start from super close. We're going to animate
it in a different way. Let's say we start from here. Now from the previous image. We start from Bolivia from
close-up to a wider shot. That way people can
see who she is. But you can do also the other
way around from a wider, and I'll show you
on this image from a wider, we're going to zoom in. Let's go to this image. Let's say we want to end again, we're starting with
the end in mind. We want to end on
close-up of her. Right here. We click the position
and scale stopwatches. We go back. We zoom out. Zoom out, right here we move
the positions. Now, let's play. Perfect. I'm going to show you
also another way. Now. I'm going to show
you this other way. So let's say we have this image, we scale up this way. And we want the image to be animated like
that left to right. And finish on this flower. And also to scale a little up. Let's say we want our end
position to be like right here. We're going to go back to
all the way to the end. Click the position and scale. Move it to the beginning. And now I want to move it to the right and start from here. And actually I'm not
going to scale at all. So let's watch. It's very fast. But We can do again, we can just move it
a little bit. Oops. We can just start from, let say from here. Although I wouldn't start
from here because this pole. But let's say just for
sake of our example, it's still feels fast. So what I can do is
extend the photo. We highlight, we
highlight the photo, hover over the edge until that arrow appears and we
just drag it a little bit. Now we want also to
our keyframe frames, because if we play it right now, It's the animation stops
and the animation ends wherever the
keyframes or what we can do is click and highlight our two keyframes and move
them to the end of the image. In this is the end of the
image. Let's play again. It's going to be
slower. Perfect. I'm going to show you
one more how I did. Let's see this one. Because you can really
tell a story with your images and it doesn't
have to be boring. Let's say here. We want to start, we want to see what she's doing. And actually Ken
Burns does this and then he adds sound effects. So it's super cool. Let's start with. From here. We click the position and scale. Although I'm not going to scale, I'll just change the position. Just like here. Let's say we want let's say we want to
start from her hands. Or let's say we want to start the shot of her
face so we see her. And then we're going
to end on the hands. So right here we begin. Now we're starting
with the beginning, but we also know the end. So we have always the end
in mind. So position. Now we're going to
go to the hands, close-up of the hands. And actually, yes. And we can zoom in a little bit. But let's say we want to start the Zoom in
from right here, so we click Scale. Then by name the
end of this frame, we just going to
scale a little bit. Let's watch it now. You can print it much animate any image and make
it more interesting. Rather than just having
an image like that. Huge difference, right? And you can play with
it, slow it down, make it faster, and so on. Compared to this. Now, because I don't like
the wavelets play it still fast. And also if you notice right where the image
changes, It's very abrupt. See, that's why I
always do this. I go to effects and
video transitions, dissolve, and I'll
get a cross dissolve. Cross dissolves can
be very cheesy, but I just use it. I shorten it a little bit. This way. It's much smoother. And what I'll do is I'll
click on the top image and move the keyframes very close
to the end of the image. I'll click to the next image and move those first two frames, keyframes to the
beginning of the image. So that way we don't see
when the animation stops. Watch now. See it's very smooth. I'll do the same for
each one of them. Again, I'll move the
keyframes together. This one to the forward. So much smoother,
so much better. It's just this
image is very fast. I wouldn't leave it like that. Again, we move this keyframe. See, perfect, looks beautiful. This keyframe here. This way. Perfect. That is how
you animate images. I'll see you in the next lesson. How are you save? How
you create oldest safe? I'll show you how to
create all those safe. If you go to edit.
16. BONUS: My Approach to Editing: Welcome to this lesson. I want to talk a little bit
about how I approach editing. So I edit the whole interview, then I'll add my bureau
and then my music. Sometimes I edit to the music. I don't often like to do that. I do it if that is a promo or something that is different
than a narrative structure. Why do that is because for me, I listened to the rhythm of
the footage and the stories. So whatever the subject is
talking and then we see a B-roll and the Bureau has to go on the bead
of beat of the music. But sometimes I like that particular Biro or shot to stay longer
because it gives this, it conveys an emotion. What happens if
the middle of it, there is a beets and
I have to change it to something else, to a different shot. And I feel like this
is more technical. And when I'm telling a
story, It's more narrative. It's more about their motion
and the timing of each shot. And I just let myself sort of in this meditative state where
I listened to the footage, to where I shook and certain shot and then
start a new one. And I'm not talking
about interview, I'm talking about the bureau. So that is why I
would edit the biro. They interviewed in the Bureau and then I'll add the music. In certain areas where I feel like it will be
beneficial to have music. It will enhance the mood. Some areas, I just
leave them blank. I have the opening with
absolutely no music in just the ambient sound
which I love because I think it gives that sense
of space where we are. What is she doing, how she's mixing the glue or walking in that
industrial space, the door shots and it's just
like this industrial noise. It transport your
severe word there. And you're right in that space. So the beginning starts with
nothing, just the ambient. I ended up in mosaics
by happenstance. And also here when
she's walking. What attracted me to it. The challenge of it, there's
a lot of constraints. I also like pauses
and quiet moments. I call them quiet moments. Because after a lot of
information from the interviews, people need time to
assimilate what was happening and what they just saw and what
they just heard. And that will prepare us, our brain to assimilate
more information. In the next scene. While I was there, I ended
up falling in love and deciding that that's really what I wanted to do with myself. Something like this. This is for this lesson. Before we move on
to the next lesson, I just want to share that you will find eventually
your editing style. And to find your style is by watching other documentaries,
other people's work. And I know sometimes it takes
the fun away from watching a movie because you start
to analyze everything. But sometimes they watch four or five times
in the same movie because I want to onetime
analyze those pauses. And other time I went to analyze the things that I don't like. The other time I want to analyze what shots actually
like the Bureau, how it corresponds with
the, what they're saying. So then in the editing, it's all about practice. I did so many documentaries that I wished I can recap now, or I wish I knew
what I know now. But sometimes that's what
it takes and sometimes you ruin a story and
you can go back or not. But we just decided
to move on and then start working on
the next documentary. But by studying your work
and other people's work, you can be conscious what
mistakes you did before. Why do you didn't do like
what you edit before, where they didn't like
about what you edit before and what
you would like to do differently the next,
the next documentary. Just keep practicing
even if it's just like footage and just keep cutting in experimenting to see how
from one footage you can make few different
stories, few different edits. And that's why it's important, like I said before, to keep duplicating
that sequence. Each and every day work
from a fresh one because sometimes I will completely
shift order of things, eliminate music,
putting new music, put something else in there. Then just completely
changed the fear and tone of that documentary
about section. Then I'll say, you
know what, no, no, no. I escaped the old one and I'll just go back to
the old sequence. So everything comes with time. That's it for this lesson. I'll see you in the next lesson.
17. Final Thoughts: Well done. You did it. Congratulations on
completing the course and also completing your
documentary story. This is a workflow that
I've been financing for the past 11 years
and never fails me. I'm very happy that I
passed it on to you. Now we have a
blueprint to follow each and every time
you edit your stories. We talked a lot about
organizing, organizing, organizing your footage,
creating your folders, setting up your project
sequences, timeline. And majority of the time
we spent on talking about cutting our interview,
cutting our B-roll, laying our music, our audio, animating the images, adding audio and video transitions
and of course exporting it. I'm very confident that you
are well equipped and have a strong base to edit your documentaries each
and every time. Please. If you have any questions
or suggestions, feel free to reach out to me here and I'll be more than
happy to respond to you. I will see you on Skillshare, my YouTube channel or Instagram. But first of all, and most of all, thank you so much for
taking the class. And I'm wishing you
great success in your documentary
storytelling joined by it.
18. Conclusion : If you find this class helpful, please sign up to my
monthly newsletter with exciting updates, creative ideas and
bits of inspiration related to living an
intentional life as a creative, this newsletter is inspired
by my desire to achieve mental clarity and flow of
ideas to live in tension. Lily, every step of the way. You can find the link here on Skillshare under my
course instructor page. Thank you.
 Luchia Dragosh, 24x Emmy nominated documentary filmmaker