Transcripts
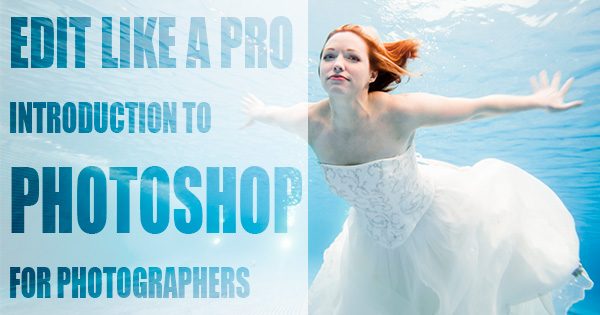
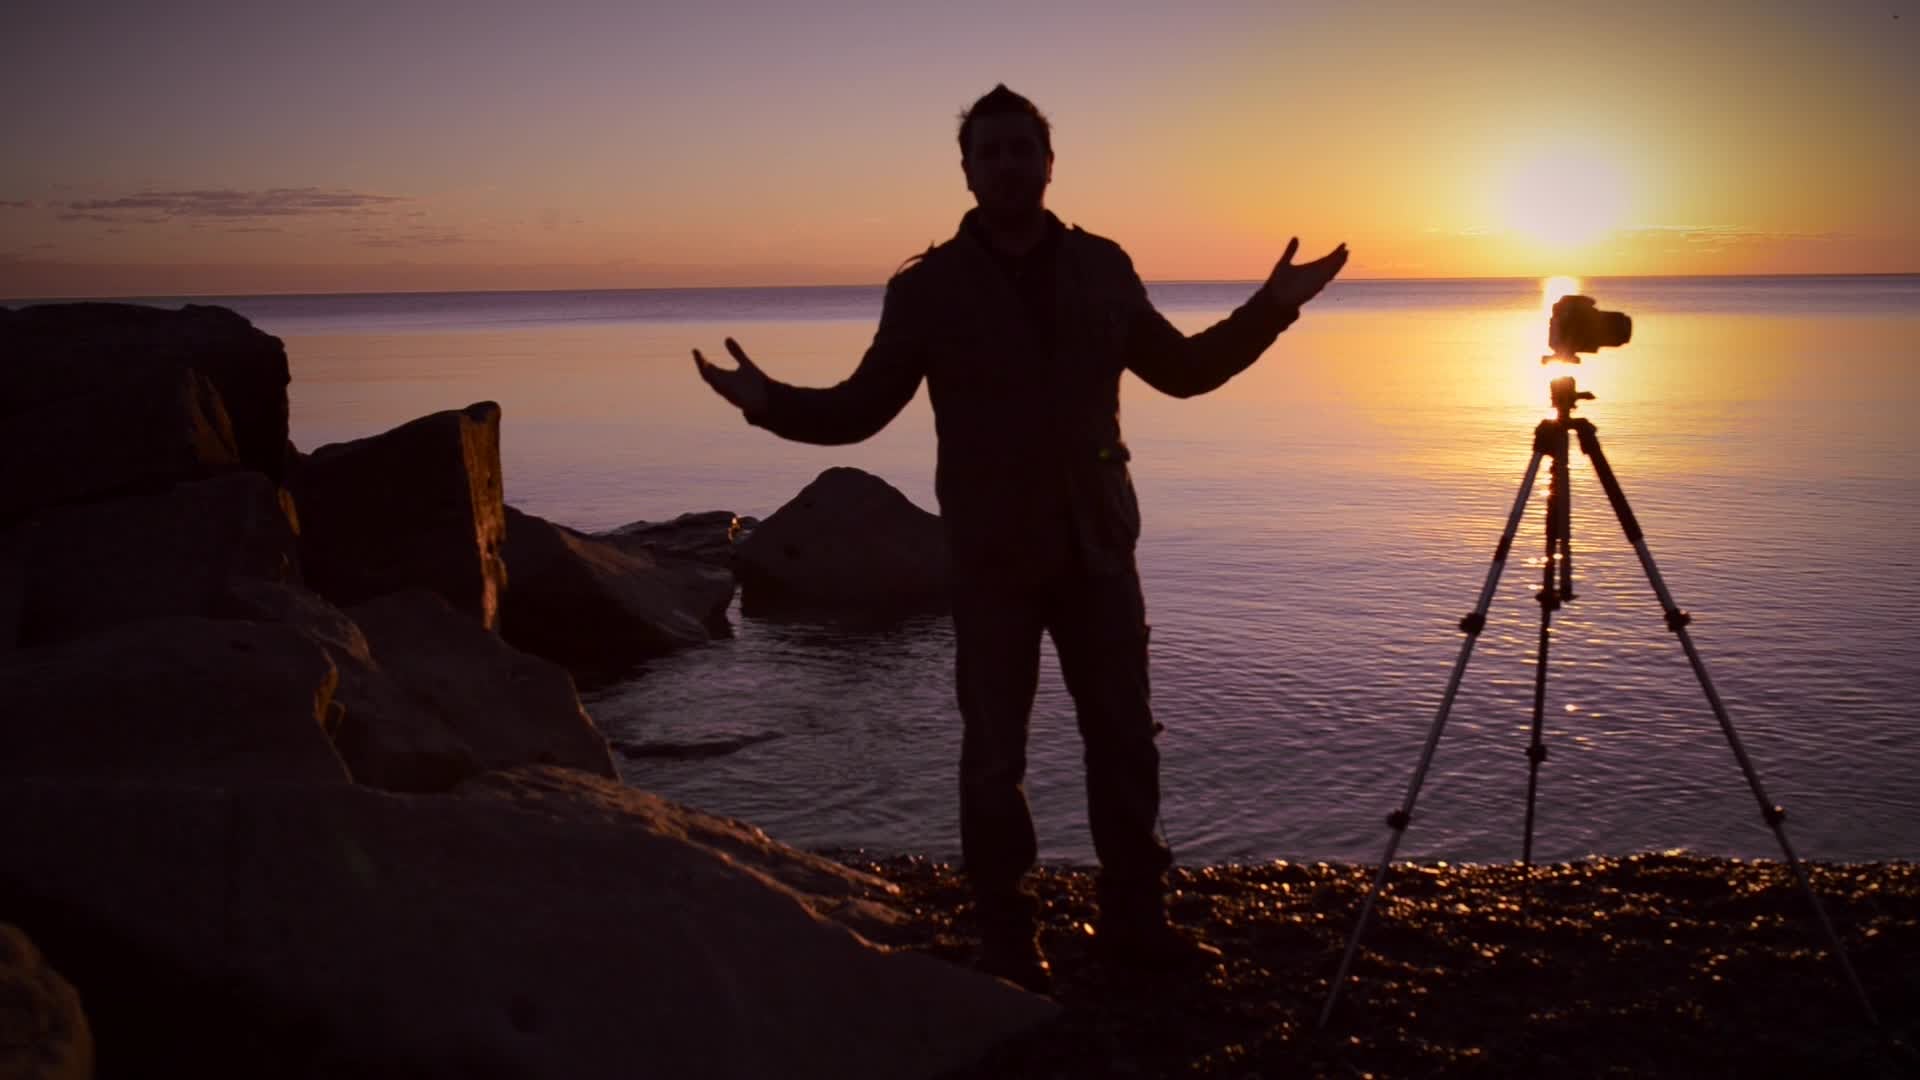
2. Introduction: - Hello, - everyone. - I am JP Denko and welcome to skill share. - And at it, - like a pro introduction to photo shop four photographers. - I am really excited to get into Photoshopped and start working. - But before we do that, - we're just gonna go through a little bit of housekeeping tasks beforehand. - So first of all, - I'm gonna give you a little bit of a synopsis of what's included in this class. - Um, - there there are 10 video lessons, - and I'm just gonna give you a quick summary of what each lesson is in a little bit of - what's included. - So lesson one is the introduction, - which we're doing now, - listen to we are going to go through an overview of photo editing techniques. - So I'm gonna show you a few sample photos and, - um, - give you cinnamon. - Some ideas of how Photoshopped can be used to improve those, - um, - lesson three. - Setting up your workspace. - We are going to talk about the photo shop user interface, - and there's a few critical settings in there that we're gonna make sure we have set before - we get started. - Really? - Working in photo shop. - Lesson four Editing in layers, - layers are a critical part of working in photo shop in a nondestructive workflow. - So I'm gonna show you, - um, - the different layer types how to use them, - Um, - and how they fit into your workflow lesson. - Five photo adjustment tools and filters. - So, - less than five, - we're gonna go through kind of the basic photo editing techniques, - color contrast, - white balance, - that sort of thing. - I'm gonna show you all the tools that are used, - and then lesson six photo adjustment techniques. - We're gonna go through an example that goes through all of those, - um, - photo adjustment tools. - Ah, - lesson seven. - Correction tools. - This is kind of the fun stuff When people think about, - ah Photoshopped Magic, - they are thinking about the correction tools, - which would be things like content aware fill cloning, - healing, - patching, - moving things around, - Um, - those sort of things. - And then lesson eight, - we're going to follow up the correction tools lesson by going through a example where we're - going to remove some problem areas from a photo. - I'm gonna go through that step by step so everybody can follow alone. - Lesson nine, - resolution, - cropping and savings. - So, - you know, - we're working with, - um, - raw images, - usually out of camera. - They're very large files. - We're going to talk about file resolution, - um, - proper ways to save your photos, - Um, - and also how to say, - for Web and also email use versus saving for print because it's quite different. - And then, - finally, - I've added an extra lesson here called bonus tricks. - So in that video, - I'm going to take you through kind of some of my favorite techniques that I use in photos - up all the time. - And, - ah, - originally I didn't have this in there, - but I think it's it's a lot of fun. - And I think you guys will get a better appreciation for what the next steps are in photo - shop if I show you a couple of the, - ah, - the little tricks that I use all the time. - So a lot of the students that are enrolled in this class are coming from different - backgrounds, - so we might have ah, - photographers who are using Photoshopped Elements or light room right now, - and they are looking to expand their knowledge, - move up to photo shop to bring their photos up to the to the next level. - Um, - or we could have creative professionals, - people that are used to working in photo shop are familiar with adobes interface and how it - works but might not be quite used. - Teoh Editing photos and Photoshopped Um, - and also we have, - you know, - hobbyists and people that are just really into photography. - And they kind of know that photo shop is Thea, - um, - default photo editing software for you know, - it's really the industry standard, - and they're looking Teoh toe learn a bit more about photo shop and how that can apply to - their photography and make their photography better. - So I think the overall goal for everybody at the end of the class is just to have a solid - working knowledge of photo shop and how Photoshopped applies to photography. - And there should be a nice firm foundation that will allow you to build on in the future as - you explore some of the more advanced features in Photoshop, - either on your own or with a intermediate or advanced skill share course, - um, - in the future. - So at the end of this class, - we do have a class project that you are asked to submit, - and that is to edit one or more of your own photos with Photoshopped so we'll go a little - bit more into detail in that in lesson to, - But it should be a photo that has some problems, - something that needs to be fixed up. - And we've also got a little bit of a photo editing contest. - So I'm going to go through the class submissions and pick a few of my favorites. - And the winners will get Ah, - Skype session with me and, - ah, - I'll critique your work and go through your portfolio and maybe give you some suggestions - of how you can move forward as a photographer. - Ah, - to help achieve your goals in this class, - each video lesson is accompanied with ah set of projects steps and ah, - the project steps basically outline what you should have learned and what you should be - able to apply as a result of Ah, - that video lesson. - And with that, - I'm also going to include a set of what I call next steps. - So that would be topics that are related to the video lesson. - But, - um, - maybe more advanced features that you might want to explore on your own to wrap up the - introduction. - I'm just going to share a few thoughts on photo shop and how Photoshopped usually fits into - a photographer's workflow. - So most for most photographers use some other application, - such as Adobe Late Room, - to manage their photography library and light room. - Is is awesome for viewing photos and also for doing basic edits. - But it's not so great when you get into some more complicated editing, - like moving things or deleting things from photos. - Um, - but what's really cool is the camera raw module in Photoshopped that we're going to go - through in this class is exactly the same as the develop module in light room. - So if you're using light room now, - if you like light room, - you can do a lot of your edits in light room in the develop module. - And it's exactly the same as if you were to do those edits in photo shop in camera Raw. - Um, - so, - like I said, - Light room is great for bulk editing. - Photo shop is really where you come to finish those photos off, - So if you've got a photo that you're going to deliver to a client, - you're not going to deliver. - You know, - 1000 photos from the shoot you're going to deliver, - you know maybe a dozen or so of your picks, - your top photos. - And that's the photos that you would be editing in photo shop. - Um, - you'll notice that I'm using photo shop CC Creative cloud and I am a creative cloud - subscriber. - So I always have the latest version. - But if you don't have photo shop CC, - don't worry. - Um, - create camera raw is kind of the main module that we're going to be using. - And that was introduced way back in CS two. - I think so. - You know, - I'm not really a big supporter of just updating software just because there's something new - . - So if you have an older version of Photoshopped, - by all means, - use that. - And, - um, - some things have been updated along the way. - So if you do have trouble, - um, - keeping track of what I'm doing in the class in Photo shop CC, - you know, - feel free to send me an email and ask, - and I could probably help you out. - There are some tools that air new that you might not be able to access, - but for the most part, - you know, - if you have an older version of Photoshopped, - by all means, - use that If you want the newest version, - you can subscribe to Creative Cloud for photographers and get Ah Photoshopped and late Room - . - Um, - you also noticed that I am using the PC version of photo shop eso all you Mac users? - Don't worry, - it's exactly the same. - Only the keyboard shortcuts are a little bit different. - So just for future reference, - if I say control control, - I'm. - If you're on a Mac, - that's command. - If I say halt, - if you're on a Mac, - it's option. - And if I say enter, - if you're on a Mac, - it's returned. - Other than that, - everything should be, - ah, - pretty much exactly the same between versions. - So once again, - welcome to the class. - Um, - your project steps for lesson one are just to get photo shop installed and running on your - computer. - And also to think about, - um, - how you're going to fit Photoshopped into your photography workflow. - Are you going to use Photoshop as a standalone application? - Or maybe you're going to use it photo shop along with Adobe Light room or some other way of - managing your overall photography library. - So give that some thought and I will see you back in lesson to an overview of photo editing - techniques, - chairs
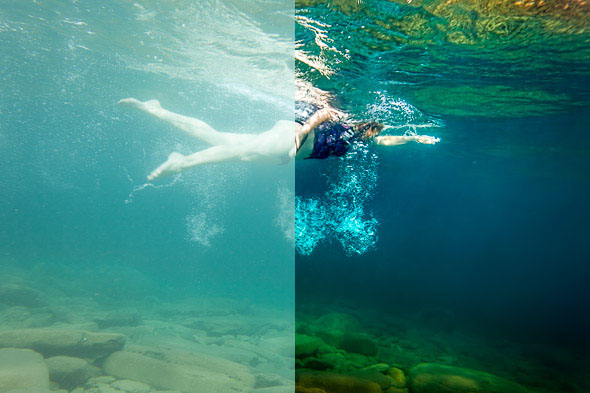
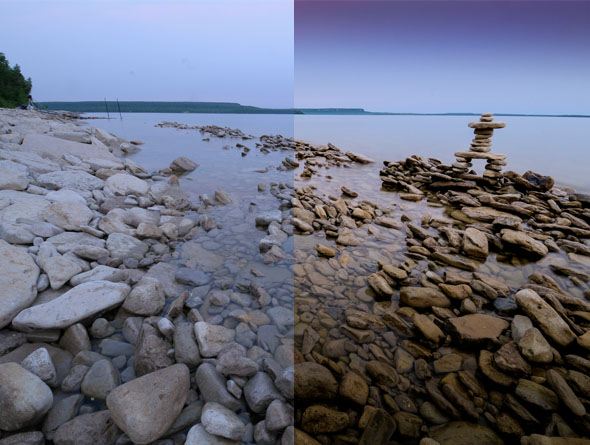
3. Overview Of Photo Editing Techniques: - Hello, - everyone. - I am JP Denko and welcome back. - This is a lesson to overview of photo editing techniques. - So in this video lesson, - what I'm going to do is basically to show you a series of before and after photos. - The reason being when you're first starting out in photo shop. - Sometimes it's a little bit hard to really know what's possible in Photoshopped. - Um, - you know, - the term Photoshopped is is so ubiquitous that a lot of times we don't really stop to think - about what was actually done to a specific image and what was it you know, - involved to achieve that look, - So I'm going to show you a mix of commercial and kind of general family lifestyle work. - Um, - the goal is really to give you a working understanding of what a typical level of photo - shopping or Photoshopped editing would be involved in A in a professional photography - workflow. - Okay, - so let's get started. - This would be, - um, - kind of a typical natural light beach shot. - Um, - there's also a small soft box. - Ah, - with off camera flash involved here for feel light. - But, - you know, - this is a fairly typical shot at the beach. - So this is the before photo and this is the after photo, - so you'll notice that the after photo is a lot more depth to it. - The white balance has been adjusted, - the exposure has been adjusted, - the contrast has been increased. - And also see that palm tree on the right That's kind of sticking in from the side of the - photo. - Um, - we went in there and got rid of that because it's is distracting next image. - So this is ah, - woman in, - ah, - house coming down the steps. - This is a natural light photo with a reflector, - and you can see that the white balance is a little bit off. - The highlights are pretty hot, - and, - um, - it needs a little bit more contrast. - So in the after photo, - we've adjusted the white balance. - So we have a true white and we've also up. - The contrast made the blacks a whole lot darker. - So those blacks really pop in that photo. - Um, - and you know that that's about it. - But the white balance in that photo is the key thing, - so you can see the before the white balance is way off, - not even close. - And in the after we've got the correct white balance there. - So you got ta little boy little girl playing around in the leaves in the fall. - Naturally. - Photo again. - This was taken on kind of an overcast fall day kind of late in the afternoon. - So the light is not very bright, - It's very flattened, - bland. - And if we go to the after, - you'll see that we've really increased the ah, - the vibrance of that photo. - So the colors really pop. - It looks like a sunny afternoon. - Not that kind of boring gray, - bland fall afternoon there. - So woman in a masquerade mask. - So again, - natural light photo this was Ah, - we're just walking out the door to go for Halloween, - actually, - and ah, - basically snapped this picture. - It's taken with an F 1.4 lens wide open. - Um, - you can actually see some streaks of rain in the background there because it was raining, - you know, - before photo is an auto white balance. - So I can tell right away that the white balance is off. - Doesn't look too bad. - So we go to the after photo, - and basically what we've done is increase the contrast. - Um, - but we've done a lot of work in the eyes and the lips as well. - So there's quite a bit of sharpening going on there to really bring your focus into her - eyes. - And, - ah, - also in the background we've we've even don't the color so you can see in the before it's - kind of brownish reddish on one side. - That's the color of the bricks from my house and on the left. - Um, - you've got some green and blues there in which is the sky and the grass. - It's of trees. - So in the after photo, - we've even those out. - So it's got the same brownish color on both sides. - This photo is of a little boy rock climbing, - and this was taken, - um, - natural light kind of mid afternoon. - So the lighting isn't that great. - The the sun is to the left. - Um, - you can see the light on the rocks in the shadows. - So if you go to the finish photo, - I've cropped that in, - and I've also added kind of like a faux son flair to the left, - there to accentuate kind of the direction of the light in the original photo. - It's kind of boring. - There's not a lot of interest there, - but in the Finnish photo, - it looks quite a bit more dramatic, - a little bit more exciting. - So this photo was part of, - ah, - time lapse sequence, - and it's, - ah, - again, - a natural light photo. - It was taken kind of later in the afternoon. - Early evening, - um, - down the beach and you can see it's pretty flat and boring light and in the background of - got some distractions there, - there there's those two posts that are sticking up that are really distracting. - And then behind that as well. - There's Ah, - there's like a homemade boat launch there that I had to get rid of. - So in the after photo, - you can see the you know, - the colors. - They're just that much nicer. - There's a whole lot more contrast and vibrance. - They're just overall just a way more interesting photo and all that junk in the background - is gone as well. - This is one of my favorite pictures. - This is me and my kids. - This is just a really cool space, - but there's a whole lot of white there and ah, - window light. - So if you go to the after photo, - we've brought the highlights down to bring some depth back into the photo so everything in - the background isn't just blown out. - We've also brought the black levels up. - So things that are supposed to be black or black and ah, - increase the vibrance in contrast, - and her clothing So that, - um, - the subject stand out from the background a lot more than they than they did in the - original photo. - This is Ah, - photo from a commercial gig. - Um, - this is a professional model. - She's a fitness model and you can see to the left there, - there's, - ah, - one of my lights. - This is what this this image looks like coming out of camera. - She's basically lit from both sides with a little bit of fill in front. - And then in the Finnish photo, - you can see we've increased the contrast. - Ah, - the whites are a little bit whiter. - The blacks are a little bit blacker, - have got rid of all the background. - So we've made the background 100% black and ah, - there's ah, - a few little blemish removal XYZ and touch ups done there as well. - So ah, - another image from a commercial gig. - This is ah, - competitive beach volleyball player. - This is the photo of a camera, - and this is a shot that was taken pretty close to dawn. - So it's just after sunrise here, - and she's also lit with studio strobes on either side. - And if we go to the after photo, - you'll see we've really increase the contrast. - Um, - corrected the white balance. - But the main thing that was done in this photo is we got rid of all the distracting trees - and junk from the background. - That's one thing that we tend to do a lot in. - Photoshop is to clean up backgrounds so that you can focus better on your subject and - you'll know. - So notice. - Also, - because this is going Teoh my stock portfolio. - I've got rid of all the logos on the on the volleyball, - so last image here is an underwater shot. - I do a lot of underwater photography, - and it's kind of one of the hardest things to adjust in Photoshopped. - So that's the before image as it came out of camera, - and that's the finish photo. - You can see the before photo, - and this is very typical for any underwater photography is that's very bland and obviously - very blue. - So when you go into Photoshop. - It takes quite a bit of work. - Teoh too. - Bring in that contrast. - Correct The color and ah, - really make it look like a photo that's worth viewing. - Okay, - so I hope those examples gave you Ah, - good idea of the type of photo shop editing that we're going to cover in the ah in the rest - of the course. - So your job now the project step for Lesson two is to identify several pictures from your - own photography collection that you could use for the class project. - So look for images that could use at least some or all of the editing techniques discussed - if you go through your collection and you don't find anything that you think would be - suitable, - Um, - I'm also going to place a bunch of these photos in the additional resources so you can - download the original raw files and ah, - and work along with those with the exact same files that I'm going to use. - You can follow my examples step by step, - and I will see you in less and three setting up your workspace
4. Setting Up Your Workspace: - everybody. - I am JP Denko, - and this is Lesson three, - setting up your workspace So you've got Photoshopped freshly installed on your computer. - This is the default user interface that we get. - The first thing that we're going to do is set are working color space options for photo - shop? - So to do that, - we go to edit color settings, - and that brings up the color space dialog box. - So there's there's benefits and drawbacks to each color space. - Basically, - SRG B is the default that your photos will look good pretty much anywhere. - Adobe RGB and Pro photo RGB arm or for a professional workflow where your work is going to - be output to professional printer. - So the biggest factor to consider when you're choosing a color space to work in is how it's - going to be. - Output photos Look the best on a screen or on a consumer level print in S RGB. - You get the best colors, - the best reproduction. - If you're out putting to a professional application or you're shooting for professionals - who are used to color management, - then you should probably think about going to one of the more expanded color spaces, - such as Adobe RGB or pro photo. - Um, - for example, - my stock agencies that I submit to don't accept s RGB photos. - So this photo is edited in S RGB and saved as SRG B J Peg. - This image is an adobe rgb JPEG, - and you can see the difference between the two. - Finally, - we'll go to pro photo RGB and you can see the colors there are completely messed up, - and that's kind of typical what you'll see if you try to view of Pro Photo image on screen - . - Now, - that's not so much of a problem when you're working in photo shop, - but it becomes a problem if you have J. - Peg saved with a pro photo color space and then you want to just grab that and put it on a - website or something like that, - you have to convert the color space to s RGB, - and it becomes a bit of a pain. - So let's go back to photo shop and I'll show you how I set up my color space options. - So we're back to the Color Settings dialog box and under the working space on going to - change the default RGB from S RGB two pro photo RGB. - The reason being is that I'm a professional photographer and I want to work in the best - color space that's available, - and that is pro photo RGB. - Also, - I use light room and light rooms, - native color spaces, - pro photo RGB. - So when I'm switching back and forth between Light Room and Photoshopped, - I'm always working in the same color space. - So if we come down to color management policies you can see under RGB, - it's set to preserve embedded profiles, - and I'm going to leave it just like that. - Reason is, - if I imported file, - that is an SRG V profile or an Adobe RGB profile. - I don't really want Photoshopped to convert that to a pro photo file because there's not a - whole lot of advantage in converting from a lesser color space to a better color space. - Another tip that you might want to consider is setting your cameras Ah, - color profile. - So most cameras can be set to either S RGB as a default or adobe RGB as an option. - And if you're really serious about working in a professional photography workflow, - you should really consider changing your cameras color profile to Adobe RGB instead of S - RGB. - The last thing to do in the color settings dialog is to tell photo shop what to do if there - is a profile mismatch in my own photography workflow, - I don't really worry about that. - I m pretty careful about managing my color profiles, - and I don't really often run into profile mismatch. - But if that's something that you think might be a problem in your own photography workflow - , - also you have to do is check thes dialogue boxes here and tell Photoshopped, - ask when it's opening a file. - That way, - if there is any mismatch in the color profiles, - Photoshopped will warn you. - It'll bring up a dialog box, - and then you can decide whether you want to convert it then or continue working in the - embedded profile. - The next thing to do to customize our photo shop user interface is to look at our tools and - also our tool palettes. - So over here on the left, - we have the default, - um, - tool palette, - and I usually leave that how it is. - And then over here on the right, - we have the default tool palettes, - that photo shop displays when it's first installed, - and if you go appear to the top, - right? - You can see it set to essentials. - I'm going to change that to photography because that brings up the history graham palette, - which I use all the time. - We have the adjustment tool palette there and also the layers palette. - So now I've got the photography tool panels set up, - and I'm going to add one more. - So I'm gonna go to window and then history, - and that brings up the history tool palette. - And I'm going to dock that over here on the right, - and I'm going to do one more thing to customize that history tool palette go over here to - edit, - and then preferences and performance, - Which brings up this performance dialogue box. - And you can see here under history states that the default is 20 and I find what I'm doing - a complicated at it like, - ah, - cloning brush or something like that. - That I'll go. - I'll run through more than 20 history states. - And if I want to undo what I just was working on, - I can't go back far enough to fully undo it. - So instead of 20 history states, - I'm gonna change that to about 100 which I find for my workflow is sufficient to go back - and undo whatever I was working on. - One other thing that you should be aware of is that if you're using a dual monitor, - you can, - um, - undock these tool palettes and move them around. - So if you're using a dual monitor system, - um, - a lot of times that it's a lot nicer to see. - If you just take that tool palette, - undock it and then you can resize them. - Make it nice and big and go and move that over to your to your second monitor. - That way you can have all of your tool palettes on one monitor and a nice, - clean, - open work space on your on your main monitor. - Now, - if you're adding menus and moving these around, - um, - don't worry about screwing them up. - So if I just turn these off, - something happens to your menus. - Also, - you have to do is come over here to photography and set reset photography, - and it sets it back to the default photography pallets. - Now, - once you start clicking through, - um, - the menus in photo shop, - you'll notice that a lot of the commands that you can click on with your mouse. - Also have a keyboard shortcut, - and that's something that becomes really important with a more advanced workflow, - because you can type in a keyboard shortcut really quickly with one hand. - Well, - with your other hand, - you still have that on your mouse, - and your cursor is still in your workspace, - so it really makes your workflow much more efficient. - The last thing we're gonna look at in the photo shop user interface is how to actually find - an open files. - So if we go over here to file and open, - that brings up my computers, - operating systems, - default file browser and you can see in this folder I've got a whole mix of files types. - There are adobe digital negatives D and G's. - There are Photoshopped Files, - PS D's. - There are tiffs there J pegs, - and you can see that the default file browser can't actually view any of these photos - except for the tiffs in the J pegs. - So it's really hard to find which file you're actually opening if you can't view a preview - of it, - so a better way to do this is to use either bridge or mini bridge, - so instead of using file open, - go up to your to file and then choose Browse Enbridge or browse in mini bridge. - So first, - I'm gonna choose Browse Enbridge so that brings up Adobe Bridge and you can see over on the - left. - Here you have your folder structure and on the right you have preview of all the files that - are in that particular file folder. - And if I click on one, - it brings up a preview and you've got the metadata from that particular file over here on - the right as well. - You can also change the size of the thumbnails. - You make a bigger, - smaller, - however, - you want to view your your photos Enbridge. - Then when you find the photo you want, - you just ah, - click it and it will open that up right in photo shop. - And if you want to do the same thing in mini bridge depending on which one you have, - choose browse in mini bridge. - So that brings up mini bridge at the bottom Here, - the same idea as full bridge, - where on the left you browse to the folder with the files that you want to look at and on - the right. - You can see the thumbnails. - Now you can also pick up this palette like all pallets and Photoshopped, - and move it or resize it, - and that just makes it a little bit easier to see the photos that you're viewing. - You can change the size of the thumbnails. - And again, - when you find the photo that you want to edit, - you just click it and open that right into Photoshopped. - Now, - one thing that's going to be very important for the rest of the course is to be able to - open our photos directly into camera raw. - We're going to use camera raw for the bulk of our basic photo adjustments, - so we need to be able to open both raw files and other file types like J pegs or tiffs - directly into camera. - So right now I'm in Mini Bridge. - If I click a raw file, - such is Ah, - DMG, - which is a digital negative or a raw file that will open up Kamerad directly, - and I can edit that photo in camera raw. - If I do the same thing on J Peg or a tiff, - it will just open right in photo shop. - So to make a J peg er tiff open in camera raw instead of just clicking it well, - we're going to right click, - which will bring up a dialog box you choose open with and then camera raw, - so that will open your tiff or JPEG file right into camera raw as well. - Now, - of course, - if you're using light room to manager photography library, - it makes it that much easier to view your photos and to jump back and forth between light - room and Photoshopped. - So if you're in light room, - also do. - Is you right? - Click on your image and then edit in Photoshopped. - Or, - if you want to just go straight from your image control E. - And that brings up the edit in Photoshop Dialog box. - The Edit and Photoshopped Dialogue Box and Light room gives you three options at it. - A copy with your light room adjustments. - Edit a copy or edit the original. - Usually, - if I have applied adjustments in the develop module in light room, - I jump over with edit a copy with light room adjustments. - If I have already done some photo shop edits than I jump over with, - edit the original OK, - so I think we've got quite a bit to think about their You should be off to a good start - forgetting photo shop set up. - The next lesson is less and four editing in layers. - And I will see you back then. - Cheers.
5. Editing In Layers: - Hey, - everybody, - I am JP Danko. - Welcome back. - This is a lesson four editing in layers. - So to get started on going toe, - open an example photo into photo shop. - And if we remember back to lesson three setting up your workspace, - we're going to use either bridge or mini bridge as a file, - browser or light room to open your photos and bring those over to photo shop. - So I've got Mini Bridge open here, - and I'm going to open my original file, - which is a JPEG image here on the left. - And so if you remember, - we right click that and then opened with camera raw. - Now, - I'm not actually going to do any edits in camera raw. - I'm going to just jump right into photo shop. - So I'm just gonna click open image, - which will bring up that photo into Photoshopped. - And you can see on the right here that I don't have any layers. - So this is the layers palette, - and I just have one layer background. - And before we get started, - let's do a quick review of the layers palette. - So I'm gonna grab the layers palette and move it over here so we can take a closer look. - So in the layer palette, - you'll see a stack of all the layers that you have in your Photoshopped file, - and you also have some layer tools down here at the bottom. - This is the Creator layer mask tool. - This creates a new Phil or adjustment layer. - You can create a new layer group or create a new layer, - but personally, - I find it the easiest to use the keyboard shortcuts for layers, - so you might want to review your keyboard shortcuts. - Another way that you can work with layers is to use the layers, - um, - menu here, - so lair and then all the ah key lair options are available there now. - The reason why we want to work with layers is so that were never editing our original photo - . - And if I was to work on the background layer, - if I stood make adjustments to the background layer, - I'd be editing my actual photo, - and I don't want to do that, - ever. - So the first thing I do in ah when I open a new photo and photo shopped that I'm going to - start editing is to create a new layer as my base layer that's not the background there, - so I'm gonna make a new layer via copy, - which is controlled J. - So now I have a new base layer that I'm going to start applying at its too. - You'll notice that you can name each layer, - and it's a good practice to get into instead of leaving these as layer one or layer to toe - actually named, - um, - the work step that you're working on. - So I'm going to call this base at it in photo shopped. - There are three main types of layers that you might use in your editing workflow. - The first is a layer that is a copy of another layer, - which is what we just did with the background. - That's exactly like how it sounds. - You're creating an exact copy of another layer. - Next is a new, - transparent layer. - So if we go down here and we click the new layer, - um, - icon, - that will create a new, - transparent layer. - Now that layer is completely empty. - There's no information there another way that you can create a new transparent layers to go - up here. - Toe layer new and layer, - which will bring up the new layer dialog box or you can use control shift end, - which will do the same thing for photography. - We don't use transparent layers very often unless you're working with selections. - So I'm going to make a quick selection and just show you how you can easily, - um, - import your selection to a new layer that also has transparent information. - I'm going to use the rectangular selection tool here and just do a simple rectangular, - um, - selection. - And then I'm going to get an air here. - And I'll explain why in a second. - So if I go right, - click new layer via copy or it could also do control J. - Now what photo shop is saying is that it could not meet make a new layer because there's no - information in that selection. - If you remember, - we created these three transparent layers which have no information in them. - And right now Layer three is selected as my current layer, - which has no information in it. - So I'll click OK to get rid of that error, - and I'm gonna go back down here to base at it as my working layer. - Now, - when I create a new layer via copy, - it will sample from the base layer and include that information in the new layer. - So layer via copy or control J. - And if I turn off the visibility of these other layers, - you can see the information that was copied over to that new layer. - Now I don't need these other three transparent layers, - so I'm going to delete them. - So if I select a layer, - I can just delete it. - Or I can select multiple layers by holding down shift and clicking. - Or cancel ECT multiple layers one at a time by holding down control and clicking. - Once I have the layers I wanted delete selected right click, - and I can choose delete layers, - or you can just, - ah, - hit the delete key on your keyboard. - The final layer type is called adjustment layers. - Adjustment layers on lee hold adjustment information. - So if I were to make a copy of a layer and then adjust that layer, - I could do the same thing by just creating an adjustment layer. - But the benefit of using an adjustment layer is it doesn't copy all of those pixels from - the other layer. - It on Lee includes adjustment information so your file size ends up a lot smaller if you - are working on a photo that has a lot of layers in it. - So if I go over here to image adjustments, - most of the adjustments that you see here can be applied via an adjustment layer. - The other way you can create a new adjustment layer is to use the adjustment layer tool - right here, - and that brings up all of the adjustments that you can apply with a new adjustment layer. - Now again, - I don't use adjustment layers very often because I apply all of my base adjustments in - camera raw. - So by the time I get into photo shop, - all of these adjustments have already been made. - But for the sake of this example, - I'm going to create a new adjustment layer so going to click on the adjustment layer icon - there and I'm going to choose hue saturation. - And as you can see, - that creates a new hue saturation adjustment layer. - And it also brings up the hue saturation dialog box and just for fun on going to bring the - saturation down to minus 100 which will turn this selection into a black and white, - and I'm going to create one more adjustment layer. - But before I do that, - I have to remember to change back to the working layer that I want to make the adjustment - on. - I can't make a new adjustment layer of an adjustment layer. - I have to go back to my my selection layer here. - And while I'm at it, - I'm going to change the name of this layer to selection. - I'm going to click on the new selection layer tool, - and then I'm going to choose a new brightness contrast that brings up the brightness - contrast dialogue box. - And I'm going to increase the contrast here quite a bit because I, - like nice contrast black and whites. - If I turn my base at it, - layer visibility on, - you'll see that those adjustment layers have been applied to all of these layers. - If you don't want your adjustment layers to be applied to all the layers in the stack, - you can pin them just to the layer below it. - To do that, - I'm gonna hold down Ault and click the line in between. - What that does is it clips the adjustment layer on Lee to the selection layer below it. - I'm going to do the same thing with the hue saturation layer. - So now you can see both of those adjustment layers have only been applied to the layer - called selection. - One of the very powerful tools of working in layers is to be able to change the A pass ity - of each layer, - so you're not always working at 100% of that layer being visible. - To do that, - we come up here to the top where we see opacity. - If we click that, - it brings up the A pass ity slider, - and we can adjust that from 100% which makes it 100% visible down 20% which makes that - layer 0% visible. - When I'm working with my photo editing tools over on the left here, - such as the healing brush or the patch tool with the clone stamp, - I want to make sure that I'm always working on a new layer. - So when I'm cloning something, - I'm on a cloning layer. - If I'm using the healing, - brush him on a healing brush layer, - so I'm going to click, - create a new blank layer control shift end and going to call it edits what's mover at its - layer to the top of the stack and unclip it from the selection layer. - Hold down Ault over on the line and click. - Now our new transparent layer edits will be applied to all of the layers below it. - Let's do some or editing. - I'm going to get rid of the top of that and look shook with the patch tool. - So if I come over here and I select the patch tool, - make a selection. - When I try to make the selection and move it, - it's going to give me an error. - The reason is the edit layer is a transparent layer. - There's no information in that layer. - We have to come up here to the top and make sure that sample all layers is enabled. - What that does is it enables the edits layer to sample all the layers that are below it. - So now when I make that selection and move it, - it's sampling from the layers below. - Next, - I'm going to show you how to apply layer masks. - Lair masks are very useful when you only want to edit a certain part of a photo. - So to start, - I'm just going to turn this edit layer off because we don't need it. - I'm going to click on my selection layer, - and I'm going to come down here and click the lair mass button that creates a new layer - mask, - which is transparent. - So 100% of the layer that I'm working on shows through that allows me to paint some or all - of this layer out using Delaire mask. - To do that, - I come over here and I make sure that my foreground and background colors air set to black - and white. - I make sure that my foreground color is set to black because I'm going to paint onto a - white layer mask. - I choose the brush tool for this example in going to just use 50% opacity, - and then I can brush summer all of that layer out now. - Sometimes you might make a mistake and have the layer selected and not the layer mask. - If that happens and you brush on here, - you're just going to brush black onto your photo, - which is not what you want to do. - So controls Ed undo and click on the layer mask, - and then we can go back and continue our edits. - We can also do the opposite So I'm going to delete this layer mask, - click on it, - right click, - delete layer mask. - And now I'm going to create a layer mask that is 100% opaque. - So I hold down Ault and click the create new layer mask. - Because this layer mask is 100% opaque, - it hides the layer that I'm working on completely now to paint that layer back in. - I come over here and make sure that my foreground and background or black and white, - I choose white as my foreground color. - Same thing. - Paintbrush. - Right now my a pass, - it is 50%. - Make sure that my layer mask is selected, - and now I can paint that layer back into my photo. - The last thing we need to learn for working with layers in Photoshop is what to do if - you're trying to apply a filter or a tool, - but it won't allow you to sample all layers, - so if you're working on a new transparent layer, - I will create a new one. - Move that to the top of the stack, - and as an example, - I'm going to apply a sharpening filter so filter sharpen smart sharpen, - and that gives me an air because there's no actual information in this layer. - And the smart sharpen filter can't sample the layers below it and take the information from - the base layer and my selection layer. - So what we need to do is to create a new merged layer. - So we're going to merge all the layers that we have visible into one new layer and then - apply our filter to that layer. - Now, - you have to be careful when you're doing this because once you merge your visible layers - and you start working on that new merged layer, - you can't go backwards to before you merge those layers. - So let's do that. - Now. - I'm going to make sure that all the layers I want to merge into my new layer are visible. - So I don't want to merge this layer one layer, - but I want to merge my hue saturation adjustment layer my brightness contrast adjustment - layer my, - um selection layer that I'm working on and also my base at it layer. - To do that, - the keyboard shortcut is control shift all e. - But you have to be on a layer that's visible right now. - So I'm gonna click my top layer and then control shift Ault E. - And that creates a new merged layer of all my visible layers. - Now, - if you didn't want to use the keyboard shortcut, - you can also do this manually. - You select the all the layers that you want to merge, - right click duplicate layers and then right click again on those same layers and merge - layers, - so that does the same thing. - It creates a merged layer of all of your layers that you're working on, - and now we can go ahead and apply that filter to this new merged layer. - Now, - like I said, - you have to be careful with merging your working layers because if you wanted to go back - and change something that you did saying here hue, - saturation layer, - you can see if you make these layers below the merge layer visible. - They don't show up because they've already been merged into that new layer. - So we can't go back into any of these original layers and change anything. - They're already locked in that new merged layer. - All right, - that should give you a solid foundation for working with layers in Photoshop. - Apply these to your class project to your own photos, - and I will see you back in less than five photo adjustment tools and filters, - chairs
6. Photo Adjustment Techniques: - Hey, - everybody, - I am JP Denko. - Welcome back. - This is less than five photo adjustment tools and filters. - So by now, - you should have a pretty good idea of the sort of photo editing that we do in Photoshop. - You should have a good background in color management and how to bring your photos into - photo shop from either mini bridge, - bridge or light room. - And you should have a solid foundation on working in layers within Photoshopped. - So now it's time to get into some basic photo adjustments, - but we're not actually going to do most of that in photo shop. - We're gonna do most of our basic adjustments in camera raw. - And if you'll remember, - camera raw, - um is almost exactly the same as the light room develop module. - So if you're working in light room, - just stick in light room and used the develop module in light room. - It's exactly the same. - Is working in camera raw, - but because this is a photo shop course, - we're gonna work in camera raw, - so I'm going to open a raw file into camera raw using mini bridge. - So remember, - if I double click on this, - it'll just open directly into camera raw or I can right click and shoes open with camera. - Now, - that should only be necessary if you're working on a J peg or tiff. - But, - you know, - just to remind you that that option is there, - um, - that's what I'm using to open this photo. - We've got our image open in camera raw, - and the first thing I'm going to do is resize this window because I like to work full - screen. - Now, - this photo I've already edited in camera and you can see the edits that I have applied over - here on the right. - So that is one of the really awesome things about camera raw is that when you open a file - that you've already adjusted in camera rot, - your adjustments are already there. - But you can change them or you can redo it. - And none of that affects your original raw file. - It's all in a new file that's over laid on top of your original file. - Now we should make a distinction with JPEG files because we have to be a little bit more - careful with J pic files. - Now let's look at a J pic file. - This is a JPEG file that I've opened in raw and actually kind of had to search to find one - , - because I rarely ever take J pegs. - So this is just, - ah, - kind of a random family shot, - but you can see if I apply some raw adjustments here. - Um, - and then I want to save these. - If I were to click open image, - it would apply my raw adjustments, - open it in photo shop, - and I could continue to edit. - But I would have to make sure that when I exit Photoshopped that I saved this as a - photoshopped file. - Um, - or another name. - Otherwise, - those adjustments get applied to the original J pic file, - which I definitely don't want the same. - If I were to click done, - um, - the camera raw adjustments would be applied to my original J peg file, - which I do not want. - So another option would be to come over here to save image and choose to save it as a - digital negative. - Now, - even though this is a J peg, - we can still save it as a digital negative. - And then if we were to do that when we reopen that digital negative, - the adjustments that we've done in camera are still there, - and we can redo them or we can change them. - Now let's go through some of the key tools that are available in camera. - First of all, - we have a preview window here. - We can resize the size of the photo that's in that window by choosing a percentage, - or what are you do most of the time is I use control minus to zoom out and control plus to - zoom in. - And if you want the hand to hold down the space bar, - and that allows you to pan around in your photo on the right, - we have our photo adjustment tools. - Now, - when camera raw opens, - it opens with the basic tools showing here. - Each of these little icons at the top here is a different set of adjustment tools. - So before we start with the basic adjustments, - the first thing that I do is apply a lens filter lens correction because a lens correction - can actually have a pretty big difference on the tonality in the photo. - And I like to apply that before I start working on the exposure and the white balance of - such. - So this image has already has a lens profile. - Correction applied, - and you can see the difference that it makes without it, - and with it, - so back to the basic tools. - Now, - Adobe basically recommends that you go through your basic adjustments from top to bottom. - So you start with the white balance and you work your way down through clarity, - vibrance and saturation. - So white balance is so that you can get your photo whites toe look white. - If you shoot on a cloudy day, - they'll have a blue tent. - Um, - if you shoot with incandescent lights, - they'll have ah, - in orange tint. - The white balance slider allows you to correct for that and make sure that your whites are - white. - Another way that you can adjust. - The white balance is to use the white balance tool appear on the left. - So if I choose that what you do is, - you find an area in your photo that's more or less neutral. - Gray and click that and photo shop will make the white balance adjustments so that that - neutral gray is adjusted and your white should look white in this particular photo. - I wanted them to look a little bit warm, - so I warmed up the white balance a little bit. - Next, - we have the tin slider used the tent slider to find tune. - Your white balance is especially helpful if you have, - um, - really off white balance. - And it needs a lot of correction. - Um, - in this case, - I'm just I just need a little bit on the magenta side, - and I'm gonna leave it at that. - Next we have the exposure slider. - So the exposure slider controls sort of the middle portion of the hissed a gram here. - And it's your first stop to fine tune the exposure of your photo so you can see that this - particular photo when I took it, - it was a little bit, - um, - overexposed. - So that's how it came out of camera. - And I've just brought that exposure slider down to minus 0.85 As we work our way through - the adjustment tools in camera, - I should just point out that there is no right or wrong way to adjust your photo. - It all comes down to your personal taste. - The only thing that you have to be a little bit particular boat is the order in which you - do those adjustments. - So continuing on, - we're gonna look at the contrast Slider, - This slider I really like because I like a nice contrast E photos so you can see if I bring - it down. - It's kind of bland and washed out. - If I bring it up, - it adds more contrast. - Next we have the highlight slider, - the highlight slider effects, - the far right hand side of your history, - Ram. - Just the extreme highlights. - And in this photo, - you can see that the highlights in the history Graham are going off the side of the history - Ram, - which means that we have some clipped highlights so we can use the highlight slider to try - and recover those. - And you can see the highlights that we have clipped are just in the sun here. - Now, - in this photo, - um, - okay, - having those clipped. - But in most photo's, - you don't want to have any clipped highlights, - and you can use the highlight slider to recover those. - One other tip with the highlight slider is that if you hold down Ault while you click on - the highlight slider, - it will show you a mask of the highlights in your photo. - And you can use that to judge how far you need to take the slider before your highlights - aren't clipped anymore. - So you can see if I bring this down to the left right about there. - Most of the highlights are no longer clipped. - Next we have the shadows, - slider, - the shadows, - slider effects, - the bottom middle part of the history. - Graham right in here. - And it is awesome for pulling a detail in dark shadow areas of your photo. - So if you have a very dark photo with, - ah, - lot of dark, - shadowy spots or an under exposed photo, - the shadows sliders great for pulling out detail in there. - Then there's the black slider, - the black slider Onley effects the very bottom of the history. - Graham just right here on the very darkest tones in the photo. - And I absolutely love the black slider because I like very contrast e photos. - I want my blacks to be black, - and if we click Ault on your keyboard and click on the black slider, - it will bring up the mask that shows exactly where the blacks air clipping in my photo so - you can see if I bring it all the way down. - I'm clipping quite a bit, - but in around this range of Onley clipping the trees kind of the top right corner There. - Finally, - we have clarity, - vibrance and saturation. - Now, - the first time that people will discover these tools, - they tend to go a little crazy with, - um because they can really make your photo look pretty awesome. - But you have to be a little bit careful. - Some photos love, - clarity and vibrance some. - It just doesn't work. - If it's Ah, - nice portrait photo of a woman, - for example. - You really don't want a lot of clarity. - If it's something that has a lot of texture, - then clarity is awesome again, - it's up to you where you want to go with this, - depending on your own artistic vision. - Um, - personally, - I do like some clarity. - Not too much. - Um, - you can see what the clarity slider does There. - Usually I'm coming around the plus 10 maybe 15 range photos. - I have a lot of textural go higher, - but like I said, - you have to be a little bit, - um, - careful with it. - And finally we have vibrance and saturation. - So these two sliders you can use to adjust your colors depending on how punchy and vibrant - you want your colors to look in your photo. - So if I bring the vibrance up, - it adds, - um, - just a lot more depth to the colors. - But if you're too high, - they can look a little weird and the same if you go the other way. - I usually like a little bit of vibrance, - depending on how colorful the photo is to begin with. - So I'm gonna go boat plus ah, - 10 or 15 on this one, - and then Saturation does a similar effect of vibrance, - except it affects the actual color saturation. - Um, - you have to be careful with saturation because it can really make your photo look candy, - floss and weird. - But if you want really colorful, - vibrant photos, - use the vibrant slider first, - and then if you still need more, - then go to the saturation slider. - And that's about all there is to making basic photo adjustments in Photoshopped camera raw - or in light rooms develop module. - I'm going to go through a couple of these other men use just to show you what's in there - and in case you wanna work on them on your own, - the tone curve brings up a ah curve tool here, - where you can make actual curve adjustments, - which is sort of similar to the old way, - how we used to adjust photos with curves and Photoshopped. - But to tell you the truth, - I don't really touch this unless I have a very difficult photo. - We have sharpening in camera raw, - which is great. - So if you have a photo that's a little bit, - um, - blurry or just needs a little bit more punch, - use ah, - sharpening writing camera raw. - Next, - we have the hue, - saturation and luminous tools. - So if you want to adjust just individual colors in your image, - this is where you would come. - So that's about it. - I'm going to click open image to apply my camera raw adjustments and open this photo into - Photoshopped. - Finally, - to wrap up this lesson, - I'm going to show you where you can find a lot of the same adjustment tools in Photoshopped - that are in camera raw. - So if you go to image adjustments, - most of these adjustment tools are very similar to the ones that you find in camera raw. - The difference is that how you work on them in camera raw with the sliders is much more - intuitive and much easier than trying to work on them in photo shop so you can do it here. - But I highly recommend that Just do it in camera rise, - way easier and way faster. - There are a couple other filters in Photoshop that aren't available in camera raw that I - really like, - um, - for finishing off my photos. - So if we go to our background layer, - remember that we never work on our background layer duplicate that go to filter. - And the 1st 1 I'm going to show you is smart. - Sharpen smart sharpen really does a nice a nice job at sharpening up your images. - You can also use on sharp mask, - which is sort of the older version. - But smart sharpen is is really a nice tool. - So that just brings up a dialog box. - Do you want your radius to be, - um, - one or two usually And then all you do is select the amount of sharpening that you want to - apply. - Now you have to be careful not to over sharpen. - So usually I would take this up to, - you know, - somewhere where it looks like I want it, - and then back it off a little bit click OK to apply that. - The other filter that I use on a regular basis we go to filter is called liquefy. - Now, - this is not something that is, - Ah, - basic technique. - You use liquefy to sort of modify people's body shape. - But that's something that you might want to play with on your own rattle, - right? - So hopefully you're pretty excited. - Now you've got all of the basic photo adjustment techniques at your disposal. - It's time to start put most of work. - So in the next lesson lesson six photo adjustment techniques. - We are going to work through all of the photo adjustments we just discussed in one of my - own photos, - and I will take you through that step by step from start to finish. - All right, - so I can't wait to see their cheers.
7. Photo Adjustment Techniques: - Hey, - what's up, - everybody? - I am JP Denko, - and this is lesson six photo adjustment techniques. - So in this lesson, - we are going to put all of our camera raw adjustment techniques that we learned in less - than five toe work. - Um, - we're gonna work on this as our sample photo. - So I just opened this photo in camera raw right from bridge. - And this is Thedetroitbureau a tive. - The raw file that came out of my camera haven't done a single thing to this photo. - Now, - hopefully you can think back way back to lesson to where we went through a bunch of sample - photos and we talked about, - um, - work that needed to be done to them. - So hopefully looking at this photo, - you can identify right away that there's quite a bit of adjustments that need to be done. - First of all, - this is obviously shot, - um, - a little bit hot, - so it's a little bit overexposed now, - just a technical thing. - If you are shooting with your camera and you, - of course, - you always try to get to your exposure as close as you can in camera. - But if you're in doubt, - shoot Just a touch on the hot side, - just a little bit overexposed, - because that gives you a lot more leeway to adjust the photo in raw. - If you under exposed, - you have to bring up your shadows, - which adds a lot more noise. - And if we can avoid that, - we will. - So let's get started first. - I'm going to go over to the lens correction palette here, - and I'm going to enable lens profile corrections. - Now, - this should bring up your lens and your profile for your lens automatically. - If you're using any sort of standard camera lens, - Raw will have that profile in its memory. - So I'm using a Nikon. - This was shot on Ah 17 to 55 DX lens, - and it's already applied those adjustments so before and after just a slight adjustment. - But it's important that we start with correcting that lens profile. - Next, - we're gonna go back to our basic adjustment. - Ah, - tool palette here, - and usually we start with white balance. - Now this This photo was taken early in the morning, - actually just after dawn, - and I think the white balance actually looks pretty good. - If I used the, - um, - white balance tool here and I find some gray in this photo. - Maybe, - um, - in the clouds up here, - Um, - it doesn't really change the white balance all that much. - But this photo was taken on the beach, - and I kind of wanted to look warm and sunny and not quite as cool as it does right now. - So I'm just going to manually adjust the white balance until it gets into arrange. - That I think looks more of a warm, - sunny beach shot. - So I think that looks good there. - Now, - don't forget, - because we are editing in camera raw. - We can always come back and change our settings at any time. - And usually by the time I go through the rest of my edits, - I will come back to the settings that I sat right at the beginning because they'll change a - little bit as, - um as you work your way through next, - I'm going to just the exposure. - And like I said, - I could see that this photo was overexposed when I took it. - So I know I need to bring down the exposure into arrange. - That looks good. - Now I don't wanna lose too much detail in the shadow was when I bring the exposure down and - here have gone down almost two stops, - and I think that's probably too much. - So I'm gonna bring that back to bring it down by a about one stop. - So minus one. - Um, - now, - if 1/2 do, - I'm going to come back to this and readjust it, - but I think that's a good starting point. - Next, - we're gonna adjust the contrast. - This is one of my favorite sliders. - Um, - I think the contrast lighter could just give your image is just so much more punch in depth - And the new technology that they use before used to have to be kind of afraid of the - . - contrast lighter. - But now you can really crank it up, - and it it really, - um, - brings out the depth in your photos. - So I think it looks good there, - but I'm going to back that off just a little bit. - I usually go to where I think it looks really good and then back off a touch. - Now let's look at the highlights so I can see that there's probably some clipped highlights - in sun area here. - Um, - so if I click Ault and click the highlight slider, - it shows me exactly where the highlights are clipped. - So I'm gonna bring those down to until none of those highlights in the clouds in the sky - are clipped any longer and you can see in the actual photo. - It's really hard to tell if they're clipped or not. - But by using the clipping mask, - click the highlight slider, - it shows us exactly where the clip highlights are next. - Shadows. - I think the shadows in this photo are pretty good because it was overexposed. - But if I want to bring the shadows down a little bit, - actually, - I can. - But I'm gonna keep those pretty much in in the middle here and then whites again. - There's quite a bit of white and ah, - bright highlights in the sky here. - So I think that bringing the whites down a little bit might give some more depth and - interest into the sky, - and you can see it darkening the clouds There. - The problem with bringing the white slider way way down is that it tends to make the whites - look gray, - and I don't want that, - so I'm gonna just bring the whites down a little bit. - Next, - the black slider again, - one of my favorite tools here. - Um, - I like dark, - punchy blacks. - I want my black to be 100% black, - so I'm going to click Ault and click the black slider and then bring that down until I see - some 100% black showing up in my in my actual subject so I can see there's there's black - showing up in the trees on the right there, - but I'm not too worried about clipping those. - I'm more concerned about the blacks in her shorts there, - so I just want those to be on the edge of turning 100% black so you can see there. - We've got our blacks adjusted. - Now, - if I want to bring some shadows out of those blacks in the trees, - I can go back to the shadows slider and maybe bring that up a touch so that will bring some - detailed back into the trees in the background there. - But if we go back to the black slider Olten click, - it kept that blacks level inner in her shorts there, - which is what I want. - I want that nice contrast Look now on to the clarity, - vibrance and saturation sliders, - this type of photo can use a lot of clarity. - Um, - pictures of athletes, - photos with a lot of texture. - Skies and clouds tend to look really great with clarity. - So I'm going to add some clarity here, - and you can see I can really crank the clarity up. - And, - you know, - that actually looks pretty good on the model. - Not so great in the sand in the background. - So I'm gonna bring that down a little bit. - Um, - I'm gonna leave it about their I don't want to go too much with it. - So, - like I said usually bring a tool up. - And then to where I think it looks good and then bring it down vibrance again. - This type of photo could use a little bit of vibrance to, - um, - to really boost the colors. - So I'm gonna bring that vibrance up. - Um, - not too much. - You don't want toe make it look too weird, - but somewhere in the 2030 range for a photo like this, - I think looks pretty good saturation. - Um, - if I really wanted to, - I could bring the saturation up. - But normally, - once you've adjusted the vibrance you don't need to add extra saturation is just a little - bit of overkill, - so we'll leave the saturation. - Um, - I believe the saturation at zero. - Okay, - so I've got my basic adjustments done. - Now, - I'm going to go back and tweak those a little bit because I think it's into, - um, - the ballpark of what I think looks good, - but it can use a little tweak. - So, - first of all, - the color temperature now I'm looking at it looks a little bit too warm, - so I'm gonna bring the temperature back down. - Just a touch. - Um, - To bring some more blues into this photo, - make it look a little bit more natural. - I don't want to go to blue because I still want that beach look, - but I would like, - you know, - some of the blues and the sky looks good. - I'm gonna leave that. - Leave that there and the same with the exposure. - Let's Ah, - let's try bringing that exposure down a bit. - No, - I think it looked good where it was. - Try bringing the contrast up a little bit more. - See what that does. - Doesn't look too bad, - but, - you know, - I'm pretty close to where I like it. - Right there. - The highlights. - I'm going to check to see where my highlight clipping is again. - It's not too bad. - Adjusting the highlight slider doesn't seem to make a real huge difference in this photo. - So I'm just gonna leave that where it is the shadows. - I might bring those up just a little bit to bring some more detail into the dark shadows in - the background there. - So just, - ah, - bring those up a little bit. - The whites, - I'm gonna leave them where they are. - I don't want them to go gray. - The blacks. - I might bring this down a little bit more because, - um, - again, - I like that black contrast he look. - And, - um, - I can I can make just the deep, - dark shadows, - um, - 100% black and then back to clarity. - I think I might add just a touch. - More clarity there. - So there you go. - That's ah, - pretty much it. - That's all our basic photo adjustments done in camera raw. - So just before we bring this into Photoshopped, - I'm going to show you a couple more tools in camera raw that you might want to try out on - your own that are extremely useful. - So if we go up here to the left. - There is a spot removal tool, - and we can use that to get rid of, - um either sensor dust or small spots in the photo. - Then there is a red eye removal tool. - So if you have read I in your photo, - you just click on it with the red eye removal tool, - and it pretty much gets rid of it. - There's a couple adjustments sliders over here. - On the right, - there is theater, - just mint brush tool. - This tool is super useful because you can apply all of those, - um, - photo adjustments that you just did globally and you can apply them with a brush, - meaning you can brush them on. - So here I can see her back is a little bit, - um, - overexposed. - So I'm gonna bring the exposure of that down. - Just a touch, - and you can you can brush that on, - and then we have a Grady int filter here. - Grady, - ants are amazing for skies. - So in this photo, - I'm going to pull ingredient from the top, - and I'm gonna bring the exposure of that down just a little bit. - And that brings a lot of nice detail into the sky. - And I'm going to do the same thing from the bottom because of those studio lights. - Um, - the bottom of the photo there is really over exposed. - So I'm gonna even that out by bringing that, - Grady and down. - The last thing I'm going to show you in camera raw is that you can actually crop right in - camera raw. - So if we go to the crop tool here, - hold that down and choose, - um, - aspect ratio that you want to use. - I'm going to choose to three because that's the aspect ratio that this photo was taken in. - And then you draw a crop window and you can also rotate your photo. - Um, - so you can get your horizon nice and straight. - But the great thing about cropping and camera raw is see all these pixels around the - outside edge. - Don't disappear once you crop. - Whereas if you were to crop that in photo shop and then save it, - all those pixels air gone. - But if you crop in camera raw, - all those pixels are still there. - And you can go back into your photo and change your crop later if you'd like. - But for the sake of this tutorial, - I'm not gonna crop it in, - Rob. - We're gonna work on it a little bit more later. - So I'm just gonna leave this as is. - Okay, - So now all I have to do is click open image and my camera Raw adjustments will be saved and - it will open in Photoshopped. - Or if I just click done, - my camera raw adjustments will be saved and ah, - the file will just close so I can open in a photo shop. - Open image. - Now, - once again, - all of the adjustments that we just did in camera raw. - You can do the exactly the same thing in light room. - Develop module. - So again, - if you're using light room, - just stay in the develop module, - do your adjustments there and then come over to photo shop in the next stage. - Alright, - guys, - So have some fun playing around with your own photos. - Do some of those adjustments, - see what you can do with your own pictures. - And I'm really excited to see them in the class projects when they're submitted. - And, - ah, - the next lesson is less and seven correction tools. - Cloning, - healing, - patching and moving. - So we're gonna learn how to get some get rid of some of the junk that's in this photo. - All right, - we'll see you then. - Cheers.
8. Correction Tools - Cloning Healing Patching and Moving: - everyone. - I am JP Denko and welcome back. - This is less and seven moving right along correction tools, - cloning, - healing, - patching and moving. - So I know this is the stuff that you guys were all really excited to learn. - So let's jump right in here. - I've got a photo that opened in Photoshopped. - First thing we're gonna do is duplicate our background layer. - So control J and let's rename that base layer. - Okay, - So thinking back to a lesson, - too. - We used this as one of our examples actually before, - before and after. - So this phone has already been edited in camera raw or in the light room develop module. - And now we are into photo shop, - and we're going to get into, - um, - fixing up parts of the photo that we want to get rid of, - things that are distracting. - So some things in this photo that I can see that air distracting right now are these tree - branches that are coming in from the side here because we can't see the rest of the tree. - They look really weird just hanging there on their own. - Um, - and I could say the same thing about this little fringe of the palm leave their thes ones - I'm okay with Because I can see where they're attached to the tree and they make sense. - But things that are just sticking in from the sides that you know, - shouldn't really be there are just distracting. - So we're gonna get rid of those. - Then I can see this really dark, - not spot on the on the palm tree here. - And to me, - that's really distracting. - It's like dead nuts, - right in the middle of the photo and my eyes really drawn to it instead of to the model and - a couple other things is down here on the sand, - you can see there's some little bits of seaweed. - Um, - that air kind of strewn about here. - And, - you know, - I want this to be an idyllic beach photo that people don't want to see little bits of - seaweed on the sand. - So I'm gonna get rid of those. - It's now to get started. - I'm going to create a new blank lair. - So that's control shift N. - And I'm gonna call this one touch ups. - So the main tools that we're going to use for our corrections are over here on the left. - We have the clone stamp tool, - and if you click that and hold it down, - it brings up the clone stamp or the pattern stamp. - The clone stamp is the one that we're going to use on a regular basis. - And then, - just above that, - here we have the the healing tool. - So if we click that hold it down and over on the right, - you can have the spot healing brush the healing brush. - The patch tool, - which, - um, - is probably my favorite and content aware move. - Let's start with the's spot healing brush. - That's probably the easiest one to use. - Um, - at first. - So we click on the healing brush tool, - bring her mouse over and activate the spot healing brush tool. - Now it's a brush so you can choose the brush size right click. - And ah, - what you want to do is pick a brush that's just slightly bigger than the spot that you want - to get rid of. - There are a couple other options when you picked the spot healing brush. - If you come up here to the top, - you can see that right now it's checked on content, - aware, - so that's what I want. - I want content. - Aware usually does the best job of filling in spots, - but you could also try proximity match if content aware isn't behaving right. - And we also want to make sure that sample all layers is on otherwise were in a blank layer - . - And if it doesn't sample all layers, - then it can't actually do its work. - Let's zoom in there and try to get rid of some of the seaweed with Thea with a spot dealing - with the spot healing brush. - So remember control plus dooms us in. - And if we hold down the space bar, - we can pan around. - So that seems like a good piece of seaweed. - Let's try that. - All we do is click on it and look at that pretty much gone now that one that we just did - there. - I don't know if you can see that, - but I can still see the circle, - um, - of where the spot healing brush was applied's. - Can you see that? - So let's try that again and maybe get a better result. - So let's go over here to our history palette, - and we're going to click back to when we created our new touch ups layer and that gets rid - of the ah, - the healing brush is that we just applied. - So I'm going to open the brush dialog box again, - right? - Click and see on the hardness. - Here we have 100%. - So the edges air very, - um, - defined there. - I'm gonna bring that down here to somewhere around 20%. - So I have ah, - much softer brush edge. - But that also means that I need a larger brush to cover the same area. - So let's try that and see what happens. - So as you can see, - that does a much better job of blending that, - um, - the healing brush into the background layer. - Now the spot healing brush is great for small dust spots, - small imperfections that we want to get rid of. - Um, - it's really good for blemishes on Portrait's, - but most of the time we want a little bit more control than that. - So let's go back over to our healing brush tool there, - click on that and bring her most to the right and just pick the regular healing brush. - So with the healing brush, - if we come up to the top, - we can see some of these other tool options are a little bit different. - Um, - in particular, - we don't have the option for content aware. - Um, - so, - unfortunately, - right now, - content Aware isn't available with the, - um, - regular healing brush. - And the other thing that we can see is it's set to sample the current layer. - We want to make sure that's all layers. - So let's zoom in and see what we can do with the healing brush. - So control plus and then, - ah, - space bar to pan. - And I think I'm going to try to get rid of this piece of seaweed right here. - So first, - let's check what airbrush settings are right click, - and I'm going to bring the hardness down to about 20%. - So I don't have a hard edge. - Look enter, - and I think that's probably good. - Now, - with the healing brush, - we have to define a sample area first. - So we click Ault, - and then we pick the area that we want Photoshopped a sample that it's going to cover up - the area that we're going to select. - So I'm gonna pick an area that's is similar, - looking as possible to the area that I want to get rid of. - So gonna click here and then I'm gonna bring that over and you can see it shows me a - preview of what it's gonna look like. - I'm gonna bring that over this area right here. - Now, - I think that actually did a really good job. - But you can see the patterns here are a little bit similar, - and that is something that you definitely need to be careful of. - When you are deleting things from a photo, - you don't want to repeat patterns because then it looks out obvious that you've gotten rid - of something from that part. - But if I zoom out, - I think that will be pretty much a seamless edit that you won't be able to see. - Um, - in the full screen. - Now, - the healing brush and the spot healing brush tend to work well in areas of your photo that - you have a lot of, - ah, - background around the area that you want to touch up where they don't work. - That well is when you have a defined edge. - So I'm going to show you what happens if I try to get rid of this, - not appear with Thea with the healing process. - So I'm gonna select my, - um my sample area over here and then bring that over to cover up. - That not, - and what ends up happening is it's sort of samples from, - um, - both sides of the edge. - It doesn't know that there's a clean line there that you want to maintain that. - So let's look at a couple other tools. - Let's try and get rid of these two knots in the tree here with content aware fill. - So to use, - content aware fill. - I need to make a selection. - So I'm going to use the lasso tool, - and I'm going to draw a rough selection, - Um, - around the area that I want to get rid of now, - the content aware fill tool is somewhat similar to the healing brush in that it needs a - edge to Phil's, - um, - your sample in with and it also doesn't work on, - um, - blank layers. - So I'm gonna click this and make the base layer my working layer. - Normally, - I would merge all these and start with a new layer, - but just for the example, - I'm gonna work on my base layer here. - So I go up to edit and then fill, - and in this selection here, - it sometimes foreground color. - We select content aware, - um, - blending modes normal opacity 100% click OK and Photoshopped will sample from everything - around that and fill in that the sample that you made. - So let's to delete De select that control D Let's zoom out and take a look. - That looks pretty awesome. - Next, - let's get rid of these ugly palm tree branches up here. - The tool for that is the patch tool. - The patch tool works great for getting rid of large areas. - We're gonna set our layer back to the touch ups layer, - and I'm going to go over to the healing brush and then scroll down to patch tool to apply - the patch to we draw a selection around the area of the photo that we want to get rid of, - similar to what we did with the content aware fill. - And then, - um, - release that. - And then we pick an area of our photo that has a similar, - um, - look to the area that we want to get rid of. - So if I pick the water, - it would try and put the water in there. - But if I pick the sky kind of right beside it, - it's going to try and, - um, - match that and put that part of the sky in there. - So let's see what it does and to de select control D And again, - that did a pretty amazing job. - Now the patch tool might not always behave that well. - If it doesn't, - you can come up here. - And right now it's set to content aware you can set that to normal. - One is not necessarily better than the other. - They're just behave a little bit different. - And for the adaptation, - you can choose strict, - very strict through two very loose. - So what that does is just changes how content aware interprets its surroundings. - And again, - sometimes strict and very strict works great, - sometimes loose and very loose works great. - Um, - you really have to sort of just experiment with it and find the setting that works the best - to get rid of the part of your photo that you're working on. - The last tool in the healing brush menu is the content aware move tool. - Now, - this isn't a tool that I use very often, - but it is kind of neat. - So what you do is you make a selection over something that you want to move, - and it's very similar to the patch tool, - except instead of filling it with, - um, - a part of another part of the photo to delete it. - It's going to try and move these parts of the photo around, - so I'll show you what that what happens when we try that. - So there you go. - You can see that the content aware move tool took the selection from here. - It moved it over here, - and it tried to take the part of the photo that this was being dropped onto and move that - into the spot where that selection came from. - Now, - obviously, - this isn't the greatest example, - but that's a good example of what the content aware move tool is meant to do. - So let's undo that. - Controls that and d Select Control D and I have one more tool to show you here and is the - clone stamp tool. - The clone stamp tool works best as, - ah, - finishing tool. - So if you've done a healing brush or if you've done a patch tool and you've tried to clean - something up, - but it doesn't quite get rid of it perfectly, - that's when you come in with the clone stamp to touch up the edges and sort of make that - into a more seamless transition. - So I'll show you what that looks like. - So I'm going to do a a really big um patch. - And I'm kind of doing this on purpose as an example, - because I know it's not gonna match in here that well, - so I'm going to see if we can get rid of this whole like, - top of the tree there, - move that patch over here and then control de to de select. - Now you can see that there's some mess around the edges there that we need to clean up. - And if we weren't able Teoh Pat repair that to other parts of the photo. - That's where the clone stamp comes in. - So I'm gonna zoom in control plus and pick the clone stamp. - Now, - the secret of working with the clone stamp is to use a fairly low a pass ity, - so I'm going to start with about 25% and we want to make sure that it's set to sample all - layers because we're working on a transparent layer Now with the clone stamp, - you click Ault and that chooses your sample area and you want similar to the healing brush - . - You want to choose a sample area that's very similar to the area that you're going to paint - over. - And it takes a little bit of skill to get used to the clone stamp because you have to be - very careful to sample from a lot of different spots and, - you know, - kind of build up your credit. - And if it's not going, - Ah, - quick, - quick, - quick enough. - You can increase the capacity the A pass ity ah becomes important for, - um, - areas of your photo. - That air arm or detailed where you're cloning from areas that aren't quite, - is clean, - But basically what the clone stamp does is it just takes that area the photo and pace it - onto the other area. - The photo as you brush it in. - Now, - if we come over to the right to our history palate, - um, - you remember back in less than three when we changed our history instances from 20 to 100. - This is why because, - as you can see as applying all those clone stamps, - I have a whole ton of them in the the history. - So if I want to undo all that clone stamp. - I have to go back way back to the beginning where I started it. - So let's get rid of that clone stamp. - And also where I butchered the palm tree there. - So there you have it, - guys. - Those are the correction tools in Photoshopped. - Cloning, - healing, - patching and moving. - So I hope you're all excited to get working on your own photos and getting rid of all kinds - of distracting stuff, - and I will see you back in less and eight, - removing problem areas where we will continue with our project photo that we started in - less than six cheers.
9. Removing Problem Areas: - Hi, - everybody. - I am JP Denko and welcome back. - This is Lesson eight removing problem areas. - So I'm going to continue with my project photo here, - and I've got this opened in Photoshop and I'm going to start by once again duplicating my - background layer control J No, - looking at this photo, - I can see there's quite a few distractions in the background there that I want to get rid - of and some of them are pretty big, - So I'm going to start with content aware fill. - So to do that, - I'm going to duplicate another layer that is going to be my content aware. - Fill adjustment where? - So control J and rename this. - So let's start by trying to get rid of this big soft box here. - So I'm going to select the lasso tool and make a selection around the soft box. - Just ah, - rough selection. - It doesn't have to be exact. - And once I've got that done, - I'm going to go up here to edit and Phil content aware, - um, - capacity 100%. - Okay. - And I don't see what it does, - so that looks pretty awesome, - except for this little problem appear in the corner. - So de select that control D. - Let's zoom in their control plus and then pan over. - So as well is that problem in the corner there, - I can sort of see the outline of where that soft box used to be. - So I'm going to use Thekla own stamp to clean that up. - So first on a creative nuclear control shift and and I'm going to call this cloning, - go to my clone stamp and select the A passive 0 50 percents. - Good. - It's on sample, - all layers. - So let's do a little bit of cloning to get rid of that over here and again with the clone - stamp. - Um, - you have to be careful to clone from areas, - uh, - adjacent to the part that you're trying to get rid of and not accidentally, - um, - clone something that you already tried to get rid of back into it. - So I'm just kind of roughly cloning around the edge here, - trying toe. - Sort of get rid of that pattern where I could see the outline of the soft box. - All right, - that looks good. - Let's zoom out. - Next. - I'm going to try and get rid of these trees over here. - Now. - I could use the patch tool for that. - But the problem is that I don't have a lot of open horizon where I can move that over two. - So I'm going to try the content aware fill for that as well. - So I'm gonna go back to my content aware layer and zoom in, - and I'm gonna make a selection with the lasso tool and draw around this section of trees - here, - and I want my selection to be just a little bit bigger than the section of trees that I'm - trying to get rid of. - Okay, - so edit and Phil content aware past 100% normal. - Okay, - let's see what we get. - Wow, - I actually wasn't expecting it to work that well. - That looks fantastic. - You know, - this is like about the third time I've edited this photo and that worked just amazing. - So same thing as we did before. - Let's go control de to de select that. - And I can see a little bit of mess around the edges there, - So let's get rid of that. - I'm going to use the clone stamp again. - Go back up to my cloning layer and Ault to select the parts of the background that I'm - going to clone, - and then we try and keep this. - Um, - that's not good. - Try to keep this. - Ah, - random. - Now you see what I just did there? - I went close to the edge, - and it cloned the edge into the part that I'm trying to clean up. - So have to be careful very careful with what your actual selection is and what your, - um, - What? - You're putting on top. - So keep cloning that just to clean up those edges. - That looks really, - really good. - I'm really impressed with that, - actually. - Okay, - let's zoom out. - Control minus and I've got my full photo there. - Next, - I'm going to get rid of these two little bushes right there. - So let's zoom in on that. - And make sure I am on my adjustment layer my cloning layer. - I can use that layer with the patch tool as well. - So you choose the patch tool, - content, - aware adaptation, - medium sample, - all layers. - And the reason why I can use the pastoral here is because I've got enough space right here - beside it that I can, - um, - move the patch to, - But I think if I did both, - I might not have enough room, - so and just do one at a time. - Trade that. - And then let's do it again on this little bush here, - Control De de selects. - Looks pretty good. - Needs a little bit of clean up on the edges again. - So clone stamp and I'm on my cloning layer and halt. - Make my, - um, - my reference and Ault again and you can see with the clone Sam's basically just make the - edges a little bit more random, - and it totally cleans up that selection where you just got rid of something. - So let's zoom out. - Control minus the next thing to work on is going to be thes um, - trees right in here. - And I know that this is going to be a little bit difficult because our arms right in the - middle and I don't have a nice, - clean background all around it. - So I'm going to, - um, - merge all my visible layers here, - which is control shift Ault e. - And I've got a new, - uh, - layer here. - So I'm gonna call this tree now, - going to duplicate this layer going to control J. - And I'm gonna call my copy arms because what I'm going to do is I'm going to try and get - rid of this tree, - and then I'm going to use a layer mask to paint her arms and probably part of this ball - back in. - So let's go down to the tree layer. - And because content aware fill works so well with the other trees, - let's try it for this. - So last so And zoom in. - Let's make a selection around these trees and see what happens we're going to get into - trouble is where I've also made a selection of her arms because photo shops not going to - know what to do with that area. - The photo and also this part with the ball is gonna be a problem. - But let's try it and see what happens so that it fill content aware, - okay? - And you can see for some reason that it grab part of her head and added it content aware - part there. - So that's okay. - You're just gonna keep going with this. - So, - control D, - I'm gonna try this part down here as well. - So make my selection and then at it, - um, - fill content aware. - Okay, - That didn't work out too great, - cause it grabbed the sand so let's undo that. - Controls that control de Select. - Let's try the patch tool instead. - So make my selection around here, - and then they're gonna patch from over on this side. - So that worked out much better. - I'm gonna use the patch tool again up here by the ball and see if I get rid of this mess - and just sample a part of the sky. - That's Ah, - that's similar. - Not bad. - It's gonna I'm gonna have to do it again. - But try getting rid of this mess here and again. - I just find, - ah, - area the photo that similar and see what it inserts there. - Okay, - that's gonna work pretty good. - And I just got to get rid of a bit of this ball here. - So try that one more time. - Maybe something over here instead. - Okay, - A little bit more of it. - I need to get rid off. - Okay. - I think that's gonna work well, - so de select now. - You remember I created a layer named arms. - So if I turn that later on, - you can see that the tree and all the information there was copied over to the arms layer. - So I'm going to create a layer mask, - and then I'm basically just gonna paint her arms and that part of the ball back in. - So I want to create a new layer mask on my arms layer. - So in a click, - come down here and click layer mask. - And now I want to paint out this part of the tree here. - So I'm gonna go over here and click black and paintbrush. - Capacity is, - um, - bring it up a little bit to 75% a little bit bigger brush. - And then as I paint this, - um, - I'll be I'm painting this out with my layer mask increased the capacity. - I'm just gonna bring the capacity down when I get closer to the edges. - So let's zoom in a little bit and bring the hardness up. - I don't want quite as round on edge here, - So I'm just going to continue with this until I've, - um, - painted most of this tree out of here and trying not to delete any of her arm. - But as you can see with the layer mass, - Utkan pretty much get rid of, - um, - a lot of that stuff. - And if you make a mistake, - if you, - you know, - paint over her arm. - You can just switch your color. - So right now I'm on black and planning on a white layer mask. - If I switch my color toe white, - then I could paint this back in. - So getting in here, - I gotta zoom in a little bit and make my breast size a bit smaller and go back to black - brush and continued just painting that tree out of there. - No. - If I was doing this for a client, - I'd be a little bit more careful with it than I am now, - But it actually looks pretty good. - The edge there want to feather that a little bit more to bring the hardness down, - and then same with up here and let's zoom out and see how that looks, - So that that looks pretty good. - So still got a little bit of weirdness around the ball here, - Um, - I'm going to make a new merge layer because I've got a lot of adjustment layers where I've - been doing edits and I want to make sure that I'm I'm capturing all those. - So I'm going to go control shift Ault e. - And I'm gonna call this, - um final and I can do a little bit of clone stamp just around the ball there, - so halts. - Touch that up. - And if a zoom in on the ball, - you know there's some logos and text on there, - I probably get rid of that. - And if I come over here to my model, - she's got a couple sort of odd sun flares on her hair there. - So I'm gonna use the healing brush to get rid of those. - Um, - let's try the spot healing Bar Sierra does. - I think it will work pretty good on those. - So I just need a small brush and that one's gone. - And that one's got should get rid of that, - too. - So let's zoom out. - That looks good. - The last thing I'm going to do is apply a sharpening filter. - So let's ah, - duplicate this layer Control J. - And I'm going to call this one sharpen and it goes filter, - sharpen, - smart, - sharpen. - And if I pan to a part of the image there that I want to make sure I have good sharpening - on so her face, - all we do is adjuster sliders here to a spot that it looks good and then back off a little - bit. - So I think it looks pretty good there and just back off a touch and click, - OK? - And finally, - you might be wondering what I'm going to do with this light stand over here on this side. - There's actually a very, - very easy way to get rid of that. - Well, - I'm going to do is crop it out. - So I clicked the crop tool, - pick my aspect ratio. - I'm gonna do so, - um, - to three. - And switch that around to landscape. - Go down to the bottom of the photo. - Just so the leg right there isn't in the photo. - Bring that up to the side and maybe up. - Just a touch. - Check my horizon. - Make sure that straight. - That looks pretty good. - So how cool is that? - Here we have our finished 100% photo shop edited photo. - Let's go back to our original photo just to see, - um, - the difference. - So that's the original photo as it came out of camera and our finished product. - And when you skip back and forth between them, - it's ah, - pretty big dramatic difference. - And I think, - you know, - it's it's It's almost a night and day. - The finished product is awesome. - The finished The original photo was, - you know was OK, - so get your class projects and get your photos edited. - And I really can't wait to see what you guys can come up with. - The next lesson is lesson nine resolution cropping and saving where we're just gonna go - over how to save these photos for print and for the web. - So I will see, - then cheers.
10. Resolution, Cropping and Saving: - I'm JP Denko and this is less and nine resolution, - cropping and saving. - So we're almost finished. - Just a few more things to cover. - So let's get started. - If we go over here to image and then image size or control I that brings up the image size - dialog box. - And if we look here, - we can see that this photo has an image size of 7360 pixels by 4912 pixels. - And if we multiply those together, - we get the actual mega pixel size of this photo. - 7360 multiplied by 4912 equals 36 million and change pixels divided by a 1,000,000 equals - 36.15 megapixels. - So the image resolution is just over 36 megapixels, - and I know that this was taken on a D 800 which has a native resolution of just over 36 - megapixels. - And when we talk about image size, - we always talk in terms of pixels as a unit of measure, - because if we talk about inches or centimeters as unit of measure, - those dimensions are tied to the resolution of the photo. - Whereas pixels are universal, - they're not tied to any particular resolution. - But if we come up two dimensions here and we click the down arrow, - we can change the dimensions that we're looking at. - So instead of pixels, - let's look at inches and see what happens. - So now that displays the size of our photo in inches at a resolution of 300. - So if you want to figure that out, - you could go back to our pixel dimensions. - And if we take 7360 as thebe pixel dimension on the long side on the width, - and divide that by a resolution here of 300 that will give us the inch size of 24.533 - inches. - So 7360 divided by 300 equals 24.533 inches, - and we could do the same for the height resolution be 4912 divided by 300 equals 16.373 - inches. - So what does that mean? - Well, - this becomes important when we're trying to match our image size to an output resolution - and different outputs require different resolutions. - For example, - if you're going to print your photos, - you need an output resolution of between 203 100 pixels per inch. - If you're out putting for screen, - you usually need a resolution of around 72 to 96 pixels per inch. - So you can see in this example that at a resolution of 300 pixels per inch, - the largest print that we could make would be 24 a half inches by just over 16 inches. - But if we change the resolution to 240 pixels per inch, - the dimensions changed to 36 a half inches to 20.5 inches, - so we could make a larger print. - Now, - if we change that to a screen resolution of 72 pixels per inch, - you can see the dimensions of the photo are 102 inches by 68 inches, - which is way bigger than any screen could ever possibly fit. - An important point to make here is that by changing the resolution of our photo, - we're not actually changing the size of the photo, - even though it says the dimensions are much different than from where we started because - the width and the height resolution are still the same. - So watch if I change this resolution to 10. - The image dimensions air enormous, - but the width and the height is still the same in pixels. - If I change this to 300 where we started, - the dimensions are, - you know, - much smaller 24 by 16 inches. - But again, - the pixel dimensions of the actual photo are still the same. - So that's why it's always important to think of a picture size in terms of pixels and not - in terms of inches or centimeters, - which are tied to a resolution. - Now let's Cropper photo. - We go over here to the left, - to the crop tool, - which is right here, - or you can just hit C on your keyboard and that will bring up the crop window. - So the crop window right now is around the outside of my photo, - and I can readjust the size of that. - If we go appear to the top, - we can see there some settings for the crop tool. - First, - you can see that the aspect ratio is set to the original ratio, - that the photo was taken in which is 23 So if you click the down arrow, - that brings up options for other aspect ratios. - So, - for example, - if I want us to leave it to a five by seven or four by five aspect ratio, - just click that and it brings up the four by five aspect ratio. - Now you've seen it's it's brought up the crop window in a portrait, - and I want to set that toe landscape. - So I just click the back and forth arrow here, - and that'll set that toe landscape. - There are a couple other crops settings that I'd like to point out. - This here sets a grid on top of your crop window. - So right now I've got a rule of thirds grid set on that which I like because it really - helps with composition. - But you could turn it off or you could set another grid, - whichever helps you cropping your own photos. - And then one that's really important is this check box right here, - right now that's checked in. - It says delete cropped pixels. - So if I was to hit, - enter and apply this crop, - all of these pixels, - all this information around the outside of my photo would be deleted, - and the only thing that would be rate maintained would be the crop window. - I do not want to do that. - I want to keep all this information around the outside so that if I ever want to come back - to this photo and re crop it and change the crop, - then I can do that. - In all that information is still there. - So uncheck this dilly cropped pixels. - Now Photoshopped will crop. - The photo will only see what's in the crop window, - but everything else around it is still there, - and I can come back to it at a later time and re crop it and resize it. - I'm going to go ahead and crop this photo. - If I click on the photo, - you can see I can move it around within the crop window. - And I could also drag and resize the crop window to fit the size of the photo that I need. - And I can rotate the crop window because, - as you can see, - this photo isn't quite straight, - so I can just rotate it a little bit to straighten it up within the crop window. - Reposition that check my rule of thirds to make sure that my subject is right in the middle - . - And then the last thing I check is to make sure that the edge of my crop window isn't - beyond the edge of the photo because I've rotated it. - If I was to crop it there, - you see this little bit of transparent would be part of my crop. - So I want to make sure that I'm on the actual photo, - so that looks pretty good. - They're gonna hit enter. - So there's our crop photo. - Before we leave the crop tool, - I'd like to point out to other settings that might be useful. - So if we come up here to where we set our aspect ratio, - if one of these aspect ratio doesn't work for you, - you can set a custom one, - you click ratio, - and then let's try 1.5 to 1. - You just type in your ratio here, - and the crop window resize is to that aspect ratio. - You can also specify specifically with by height by resolution. - So if you want to crop this photo to an exact resolution, - you can type it in here in pixels. - So if I want to do 1000 by 1000 pixels at 72 pixels per inch, - which would be for screen. - Then I just type that in here, - and the crop window brings up a one by one aspect ratio window. - But if I hit enter, - it's going to actually resize this photo to crop at 1000 pixels by 1000 pixels by 72 pixels - per inch instead of pixels. - We can also do this and inches. - So if I want to set this to, - say, - an eight by 10 type eight and then inches I n. - And then over here 10 and inches I end and I'm going to set it to a print resolution. - So 300 Now that brings up an eight by 10 crop window. - But again, - when I hit enter, - it's going to actually resize this photo to eight inches by 10 inches at 300 pixels per - inch. - So be very careful if you're actually changing the width by height by resolution, - because you are actually affecting your photo size. - Now that I'm done working on my photo, - I'm going to save my work. - So I come up here to file and then save as or on your keyboard, - you can click control shift s which brings up the file save as dialog box. - I'm going to set the file type to photo shop, - which is ah dot psd file. - And the reason why I want to save it as a Photoshopped file is because that will maintain - all of the layers and all the work that I've already done in photo shop. - It also maintains my embedded color profile properly, - and the Photoshopped file type is a lossless file type. - You can open it and save it as many times as you want, - and you never lose quality. - So to apply that, - I just browse to the file folder where I want to save my work, - put in the name and then click safe. - Now. - Saving your work as a Photoshopped file type is great for working on your photos in - Photoshopped or, - if you're going to be using any of adobes, - other applications. - Those applications will be able to work with Photoshopped files natively. - But if you want to display your photos on another display, - or use 1/3 party application, - or if you want to send your files to print a photo shop file is not the best file format - toe work in for those applications. - We usually are going to save her work as a JPEG. - Now, - let's save this photo as a J peg as well as the Photoshopped file that we've already saved - it in. - To do that, - we click control Shift s on her keyboard and that brings up thesafeside as dialog box. - Instead of a photoshopped file, - we're gonna scroll down to JPEG, - select that and we browse to where we want to save it. - We put in our file name and then you can see that the only option that it keeps is the - embedded color profile. - The layers and all the other work that we've done in photo shop are going to be gone once - we save this as a J peg. - So let's click Save, - and that brings up the J peg options dialog box. - The only setting that you need to worry about in here is the quality setting. - So right now you can see it set to maximum, - which is a quality of 12. - And if we come here over here on the right, - you can see that that preview is an 8.7 megabyte file size. - Now, - if I'm saving for my stock portfolio, - I'm not worried about the file size. - I just want the absolute best full quality J peg file that I can get, - so I leave that at maximum. - But if I'm just setting this for print or I just want a full resolution J pic saved on my - computer for future use, - I don't necessarily need it to be at maximum. - I can bring this down to eight or nine, - and that will produce a J peg that really to your eye. - You won't be able to tell any difference between a maximum, - but if we look at the file size, - it goes from 8.7 megabytes down to 1.4 megabytes. - So those files will look to your I exactly the same. - But you can save a lot of file space, - and it makes working with those files for transferring them around a lot easier as well. - So to finish saving, - we just click OK and the files saved as a full resolution, - JPEG saving full resolution JPEG files with the embedded color. - Working space is great for us because we're working in a professional workflow with - professional software. - But if you want to share your work on the Web, - or if you want to upload your photos to Social media, - they need to be optimized for Web use. - To do that, - we come up to file and then save for Web or all shift control s. - And that brings up thesafeside for Web dialog box. - First, - let's resize this view so that our photo fits in the view window. - So we click here and that fit in view and you can see right above that it's telling us that - this is a JPEG file. - And if we saved it with the default settings, - we're looking at a file size of about four megabytes. - That's not what we want for Web use. - We want really small file sizes as small as possible. - So if we go over here to the right thes air, - all our settings for saving R J pegs optimized for Web, - and one of the most important things here is that it's click to convert toe S RGB. - If you remember back to Lesson three, - we saw how the different color spaces are displayed by different screens and different - devices converting it to S RGB will ensure that the best colors possible are displayed - across all devices. - All screens. - Then, - if we come out down here to image size, - we can see that right now it's set to save at its original full resolution 100%. - That's not what we want for Web use for Web use. - We want to optimize the size to match the actual use that it's going to be used at. - So, - for example, - if I'm saving this for a website or a blawg, - I want a photo size that's about 600 pixels long on the long edge. - If I'm saving it for email, - 800 to 1000 pixels is usually good. - Ah, - for Facebook, - you're looking at about 900 pixels. - Or if you're saving this for a Web portfolio and you want a, - ah, - high quality image, - um, - you might want to think about saving it for a retina display resolution, - which would be 2000 and 48 pixels on the long edge. - So I'm going to change the image size to 1000 pixels, - which is a pretty good file size for most Web applications and instead of a quality of 80. - I'm going to bring that down just a little bit to 70 because I want to optimize the file - size. - And, - um, - there's not a big quality difference between a quality of 70 and 80 and come down here to - the left. - And let's resize that to fit in the view. - And just above that, - you can see that now it's previewing that to be a file size of 123 kilobytes instead of - four megabytes. - So once we save this and it's online, - you can download that file very quickly. - Instead of trying to force people to download a gigantic four megabyte file. - Now they're downloading a nice little 123 kilobyte file. - Now, - if we want to save these settings and use them again in the future, - we could go up here and click optimized menu save settings, - and then you put in your J peg settings name, - Click, - Save And then in the future, - you can bring up that preset and apply it to your photo without having to go through all - the all these other steps. - Or you can just come down here and click Save putting in the file name browse. - Do you want to save it and you're done? - That's it for less and nine resolution cropping and saving when you're saving your project - files for uploading to the skill share site, - please remember to optimize them for Web Web use like we just learned in this lesson. - And guess what, - guys? - That's also the end of the class, - so I really hope that you enjoy the class. - I hope that you've learned a whole lot of new techniques for your own photo shop workflow. - And I hope that you've got a great foundation now for incorporating Photoshopped into your - own photography. - And, - if anything wasn't quite clear. - Or if we, - you know, - if you have any questions, - leave those questions on the skill share site. - Somebody else from the class might be able to answer them, - or I will jump in there and answer questions as we go as well. - So thanks for watching. - And thanks for signing up. - Please keep in touch by following me as an instructor, - and I hope to see again in the future. - Cheers
11. Bonus Techniques!: - jp dangle here. - Now, - I know we've already wrapped up this course and you're supposed to be finished, - but I felt like I was kind of leaving you hang in there because there are a few really cool - tips and tricks that I use all the time that you know, - I wasn't going to include, - but I think you know, - you guys would get a riel kick out of these, - So I'm just gonna share a few with you right now. - The first thing that we're going to do is look at making skies awesome in Kamerad just by - using the Grady int filter. - So I've already done my basic adjustments over here on the right, - and I'm going to go up here to the Grady int filter. - So a lot of times in a photo like this, - you're exposing for your subject, - which leaves thes sky over exposed. - So let's grab the Grady in filter unless draw Grady and on from the top down and then come - over to the right here and let's drop the exposure. - And also, - let's bring up the saturation a little bit. - Let's bring up the clarity a whole lot and maybe let's bring the shadows down a little bit - , - too, - so that adds a whole lot of more punch into that sky. - Let's do the same thing from the bottom. - Let's do another filter. - So click new and then let's draw another one up from the bottom here and you can see just - the change of that makes in the in the water and in the sky. - So it's a really easy thing to do, - and it could make a very big, - cool, - dramatic difference to your ah, - to your finish photo. - So we've got this photo in photo shop, - and I'm gonna show you another cool trick here. - If we zoom in on your subject down in the bottom right there, - we'll see that she's just a little bit blurry because this was a long exposure and she was - trying to stand still for the whole time. - But obviously she can't stand perfectly still, - so there's some motion blur there. - So to fix that, - we're gonna go up here to filter and then sharpen and shake reduction, - and that brings up the shake reduction dialog box, - and all that we do is make sure that advanced has turned on. - We see we have this Ah, - blur estimation region down here. - We're gonna move that over the part of the photo that we most want Photoshopped to get rid - of the motion, - blur, - resize it and click. - OK. - And then in our finished photo, - we can see that photo shop has got rid of a lot of that motion blur. - And the whole image just looks a whole lot sharper and better. - Here's a natural light image. - So again, - we've already done our basic adjustments over here on the right. - But because it's natural light I can see in this face here it's just a little bit dark and - in particular, - his eyes air quite dark there. - So if I was using a fill flash, - the fill flash would fill in those dark shadows. - But because it's just natural light, - I need to brighten those up a little bit. - To do that, - I'm going to come up here to the adjustment brush, - so choose a brush size that is just slightly smaller than his face and a feather that is - not too big, - but we don't want any hard edges. - And then we're just gonna up the exposure. - Just a touch here. - So I'm gonna go maybe plus half a stop. - And then we brushed that onto his face here. - Now we can do even better than that. - We're going to zoom in, - and I'm going to apply that to just to his eyes as well. - So you can add a new brush and I'm gonna make it pretty small. - And then I'm going to add just a little bit more exposure to his eyes and that's it. - View fit on screen. - And again, - that's a pretty easy adjustment to do with the exposure brush. - And that is an adjustment that I do for practically every single natural light photo that I - edit. - Here's another photo that's very similar to our project photo. - So over here on the right, - we can see if we've already gone through our basic adjustments. - But I'm now I'm going to do a few more adjustments to this photo, - but Onley locally. - So we've applied these basic adjustments globally to the entire photo. - But with the adjustment brush, - we can work locally just on specific areas that we want a target. - So I'm going to decrease the size of this brush just a little bit, - and I'm gonna bring down the exposure here just a little bit as well. - You know, - you see here that most of the controls that we have for our global adjustments are also - available in the brush. - And that's a very powerful tool because you can target just specific areas of the photo. - So they're the The exposure was a little off. - It was a little too bright on her back there. - So now I've brought that exposure down locally, - and I can also do that to just skies or any other parts of the photo. - So I'm gonna add a new brush and then down here at the bottom in the sand, - that's a little bit too bright, - too. - So let's bring the exposure of that down. - Same thing with the sky in here. - I think that looks a little bit too bright. - So going to bring that down as well and just paint on my adjustments with the adjustment - brush, - and you can also, - you know, - do a whole lot more than that. - You can increase the saturation if you want toe, - so maybe really want a popper sky here, - so at a new one, - and I'm going to include increased the clarity in the sky, - the saturation And I'm even gonna pick a color. - I'm gonna make it bluer And we can brush that on to Ah, - just local areas of our photo for some pretty cool dramatic effects. - No, - you'll notice that I've kind of brushed over my subject a little bit with this, - but that's okay, - too, - because what we can do is now fine. - Tune this. - So I'm gonna choose the erase brush, - which ah, - Aiken delete parts of the brush that had just brushed on here so I can delete that brush - from my subject. - Now, - I'm just doing a rough job here to give you an example. - But you can see how powerful this is, - working with the adjustment brush in camera raw. - And you know you can do something similar in Photoshopped, - um, - itself. - But it's a lot harder because you have to use layers and layer masks and it takes a lot - more work. - And, - ah, - if you can do it in camera raw with the adjustment brush, - then make your adjustments here it's a lot easier. - So there you go. - There's a rough example of how you can use the adjustment brush to do some local - adjustments on your photos. - OK, - so through this whole class, - I've been telling you how the develop module in light room is exactly the same as camera - raw. - And the only difference is that how you some of the tools is slightly different. - They have different icons, - but what they do, - how they work is exactly the same. - So I'm gonna show you a few tricks for doing some basic facial retouching right in camera - raw. - But I'm going to use the develop module in light room, - just just for fun. - So I'm gonna zoom in here on her eyes, - control Plus, - and I'm going to go over here and grab an adjustment brush. - So this is exactly the same as the adjustment brush in camera. - Roz just has a different icon, - and I'm going to make her iris black, - so I'm gonna bring the exposure down a little bit. - Let's make it up. - Sorry. - That's the pupil. - Make the pupil black, - and then a new brush. - I'm going to make the middle of her iris just a little bit lighter than the outside, - so I'm gonna brush on here, - increase the exposure. - I'm gonna go a little bit more extreme than I normally would, - just to show you the before and after. - But so you can see, - have painted on the middle of her, - her iris there and have brightened that up a little bit. - And then on the outside, - I'm gonna dark in that Slaten slightly and add some sharpening and clarity, - some around the outside of her iris and also just around the inner circle of it as well. - Now, - you don't want to go too crazy with this technique. - Increase the clarity there. - And also some sharpness. - Crank that way up now for her. - Ah, - her eyelashes. - So another brush and I'm gonna bring the exposure down a little bit and increase the - clarity and gonna paint over her eyelashes. - One last thing gonna make the whites of her eyes a little bit later. - So another adjustment brush. - Bring the exposure up a touch, - make sure went out of playing any clarity. - And I'm gonna paint on the whites of her eyes just just to bring the exposure of the whites - of their eyes up just a little bit. - Get rate in there again. - I'm doing this a little bit more than that I normally would, - but, - um, - So you can see the big difference between this I and the other eye that we haven't touched - . - But, - ah, - show you how you can do some really cool basic facial retouching right inside of light room - , - develop module or with the photo shop camera Raw module. - So let's apply those and fit on screen so you can see the difference between her eye on her - left in her eye on her. - Right now, - we can also go a bit further than that. - We can ah, - adjust your skin tones as well. - So if I go control plus that's a little bit too close. - Zoom out a bit so you can see all these poor structure in such inner skin. - And sometimes facial Portrait's of women look good with their skin just a little bit soft. - So we're gonna just Ah, - we're gonna change that with another adjustment brush, - and I'm going to leave the exposure and everything all the same, - except I'm gonna bring the clarity way down to minus 100. - So let's apply that to her skin, - and all this does. - Is it kind of smooth? - Zod, - Her poor structure and her skin just a little bit in some of the areas in this photo there - already blurry cause of the Boca in the photo. - But, - um, - if you've got somebody that's got a little bit of rough skin or you just just need a little - bit of facial retouching using using the adjustment brush with the clarity down to minus - 100 or, - Ah, - somewhere in between there can instead of, - you know, - doing a full facial Retentions is a really great start. - Let's see how that looks. - Hey, - so there you go. - There's example how you conduce you some really easy facial retouching right inside of - camera raw or light rooms develop module. - I'm not quite done with this one yet. - I'm going to do the other I just to show you, - um, - how you go about doing that because it is a little bit tricky to make sure you do them the - same. - So first I'm going to click on the brush that I used for her pupil. - Now you can see over here on the left. - The settings are already set for that brush, - so I could just brush that on, - and the settings for her left and right eyes are exactly the same. - Next, - going to click on the ah Iris and it shows me that mask. - Okay, - that was the outside through the inner one first. - So again, - over here on the right, - the settings are already set for that. - So I can just brush this on and then the outside of virus brush that right on there and - inside, - it's the same brush. - And then we did the whites of their eyes. - So let's do that now. - You do have to be a little bit careful with doing eyes that you don't go too crazy with it - . - We kind of call it vampire eyes if you make them really extreme. - But, - ah, - the eyes are usually the first thing that you look at in a photo, - so it's important to touch them up. - Um, - and it's really easy to do this with the adjustment brush. - So let's do her, - um, - her eyelashes last make the brush a bit bigger. - There we go. - So it's fit that on screen and let's take a look at her before and after. - So we've done, - you know, - just some adjustments on her eyes with the adjustment brush and also her skin down here - with the adjustment brush. - So there's how it looked when we started and with a few simple adjustments in camera, - raw or light rooms developed module. - The last thing I'm going to show you is just a really cool technique to use when you really - want to increase the contrast in images. - So this is an underwater photo. - And if you remember from way back and less than two, - the original was very flat and had very little contrast. - And I've already done my basic camera Raw adjustments here, - and that's is much contrast as Aiken dragged into this photo. - So now going to use a dodge and burn trick here in photo shop. - So let's duplicate or background control J. - And I'm going to call this layer dodge and burn, - and then I'm going to go over here to the left and picked my burn tool. - So it's the little hand and then burn, - and I've got a very large brush size, - and I'm gonna come up here to the top and make sure that I've selected shadows. - An exposure 5% usually somewhere between three and less than 10% works good, - so Let's go with 5%. - You make sure that the protect tones is turned off, - and I'm just going to paint over this photo with the ah with the burn tool and you'll see - as a as I paint over it. - What it's doing is burning in the shadows. - So every time I paint on here, - it's burning in the shadows by ah minus five exposure. - So it's darkening the shadows every time I burned, - but only the shadows. - So the highlights in the mid tones don't change. - Only things that are already dark in the photo get darker. - And you just keep brushing that on until you get to a point where it looks like, - um, - you've got the sort of level of contrast that you want and if it's not, - ah, - it is not behaving properly than try changing the exposure. - So I'm gonna increase this a little bit just to go a bit faster here for the tutorial. - But you can see that just the dark spots in the photo get a little bit darker. - The light spots stay light and the mid tone state light. - So I'm adding contrast. - So once I've done all the dark spots in the photo I'm going to do Ah, - the opposite. - But we're gonna use the Dodge Tool. - So go over here toward Dodge and burn Tool and then choose Dodge. - And instead of the shadows, - I'm going to dodge the highlights. - Said the exposure somewhere low as well again. - So let's try 6%. - And we want a really large brush, - something that you Kenbrell sh over most of the parts of your photo. - So I'm going to do the same thing that I did with the burn tool. - Except now I'm lighting lightning, - the highlights, - and for photos like this again. - So we've decreased the darkness of the shadows. - And now we're lightening the highlights, - Um, - Onley in the highlight areas of the photo. - So that looks okay. - I'm gonna come over here to the right, - and so there's how we started. - And there's with our dodge and burn contrast tricks. - And if that if you go end up going a little bit too heavy with it, - you can just change the opacity of that layer and blend it into somewhere that you think - looks good. - So right there looks awesome about 66% so you can see 100%. - It's a little bit too much. - So we just back the apace city of that layer off a bit and right there before and after. - All right, - All right. - So there is a few extra tips and tricks for you guys. - I hope you like those. - Um, - once again, - you know, - thanks everybody for taking this class for enrolling. - And I'm really excited to see everybody's class photos. - So please get your, - ah, - your class projects done and upload those two skill share, - and I can't wait to take a look through. - All right. - Cheers, - guys.
 JP Danko, Commercial Photographer