Transcripts
1. Introduction: Have you ever paid attention to the colors of the
soil around you? Hi, I'm Kenia, and I'm Kaela, we're in the Andes of Peru,
surrounded by nature. We're going to guide you
on a creative journey where you will learn to
make mural paintings using the pigments of wild
clay and to craft relief textures using
mud, sand, and straw. Making art with the colors defined on the
ground and mountains is a sustainable way to connect with the Earth and
celebrate its beauty. Throughout the course, we will explore various methods
of making clay paint, walking you through each
step from gathering natural materials to the
final touches on your mural. We will also prepare
different mixtures of cup to create a mural relief that
is durable and waterproof. By the end of this
class, you have a deeper appreciation of
the landscape around you, and you'll see the full
spectrum of nature's colors and gain the skills to create
your own unique ur leaf art. Join us and let's discover the beauty of
creating with the Earth.
2. Overview: Welcome to our class. Before
we dive into the lessons, we need to get familiar
with certain terminology. First, what is Cove? Cov is a natural building
material made from clay, sand, straw, and water. It can be easily shaped by hand, making it great for both
construction and sculpture. You will learn to use this
mixture to create your leaf. Second, what is clay paint? Clay paint is a natural paint
composed of the binder, mineral pigments
that can be obtained from various colors
while clay and water. The binder helps the
pigments adhere to your mural while the pigments
provide color and vibrancy. It's breathable, nature makes it suitable for both indoor
and outdoor applications. In this course, we will
teach different recipes for cup and clay paint in
a way that you can adjust them to the resources
available in your area. The sustainability of
clay is remarkable. It can be reused, recycled
and molded in countless ways, reducing waste, and promoting eco friendly artistic practices. For millennia, humanity has utilized clay for construction, and in fact, one third of the world's buildings
are made from soil. There are a counts as
examples agout the globe of sophisticated ancient
construction and murals from Egypt to
Peru, Mexico, and beyond. Now let's dive into the process.
3. Gathering Cob Materials: Any cop recipe must
contain clay soil, straw or hay, sand and water. Depending on where you are, you can either gather
all the materials for your cup or get them in a store. Here on the property, we
have plenty of soil to use, but we are buying
the sand and hay. In order to determine
if your soil has enough clay to be
used for your cup, first, you need to
collect a sample of soil. Ideally, you should contain at least a minimum amount of clay in order to be malleable
for the sculpting process. When the soil shows these
desiccation cracks, it's a sign that it contains
clay and has lost moisture, causing it to shrink and
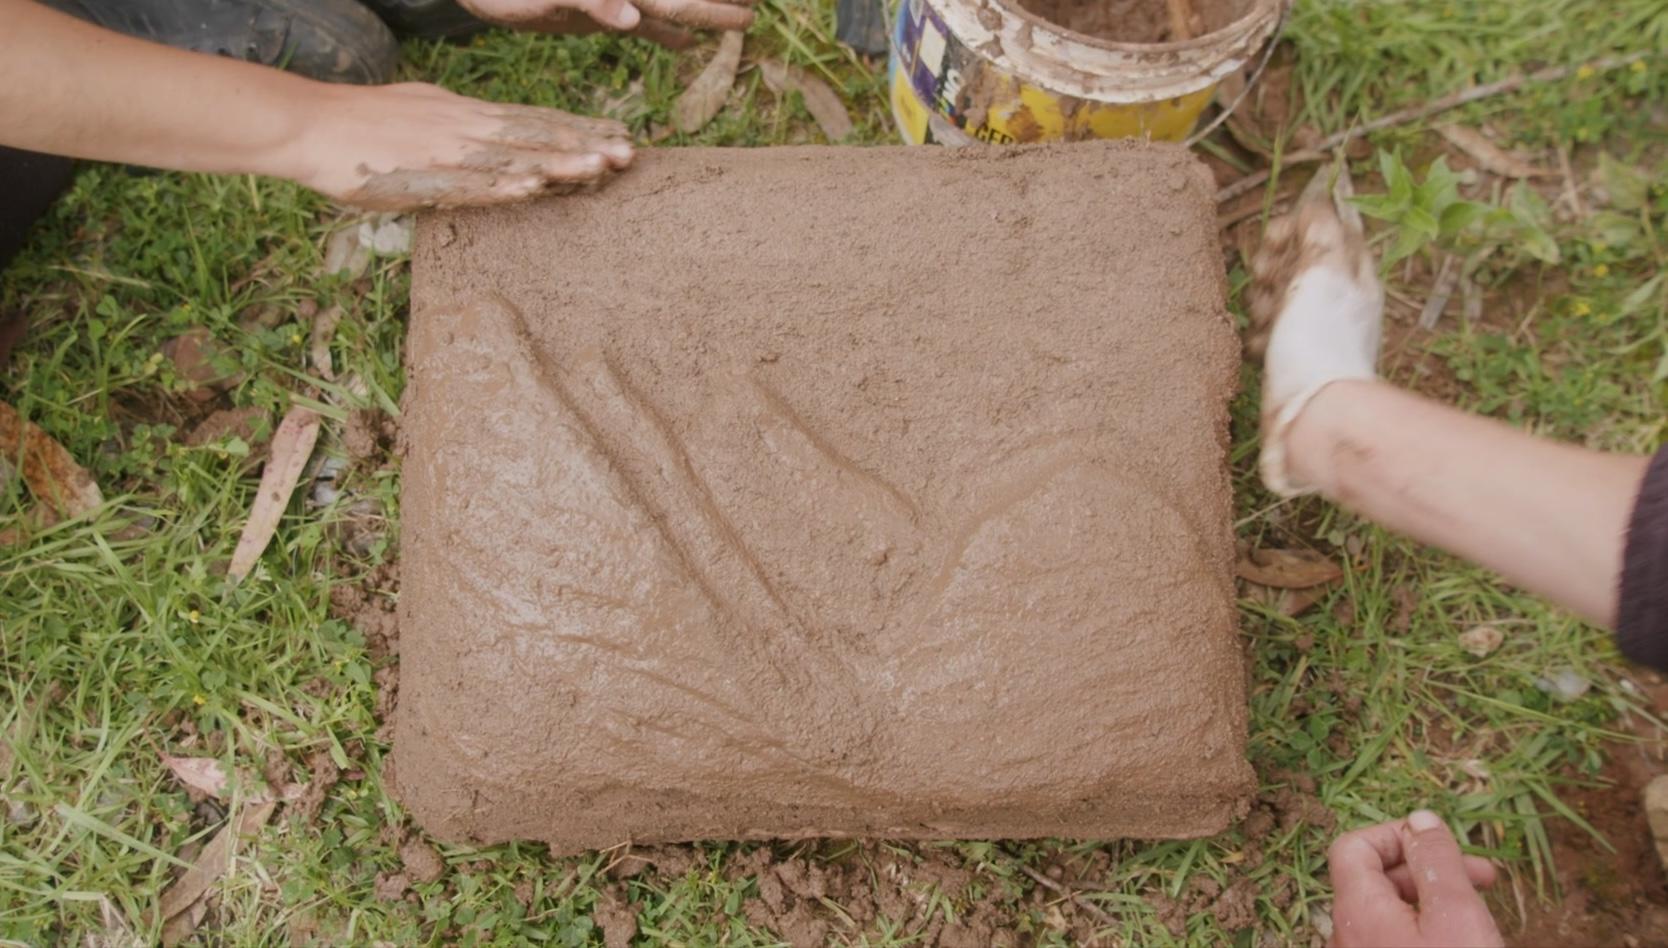
form visible fissures. You can even try molding
it to test its plasticity. In order to know if you can
use the wild clay or the soil that you have in your area to
make your relief sculpture, we're going to make this test, which is a clay
content soil test. In this test, we're going to see how much clay itself we have because in our soil,
it's never pure clay. It's always have sand,
rocks and stuff. So here we will see
the quantity of it, and we have to put the
clay in the glass jar. Any glass jar empty that
you can easily access. So we're just gonna
directly insert Mm hmm. Our sampling here. Mm hmm. One third of the jar
would be enough. We have to put water enough
water to, like, cover it. And after we have to shake
it, like, shake it very, very well, or you can also help yourself with some steak spoon. And we need, like, all these particles
to dissolve inside. We have to really,
like, mix it. Mm hmm. Once your mixture
looks very dissolved, like this one,
we're gonna let it rest for at least an hour. So it is important
that you don't have any tags on your jars. Otherwise, you're not
gonna see very clearly the decantation process that's going to take place in the jar. So the seeds, and after a while, we will see the results. Mm hmm. Now it is time to see the
results of our experiments. It is important to know
that any type of soil contains certain amount
of organic matter, which is the first layer, followed by a layer of clay, and then a layer of silt, and at the bottom,
the layer of sand, rocks, and other
heavy particles. So for this sample that we did, we can see that the
organic matter is here, very thin layer, and then the clay content
is also very thin. And we do have a big layer of silt because this soil was here collected
from the garden, contains a lot of organic
material, organic matter. And at the bottom, we can find sand
and pieces of rock. So have an example
of the violet soil, and He can see it have much
more presence of clay. It's a little bit of sand
in the bottom and no silk. Probably to get
this kind of clay, you have to dig a
little bit more. So this soil would be
perfect for our sculpture, because we do need
a certain amount of clay, but not that much. Now we have our clay soil ready
next to our sand and hay, which we got from a store. We will explain
the properties of these ingredients
in the cuff lesson. We want to show you
another natural ingredient to improve your cup, cow manure. It's not a requirement, but it has special qualities that are worth talking about. Cow manure is an
ingredient that enhances durability of your sculpture
by preventing fractures. And it's also a great
waterproofing agent. We're collecting
just a few samples to show you how to use it. It's best to gather it in a dry state to avoid the
presence of pathogens, as they might cause issues during the drying
process of the cup. That's all you
need to know about gathering materials for cop. In the next lesson,
we will go out to collect the clay pigments
to prepare our paint.
4. Gathering Clay Pigments: In this lesson, we're
going to go out there in nature to gather
our mineral pigments. We are here in the town
of Maas in Cuzco Peru, and we know that
around this area, we can find many
different hues of colors, many different types of clay. So this is a perfect place for us to go gather our materials. And we would like to
introduce our friend, she called Diane and she will join us in
all this process. And since the work
we're going to do, it's like a big scale project. It's a big mural, so
we decided to invite some friends to help
us to learn with us. So we can see the different
layers of the soil, and sometimes we have to go
deep to get what we need. For example, the clay
and the pew color, it's mob low. Uh huh. If you live nearby a forest, you might find this
situation more often. Essentially, it's like
digging around half a meter until you find
different colours. As you can see here, we
not only have beige, we have different hues of
orange and red and brown. So we found an excellent
spot to get some earth. We can see a variety of colors
like yellow, some, like, white, a little bit blue white, violet, all in one
place together. The purpose is to find
what you have around. So this is a base, like, of permaculture and by construction and all these
sustainable things. We will get all the materials which we have like
easily access. We don't need to go really far. Also, one tip to dog
get yourself confused. Sometimes you see this and
you think that it's a rock, and then it's not
going to work for you. But in reality, it's really compacted soil that
with the proper tools, you can turn into pigment. See the cracks. This
soil have a lot of clay. Then more clays, then
it's easy for us to work. Mostly it's all,
like, mixed with some stones and no stuff. So afterwards, we will show
you how we're going to clean this to get the pigment
and to get the pure clay. The tools you need for gathering soil and minerals are spatulas, shovel, and large sacks or bags to store your
samples separately. This is a rare color. So we decided to took a
little bit from this. So it is important
to know when to set a limit on the
extraction process. If you live in the city, you might have to search
for nearby places in nature where to
gather your pigments. In the resource section, we explain how to identify specific areas where you
can find mineral pigments. This area here has a
lot of mineral content. But in this case,
if we look closer, the pigment is mixed
with clear cards. So even if we crush it, we're not going to get
much pigment out of it. So it's best to leave
it as it is and look further for other
types of samples. And also the places
along the water, it's a good spot to fun clay. Like here, we can find the
same color. We get uphill. So here we can see
that this clay is pretty plastic. You see? This is a good quality clay. With the water, it
looks more intense. Once it get dry,
it will look more like faded or a little
bit more clear. Here we found a
light brown sample to complement our
range of colors. We visited four
different locations to collect all the
colors we needed. As you can see, we decided
to gather from places near the road so we wouldn't
disrupt the landscape. The best way to know if certain pieces of
compacted clay or soil like this might work as a pigment is testing it over
a rock and paint on it. So, for example,
here, the pigment is releasing very easily, which is an indicator
that this pigment, it will be easy to
crack and grind in order to extract
the finest pigment. Here we found several
piles of dirt in different colors as local people extract clay soil for
building their houses. We gathered a sort of violet
colored and greenish soil. Within 5 minutes of driving, we moved to another
location that Snia had identified
in previous days. Here, we gather only
a light yellow color as we have plenty
of colors already. This was our final stop. We found a beautiful
reddish clay that was very compacted. We gathered a few
blocks and took a moment to pay our
respects to the mountains, showing appreciation for
all the samples we got. Here in the Andes,
blessing the coca leaves is a way of expressing
intention and gratitude. And we truly felt grateful for the rich variety of colors
from this majestic land. Besides collecting
our mineral samples, we also need to gather
cactus to prepare one of the natural binders we will
use to make the clay paint. Muslago. Milgo is
a biscuit liquid we obtain by soaking
cactus in water. This liquid works
great as a binder and was very popular
even before Ica times. He have several plants
which can work out for us. Even this cactus also, but it's too
difficult to get it. So we decided to choose this one because it's more easy access. Even a era can work
if you have it around you because we're
looking for a nding material. So cactuses have this substance that allow us to stick
the color to the wall. Here in the Andes, for example, they've been using
this for centuries, and we are given a try as well. When manipulating cactus,
make sure to protect your hands and bring a sharp
knife to cut the pieces. You can collect
around 3 kilograms to prepare 15 liters of binder. In this lesson, we're demonstrating the
initial steps to prepare the mucilgo as it needs to
rest for at least one night. First, we cut the cactus
into very thin slices. It's not necessary to peel it. Then fill half the bucket with cactus and the other
half with clean water. Let it sit until the
water becomes viscus. We recommend to choose a large bucket of 20
liters to do this. But these are all the colors
that we gather today, and we're very happy
with the result. Here in the Andes, the land
is very rich in minerals. So we were able to find all these colors within a
radius of 10 kilometers. Of course, before
gathering the colors, we did some exploration. So we knew the spots where to
get exactly what we wanted. So we have some
warm colors brown, which pretty closes the
color of our, like, original wool, and we have some cold colors like
this kind of blue beige. So then your creations comes to see how you combine it, how you're going to use it. You can see, these
samples contain different amounts of rocks,
different composition. So processing each color
would be different, and we will see this step
in the following lesson.
5. Testing Cob Recipes: Now it's time to
talk about one of the most basic recipes
in bio construction, Cf. Which is a mixture of
clay, sand and hay. So we are using this same
recipe to make our sculpture, to make the relief. When collecting your clay, it's important that it doesn't
have any rocks or sticks. Otherwise, you will need to sift it first in order to use it. The second ingredient,
which is the sand, if you are collecting
it out in the wild, you need to remember to
use sand from the river. But if you are thinking to
use sand from the ocean, I recommend to not do
it because it contains a lot of salt and may
ruin the sculpture. And the third ingredient is hay. So it's important to cut it
in small pieces because it's going to act as the
skeleton of the mixture. Important detail is that your hay needs to
be completely dry. Otherwise, it will rotten
inside the sculpture. The sand, on the other hand, is an anti plastic material, which allows you to create
more stability in the mixture, prevent cracks on the relief, and the clay is the
body of the mixture. It's going to add the
flexibility is going to help us mold our relief
and sculpt our design. We're going to test three
cough recipes to choose one for the first layer of the relief and a different
one for the second layer. So we'll do three tests
in different proportions. The first proportion
gonna be like one clay, $0.01, so one to one. And the second one is
going to be one to two. And the third 11 to three. Now we're adding the
same amount of hay to each test and water
in small batches. That need to mix the ingredients very well until we get a muddy consistency that is easy to manipulate
and work with. We're doing a second round of tests with the same
ratios we used before, but with one addition, one part of cow manure
to each mixture. We would like to show
you the difference this ingredient makes
once the cup is dry. We need to spray water on the wall before
sticking our cup tests. This will help with addition. So these are the results of our cup test that we
did a few days ago. And this is one part clay, 1%, one part clay two parts sand, and one clay three parts sand. And as you can see, the
differences are very clear. This first sample
has some cracks, which means that has
obviously more clay, but also it tells
us that we can use this recipe to
create a first layer of our sculpture because
it's more malleable. And second nets have much
more send not much more. Two times more sand,
almost have no crack. And this third sample
has three parts sand. So it means that it's not that
flexible like the others, but also it adds a
lot of smoothness, which means that
we can use it as a second layer to give the final touches
to the sculpture. And it's not going
to crack at all, so it tells us the point. If you have more clay,
it's gonna crack. If you have mussen, it's
not going to crack. If you have more clay,
it's more plastic. If you have mussen,
it's less plastic. Here are the other results
of the same ratios, but with a one part added
of cow manure in each one. And the cow manure adds this waterproof quality
to our mixture. Else we can absorb this cow
manure ratio one to one, but it have less cracks
than without cow manure. This material add like a double
mesh to the cup mixture. So that's why it does have less cracks than the
same ratio here above. With this information,
we will use Cup recipe one to sculpt the
first layer of the relief, and we will prepare Cuff recipe three to add the finishing
layer before painting. In the middle relief lesson, you will see us preparing both recipes and
sculpting the relief.
6. Making Clay Paint: So this is our raw material
that we have collected. And the first step is to
separate the pigment, the clay from the rocks
and the organic materials, the sticks, the roots, all that is embedded and together here compacted in
this block, for example. There are two methods to extract the pigment
from these samples. One is the humid method
when we use water, and the other one
is the dry method. In these cases, this
is a very hard block. It's going to be easier
for us to soak it in water and leave it could be around
a day until you get a mat, like really creamy mode that
we're going to show later, pass it through the mesh, and then we're going to
obtain a paste that is really soft and it contains all the pigment that we are
going to use for the paint. Mm hmm. The second
method is the following. Uh, it's a dry method. But, for example, this
soil is much more soft, we can use the dry method. So first, we have to grind it a bit to make the
particular smaller. And then we go straight and
pass it through the mesh, and then we have our
pigment and dry. We're going to show this
process step by step, so you can see what is the
real difference between these two metals and you can choose depending on what
you have collected, make the process much more enjoyable and less hard
work as we possibly can. Is the hard work, so. Yeah. So let's do it. So here we are using
three basic tools, which is our mortar, you know, on a surface where we can
do this to break the soil. A mesh doesn't have
to be a perfect mesh. It's just this a plastic
one that people use for construction
and just a bucket. This is also a nice activity
to invite friends over. We also need lots of hands to make the process
a bit more fluid, grinding and talking and laughing and just
having a good time. So here, we're
using this mortar. This standard is more rounded, so it helps us do this movement to break
the grounds of soil. But if you don't have it, you can just use these big rocks to help you also crush the soil. We don't have fancy tools. We don't have big
mechanical machines that will help us grind
this material into dust. But we do have our
initiative and our enthusiasm and excitement
to make this happen. So here get us a point of the material like stones which
can go through the mesh. So this one we just take it out. This material we're
not gonna use. So i get our first color, almost done, like pigment, none. Still no paint, but a pigment. So we're very happy
about it. Next color. Here is the same dry method
process in a different color. As you can see, we
didn't need to grind this sample since it
was already very loose. So we passed it directly
through the mesh. This is the before, and this
is the after of this color. So you can see that
we're not getting super, super fine pigment. This is pretty much ready
to be turned into paint. So this is the last
material that we collected, and it's a block of
clay, pretty much. So to help the process of
soaking go much faster, we're gonna break this,
like, not perfectly, of course, but just at
this in certain pieces. So once we have it in
small pieces like this, it doesn't have to be
super, super crushed. We can just add water and let it soap as
long as it needs. So here's the clay that is already breaking up
because of the water, and we don't even
have to do much. If we have enough time to
let it rest and let it sit, it's going to be
much easier to work. The organic matter have very little sticks that
sometimes pass through the mesh. So this process also
allows us to remove the organic matter because it's going to be floating on
the surface like this. We are using the same mesh
to sift the clay mixture. We recommend using
a medium fine mesh like ours so that this
process won't take much time. This is a result of the pigments we obtained using
the width method, along with the other pigments obtained through the dry method. They are all ready to
be turned into paint. And the natural binders we will use Msib and
wheat flour paste. The first step we're
doing here is sifting the cacti that we've been soaking for at this
point, two days. So the viscosity
of the water is, it's really slimy and it's almost very difficult
to sift to this mesh. In this case, we added
a bit more water and mix it to be able to get the liquid to flow
through the mesh. You can leave it just
for like one day, and it's going to be
less less sticky, less viscosity, and
it still work out. After stiffing all the cactus, we get a piscus liquid that is perfect to
use as a binder. So Heba we are in the kitchen. We prepare one ingredient
for our painting. This is flour paste, and it's made just with
water and some flour. It is important to
use wheat flour because wheat has more
elasticity and stickiness. I will work as a
binder for our paint. Just mix it first with water. All the details of this recipe, you're going to be
able to find it in the PDF in the resource section. To prevent lamps, we must
dissolve the wheat flour first in cold water and then add it to a
pot of hot water. Once the flour paste has
thickened like this, it's time to take it out of
the fire and let it cool. So we're about to start
the paintmking process. And in the left here, we have all the pigments, all the colors that
we have sited, either to a mesh in a dry
method or wet method. And here on the right, we have all the binders
that we are going to use in order to create a
paint as a final product. We would like to talk
a little bit each of the binders because
we're not going to create a perfect
unique recipe. For each color, we will make different variations
of the recipe. So it's important to
understand what is the purpose of each one of these
ingredients so here, for example, we have the wheat paste that we prepared before. If one of your pigments doesn't have a high
content of clay, the wheat paste will help
you improve the paint. And here's an Az material. It's not natural, but
synthetic material. It's synthetic glue. This material is like
alternative flour paste, but it's have more like
waterproof qualities. So, for example, if
you want to make your wall outside and if
it's a place you live, it's very rainy, it's
much more humid, you might use this material. And this is the third
ingredient is minced oil, and it helps us add waterproof
qualities to our paint. We need to be very careful with this ingredient because
if we add too much of it, you might end up with
oil spots on the wall. And this material,
which we wrap it for. It's totally natural material. It's more syllable of cactus. I have this quality
waterproof quality, not so strong as a lean
oil or synthetic glue, but it's also a help somehow. And it's also make our painting more flexible and more
adaptable to the wave. So we are going to begin
with the first color, which is this beige. And we know that these and
other pickings that we have here don't have a
high content of clay. So what we are
going to do is add the wheat paste to this mixture in order to improve the
quality of the paint. So we're going to use
this measuring jug. It's very important for us to know the quantity of ish
material, we're going to mix. For this color, we're
mixing two parts of dry bisment and one part
of wheat flour paste. Once the powder has
incorporated well, we add half a part of
silla go to the mixture. Mix a bit more and
finally add water in small batches until we
dissolve in little lumps. We're doing this
process manually, but you're welcome to use an electric concrete mixer
to speed the process. We want to achieve a
creamy consistency, not too thick, but
also not watery. Also, for this color, we added 200 milliliters of
linseed oil to the paint, which was around 3% of the
total litters of paint. Don't forget to download
the clay paint recipes from the PDF instruction manual
in the resources section. Okay, now we have one of our
pigments in a liquid form. So this is the pigment that
we soaked in water and we sifted and still very liquid. So for this color, we know that it contains
a huge amount of clay, so we don't need to add many
different kinds of binders. So the only binder that we're going to add is a white glue. And obviously this is
syn direct material. If you're looking for something
totally like organic, this is not going to
be the option for you. But the advantage of this material is that it
makes much more waterproof, much more than any
natural material. So then you decide which
material you want to use. Mm hmm. And one last recommendation
is not to add a glue directly into the pigment because it will
make lots of lamps. So that's why we recommend
first to dilute it into water. So let's first we
put water. Mm hm. And after we will put the glue, the ratio is half
water, half flue. Now, we will show you the
consistency of this binder. It's not super watery, but it's also not very thick. It's like a very watery
jobart, let's say. When adding any binder, it's best if you do it
progressively to avoid lamps and facilitate
the mixing process. Also, when using synthetic
materials like white glue, you need to be careful on
how the clay will react. Some samples won't require the total amount of binder
that the recipe says. So it's best to stop
when the paint is thick enough and add water to
adjust the final consistency. This color is ready. And we repeated the
same process for the violet pigment using
only white blue vender. Now we have all our
fackets of paint ready for the painting process of
the relief and Mural design.
7. Sculpting Mural Relief: Now this lesson is about
making our relief. The first step is to prepare the cup recipe for
the first layer. We are using one part clay soil, one part sand, and
one part straw. We are preparing a
fair amount of cup as we are creating two
medium sized sculptures. We start by mixing the
sand and clay soil. Then create a hole in the center to add the
first portion of water. We mix the cough with our
feet because it's much more practical and comfortable when working with large
amounts of material. We continue adding water
as needed and keep mixing. Then we add a straw in batches, along with more water. At this point, we need to flip the mixture to ensure all the ingredients
are binding together. Make sure to do this
process on a layer of plastic or another material
that you can fold easily. Continue adding the rest
of the straw and water. Be sure to roll the cove in all directions until
it is homogeneous. This process takes
about 15 minutes until you achieve
this consistency. Our cuve is ready. For our relief sculpture, we decided to make two snakes, one facing up and
another one facing down. Now it is time to have the
layout of your design, print it, and draw
it on the wall. So remember, if your wall is too smooth, you
have to scratch it. Maybe if you have
very rough wall, it's okay if you don't, but we always suggest you to do it. And the next steps
to water the space, where we're going
to stick our cup, and we have to unite together
because watering it, we will open the
pores of the wall. So that's why it's
necessary to do it. So we have our cup
mixture ready. It's like this, and that's
what we get. You see. Mm hmm. So we left the mixture of this cuf resting
for around three days. And this resting time will
allow the clf to nd better. But if you don't have the time, you can still work with the sculpture right
after doing your cup. It's not a requirement. So let's go to the action. We need to make sure that the surface is wet
enough, like this. And then we apply our cuff. So we have to stick strongly. It's not like a really
gentle process. So then strong you
heat, then it's better. You can even throw
it to the boll. But since they have very, like, thin design, we're
not going to do it. But if you have a
big super fice to cover with this, you can do it. And after we have to, like, kind of mold
it with our hands. Defining the borders,
make the shape, we want this part of the
head, we want more volume. So here I'm going
to stick more clay. And remember, this is like the
first layer of the relief. It's not gonna stay
like this, you know? And then we're going to add the details in the second layer. Mm hmm. So I want to tell a little bit
about thickness of the relief. So it should be not
too thick, otherwise, because of the
weight of the clay of the water can just fall down. So in that case, we have
almost like two fingers, two of my fingers. So that's thick enough. I wouldn't put more or if you want to make it
thicker, there are two ways. First, you can put by layers, like you do one layer, leave until it get
dry completely, and then you put another layer. Or if you want to make
really thick stuff, like most sculpture,
you can put some kind of structure behind
like nails, wires. So it's going to help
to sustain this clay. But in that case, if
you want to make, like, a soft relief, you don't
need to put anything. You can just put the
clay and the leave. One tip I have to
smooth the edges of the relief is
to wet your hand. I mean, clean it with
just a bit of water. And then you can
use the water to help you fix certain details, especially on the edges or on the corners of the sculpture. But make sure to not
add too much water. Otherwise, it will
come off of the wall. Once you are happy with the
first layer of your relief, and as you can see the
surface is still very wet, we are going to scrap
the edges and take all the remaining material with the purpose of defining
our sculpture even more. Would you want to do this
while it's still wet? Because when you dry, it's really hard
and really tough, and you can end up
breaking your sculpture if you do apply too much
pressure on your too. So you can use a
spatula like this one. But any other too that has this sharp edge might
help you as well. The first layer is finished. Now that the first layer of
our sculpture is fully dry, it's been approximately
three days. We are ready to
prepare the mixture for the second and final layer. This mixture contains
one part clay, three parts, sand and water. Just to remind you, we
do like clay plaster, we do finishes, it contains
more sands and clay. So it's going to
prevent cracking. It's make the supervise smooth. But this mixture doesn't really work to make the shape to mold. We begin by adding the
clay soil and scent. Mixing them well before
adding any water. As you can see, we only need a small bucket to prepare the second layer mixture because we will apply a very
thin layer just to smooth the surface and
give it a finer look. Instead of water, we're using the silago because
we have a hand. You can of course use only
water to do this mixture. This is the texture
that we want to achieve to create
our second layer, and now we are
ready to apply it. Just remember to
wet the surface of your sculpture before
adding this second layer. Otherwise, it won't
stick together, and it might break down. The process of adding the second layer is more
gentle than the first one. You need to make sure to smooth the surface as much as possible. So first, we cover the relief, and then we can use our
clean hands to smooth it. Sonia is using very thin
latex gloves to do this step. We are done applying the second layer to
our relief sculpture, so we can leave it to dry. Okay, so the second layer
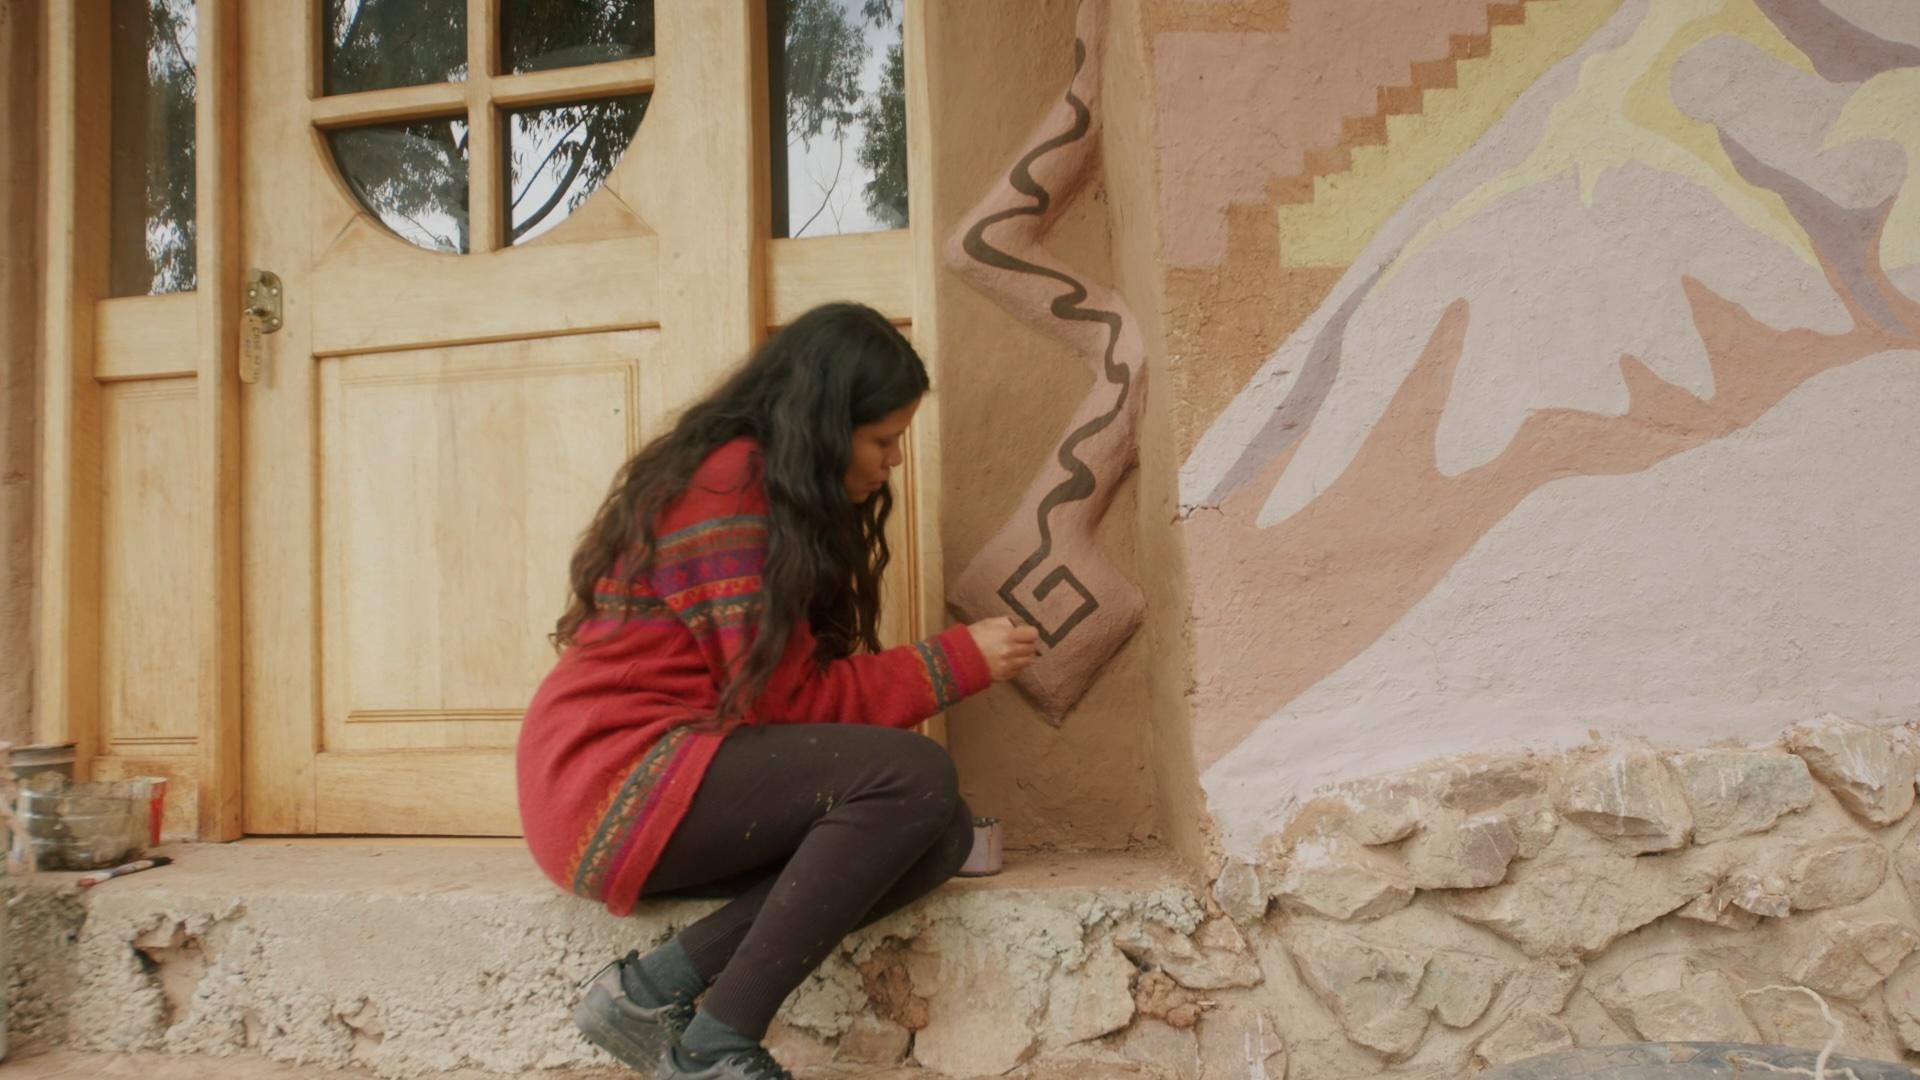
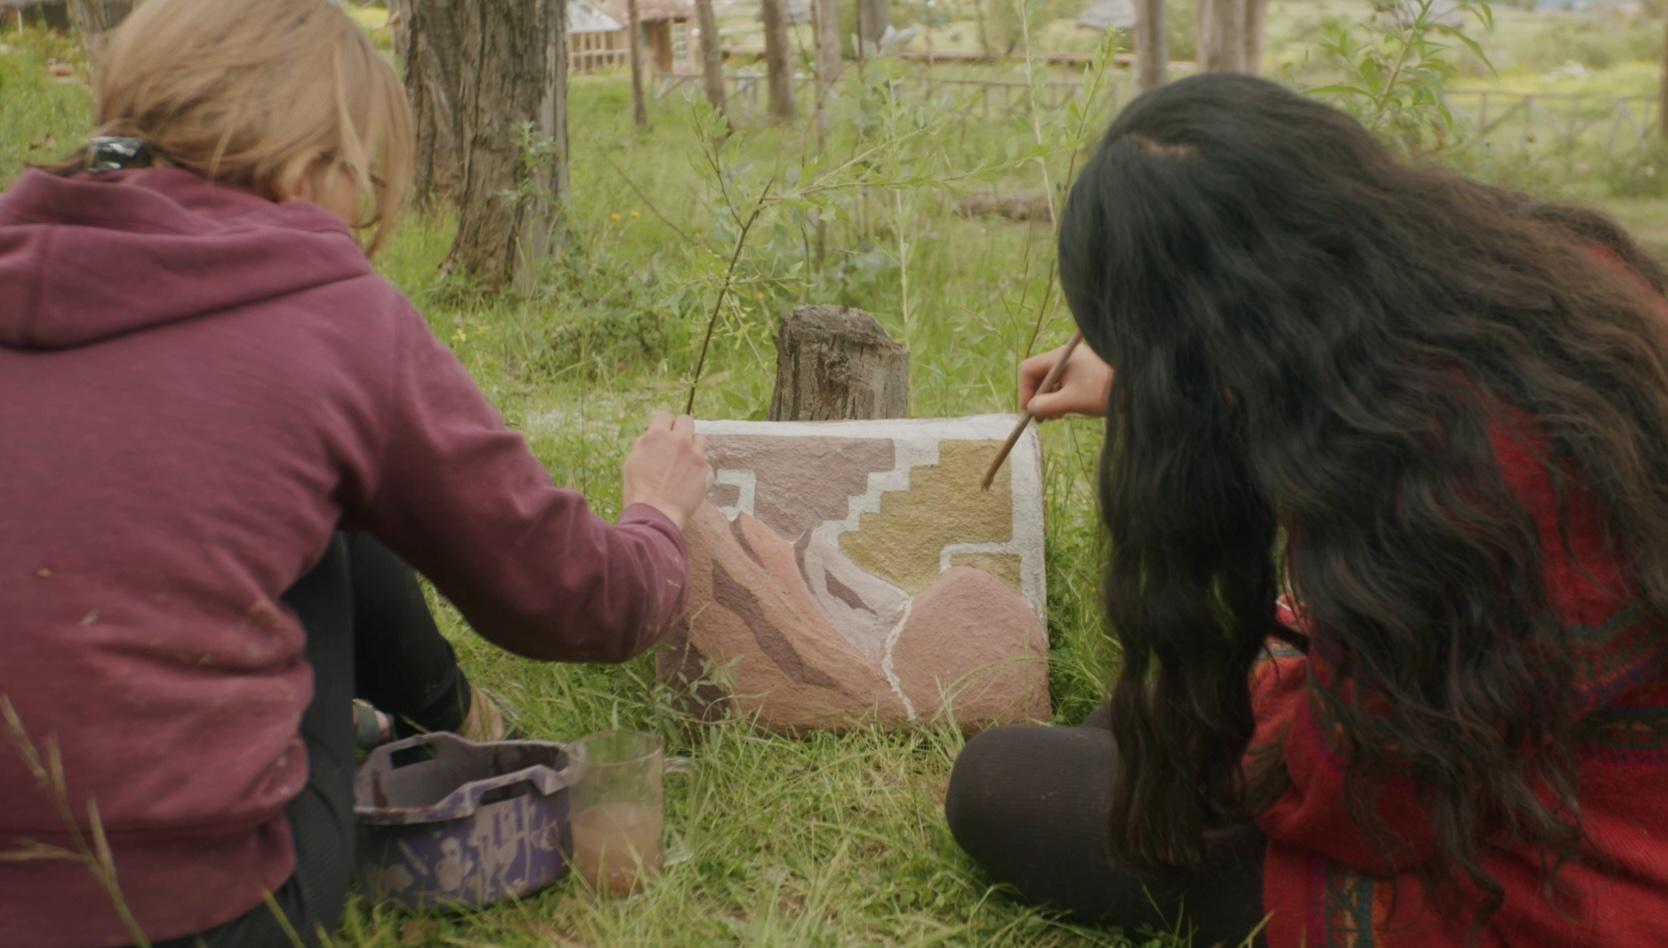
of our sculpture is dry, so now we are ready to paint. But it tended to paint
it with this like purple color to
outline it shape, and so it's gonna also combine
with the rest of A mural. And also, we will paint
background with some brown to make it looks
more clean, more perfect. Depending on your relief, you can use brushes
of different sizes to help paint the details
of your sculpture. You don't need to be too precise when painting the
edges of the relief, as you can cover the
background later. This way, you can enhance the overall finish of your work. Now that we have
finished painting the snakes and allow
some time for drying, we can begin covering
the background. Here we are using
small brushes to define the edges as
neatly as possible. When working on walls, drips and splashes are common, and you can always
cover them at the end. So don't worry too much about
removing them immediately. We're almost done
with the painting. Here uncovering some
splashes from earlier. Now it's time to let it
dry again before adding the final layer of details to our snakes using a
dark brown color. We decided to keep
it very minimal, so we added a wavy line
across the snakes. Finally, we painted a geometric
spiral on their heads. We will show you the final
result in the next lesson, along with the mural paint.
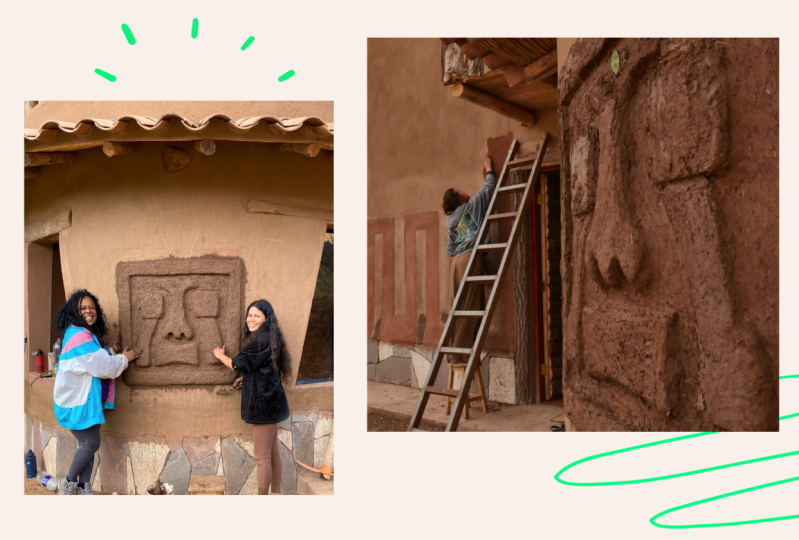
8. Mural Painting: So this is the building
that we have chosen to make the murals around
construction that we call here a maloca because
of the shape that it has. So this is a clay made building, and the surface of
this is also clay. If you want to do clay based paintings or
the cop techniques, it's going to be better
like compatibility. But it doesn't mean that
you can do it another way. So if you have, maybe cement wall or even
like piece of wood, you also can use this painting. But we choose this because
we have it around us. Perhaps one of the
challenges to do this mural is that
we have no margins, you know, we sometimes our
eyes are accustomed to see square or
rectangular shapes. So in this case, we are
kind of playing with this infinite loop
that is this surface. And it's also going to look more organic, you know,
because, like, in nature, you don't see, like the end, you know? It's not like a
square here as well, they're gonna make this
more continued design. In terms of the design, we did several drawing tests until we found the right size for the mountains we wanted to paint and the pattern
we had chosen. Normally, when working
with large murals, projectors are a great tool for transferring any design
directly to the wall. In our case, we didn't
have one available, so we invited a friend to help
with the drawing process. Meanwhile, we created a template
of the pattern we would replicate on the wall and
sketched it around the Malka. We used a construction
leveler to make sure the pattern was perfectly
straight on the wall. We decided to run a few
sample tests on the wall. This where we're going
to have a palette, and we will see which
colors are darker, which is lighter, which can
combine, which make contrast. And it will help us to define Vera at the moment to put
our colors on the wall. When working with
their pigments, it's important to
see the color of the paint after it's dry
because they tend to change. That's why we're making
these little samples. So this is the final result
of our color palette, and it looks amazing. We decided to paint
it on this wall because it has the same color of our working surface
and is helping us decide and identify
the lighter colors, the mid tones, and
the darker tones. We really like this violet, so we decided to use
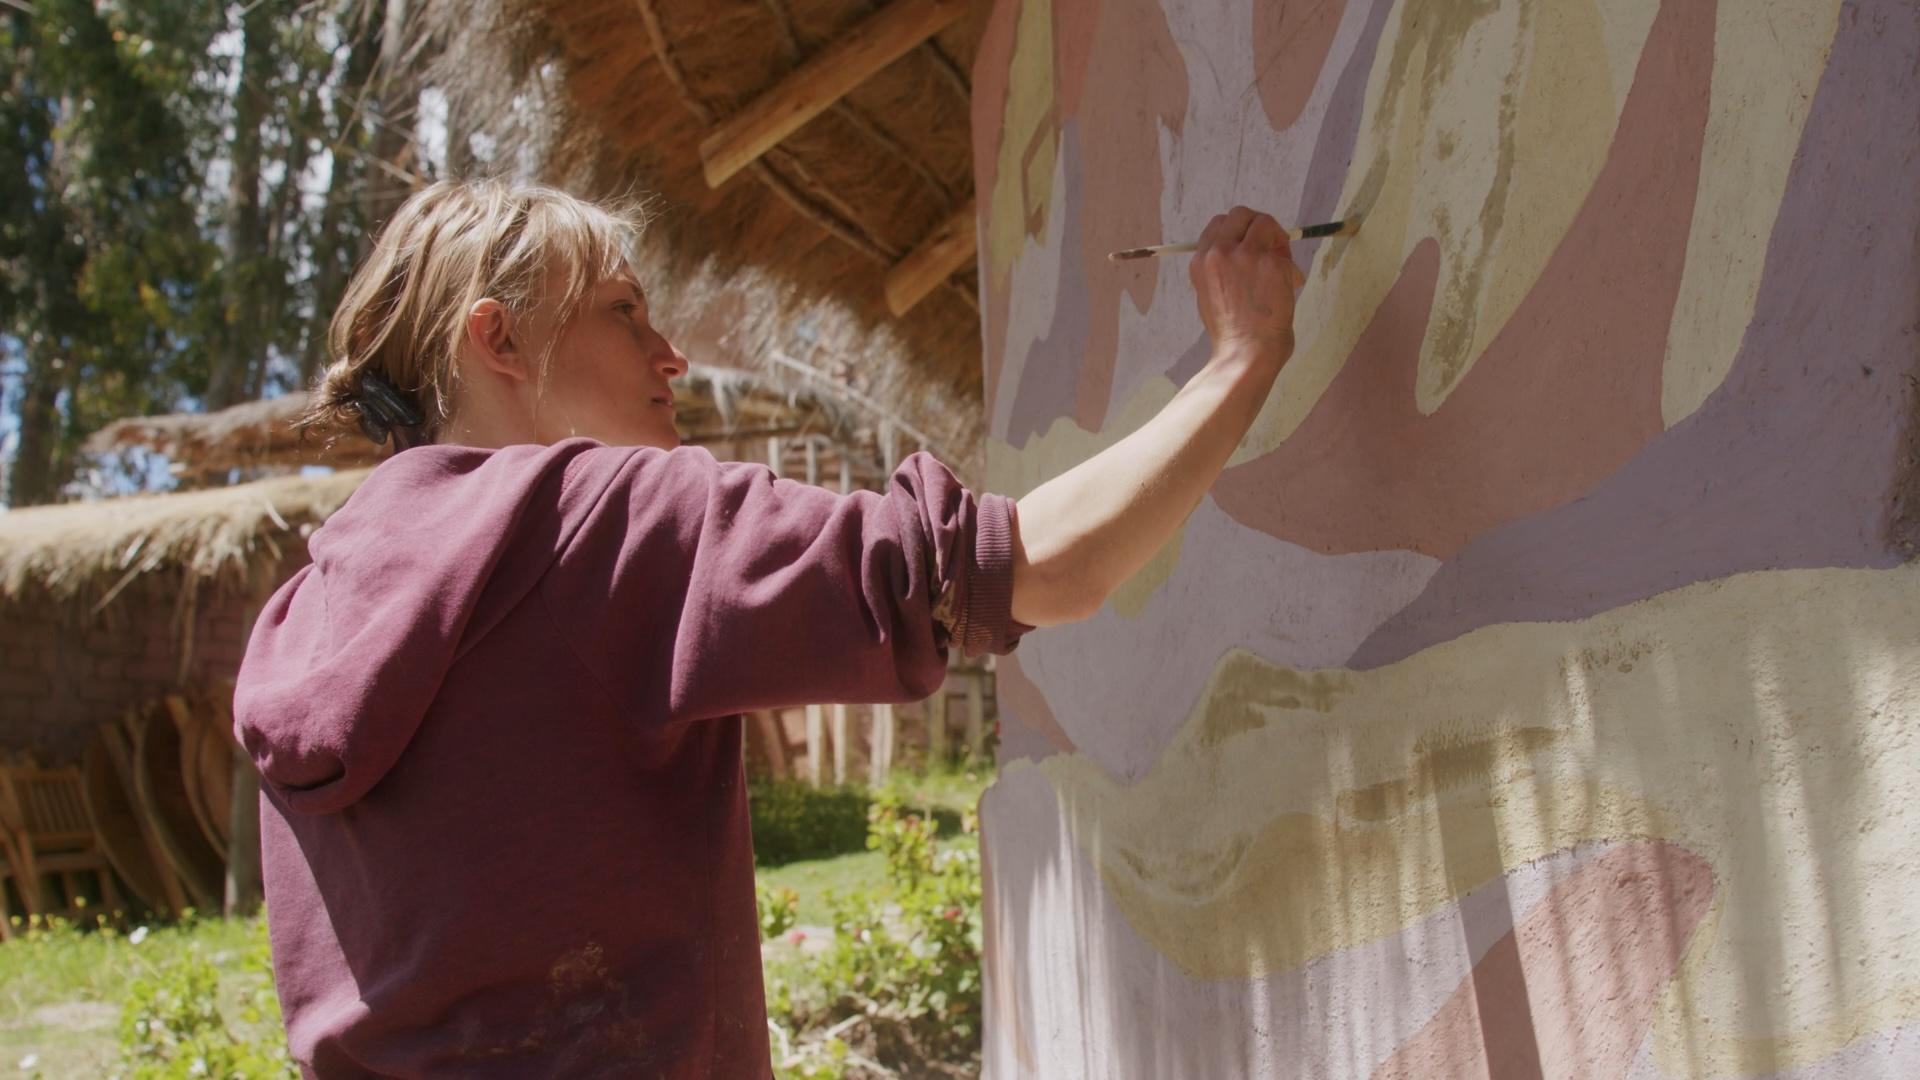
it as a main color. Also, this color here and here, they do complement very well. Now we are ready to begin
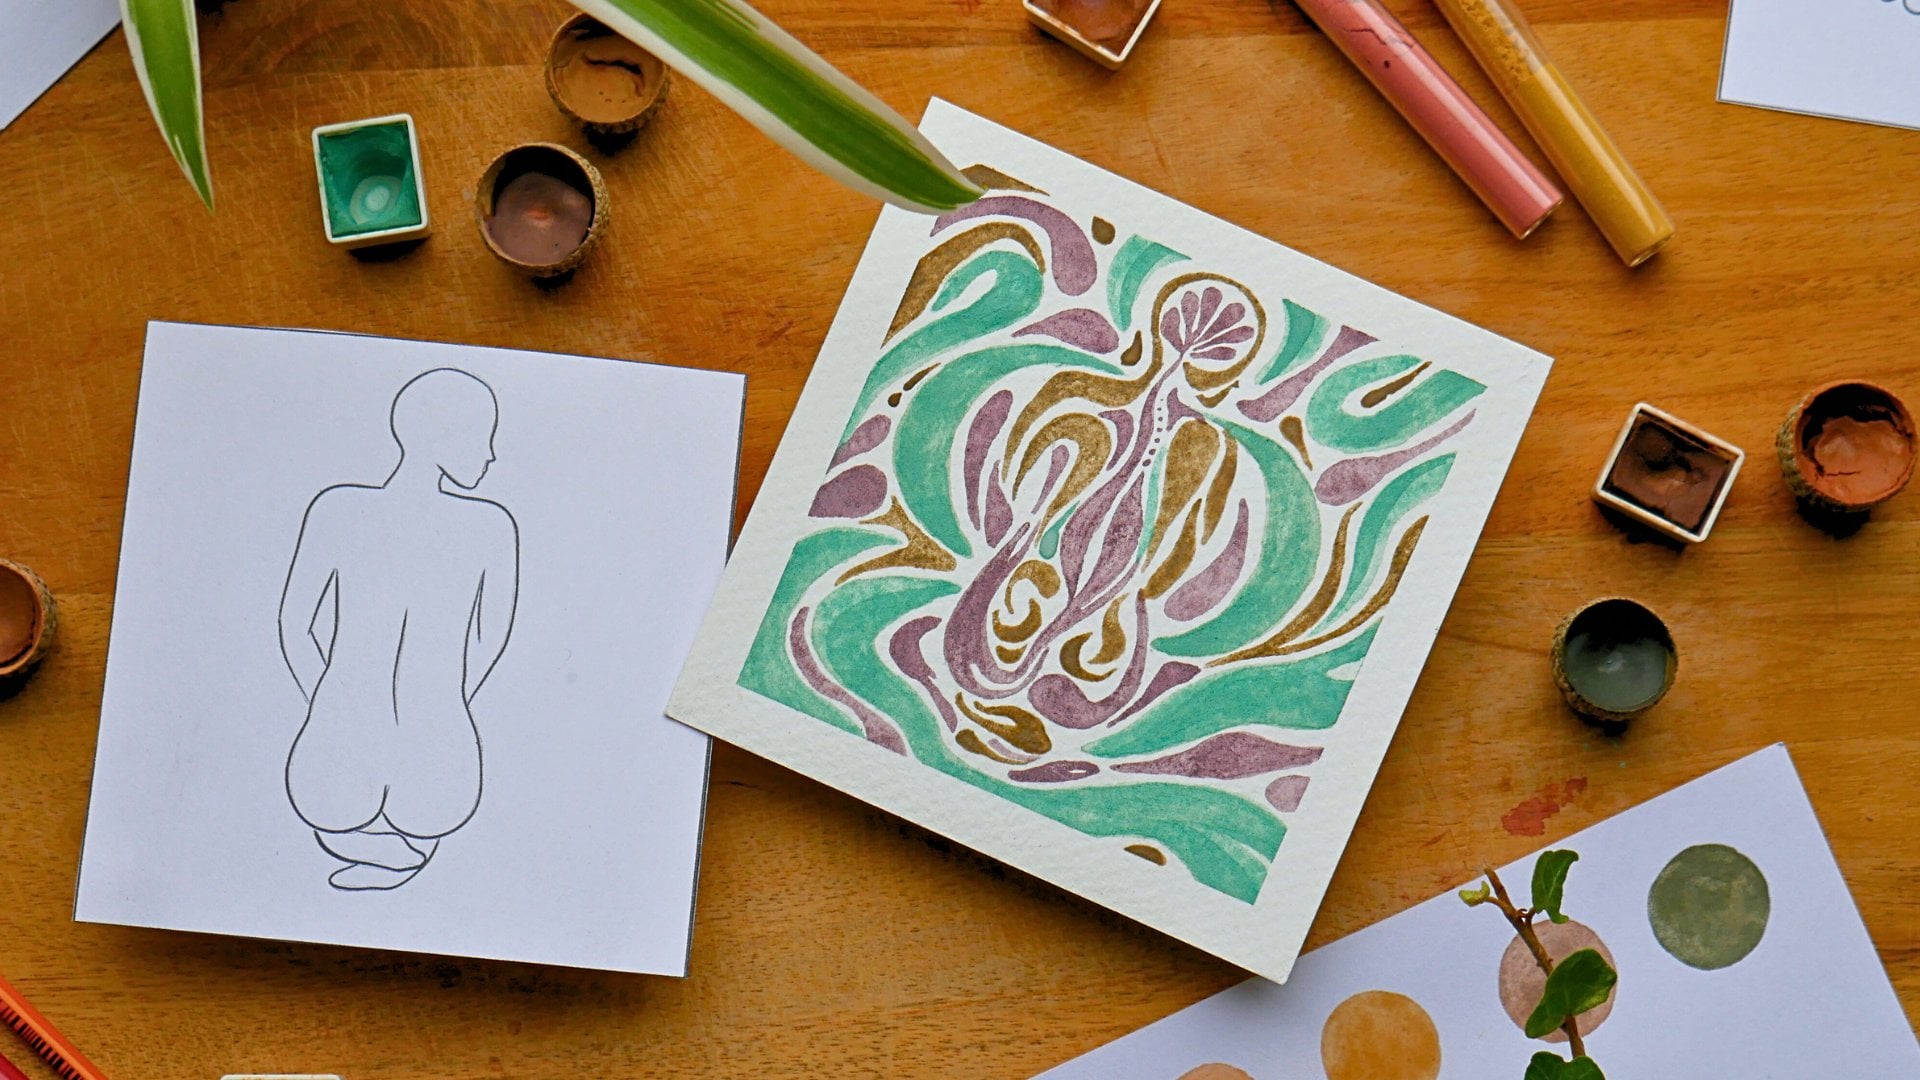
the painting process. So we made our design in
brace of these three colors. We use this one as the
main color, this violet, and this purple is gonna
be like shadow of this, and this yellow
gonna be the light. So here Elsa would like to introduce you Asa
material you might use. It's not essential, but it could be useful and helpful
if I use this egg. In this case, we're going to
use the whole egg mixture, and we going to use
just the white part. And we're going to paint some
samples on the wall so you can see the results
after they're dry. Okay, so this is
the white mixture, and we're going to paint here
on the left of this sample. So we can later see
the difference. And here is a mixture of yolk and white part. So let's see. And we decided to
show you an example on these two colors,
which is different. So here we get our result
of the test with egg, and we only added the
white part of the egg. And in this part, it's both yolk and white
part, the whole egg. So you see only with
the white part, it looks even darker. If you can look closer, it looks even a little
bit more yellow. This tone here, which
is more bright. We see that the difference
is very little. Here is the white, and
this is the whole egg. So we can see here
that this part still is slightly a little
bit more yellowish, but it's not that
much of a difference. Depending on what
you're looking for, for your mural paint, you can do this test for all
the colors that you have, and based on the results, you can choose wisely. So our painting is almost done, and the only details we
are missing here are some contrast and shadows in
certain parts of the colors. So to create a shadow color, we decided to mix as a clay
weh, this is an aza clay. We got it before Asa
patunity which is more dark. It's a mole gray tone. So we're going to create
two different colors to mix and apply contrast
and shadow here and here, and that would be
the end of our work. We run a few tests before
deciding on this color. The purpose is to add some dimensionality and enhance
the depth of the design. Now we are fully
done with our mural, and we want to show you how
it looks like right now. Here is how the snake
end up looking, and we really like the
relief at so much volume and so much movement
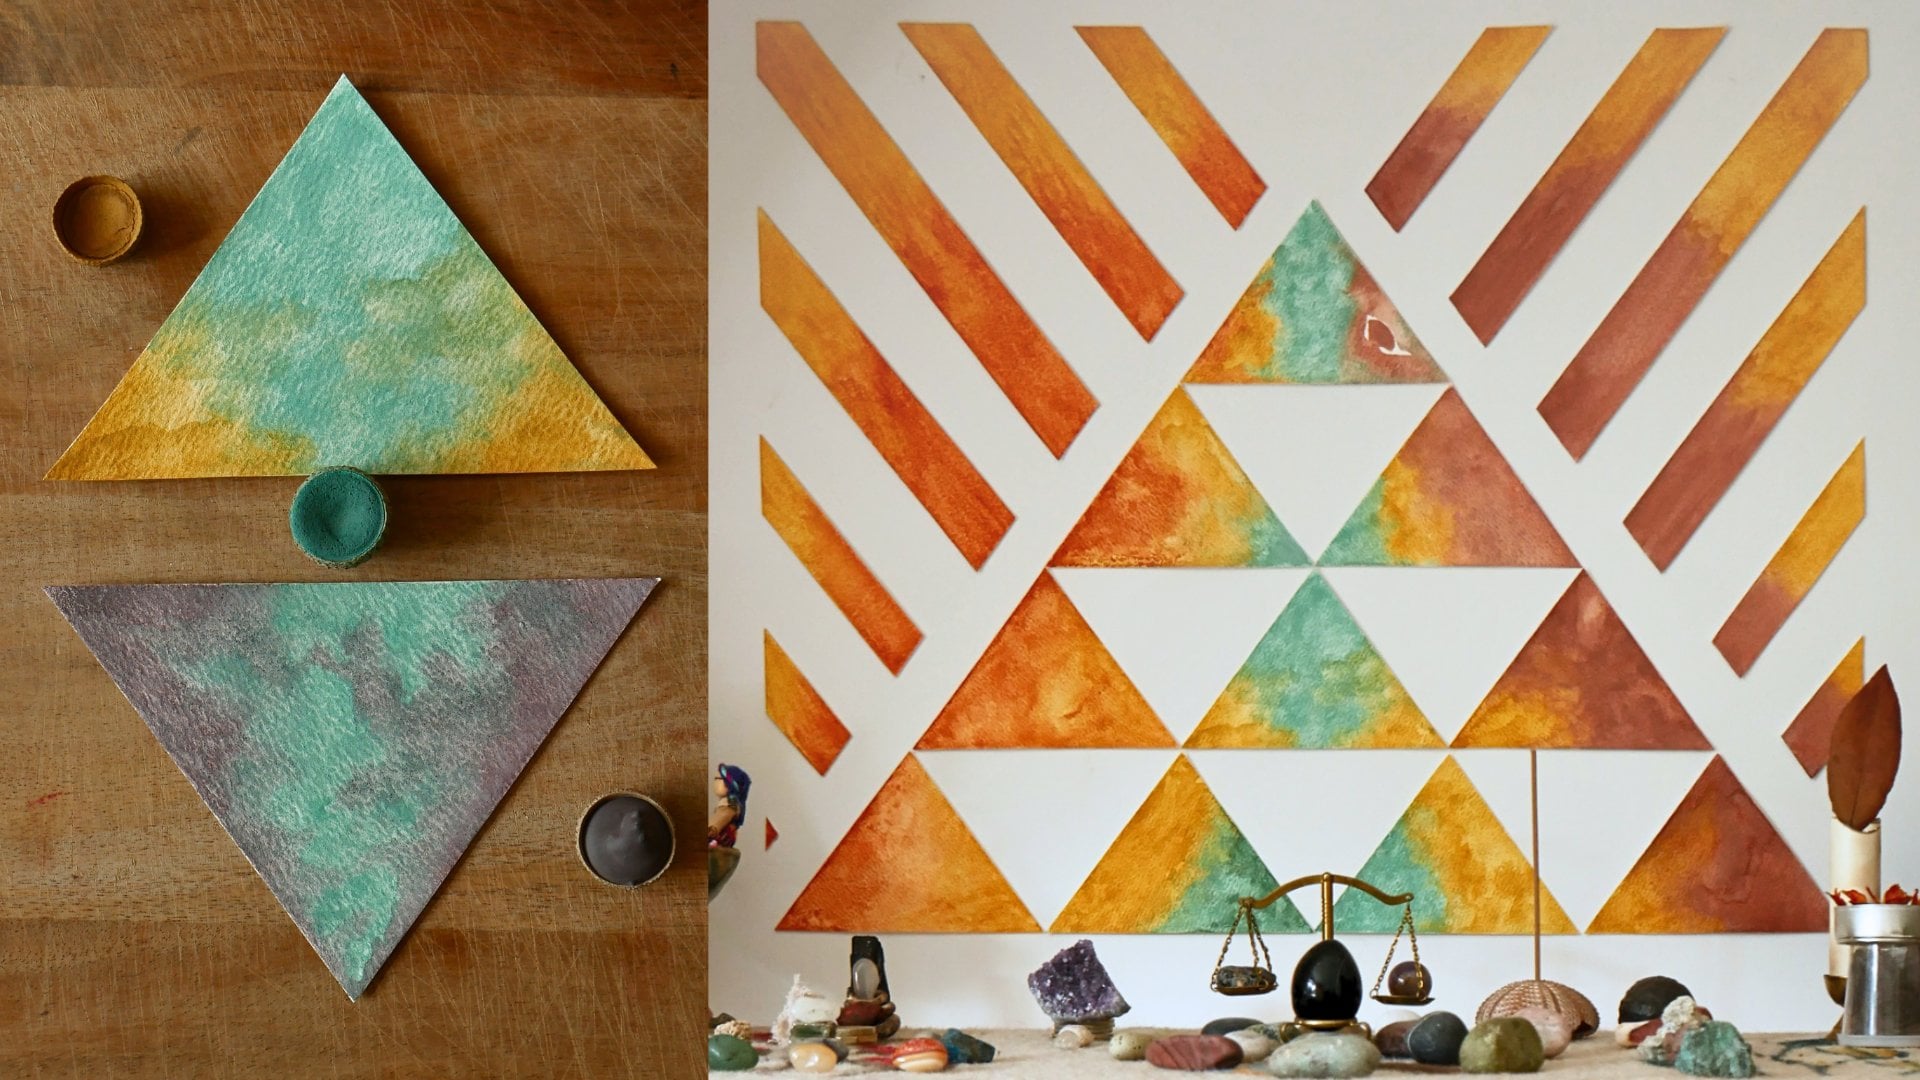
to this element. Since we have this geometric
direction to add also some wavy parts to our design, and we really loved
how this turned out. And also the mural paint. So he did the foot painting and this design was inspired
by the mountain we have behind us all around. And also we have these
Indian patterns. It's like traditional
ancient patterns. You can find in Indian textile. This design combines two
elements water and Earth. And Earth is represented by
this sell like pattern here. And water is sort of like
this spiral over here. So the combination of water
on Earth brings up fertility. And this is also
the purpose of why this pattern was represented in all these ancient cultures. And we love it because we not only kept this
geometric shape here, but we also added the
mountains which are more wavy and more
abstract in a way. We think it's a good
mixture of elements. So geometry and free flow, traditional and modern and
very happy with the results. And we want to show
you a bit more about this other side here. Because we also added some elements with
different colors for the snow and the lakes
and the river as well, because we thought
that the river would add this flowy
essence to the painting. So all about, like,
playing these colors. If you want to make it more
realistic, it's about, like, color you choose for the light, color choose for the shadow. And obviously, you can make
it can get infinite shapes, so it can be more abstract,
even more realistic. So it's up to you. It
depends on your creativity. And look here you
can see after and before our material role
and what we get after this. So it's a proof that nature give us all the infinite
possibilities to create with this. U
9. Your Class Project: Your class project
will be to create a sculptural relief
and mural painting, whether indoors or outdoors. It can be on a small
scale or you can join forces visas in your community
to create a large project. If you don't have
a word available, we will show you how to
create a small clay panel so you can make your
own sculpture from scratch and paint it afterwards. We would love to see the
result of your creativity, so please share a picture of your artwork in the
project section. So we already have our
mixture ready to work. It's a few clay with
hay and some slago. And this one is not
the same mixture we prepare for some leaves, but it's like the mixture
to make a bowl itself. So this is like our canvas. The recipe for the vase of this clay panel is
one part clay soil, half part hay and water. You need to add water
until you obtain a stable and malleable
consistency. You can even play with
different shapes. It doesn't have to be square. It can be rectangular. You can have a rounded edge, perhaps it's up to you, depending on the area that
you want to place it, perhaps in your garden
or in your yard, or even indoors, it's
decorating a cake. Tool. It's important to create some reinforcement
on the corners. The surface of this
base doesn't need to be super smooth because we will add the rest of
the layers later. Now we are done with
this clay base, so we will leave it
to dry in the shade. This is the clay panel
that we did two days ago. So it's not completely dry. You can sit by the color, yeah, but it's already stable. So we can keep working on it. And the time you
leave it for dry, very depends on the
climate you are in. Maybe place you live, it's very humid and even in a week, it's not
going to get dry. Or if you live in some
deserted zone in one day, it could be completely dry. So it's very depends, but since it's stable, we
can keep working on it. We are applying
some water to stick our cup mixture and
start sculpting. We are using the same
cup recipe for reliefs, which is one part clay soil, one part sand, and one
part hay and water. You can mold any
shape that you want. We are creating a relief with mountains of
different sizes. The first layer is done, and it needs to dry completely before we apply the
second and final layer. This is a mixture of
our second layer, and now we're going to apply
it here in our clay panel. The recipe for this mixture
is one part clay soil, three parts sand and water. Before adding this layer, first, we need to
water the surface. Remember that the
second layer is for adding details
to your relief. Since it is a very fine plaster, you can use it to refine shapes and enhance the depth
of your design. If you wish, you're
going to use gloves. This is like normal, like, pharmacy surges gloves. And I like it because it really helps to make it so smoother. Mm hm. Now, here we have almost
done our clay panel, like this mural sample. And now we want to
paint it to give it more like to give it more color. And also, here we used wood
to put our clay on it, uh, and this is
attached to the wood. So if you want to
separate afterwards, you have to put between wood and your clay some
plastic or fabric. So then afterwards,
you can separate it. We're using the same
colors we did in our mural since we want the panel to be like a miniature
version of it. After the first layer
of paint is dry, we are adding some shadows and also the patterns
we used before. So here's a final result
of our clay panel. It's portaable. You
see you can lift it and move it wherever you want. And we're very happy
with the result. It is very simple, so we do encourage you to experiment with it if you don't have entire wall to make your mural paint
and your sculpture.
10. Outro: Thank you for joining our class. We have really enjoyed sharing all this knowledge with you and spreading these
ancestral techniques of creating with the Earth. We want to hear all your
questions and help you with any challenge you might
have during the process. So please write to us in that discussion section
and we will reply shortly. If you would like to know
more about our work, please follow us on Instagram. Also, remember to leave
review for this class, even if you haven't
made your art work yet. Your opinion can
inspire others to take this class and help us
improve our content. We hope you have
fun experimenting with the natural
colors of the Earth, and we can't wait to
see what you create. Thank you very much.
Miss gracious.
 Karelia Blum, Artist | Mindfulness Facilitator