Transcripts
1. Introduction to the Class: Welcome to this course on
cartoon background, the sign. My name is Martin, and I'm so excited to share everything I know about a topic that is
not commonly talked about. Keep bashing backgrounds. Keep bashing involves using pre-made assets to build an illustration
from the ground up. My goal is that by the
end of this course, you are able to keep
batch something of the level of what you're
seeing right now. Even if you're a complete
beginner who can draw. And that's the thing
this course is ideal for complete
beginners want to get started in the
world of illustration and more specifically,
back on the sign. But who feel like the
main barrier is that they can draw there
are two reasons. The first one is
that we are going to draw everything with
a keyboard and mouse. You want neither
inexpensive tablets at all. We're going to use
the fantastic free vector restriction
program, Inkscape. And this type of
program allows us to draw everything use in a normal, everyday keyboard and mouse. I've included a full
mini-course that will teach you not only everything you
need to know to use Inkscape, but also the principles behind vector illustration in general. And the second reason
is that we're going to illustrate by keep
bashing our backgrounds, we're going to use
a fairly beefy list of pre-made assets
that I will provide. We will assemble this background
that you're seeing now. Well, not only know
the fundamentals and cod that you need in a very concise and practical way without you ever having
to grab a pencil. Now, if you could only
use the assets that I provide a venue will
be quite limited, no matter the quantity
or flexibility of them. So I've also included
a few lessons on how to expand and even
create your own asset backs. I want you to learn as much
as possible from this course. If you need any help, please don't hesitate
to contact me through the course page and I'll
respond as quickly as possible. I'm incredibly excited to get started, and I hope you are too. Let's dive in and have some fun.
2. The Method and Some Explanations: In this lesson, I want to explain a bit how the
course is gonna go. I wanted to go over what's
gonna be in the curriculum and what can you expect out of this course and how
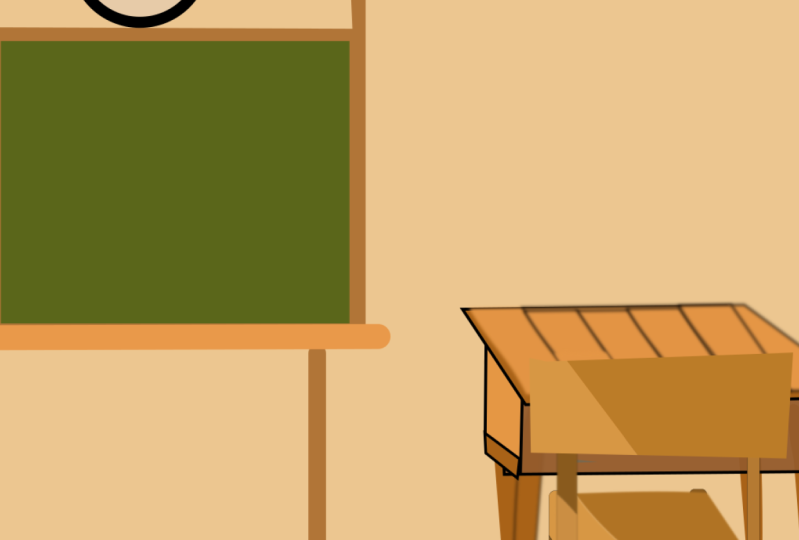
we're going to proceed? So what you're seeing
now is the project that we are going to be
making throughout the course. By the end, you should be able to not only replicate
this a sin, but also make our
tone backgrounds in a similar quality to
what you're seeing now. Now, as I said in the
intro, in this course, we'll be drawing and illustrating using
keywords and mouth. This was made using just a normal everyday
keyboard and mouse. We are program called Inkscape. The program that you're
seeing right now, except is a free open-source vector
illustration software. In case you don't know what
a vector illustration is. I'm going to go more in depth in the Inkscape section
that's coming right up. But it is a type of illustration where you
draw using the mouse. And it's different to
the way a traditional pixel base illustration
software like Photoshop, e.g. works. Because here you
basically are building a drain by modelling it like a
3D modeling application. But obviously into the, that's what allows us to illustrate with the
keyboard and mouse. Working with vectors
is generally used for simpler illustrations that are heavily shaped based like e.g. graphic design or more
relevant to our case. Cartoons. In my opinion, if
you are a beginner interested in getting
into background assign, maybe for animation,
for games or whatever. There is no better way to
get us started that learning the basics through the
use of a vector program. I know it is a bit
unusual to say that, but I do think that working
with keyboard and mouse, it really helps you into
not getting bogged down in. Unnecessary worry
is like if you have a tablet or if you can or mudra, which is not as
important as you think, as you'll see later
on in this course. So in the next section, I'm going to include
a full mini-course I made a while ago on the basic concepts behind both Inkscape m vector
illustration. In general. It lasts about an hour or so, and it's very complete, at least for
illustration purposes. Save costs are a lot
of features regarding graphic design that
we don't care about. So I left them out. I must admit that isn't
exactly the industry standard. I'm sure professional
productions either go for Adobe Illustrator or some of the vector tools
in Photoshop. But the great thing
about ink say is that it is much simpler
and faster to numb. And what's more. Once you learn the methodology
of vector illustration, you're gonna be able to
transfer that knowledge to any other major application
that you want later on. Once that you have a
firm understanding of the problem that
we're going to use. I'm going to show you a very
beginner friendly system. I have to build really beautiful looking
cartoon backgrounds super easily by taking advantage of the tools
in a better software. Here's the key of that system. This is a pack of different generic Catherine
assets that I made for you. With this back and
abit of reactivity, you should be able to
build your background by throwing together
some of these acids. Here you have clouds, bushes, trees,
stones, mountains. Pretty much everything
that you may need for a nature scene. Of course, it is nowhere
near close to be the complete set of assets you
might need for everything, Go type of illustrations. I can possibly make a pack for any possible
type of diagram. But one of my main goals for this course is to get
you to the point. You can modify the items, draw on top of the illustration to
create unique elements. And even create
your own packs from the ground up, like e.g. a. City park or a decile pack. And I'm going to show
you how to do that next. So this is more of
something to get you up and running while you master
the program and the system. Plus, believe me, when I tell
you that you can do a lot, even with much less assets than this most backgrounds you will make and will require only
a few of these add best. Now, here's the thing. There's more to a
beautiful background that just throwing
assets together and see if that results in
something good looking. You need to understand certain
theories and principles to help you come up with the best possible
looking background. You need to be able
to come up with nice-looking color schemes to create interesting focal point. Now how to guide the eye
to important areas of your composition and understand and draw the correct
elimination. You'll notice that
the assets don't have any light or shadow on. You're going to have
to have that yourself. And for that you need some
basic knowledge or friendly. So as we move on
with the course, I want to throw in some
theoretical information as we apply them to practical
background get bashing. Now this eureka topics could take an entire
course on its own. So I can go in depth
into any of them. However, because we are
working with cartoons here, we don't really require
an in-depth knowledge. That's the great
thing about cartoons, where it's just a
bit more leeway for artistic interpretation
on these concepts. So that means that
we can get around by learning and
understanding the theory. But maybe only the
condensed version, the 20% that gives us
the 80% of the results. And with that, you can
actually get pretty far. I wanted this course to be
more practical, more hands-on. I originally envision a very dense and
complicated the curriculum that on a three, either not serve the premise
of the course at all. So in this version,
we are going to appeal to a project that will show you everything you need to know how to use this method, including the theory and
the practical tools. It's really impractical
and a waste of your time for me to
talk and work in real-time for the four to 6 h that the project
takes to complete. But I don't think
that you can benefit the following along
the illustration, along with the theory lessons, demonstrated normally in
ten to 15 minute lessons with fast-forward and
a few timescales. But I've included the entire
real-time version of it. If you want to follow. If you do, I would strongly recommend you to first
watch the lessons, internalize the
theory and the two Senate and maybe testing
them on your own. And only then move to follow
the real-time version. And of course, once you finish the course and
everything has sink, then I recommend you to immediately practice making
your own backgrounds. Following the same process is only by experimental
that you truly learn. I can promise you that by
the end of the course, you'll be able to make backgrounds similar to
what you're seeing now. But you need to put the
work to get results. So follow along,
do the exercises, and get ready to put
on a lot of practice. And this will be especially important for the next section, which will be being saved me, Nicholas talked about except is the base for all
our illustrations. So you have to be quite
comfortable with it. So we can focus on the
more complicated stuff, the main subject of this
course, the backgrounds. In any case, if there is
something I can assure you, is that the entire course
is going to be super fun. So let's get started.
3. Introduction to the Inkscape Mini Course: Hi there, I'm Martin. And in this mini-course, I want to show you the
basics of how to use the amazing free vector
illustration software, Inkscape. My idea is to create a fairly quick and
easy introduction. Not only do this after Inkscape, but also to the wonderful
world of vectorization. You see vector illustration is considerably different
than the original drawing. That is a whole new
set of concepts. You have the lung that and the fact that you
have to learn how to use a fairly complicated
program means that usually Inkscape courses tend to be really long and dense. Sometimes you don't want
to learn my whole program to take a more exciting
course that uses it. And that's what this
course is all about. To get you up and running with the basics of not only Inkscape, but also the principles
behind vectorization. Of course, if you want a more in-depth view
of the program, I encourage you to check out
my other course on Inkscape. Or if you prefer, I've left
you in the file resources, a list with some of the
best free resources to learn all about Inkscape. The links ranged from full hour long YouTube video tutorials to 20 min up and running
Britain articles. So with that out of the
way, go to inkscape.org, download the latest version and salad NICU in the next lesson.
4. User Interface: In this lesson, I want
you to get familiar with the user interface. This way. By the end of the
lesson, at least, you'll have some general idea of what each of these
bars and buttons to, or at least how
they are organized. Because I know all
these tiny buttons altogether can get to
be pretty confusing, especially if
you've never worked in a vector software before. But the first step is
getting the program. Inkscape is a free
open-source software, which means that you
can download for free the latest version in the
official page and save that. One style. Does it go to the section
that says downloads? Then you'll see a list of
multiple download options. Just pick the one that
fits your predator system, then download it and install it. Once we opened the program
for the first time, this is what you're
going to see. This is the default
user interface. So what I'm gonna do
now is going to be going one by one
and give you a we can loose idea of what each
of these UI elements do. Later on as we move
on with the goddess, I'll go more in-depth into the
relevant bars and buttons. The first array element you're gonna notice
is going to be this big white area with this black
rectangle in the middle. This is the drawing area. This is what you'll be
making your illustrations. This area is way bigger
than it looks in, extends infinitely
in all directions. So you have a lot of space
to draw whatever you want. As far as the black rectangle, this is a guy the
brand creates by default in all new documents. So it's going to appear in
every new document you create. This guy is here because instead is a vector
illustration software. And these types of programs are mostly used for graphic design. This guide is made for
the creation of PDFs, dad's brochures and
that kind of stuff. Where it's helpful to have
a clearly defined border. But for what we'll be
using it, digital drawing, you can safely ignore it and draw whatever you
want in the white area. This highlighted bile, it's
called the common sweater. And it has a lot of shortcuts to the most common actions
of the program, like open and save files, copy, paste, new document,
and that type of stuff. This vertical bar, it's
called the snack bar. And it has a lot of options
related to snap in. So you can position
shapes with more accuracy depending on the type
of drawing you may want it enabled or not. And you can toggle snapping on and off with the first button. I recommend you that for now, disable snapping altogether, at least while you're
still learning. Because it can bother
you later on when you start to move shapes around, the shapes that snap into
every cent accidentally. So I recommend you to disable it now to avoid future problems. This element right here
with a lot of tiny squares, it's called the palette. If you have a selected object, you can give it a color by clicking on any of
these swatches. If you use the scroll bars, you'll see that you
have a ton of colors to pick out the ballot
is the status. Well, this bottom shows a few important options
regarding the document. Likes selected colors
soon, current layer. And it even shows you some really nice deeps and shortcuts as you go
using the tools. The ruler is this element that stuck to the left and upper
side is the drawing area. This element marks
the position of the pointer with a
ruler and numbers. This ruler can get to
be useful if you are working in something related
to the graphic design area. For illustration, it's
pretty much useless, as well as the scroll bars, they are completely useless. They allow you to
pan the document. But as we'll see in a minute, the best way to move around in the document is by
using shortcuts. Finally, the two most
important elements in the user interface other
than the drawing area. The total box, which
is this vertical bar that has all the tools you'll
be using to draw anything. Later on we'll be seeing the most important
tools so you'll get pretty familiar with it and then use it to
control as well, which has the options of the
currently selected tool. So they kind of work
together with the toolbox. Sadly, enslaved
doesn't offer much as far as UI customization goes. Or the elements are basically
stuck where they are. So you'll have to
get used to it, like it or not. However, you do have
the option of Haydn, each of these
elements we just saw, if you go to View
and then Show Hide. See this list with the names of all the elements by
next to the name. That is this checkmark which shows which ones are activated. Just to show you, I'm going to hide them all so you can see how the interface looks
without an element. Now all the elements
have been hidden. All but the drawing area. Is pointless to hide. And of course, the main menu. If you have space
problems due to the low resolution
of your screen. Or if we want this slightly
bigger drawing area. Or maybe if you're going
for a more minimalistic UI. There are a few elements that
I consider to be safe to hire for almost all
drawing projects. The commons, while the
one with the shortcuts to the basic actions,
that's safe to hide. Worst-case scenario, you'd
had to make a couple of extra clicks to open the main menu without
those shortcuts. It does so safe
to hide the ruler and the scroll bars legacy, those elements are not the most useful for drawing
and illustration. And if you want, you're going
to suffer the status well, the sum of the deeps and
circuits that shows when you get done can be
helpful for a beginner. There's one less
customization option. This allows you to
switch the position of the command bar
and the snack bar. If you go to the View menu, then here you see
these three options, default, custom, and while. That default option
leaves the comments about on top and the snap,
but on the right, particularly the
custom option leaves both bar on top and the white option both
on the right vertically. It's not much, but it can help you in case
you're working in a low resolution screen and you don't want
to hide anything. The rest of the options of the program handled by using
docker will dialogues. In Enscape Dakota, Dylos
are floating windows that you can open and close and
can be docked to the right. And they have comments
and options related to a particular area that
are at dawn of dialogues. Pretty much every big
important area of the program has that
dedicated dialogue. Branching from the,
branching from color selection to
document the options. We'll go more in-depth into particular the ILOs
as we move along. But for now I want to show
you how the UI works. So I'm just going to
open a random dialogue by going to the top menu. You can see when a menu
will open up a dialogue, when it has these
three dots at the end. So I'm going to open
the objects dialog. This dialogue
contains information about the individual
objects in the document. By default, the first
time you open a dialogue, it'll be dark to the right
of the main windows. Remember that all the dialogues
are floating dialogues. So if you click on the
title, you can drag it off. You can live with
float in there. Then if you want, you
can dock it right back by moving into
the right side. Keep in mind that you can only dog Dylos to the right side. You can not dug
them anywhere else. If you open more
than one dialogue, then start to stack
into columns, one on top of another. That has no more vertical space. When you stack
multiple dialogues, the body of the dialogue
will automatically, this little bar with the
dialogue with data will appear. If you click on it,
the dialogue will swap with the one
that's showing. If you don't need a
dialogue anymore, you can close it with the
X button in the title. Close dialogs will retain the options that
you may have set. You can also click on this
little arrow in the title and convert it into a vowel on
the right, that's vertical. This will help you to
save space and keep the dialogue they're
ready to be opened again. Now if we wanted to show it, just click on the icon. We find in this lesson, I want to show you how to use the shortcuts to move
in the document. When you're drawing,
you are going to have to constantly move from one side to another as you
go building your drawings. So it's very important
to learn the shortcuts. So moving in the document
becomes second nature. Lucky for us. We only need
to know two circuits. They are really easy to learn. To pan the camera. Just hold the middle
mouse button and move it. You're going to see
how the guy that rectangle move side-to-side
as the camera moves. If you have an actual
drawing in the document, you will see it moving as the view of the
document changes. If you don't have a
middle mouse button, you can also use the space bar. The other type of camera
movement is the song. The song is extremely important. Remember that we are
working with vectors, which means that you, the resolution independent
shapes as you draw, you will be constantly
wondering too soon to work in a particular
area, to add detail. Assuming it's really easy, just hold control and move
the mouse wheel up or down. Depending on if you
want to zoom in or out. It really nice detail is
that when you are assuming in your Zoom to the
position of the pointer, if you want to go to
a particular area, just move the pointer
there and zoom in. If you don't have a
mouse with wheel, you can zoom in and out with
the plus and minus keys. Though this way you only assume to the center
of the document. And that's it for the
user interface of insane. Hopefully the program won't
look as intimidating. Now. Of course, as we move along, we'll be needing to learn how to actually use some
of these options. But by then, hopefully you'll be ready to learn model
of the program. In the next lesson, I'll
be showing you every sound related to the creation
and handling of objects.
5. Objects: Before we begin with the tools
you'll be using to draw. First, you have to
understand the way to build your drawings
using Inkscape. As you may know, in CEP is a vector illustration software. And vector illustration
is considerably different than
traditional drawing. In traditional
drawing, using either pen and paper or
a drawing tablet. You draw using lines that outline the shapes you
want your drawing to have. This way is by far the
most flexible way to draw. You can make a square or cube or figure with the same
level of effort. On the other hand, when you draw with a
backdoor software, you build your own shapes. And then you just stack
them one on top of another until you build
your final illustration. This workflow is meant to
be used to create what vector softer were originally
made to do graphic design, where most of the
illustrations are made of flat and simple
geometrical shapes. And this way of working strongly influences the type of
drawing you'll be making. Flat and graphical, cartoony drawings with simple
forms and silhouettes are way easier to make with
the tools the program has than complex, expressive,
three-dimensional ones. However, the benefit
of working in a vector software has more to do with convenience than
artistic potential, is way easier, faster and
effective to use the mouse directly on the program to draw a simple,
cartoony character. Now I'm drawing it on
pen and paper and then scan and refine
the image to them. Draw on top from the beginning. Maybe with an example, things will be clearer. What you're seeing right now is a tree that I drew
for a course of mine on background
design using Inkscape, which by the way,
you can get here on Udemy on my profile. This tree is built off
for different shapes. First is the trunk, which is simply an
elongated triangle. Then the branches which are
also elongated triangles, then the leaves, which are triangles that I call
the edges a bit. And then the shadow, which is a slightly
more complex shape. As you can see, the tree
consists of geometrical shapes, scale, skew and modify it. But 100 per cent simple
geometrical shapes stacked one on top of another. The great thing about
working like this is that it is extremely easy
to create variations. E.g. this is the end result of the project of the
background design course. All these trees that are in there are copies of the original that I just changed
the color them modify the position
of some other funds. And the basalt is
that a large part of these words were made with
a single tree in minutes. The real way to draw this way, you need two things. First, a way to create
your own shapes. In the case of the trees, the different triangles and
the shape of the shadow. And second, obviously a way
to manipulate those shapes, to move them, rotate them, duplicate them, and stack them. E.g. in the case of the three, I just drew a single shape for the leaves and the other
ones were duplicated, moved, and scales into position. In this lesson, you're going to learn how to do the second, how to manipulate objects. But in order to
manipulate objects, first, you need to be
able to create objects. Luckily, in FAPE comes with four geometric shape tools that allows you to create
objects fast and easy. They add the rectangle tool, the ellipse tool, the Star
Tool, and the spiral tool. As a side note, there are also the tools that allows you to create your own custom shapes. But they add a bit more complex and we're gonna be
seeing them later. So click in any of
them in the toolbox. And you're gonna see that
the pointer changes. Now it has the shape of
the tools that you picked. In my case, it has the
shape of the rectangle. Now you can draw your shape. Simply click and
drag. Once around. You are going to see these data, the murky with this tiny
shapes in the borders. This means that the
shape is selected. This tiny shapes in the
borders are the modifiers. And they allow you to make some basic modifications
depending on the shape. In the case of the rectangle, if you click on the squares, you'll be able to change
the width and length. And if you click on
the little circle, you'll be able to
round off the edges. Both operations are very common and you're going to
be using them all the time. Each shape tool has
different basic operations. I recommend you to
play around with each tool and see
what each does. You will be surprised
to know how useful and flexible can be a simple
rectangle, an ellipse. Doesn't pay attention to the
huge amount of objects that have rectangular or
elliptical shapes. Then you start using
these tools to draw. The first two tools, the
rectangle, an ellipse tool. You're going to be using them in 99% of all the drawings
you'll be making. Because as we'll be seeing
in the next lesson, they are very easy to modify and easy to use to
create different shapes, as well as the other two, the polygon and the spiral. Usually you'll be using them whenever you need a
style or a spiral. So they have a limited use. Now that you know how
to create objects, we can take a look at the
main tool for handling them, the objects selection tool. This tool is one of
the most important in the entire program and you'll
be using it constantly. It allows you to do pretty much everything you may
want with objects. You can select them
and place them, move, rotate, scale, duplicate. In a lot of other
essential operations that you'll be using
in all illustrations. Let's just start
with the most basic. Select the tool and click in
any object in the Canvas. If you don't have any object, a few with the shape tools. Once you click on one, you will see this
dotted rectangle with these arrows
and the coordinates. This means that the
object is selected. There are operations that
are only possible to make when you have
a object selector. To unselect an object, just click outside in any
empty area of the canvas. It is also possible to
select multiple objects. This is really useful to
apply an operation to multiple objects at the
same time to the list, just click on an
empty area and drag. You're going to see
this rectangle. All objects that
are fully covered by this rectangle
will be selected. Alternatively, you can
hold the Shift key and click on new objects
to add to the selection. The move an object,
click and drag. It's not necessary that the object is
selected beforehand. You can just click on
an object and move. It is also possible to move multiple objects
at the same time. To do this, first, select the object
you want to move, and then click on any
of them and drag. The objects are
going to maintain the relative distance
between them. One of the most common
operations there'll be doing is to delete objects. Delete an object first selected, and then hit the Delete key. It's very common
that you'll want to duplicate an object
or group of objects. It's really easy. First select the object or
objects and then hit control D. An exact copy of the selected object
is going to be created on top of the old one. And it's going to be
automatically selected. So it looks like
nothing happened. But if you move this object, you'll see that the
other one is down there. The little arrows
that appears when you select an object are
really important. They allow you to scale an object in the
direction of the arrow. That is to stretch or shrink in the direction of
the selected arrow. Simply click on any of the
arrows and move the mouse. If you click on a
selected object without moving the mouse
for a second time, you see a different
group of arrows. The arrows in the corners, we're gonna be able to rotate the object no matter
which one you pick. The rotation pivot will
always be in the center. The arrows in the
middle, the one that points to both sides, allows you to skew the object
from the center as well. And this was the
basic operations you need to know about the
object selection tool. But there's one more
essential operation to manipulate objects
that you need to know. But it isn't the two contrasts. Well, if you remember
from the previous lesson, or tools have a group of options that are displayed in
this bar right here. Even the shape tools
that we saw a minute ago had options in this battle. Though not the only one
that was worth to mention. The object selection
tool has a couple of important options
worth checking out. And just like everything
I'm showing you here, are recommended to
stop the video and get to play and see
what you can discover. If you let the pointer
on any of these options, a tooltip will
appear telling you more or less what each does. However, the ones that
we'll be seeing now, these four buttons over here that are grouped by
these separators. These four buttons
allows you to change the stacking order of
a selected objects. Let me explain you. As I said a minute ago, when you draw using
vectors u dot creating shapes and then stacking
them one on top of another. Each created the object has
a stacking order number. Which identifies which
object is on top of which. By default in CEP places the last created object
on deposit stack. But as you may have guessed, I mentally you need to
change the order of a couple of objects, e.g. in the case of the tree I
showed you in the beginning, the trunk is on top of the leaves and the branches
on top of the trunk. And the shadow is on
top of everything. But didn't originally
made it like this. To me, it was easier
to draw the trunk first and then draw the
leaves accordingly. When I draw the leaves in save obviously put them
on top of the trunk. I had to move them below
by using these buttons. First and last button of
the group allows you to move the object to the
bottom or top of stack. Very useful if you
have a lot of objects. And the two in the middle
allows you to move a position up or
down in the stack. These four button lets you
draw without the need to keep in mind the order in
which you're dry shapes. Practically every
illustration you'll ever do will need you to arrange the stack position of
a couple of objects. Now I want to show you a few really important
and useful shortcuts to use with the object
selection tool. Now, I won't be going over all the shortcuts
because they add a lot. If you are interested, you should check the manual. But I am going to show you the essential ones that
you'll be using all the time. It's possible to move
the selected objects with the arrow keys
in the keyboard. This will move the
object just abit. This is great to make
some minor adjustments to the position of objects. However, if you need, by holding Shift, the object will move
a greater quantity. It's very common that
you may want to select an object that's obscured almost completely
way or another. You can select an object
directly below it, selected one by holding the Alt key and clicking
where it should be. Even better. Move the mouse to be on top of this text objects. Hold the Alt and use the mouse wheel to highlight
the object you want. This one's are really important to the
creation of shapes. You can make the scaling
of an object uniform. This is useful for maintaining the proportions when scaling, just hold the Control key and a scale using
any of the arrows. If on the other hand, you are rotating or rescuing an object with the
other group of arrows. Holding Control will snap the transformation
to a fixed angle. This is most useful
with the rotation, since it will snap to
common angles like 45 degrees or 90 degrees or so. Then if the Shift key, when scaling this will automatically change
the scaling pivot to the center rather than the opposite side of
the selected level. If you listen, shift
to rotate or scale, where the pivot point is
already in the center, then it will move it to the opposite side
rather than the center. The Shift key can embed the period composition from
center to Cornell and back. Of course, you can also use both Control and Shift together. A very important detail is that both the Control and
Shift shortcuts work at the moment of dragging
to create a built-in shape. So you can easily drag it perfect circle with
the ellipse tool. If you hold Control or drug or rectangles
from the center, if you hold Shift or create perfect squares
from the center, if you hold both
at the same time. Before and in this lesson, I want to talk
very briefly about a very important subject
related to objects. And that is color selection. Because color works slightly differently in a vector
softer replication. And it may require a
quick explanation. In Inkscape, all
shaped objects with no exception have
these two properties, a field and a border that
surrounds that feel. To these two properties, you can assign them color, gradient, patterns, textures, and you can
even make them invisible. But some of these options are
a bit more advanced so far. Now, let me show you how to give your objects fill and
stroke any color. In order to do that,
you're gonna be using the palette element
is releasing. First you select your object, and then you click on
any of this lectures. This is going to assign the
color to the object's field. There are a lot of juice. If you move the scroll
bars to see that you have hundreds of
possible colors. Pretty much every color
you may ever made. It's also possible
to assign any of these colors to the stroke
instead of the field. Just hold shift and
click on any swatch. But there's one of
these swatches that has this weird symbol. The first one, the white
one with this red X. This swatch has a
unique function. By assigning this swatch to either the fill or
stroke of an object, you will make it invisible. As I said a moment ago, all objects with no exception
have fill and stroke. So it's not possible
to erase either, but it is possible to
disable them temporarily. And that's what
this swatch does. At least deal, you select another color and
the fill or stroke goes back to the visible.
With the substance. You have a lot of control over
the appearance of a shape. But the pilot is more useful
to quickly change colors. For a complete control over
the way the shape looks. You're going to have to use
the fill and stroke download. This dialogue not
only allows you to pick between all
possible colors, instead of the p, select
the swatches of the palate. But also allows you to
change the stroke size, opacity, and other appearance
related properties. To open the dialogue, go to
object, Fill and Stroke. The first thing you'll notice
is that this Taylor has three tabs to change the fill color and other
identical for the stroke color. And a last one for the
properties of the stroke. The first two tabs have
exactly the same options, but depending on
which one you use, the color will be set
to either the fill or stroke of the
selected objects. Let's take a look
at the options. So select an object and
click on the first tab. We're going to start
by changing the field. The first thing
you'll notice are these ten little buttons. This will set the
type of painting that's gonna be applied
to the fill or stroke. Don't worry, in real life you'll only be using
the first two. You can safely ignore
the other eight. The first button with the x is just like different
swatches palette. By selecting it, you
disable the fill or stroke. Depending on the WOR. The button right next to
it applies it a color. A bit like if you
were to click in any of the other
swatches palette. But the difference is that
now you can see a group of options to pick the
exact color you want. These five protons
here will change the mold with which
you select a color. But I'm telling you right away, 99% of the time you'll
be using the one that says wheel or the
one that says HSL. You can forget about
the others completely. For now, pick colors
using the wheel mode. This color selection mode will display all possible colors, like the classic color
wheel with a hue on the outside and the saturation and lightness on
the inner triangle. The last tab, the one
that says stroke style, allows you to change
the size of the border, and a few other options. Again, there are a
lot of options here, but the only one we
care is the first one, the one with a label
that says width. Here you can set the
stroke width you want with an input right
next to the input. That is this drop-down menu with different units with which
you can pick the width. Picking the right
unit is important. I recommend you to
always pick the one that says bx, that is pixels. I believe that is the most comfortable and
unpredictable unit to do any purely digital work. There are a couple
of sliders that are independent of the W pick. One that says blur, another one that says opacity. The one that says blur will apply a blur to the
selected objects. You're not going to be
using this option to match, except for a specific cases. The slider that says opacity
is a bit more important. It allows you to apply
transparency to the entire object. With this dialogue,
you're gonna be able to give any possible
look to your shapes. Steal the pilot has
its place though. Usually you'll be using
the palette to make super quick changes and the freelance stroke dialogue to do more deliberate changes. And also to change
the stroke width, which can be done
with the bullet. And that also you need to
know about objects from now. What you've learned in this
lesson is the base for everything that will come later with the
knowledge you have now, you can try to make some
basic illustrations. Of course, you still
need to learn about the other half of vectorization, how to create your
own custom shapes. So for now you'll be a bit
limited of what you can do. But practice is essential. So I'm going to leave you in the resources and except
document with exercises designed to help you to completely mastered
everything you've learned in this lesson. I strongly recommend you to at least check this file before
starting the next lesson.
6. Paths: As I said in the
previous lesson, knowing how to create
and manipulate objects is half of what you need to be able
to draw in Inkscape. The other half is knowing how to create your
own custom shapes. Inkscape brings in these
four basic built-in shapes that we saw in the
previous lesson. But no matter how flexible the rectangle an ellipse
our sooner or later, you're going to
need a unique shape to draw something you want. In this lesson, I want
you to learn everything regarding how to create
and manipulate paths. Paths, or the way Inkscape handle the creation
of your own shapes. The way Beth works is going
to need a quick explanation. But I want you to
know that paths, just like built-in
shapes or objects, they can be manipulated with
the object selection tool. So everything you've learned in the previous lesson applies
to any past omega1. This lesson. Just like in
most vectorization software, bus are made of Bezier curves. A Bezier curve is a type of curve that's defined
by the position of two nodes and the position of two handles
attached to each node. By changing the
position of the nose, you change the starting
and ending position. It handled affects a
certain quantity of the form that takes
depending on its position. This way, by changing
the handles, you can give your
curve any type of possible curvature
between two points. You can even make a
completely straight curve if that makes sense. Don't worry if this
feels a bit confusing. Once you start creating
and manipulating curls, you're going to
see that it's way less complicated than it seems. But that's the way a
single curve functions. What's interesting is that
it's possible to attach one curve to the end of
another and repeat this deal. You close the shape
by attaching a curve, joins the beginning and
ending of the chain. And this way, you create your own custom
shape that's built by multiple groups where each column is a different
section of the path. There are a few tools
that allows you to build path directly. You have the pencil tool that allows you to
create paths by drawing them as if you are
using an actual pencil. This tool is most useful with a tablet to
draw more naturally. Then you have the
calligraphic tool. Again, more useful to create interesting looking
strokes with a tablet. But the most important tool, not only in SAP, but in most vector illustration
software is the pen tool. This tool is by far
the most flexible and powerful of all the tools
that creates paths. Because it allows you to
create paths node by node. And because of
this, you can build your own custom shapes with rate control and
accuracy with the mouse. Something that will be really hard to do with a traditional
illustration software. So pick the pen tool. Now, every time you
click on the Canvas, you're going to place a node. Once you place the first node, you see this red line
following the pointer. This line is there to
help you visualize the shape the curve is going to take when you place
the next node. You can place as much
notice as you want. And when you went
to finish the path, click on the first node, the one with the
little white square, or to close the path. Now you no longer gonna be able to edit the path
with the pen tool. The shape is finished
and ready to be used. By default, the pen tool disables the handles when
you click to place a node. The nodes create these completely
straight Bezier curve. Later on you'll see
that this behavior is really useful to
sketch shapes fast. But it is possible to place
a handle when creating the nulls in such a way that
you introduce a curvature. When placed in a note
just click and drag. You will see this handle
that moves with the mouse. Pay attention to their
previous realization line is going to show you
how the curvature is gonna be when you
release the mouse. It's also possible to
leave the path open. Simply place the nulls we want. And when you're
done, right-click. This is going to finalize the path addition in
the last place node. Now you can leave it like
this, or if you want, you can append more sections
by clicking on any of the n, also with the pen tool, the ones with the
little white squares. Whenever there is an open path, you can always keep
adding more sections. Open paths are useful
for a couple of things, but mostly to create lines. Here's an interesting deep when creating a path
with the pen tool. When you create a node
with a curvature due to a property of the nulls that we're going to
see in a moment. Sometimes the node
is going to force a curvature into
the next section. You can see this in the
previous section line. So if you want to create a straight section connected
to a curve section, a good tip is to
de-select the bath. To end the editing
in the last place, dealt with the curvature. Then continue appending
your straight sections. From that end.
With the pen tool. You shouldn't be able to
draw pretty much everything you do with a real
life pen or pencil. And this is the power
of the pen tool. It gives the control
and flexibility of a real-life pen or
pencil to your mouth. But the real power
of the pen tool really starts showing when
you use it with another tool, the null selection tool. They're not Selection Tool. It's just like the
object selection tool. But for paths with this tool, you are going to be able
to do things like create, delete, and move
nodes in a path, change the curvatures and change the properties of
individual nodes. In other words, it allows you to completely edited path
after it's been created. As you rarely are going to draw a perfect path the first time
around with the pen tool. This tool and return a path. It's a very common operation that you're gonna be
doing all the time. That's why, just like the
object selection tool, this tool is one of the most important tools in the program. To be able to edit the path. First, you need a path. So create a quick path
with the pen tool. This is important because the node selection
tool won't work with built-in shapes unless you do something to them that
we're going to see later. To select a path is just like with the
object selection tool. Click or drag a rectangle
to select more than one. You're going to see
these dotted rectangle indicating that selector. But you're also gonna see the notes that
makes up the bath. Now, if you click in
and out your selected, you can see that it's selected
because it gets blue. Now, just like with the
direct selection tool, you can click and drag
to move the node, select multiple notes and move
them all at the same time. Of course, it's not possible
to rotate or scale an old. After all, a node
is a single point. You can also try some of the Object Selection
Tools, circuits. One especially useful
is the Delete key. To delete the selected nodes. Even more important is the possibility to
add no sway path. You can add notes
in any location of a girl by double-clicking. This will, of course,
the binding curve. When you place the
nulls into two curves. This way, you can completely change the overall
shape of a path. But the one operation
that really gives you a complete control over the path is the
handle manipulation. When you click on a note, you're gonna be able to see
the handles of that node. By clicking in the little circle at the end of the handle. You can move it, allowing you to completely
change the curvature. Once you start to play
around with paths, you probably noticed
that a couple of things. First, that nodes belong
at those three curves. One show a handle. And second That's
some handles are stuck together with a
curve right next to it. So when you move one
handling one side, the other side moves
to the opposite side. Let's start by checking what's the deal with
straight curve notes. Straight curve nodes don't have handles because
they are Melinda. There is no curvature, so there is no need for handles. This raises a big question. How do you introduce
a curvature to a straight line if you
don't have the handles. Well, another
awesome property of this tool is that it's possible to edit the curves
super easy and fast with no need
to use the handles. If you move the pointer to
a section free of nodes, you're going to see how the
icon of the pointer changes. And it shows this handler. If you click and drag, you'll see how the
curvature moves. Depending on where you
will have the curve. The movement will be different. This is exactly the same as
going handled by handle, fixing up the gulp.
What's model? You can see both handles
adjusting as you move the curve. I strongly recommend
you to do most of your editing by using this method because
it's way easier, faster than an intuitive, even if you do have a bit less control than
when using handlers. Now, let's see why
sometimes moving a handle in a curve affects
the gut right next to it. In order to make drawing
certain shapes easier, it's possible to change the
way a note the incisions, the curvature from
one curve to another. You do this by using
the right node type. Let me show you. Take a look at
these three paths. I created. These heartless shape. Has these sharp corners
and bend the lines. Pay attention to the nulls
and you'll see that they have these diamond shapes icons. This icon will indicate to you that the nodes
are of Cornell type. With Gunnar type nodes, the curvature won't
carry through the node. That is, the curvature in one curve won't affect
at all the other curve. Obviously, this type of node
is used to create corners. Though there is
nothing keeping you from trying to create
a smooth transition. This type of node is also
used for strike Carlos. Since each curve
ends in a corner. The final shape is made
entirely of smooth surfaces. You can see that they are smooth nodes because they
have this square shapes. Instead of the diamond
shapes of the corner melts. Gradient something
like this with Garland nulls will
be a nightmare. Instead, all nodes
are set to smooth. Smooth, no other forces. A smooth transition
through a null. No matter how much you move it. It's impossible to create a gardener using this null type. When you move the handle
from one section, the one in the
other belonging to the other section moves as well. They are not independent
of each other, like with the corner type, this type of nodes
you're going to be using for pretty
much everything. That's another corner
since it helps you to make soft and
elegant curvatures through. I know at the moment
of drawing your path. Instead we'll decide
automatically the type of nodes based
on the shape of the bath. But if you want
full control over the curve after it's been drawn, you need to be able to
change a node to any type. If you have selected
the node selection tool and check the two controls while you're gonna see a lot of options that aren't
important right now, so we're going to skip them. But these four buttons
over here allows you to set the node type
of a selected node. But like you've seen in so many cases before
in this course. In reality, you'll
be using the first two and you can completely
ignore the other two. If you're curious about
what the other two do, they change the null type to a small variation
of the smooth type? They are rarely needed, so they are not worth your time. The first proton is
the common type. When you set a smooth
nodes to this type, nothing appears to happen. But if you pay
attention to the icon, you will see that
change to a diamond. Now you can move the handles and the curvature won't
get past the North. The second button is
the smooth node type. When you said that
corner node to smooth, this will introduce a curvature based on the angle of each car. This is important. Sometimes, rather
than start making your path from Cedar
with the pen tool, you'd like to start
with a built-in shape. But if you try to modify something with the
no selection tool, you see that once you select it, it won't show you the notes
and you can modify anything. It just shows you the
modifiers of that tool. This is because
technically this built-in shapes, I'm not paths. They are special tools to be
able to use them as paths. First, it's necessary
to transform them to a path that is a special command that does just that with
the shape selected. Go to object, and
then object to path. This is going to
transform the object in its current state
to an actual path. Now you are going to be
able to see and modify the notes and currents as
if you made it yourself, but you no longer have access
to the shape modifiers. Boolean operations
are an essential part of most illustrations
you'll be doing. They are used to simplify
some of the work. At the moment of creating some of the more complex shapes. Boolean operations,
like the name implies, worked by following the classic mathematical
Boolean formula. Take into shapes, path or built-in shapes as input
and outputs a single path. As a result. There are a total of six different
types of operations. However, for illustration, you only realistically
need three of them. The other ones
aren't really that useful or not worth the extra
energy in leveling them. I'll be skipping those. Their union is just to join two or more shapes
into a single path. Just delete the
shapes we want to join and go to Path union. Or they're really easy to
remember shortcut Control. And plus, this type of operation is mostly
used for two things. First, to create
organic looking shapes like bushes are clouds, by performing a union with
a lot of simple objects. The other common
use is to create complex mechanical
shapes made of simple forms like goggles
or robotic parts. The difference operation
will take two shapes. And the resulting shape
will be the shape below minus the area
where they intersected. To perform this action, select two intersecting
shapes and go to path difference or the shortcut, which is Control minus. We will often use this
operation to gallop or delete a section
out of the shape. The intersection operation is similar to the
difference operation, only that it will keep the area where two shapes intersect
and delete everything else. Use it, go to Path intersection or the
shortcut Control asterisk. This operation is mostly
used to limit a shape, the silhouette of another, often to create
shadows or highlights that fit perfectly in
a complex silhouette. So as you can see,
everything you can do with Boolean operations,
you can do manually. But most of the time it will be really time consuming
and tedious. So take your time to get
comfortable with each operation. Use the shortcuts instead of the menu and do
all the exercises I left you in the exercise
document of this lesson. This was the last piece of information that you need
to be able to create any type of
illustration that you may want using Inkscape. Of course, there are a
lot of program features. I haven't showed you
tools and comments that are pretty useful
but maybe not essential. I strongly recommend you to
check the exercise file for this lesson and make them all more than once
if you need it. It's really help you
to get everything you've seen in a practical way. So don't skip it.
For the next lesson. I want to give you
a quick overview of a few features of the program that you
could experiment with, as well as showing you a few
important tips that I've found to be essential to
any type of illustration. You see an X shape.
7. Tips for Using the Program: In this final lesson, I want to do two things. First, I want to talk very quickly about a few
features of the program that we didn't cover because
I thought that they weren't essential to most
illustrations you'll be doing. Second, I want to give you a
couple of what I think are really important tips that will help you avoid a lot of
headache in the long run. First, I want to start with
an essential tip that I think every Australian
culture now, I believe that in most
tutorials, for the most part, everyone forgets about one of the most important parts
of working in Inkscape. Switching between the
two selection tools. And switching between
these two tools is one of the most common actions
you'll be doing when drawing. At the end of a day's work, you'll end up wasting a ton
of time moving the mouse to the toolbox to switch
to the right tool. A little like when you are
learning in a 3D program. And everyone tells you that
you should get used to the keyboard shortcuts to their manipulator tools
as early as possible. Otherwise, it will be forever a slave to move in the mouse
all the way to the UI. Every 2 s. The default shortcuts are a little bit
awkward for my taste. The toolbox is set to the
function keys F1, F2 of three. So I prefer to set my
own custom shortcuts. You can edit the
default shortcuts. If you go to Edit Preferences. Here you go to the interface. Keyboard shortcuts. The tools are in
the contexts list. You can search in
the search box. I recommend you to set the
selection tools to something like a and S or Q and W. Something that is
not as separated from the rest of the default non
toolbox keyboard shortcuts. And since you're there, you
might as well set a couple of shortcuts to the
next most used tools. You'll be using the
pen tool a lot. So I recommend you to set a
comfortable shortcut for it. And very important, a
tool you'll be switching to constantly. The dropper tool. The dropper tool
allows you to sample the color and set
it to the field. Or if you hold shift the
stroke of the selected object. This tip has to do with the color mode with
which you select colors. If you remember, in the
freelance stroke dialogue, you get to choose from
five different models to select color. In the lesson back then, I told you that you should
concentrate in only 2 mol the wheel and the HSL mode. The wheel doesn't
need explanation. It's just the will of colors. You can see the relationship
of colors and then set the saturation and value
once you pick the hue. However, I think
that you should get comfortable with the HSL mouth, since it's the most important to picking colors for
our illustration. In R3, say classical
theoretical representation of color that uses
three variables, hue, saturation, and value. The heel is the actual color. Can be blue, green,
greenish, yellow, etc. The saturation is
how pure a color is. The less saturated, the higher quantity of gray that color has. Saturated colors
are very vibrant, while these saturated
colors are far more pale. And mentally, if you crank down the saturation of a color, you'll reach full gray. Value is how light or dark
a particular color is. At no lightness, the
color becomes black. The HSL color selection model, which stands for hue saturation and lightness,
which is the same. That value maps this
classic representation by using this color
selection mouth, you can compare whether the hue, saturation or value
of the colors, e.g. to imply a surface in shadow, you can sample the color of
the surface in light and then lowering slightly the
lightness slider. This type of comparative
color selection is something you'll be
doing all the time. So I recommend you
to get used to handle colors using this model. Okay, he goes to a few of the features of the program
that we didn't cover. Some of these features
are quite important for some styles or types
of illustration. Though I wouldn't go any of these features essential
to all illustrations. That's why I decided
to leave them out. If you think you
could use any of these features and would
like to know more. I'll leave you in the resources, a list with the best links to
learn more about Inkscape. Remember when I told
you that you can not only add color to an object, but also other types of paint. Well, in common illustration, the other type of pain
that you will most likely use will be the gradient. A gradient is just
a way to create a blend between two or more
colors in a linear way. Often used to generate
some subtle effects like the sky change and colors
are some basic lighting. In Inkscape, you can create, edit and apply gradients to
both the fill and stroke. Radians are created by using the gradient tool
in the toolbox. Then you drag on an object. This will create two stops. Each stop is going to
have a color assigned. To assign it a color. Just click on stop
and pick a color like you would normally
do with a common object. Depending on the options
set in internal controls while you create a linear
or elliptical gradient. Right next to these options, there are two buttons that
allows you to set two. What are you going to
apply the gradient to the field or stroke? You can move the
position of both stops. This way. You'll be changing the
direction of the gradient. And you can do this with
either the gradient tool, whether node selection tool. It's also possible to add more stops with the
gradient tool selected. Double-click on any section of this line that joins both stops. If you'll remember, in
the objects lesson, I talked about the
fill and stroke Diana. And that at the moment
of picking a paint type, you get to choose between
these ten little buttons. Well, a few of those were to assign a gradient as a paint. Begin any of those
gradient buttons, a few options will appear. But given that most of the options shown in the
fill and stroke dialogue, I've also shown in the
gradient tool controls. I've found that it's
not necessarily to think about the options in
the freelance drug dealer. In fact, I recommend you
to completely forget about them and handle everything through the gradient
to controls. We didn't cover the snack bar. And that's because snapping, It's not something you'll be
using in all your drawings. But it is important
and it can help you with some types
of illustrations. By clicking in the
very first button, you'll enable or disable or
the snapping functionality. As I said in the UI lesson. By default, these three
buttons should be enabled. This will give you the
snapping that you want. So I would recommend you to
not touch anything here. If you're feeling
adventurous and you want to play around
with this file, you can just leave the mouse
on top of a button and get a nice tool tip that will tell you more or less what it does. Once a snapping is a naval, shapes will snap to each other. You will see this little
x just before the shapes. More. Snapping works with both
objects when you are working with the object
selection tool and nose. When you're working with
a no selection tool or when you're creating a
path with the pen tool. Clipping allows you to
limit the visibility of a shape to the
silhouette of another. After the clip is done, you can edit the clip shape inside of the node
selection tool. And no matter what,
the changes won't show outside of the silhouette
area of the object. In illustration
clips that are often used as a more robust way to create shadows and highlights than using the
intersection operation. To create the clip,
you use two objects. First the object
you want to limit the visibility or
the target object. And then the object
that you want to use to limit the other or
the clipping path. The clipping path has to be above the other in
the stack order. Then you select them both
and go to Object clip set. My favorite method,
right-click Set clip. Once it's done,
these two objects will become a
single glyph shape, which you can move,
scale, rotate, and do pretty much everything you can do with other objects. But now you can edit the shape inside with the node
selection tool. And the shape won't show outside
of the equilibrium path. If in the adult selection tool you have this
button too good on, you can edit the
clipping path itself. To unclip. You can go to Object, clip, release or right-click,
bellies clip. Old shapes you added it
will keep the changes, whether it is the equilibrium
path or the target shape. Then it's also a similar
feature to clipping masking. Masking has the
same functionality, but with the
difference that it has a few transparency features
to make clipping is simpler, so I prefer to use
them over masks. The effects are
modifications that change the behavior
or looks off a path. Some of them can be very useful to open the
path effort dialogue, go to path, path fx, to Allied Path
effect to a shape. Simply click on the plus icon
in the bath effects dialog. This will bring up a list
with all path FX available. Now you just select
the one you want. And the effect will be
applied to the shape. It's possible to add
effects to build in shapes. But this may transform them into path depending on the effect. To delete the path effect from a shape just to click
in the minus icon. Any modification you did with
the effect will be lost. Almost all path effects
enables one or more control, handles or curves on the shape to manipulate
the parameters. You can see an access these controls within our
selection tool. If the object is selected, then the effect options will be shown in the Pacific dialogue. With an effect active, you can still modify
the object and nodes. However, depending
on the effect, this may bring buggy and
unpredictable behavior. There are a lot of path fx, icon possibly go
through all of them. But the truth is that you don't need more than a few
for most illustrations. Effects are something you learn better when you add
experiment by yourself. And that was it
from the goddess. The goal of this course. Although then prepare you
as fast as possible to take other Inkscape
dependent courses was to at least left-click
wanting to know more about these fantastic and extremely powerful
free vector program. And Libya in the
resources link with the best free resources I've found to learn and
master Enscape. So if you want to know more, now at least you have
a strong foundation. I believe that with what you've learned in
this mini-course is enough for you
to go and tackle any of my other courses. Knowing more of the
program will only make you a better and more
confident artist. Saw the time spent learning more about it is never wasted.
8. Inkscape Techniques 1 - Boolean Operations: Before we begin
with the brush act, in the next few lessons, I want to show you some
of the basic tools and techniques that we're gonna be using all
throughout these gods. Pretty much every cent of
what I showed you here. It's common to all
vector illustration, not just came out. So if you've never worked with
a vector software before, it's gonna be
especially important to get familiar with
these concepts. In this lesson. In particular, I want to start with one of the most important features of vector illustration,
Boolean operations. I know that about Boolean
operations in the mini goals. But then I showed you the
mechanics of how to use them, not what they are actually
useful in illustration. And this is what this
lesson is all about. But before that, let me remind you really quickly what
our Boolean operations. Boolean operations are a
group of tools the program has that work by making
two or more shapes, interact, and outputs a
single path as that assault. Boolean operations
do not need to be performed with custom paths. They can be used with built-in shapes like
ellipses are rectangles, but the resulting shape of the operation will
always be a path. An important detail is
that Boolean operations only work with shapes
with them or Gustaf, but not with other
types of objects like important images or groups. There are a total of six
different operations that say bring sin. But in practice, only
three of them are really necessary for
most illustrations. They are the union, the
difference, and the intersection. With that out of the way, let's begin with a union. The union will join us, select the shapes
into a single path. Often used to create
organic masses of objects like clouds or bushes. Creating organic shapes like
these can be way faster than using the pen tool to
draw the silhouette manually. And it gives you a lot more
fine control and flexibility. Take a look at this cloud. If you pay attention
to the silhouette, you'll see that
it's actually made up of multiple
ellipses overlapping. This is something
that will be really easy to do using a union. So take the ellipse tool
and draw a lot of ellipses overlapping to build the
silhouette of the Cloud. Now pick the object tool
and select all the shapes. Go to Path union. What are the really
easy to remember shortcut, Control and blues. Now the Cloud is a single path instead of being made
or multiple ellipses. Now you can see and edit the
notes with the node tool. Now, I'm sure you're thinking, why couldn't we just
leave all the ellipses together overlapping each other? Well, for once, it's
more uncomfortable to control an object
made of a single shape. But the most important
benefit of having a single path is that we can modify the
silhouette of the shape, since it's a path. That is something we
cannot do if there are a bunch of separate
the shapes together. Now, if you select
the note, don't. You can play around
with the path and make the silhouette much
more interesting. Like I said a minute ago, the union is perfect to
build objects that have these organic bumpy silhouette like Laos or bushes
made of ellipses. But it can be used
to build pretty much any complex shape that's made of multiple, smaller,
simpler shapes. In another command
use will be to create mechanic looking shapes like
goggles or man-made objects. The good question
you should be asking yourself is if you need them multiple shapes to be a single
path for whatever reason. And if they do, build
it with a union, the Boolean difference
will generate a shape. That's the first shape. Minus alleles we intersected
with the second shape. In other words, you need to cut out or carve a shape
by using another one. A couple of important
difference with the union. First, you should
only use two shapes. The difference does not work well with more than two shapes. And second, the shape
that's going to cut the other one should be
above in the stack order. Let's go back to the
example of the Cloud. What if we want to
make the classic loud with a flat bottom? We could go in there and
add and remove nodes manually and then adjust the
buttons so it looks flat. But that's a lot of work
for such a simple desk. The best way is to use
a Boolean difference to cut out the lower
parts of the globe. The rectangle tool
and draw words. You want to adjust
the shape carefully. It may be helpful to change the rectangle color so
you can see better. When you're done. Go to path difference or the
shortcut Control and minors. Remember that this
cloud shape is a new shape result of performing the difference with
the other two shapes. I'm telling you because
it may seem like it's the same object as before. Gas, it has a similar form
and it's in the same place. But if you perform a difference
with a built-in shape, initially will be graded
in the same place. That looks similar, but there is a path and does not have
the built-in modifiers. Also keep in mind
as you could have used the pen tool
to make the shape. Now, here's an extremely
common use for this ablation. And he's creating a
shadow or highlight. Let's keep going with the Cloud. What if we want to add
some sort of highlight on top as if the light is hitting the top part
of the silhouette. This is something very common. You'll see a lot
in illustrations. Again. We could go in and
do it manually, really slowly and
really carefully. But that will be slow,
inaccurate, and tedious. So for that we're going to use a difference operation to create the shape
of the highlight. Now the first step
may seem a bit weird, but you have to duplicate
the cloud shape two times. You'll see why in a minute. So select it and press
Control D twice. Remember that duplicate
them will control the, recreate an exact
duplicate on top. So it looks like
nothing happened. But there are three
exact looking clouds are stuck in the same
place right there. For the next step, it
will be very useful to change the color
of the top duplicate. So you can see whether what
you're going to do next. Now the Cloud directly
below this doublet Cloud, It's gonna be cut down and it's going to
become the highlight. Just this top red clouds. So what's showing through
of the crochet below the form of the highlight you want when you're happy
with the result. So mode shapes and
perform the difference. There are certain
shape may not be visible because it has the
same color than the backlog. So give it a nice whitish gray. Just to clarify,
if it's not clear, you needed to duplicate
twice because our Boolean operations produce
only one output shape. So we need to regenerate the
highlight shape with a copy. So we could also keep the
original cloud shape below. At the end of the
day, difference are basically used to
cut other objects. To me, it's easier
to think of it as the scissors of the
Boolean operations. Only then instead of
a couple of ladies, you use another path to good. What's below. Finally is the
intersection operation. This operation is used to limit the shape to the
inside of another. Often to create shadows or highlights that are shared
in a complex model. Or to create patterns
that need to be limited to the inside
of a complex shape. For the sake of simplicity. Let's continue with the
theme of the clouds. Let's say that I
wanted to create a nice-looking shadow that
give some traces of volume. Notice that the
silhouette of the Cloud is actually fairly complex. The easiest way to
create this type of highlights or shadows that
are made with the pen tool. And I've not created by using the technique I
showed you a minute ago with the
difference operation is to use an intersection. It's super easy. Just another shape you want with the pen tool on
top of the cloud. And now very important, when you get to
the outside area, continually shapes so it
covers completely aside, the shallow is going to go. We're going to
delete the excess. But the important thing is that the shape of a lapse
completely aside. So it won't show any holes once you perform
the intersection. Now it's time to actually
perform the intersection. But just like in the previous
case with the difference, want to create a new shape
on top of the cloud. So duplicate the cloud
shape with Control D. Now the glove copies on
top of the shadow we made. But that doesn't matter. The intersection
doesn't care about the stack order like
the difference does. So these duplicate and the
shadow shape and go to Path intersection or use the shortcut Control
and asterisk. The resulting shape will fit exactly to the inside
of the cloud shape. The important thing
here is that in illustration is very
frequent that you have to draw a shape
that's one on top of another and needs to be constrained to the
inside of a shape below, not just in the case of
shadows and highlights. That's the most frequent case. But there are other uses. And that's all you need
to know about using Boolean operations in practice. Boolean operations are some of the most common operations that you'll be
doing all the time. So I strongly suggest
you to really wrap your head around what
you've seen in this lesson. Play around and
practice on your own. The list concepts becomes
second nature because they really are
an essential part of all bacteria recession. One last thing. I believe that just like with
the main four tools, you should as soon as possible, started using shortcuts
instead of the menu. So get used to performing the operations using
the shortcuts. They are quite easy to
remember and they add essential to work in
a comfortable pace.
9. Inkscape Techniques 2 - Groups and Clips: Okay, now let's continue with
the tools and techniques of vector illustration
with a couple of really important features to
handling groups of objects. First of all, I want
to talk about groups. You can group
multiple objects so they handle as if they
were a single object. This will help you a lot
when you're dealing with an illustration
filled with objects. And you have problems selecting a group of shapes that are meant to be a single thing, like e.g. this cloud is made of
three different shapes. The base class shape, the highlight shape,
and the shallow shape. But the three shapes makes
up a single thing, a glove. If we were working in a real life
composition with a ton of nearby objects dragging a rectangle to only select these three shapes may not be
as easy as you would like. So the solution will be to
group these three objects. So select them all
and hit Control G. You'll see that the three
outlines that indicated that the three objects were
selected becomes one. Now you can make any
manipulation as if these three shapes where
they single one. However, at any moment
you can double-click on this group and then
you'll enter the group. You can see that you've entered a group because
you will see this. We'll text in the current layer, drop down in the status bar. These drop-down displays
the currently active layer. But when you enter the group, will display the
name of the group. They will text is
the default name, accept gifts, the groups. Now that you've
entered the group, you can modify the shapes as if the group never was created. You can modify the individual
shapes, edit them, delete them, and even create new ones that will
belong to the group. After you're done
it in the group, you can double-click in any free place in the
canvas to leave the group. Again, you will see
that the wheel, the exchange back and it
will display the layer name. All changes that you made
to the group will be kept. If at any moment you
want to ungroup a group, you can simply select it
and hit Control Shift G. A couple of notes about
the behavior of groups. First, node tool bypasses
any group against that. This is a feature to simplify the editing of the
contents of a group. So he doesn't have to enter
first if you want to quickly adjust something
and say a second. And this is important, you cannot perform Boolean
operations with groups. The program won't allow it. This behavior can be
a bit of a pain when building more complex
shapes because grownups are really useful to handle the
complexity and organize objects and Boolean operations and some of the most common abbreviations you'll be doing. For this reason only, I tend to avoid using too many groups if the object
I'm drawing is manageable. I talked about glyphs and
they inseminate tutorial. But just like with the
Boolean operations, I didn't went into
the actual uses for illustration or the
more important details. I'm assuming that you've
watched that lesson or that you have at least familiar
on how to create clips. So I'm not gonna go
over the basics here. We watched that lesson if you forgot about how
to create leaves. However, as a quick refresher, clips allows you to
limit the visibility of an object to the silhouette
of another object. If this description
sounds a bit familiar, it's because it will feel a similar purpose than
the illustration, but with a couple of
really important changes. First, clips do not generate a new shape
like the intersection. It just limits the visibility
of the target shape. So you can still edit the
clip shape inside and have way better control
of how an object looks. And second, while
the intersection between a Boolean operation. Only once with paths. Clips work with pretty
much everything. Paths, groups, important images. You can even use groups as
clipping shapes themselves, which is tremendously
useful at times. As you can imagine. This opens up a lot
of new possibilities. Let me show you an example. If I wanted to add
this pattern to the Cloud using an intersection, I will have to dismantle
this pattern and group it and move each path
into the right position. Then perform an
operation with each of the shapes one-by-one, being careful that the
overall patterns and not get destroyed
in the process, it will be a
ridiculous amount of work for such a simple desk. Luckily, glyphs can
be used with groups. So first, make sure the
pattern is a group. Select all shapes
and hit Control G. Now put the pattern
on top of the cloud. Duplicate the Cloud, and
perform a simple click with it. Because the grid
pattern is a group, you can enter the pattern group and easily move the shapes, modify them, and even add new objects with a fever flu and the silhouette of the Cloud. It's really powerful. Another common use
would be to use them as a way to add bitmap
textures to our path. Since clip work with
important images, all you have to do is to put it on top of the shape you want. Duplicate the bottom shape and perform the clip
with the texture. Now you should play around
with the opacity and maybe add a blender effect or something to make it look nicer. All this power the
eclipse brings in may make you think that you should use clips only and completely forget
about intersections. After all, every time that you can do with
an intersection, you can do it with a clip
in a more flexible way. Well, in practice,
there are a couple of inconveniences that
eclipse brings in. One big example is that
just like with groups, using clips with Boolean
operations is a bit tricky. The difference with
groups is that you are able to
perform the operation, use the clip only has paths. But the problem is that since they clip function is to only
hire parts of an object, the operation will be
performed with a full shape, not only with the visceral part. On the other hand, if I
clip is made with a group, the operation will not perform. If you're working in a more complex drawing with
a lot of shapes, it may end up being a bit
complicated to identify which object is not letting the Pollyanna
relation to execute. In practice, I tried to be as careful as I can
both with groups and clips because they can seriously complicate
you in the long run. So my recommendation is that
you should try to at least not use them in completely
unnecessary places. As a rule of thumb, I always use intersections for simple and quick shapes that I can remake in a
minute if I want. I use clips for the
more complex shapes. And of course, for
every time I need to clip a group or an image. This way, I minimize the amount of clips as much as they can. And the drawing
is a bit cleaner.
10. Inkscape Techniques 3 - Light and Shadow Basics: In this lesson, I
want to talk very quickly about the
basics of light and shadow and how to apply those concepts to your ink saved illustrations. We can think of an object as
having two types of color. First is the local color. This is the actual color
that the object is painted. Red, yellow, greenish blue, or a combination of
multiple colors. Then is the illumination
color on top? Let me explain. In real life, when
light hits a surface, it makes its color lighter. A red surface director
hit by the sun will have a lighter shade of red than the rest of the
surface in shadow. And let's same if the color of the surface is
yellow or greenish, blue or any other color, you may think how light
that surface will be depends on how directly the light rays
are hitting the surface. That is, how much a surface is pointing at the light source. Our brains are programmed to quickly and
effortlessly identify different shades of lightness of one tone as different
planes in an object. This way, by giving your objects the right
shade of a color. You can imply volume. Now, in real life, most objects with round
surfaces, that is, non man-made objects have surfaced that transition softly
between light and shadow. But since we are working with a cell shaded cartoon style, we can easily to stylize
this light and shadow areas in easy to draw
shapes like this one. Now, how many of these have elimination shapes you create depends on the stand
you're working. In some cartoons, you'll see three or more light
and shadow shapes. That simplifies elimination
but gives a lot of dividends. In some others,
you don't even see any separation between
lightness areas. That depends on the
style you're going for. Of course, there's more
complexity to light and shadow. But for our purposes, that's all we need
to know for now. So to summarize a highlight, we will have the same color than the local color
of the object. The lighter and the
shadow will have the same color than the
local color. But LCA. Okay, so let me show
you how to apply these theories using Inkscape. They can look at
this red circle. I want to imply a light roughly coming from
the top left side. So very quickly I'll
draw a highlight on top where the light rays
in the area will be hidden stronger in a
shallow shape below roughly where the
light rays will then be hitting the area directly. Of course, both using the intersection technique that we saw in the previous lesson. I start with the shadow. Remember, the shadow has the same color than the
local color, but darker. So I selected make sure
I'm in the field tab. And here they've got
their decision to make. Which one of these five color
selection moles or use. If you watch the lesson, that I say that I always
recommend using the HSL mole, since it takes more
than I believe better for illustration
in general. In the HSL model, you have the same colors
than in the other moles. But the difference
is that you select the colors by selecting the hue, saturation and
lightness by separate, using separate the sliders. As you can imagine, this
works like a champ for us. We have a separate slide that we can use to handle
the elimination, the slider, which
Kansas the lateness. So what I'll do is to use
the eyedropper tool here. The default shortcut
is the sample, the local colors, so
they are the same. Now, go to the slider and start to
slightly lower it so the shadow is now way
that it goes down. Of course now we'll do the same for the highlight, but instead, I slightly move the slider
app delegate a lighter, well, one little note here. Remember that we
are working with highly stylized cartoons here. So there is no needs to be physically exact
with the colors. Just eyeball which shade, darker or lighter you think will fit your shadow or highlight. Any of them. Look okay. Now can repeat the same step with these
different colors, circles. The method is the same. Just sample the color
and move slightly the slider to one
side or the other, depending on if you are making
the highlight and shadow. A couple of things. First, because I've used any of the other color selection
mode to set the color, is because it is way more comfortable and easier
to use a slider to control the lightness of a color individually from
the other properties. But there's no reason
why you couldn't have use any of the other moles. If you know what you're doing. At the end of the day,
what you want us to keep a similar hue
and saturation, but lower or higher. And you can do that with any of the other color moths
just not as easily. The other issue is
that this method of sampling the local color
and then moving the slider only work when the highlight or shadow is going through a
surface of the same color. If you have an object
made of multiple colors, then we have a problem. Well, let's me show you a quick
technique to quickly make light and shadow shapes that will affect
equally all colors. For this, we're going to
use a nice property of digital colors and
that is transparency. First, of course, make the
highlight and shadow shape. Now for the highlight, give it a completely
white color. Now in the HSL dialogue, you see for slider
with the label a. A stands for alpha. That is the transparency
of the color. Lower the transparency
quite a bit, almost to one-third down. There's no formula here. Just play around with the
slider till the highlight interacts the way you want
with the colors below. As you can see, because the color is white
and transparent, it's adding to the other
colors white and give me a pretty good effect
of being a highlight. Now, I think you
know what to do with the shadow is the
exact same process. Only this time you should use a full black
instead of white. Again, play around with the opacity until it looks good with all
the colors below. This methods of using black
and white colors with transparency also
has the advantage that you can change
the color below and both the highlight and shadow
will adapt pretty well. So you can make the highlight
and shadow shapes once. And then play around
changing the local color and experimenting and
see what looks good. But remember, different colors have different
natural lightness. So the alpha transparency
that looks good in one color may require
adjusting in another color. Remember that generally
shadows looks better than highlights using Smith.
One quick thought here. I'm sure you're wondering
if you could just use these black and white
transparency method to create highlights
and shadows. Always and completely
forget about the color method I
showed you first. Well, you certainly could. But the problem is that when
you're using this method, you're not picking
the actual colors. You are Tintin, other
objects scholars. So you lose a lot
of control over simply being able to
pick the color you want. E.g. it's very common that on top of making a
highlight later, also adjust the hue just to make the colors more
rich and very hidden. Same with the shadows. If you're working with a
color with transparency, you can still
select the hue that will influence the colors below. But you're going to
need to go back and forth and waste a lot
of time experimenting, trying to get the
resource you want. Then another way is to add
shadows and highlights that look slightly better
by using bled moles. But that's a bit more
difficult to implement and doesn't look that
better in my opinion. In other words, sometimes
it's easier to simply give the high light or
shadow a detect color, especially since
adjusting colors, it's not a particularly
slow process. So as a rule of thumb, I prefer to always use the red color when
I'm working with simple objects where it's easy to go in and
change colors quickly. And I use the transparency
method when there is a ton of highlights
and shadow shapes. And it can be difficult to go in and adjust things one by one. Or when it's a
single object made of multiple objects
of different colors. And it will simplify
the things a lot.
11. Revisiting the Asset Pack: Now that you have
knowledge of Inkscape, I'm probably an idea how
the assets are made. I think it's wants
to go in and explain a bit what everything is and how you're supposed to
actually use some of these assets in a
real life scenario. First of all, all complex
assets are grouped together, made of multiple shapes. Since you will most
likely going to have to edit them,
at least submit. Remember that you can enter
the group by double-clicking. After you're done editing, you double-click anywhere
on the canvas to leave the group and
the changes are saved. I tried to create groups
in a way such that if it's easy as possible to
make changes and variations. However, a really nice
tip that you should remember is that the node
tool by buses any group, you select a modify objects
inside groups super quickly. In any acids where I grew up, I didn't colorations by using
the opacity shadow metal. They talked about the many cars. So you can easily change
the overall color and the other planes will change to the right color
automatically. Like in the case of the rocks. I wanted each of
the assets to be as easily adaptable as possible. So I avoid using shadows
and highlights in general, buoyant force in a time of day. How a lot of some objects needed some indication of the
planes to do correctly. Like in the case of
this man-made objects. Just remember that
you can easily flip them horizontally
and rotate them. And worst-case scenario,
you shouldn't be too hard to go in and
redraw a shadow plane. I also tried to avoid as much as I could
clips, and instead, I use Boolean operations when possible to make it
easier to handle. But for those assets
that are meant to be flexible and that are
meant to be modified. I had to go four clips. I originate by giving
the assets a gray color to encourage you to work
with your own colors. But it looked horrible. So I decided to actually give
them some genetic colors that should work out to the
box for any datum landscapes. But as you'll see later on, you'll definitely
want to replace them with around as soon as we can. So now let's look at how
to use some of the assets. The first thing you have to
keep in mind when you send this asset is the three
golden rules of good version, which at scale, flip and
most importantly, overlap. So just by doing this, you can get an almost
infinite amount of variation without even touching the geometry of the assets. Clouds, bushes, mountains,
shapes, glass shapes. And a lot more can be
constructed by putting different versions together
using these three tools. For as long as they share
the same or similar color, they look like a
new, unique version. That doesn't mean that you'll never going to have
to go in and make some changes to molded
into the exact same thing. But modifying an asset
should be your last reasons. Not because it is particularly
complex or difficult, but because it can
be time consuming. Some of these assets
are meant to be used to build shapes like
this. Merge trees. Having a sort of mercy line of trees is super common in
cartoon nature scenes. This asset is too short. So what you're supposed
to do is to use the three main tools to construct it in the
exact shape union. You probably notice that some of the assets are less
detail than others. Like in the case of these
trees here at the bottom. This is one of the key things that you need to know
about backgrounds. The furthest thing that are in the background
usually will have less details unless there's a good reason for them not to. We'll see more
about these later. This has to do with some
of the principles of composition that we're
going to see later on. Almost all of the assets
here follow the pattern of the more detailed elements
in the first row, and the less detail
go in the second row. So this tree is at the top with the trunks and the
interesting silhouette sugar, somewhere in the
foreground or milligram. And the ones in the second
row should go somewhere in the background adding
noise to the composition. If you are creative,
I'm sure you can find a way to make it work
whatever you want. Some of the objects are
meant to be dressed up or add detail to
the composition. This objects over here and
meant to be sprinkling in different places to add noise or feel in a space
that feels too empty. Objects like these flowers, grass shapes, and mushrooms. I meant to be placed on top
of the ground or on top of other assets to detail an area rather than to affect
the overall composition. Then there are some gram shapes. I didn't want it to
pollute the asset back with other assets
that in context. But this ellipsis here
and meant to be ground. We're supposed to use
the objects on top, not the actual ellipse. E.g. this way we lanes that
meant to be placed on top of a grand idea to help you communicate that
this is a surface. You should just copy
the way reliance and put them on top of
what's supposed to be left. In this case is consider
using the splitting tool. Especially if you want to
go for a more dense area. Though, I don't like to
use it because then it becomes too much water to remove assets where you
don't want them. I prefer to work manually, but it's up to you and doesn't sit for explaining
how to use the assets. I don't want to say a couple of things before and
in this lesson. First, I will be adding new
assets from time to time. So always check when
the course updates. And second, later on, I'm going to show you
how to build your own asset-backed like this one, maybe with other themes or whatever you want. But
that will come later. For now, get comfortable with
the assets and group them, study them if you want, or just play around and see
what you can come up with.
12. Making Your Own Assets Part 1: If you can handle Inkscape and the basic techniques behind vector illustration that I showed you in the
ink type section. You shouldn't have any
technical problems expanding or creating
your own asset box. However, I do realize that
maybe you have some questions regarding the creation of
pacs outside of the stations. And I want to answer that here because I want to show you
a hands-on the process of creating your own
bag or expanding the packs you have from the research phase to
the finished asset. So this lesson will be about things you have to keep in mind at the moment before starting
to draw your assets. And in the next one, I'm going to demonstrate
how to actually draw them. The first thing you have to
define before starting to draw is the style
you're going to work in in the asset pack. I went for a fairly generic
and modern cartoon style. That was in part because
I loved this style of cartoon in part because like
I said in an earlier lesson, a cartoony style works
pretty good with the tools of a vector
recession software. However, keeping in mind
the limits of the program, you could have a completely
different range of styles, from the most abstract
and simpler ones to them more photo-realistic
and complex. I guess every cent works
if you are consistent, I would recommend
you to always favor the most simplest
styles you can, if only because they simpler
style will usually have assets that are easier
and faster to modify, which as you will see, it is something essential to elevate a kid bashed
illustration. What I'm saying is basically
that you should pick a style and make asset
consistent with that side. If you want to work
in a different style, make separate pacs. As a beginner, I wouldn't encourage you to
build your own one. That's something that takes an enormous level of experience. So leave that to the
professionals. For now. Steal the style for my cartoon you like, or other
illustrations. And that leads us directly to the second point that I
wanted to talk about, how to actually make the assets. Let me go straight
to the point here. You should copy assets from finished playgrounds,
copy trees, clouds, mountains, bushes, maybe more specific things like a moon
and the sun on a building. If you like something,
you should copy it. That's how I build
this asset tag. I pick the very
few artists that I liked and that I felt were more or less
in a similar style. And then search
one by one through all of their published
illustrations, finding assets that I could use. Doing this SO has the
benefit of immediately demonstrating how artists use
a limited amount of time. Assets, even across
different illustrations. You will see that
an app this make usually the same
type of three are the same type of Cloud or same type of mountain
over and over again. And what really changes
is decomposition and maybe a couple of unique things either specifically
for one illustration. What's more? You'll also realize that
even different artists into use very similar
assets between them. Not in all objects. Different styles
necessarily need different look in assets. But there's a large quantity
of objects that you'll see repeated through different
but similar styles. Let's look at these trees.
They are basically the same. One cartoon was made in the 60s and the
other in the 2000s. Obviously what is at play here, it is just playing
Google inspiration. But it comes to show that
at least in some assets, even the pros steal
from each other. However, there is a bit of a gray area here regarding what constitutes through theft
and what's Fairplay. Obviously taken a part of someone else's work
is pure theft. Even if it's a single asset. Anyone, if you
change the colors, get capitals as
symbolic in nature, which means some things can
get quite similar looking. Nobody has a
trademark and style. As far as I know. Basically I'm saying that directly tracing
over the work of an artist to get an asset is theft and can even
get you into trouble. But making a copy that is not
exact, it's perfectly fine. Just pick an asset that
you like and then make an effort to not
copy it exactly, but pay attention to
the way it works. Mentally deconstruct it and build a new one just like that. But it's the way I
built the asset pack. So you can see that I did
not install any of these. I just created instances of popular assets that
I saw all the time. Those are the two main
general concepts to keep in mind at the moment of
starting your own packs. But I want to talk about
something extra here. I want to talk about
tracing real life pictures to get specific things
in the project. I did this. I just saw the picture of idea and put it in
the background. Now, I'm sure you
have a few questions regarding what we
just talked about. But first, I want to
discuss why it's useful. Even if you're working
in a cartoon background. Sometimes you want some
little details that just does not want a dime or the pain to draw it entirely on your own. A few examples will be
some animals in the back. In the case of audio press
or maybe a few birds flying in the sky or a school
officials in the water, then there will be some small but very
specific objects like a beehive or a
section of a ruin, or maybe some other
small object. The final units, you can give
it some type of texture, not using the image
directly as a texture. Though that's
something you could do a bit clumsily in
Inkscape, but doable, but rather using it to
get the shape, texture, pattern, or even just using the automatic
failover feature. And then there is the
legality of everything. Is it legal to trace
over a picture, even a section of one? Well, I don't know much
about the legality. I'm pretty sure that you
are only 100% safe if you trace over royalty-free,
copyright-free images. In either case, there's
usually not gonna be a lack of good
images to trace. Especially because
you should absolutely keep that race material
to their minimum, at least to not mess up
with the capitalist style. Remember, you only want to trace over to add specific details. You're turning something far in the background to find free
and royalty-free images. I would recommend you pixels has more than enough pictures
of iris and zoom in here. But there are a ton of
other sides to get free. Totally legal images
to trace over. You just have to
search for them. Also, one last thing, I personally think
it's perfectly fine to trace over material
as an artist. As long as you keep in mind that it won't make you a
better draftsman. However, the practice of designing and
building background, we'll make you aware that at least for long as
you keep working, I think there is no problem in employing a few
trace assets here. And if I could give you one last tip is that you want the most flexible
possible assets. You don't want quantity. We want quality.
And by quality I mean flexible and
easy to edit assets. And to do that, I would say
to find the generic assets, those assets that can be used and reused in
different contexts. This depends on the composition, but usually an illustration
will be made of generic assets that feel
the space and set them all. And then some specific
and unique ones for the focal point or the center or the main idea of
the composition. Of course, I'm talking
in general terms here. In real life, there are cartoon backgrounds
made entirely of unique assets and some other will be made entirely
of generic ones. Just remember that
here we are working with them mentality
of kid bashing. So the more useful
assets are those that are the most
for your server, the most generic ones, ones that can be combined
to create new ones. So don't go about copying
assets mindlessly. Think about the way
they are gonna be used. Weight. We're done with the principal concepts
of kids machine. Now I'm sure you
really get to see how to approach the creation of a new asset in
a practical way. And we'll see that
in the next lesson.
13. Making Your Own Assets Part 2: It occurs to me that
you may want to make an environment other than
just a forest the scene. While I chose that for this team because the assets
that make up a forest or universal enough that you can easily adapt them
to different themes. I realized that maybe you
want to make something that requires more specific assets. Maybe you'd like to make it
a CD or a snowed station. In this lesson, I'm going to demonstrate how I
go about adding new assets to our back using
that in office now, sin. And of course the first step is always gathering references. I'm gonna go to my
Pinterest account and search for snow
cartoon illustrations. I'm aiming to find illustrations
as similar as possible to the style of the rest of the assets I have already made. If you go for a different style, reference as similar
to that style, sometimes it may be hard to find exactly what
you're looking at. This happened to me here. I could not find illustrations
in the style that matched the assets pack
the best. But that's okay. That just means
that we may have to improvise a leader at
the moment as Ryan, I would recommend you to
gather anywhere 10-30 images, title search for individual
things you think will make good assets
like an S3 or rock, or in this case
maybe an isosurface. Remember what we said
in the previous lesson? Always prefer things that
don't genetic and real server. One thing to keep in
mind is that since we're not making a one-to-one
copy of anything, you can always make
modification to something to either make it fit with the
style you're going for. I'll make something more
generic and they also well, okay, so he'd are important in turning except all the
images I gathered. Each one of these hazard, this one interesting thing
I think can be copying. The second step is to make a deeper scout and pinpoint
exactly what you're saying. You can transform into an asset. I like to organize them
into different categories depending on what I want
to take out of them. Like rocks or trees
or mountains. And of course eliminate
any unnecessary ones. So here's what I got
them. From this image. I like this long tree
in the background. I think they look great
and a bit creepy. And they can really
use not only in some winter scene
but everywhere. The other theories
also look nice. There could be a
bit difficult to make with a vector tools. You can make it work
by renewable creative, like I said before,
but I will leave that as an exercise to you. Continuing with the
theme of trees. I love this creepy trees
and branches, right? Not only for winter scenes, but also for other
creepy backgrounds. Trees, these trees look awesome. We may need to adjust the style because it is not that
picture of roundly. This one has a more
cartoony style. If you don't like to,
things like this arcs. They are a super-fast
and nice ways to draw a mass of trees, especially here, where
they work like ministries. Similar to our mercenaries, acid, but less detailed. It comes to show that
you don't need something super detail at all to make
for a great use of an asset. And the second thing I
like about this image, how this snowy
mountains, mountains, they are so simple yet they make the composition
work. I love them. Again, showing that it's not
the complexity of an asset. What makes them great, but the contexts
where you put them. Another awesome cartoon image. There are a lot of things that
I love about this and that we can take from the three-step polyester
and even the gate. But what makes my imagination
flow the most are these big snow cover
rock surfaces. I think they would
work great to put somewhere in the middle
ground of Israel composition. Just like they are here. Small drugs covered in snow. Because you, some of
those other types of details that can be hard
identify as an asset. Many of these conversations have a signal transition from the trunk of the
tree to the ground, which is something that happens all the time in real life, is going to be nice
to have some of these to detail two or three. I guess you can
make a version of each story with that asset on our probability whether
a more flexible is to make the snow
independent of which three. So it's up to you to shape
it where you want it. I would rather Borealis
would be nice to have, though that may require a slightly more advanced knowledge of illustrating an example. Winking here while directing you to some of my other courses. Maybe some cabins. This
one are nice and generic, perfect for reusability. Great. All of these items will be great to add to our collection. But I'm not going to show
you how to draw each. Instead, I'm going to
draw three of them to demonstrate the basic
picture try and techniques and how to transform these into nice and
reusable assets. This is not going to
be an in-depth lesson on how to draw with vectors. But I think all of these assets here then to be easy to draw. So let us start with
something really easy. Let's make this bigger
rock with the snow on top. Remember, we don't want to
make an exact copy here. We want a rack of the
same type, but different. When you drag using
vector shapes, you have to separate between
the different shapes of an object and treat them
as separate things. In this case, this rock can be thought as made of two shapes. The rock shape and
the snow shape on top. Let's just start. Let me get the rock first
and then other snow on top. Let's draw an arc
with the pen tool. When building this sort of Alex, I find it easier to just round spiky shapes and introduce
the curvature later on. So just make a triangle. And when you're done, select
the node and go to the smooth knows Mouton
in the tool controls. And now you have a note
you don't need anymore. I don't wanna pictorial
station is that nodes in curved sections I
getting in the way. And if you can, you
should delete them. If you want to make this
shape even more complex, like the one in the background. Remember that you can add notes super easy with the node
tool by double-clicking. When you're done, you can sample the colors from the
illustration itself. Though later on,
if you're going to move it to an asset pack, you may want to go for a
less specific color scheme. Okay? And now for the snow
here in the reference, this now is made
with these arches. Remember what I said
about making an actress? I find it easier to just
draw them as triangles. So hidden gonna make a
shape with triangles and draw well outside
of the rock area. Now the classic technique
to remove the excess, you should be familiar
with this technique. If you don't
remember how it goes for watch things happen equals. Now repeat the same steps
to smooth the corners, remove the nulls and
adjust them so they look all the keys in the reference. Pay attention to the details of how the shapes and
drugs and 100. Something doesn't
look as you expect. It is almost always
because you haven't paid as much attention to the small
details in the reference. One final thing, this rocks indicate detail with a
line that goes over them. I know that this is a
particularity of the style of the reference that is not in
the style we are working on. The assets I made don't have this type of lioness textures. But just for the sake of getting familiar with the
process, Let's have it. This is just a quick line
made with the pen tool to indicate the smaller changes
in the surface of the rock. There are some other
things in the reference that we could implement
that in our version, like the texture or the more complex no
pattern or patterns. But this is just
a demonstration. I'm going to leave the decision to include those details to you. Just keep in mind that the asset doesn't have to be something that has to fit in the
illustration you took it from. An again in should
be its own thing. Let's move on with a slightly
more complex asset and make one of those tributaries
that I like so much. The only difference with these
assets is that the shape is a bit more detail,
but that's about it. It should be easy to make. To tackle this type of
complex looking object. You will need to
simplify it mentally. Think about the
big shapes first. This way you can assign the
way it's gonna go easily. In this case, if
you think about it, all of these trees can be simplified with a
simple triangle. The main trunk is a triangle. And the branches as well. They are not exact triangles, but triangle like things. You probably get what I mean. So let's start from
there with an I in the proportions
with the pen tool, make the triangles that
makes up the tree, the trunk and the branches separator as different objects. It feels right as
a separate object. It is much easier
to edit and make variations later on if you want. Remember, we don't want an exact copy of any particular
tree in the reference. We want one of its type, one that could more or
less be one of those. We have the big shapes.
Hitting may find it useful to give it color
and remove the line. With the node tool at multiple nodes all
around the surface. Moved into sculpt all these
bumpy shapes at the site. But important, keep the notes as coordinates so they
are easier to handle. Keep them up to the last step. If you ever accidentally
make another smooth and accidentally
introduced a curvature. Remember that you can
transform any node into a corner node type by selecting a node and double-clicking
on the corner. Now, giving you a straight
section once again. Now you can probably
see how similar it looks to what you want. Only that it is a bit choppy. The choppiness. We are going to finally introduce the curvature. The trick I have to draw these
in a controlled way to use the Shift key while
dragging from the null to pull the handle out, giving you much more control. You need to do this from the
two handles that makes up a segment of a curve to
fully effect this section. And we are done with the tree. As you see, this wasn't
as difficult at all. This process of working
with a straight section. Two then at the final step, introduce the curvature is the main way to draw this
organic looking objects. And then the final example
I'm going to show you how to draw man-made objects. Constructed objects require a
slightly different process. They usually will remain a
larger quantity of shapes. But the good news is that
they tend to be much more geometrical and therefore much
easier to draw and modify. What's more. Concerted. Objects tend to be
much easier to make variations because they add themselves, get
batched together. You'll see what I
mean in a second. Let's make one of these
cabins perfect to add to a farm with the ground
on a snowy station. The key to draw this
constructed objects is to hyperfocus on the different
shapes that makes them up. Draw the shapes by separate and then
assemble them together. Here you can see the
roof, the walls, the doors and windows
are all rectangles, like I said, super easy to draw. After you're done, you
assemble them together. Remember that it's super
easy to mess around with the proportions and make
some quick variation. And as a quick tip to do that, try to be smart at the
moment of grouping the different sections
of the assets together. E.g. this shape that makes up
the chimney can be grouped together and in this
way can be used for other variations
much more easily. Like I said a minute ago, keep bashing the asset itself. That's it for making
your own assets. Hopefully now you have a
bit more of an idea of how to approach adding stuff
to your collections. There is no escape to draw in if you vote is to
make an illustration. Not even when an asset back. So it's always good to practice and in more and more stuff. Having said that, I'll be
adding more items to the back. So make sure to
check the resources every once in a while.
14. Introduction to the Project: In the next few lessons, I'll be constructing
a background from the ground up
using the asset back. My goal is not only to
demonstrate how to use the back, but primarily to teach
you the theory and tools necessary to create a beautiful
and polished background. This requires a
bit of art theory, as I mentioned in the
previous lessons, along with some practical
tips on how to apply it. Each lesson will focus on one of the primary steps in
borrowing rate and a police background
using the assets. First, we will explore
a sketch in where I'll experiment with
various compositions and select our preferred one. Next, we'll move on to
the refinement stage, where we will start again from the final image using the
sketch we made as a guide. From there we'll tackle color, assigning the final palette. Finally, we'll address
light and shadow, adding elimination to
complete the composition. Maybe some details as I'm going through this
and other topics. And you don't usually work
linearly when illustrating. These are the steps
you need to follow for pretty much
every illustration, any CEP, I wanted to
take this opportunity to demonstrate how to use
the asset back correctly. As we proceed
through the project, I will begin each
lesson by introducing a simplified and practical
version of the theory and tools that we'll need to complete the task at hand
to keep the lessons short. And to the point, I decided
not to go for real time. Instead, the lessons will be
sped up and throw down as necessary to demonstrate
how I use each technique. This way you can watch
this lesson repeatedly and hopefully internalize how to
apply each theory EN tool. If you'd like to follow along. I also included the Realtime
lessons which will run for approximately 5 h
and our uncommented. However, I strongly
recommend you that you first watch the
normal lessons and pay close attention to
the theory and those we discussed before attempting
to follow along. And only once you
are comfortable with the concepts presented
in the lessons, you try to follow along.
15. Sketching the Background: Let's get started
with the project. As I mentioned in
the introduction, the first step is to create
a sketch or a thumbnail to visualize and
get a better idea. Holiday illustration
is going to look, but at least put us
in the right track to develop an idea. I want to expand
on this point and explain why it's helpful to create one or more sketches before assembling the
final background. If you try putting
together something with the asset back
leg, I suggested, you probably realized that
it's not easy to come up with something good or
interesting on the spot. Even with the process
of kid bashing, you still need a good
composition to build upon. Just like with a
traditional illustration. That's where making a quick, easy to make a sketch or
thumbnail comes in handy. Glucose sketch tons and tons of compositions and iterate
and improve over time. And in the end you are
bound to get something better than just rushing in. Now, in this lesson,
I want to show you the sketching
techniques in Inkscape. But if you're more comfortable
with pencil and paper, I recommend you to go for that. It's much easier to sketch out concepts on paper
than on Inkscape. But if you're more
of an editor type of artist who prefers trying things out undefined from their insight may
work better for you. I'm only going to draw a
single sketch and move on because I already have
something prepared beforehand. However, I strongly
recommend you to make at least six quick sketches
to refine your ideas, see what works and what doesn't, and improve your RDS
through practice. So what makes a good sketch? The study of what makes good illustration is
essentially composition, which deals with how to arrange multiple objects in a
way that looks good. Composition is, say, complicated and fairly
advanced topic. But it's super important for
any type of illustration. While it's impossible for me to cover the basics about
composition in this course, I can give you a list
of practical tips to get you the most results
in the shortest time. The first, and in my opinion, the most important
tip I can give you. Think of an idea for your illustration before
you start the sketch. The illustration
should always try to communicate an idea. You don't need to have a B
cell concept at this point. Just a general
idea will suffice. You will explore the
visual concepts with the sketches. For this project. My idea is a mysterious
resting area in the middle of the forest. All my sketches
will be about that, trying to communicate that. Lastly, I strongly recommend you that you search
for references. It's impossible to come
up with something good if you don't inform yourself of what the pros are doing in terms of composition value and colors. If you want to improve the
quality of your illustrations, find similar illustrations and put them next to your
own under Canvas. Take inspiration from them and even steel small
sections if necessary. I must warn you that I already know what I'm
going to be doing. I've already drawn
the final project. And that's why you don't
see the references here. But when I was coming
up with the project, I have plenty of references
and usual to in fact, just to show you,
here are some of the actual references I used
to come up with a sketch. So remember, if you want to
create whether your sessions gather more references and try to replicate what
you see in them. Let's begin the sketching phase. And except now that we have
a clear concept in mind, I prefer to start with
a guy of the area, what I'm going to be working. So I can have a
clear understanding of the limits of
the illustration. I recommend you to do the same. I'll just make a
rectangle on the canvas. And with the rectangles
to select it, I set the resolution
in the term contracts. I will work at 19:20 by 1080, which is the most common
HD standard for video. However, you can work at any resolution and
ratio you prefer. Make sure that the
drop-down is set to be x. So the values are handled with pixels rather than the
default millimeters. And then you just set the
input that says W2, 1920s. And the one that says eight to 1080 to change the
width and height. Now that you have set the guide layer to start with a sketch, if you have no idea
where to begin, let me introduce you to
a technique that has helped me enormously in
improviser and stuff. I call it the layer metal. Most illustrations
have a foreground, middle ground, and background. We've got the foreground to all objects that are really
close to the camera, mental frame, the composition, or give it some depth. That middle ground
is usually the edit, whether things are happening in-between the foreground
and background. The background is whether
things far away are. However, you can see
that most objects are layered into more than
these three layers. A middle ground may be made of multiple roles of three hills. The background may
have multiple layers of mountains and clouds. The foreground usually
will have a single layer, but it still can
be more complex. When they're building
a background with an asset back like this, it is easier to
think in terms of layers of rows of objects. Build one layer at a time, usually from the front-to-back, but it can also go
the other way around. This way, you only think in
terms of the current layer. You only worry about
the placement of the assets in relationship
to its layer. And then once you've
already placed. And if you are careful
with this method, the illustration
kinda builds itself. So let's start with
the foreground. If you did your homework and have done some
references with you, you'll notice that
the foreground is often used to frame the rest of the composition and to
help it give it some depth, like I said a minute ago. So it's super common to have
some assets in the corners. Again, look at the references
to see what's common to do. Here. I'm going to place
two big objects at the two bottom corners. Now whatever the small details, just paste them in
their rough location. Remember this is just a sketch. We'll re-allocate
every sand later on. The middle ground is usually
the most complex one, made of multiple layers or rows. This is usually one of the important things
are happening. So let us start
with the main idea for the whole composition. Which if you remember, what's like a resting
area in a dense forest. But first, I'm going to add something super fun
and interesting that you see often in the references in
the woodland forest. This heals that overlap. They really help if depth
and they really look good. Now I'm going to move
on to the main idea. Here. I felt that some ground
coloration and maybe some three stamps for sitting will make for
a great best scenario. Remember, we're sketching here, so everything is subject
to change later on. Now we need to indicate that
this is a dense forest. And I think this hill
over here can do that. Here. They're going
to be a lot of trees. I feel that with
all these trees and decide something is
missing on the other side. If you look under
study some references, you'll find that a very common
technique to do when you have a ton of objects of
one type on one side, is to add one big object of the same type on the opposite
side to balance things out. I like the idea of a big
tree here on the right. Moving down a layer. Another effective
compositional trick is to add some sort of wall that closest
of the view and create a sense of
claustrophobia. And I'm going to
do that by using these assets of all
the three smells. I will build a wall by duplicating this
asset over and over again to the span of the entire length
of the composition. And now we're starting
to overlap the layers. Remember which areas
service route through the overlap ones and
assign it accordingly. Note that I have grouped all the three objects to
make them easier to handle. It doesn't feel
claustrophobic enough. So I'll add another layer
of trees behind it, always making sure that they are visible through the overlap. The layers provide
the nuclei Visceral. We'll finally the background. I will keep it simple by
choosing one of the big assets, like the mountains and placing a few of them behind
everything else. It's common for the background
to have multiple layers. So I'll add the one of the Cloud assets to the
back behind the mountains. To complete the scene,
I'll add the blue sky and a few washes here
and their functions will serve as a reminder to add them at the size stood in
the final illustration. And we are done with the sketch. It is a bit distracting
to have all of these trees coming
out of the frame. So I chop them off a bit. Later on, I just decided
to go for a clip, which was probably
the smartest thing to do in the first place. So hopefully you can see how
easy it is to sketch out something quickly by just
throwing some asset together. If you think in terms
of layers, here, I will recommend you to do
this over and over again. Practice making tons
of these sketches. And only move on
to the next stage when you find your
absolute favorite. Remember, this way of building sketches with layers
is a suggestion. So one thing the way you
want and in the way you feel enhances your
creativity the most. One less thing, if possible, using pencil and paper, since it is soft and
more comfortable and faster than
working in Inkscape, it is true that
making this sketch took me like 5 min to complete. But you could do it
even faster with a quick and easy Pencil one.
16. Refining the Sketch: Alright, it's time to begin
the asset could bashing of the final illustration. Let's take a look at the
sketch we created in our last lesson as a guide
for what to do next. I don't like to
start from serum. I think it's always
good to refine something with the rest of the illustration as context
to see the whole better. I just think the heels and the sky are pretty good as I am. So he didn't just make a
duplicate of the whole sketch. And I'm going to go replacing
the assets and we're making the different
areas one by one. Let's begin by focusing
on the area with the trees in the sketch that these were
placed haphazardly. I want to create a
natural-looking section of trees in a forest. There are three important
tricks to keep in mind when placing objects to make
them look natural. These roles are
really important. So you shouldn't follow
them to the letter. Otherwise you risk the entire
composition to look bad. First, avoid mechanical looking
distribution of objects. Like placing an object exactly in the middle between
two other objects, especially when
they are similar. For instance, if
you see two trees, make an effort to avoid placing another three in the
exact middle of them. This rule as two
applies when you align two objects horizontally
or vertically. E.g. a. Bush that aligns
perfectly with a three. In this example,
as you can see how it looks like the objects
were placed deliberately, not created
organically by nature. The second rule is to
overlap as much as possible. Can we are working
with cartoons. They are flatter than normal. We don't even have a
perspectively is set up. The only way to imply depth
and S is to overlap things. This of course is something
that's more important for things that are meant
to be relatively close. One thing you'll see me do
is to place a lot of bushes, willow trees, or patches of
grass in front of rocks. Or three slightly
overlapping other threes. If it is possible to
overlap something, do it. Remember to follow
the previous rule? Never put something that aligns perfectly
in the middle of something like a bush that is centered
perfectly below a three. The final rule is to avoid
tangents at all costs. Tangent so good when
two or more objects touch or nearly touch
at the borders. And this includes, say, a special case of the objects contacting with the border
of the illustration. These tangents call
attention to themselves. Remain the viewer that the
drawing is two-dimensional. Always be on the lookout for accidental tangent because they can draw in another way
is fine composition. It may be challenging to keep these rules in mind,
the beginning. But with practice,
you will do it automatically without
even thinking. These concepts will be essential
throughout the rest of the illustration and in any
illustration in general. So make sure to
internalize them so you don't even have to
think about them. On until a restriction. I duplicated the trees
from the leaves. And I ended up removing the foliage because
it was distracting. To create a realistic forest with trees in front
and in the back. I made the trees in the
front larger and thicker, and those in the back
smaller and thinner. Always keeping in mind the three rules of
placing objects. I space them apart and
adjusted the thickness. You'll notice that
I also give each of them a smile inclination. This was in pretty much all
of the reference images. So again, always inform
yourself with references. Then I place the leaves on top. This process was slow
and time consuming because I don't want them to
look like copy paste them. I made sure that the scale of
the leaves much in threes, and I added a slight
rotation to each one. I even modify the shape of
a few of them using an L2. This is something
common that will happen with pretty much any type
of nature composition. You have a ton of
objects that are duplicated from
one single asset, and you have to go in and make a small modification so they
don't look like duplicated. Okay, we're almost
done with the trees. Now I'm going to go for the
three that is closer to us. And here's the
thing. In general. Objects that are closer to us should be more detailed than
the ones that are far away. Especially if you
have the same objects repeated in different places. These three at the front, it is too close to us to have
those big simple leaves. They are too distracting. What we need to do is to have a version that is more detailed. Well, here we go right
back into the concept of learning and adding new
assets to our back. I'm going to search in one
of the references that I've gathered to
see if one of them has one type of foliage that is more detail and walk
for these three. I think that this one
will do the trick. I really liked this leaves. I think they are basically an HD version of the
leaves I already have. So they'd worked perfectly
for the front three. Let me repeat what I said
in the asset making. Listen. I'm of the idea that
tracing over this section of someone South can be considered
as some sort of theft. However, copying a type of acid, it is not some not going
to trace this leaves. Instead, I'm going to make my own version just by
looking at it and improvising something. And it is done. And I realize these new
foliage asset could work really well in the bigger
trees in the back as well. Now, the row of trees, I think they look
more or less correct, a couple of integers, one third, my main problem
with them is twofold. First, they can be a bit taller. And second, some of the
trees look too simple. I want to align them a bit better and just play
around so they give this feeling that I
mentioned in the sketch of a world that makes the whole scene feel a
bit more claustrophobic. I also went in and edited
a couple of those trees in the center that are
the most visible ones. And that will give me
the most attention. So they have to
look a bit better. Then there is the backlog here to just play around
to see what works. In fact, it is something that you'll be doing a lot
in vector illustration. Just playing around
with the positions and eyeballing what
you like the most. And finally the mountains. The thing that I
don't like about the mountains is a scale. They look just a bit too big. So what I'm gonna do is
to make the pig smaller. And this will affect the
scale of the mountains. I'm also playing around
a bit with the location. I think we are done
with the refining. Like always with any type of illustration that's always the
potential for improvement. Might read Dutch, a few small
things as we move along. But for now, I'm happy with
the way everything looks.
17. Adding More Detail: We are done with refining
what was the sketch. And now we have a nice
illustration, but a bit empty. In this lesson, we're
going to add some objects to dress up the scene and
make it look more natural. So hard with dressing
up the scene, mostly with bushes and
rocks, but mostly wishes. We're going to add
a ton of them. And here's another concept
that we will help you out, make it better matrix
since I got it grounding. When you present an object and
there's nothing around it, it will give the
impression that it's floating up in the air, or at least in an undefined
position in the ground. But the moment you put
another objects next to it, overlapping it, we get enough information to make the two objects feel
connected to the ground. So if possible, right below every 31 some objects
overlapping it. In this case, a bush will
do the job just fine. This is a resource that
you see all the time. Once you start paying
attention to the references. Anyway, a really nice way to start dressing and
the restriction is to start by grounding the most important
objects in the scene. In this case the
three at the front and the ones at the back. Also notice that not all trees have bush right below them. That will be, we'll always use the headwind
dressing. The dressing. Sometimes I know
that right behind the tree would do the
trick just as well. The bushes through
serve the purpose of Grandin, another
bigger object. Sometimes you just
want some bushes. In some places. In this case, I felt some bushes
here on the right and on the left side
would look nice. Even though there is only a
limited amount of Bush acids. You don't really need that much. You can always scale, rotate mirrors or plain
straight edit some of the bushes or any other
assets if you want to. Crashing illustrations
is all about being crafty and resourceful
with the things you got. And believe it or not, the fact that you
have a limited set of assets will make you more creative by forcing you to
find interesting solutions. E.g. here, I wanted some
different type of push. So I got a cloud and
change its color. Once again, I took an
idea from the references. And that idea is to
reinforce the wall of trees by placing a big
bush right in front of it. Here's another nice little
detail that you can use that related to the
concept of rounding. If you place this
small role of glass coming out of the ground
overlapping some objects, it really gives the
impression that the object is really resting on the ground. You can use this
with other objects, not only with glass. E.g. you could use
this grant bumps in the asset pack and a small object that has
the same color than the ground will extend the
grant of it and really create some nice effect of grounding
and setting up some scale. When you send these
small-scale random technique, always keep in
mind three things. One, follow the three
rules of placement. The place, the patch
of grass right in the middle of a bigger shape. Visit with one of the
sites and be aware of its alignment to extend it all the way
through the object. This is a bit of a
personal preference, but I feel like it
doesn't work as well when you overuse this. And three, be especially
wary of the size. Remember that this
is supposed to be a small patch of
overlapping ground. It should be more or
less consistent in size. The budgets indirect should be smaller than the
ones in the front. There's no need to be
super accurate though, just being aware of
their relative sizes. Another thing you'll see me
do with this small patches of grass is to add them
to a cold area. So it overlaps with the
area with the other color. Again, this is something you see often in these sorts of things. If you look at the references
and it always looks great. Proxy for your friend
when dressing up a scene, especially smallpox, they helped add variety and occupies space. You'll notice that I decided to finally take out
the central area. The most important idea
in the composition. Here I was putting drugs in place and I noticed that I could use the stones to imply
something is happening there. Hopefully the viewer with ask, what are those frogs for? Good people sitting
there or standing there? What was the purpose? This is an integral part
of the composition. You want the audience to think and feel something about it. Also, the centerpiece of the composition should be the
one with the most detail. Detail brings attention. And you want the attention
to go to the focal point. So here I'm going to be
adding a ton of stuff to this slug and to the
area next to it. I want to add things that aren't in the rest of the composition. E.g. this mushrooms. I'm not only unique
to this location, but also the only place in the entire composition
that has the color red. That's sure to call
attention to it. This idea of adding
unique stuff to the focal point rotten me an idea that I didn't have in the original
version that I made. I decided to throw in a few of the basis in this
idea immediately intrigued me. Why they will be basis in
the middle of the forest. I don't know, but I
hope that we will ask themselves that
question as well. And I decided to roll
with that concept, expanded and try new
things related to it. As you'll see later on. Okay, I'm more or less satisfied with the
entire composition. I still want to make some more refinements here and there. But the bulk of the
dressing was done. Before moving on to
the final touches. I want to have the final
colors of these Thracian. So next lesson, I'm
going to show you how to pick a missing colors.
18. Adding Color: Picking good colors,
probably one of the most important stages
in any illustration. It's not something
that's easy to do without some
knowledge of theory. In this lesson, I want
to show you my metal to easily get amazing colors. Now, there's a lot of
theory regarding color, like color schemes,
color temperature, the HSV mold value groupings, that sort of stuff that I don't
want to get in right now. However, I will stick to the
cross premise and teach you the most important
practical elements to get you started as
quickly as possible. So here are some of the
fundamental guidelines and rules you need to
pick the colors. First, you need to understand the concept of color distance. You will probably notice that here in the fill and
stroke dialogue, you have to color
selection modes. One is the wheel that has
all the hues and the wheel itself and the triangle with
the saturation and value. This is the most effective
way to see and pick colors quickly because it allows you to see all the variables
at the same time. However, down below, you have another model which works
slightly differently. These two color
selection moles are connected with
developers often say basically wanted to give you two ways for you to
select the same colors. If you change the
color on 1 mol, the other will update. But going back to the last
color selection model, what makes it useful for us is that it
separates very clearly between the three main variables that define how I color looks. Those are hue,
saturation and value. As a quick summary of
what each of them does, the hue the first slider
handles the actual color. Could be red, blue,
green, yellow. There is a saturation. This handles how
much gray color has. At full saturation,
the color looks as vibrant as possible. Hello saturation, it
looks a bit dull. And finally, there is value. This one controls how
dark the color is. At high-value, the colors becomes as light as it could be. At rebellious, it becomes black. This color selection
mode is really useful for illustrations because it allows us to easily
compare how much distance exists between the different
variables of a color. Distance is super-important
for the colors to look right with each other and
look at them honestly, take a look at these two groups. We have different boxes. I've only change
the hue variable. This is duration and value
is the same in both. But notice how the colors in the upper group just
doesn't work well together. While the ones in the
lower work just fine. This I only change the hue. The main difference between the two groups is the
distance in the hue. You can see it here in
deciders in the group below, because the distance
are not that far away. There isn't that much
difference between colors. And they work together.
They harmonize. This example. I just repeated the same thing only this time. The only variable
that I changed, it was this saturation. And again, notice that the squares with the
most distance between saturation didn't work nearly as well as the ones
with less distance. And the same happens
with the value slider. Just think of distance
equals our money. The second thing I
want you to keep in mind is the concept
of color schemes. And I don't want to open
a can of worms now. Color schemes that are
super complex subject. So for now let me
give you the most important info about them. Keeping in mind that we just
talked about color distance, we talk about colors in an illustration is useful to limit yourself
to a range of use. Usually spending no more
than two different ones. And then just selecting
within that range. If you pay attention to
the work of the process, you'll immediately
get what I'm talking about. In this example. If I sampled the colors
from the illustration, you'll notice how all or most of the colors come from my limited
range of the hue slider. And occasionally you
see colors that are far outside of the hues that
dominate the composition. These are often called
accentuating colors. And these two can have a range. So to summarize, when deciding the colors
for your illustration, think in terms of the main dominant range of use you want. And maybe arrange for a few exception colors
that are going to have some contrast or accentuation somewhere in your illustration. Relating this to the
previous concept we talked about color distance. The recent to pick a hue range is all the colors are
super harmonious. If we pick random colors, then there will be
no security that they will fit nicely together. Okay, So here's the thing. I also want to take this
opportunity to show you a bit of a foolproof method to
pick the right colors. To start picking
the right colors, we're going to steal
the colors from a successful composition and adapted to around
stealing colors. It's one of the few things
are these are allowed to directly copy
from each other. And it is a great way to build the color foundation
to build upon. So here I have this
amazing background from professional artists
create swatches. I love his style. We're going to
import this image to our document and sample a few of the most
important colors. I want to start with the sky
and ground and mountains. You can see that I do
the type of mountain from the Southeast and some of the trees in the back because the composition is so
different to mine. This no big trees
or bushes here. I'm going to have to improvise
the rest of the colors. Here's where the concept
of color distance comes in handy for as long as
you don't pick hue, saturation, or
values that are too different from the colors are
ready in the illustration. You'll know that they
work nicely with it. But of course there
is still a lot of experimenting and fine
tune into the hair. As in any illustration. You can see how in a
matter of a few minutes, I managed to change the whole
feel of the illustration. A couple of things. First, I should have probably pick the colors
at the beginning. In the sketching phase. That's the best place to do
it since coloring a sketch is faster and we'll give you a more accurate preview
of what you want. But here for the
sake of the course, I wanted to talk about color separate from
everything else. So the next time you want
to draw an illustration, consider doing all of these at the sketch phase
and start from there. And second, this is
more of an exercise. Now, they always make
more than one version. Especially if you're at
the stage of sketching. But even now, it shouldn't
be too difficult to do it. Just look at how fast
I change colors. Just make copies of your illustration and
try new color schemes. Maybe a different time of
day or a different station. What different colors? To me, this is one of the most fun
stages in any illustration. Okay, we're done with the color. But remember, you're never really done with
the fine tuning. Another, the final
colors are selected. I just wanted to be
with a gestation. The final path, which
is often one of the most time-consuming
moments in the entire drawing.
19. Finalizing the Illustration: Now it's time for
the final touches. This stage can take a long time because you'll never treat
them with touching things up. Even when you're done,
you'll always find little things that you'd like
to fix or change or add. Still, I consider the
stage of the final touches because technically
the restriction could we just finished as it is, maybe with a few quick fixes? The next trenches
we're going to make. I'm not technically necessary, but they will add on to
the final illustration. I felt the central piece of the illustration
needed something else. So I decided to bring
in a few more of those bases and
other items. Here. I'm just playing around seeing what works and what doesn't. This is a common thing you'll be doing all the time
while you're sitting, at least when you're illustrating
using an asset back, just trying things out. New asset scholars locations. It sounds super
easy to do and say. And you should take
advantage of that. Because I wanted the area
to give the impression that was some sort
of meeting place. I decided to add a log and
prepare it in a way that looks like it was used as an
improvised sit in object. Again, being creative with
the assets you have is really essential because you're not going to draw everything
the same way. They have varied
based I improvise that from an existing
asset and it worked. It looks completely different when building
backgrounds like this, being created with the
things you get is essential. Because no matter how
much assets you got, it always want to be missing
the exact thing you want. Now I'm playing with the idea
of removing all together the foreground and
putting something else in the corners to
occupy the empty space. But it just hasn't worked out. This happens sometimes not already as will lead
to something great. However, that
failure did lead to a new better idea to as basis all pile up together and the borders in the foreground, those implying that
something is going on with that area that goes
beyond the centerpiece, maybe a remnant of
some kind of ruined. I like the idea and I
decided to go with it, adding a few more basis
to the background to reinforce that concept. But now it runs the risk
of feeling like this was some sort of this post
area for the local shop. So I came up with ADF
either in a wild animal in the distance will make it feel like it's really somewhere
deep in the forest. But a wild animal is a very specific thing and a
fairly complex thing to draw, especially if you're a beginner, I'm going to do is to
show you a little treat that vector artists
use hidden there. And if you use it sparingly
and strategically, it will hugely improved the
quality of your restrictions. So here I am in the
royalty-free stock site pixels, which is political. And it has a decent
amount of material. He didn't want to search
for an image of an animal. I want this case a deal. I want to import this
image to Inkscape. I'm going to trace over it. It doesn't need to
be super detailed. Trace over. Just a
rough quick work with the animal will
be in the background. When you're done, you can copy the sign and imported
into the project. So now with the deal done, I'm going to put it
in the right side looking at the focal point. And I've got to make it
merged with the background. I don't quite want it to
call attention to itself. Otherwise, it will be fighting
with the central piece. Another illustration part of the composition is
basically fully done. I will be fiddling with some stuff and maybe
trying some things out. It's always easier to try new stuff when you
got everything almost done because
everything looks finished. But here's the final
trick that I'm going to give you one,
making backgrounds. You will notice that I flip the entire illustration
horizontally. This is a very well-known trig illustrators
use all the time. And the idea is that
it helps you see the image in a new light. And this helps you spot any mistake your brain
has gotten used to. Likely doesn't seem to be large mistakes I can
spot at the moment. One problem with this trick
is that your brain gets used to this image pretty fast. So as soon as you flip it, brush to find any mistakes
and fix them, immediately. Flip the image
frequently all the time from the beginning
stages to the end. Other than that,
I'm just adjusting the phenyl things to the drain
and trying new stuff here, minor things that they
call the amended to try, but still we're done. You can see that this is
starting to look critical. The final lesson in this project is gonna be about adding
light and shadow. And this is what will give
it that nice finish thrill.
20. Adding Light and Shadow: Here we are almost done. This lesson we'll be adding light and shadow
to the recession, as well as adding just a few extra details here and there. But before we delve
into light and shadow, I want to talk really briefly about the basic theory we need. I already talked about light
and shadow in the submucosa. So I don't want to repeat
myself too much in this lesson. When the light rays
hit a surface, it changes the color
of that surface. It will make the lighter
of a higher value. Now, it can be a bit
more complex than that. And we'll get into that. But for now, just think
in terms of value. In this example, we can
see how the idea in light has the same
hue and saturation, but the value has
just incremental. Remember then the last slider
in the HSB color mode is the one property
they can control how light or dark a surface is. Depicting an object with
areas of light and shadow. The most common trick
you'll be doing is to sample the color from
either light or shallow. So they are the same. And then slightly
move either up or down the B slider to
increase or decrease the value of the color
does implying a plane is either in shadow
or hit by light. So remember this
two-step process, sample the color and then move the slider either
up or down a bit. Feel it feels like it's
in light or shadow. Now, here's the thing in real life where the
light interacts, not with flat plains, but we found this surfaces. The shadows have
nice and smooth. And while some styles of cartoons use this type
of smooth shadow, this style of ketosis
we are working on. They go for a sterilization
of the separation between light and shadow areas by making it super hard
and clearly visible. This is something
called cel Shading. And I personally think
it looks awesome. There is a nice little trick
that's super easy to do. And it's usually employed more
in shadows and highlights. Just make the shadow shape on top of your shape
you want to draw. And then instead
of giving a color, you send it to completely black. Then remove the alpha slider, the one that controls
the transparency. Because we are making a black
shape more transparent. We're darkening whatever is down below those low and its value. Like what a shadow idea does. This method also works great for any asset that made
of multiple colors, not just a single one. Because the shadow
shape is transparent, it will lower the value
of anything below it. Going back to the project,
I want to start by creating a highlight area on
the right side of the trees. Lose implying that the
sun is coming from a low angle at the
right, like a sunset. Which works great for this
color scheme. I went far. I'll be creating a new
shape right on top and use the two-step method to
do it the right color. I'm going to do the same for all the other trees
that are closer to us. But now for some shadow areas, this time I'll be
using the shell trick. I basically just run on top of everything really quickly and set the color to the shadow. A couple of notes here. First of all, I'm using a
little technique I mentioned in the lesson of the money goes. But let me remind you. It is a feature called
pasting the style. If you copy a shape
with contrast, you can paste the style that is the fill and stroke colors to another shape while keeping the shape geometry to select it and then hit control shift P. This is super useful to
paste the exact color and transparency of the
shadows super-fast. And the other thing
I wanted to mention, you can see that the shell
is not entirely black. In fact, you can see
that the color I picked was anonymous
black brown. This is a common trick to
make the shadow look better. To live with a bit of
color to show through. This only work if it's subtle. And to me it makes
a clear difference. Other than that,
I'm trying to be consistent with the
location of the shadows. This is a low under
light source. So I tried to be
as consistent with the angle when drawing
the shadow on the floor. But remember to not sweat it. This is a cartoon. You don't need to
be super accurate for as long as it feels right. Speaking of shadow
shapes in the ground. I so notice how I add a shadow
shape on the back heel, just American smooth shadow
shape to the ground. This is meant to imply that the light won't penetrate
too much in that area. Because of the three density. It is certainly not
realistic at all. But it looks good because it
adds detail to that area. The highlights in the
bushes and also something that's not entirely accurate. But it still works because it's subtle and not distracting. Okay, one last trick I
like to use contextualize. This is a type of shallow
that formed by the contact between an object and
the ground, this one. So we plugged the ground in shapes that we talked
about previously. They can pass down further the objects and give
it dimensionality. We have done with
the lightening. Now for some final
finishing touches. Again, this three
over here is just too big to not have
any type of texture. So I decided to at
least add a couple of situations by using a line plus the deeper
Stroke Path effect. Not necessarily at all. Great thoughts, some
detail within hurt. Check out the resources
file to learn how to use the path effects
as an extra. And finally, to truly
end the illustration, I feel entire composition
feels a bit dull. I feel there's not
enough contrast. So I'm going to go into
some of these acids, enter saturation
with the slider. Either want to go
overboard with this. I just want to add a bit more
life into the whole thing. Now we are truly done
with the illustration. Of course now I look at it. I feel like there's
1 million things that I would like to improve. But that will happen to you with every single restriction
you'll make. You'd never really finish it. You just stop working on it. I think it looks
pretty good as it is. For a few extra words and
guide on where to move next. Please check out
the conclusion to the course on the next lesson.
21. Conclusion to the Class: Congratulations on
finishing the course. Hopefully you enjoyed
this introduction to the wonderful
world of background, the same, I'm sure you feel ready to tackle the
next big challenge. Here is you can go into
ways depending on what was, what got you hooked. If you enjoyed
vector illustration and drawing with
keyboard and mouse, I have quite a few courses on drawing and rendering
using Inkscape. If you're a beginner, I
would recommend you to check out character design within CEP to learn how to
design and illustrate collectors and daily
with keyboard and mouse. Or maybe to the vector rendering to really
push the limits of rendering and finally send
sketches using Inkscape. If on the other hand, you are left one
thing to learn more exclusively about
background design. I do have a course on that. In fact, this one is
a bit of a remake of that one with an emphasis
on the asset pack. Of course, suddenly I haven't found much content
on background, the sign that it's not aim that concept art and
traditional painting. If you have any question
about the course, please don't doubt in contacted me through the course page. So I can answer as
fast as possible. I'm always looking
for feedback and ideas for a second and dwell. So please don't be
shy to contact me. And I guess that's it for now. I really hope this course has
been of some help to you. I see you in the next one.
 Martin Belvisi