Transcripts
1. What We're Creating: This is such a cool
feature and technique. I'm sure you're
going to love it. And I'm going to take you
through this step by step. So if you've got very
little photoshop knowledge, you'll still be able
to follow along. Now, we're going
to start off by, first of all, doing the
background picture in here. This is generated using AI, so you don't have to go
and find an image at all. Then we'll be putting
this into the text, so we have the picture
inside the text, and then we can then do
things like the stroke, the line around the
outside of the text, the little drop shadow in
there and the other text. The great thing about this
technique is that at any time, I can change my text, and the picture will
still remain in there. Or I can even go in and I can change the picture
to something else. So ready, ready, cool. And I'll show you very
quickly now how I can just very quickly change
this to a different picture. It's as easy as that. I can also change the text to something
ready fast as well. So I'll just say, go in there. So really nice, flexible
way of working. Anyway, let's get started
right from the start.
2. Make a Blank Document: Make a new document. I'm
going to go to New File. And if you're doing
something for the web, choose web and you
can pick one of these sizes or you can put your own sizes in
there on the right. If you're doing this,
make sure you switch artboards off because unless
you've used them before, they can be a little bit strange if you've
never used them. I'm going to go with print because I'm creating
something which is going to be a poster or a birthday card, something
along that line. I'm going to say view presets
and find a five in there. Now, I don't want
this to be portrait. I want to be landscape, so I'll click on
landscape in there, and then I'm going
to go down and choose Create at the bottom. There it is all ready to go.
3. Make an AI Generated Paper Scene: Now that we've got
our page up here, we're going to make the
fish scene by clicking on a little button right at
the bottom of your toolbar. It's this one down here. Now, if you can't see it, and I'm going to pull
this out like that. Click on that
little double arrow to make it into a double row. It's just easier for
you to see that button. Over there, it's exactly
the same button, whether you are single
row or double row. I'm going to click on
that, and it opens up the generate image area. Now, this is where we actually
type in what we want. So because my
typings quite slow, I've just typed
this out already, copied it, and then
I can paste it in. So I've said, create
an underwater scene in a paper cutout style. And the content type is
going to be art over there. The rest of these I'm going
to leave switched off. Now, if you try this yourself, you'll find that there's a photo option in there so you can have things that are a little
bit more realistic. You've got effects in here. So if you click on
there, you can say, Oh, I want this to be
an anime effect or an art deco style of effect. There are different styles
over here that you can use, and you just go
through and choose the sort of thing
that you're after. And over here, we've got a
composition in there as well. So I'm just going to leave
all of those switched off. I've gone to art, and I'm
going to click generate. And then, depending on the
speed of your machine, your Internet
connection, et cetera, you just twiddle your
thumbs for a moment or two. Right. And there is my scene. I kind of looks quite
cool, doesn't it? But this is just one of them. And I want to bring
out the layers. So if you are, once again, if you're not that
af with Photoshop, layers are a panel,
and you can find it in the window
menu over there. And this shows that there's
my white background, and above it, it's
made this fishy scene. But I'm also going to
find my properties. Once again, you can go to
the window menu and find the properties properties
properties in there, or and Min's up at the moment. If I pull that out, I can then see the properties
and look at that. There's my fish scene there, and there's all the other
ones that it's made. So if I click on
that one, and go, Mm, Oh, that's quite fun. I really quite like
that one, actually. But the great thing
about this is that if you look at those and
you think, You know what? Uh, I'd prefer it to be orange. So what I'm going
to do is I'm just gonna click in here
and I'm going to say, um, make it orange. And once again, I'll generate. Now, this won't delete those last ones,
they'll still be there. So we just got to give this
a moment and look at that. We've got some really
cool orange ones. You can see they're
all in there now. So we'll have a
look through these, and you can change
them at any time. So even once you've
finished this, you could come back and then do another one or create a
different scene in there. So I'll just change the
word underwater to space. And once again, generate some
more in the space scenes. These are great for
kids' rooms where you want a big poster or
something like that. And you can use whatever
subject really interests them. Oh, look at that space scene. Ah, that's lovely. I
really like that one. Anyway, I did say this was
going to be a fish one, so I'm going to just go back to my fish over there and have
that nice blue fish scene. Have a bit of a go with
that, get your layers up, get your properties up, and then we'll put this
into some text.
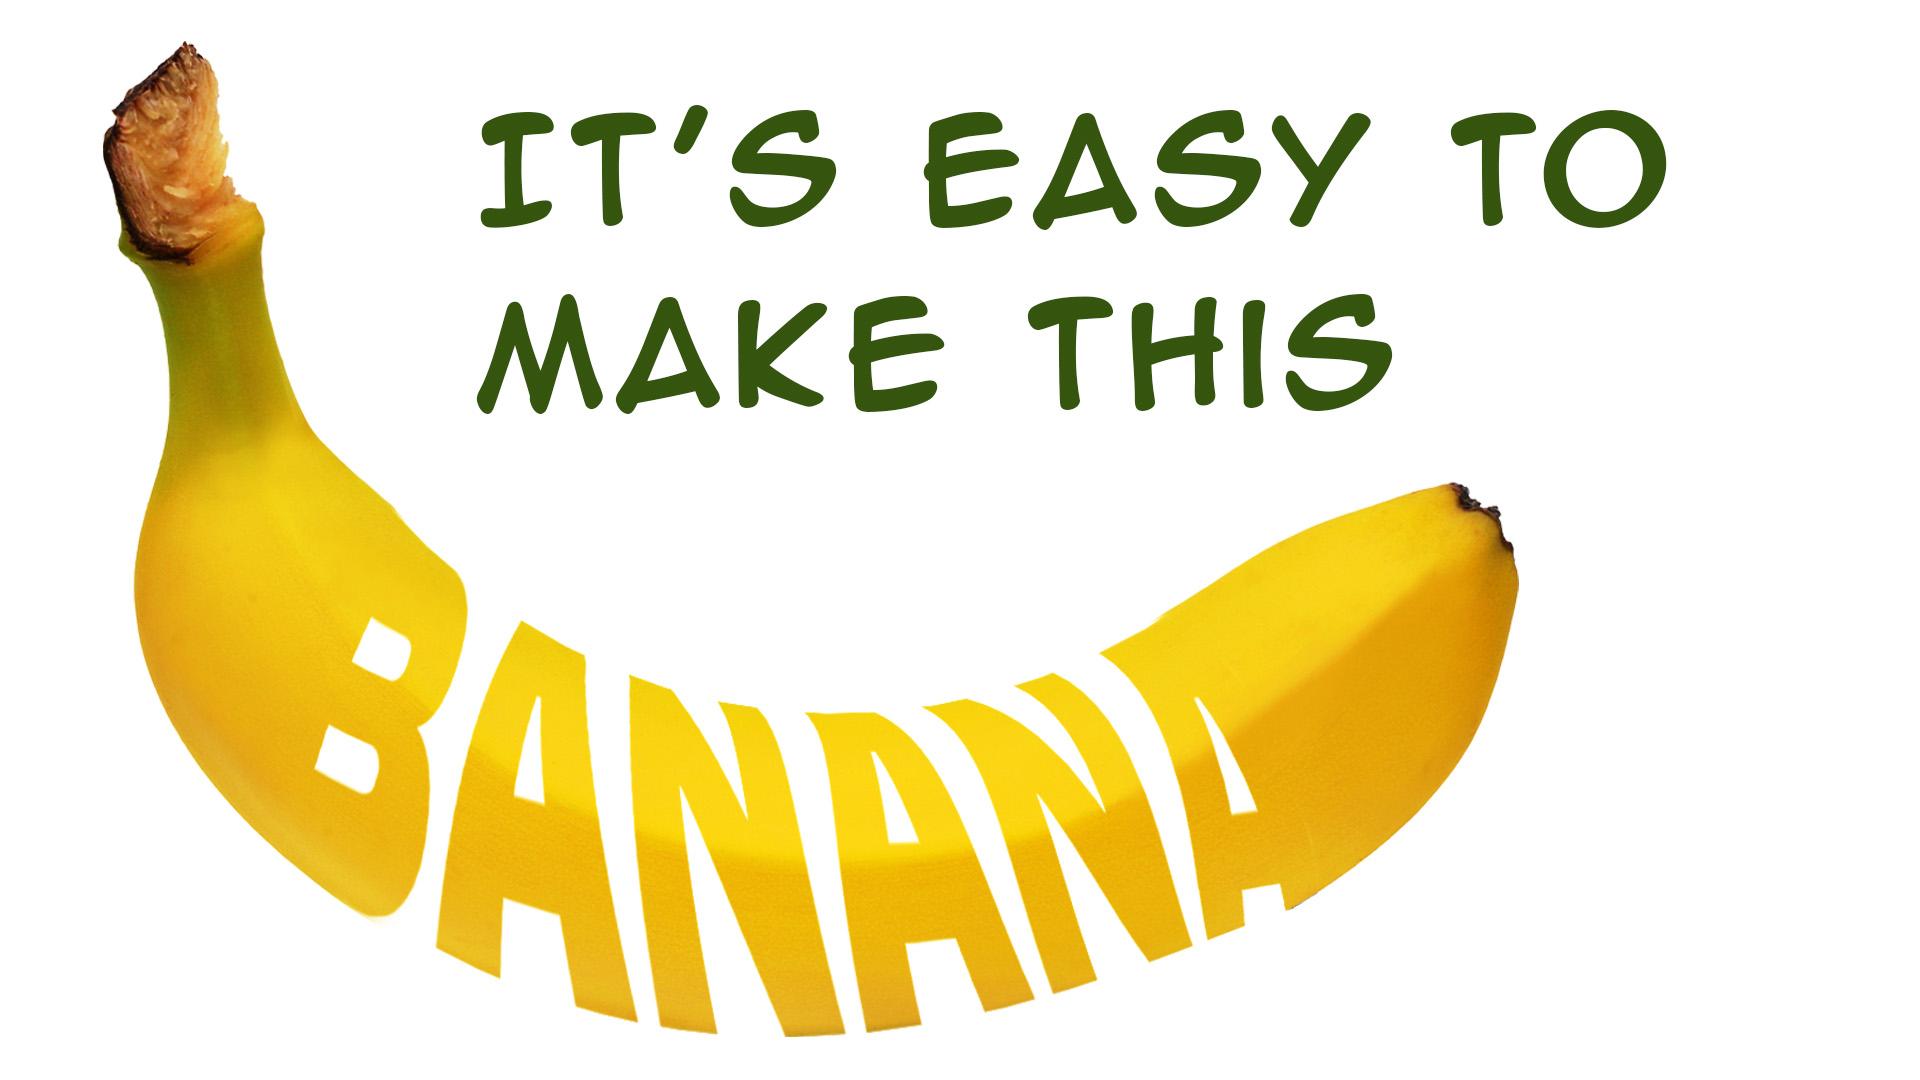
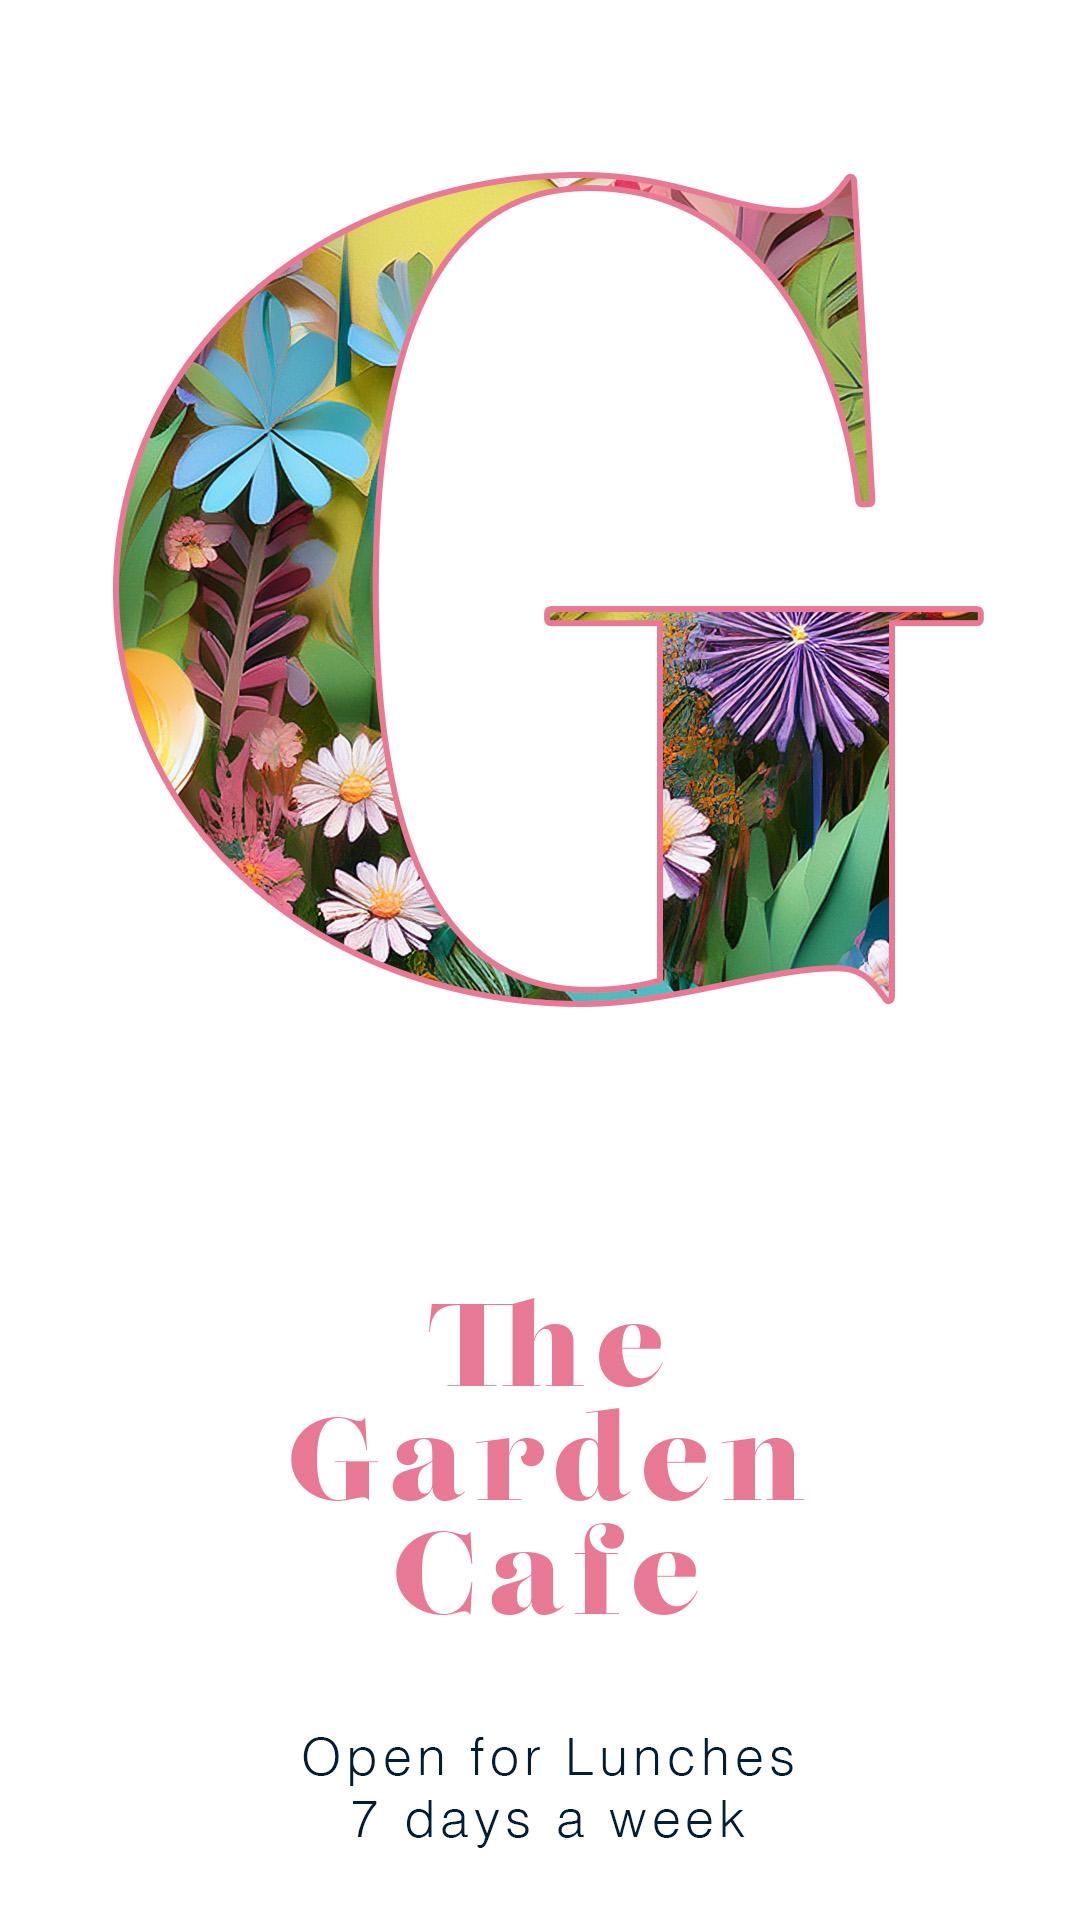
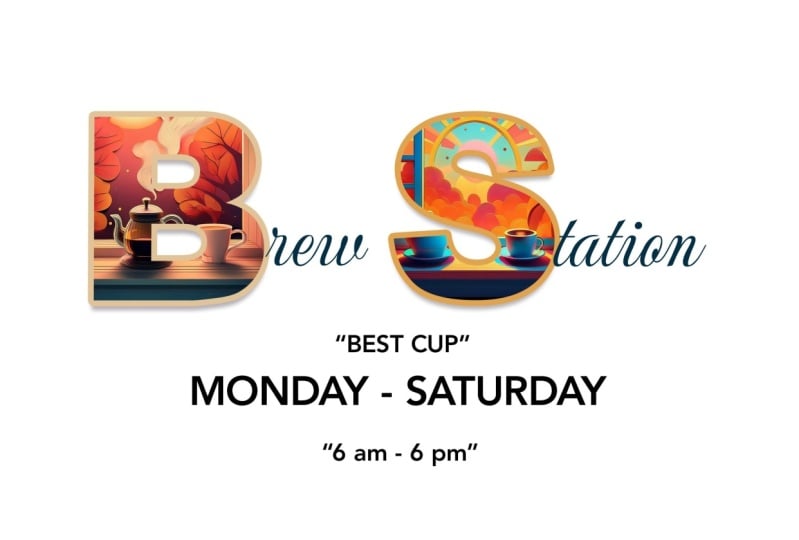
4. Scene into Text: Let's get some text up. I'm going to go to my Text
tool, and just click. Don't click and drag one click on there and
put in my text. So I'm going to say
Fish. For there. Now, I'm going to select
that little bit of text and use in this little display
here, we've got a size. I'm just going to click on
that double T and drag it, and that'll make it
a whole lot bigger. Or if you just click on the
tick for that to okay it, you could also go to edit, transform, and scale, and you can grab the
end of it and scale it. If you want something a
little bit more weird, hold a shift key on the
keyboard and you can then scale disproportionately,
as well. Now, I have used a very thick and chunky
type face in here. I'll just select it again. I use something called asphalt. But, you know, you can
use anything you like, but I'm going to suggest that you go for something which is really thick because
you want to be able to see that picture through there. Now I'm going to move the text. In the Layers panel,
I'm going to move the text below the
fish over there. So just drag it
down underneath it. And here's the magic bit. Click on the fish layer,
must be on the fish layer, not on the text layer
on the scene layer. Go up to layer and go down over here to create clipping
mask and click that. And you'll see
it'll automatically put your scene into your text. You can still use
your move tool over here if you're on the scene,
you can move it around. You can change it to anything
you like over there. You can even change the text. So I can just change
that to space. Anyway, I'm going
to go back to Fish, because that's what I
wanted to do this with. But you can certainly
see that if you've got kids and one is interested in one thing, one
is interested in the other, and you want to put
some stuff on the wall, this is a lovely
way to go about it because it's easy to change their name on
it and the content. Right, have a bit of a go with that and get your
picture into the text. If you miss this or
it doesn't work, watch this video
again and try it out. You move the text below, you then click on the scene, and you go up to Layer, and it will be great
clipping mask. If you release it, it releases it back to how it was before. Try it out.
5. Add the Effects: Now, I'm going to click
on the text layer, so I'm clicking on the
right hand side over there, and I want to add some effects. So I've clicked on that layer
to make sure it's selected. I'm going by the way,
I'm on the move tool. In case you're wondering
which tool I'm using, I'm almost always
on the Move Tool unless I tell you that
I'm on a different tool. Over here, I've clicked
on the fish layer. I'm going to click the
little FX down there, and I'm going to go down and I'm going to add a drop shadow. So you can see, we've got a bit of a
drop shadow on there. Now, this is the options
for the drop shadow, so I can change the opacity
of that drop shadow. I can change the distance of it. I can even move the
angle with this little angle um, twisty thing. I'm sure there's
a proper name for it, but I don't
know what that is. It's kind of like a um, yeah, little dial, I suppose. And I can change the size so I can make it soft or harder. Now, we want something
which is pretty subtle, so not too too harsh. Let's just take that down a
bit, something like that, just to lift it slightly
off the background, not to scream, Look
at my drop shadow. So over the top drop
shadows, they're very 1990s. We don't want to go there. So let's do it
very, very subtly. And then I also want to add a line around the
outside a stroke. You'll see I've got the
word stroke over here. There's two of them. I'm
going to go to the top one. Click the word stroke. Don't just click on the tick. You see, if you click the tick, it puts in a stroke,
but these are still the drop shadow options. You have to click
on the word itself. And you can see how
it's picked up a color. If you want to change that
color to something else, you can click on
the little square over there, and I can change it. I could make that
white over there, or while I'm in here, I can even sample
colors directly. Of the shape itself. I'm going to go with
white, click Okay, and then we can
change the width of that to make it
thicker or thinner. We just want
something quite thin. So you can see the drop
shadow underneath. Click Okay. Now,
having done that, I've realized I've actually
got a space scene in there. So if I click on my
space scene layer, I can then really
easily go back and go, Yep, let's make that
fish again in there. It's so very, very flexible. Well, have a go,
get to that stage, and then we'll put
the last bit of text on and save it out.
6. More Text and Save It: Let's do some text. Now, if this is a birthday card, I might want to have the word
happy birthday in there. If you're doing this
as a poster, well, exactly as it is, you
can just stop there. But I'm going to make sure if
I want to put in some text that I'm on the top
object over here. So I'm on this top layer. That's really important because if you're in this one here, your text might
disappear because it goes into that clipping mask. Get your text tool and move until your cursor
has a square around it. Now you can click and you
can put in your text. And let's go and
make that. 16178. Yeah, that will do very nicely. Usually move to and move it
into the right position. Now, what I'd like to
do is to save this out. So I'm going to go to File. First of all, I'm
going to do a save as, and I'm going to put
mine on my desktop. You can put it
wherever you like, and I'll call this birthday. And let's say that. So that's saved the
editable version. Let us go and save this out now so we can send
it to the printer. If you're printing it yourself, you can actually print
directly from Photoshop. You can go to File and
print in there and that'll take you to your printer
and your print settings. But we're actually going
to be sending this out to a local company who
does a card for us. So we're going to go to Export, and I'm going to say Export as. And the easiest one here
is going to be a JPEG. And then all we
need to do is down the bottom here
is choose Export. And I'm going to
export that out. Place it where I want,
I'll put onto my desktop. And that's now done and
saved out, so J Peg. I hope you enjoyed
this tutorial. Don't forget to try out
variations on this. Try different contents
and also different words. Try it for the web,
try it for printing, and show us your results. I love seeing what
people are creating. Also, don't forget
there's a project listed, so have a bit of a go with that. If you want to learn
more about Photoshop, look for my Photoshop
for beginners course. It's called non scary Photoshop, and I take you through
everything step by step, pretty much like I
did with this one. I've also got some
other shorter videos out in this line that you can have a look at
and try it as well. Anyway, what do you do have
such fun with Photoshop. It's such an awesome package.
 Tim Wilson, Adobe Certified Instructor and Expert