Transcripts
1. Introduction: My goal is always to capture the best range of human expression as possible, to capture movement whether it be in clothes or setting. I mentally subtract basically everything out of the photo that's unneeded and unnecessary until you have just what's needed in the photo. Hi, my name is Justin Bridges and I'm a fashion and lifestyle photographer based in New York City. So, today I'm excited, we're going to be talking about everything that has to do with lenses. We're going to be talking about the lens choice, what lens to pick for which thing you're doing, whether it be shooting portraits or landscapes. We're going to talk about focal length and crop factors and all the exciting things that have to do with lenses, so that you know next time you pick up your camera which lens to choose and what to use it for. The reason you want to start getting comfortable with your lens choice and how lens works is because once you understand all the technical aspects of using a camera, it's going to set you free creatively. You're not going to be so tied to the technical aspects of your camera because now you know how to use your DSLR, now you know which lens you need when you're going out to shoot portraits or street shots or pictures of landscapes or beautiful buildings. It will allow you to start making creative decisions on the fly, and making creative decisions that allow you to break some rules. At the end of this class, I would love to see you share some of your photos with the community, with me, explain what lens you use and why, and if you have any questions, please feel free to share them with me as well. I'm so excited that you joined this class, let's get to work.
2. Lens Anatomy: So, as we begin this lesson, just a quick reminder, if you are already comfortable with things like the exposure triangle, how to use your DSLR, this is going to be perfect. This is the next step for you. But if you're still a little shaky on your foundations of how to use your camera, understanding how to get the right exposure and things like that, we have the perfect class for you. You can go back and look at our fundamentals of DSLR photography, and that'll help brush you up or give you the first lessons you need to have a solid foundation to proceed into learning about the lenses. As photographers, we tend to think about the camera more so than we think about the lens, or we think about the total package but don't understand how the lens and the camera are working together to give you the best image quality and the best picture. I want you to be very fully aware that the lens is oftentimes going to be a major piece of why your image is so beautiful. You've got the camera that's going to be supporting, it's the part that records the image. You're going to get a lot of image quality here, but the lens is actually worth resolving the picture. Imagine if you're wearing a pair of eyeglasses that were scratched up or you have fingerprints all over them. When you look through those lenses, your vision isn't going to be very nice. If you use that analogy to think about your lens in terms of the quality of the elements inside of the lens, that construction and just the overall ability of the lens to deliver a clean and sharp image, and you combine that with the camera, then you start to understand how important the lens and the camera are to each other and not to be viewed too separately. So, now we're going to get into what are the features of the lens. What are you actually looking at when you pick up your lens? So, what we have here is a 24-70 millimeter lens. It's a standard telephoto lens, meaning it zooms longer and wider. So, I'm going to take off the lens caps, and what you have is a front element, the front of the lens, and a rear element, the back of the lens. What you have in between all this plastic or metal construction is basically glass, that's what you're seeing through. That's how you're finding the picture you want to take and snapping it, and it's recorded on your camera. On all of these Canon lenses that I have in front of me, there's going to be a little switch. It's an autofocus, manual focus switch. When it's an autofocus, that means when you have pressed the button on your camera, it's going to focus for you, so you pick whatever zoom length you want to be at. On this, you could be at 24, 35, 50, 70. You have pressed the button, and it's going to automatically focus on your subject for you. Now, if you switch this button to manual focus, then you're going to be doing all the work yourself. You're going to find your subject, and then you get to use the focal rings which I'm about to talk about to sort of focus on that subject. When we're thinking about the focal length on a camera and the focusing rings, let's think about it in two ways. You have your macro focus and you have your micro focus. So, we have this 24-70, I can decide how close or how far I want to be from this subject using the macro focusing ring. So, basically I can choose to be at 24 millimetres. I can choose to be at 70 or somewhere in between. Let's call that our macro focusing. Then if you are using a zoom lens, you have the second focusing ring, let's call that your micro focusing ring. So, you've already chosen. You want to be at 24 millimetres, or 50 millimetres, or 70 millimetres, and then you go to the second ring and you can fine tune your adjustments. So, you might have framed up your subject, and it's still a little fuzzy, you use the second micro focusing ring to dial that in and get it very clear. So, this is a 70 to 200 millimeter lens. It's a really big and heavy lens, and you can already see that there's a ton more buttons and features on it, but the one I want to call your attention to right now is the stabilizer mode. Whether you have a Nikon or a Canon camera, the lenses will come with this feature. Some of them will come with an embedded, so you don't even have to switch it on or off, and then some won't image stabilization at all. What image stabilization does is help nullify any movements while your hand holding the camera. It helps smooth out the picture. So, when you're ready to take the photo, it's adjusting for that what could have been blur. I tend to just keep it on at all times. It's not ever going to really hurt you, but it's always going to be there to help you. So, just to go over a little bit of terminology, we talked about how a small number is going to get you a wider shot. So, at the wider end, we call that a wider angle. Then we have a couple of mid-range focal length, and after that, we start having telephoto and super telephoto lenses. So, something like a 70-200 is going to be classified in that super telephoto range, but just so you know, the telephoto ranges go all the way up to, say, 800 millimetres. So, whether you decide to go with wide angle, or super telephoto, or something in between, is all going to be determined based on what kind of things you're shooting. Whether you're going to be shooting a portrait in a condensed or small studio, or you're going to be shooting wildlife on a nature preserve. All those decisions are going to be guided by what you're shooting in which lens you pick. So, now I want to show you the difference between types of lenses. You have a zoom lens and you also have a prime lens. A prime lens is basically considered a fixed lens, meaning you can't zoom in and out. You just have one focal length, and that's what you're stuck with. A zoom lens gives you a range. Like we were showing you earlier, you have a 24-70, meaning I have 24 at the wide end and 70 at the long end. This is 7200, meaning the shortest I can be is at 70 millimetres, which is where this one stops. The longest I can be is 200 millimetres. Here, we have a 16-35 meaning I have a very wide range to navigate in between. Let's talk about advantages and disadvantages. When you have a prime lenses of 50 millimeter, that means I can't zoom in and out, meaning I have to move around my subject. If I want to be closer, I have to walk closer. If I want to be further away, I've got to back up. So, you don't have that ability to stay in one place and zoom in and out. But, one of the benefits of using a prime lens is you're going to get less distortion in your picture. When you use a zoom lens like a 24-70, when you are at the wider angle of the zoom lens, there's more barrel distortion. What that basically means is, you're going to get a little bit more vignette. Vignette, meaning darker edges around the photo, and you also might basically have some curving in your photo. So, you get more wider angles and on zoom lenses because just the way that lens is constructed, you're losing a little bit of quality. That doesn't mean all fixed lenses are amazing, but it just means that when you're using one piece of glass versus multiple pieces of glass in order to get that zoom range, there's some give and take there. So, remember fixed lenses, you're going to move around your subject, you're going to get a little bit better image quality. It's probably going to be a little bit faster because it can focus on something quicker. With a zoom lens, you get a little bit more flexibility. You don't have to necessarily move around your subject. You can move in and out, and then focus on your subject. You will have a wider range of what you can do, so I can use this 24/7 in a room that's very small. I can also use this for a couple of different portraits on the street. I have way more options I can do with this, but the trade-off is I might have a little loss in image quality both from the vignetting and distortion of the final image. So, things to think about when you're deciding do I want to buy zoom, do I want to buy a fixed lens, or what I want to use for this particular project. One other consideration obviously, when you're thinking about lenses, we're talking about a substantial investment. You're at times going to be better off buying something like a fixed lens because in many ways, some of the constructions on fixed lenses can be a little bit cheaper, meaning, that means it's cheaper for you. For instance, the 50 millimeter lens is an important lens in the Canon lineup, and they make three different versions of this. They make a red ring version, which is the most expensive premier version and probably runs somewhere between $1,500 and $2,000, but they also make two versions of a cheaper, what they call the nifty fifty. So, fix lenses will have options like that, but that doesn't mean all zoom lenses are completely expensive. You can buy a 24-70 L lens from Canon for $2,500, or you can still find the same lenses from other manufacturers like Sigma for half the price or even a third of the price. So, there are options in each category. I always encourage students and anybody looking for lenses that not only test it out by renting it, look at reviews online, talk to your camera store, and figure out what is the best lens that you actually want in the right budget category with the right construction and image quality that will deliver what you're looking for. So, one of the things we've been focused on is focal length, and the difference between wide angle and a telephoto angle. But one of the other things you're going to be thinking about when you're buying a lens is the speed of the lens, the aperture. Every lens has a maximum and minimum aperture. On a lot of prime lenses, the aperture is going to be consistent throughout. So, a prime lens like this 50 millimeter has a 1.8 millimeter aperture, so does this 85 prime, and this zoom lens like this 24-70 has a 2.8. So, that's the maximum aperture, and it doesn't matter what focal length you're at. That's as quick as this will shoot. So, I would keep my eyes open for faster lenses 2.8, 1.8, 1.4, those kind of lenses. If you plan on being the type of photographer that's going to shoot in a lot of low light situations, if you're an event photographer, if you're going to shoot low light portraits or something like that, you're going to want to have a faster lens if you're going to use natural light. Then, if you are the type of photographer that's going to be shooting in broad daylight, you can be a little bit more open about what kind of aperture you're going to need. Just remember that the faster the lens, the more you're probably going to spend on it. So, you're going to have to balance all these considerations when you make a decision to upgrade your lens.
3. Understanding Focal Length and Field of View: So now, we're ready to do the demo. We're going to take a bunch of different lenses at different focal length and we're going to show you how each lens and each focal length will basically affect your field of view on your camera when you're ready to take a photo. Before we get started, let's make sure we all understand what I mean when I say focal length. I don't want to get into the nitty gritty or the science of it but the focal length is really going to determine your field of view. So, when you bring your head to the camera and look through the viewfinder, depending on what focal length your lens is that is going to determine whether that scene is very wide or very narrow. For the purposes of this demo, I'm going to only change the focal length. So that means, aperture, shutter speed, ISO, those things are all going to stay constant. As you can see, the cameras on a tripod, so we're not going to move where the camera is. Everything is at a constant. The only variable is we're going to be changing the focal distance and the lens that we're shooting with. So, you can really start to get a sense for what the focal length does in terms of field of view and you might also be able to tell sort of the image quality differences and some of the more drastically different lenses. We are now shooting with the 24-70 and we're going to shoot at three different distances. We're going to shoot at 24 millimeters, 50 millimeters and 70 millimeters, so you can see the difference of field of view as we get closer and closer or are longer and longer on our focal length. One thing to note as I start getting closer to the items we're shooting, we're actually going to start cropping things out i.e. we're going to start losing things from the frame. So, I'm going to actually shift my focal point as I get closer. So, the first picture from this will probably have the radio, and then as we get closer I'm going out to focus on the video camera, and at some point, we're probably going have to cut the video camera out and only focus on the globe. So, just in case you're seeing the pictures have different focal points, now you're aware. So, now I'm going to take a picture at 24 millimeters, which is the widest this lens will go. Now, we're going to take a shot at 50 millimeters. So, the next thing I'm going to do is go ahead and zoom in to 70 millimeters so you can see what that looks like. So, the 24-70 millimeter lens is something I like to call the my walk around lens. It's very versatile. It's probably my favorite and most go-to lens and my entire kit when I'm using a Canon camera. That allows me to get some pretty decently wide shots but also lets me zoom in on things that are a decent distance away and it just gives me that flexibility to not have to guess, am I going to have to shoot this or shoot that. I can manipulate the situation to my needs. You can get a really a lot of use out of this, so if you could save up your money and get one of these, this would be the next item in my kit if I didn't own it already. Now, we are on the 70-200 millimeter lens, quite bigger than all the other ones, a little bit heavier as well. You'll notice there's an extra ring on here that allows you to attach for extra support if you, for instance, were on a monopod and wanted to attach a lens directly to the tripod or monopod, you have that option as well and you can also unscrew this and take it off. So, let's get started. We're going to shoot at 70 millimeters, we're going to shoot at 85, 100 and 200 and show you all those differences and you'll see a different change of field a view that would be drastically different than where we were at where we started the demo. So, that first shot was at 70 millimeters. Now, I'm going to sort of estimate where 85 will be on this because it doesn't actually put all the numbers on the focus ring. Now, we're going to go up to 100 millimeters. Lastly, we're going to top out at 200 millimeters, which is as far as this lens will go. So, why do I use the 70-200? One of my favorite reasons to use the 70-200 is to shoot movement on the street. So, where I actually started my career was as a street style photographer and you couldn't always run up and catch up to people so you had to shoot them from a distance. So, one of the reasons you use this lens is for movement on the street. You'll also see this lens heavily used at sporting events. So, the sports photographers are shooting tackles in NFL. Those guys have these on most of their cameras. So, it allows you to be a little bit closer to your subject when distance is going to be an issue. Another reason to use this lens even if you're in the wild and shooting landscapes or wanting to shoot even more specifically wildlife, there's going to be a lot of situations if you shoot wildlife where you not allowed or can't get close to an animal because they're dangerous, this is one of the guys you want to start with. That's 70-200. So, so far we've only really been talking about focal length. But there is one other thing that's going to affect your field of view and that is the crop factor or the size of your sensor on your camera. We've been shooting on a full frame camera. The way to think about that is if you've ever used like 35 millimeter film, like a disposable camera or some old vintage camera that you picked up before, it uses 35 millimeter film. That is the size of this camera's sensor. So, the thing about the crop factor or the sensor size is that the bigger the sensor, the wider your field of view. This is sort of the biggest sensor you can have for this type of camera in this world of cameras of DSLRs. The full frame camera. Now, there are smaller sensors and when you get a smaller sensor that means your field of view also gets smaller. You almost get the sense of being zoomed in on your subject. So, when I shoot something with this full frame camera at one focal length, I'll have this wide or whatever the view is for that camera will be just normal. Now, if I go to a smaller sensor with the same exact focal length, I'll be closer to my subject the field of view will be narrower and if I go to a even smaller sensor same thing happens. It gets narrower and I'm closer to the subject. So, where you're most likely going to come into contact with a full front camera is when you're spending a little bit more money to get a professional grade camera. Now, when you start looking at the next level down those are going to be sort of the intro level to Prosumer cameras, so like a Canon Rebel. But those have cropped bodies which are considered APSC sensors, and so those have a different crop factor of 1.5, for instance. So that means, if you take a focal length that's 35 millimeters on the full frame, just 35 millimeters. If you go to the APSC on a Canon, it's going to be 1.5. So, you're going to take 35 millimeters and multiply that by one point five which gives you something in the neighborhood of 53 millimeters. Then there's one step down from that sensor that's going to bring you even closer to your subject and that is the Micro Four Thirds camera. For some of you guys who probably use maybe a Sony A7 S or a Panasonic GH 4 or 5, the mirrorless cameras, those are very popular and they have Micro Four Thirds cameras. It's even smaller than the APSC and even smaller than the full frame. So, think about that. The smaller the sensor, the closer we are to the subject. The bigger the sensor, the wider the field of view, the further away we are from the subject. So, that's it for this lesson. We took a couple examples of different shots at different focal length on different lenses, we talked a little bit about crop factor, we talked about some pluses and minuses of using fixed versus zoom lenses. So, stay tuned we're going to get a little bit more in-depth on the next lesson.
4. Deep Dive: Portrait Photography: So now, we're going to get to put all of the things that we've learned to test. We're going to actually start off with portraits. We've got a great model today. We're going to see how we can get the most out of each one of our lenses at different focal length. When you're shooting an actual person, they have a round face, and certain focal lengths will make that person look a little bit more flattering. A longer focal length will sort of flatten the face out, and a shorter focal length will sort of widen it out. So, you want to be careful. We're going to find out as we go through this. The mid-range of focal lengths is going to serve your purposes the best for portraiture. We're going to keep the settings on the camera the same, but we're going to move the camera along with the focal length closer and closer to the subject as we reduce the focal length. So, we're going to see what that does to change the way that the face looks, we're also going to keep the framing exactly the same. So, you have a good basis of comparison. So, the first picture we're going to take is going to be at 200 millimetres. So now, I'm going to change our focal length to 100 millimetres, and I'm probably going have to move a little closer and reframe the subject so we keep the basis of comparison the same. So, one of the things you'll notice is from even 200 millimetres to 100 millimetres, one obviously have to move a little bit forward to keep the same frame. I'd actually drop the position of the tripod but as we get closer to our subject, we have a sort of different relationship with the subject. So, if you're somebody that loves to shoot portraits, think about your proximity to the subject, how you can interact with them to get the expression you want. When you're shooting with a longer focal length, you have to be further away, that's one consideration as well. If you are across the room, when you're taking somebody's portrait, and you need to get some sort of expression from them, it's going to be a little bit harder coaching them into what you need them to do. Now, I'm going to switch lenses and do a couple of different shots and come back to you so we can see what the comparison looks like. One of the things you'll notice if we've got quite closer, when I was on the 16 to 35, I actually had to take the camera off the tripod to get right up in his grill because to keep that same framing, you have to get closer and closer to your subject as the focal length shrinks. What you'll notice when we show you these comparisons is that, the mid-range focal points are going to be the most flattering to the subject. When we're at 200 millimetres, what we had was a flattening effect on the face. Now, the opposite is happening as we get all the way to the wide end. So generally, we recommend using a 50 millimeter or an 85 millimeter lens if you're going to shoot portraits. It makes the face look more true to form, it's more flattering, and it's just going to give you an overall better picture. So now, I want to talk about my two favorite portrait lenses. We're going to start on the 50 millimeter because one, it's budget friendly. Two, you get great results with versatility baked in. The 50 millimeter is great because it's not the perfect portrait lens, which also makes it not only good for portrait but also good for other opportunities. So, if you want to get something that you can use for other types of photography, you're not putting yourself, pigeonholing yourself into one lens particularly and being stuck in just portraits. The nifty 50 not only is it cheap, it's lightweight. So, you can carry it around your shoulder with your camera, or put it in your bag, and you won't really even notice it. It's a little bit wider, if you will, from the 85 which means you do still need to be cautious or more cognizant of your subject and making sure you're hitting them from good angles. I like that when I take portraits come in a little bit lower for people that it may be a little bit shorter, or when I want to show that the person is stronger or like a leader. But with the 50 millimeter, you have tons of options. As you can see, I'm not too far from my subject, and that's one cool thing about the 50. It's a mid-range. To keep the same framing that we have in all the example photos, I only need to be about this far away. So, that means, I can talk and converse with the subject. I can tell them, "Hey, chin down. Smile a little bit. Show me this, or show me that." He can feel that energy right off me without me being at a 200 millimeter which might be across the room to zoom in on him and get a shot. So, the 50 is good for moving around. It really forces your eye to compose. It's a fixed prime lens. So, it's a little bit quicker. In terms of taking in more light and speed of focus, it's just a good all around lens to get started with portraiture and it won't cost you an arm and a leg. So, some of you might still be opting for a zoom lens because you want a little bit more versatility and the fixed lens is going to keep you stuck. So, for the Canon, I recommend 200. It's a 24-70, that's at a 2.8, that's the fastest aperture it'll go. So, really good for low light and different situations. The other lens is going to be a 24-105 and that's an f/4. So, if you're looking for the most versatility plus low light, definitely go 24-70. If you plan on shooting more in daylight and you need the versatility as well, the 24-105 will do fine. But remember, it's going to be a little bit slower taking a little less light because it is at f/4. That's the maximum aperture. One of the most important things to think about when you're taking portraits, especially if you're using shallow depths of field, like with the 50 and 85, that stop all the way down to 18 or 28, we want to be very careful about what you're focusing on. It's a lot easier to shoot a big landscape and have everything in focus than it is to shoot a person and make sure those two eyes are in focus. So, if you're going to use a shallow depth of field like 18, 16, 14, something crazy like that, because you want that full blur, make sure that you're focusing on the eye, the eye closest to the camera, and also make sure every time you recompose, you refocus again. It would suck to get done at the end of a long day where you shot somebody, and you got 500 photos, and the only thing that's in focus is their nose, or their forehead, but their eyes are completely blurry. The more shallow you shoot, the more risk you run of having a blurry face. So, be very careful about what you focus on. Every time you recompose, refocus. Every once in a while, try shooting on a little bit less shallow depth of field. Portraits can still be shot around 35, 45, 56, and still be beautiful still have that good blur in the background. Don't be afraid to experiment at different levels of depth of field. Also, don't be afraid to step back or step forward to get more face, or more of the body, or more the scene in the photo, too. Portraits can be taken from all different ranges of angles, heights, distances, and you can get some interesting results. So, that's it for portraiture. I want to leave you with a couple of things. As you saw, we experimented from focal ranges all the way from 24 to 200 millimeter. We explained what the difference would be, and where you're better suited if you're going to take portraits. We landed on 50 and 85 being the most optimal focal lengths for beautiful portraits. Remember, quick tip we left you with at the end was make sure you're cognizant of your depth of field. When you're shooting very shallow at 18, 14, 28, you have to be really focused on what you're focusing on. When you're shooting a portrait, you want to make sure those eyes are beautifully sharp, and you're putting the blur where it belongs. Behind the subject, behind the eyes, so you have that beautiful crisp picture. Remember to play around a little bit with different apertures. Don't be afraid to go up to 5.6 when you're shooting portraits. You'll still get great results. Experiment. This is a good place to start with portraiture. It's all about experimentation, getting different expressions from your subject, trying different distances in framings, trying different apertures in shallow depths of fields. Just go wild.
5. Deep Dive: Object Photography: So, we have a new setup here. I'm going to be talking about some good focal length, some good lenses to use for a couple of different scenarios. One, we have products shooting, second, we have food, and the other would be macro photography that you might use, say shooting a flower or something in the wild. So, what we have done is set up a watch, so we can try to take a product photo. We're going to look at two different lenses, we have the 85 millimeter on the camera right now. That's the one that we talked about being a great portrait lens and we also had a 100 millimeter macro lens that's dedicated specifically for shooting things closer up with better detail. So, what we're going to do is take a photo and try to see if we can get a beautiful product photo from both of them and then talk about how that might apply to other things you might want to shoot. I'm about to take a photo with the 85 millimeter, snap a photo of this watch on the table, pretty close up. I'm going to do this looking at live view. If you don't know live view is basically the mode on your camera that allows you to see what you're doing before you take a photo. So, it shows on the back of the viewfinder. It's all digital, it's exactly what you're shooting, you could tell how the light's looking, how the product's looking, what you're focusing on, it's just a cheat code for taking a photo. So, let's take a look and see if we can focus on this watch. So, right now, I'm clicking the button that focuses the camera on the watch and what I'm finding is that basically, the focus is going in and out trying to focus on the watch and nothing is happening. It's just going back and forth, back and forth, not able to catch a focal point on the watch. So, that's the problem. What it's telling me is that the lens is too close to the subject that I'm trying to shoot and so it can't get its focus point. That's what happens with lenses that aren't dedicated for macro photography. If you're too close to the subject you're trying to shoot, it can't get a focus point and what you have to do is you're going to have to back the camera and the lens up in order to shoot your photo. One thing you can do if you don't have a macro lens is you're going still back the camera up, take the photo and what you'll do in post is crop in if you still want it to be a tighter shot. So, what we're going to do is we're going to see where we can back up to take the photo. Now, keep in mind, when I say back up, I'm not saying you got to go across the room to take the same photo. What I'm saying is we're going to just into the tripod back a little bit to solve for that problem and see how that works out. Perfect. So this time, as I clicked a button to try to focus on the watch, it's actually finding the focus. It's not perfect because I need to align the camera just a little bit. There we go. Now, we can actually take the photo. Perfect. So, it actually works. All we had to do was push ourselves back about a foot and a half and we're still able to take the photo. The only difference here is that your frame of view, your field of view is a little bit wider and so what you're going to want to do in post is just crop in a little bit, if you want to keep it close and tight. But, there is a trade-off there, you're losing a little bit of the quality, meaning there are less pixels dedicated to that watch now because you'd have to back the camera up. So, the way we solve for this is we get a macro lens, so we can get right up close to it and be able to focus close and fill the frame with that subject. This lens that we have here is one of the more expensive ones, it's an L series lens by Canon. One thing you'll notice it's different from this lens from the 85 is that it's got an extra switch on it. This extra switch basically allows you to control your focusing distance and it allows you to say, "Oh, I need to shoot really, really close up. I need to be very close to the watch, I'll flip the switch to full." It's a lot of my new Tsha and something you can read about later, but just know that with a macro lens, it's going to give you a little bit more control, a little bit more versatility and more ability to push in closer to your subject, to get all the rich details from the photo you're trying to take. So, what we're going to do now is move the 100 millimeter closer to the objects and since we can get really up in its grill and take a really beautiful photo. So, I'm also going to have to because we're a little closer, recompose a shot. Again, I'm using live view, so I can still talk to you and judge this very easily. Try to align that up and get the exact frame that we had before, and remember this is also macro lenses are awesome because I could probably get even closer than this if the watch was longer instead of fatter. I would cut it off if I got any closer, but I could get even closer to this watch to take a very, very, very close photo. So, we've lined this up, everything's in focus or sorry the part that we're pointing the lens at is in focus. We're going to be focusing on the top part of the bezel and I'm going to go and snap a photo. So, on this photo, what you're going to see is everything around that focal or everything inside of the focal point which is the top of the bezel, near the buttons. Everything is super sharp and crisp and then you see that beautiful shallow depth of field all the way around it, but the very fact that we could get that close to the object or the item and snap it in and retain all that detail is amazing. When you're shooting jewelry or anything like that what you're going to want to do instead of going very shallow, is you're going to want to turn the aperture or stop down to an aperture that's closer to F22 or F18 and that way you get more of the object of the item in focus. So, this is really the best way not only to capture detail if you're shooting product, it's also a great way to shoot if you like beauty photography or wildlife photography and like shooting beautiful flowers or anything like that. Anything where you need to get really close up, a macro lens is the way to go. Now, remember, it doesn't mean that you're trapped and can only get a macro lens if you like taking beautiful photos of things close up with rich detail, you can still use a different lens. You're just going to have a backup further and if you want the view to be a little tighter just crop in after the fact. So, what we're going to do now is we've looked at the 85 millimeter, we've looked at the 100 millimeter. We know that the 100 millimeter macro is the better lens if you want to get really tight in there and detail, but some of you are going to say, "Well, I don't want to get a macro lens because I want the versatility. What are some other great options to look at if I want to have the versatility and the flexibility to shoot more than one type of photography and still get good shots from all those different types? So, my favorite lens that I love walking around with that I use on a lot of fashion shoots. I've used it to shoot product photography. My favorite lens is going to be the 24-70. It's got a good overall mix of wide angle all the way to medium telephoto. So, let's put on a 24-70, show you an example of what that's going to look like and how you can take advantage of it and show you what that shot is going to look like. I'm all the way zoomed out to 70 millimetres at the long end. So, that's a little bit shorter than the 85 millimeter, but the bonus of this lens is that I can still focus being this close. It's still a wider frame. So, if you're really looking for a really, really tight shot, you're still going have to zoom in or crop in after the fact. But I still have the ability to take advantage of some of the aspects of being close to the subject or being close to the item, to snap the photo. So, we're going to take a quick shot on 70 millimeter and then we're going to show you how crazy wide a 24 will look in the same setup. So, I'm going to go from 70 millimetres now to the wide end of this lens, the 24 millimeters and not because you'd want to actually shoot product like this, but because I want to demonstrate a couple of advantages for having the versatility in a zoom lens like this. All right. So, we're zoomed out to 24 millimeters. This is not the shot that you want, but I will take a picture of it so we can see what that would look like. But, the reason I like having the 24 millimeter at the short end besides being able to go from product to lifestyle shots is because, for instance, if you're doing product photography and you're in a small apartment. I live in a studio or one bedroom where it's really not that big, I live in New York. So, the ceilings aren't that high, it's not like a beautiful studio that you'd rent. Sometimes you got to set up your still life or your scene or your food in the corridors are just close. So, sometimes I'm setting up the camera above the product and so I don't really have room, I have a light above the camera. So, everything is compressed and so I need a lens that can go wide. So, the 24 is great because you're right over the product, you can zoom out, still capture more than one thing right now, we're only shooting a watch. But imagine if you had an entree, an appetizer, a glass of a beverage, silverware, you'd have to capture more of a scene. If you only have a longer lens like a 100 millimeter macro or an 85 or even the long end of the 24-70, you might not be able to fit everything you want in your scene. So, that's why having that versatility is going to be a bonus. So, there's options for every type of shooter whether you'd be somebody that just wants to shoot very rich details close up or somebody who needs the versatility in whatever they're shooting, to be able to go from food photography, to product photography, to even a couple of portraits. So, 24-70 it's going to give you the most range, probably more bang for your buck. But, if you're really interested in the details, I will still stick with a macro lens whether it be a 100 millimeter macro lens or another type of macro lens.
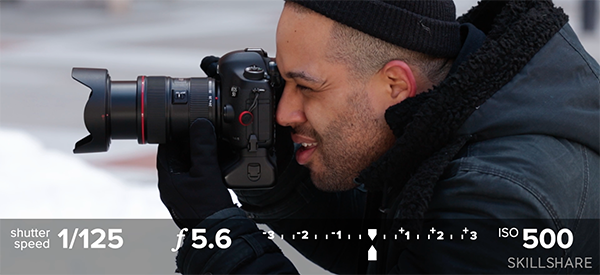
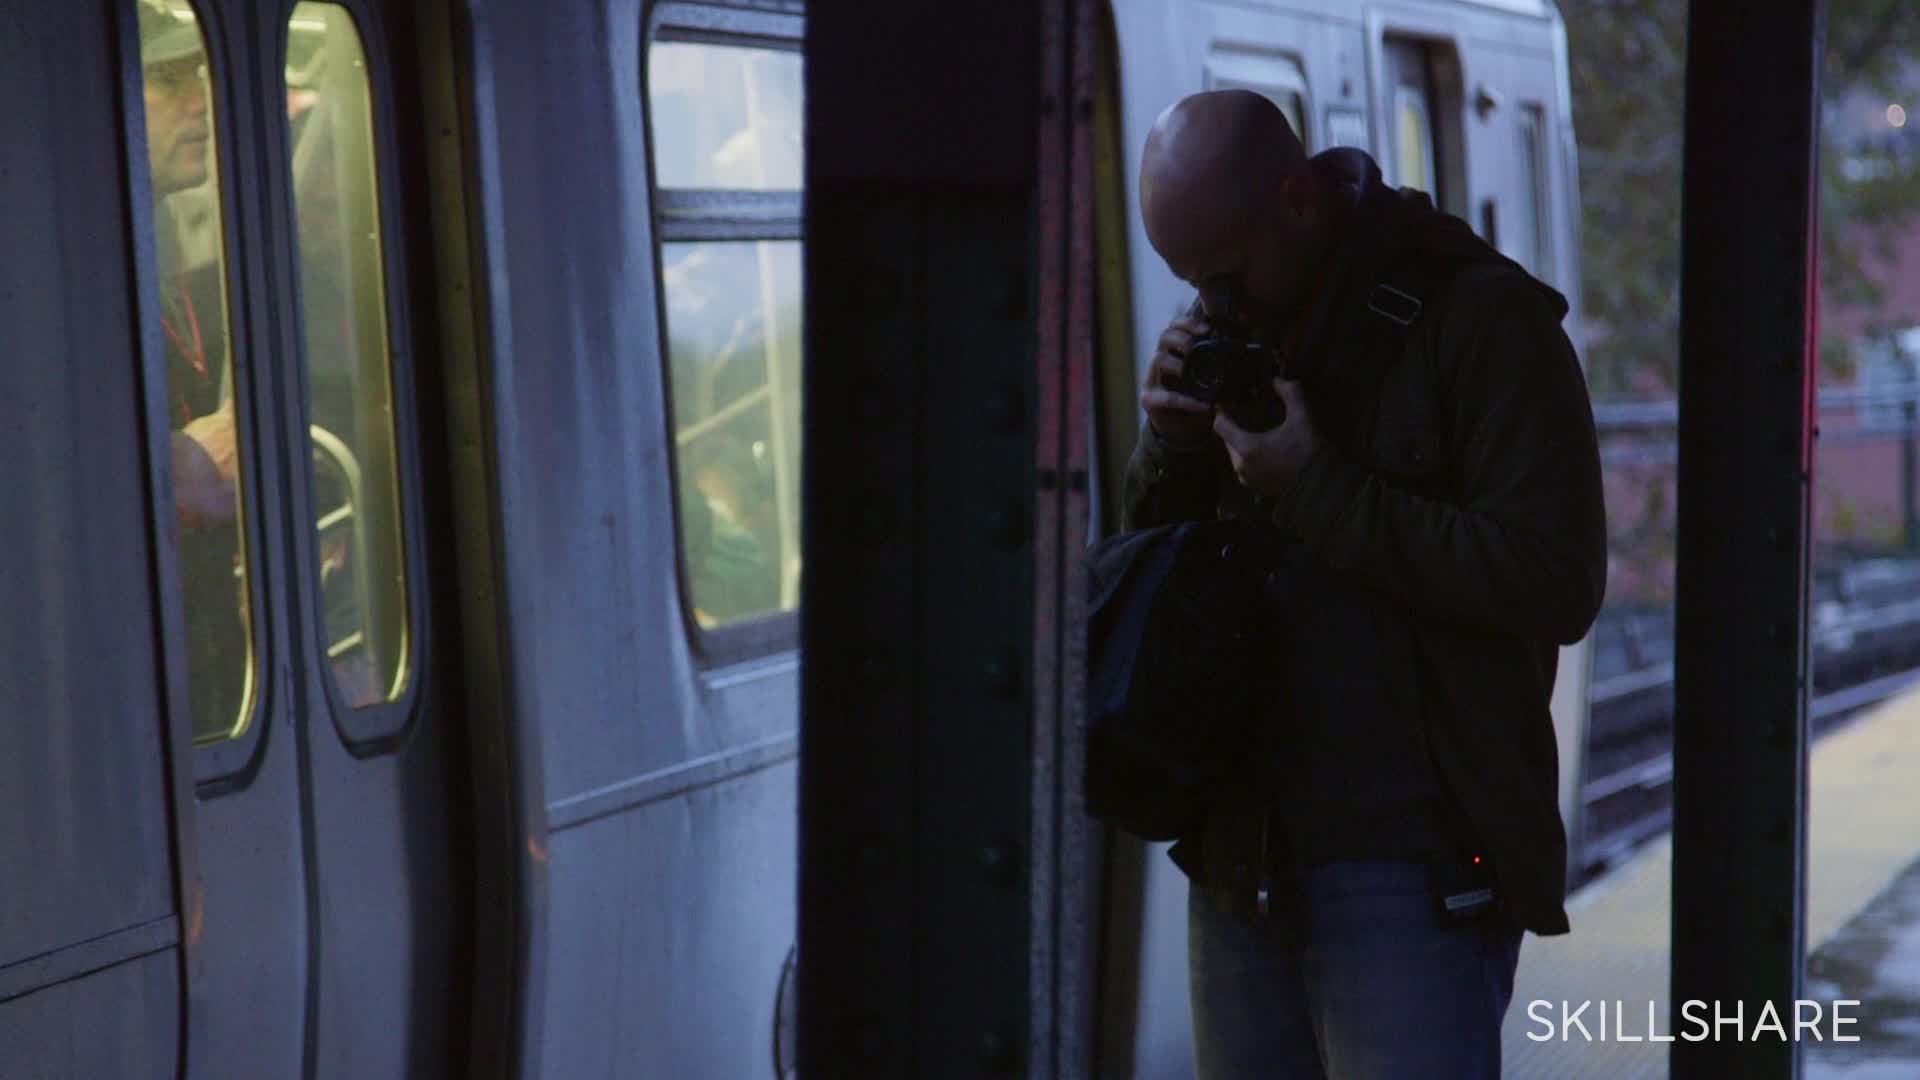
6. Deep Dive: Street Photography: So, for this next lesson, we're actually going to demo outside. But first, I wanted to have a conversation about how can you pick or select which lens is going to be right for you. With street photography, I mean, there's a range of things you could be shooting and a range of ways you could be shooting it. A lot of the most famous and a well-renowned street photographers tend to do a lot of things like sneakily and stealth. So, they tend to have a low footprints when they go outside with smaller lenses and smaller cameras. Some people go outside and shoot just beautiful scenes that they observe on the street and aren't really worried about whether or not somebody is looking at their camera or not. You might see somebody with a bigger lens or more versatile lens. So, we're going to talk a little bit about like why I would choose the lenses in this lineup based on budget, portability, and even technique as well. One of the first lenses I always want to bring up is the 24-70. So, let's think about this on the street photography world. If I'm outside walking around with my camera, one, it's not necessarily the most or the lightest lens, but it is very portable, it's not that big, it's not a 70-200, and I can shoot very wide scenes if that happens to be what I'm observing or I can zoom in a little bit, not as far as I could with this, but I can still zoom in and get maybe a scene from a far away. Then, I can also use this lens obviously off the street in many other way. So, you get a lot of versatility for what you're spending here. Now, if you're thinking, I want to have a little bit smaller footprint or I'm thinking about my budget, I'm going to go all the way to the 50 millimeter lens. This is, obviously, if you get the cheap version, the expensive version is a bigger chunkier and a lot heavier. But if you go with a nifty fifty, something you just toss in and out of your backpack, the nifty fifty is a great option, it's lightweight. I mean, this thing is a couple ounces. It's a cheap build. So, when you're running around, trying to take quick shots, if I broke something like this, and I'm not saying I want to waste 150 bucks, but if I was going to break one of my lenses, it'd definitely be this one. The 50 millimeter have a great field of view. Meaning, you don't want to be too close or too far away. It just captures a really nice scene. You also have this lens again, if we talk about portraiture, you have this if you want to stop somebody on the street and ask them to take their photo. You have a good length for a portrait photo. People, when they see you point this at them, they won't see the same big lens and they won't be as conscious of it. So, you can get away with a lot more. One of the things I want to tie this into the 35 millimeter lens. One of the reasons I like both of these is because the field of view is so wide, not necessarily wide, but you get a rich and wide view, which is great. So, with the 35 or the 50 on your camera, a lot of people like to be a little bit more stealthy. They hold the camera, and they sort of see something going on, and they focus and shoot just from the hip. So, these two give you that option because you're not worried about whether or not you've got to zoom in or zoom out. You just have a fixed field of view, and you're just snapping away. The last lens that I want to talk about is a little bit of a beast, and we've talked about it a little bit already. It's heavy. Whereas we were here, the 50 millimeter at a couple ounces, you're talking about at least two and a half pounds here. So, it's a behemoth. You see a lot of sports photographers using this. The 70-200 lens is a workhorse. But if you plan on being out on the streets all day, it's going to wear off that shoulder. If you have this over in your backpack, it's not going to be the most pleasant thing to have on your shoulders all day. The other thing you got to think about is portability, being able to bring it around and take a photo. It's heavier. So, you're not going to be as quick moving it. The benefits of this though, if you're shooting anything from wildlife to street scenes, I mean, just a number of things, you can zoom in closer and be further away. So, when we talk about stealth with the 50 millimeter, we're talking about stealth close-up. When we talking about stealth with the 70-200, we're talking about being able to be across the street and maybe catch something that you like, and snapping that photo without anybody even knowing you're pointing the camera at them. So, you may be wondering, okay, I've got four different lenses, they all do the same thing but differently, and you might be wondering, how would I like really put my kit together? There are a lot of options here. If this was me and I was going out to take a couple of photos for the day, I'm always thinking about my comfort level. I want to be able to actually enjoy taking photos, so, weight and portability is a big issue. The other thing is I'm always thinking about what kind of photos do I plan to get on this journey, am I planning on shooting street style, am I planning on catching beautiful architecture with people in the photo. So, whatever you plan on doing, you're going to sort of put your kit together based on that. I would always go with one flexible lens and one fix lens because I think that the fix lens challenges you more. It makes you move around and compose and think about your shot before you take it. So, in that case, I'd go with a 35, just because it's fun and I like shooting from the hip and challenging myself to see if I can get a good photo without looking through the viewfinder. And I go with the 24-70 because it's a workhorse, it's versatile, and it just gives me the option if I'm not getting a lot of success with that 35 to be able to have a wide range of things I can do. But if you're just walking out of the house tomorrow, go with the budget option, you can fall on the ground and trip because you're chasing a photo, break this and still be able to get another one. It's just an all around good lens that you don't really worry about, no fuss, no muss, get a good shot, and call it a day. So, we're going to go outside, show you what I would do if I was shooting street photography. I'm not going to bring all these lenses, but now I'm starting to build an understanding of what all these lenses can do and the power you can get from them. What we're going to do is we're going to take the 50 millimeter and we're going to take the 35 millimeter. I'm going to show you how we'd shoot kind of stealthily with the 35 and how we'd frames some things with the 50 millimeter. We'll talk about why I made those choices and how I came about those photos. We'll talk about what you can get out of them as well. So, welcome to outside in the freezing cold, New York City. We're going to do a little demo using two focal lens. We're going to use a 35 millimeter and we're going to use a 50 millimeter. I'm going to show you why I sort of go for one versus the other, what you can use those lenses for in reality, and show you how to get some good shots. The first thing I think I'm going to do, we're so close to the iconic Flatiron Building. I'm going to turn around and shoot that. Why I'm going to use the 35 for that shot, is because it's super wide, I get a dramatic scene. I can not only shoot the Flatiron Building, but then I can pan down, maybe get a couple of street shots, and then I'll explain to you what I got. As I'm taking some of these shots, I notice, and I probably already knew this in my head, but I wasn't thinking about it. Obviously, the Flatiron Building is so small, skinny that I'm catching a little bit of the buildings around it. The Flatiron Building is looking sort of like a small sliver and a lot of negative space, which is the blue sky. That can be very cool and very dramatic. So, you want to think about that when you're composing your shots. Another thing you can do is sort of get it in context with a couple of other buildings. A great thing to do with this 35 millimeter is sit and wait for good shots of people walking by, or tourists taking photos, or just anything interesting that you're seeing on the street. Sitting and waiting with this guy is pretty cool. One thing obviously to remember is that it's a 35 millimeter. So, your shot is really wide, which means you can get a lot of context for your shot. But at the same time, if you're looking to focus in or punch in on some detail, you might want to think about the 50 millimeter or something a little bit closer, that can get you a little bit closer to your subject. Another cool thing that I like about the 35 millimeter, and this is something I don't do a lot myself, because I'm not that type of photographer, but you can shoot sort of from the hip. You can actually put it down here, figure out what you're going to focus on, whether it be this scene over there, over there, and then just take a couple of different shots without anybody even noticing that you're taking the photo. One thing you're going to do if you're shooting from the hip, a quick tip is that you want to be in a less shallow depth of field. So, instead of like a 2.8, I would say start at 5.6 if you have enough light. That will give you more of an opportunity to get your scene in focus without having to deal with checking this back of the screen to make sure you got what you were shooting, and just look for different things that compose. Remember, you're going to do a lot of stuff after the fact. So, you might be holding your camera and not have it completely horizontal, or you might not have got the right composition. So, after the fact, you're going to want to straighten your photo if it's not a stylistic choice, and then you might want to punch in onto a certain scene and recomposed the shot using the cropping tool in post-production. But that's one cool thing you can do. But I'm not going to do that now because I'm not that good at it and it's not something that I do regularly. So, let's shoot a couple of things and see if we can get some decent pictures for the day. It's freezing and everybody is bundled up. So, we'll see what we can get. One thing that I've talked about is being very careful about shooting portraits with your 35 millimeter. In some cases, it's actually going to work out very nicely, especially when you're doing a street scene and the focus isn't just on the person or just on their face. When you can pull back from them a little bit, you don't see as much of that widening of the face. So, don't be afraid to take pictures or take experiments. With a 35 millimeter, you're going to see you can actually get some great results. So, I'll just switch to the 50 millimeter lens. I've got this little. It's sort of like a nifty fifty, but another version of it. We're going to take a couple of more street shots. The reason I really like moving to the 50 millimeter is it allows me to be a little bit closer to subjects that I don't want to know that I'm taking their photo. The other reason I like using the 50 millimeter lens, not only to get closer to people, but it's also a better portrait focal length. So, it allows me a little bit more versatility when I'm shooting somebody close-up and I want to get details of their face but don't want them to look a little too wide. So, that's great. You'll notice that this lens is a lot smaller than the 35 millimeter, even though it's longer. So, it allows a little bit more portability. If I have it on my shoulder, I don't have to worry about knocking it around, its lighter weight, toss it in the backpack. It's just a little bit of an easier lens to move around with. Then when I'm composing on the street with a 50 millimeter, it allows me to get a little bit of a tighter scene without feeling like I've got too much stuff that I wasn't intending to get in the shot, in the shot. So, three different benefits you get from it, the portrait getting closer to people and then composing a smaller scene without having to worry about extra stuff. So, let's take a couple of shots and see what we can get.
7. Deep Dive: Landscape Photography: So, for this next lesson, we're actually going to be talking about landscapes, shooting outdoor shots and scenes. I have two lenses in my hand, two great zoom lenses at the wider end of the scale, we have the 24-70, which as you can see it's a common theme, I love this lens, and we also have the 16-35 which is a bit wider. Remember, the shortest focal length on this is the 24. Here is going to be the 16, so when we go outside and show you a demo, you're going to see how much wider that difference is between 16 and 24. Some of the things you'll notice, some pitfalls, disadvantages of using something this wide is that, there's a little bit more distortion. Things start to wrap at the edges, but we're going to also show you how to fix that in post. One thing that I really like about the 16-35 as well as the 24-70 is the versatility, but for a different reason. Because of the width at the short end from 16 to 35, I can pretty much either shoot a landscape or sometimes I might have to walk into a room or a restaurant and shoot the scene, and I can fit way more in my field of view with the 16-35, and because of the quality build and the quality construction of the lens even when I talk about barrel distortion and vignetting, a lot of that is minimized. So, you get versatility from both of these. I still wouldn't shoot portraiture or a lot of people with the 16-35, it's going to be mostly inanimate objects and beautiful scenes like outdoors, but it still gives you a range of things you can use it for, and you're going to see how in the demo in just a second. Okay, so we're outside for this demo. For this shot, we're going to shoot sort of sunset with a 16-35 millimeter lens. I've already already set it up for the 16 millimeter angle, so we're shooting the widest this lens can go. I've actually just a quick tip when shooting water, if you kind of wanted to look smooth and buttery, you want to drag the shutter and what that really means is to shoot as slow as possible. So, what I've done is, I've cranked up the aperture or cranked it down, however you want to think about it to f/22. So, try to get as much in focus as I can, it's a stylistic choice you can shoot at five, six if you want to, but I wanted to make sure that I'm shooting slow, so I put on f/22 to restrict the light that's coming into the lens and into the sensor, I am shooting at one over eight which is a very slow shutter speed, which is a good reason we have a tripod, and we're shooting at 100 ISO, which is the lowest this camera will go. Basically, I set all those again to say shoot as slow as possible, reduce the amount of light that's hitting the sensor. So, let's take a shot and see how this sunset looks. I always try to take a couple of exposures. You never know, you might shake when you're holding the camera even when it's on a tripod, little jitters during a slow shutter can still send ripples through to the camera that result in motion blur when you're looking at your photo. Actually, there's a boat coming up in the background, I'm going to snap one more photo as it gets a little bit closer, but you'll probably see on the screen now that the vista that you can catch with a 16 millimeter lens is just amazingly wide and beautiful. So, now we're going to do, is to see how it looks at the other end of the spectrum at 35 millimeter. So, one thing I want to call to your attention. You notice the first shot that I took at 35 millimeter is a little bit darker because from end to end, from focal length to focal length with some lenses, you're going to lose a stop or a third of a stop when you go to one end to the other. So, what we had was those settings were too dark for that exposure. What I did was, just open up a little bit. Now, we're at f/16, we're one over 30, it's faster than before, but we've opened up on the aperture to let more light in, and we stayed at 100 ISO to get a better exposure. The one thing you will notice with this shot is, it feels a little less impressive, when you're all the way wide, especially when you're trying to catch a ray of landscape and buildings, and all kinds of things, it looks a lot more better, a lot more powerful, when you can catch more scene than less scene. When I just zoomed in, it feels a little flat. You know what, one thing you can do to fix that is maybe recompose, find a set of buildings that adds a little bit of symmetry or a little bit of balance to your composure, but just given the fact that I went from 16 to 35 and kept at the same, you'll just notice that the picture is not as impressive, it's a little bit more flat. So, it's just things that think about. When you change your focal length, you're probably going to most likely have to recompose, maybe move the camera a little bit, maybe you lower or rise to try or raise the tripod, and you might lose a little light going from 16 to 35 or vice versa. So, it's just all things that keep you on top of the mind when you're using a lens to take a nice snapshot of the landscape. The last picture we're going to take is, we're going to try to take a picture of this cool Pepsi-Cola sign that's over here in Long Island City. So, we're going to show you the power of shooting wide angle really close up and see what we get. So, I just got done taking a couple of cool photos of this Pepsi-Cola sign, just wanted to call out why using a 16-35 or a wide angle lens is so cool, because I'm literally right underneath it and I can still fit the entire two words into it. The angle is cool too, you can chew right up into it, you can even catch light behind it bouncing off the buildings. So, the things you can do with the 16-35 when you really let yourself free and get creative are just amazing. So, great lens to have in the kit if you're interested in shooting outdoors, great vistas, and backgrounds, and scenes, and all that kind of stuff.
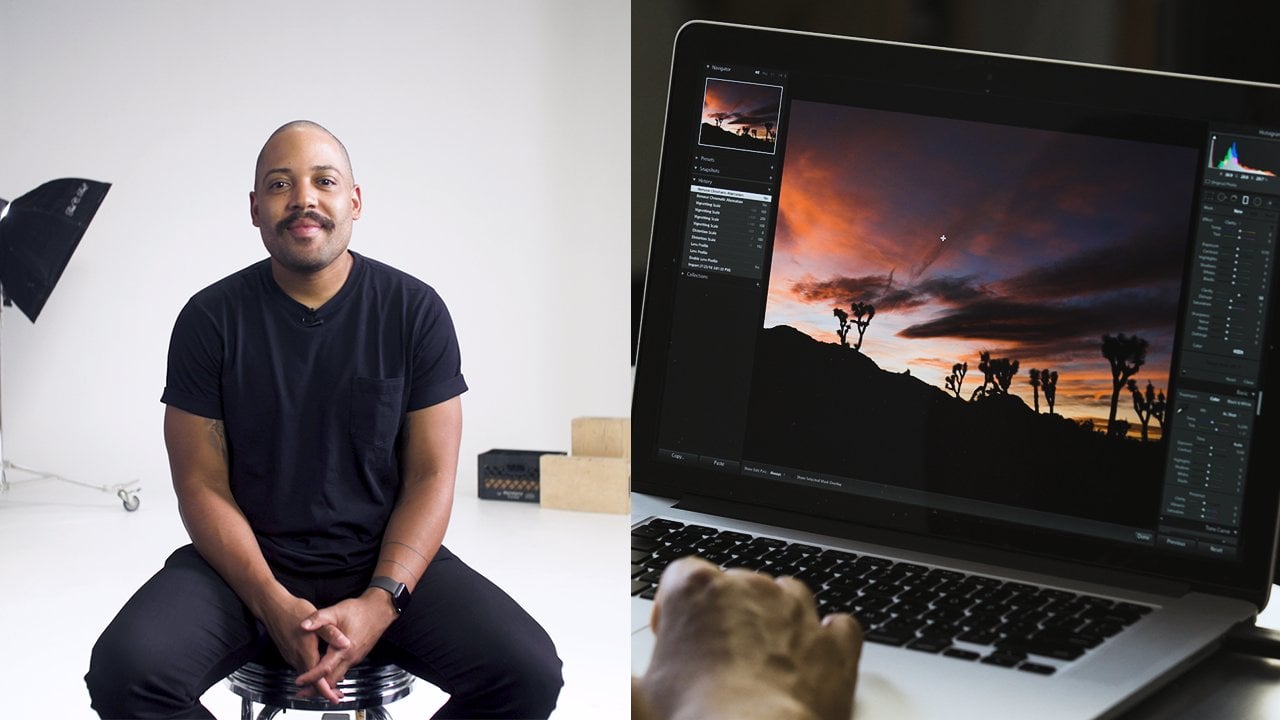
8. Editing Tips & Tricks: So, this is the fun part, the exciting part. We've taken a lot of photos, we've done a demo outside, we've done demos inside. Now, we're going to take a look at the photos, I'm sure you've had a fix in common things that go wrong in the photo based on the lens width, like we talked about, barrel distortion, vignetting, and show you some comparisons and how to fix those really quickly with your editing software, whether you have Lightroom, Photoshop. They're all going to be similar, and you're going to get a lot out of this part. So, the first picture I want to start off with is this picture of Jack, this portrait, and I'm going to look at the metadata here. So, this is a picture we shot at 24 millimeters, which is not an optimal focal length to shoot a portrait. It's a little too wide. You can probably see here that he's looking a little sort of like- I don't know. In the middle of this frame, he just looks at a odd proportion. It doesn't look like it's true to form, like it's really him. So, I'm going to show you a way to fix this really quickly. But first, before I get to fixing the distortion here, I'm just going to brighten this up a little bit using the exposure knob just so we can get a little bit more light on his face. I'm going to bring up the shadows just a tiny bit just so we can see a little bit more detail here. This doesn't need to be perfect. This isn't going on the wall, but just want to be able to see more in the photo. So, what I'm going to do here is scroll down to the lens correction section. This is the part where you're going to be doing all of your distortion in vignetting fixes. The first thing you want to do is click on Enable Profile Corrections. What this allows the software to do is to search the metadata, find out what camera, what lens you shot on, and then it pulls out a profile that matches those settings. So, it can figure out how to undistort and unvignette some of the things that happened in the photo. So, once you click that or check that box, it automatically goes out and fixes everything to a 100 percent. So, distortion's fix, vignetting's fix. Let me show you what it looks like to turn those both on and off so you can see the difference. Right now, I'm going to drag the distortion slider all the way to zero, and you can see that the frame got a little bit more wider, if you will, when you zoom it all the way into 100, and I'll go all the way to the end, to 200. It's subtle but you can tell that the frame is actually almost compressing, almost bringing everything closer to you, I don't want to use the word widening out, but it's correcting for that widening. So, it helps make the face look a little bit more true to life. The one thing is, though, if you do shoot a person this close up at 24 millimeters, there's only so much you can fix. So, be very conscious of that. That's why I like to start my portraits at 35 millimeter, but optimally starting at 50 to that 85 millimeter range. So, I'm going to put that back on a 100, and then I'm going to show you a little bit what happens when you turn the vignetting off. So, I'm going to drag the slider all the way to zero one more time. You see those dark edges around the top and the bottom and a little bit on the sides? When I put this all the way up to 200, it gets completely bright. But we're going to settle for 100 in the middle, and that gives you this nice. You still get a little bit of vignetting around the edges, but that's okay, it helps frame the subject a little, but you don't have that dark heavy shadow around the frame. So, I'm not going to do any more to this photo, I want to concentrate a little bit on some of the other shots. So, let's go to one of our landscape shots. So, this is a picture we took on the water. We got this nice sunset, very cloudy. I'm going to just take you through all the steps I would do for a landscape shot just so you can see a little bit how I think about this. One of the first things I do is I go ahead and put white balance on auto just to see where it puts me. I like what it's doing here, it's making it a little bit warmer even though it was really cold that day. It's a little warm for me because I like things to be realistic to what they look like when I was there. So, I'm going to bring this down just a little bit. So, it's a little bit cooler. It is a little dark which is fine depending on- I like to say season to taste. Add a little salt, add a little pepper, whatever you want, just make sure it's a picture that you're proud of. I'm going to put a little bit more exposure on this even though it was sunset. So, put that at 0.4. Again, don't even worry about the values that we're using here. You're going to do whatever makes sense for your photo, but I'm just walking you through the concepts here. For shadow, the buildings in the background, I'm going to zoom in a little bit. The buildings in the background, they're well-exposed, but they could use a little bit more pop, and I just want to expose them a little bit better. So, I'm going to drive the shadows up just a little bit just to give a little bit more detail in the darkness. One of the things I like to do to add a little bit more punch is to drive the clarity up a little bit. For landscapes and things where it's a little bit more forgiving, there's more detail in the frame. You can actually push this a little harder. I don't like how far I've gone, so I'm going to back this off a little bit. The next thing I want to do is I want to play around the saturation. I'm going to slide it back and forth a little bit just to see what an optimal level would be for this photo. I tend to be a little bit more desaturated with my own personal work, but with landscapes I tend to be a little bit more lenient in terms of adding saturation to the photo. Twelve looks really good here, so I'm going to keep it there. One thing, I want to back up and say one thing. I'm going to go drop all the way down to lens correction. I usually do this first, funny enough, because when you click it, what you notice is automatically, the edges get a little bit brighter, it flattens out the photo on the edges if that makes any sense. Now, I had already messed with my exposure. So, what I want to do is bring it down just a tiny bit just to compensate for how far it went. Then, one of the things I'd like to do with landscapes, anything where there's like a table or something where somebody can judge whether or not it's going to be a straight photo, like horizontally straight, is I go up here to transform and I start with auto to see if it does it correctly. Usually, it's pretty good. So, let's show you the difference here. This was off, this is on. What it's doing right now is making an upright correction. Meaning, when you shoot from an angle from far away with a wide angle, some of the building, some of the straight line objects in your photo will look like they're either falling away or falling towards you. So, auto right now, this upright correction that you see here, that's making the building stand up straight without being distorted and looking like they're falling away or falling away from the center of the lens. So, I like that but I also feel like it needs a little bit more leveling off. So, I'm going to click on this icon here, which allows you to crop or change the angle, and I'm just going to turn the photo a little bit. So, just a small correction that feels a little bit more horizontally level and looks a little bit better. The one thing I want to do before I move away from this photo is I want to add a little bit of contrast, which I'm actually going to do with my tone curve instead of using the contrast slider. It just allows for a little bit more control. So, I'm going to drag the darks here just a tiny bit, and then over here in the light section of the histogram, I'm going to drag up just a tiny bit. That creates what we call an s-curve, and s-curve is really just darker darks lighter lights which allows you to have contrast. Now, another way obviously, like I just said, you can do is you can mess around with this contrast slider, just back and forth however you want, lowering the contrast into the negative, makes images look flat and a little muddy and cloudy. Upping the contrast is going to add the darkness in there, it's going to look poppier but just be careful how you're using it. The reason that I like to use the tone curve or the RGB curve, if you're using Photoshop, is because you can choose what portion of your histogram you actually want to affect. So, if I want only to affect the darkest darks, I can drag here. If I want to affect the mid-range of the darks, I can go here. If I want to affect the mid-tones overall, I can use the slider in the middle. So, you can really, really take some really full control over what you're doing to your photo if you use the tone curve. But if it's completely new to you, start with all the sliders and then warm yourself up to learning some of the more in-depth tools that Lightroom or Photoshop can give you. So, let us show you the difference from where we started and where we ended with all this correction. So, this is where we were when we brought the photo in. As you can see, it's a little too blue and cold, it's too dark, and there's not a lot of contrast here besides what was in the camera. When we finished it, we had this beautiful sunset. You have a nice balance between warmth and cold, and you have a less distortion, less vignetting, just an overall more balance in contrast of the photo. So, that's it. I use those tips and tricks all the time. I hope you get a lot of use out of them.
9. Final Thoughts: So you've made it to the end of the class, super exciting. I hope that some of the tips and tricks I've given you, you can apply to some of your own work. I hope you're starting to understand the relationship between focal length and how the subject will look, and using different lenses with your camera, understanding crop factors, and why to make certain lens choices when you're going out to take your shots. It's a lot of information, so don't hesitate to watch some of the modules over and over again. If you have any questions, feel free to reach out. Ask questions in the comments. I want to see your work. I want you to let me know why you chose the lens you chose. If you're buying one or if you have any questions about buying one, feel free to ask me. I don't know everything but I will do my best to give you whatever advice I can for your situation. I really just look forward to seeing your work so thank you for taking the class and good luck.
10. Bonus: Buying Tips for Lenses: So, if you're thinking about maybe upgrading or adding another lens to your kit, I want to give you just a couple of in things to think about. The first thing is compatibility, this is a big one. If you're using a Canon camera or a Nikon camera, you're going to want to buy lenses within that school. So, Canon cameras can use Canon lenses. They can also use Sigma, Tamron, or other manufacturers just as long as they have the right mount. So, this Canon 5D Mark III for instance has an EOS mount. The other part of compatibility is that some of you might have a full frame camera, some of you might have a crop sensor camera, we won't go too in-depth there. But if you have a full frame camera, you're going to need to get a lens, it's built for full frame sensor. If you have a crop sensor like an APS or APC or whatever they're called, you're going to want to get a lens that is built for that crop factor. If you go to the camera store, they'll be able to help you work through that or if you're looking online, you'll be able to look up these kind of things. The second thing I think about is weight and portability. If you're somebody that's planning on carrying all your equipment on your back, you might not want to get the heaviest 70 to 200. You might want to go with something a little bit lighter. Also, depending on the space of your kit, how big your kit is, you can't fit three of these in one backpack if you have another camera body or whatever. So, you want to think about how your kit is going to fit together and what kind of burden that kit is going to be with you. Then the third thing is going to be about image quality, which has a lot to do with the construction of the lens. Like I was saying earlier, if you have a zoom lens, you're going to think about which zoom lens you have. So, if you have a more expensive zoom lens, there's going to be a reduction in loss of quality when you think about the vignetting, the barrel distortion. If you have a cheaper one, that's something you're going to care about. If you have a prime lens, a lot of those things will be out of the picture, you won't necessarily have to worry about barrel distortion at a longer focal length or with a fixed lens. Vignetting is something that's going to be present in all lenses, but it will be less in a more expensive camera. So, all those things are something to think about. The last thing I'll say about construction is obviously, a heavier metal build is going to be a little bit more durable, a little bit more weather sealed than something that's made out of rinky-dink plastic. But either way, you're still going to get a good picture as long as you get the right composition, right exposure and do the things that we talk about when we're taking a photo. So, now that we've talked about an overview of lenses, focal length, different features on the lens, speed, and aperture now we're going to put all those things to test with practical application. This is going to be the fun part.
11. Learn More from Justin: way.
 Photo Essentials x Justin Bridges