Transcripts
1. Introduction: Hi there. My name is ELISA, and I've been playing with fiber since I was about eight years old. My husband and I run a small farm with a flock of fiber animals made up of a couple of different kinds of sheep and a guard llama named Banjo. Today we're gonna talk about the basics of carding specifically using a drum. Carter, maybe you've always wanted to make a custom blend their fibers. Maybe you're looking to make a beautifully colored that maybe you just want a process that fleece so you can spin it. If so, this class is for you.
2. Materials and project assignment: Welcome to this class. Before we get started, there are a couple things you're gonna need. First and foremost, you're gonna need a drum. Carter, you can borrow in. You can rent one, or you can purchase one or if you already have one. Great. So this is gonna be the main tool of our class. Secondly, you're gonna need either a metal knitting needle or a doctor pin. They serve the same purpose. Um, in a pinch, you could use a screwdriver to, but I think the knitting needle works just as well. This is optional, but it's useful. If you're trying to card from locks is some kind of a brush. This is a dog brush, which you can get that Wal Mart for your favorite grocery store Pretty inexpensively. Um, but some kind of brush is gonna help you open up blocks, so that is optional. But it's useful for that purpose. And of course, you're gonna need some fiber that you want to card. Um, for this class, I did divided it up into three sections. The first section focuses on carding locks into roving. The second section describes how to car together two different fibers for instance, border, Leicester and bamboo. And the last section of this class is going to focus on color, combining in optical blending. Using the drum. Carter, you can pick pretty much whatever kind of fiber you want to use. So grabs a fiber and let's go. Your project for this class is to create your own custom bat. It could be a combination of different fibers. It could be your own custom color palette that you put into robing. Be creative. Try something new, fixing fiber you haven't worked with before and give it a go.
3. Drum carder parts and specifications: so drum Carter's are made up of two drums, with times a smaller one and a larger one smaller. One is called the Liquor in, and this is where we feed our fiber into. And then we have our handle scythe. You can see this line here is where we take the fiber off, using a duffer or a doffing pin. Basically, once we've got fibre on their, we run this pin down this line and pull up on the fiber to remove it. Most from Carter's also come with the cleaning brush of some kind, and you just use this to remove the fibers from your current project. If you're switching to a new project or a different kind of fiber and you don't want the fibers to mix my drum, Carter has clamps which secure it to the table. Not all drum Carter's do if yours or the one you're using, does not have clamps. I do suggest that you get some kind of a clamp to secure it to the surface you're working on. You are going to be exerting a fair amount of pressure against the handle here, and it makes it. It makes it much easier if you're Carter is secured well before we get started. Drum Carter's are a significant investment. I do suggest that you try using one before you purchase one. If you're part of a local for fibre guild, those groups will often have a drum Carter that you could use or borrow. Your local yarn shop may also have a drum Carter that they either let people use or they loan to people for a small fee. I would look into those two options to try went out before you purchase one. When you are in the market for drum Carter, there a couple things you're gonna look at one is the diameter of the drum that determines how wide of a bat you're gonna get. Mine is on the smaller side, it's four inches wide. Um, typical. Other sizes are eight inches or 12 inches, and then the other specifications you're gonna see when you're looking at drum Carter's is a number called T P I, and that stands for teeth per inch. Teeth per inch refers to the density of teeth place on the larger drum. Now the larger the teepee I number, the more times there are going to be in a smaller area. The smaller the teepee, I number earthy, smaller number of times. Also, the smaller TP I number means that the times air going to be more substantial ans differ. And if you have, if the teepee I number is higher, that means that they're going to be more flexible and thinner in general, The higher number t p I is going to be used for processing finer wool and you get a smoother looking bad by using that kind of a drum. Carter, the smaller TP I numbers are going to be used for carding medium or coarser wool, and they're gonna give you a little bit more texture to your bats. So it kind of depends on what kind of fiber you card most of the time. And also what kind of ah, look you're looking for in terms of your final bat? Um, my drum Carter is a 72 t p i, which means it has 72 teeth per inch on the larger drum. Here, 72 is a good middle of the road number for T. P I. I use this to both process cleaned locks and also to combine Rove, ing's and different fibre types. So and I've been very happy with it. So I think I think 72 is a good is a good number for for beginner to start with, but play around with it, try a couple out and see what you think.
4. Basic carder use: to familiarize yourself with the basic function of the drum. Carter, we're gonna be using some already carted robing to run through the drum Carter and just show you how to feed fiber into the from Carter and how to take it off. So this is just some commercial roving that's been died, and I'm just gonna tear it into a couple of chunks here. So when we feed the cyber and we're just gonna hold it against the liquor and Bergen turn our hands and as you can see, the fiber transferred from the small drone to the larger drum And now we have a little bit of our fibre distributed on our larger drum. I'm gonna do it again. Now, when you do this, I find that less is more in terms of feeding fiber into the drum. Carter, you want to feed small pieces. You don't want to feed too much in at one time. Otherwise your father won't be evenly distributed, and it will be very clumped up, so you can see we've got a nice layer kind of on the bottom of her drunk. Carter here and now I'm finishing how to take off the fibers. So we're going to use our golfer are golfer pain here and you can see the line here where we're gonna run it. And you're just gonna run the doctor paying down the groove that piece of wood on Carter and lift straight up. So, as you can see, this is part of our bat, and then you're just gonna lift this off the drums? You're just gonna turn your drum, Carter, I like to roll it as I dio and you can pick up little pieces. That seems like they want to stay behind here and just roll it. Kind of picking it up as Ugo. There you go. That is the basics of how you create about, Of course. Then you could either spin from the end where you could unroll it and spin strips
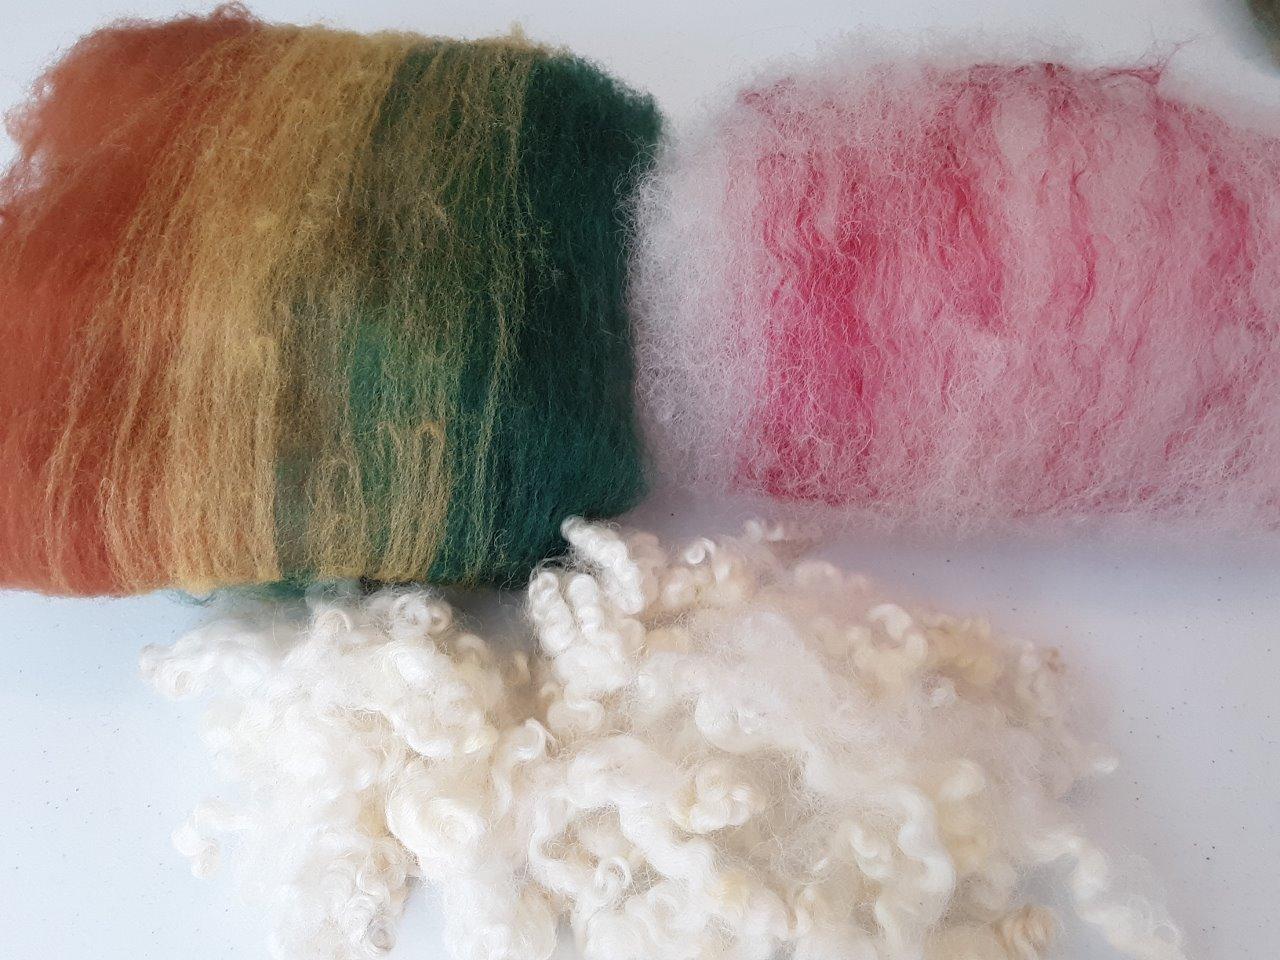
5. Carding from locks: All right. So here, I've got some border Leicester Wolf that I washed, and it's nice and clean now, but as you can see, it's still in the form of locks. So how do we get from this to this? I'm gonna show you. No, this lock structure. Um, when you feed it onto your drum, Carter, you're gonna want to just pull it apart gently, and you're gonna want to just feed a little bit at a time into your liquor in and turn and crank the handle on the drunker in the whole district. As you can see, some of the wool has transferred to the larger drum again. With this less is more so feeding small amounts of fiber onto the drum. Carter at a time is generally your best. As you feed your fiber on, you want to make sure that you're distributing it evenly between right and left. This is a bigger deal if you have a wider drunk, Carter. But I do make sure on mind that I kind of put some more on the right and then some more on the left. Um, as I feeding the fiber in some fiber, you don't really even have to pick apart much at all. For instance, it down breathes. We've got a couple of Shetland sheep and thieve, and their fleece is are much more open, and I can feed them almost directly into the drone. Carter, without picking them apart much at all on day, do just fine. So that's one consideration. The other thing you want to pay attention to is your staple life. So the staple length is the length of the fiber from tip to the cut end. And when you're drunk parting, I recommend using a staple length that is less than six inches. In fact, I recommend maybe three or four inches for optimal results if you use. If I were that has a staple length that's too long. It's gonna be really, really hard to get it off the drum. I have done it before, but it's it's difficult and unpleasant, and if you have a lot of fiber to card, I don't recommend it. So this lease is really perfect for this. We've got what about a three inch, roughly a three inch stable length on this fiber on? This is perfect for use on a Carter you want to make sure not to overload your Carter. I find that for my Carter it can accommodate about 3/4 of an ounce of fiber without getting overloaded. And the way you're gonna be able to tell if you're overloaded on fiber is you're gonna have five or build up on your liquor in and you're also gonna have less even fiber on your drum , Carter. And if you overload your Carter, not only are you gonna get a roving, that's less even. You're also gonna end up with waste of the fiber because you're gonna have more fiber that gets caught on your liquor in. So again, less is more. That is the that is the cardinal rule in drum carving. There are also some fleece. Is that have much more closed locks? For instance, this is a lock from one of our land border Leicester polices, and you can see this. The tips are stuck together much more than the other fleece. And what I do with this typically is there. There are two ways you can approaches. One is you can just kind of pull it apart by hand like this, and then feed this into your dream, Carter. The other thing you can do is what's called Flick Carding. So demonstrate that so for flip carding, you're gonna want some kind of a brush. You can use a cat brush or a dog brush. Something like that. Um, your fiber. And you're gonna want something. Um, a sturdy surface on which to do this. I use an old piece of jeans, but you can also use, like, a piece of leather or something like that. I've seen people use si two foot card. You're just gonna grab one end of the fiber and lay it down, and you're just gonna open at the other end of fiber with your brush? See that? And then you're gonna grass the other end. Indeed. Same thing on the other there. Yeah, that looks significantly different, doesn't it? So then you can feed this directly into your drum, Carter, or you can actually just spin from here if you want. Teoh, Um, depends on what you're going for. So in this case, I'm just gonna feed this, and we're gonna keep going until we have about 3/4 of announce on our girl. Carter, you can use a scale to measure your fiber beforehand, and that's typically what I do, but it is not necessary. All right, so we've got about 3/4 of announce on our drum, Carter, and now we're gonna take our fiber off. So again, we're gonna take our doctor pin, and we're gonna just run it down this line here, and I'm just gonna twist this around. I'm just gonna roll this to take the fiber off, All right? So we have a little bad here, but as you can see, this is not very consistent. We still have clumps. And some of that Locke structure is still in there. So what I'm gonna do now is I'm gonna run through. I'm gonna run it through the drone. Carter, a second time, I'm gonna tear it up into smaller chunks. It doesn't have to be as small as the first time you did this, but I get the best results when I tear it into chunks about like that. Hold this down here again. You want to distribute it right to left, and we're gonna card it onto the large drama. All right, so here we go. We're gonna take this off a second time, and I'm just gonna roll it up. Let's take a look. So this is much better. It's getting there. It's still have a little bit of areas that are not uniform. It's kind of up to you. I probably would go ahead and holiday at this point, but if you wanted it to be more uniform or smoother, you could run it through the Carter 1/3 time. I am gonna actually run this through one more time here. No, it looks just about perfect. I think so. I like to keep my backs just rolled up like this. If when I am willing to stand and then when you get ready to spend it, if you could do one of several things one is you can spin from the centre on draft like that, or you can split your bat and spin like this again depends on what kind of your in structure you're looking for. All right, so that's it for this section.
6. Combining fiber types with a drum carder: welcome to the next lesson in this lesson, we're gonna learn how to combine two different types of fibre. In this case, I've got some border Leicester roving that. We just card it up and I'm gonna combine it with some bamboo viscous. And we're going to create our own custom fiber blend that when you are creating fiber blends, I do recommend a fairly substantial proportion of wool. Um, at least 30%. This is gonna help hold your back together and also give it some body. Also, you want to think about the staple length of the two fibers or multiple fibers that you're combining. Like we said before our staple length of our border. Leicester here is about three inches somewhere in there, the staple length on our bamboo. Yes, it is similar. They don't have to be exactly the same, but you don't want them to be vastly different if you can help it. So when I card these two fibers together, there are a couple of things to keep in mind. One is that when you're starting out on the drum, Carter, you want to make sure you put a layer of wool first. Always put your will first. Even if it's just a little bit, that will help you be able to get your back off of the drum, Carter, when we're done. The other thing is that with some fibers, bamboo is one angora would be another or if you're working with, like, 10 cell or, uh, Fire star, something like that. Some of these fibers were not going to feed into the liquor in. You're going to place directly onto the drum, Carter. So I'll show you how to do that. Um, the reason is that if you feed some of these more delicate fibres into the liquor in, they just get stuck there. They don't make it to the to the bigger drum, especially if you're working with a a lighter, more delicate feiger. So that's something to keep in mind. I'll show you how it works. All right, So, like I mentioned, I'm going to start with a san layer of the wool the border Leicester will. I'm gonna try to get it fairly evenly distributed on my drum. We're just gonna put this on here. And here is our bamboo. You can see this is kind of our but this fiber Looks like this is really nice and soft and makes a really nice combination with wool. And so there are two ways to do this. Like Like I said, you can try to feed this in and the liquor in, I'll show you. And then I actually transferred fairly well. You can see the streaks of color running through here. Like I said, with something like angora and sometimes with bamboo, I use this or 10 solar fire star. You can also just place this onto the larger drum. I'm just gonna place it as it goes along. Placing it by hand also gives you a little bit more control over where your color goes, and you can actually kind of paint with your fiber. This way you can make some really beautiful, beautiful things. Just gonna have a little bit more in this layer. All right, Now, I'm gonna have just a little bit more wool on top, and we're basically just gonna sandwich these two fibers and make a couple layers. So I'm satisfied with this. I'm just gonna take this back off of the drum, Carter, and we'll take a look at it, All right? So as you can see, we have a pretty nice blend here. We still have some more discreet areas of the bamboo in contrast ing with the white of the border. Leicester. If you wanted this to be more uniform, you could run it through one more time and get more of ah to solid pink color. I kind of like some unevenness because that gives the yarn a little bit more interest in texture when you're spending it. So for me, I would just leave it right like this and spin from here. One other thing that I should know when you are trying to combine two different types of fibre, especially if they're very different types of fibre. I recommend that you card both of them separately. Beforehand, for instance, you would not want Teoh card these locks directly in with the bamboo card. Your card, your locks first gets him roving. This bamboo is already in the form of in the form of roving, so I could just add it straight onto there. Um but for instance, if you were doing a blend of wool and alpaca or will Allama card them both separately first and then combine them. That's going to give you the most control over your blend and how your back looks at the end of the day.
7. Combining color with a drum carder: welcome to the last section of this course. In this section, we're gonna learn how to card together different colors of the same fiber using the drum. Carter. There are two major ways of putting different colored yarns onto a drum. Carter. One is to layer them vertically, like so. The other way is to make sandwiches horizontally like so. Each technique gives a different effect when you're spinning the wool after, and I'll show you examples of that before we get started. Let's talk a little bit about optical blending, so optical blending is basically when you're blending colors using the drum Carter, the color of the actual wool is fixed. Obviously, this will is going to stay yellow, no matter how much I heard. Card it on the drum. Carter. However, if I mix it thoroughly with this dark green, if I mix it enough, it's gonna end up being kind of a light, yellowish green, as if I had mixed thes two colors together on a paint palette. So, in this way, combining colors on your drum, Carter's a little bit like painting. You can use color theory to combine different colors and get completely new colors It's a pretty exciting aspect of drum carding. If you ask me, let me show you some examples of optical blended. The weft of this carp was made using three major colors kind of a a greyish purple color, an orange and kind of a sky blue. So in this section of the scarf, you can see those colors discreetly. Then, as we moved on the scarf, you can see here in this area these colors were blended together a little bit on the drum. Carter. They were not completely incorporated, and you can still see kind of flecks of yellow flecks of blue flecks of purple in in the West there. And then, if you look at this section of this scarf, the's colors were completely incorporated. Using the drum carter, the scarf was made using Onley three colors. But you can get some very different effects by how much you card these colors together again, we get almost a uniform gray color. When we carted them all together or carted them a little bit, we got kind of these flecks of color or just discrete blocks, so that's an example of kind of the different effects you can have with different colors. Now, let's get some color on the drum, Carter, and we'll show you how it works. Alright, so I've got three different colors. I'm gonna combine on the drum. Carter, when this kind of an orangey brown color, we've got a dark green and kind of a golden yellow color here, and we're just gonna start by turning these into some smaller pieces like we did before. It said you never want to be putting too much fiber on the drum. Carter, a time smaller pieces allows you to control where things go much better and gives you a more uniform card. You can see about the size that I'm tearing these apart and last but not least, start yellow here. All right, So first we are going to try to make vertical stripes with our color down the drum. Carter. Now, like I mentioned before, my drum Carter is a little bit narrow in terms of its with. If you have a wider drum, Carter, you're gonna be able to you place your color more discreetly, but it's still possible with this drum, Carter, and I'll show you how we do it. So the way I control the position of the color is I'm gonna hold it on the liquor in where I wanted to go. So I want this green to go on the right side here. I'm just gonna hold on the right side of the liquor, Anna's post of the center of the left, and I'm gonna crank the handle. All right? A So you can see we've got green on the right hand side. Now I'm gonna add some orange and I want the orange to go on the left side. And last but not least, I'm gonna add some yellow right in the middle, right? So I'm gonna just continue adding pieces distributed right and left, continuing to keep the green on the right, the orange on the left and the yellow in the center. All right, so I think we're done. So, as you can see here we have a pretty nice Grady int. Almost a stoplight effect or a rainbow effect from kind of are brownish orange all the way to our green. We're gonna take this offer drum. Carter, we go. As you can see, I did not clean the term Carter in between parting the border Leicester. So there is a little bit of border Leicester on here. But that's okay. It comes off pretty easily. And here is our bats. Pretty nice. In case you're wondering, this is about half an ounce of fiber all together. So that's one example of ways we combine. We can combine. Color is using the drum Carter. And next, I'm gonna show you kind of the sandwich approach. Like before we're gonna tear are pieces of roving into since smaller chunks. In this case, instead of keeping our fiber of one color on one side, we're going to try to distribute it as evenly as we can across the width of the drum. I'm going to start with some green here. As you can see, it's kind of all the way across. It's not perfect, but it's a fairly good distribution. Next, I'm gonna add a layer of yellow, and you may need to kind of pull it apart. So you do get a little better distribution here, and I'm gonna finish it with some orange, all right? And I'm just gonna repeat this process with All right, so we've carded all our fiber onto the drum. Carter, Now we're gonna take off our bat. As you can see, you can kind of see peaks of color going all the way through. But it's a very different look from this. So this is how this that looks very different. Look, about very pretty, I think. Um, now, if you look from the side, you can kind of see where we've made layers. And if you are spinning this, you could just take a strip and you're gonna get a twist of all those different colors. Um, So what I'm actually going to do is I'm gonna split this in half, and I'm gonna card half of it some more through the dark drum, Carter, and we're gonna look at the difference between the two. See here we have half of it. And what I'm gonna do is I'm gonna split this up, and we're just going to make a bunch more sandwiches with this section, and we're just gonna run through the drum. Carter trying to distribute right and left. We'll see how it looks. So this is what this looks like after one more pass through the drum. Carter, you can still see some differentiation between the colors but it has become significantly more uniform and the the colors have been kind of muddied together. And depending on which colors you pick obviously to combine, you can get a whole bunch of different effects using this. So again, you can combine this with this. And obviously this is if you spend these that these they're gonna give you vastly different looking kinds of yarns, but it's all using the same three colors, which is pretty cool.
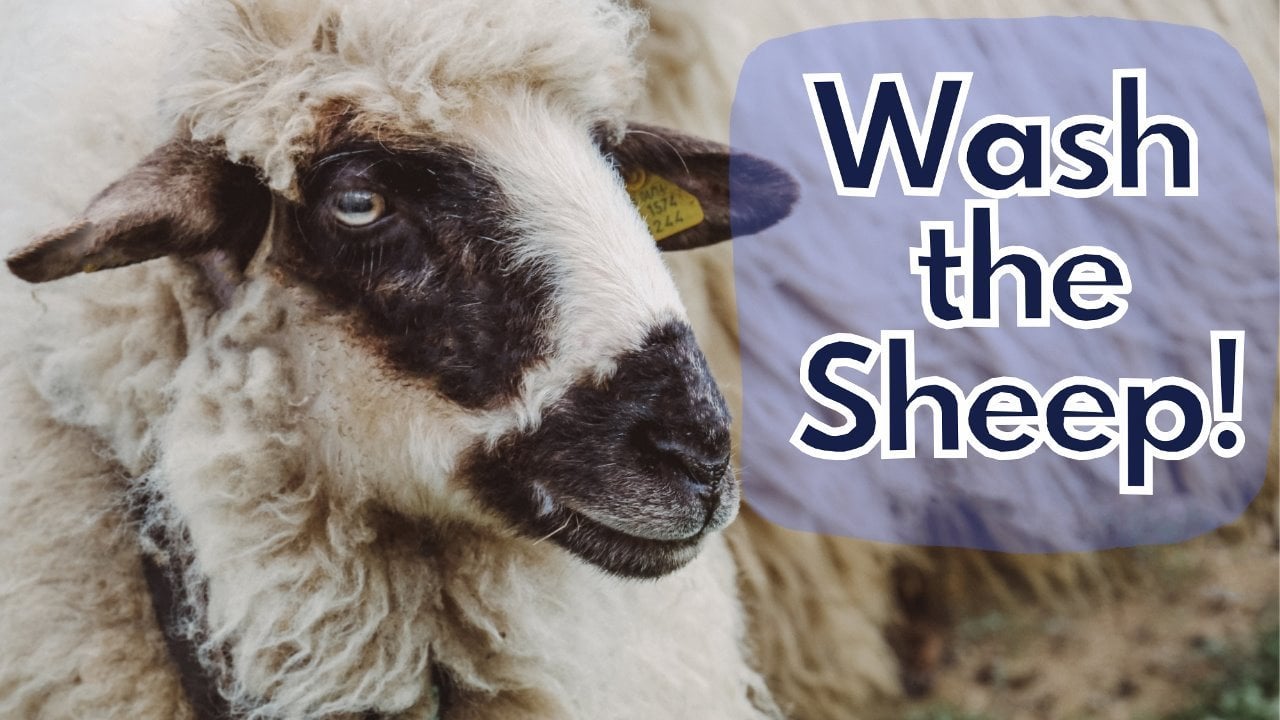
8. Final thoughts and carder cleaning: a couple final thoughts. Make sure that you never card raw police in your drum, Carter. And the reason is that you will get Landel in and Greece stuck to the groom Carter, and it is very, very difficult to clean off of it. So make sure that you're working with clean fiber. A little bit of dirt or vegetable matter is okay, some of that will fall out as you're carting, and that's kind of a side benefit of using the Carter. Um, but you do not want any whale's or Greece in your rule when you're carting it. Last but not least, I'm gonna show you how Teoh clean your girl, Carter. Um so, like I mentioned most from Carter's come with a cleaning brush, and it's basically a brush with some carding cloth on the end of it. Similar to what's on your drum, Carter. Um, so to clean it, you're basically going Teoh, uh, use your brush and the Joe Carter in the opposite direction. So instead of turning our drum clockwise, we're going to go counter clockwise, and this takes off the extra fiber on the large drones. The small drunk the liquor in also has a place where you can place a golfer pin and so you can take that fiber off much in the same way that you would take a back off the larger drum . And you can also use the rush for that. So here you can see this little gap here. If there were more fiber on it, you could just lift up and more this would come off and then we can use our there. We've got pretty much all the fiber off of our liquor in, as you can see here, a lot of the fiber that was on the liquor and has now been transferred to the large drum. For this reason, it's probably a good idea to you clean the liquor in first before you clean the larger drum . So we're just going to clean off the larger dream. There we go. Our dream is clean and ready for our next project. The other thing that can be useful when you're cleaning the drum, Carter is a vacuum cleaner. You can get kind of the crevices, um, and get all the dirt out of there. And you can also, um, every once in a while, unclaimed but from the table and clean out underneath the drum. Carter, because you will have a lot of residual little pieces of wool. Little seeds, little pieces of hay, dirt. Pretty much the whole the whole nine yards underneath there. So, um, if you forget about it, gets pretty, gets pretty gritty, and then you end up. Once it builds up enough, you end up getting some of that junk in with your roving, which is no good. So just remember to clean that out from time to time. So I hope you enjoyed this class. I look forward to seeing what kinds of things you make with your drum. Carter, show me pictures in the projects links below. If you have any questions, please don't hesitate to ask.
 Ancestral Evolution, Traditional skills for the modern world