Transcripts
1. Class Trailer: Drawing Ideas: An illustration teacher,
I've taken on some of the hardest topics including style, color, and composition. Now I'm taking on
conceptual illustration. How do you come up with clever, compelling ideas for editorial, advertising, and publishing
clients and beyond? I've had to dig
deep for this one, but I think I've figured it out. It turns out that the best
conceptual illustrators are all in on a little secret, leaning closer, and I'll tell you three things
that I found out. Are things they don't want
you to know that will revolutionize how you come up with your ideas
in your own work. First, the best ideas are
actually not that original. In fact, they're based on
pretty unoriginal ideas. The trick here is that the
best illustrators know which ones to start
with and how to add just the right twist
to make their point. Second, most of these
starting points are right under our noses, like literal on our lips, we use cliche ideas all the
time in spoken language, not just to state dry facts, but to express deeper feelings
and truths behind them. The best illustrators
just know how to take these verbal metaphors and
turn them into pictures. Third, it just so
happens that many of these visual concepts
have already been made, and we illustrators just
go out and steal them. Or maybe not steal them, but we shop for them. It's like finding a
ready to eat meal in the freezer section rather than hunting for our
dinner in the forest. Are you hungry for
more? Learn all about these secrets and more
in drawing ideas. This is my new class on Skill Share. I hope
you can join me. Visit tomfroz.com slash TeachET earn more. I'll
see you in class.
2. About the Class and Project: This class is all about
conceptual illustration. How do we communicate big ideas
in just one illustration? One of the most interesting
kind of projects for illustrators is the
editorial illustration, which is often conceptual. In this class, you'll learn the basics of what goes into
a conceptual illustration, and then we'll get to put that knowledge to the test
in the class project. For the class
project, you'll make an editorial style
illustration that communicates a big idea in
a clear and compelling way. Conceptual illustration
is not exclusive. Everyone can use the methods in this class to make
conceptual illustrations. These methods are based on ideas that you already know
about and for which there are thousands
and thousands of examples out there in the world to learn from
and be inspired from. To take this class,
you'll need a notebook or a sketchbook for taking notes
or the digital equivalent. You'll also need pencil
and paper for sketching. I will be using Procreate, and you'll need your
favorite illustration gear, and for that, I'll be
using Procreate, as well. If you're interested in learning my techniques and the brushes
and stuff that I use, all of that will be included in my project demo
later in this class. In terms of experience,
you should have at least beginner to intermediate
illustration skills. So that just means that you have some experience
working in some kind of tool or technique, whether it's an app
on your iPad or Photoshop or even just
stuff that you do on paper. You should have some experience playing around of
making illustrations. You should also have a
basic drawing ability, and that doesn't
mean you have to be the best drawer ever, but you should be
comfortable holding a pencil and sketching. So who is this class for? It's for a beginner to intermediate illustrators,
artists and designers. It's also for anyone
looking for techniques to develop concepts
or illustration, advertising,
marketing, and beyond. So even if you're a more
experienced illustrator, but you tend to work less conceptually and
more narratively, or you do more storytelling. If you want to dip
your feet into some more idea
based illustration, this class will be
perfect for you. Now, just a quick note
about how this class works. I always start my
classes off with a little bit of theory
that I call the primer, and this is where we just
learn a little bit of the what and why of
what we're going to be doing in the project before diving into that
project part so that by the time we get there with our pencils and our iPads
and stuff like that, we're fairly confident about what it is we're actually doing. So if you want to jump right
into the project, you can, but I highly recommend
that you start with the theory or basically
the first lessons, and that will really
help you understand what we're talking about
and doing later on. Okay, with that being said, let's get into the class.
3. LESSON 1: What is Conceptual Illustration?: In this video, we'll
look into what makes an illustration
conceptual and what the difference is between
a conceptual illustration and a non conceptual
illustration. A conceptual illustration is an illustration that
has an idea to it. There's more to it than
what you see at face value. Whatever you see in
the picture at first, it probably means something
else on closer inspection. In spoken language,
we're used to saying one thing but
meaning another. We call this metaphor
or more broadly, we might say that we're
speaking figuratively. For example, I might say that my last meal out cost
me an arm and a leg. That sounds pretty extreme and gory if you take that literally. But of course, you
know that what I really mean is that my
meal was really expensive. We can speak figuratively
in illustrations as well. Conceptual illustrations
often involve some visual metaphor or they make a visual
pun or they otherwise have some surprise
twist in it and the twist is possible by showing mostly a
regular expected thing, but changing a part of
it in a surprising way. The opposite of a conceptual
illustration would be a literal illustration or a
representative illustration. Here, I mean, the
illustration is literally about what
you see at face value. What it means and what it represents are more or
less the same thing. Non conceptual illustrations
are perfectly valid. It just depends on the context and what you want the
illustration to do. Sometimes you just need a beautifully
illustrated object or a fun character or a lovely
little illustrated scene. I would also include maps as part of non
conceptual illustration because they're non
metaphorical and they literally represent the
place that they're about. Another non conceptual
illustration type is what I call the act out. An act out is an
illustration where there's a character literally
acting out the idea. I've found that
illustrators who aren't used to working in a
more conceptual way will often resort to
showing a character gesticulating or acting out an idea almost like it's
a game of charades. For example, if an
illustration is about comfort, the acto might show
a figure sitting in a couch snuggling up with a blanket or
something like that. Nothing wrong with
the actout approach, but strictly speaking,
it's not conceptual. This particular example
would be more narrative. A good test of whether
an image is an actout or maybe more
conceptual is to ask, could you have shown the
scenario in a basic photograph? If the answer is yes, it's not conceptual and maybe a photo could have
been used instead. Now the most common context for conceptual illustrations is
in editorial publications. This would be mostly
newspapers and magazines, whether that's in
print or online. Now, we all know
about the big names here like the New York Times, the Wall Street Journal,
or Time magazine. But there are many smaller
editorial publications out there that you can find
across all industries, including but not limited to travel, education, and retail. Thing that makes any
publication editorial is that it features mostly
written articles or stories, and these are often paired
with illustration or photography to make them more
appealing to the reader. Now, not all conceptual
illustration is editorial. Conceptual illustration
is useful in many situations such as posters, book covers, and advertisements.
The opposite is true. Not all editorial
illustration is conceptual. For example, most
of my illustrations for editorial clients, including the Washington
Post, Time magazine, and the Independent, have
been non conceptual. Most of these have
actually been maps. Now, many people
might think that a conceptual
illustration needs to be super clever and original, but the truth is that the best illustration concepts aren't that original at all. In fact, they rely heavily on very common ideas to get
their main message across. The clever part is in how
they springboard from these ideas in a
surprising or novel way. This takes us back
to what I said earlier about speaking
figuratively. We all use these figures
of speech to say what we mean without actually saying what we mean in a direct way. In this case, I call these
figures of speech idioms. Referring back to my
previous example, to say that a meal costs
me an arm and a leg isn't just a fancy way of saying
that it was expensive. It suggests that the expense was a huge sacrifice comparable to trading my own
irreplaceable limbs for it. Obviously an exaggeration, but this dramatic figure speech helps me communicate not just a fact about how
much a meal cost, but about how I feel about it. We lean on common
metaphors and images to help get our message across
not just in a factual way, but also in a more
emotional or intuitive way. In summary, a conceptual
illustration is any illustration that expresses an idea in a non literal way. These include common
metaphors and idioms and also
symbols and tropes. In the next few videos, we'll look more deeply
into each of these idioms, symbols, and tropes
to learn how to harness their power
in our illustrations.
4. EXERCISE 1: Is it Conceptual?: At the end of each lesson, I've made these
simple exercises that will help you test out
what you just learned. This first exercise is
called Is it conceptual? The purpose here is to help
you learn the differences between conceptual and non
conceptual illustration. Using Pinterest,
find one example of a conceptual illustration and one example of a non
conceptual illustration. Next, explain what makes each one either conceptual
or non conceptual. For the conceptual piece, describe what the
concept or idea is. In your own words, just explain what you believe
the illustration is saying. Share your answers in the
class project and be sure to include the name of the
artist in each illustration. So I'll show you an example of how I've done this
first exercise. This is my conceptual illustration
on the one side here, and then the non conceptual
illustration on the other. I've just pasted them into Procreate and I've put the artist name for
each one of them. Now I'm going to just explain why I believe this
one is conceptual. And this one is non conceptual. Now, I've gotten two illustrations
of a similar subject, basically a kind of statue head. So this one's a guy
carrying a statue head, and this is just
basically the head from the statue of David. So this one is conceptual because it's more than
just showing statue head. There's something
else going on here. There's an idea.
Happening here is there's this guy carrying a statue and I don't know exactly
what this means. I don't know what the
headline is or what the artists original
intention might have been, but I'm going to do my best at interpreting it myself here. What I read out of this
is what is a statue? The statue is a monument. It's an image of someone it
looks like it's an image, maybe of this guy here. It could be the idea of he's
trying to keep up his image, it's this idea of a burden because he's
carrying a burden here. It's a burden of
keeping up your image. This just makes me think
of the whole phenomenon of personal branding that is this thing now that everyone
seems to have to do and that could be on Instagram
or other social media. It could be on
LinkedIn. But anyway, it can get burdensome. That's what I read out of it. That's what I'm getting at here. I can just put my reason here, why I think it's conceptual. It's using clear symbols
to represent an idea. So how do I know that? Well, the easiest way to describe it here in this class would just be that
this is the trope. This trope is playing on the idea of atlas,
carrying the world. This is I don't know why I
feel like I have to draw what I'm talking about
here, but, you know, you have the mythical creature
or the mythical character, I should say, of Atlas having to bear the
burden of the world. And so this would be
considered a trope. Now, for this one, I don't
see any real meaning in it. It's just a stylish or stylized
version of David's head. In some context, it
might mean something, but out of context, there's
no concept to this. So you really only
have to describe why the conceptual
piece is conceptual, but if you want to
go ahead and talk about why the other
piece isn't conceptual, you can go and do that, as well. I would say it's not conceptual because
there's no clear idea. I don't know what the artist
intended this to mean.
5. LESSON 2: What are Symbols?: In this video, we're
going to look into what symbols are and how they are the basic building block
of conceptual illustration. Every day, we use words
to represent ideas and things that are in our heads and somehow others seem to understand what
we're talking about. We can talk about love or dogs or inflation without any of those things actually
being present or even a physical thing you
can see with your eyes. It's almost magic when
you think about it. The sounds I make with my
mouth can put pictures in your mind thousands of
miles away perhaps. In this way, words are symbols. There are things that we use
to represent other things. In spoken language, symbols
are made out of sounds. In illustration, symbols
are made out of pictures. In this sense, a symbol is a picture of one thing
that means something else. Symbols can be graphic symbols
like logos or characters, but they can also be more
complex representations. Whether we represent them more realistically or more graphic
in a more simplified way, we can use symbols as building blocks to craft our
visual messages, just as we use words to
craft our verbal messages. Symbols can be very literal in their meaning or they
can be more abstract. For example, a book can be a symbol of just a book,
like a literal book, but it can also be a symbol
for anything we might associate with books in
a more abstract sense, education, stories, literacy, doorways into
other worlds, and so on. We can choose symbols for both their literal meaning and for other things that we
might associate with. Smokestack could
represent a smokestack, but it could also express an idea like industry
or air pollution. For another example,
a ladder could literally represent a ladder
like the thing you climb up, but it could also be symbolic of concepts like opportunity, going up, ascent, access, having a better vantage point, and on and on and on. Some symbols are really
open to interpretation. There's not just a few
possible meanings. I can really be
applied to anything. For example, a jigsaw puzzle can be used to represent
all kinds of things, especially abstract ideas that don't have any physical form. Things like connection,
relationships, cooperation, following apart, intelligence, and
things like that. Because these big abstract
words are hard to visualize, it's easy to see why
the puzzle piece has become something
of a cliche symbol. Now, there's nothing wrong
with cliche as illustrators, it's our job to find a way to use them more
appropriately and to add something more to
them in order to make more powerful
and more meaningful. Often, all it takes is just
adding a little twist. Just for example, let's take the puzzle piece
we're talking about. Maybe the idea of piecing things together is
a good metaphor and maybe the puzzle symbol or metaphor is perfect
for our concept. But then we can think beyond
a literal jigsaw puzzle. Maybe it's a broken vase or
a mirror or more abstractly, maybe a fragmented face
in your illustration. Whatever it is, you want
to adjust this idea of the puzzle more to whatever it is that your
illustration is actually about. You still have this puzzle idea, these pieces that are coming
together are falling apart, but they have been reinvented or reimagined in a way that speaks to the
subject more directly. For another example,
instead of using a ladder as a symbol of
opportunity or access, you can think about
what else might be used to climb up something or down something that will be more related to your subject, such as a beanstalck
or a rope or stairs. These are basically all symbols
for the same basic idea. The takeaway here is that in
order to illustrate an idea, you need to start with symbols. The symbols you
choose need to be related to your subject
in a more direct way, but they should also have
deeper meanings that can speak to some bigger ideas that you're working
with as well. As an illustrator, your job is to understand
how symbols work, what do symbols
mean at face value, then what deeper meanings
might they have as well? The most powerful images don't shy away from using
common symbols. Whether they're cliche
or overused matters less than whether they're appropriate for your specific subject
and how you use them. Now, in our conceptual
Illustration tool kit, symbols are the basic
building blocks of meaning, and sometimes we can get away with just one
building block, like just using one symbol, and that's our
entire illustration. But we usually need to combine symbols to communicate
our message. In the next couple of videos, we'll look at tools that
will help us do that, namely idioms and tropes.
6. EXERCISE 2: Symbolic Nouns: This exercise is
called symbolic nouns. We all know what a noun is. It's a word for a person,
place, or a thing. In this exercise, we'll look
into how literal people, places and things can become symbols for more abstract ideas. The purpose here is to help you build your symbolic literacy. That is your awareness of how everyday things can be
used symbolically in your art. To do this exercise, first, write down three nouns, one person, one
place, and one thing. A person, it can be a
real or fictional person, could be a figure from
history or at a politics, for example, or a character
out of a movie or a book, but they need to be well known. For the place, this is a
hard one to symbolize, choose a well known
building monument or landmark to represent it. Choose a familiar
object that you believe most people
would be familiar with. Next, write a one to
three things that each noun could be a symbol of or what it could represent. For each of these
possible meanings, write or sketch out alternative symbolic nouns that could in turn represent these. Share your answers
and any sketches you may have made on
your class project. So I just have my example
here of my exercise too, and for my person, I chose Abraham Lincoln
and for my place, I've chosen the US capital. I could have said, my place is Washington, but then I start thinking about how to represent
that symbolically. So it's much easier to think of a specific monument or building or landmark that I could easily draw and so the US
capitals my place. Then for the thing,
I've chosen a neck tie. Part two, we want to write
one to three things that each noun could be a
symbol or represent. The most literal thing here
is Abe Lincoln himself. I've just doodled
a little symbol of each of these things up here. Now I want to think about
what does Abraham Lincoln, in this case, represent? He could represent
the idea of freedom or emancipation, or
perhaps assassination. Now, for the US capital, this could be a
symbol of America, it could be US politics, or it could represent
something like big government. And then for the
thing, the neck tie, this could represent men
or just, like, a man. It could represent business, and a neck tie could
also represent dads. So we've gone in the direction of going from something very literal to what they more
abstractly represent. And now we're going
to flip things around to go back the other way. So we can take each one
of these associated words and see what other symbol we
could use to represent them. So, for freedom, we might
choose to represent that with the US flag or
the statue of Liberty. For emancipation, we could
represent that with, say, a hand and shattering handcuffs
or something like that, or even just handcuffs
themselves being shattered. Now for our place, we
have the US capital. We said that it
could mean America, US politics, and big government. Let's just say US politics is a word or an idea that we want to then find
another symbol for. You could represent
that with, say, Donkey. I'm going to try and
draw a donkey here and an elephant, which are, of course, the symbols of the two parties of
America's two party system. So Donkey and elephant together would be a
symbol for US politics. Then finally, the
thing, the neck tie. The literal neck tie
is symbolized here and a neck tie can symbolize
men or businesses or dads. Let's just see what we
can come up with dads. Reverse engineering this to see what symbols we could
use to represent dads. I think right away
of lawnmowers. I think of beer. I
think of beards. I know not all dads have beards, but these are the
things you think about. There's no wrong answer for what you associate with
certain ideas. The question is, which of these symbols might be
the most universal? Now keep in mind that
for all of these, you're looking for
symbolic nouns. If you get stuck for ideas here, you may find yourself
turning to actos, something more than
just one thing that can represent the idea. For example, for the dad one, it's hard to represent dads abstractly with one
symbol, isn't it? My first thought
is to show a dad like figure holding
a child like figure, which is literally what
a dad would look like. But our job here is to go beyond that literal scene or scenario or what I'm
calling an act out. And by doing this exercise, you'll experience first hand how hard this process can be. It can be hard to find a symbol that represents
an abstract idea. Just do your best and if you
find yourself in a dead end, just say so in your write up, just say you couldn't
think of a symbol for that particular idea.
7. LESSON 3: What are Idioms?: Okay. In this video,
we're going to look into what idioms are
and how we can use them as a powerful
starting point for ideas in our illustrations. Idioms are common
phrases or figures of speech that we use so often
we barely even realize it. For example, hair of
the dog or pulling back the curtain or the goose
that lays the golden eggs, a bird in the hand is
worth two in the bush. The piper must be paid. I'm sure you've heard
some of these before. Idioms are usually references to well known old stories or historical events
or cultural works like movies or books or songs. They can also be more
direct metaphors drawn from shared human experiences
like fanning the flames. Idioms are prepackaged metaphors that we can use to express
bigger ideas and simpler ways. Now, metaphors are probably the most common type of device used in
conceptual illustration. To say we're pulling
back the curtain, that's a very illustrative way of describing the revealing or unveiling of some truth that was hitherto hidden from us. While we might say
pulling back the curtain, we don't actually mean there's a physical curtain involved. Now, conceptual
illustrations often play off idioms in ways that are very clear
and easy to identify. An illustration isn't a
direct interpretation of the idiom itself. The idiom is modified in some way to represent
a more specific idea. An idiom is chosen
to line up with the subject or the point of view or whatever the
illustration is about, but then it's adjusted or
twisted in ways that make it mean something more or to
invoke more curiosity. Now, there are no hard
and fast rules here. Sometimes an idiom
can be used in a very on the nose way that is perhaps used ironically
or for a comedic effect. Other times an
illustration might just use an idiom as a
starting point, but then it takes a lot of
liberties to make it more specific or interesting
or even quirky. Often as illustrators
will get idioms handed to us directly in the headline of the story we're illustrating, especially if we're working on an editorial style project. For example, a
recent illustration that I worked on was for an article with squeaky
clean as the headline. The article was about how
to wash your car properly, but my point here is
that the headline of the article came with that
built in idiom, squeaky clean. I was a natural
starting point for me. It's sometimes enough to just run with the idiom
that you get from the headline and then customize it according to the
context or subject. Now one key thing to note about idioms is that in themselves, they're not original ideas. They are cliches, but that's
what makes them idioms. Now, the best illustration
ideas are not that original. They take an old idea, an idiom, and then use it
to communicate a new one. Example, fanning the flames
is probably something every culture since
the beginning of civilization
would understand, but we can apply it to more current events or
ideas in an illustration. Creative communication does not mean we're inventing
a new language. We're just being creative in how we're using the one
we already speak. Other thing to note here is that idioms are most powerful
when they're used figuratively as a
symbol or metaphor for a bigger idea and not
in a more direct way. Even though idioms
are unoriginal, they're powerful to
us because they give us this prepackaged metaphor or this mental illustration that we can use as our starting point and we can be fairly certain that our audience
will understand it.
8. EXERCISE 3: Drawing Idioms: Exercise is called
drawing idioms. As you now know, an idiom is
a common figure of speech, which is often based on
a metaphor of some kind. In this exercise,
we'll play around with the literal and more
figurative meanings of idioms through drawing. The purpose here is to practice visualizing idioms
through sketching. First, write out one idiom
that comes to your mind. Next, explain in your own
words what the idiom means. You can write it
out in one sentence or you can make a list of
possible explanations. Next, draw your idiom out in the most literal
possible way. Next, experiment with replacing different elements of
your idiom drawing. My example, idiom here is a bird in the
hand is worth two in the bush and I've just written a list here of
possible meanings. Sometimes you know
what a thing means, but you don't necessarily know how to say it
in an eloquent way, or it means lots of
different things. I'm just saying all the things
that come to my mind here. The thing that you have is
worth more than the thing you wish you had or go
with the sure thing. Or work with what you have. There's a few others here, but the other one that I was thinking is
if you're greedy, you might lose what
little you have. I think that's really the
meaning of this idea. The bird in the hand is
worth two in the bush. You have something in
your hands, you can eat. You have your pigeon
or whatever it is. But if you go and try and
get those birds in the bush, you might lose the
one in your hand because you got distracted
or something like that. There's lots of ways you
can pull at this idiom and turn it into a metaphor
for other things in life. I already went
ahead here and drew different configurations
of this bird in the hand metaphor,
it's really literal. There's a bird and a hand and there's two
birds in the bush. That's really the exercise
here is just to start by drawing the literal
interpretation of the idiom. I went a little ahead
here and decided to as literally as possible
illustrate the whole idiom. There's a bird in a hand
weighing more or being more valuable or worth
more than two birds in the bush over here. It weighs more than the
other. It's a super literal, not very thoughtful or brainy
way of depicting this idea, but in a way, you understand what is meant
in this little picture. If you were looking
at this picture and you didn't know
what the idiom was, you could probably
guess it pretty easily. For this next part
of the exercise, I experimented with replacing different elements in my
more literal drawing. Instead of a bird in the hand, it's an elephant in the hand. Then I was thinking about the other one,
two birds in the bush. I replaced the two birds with two elephants in the
bush, which is silly. But then I was thinking
like, Oh, okay, elephants have trunks
and trees have trunks. I started playing
with that idea here, drawing a sort of loose tree there with two
elephants in there. I ended up with this
silly thing here where one elephant's trunk
is the tree trunk, and there's a bit of a balancing act happening
here and I included a little bit of plant or tree in this elephant's mouth up here
just to reference the bush. At this stage, your ideas or your drawings don't
have to make any sense, but it might be interesting
just to see what other meanings can happen by accident or just what interesting compositions
you come up with. When you're done this exercise, be sure to share
your idiom and some of your sketches on
your class project.
9. LESSON 4: What are Tropes?: In this video, we're
going to learn about illustration tropes. What are they? And how can they work for us as
conceptual illustrators? Just as idioms are
prepackaged metaphors, Illustration tropes are like
prepackaged concepts and compositions that we can use as a starting
point in our own work. You've probably already seen what I'm talking
about here before. There are certain kinds of illustrations that seem
to come up all the time, the same concept or composition, but from a different artist. Sometimes the only difference
is in the color or style. Example, there's the stack of books with people
climbing on them. There's the book as
portal to another world. There's the head silhouette with gears or a maze or something
else inside of it, where the brain should be or the human head with the top open and stuff
exploding out of it. As you can see, there
are certain concepts that show up again and again. In this sense,
they're visual idioms and that means they're
often very cliche. The power of tropes here
is that they provide something that viewers can
immediately recognize. We humans don't really
connect well to things that are totally new or
totally unfamiliar. Having something that we've
seen before can help us at least start to pay attention. We can use tropes to hook
viewers in before hitting them over the head with a more
complex or nuanced idea. Whether a trope is a
thoughtless imitation or a clever concept depends
on how well it was used. How appropriate is the
trope for the subject? How natural a fit is it
to the overall idea? It also depends on how well
the trope was executed. How well suited is the trope
to the artist's style. Sometimes we can
forgive a cliche if it's just beautifully
illustrated. As we saw in the
previous lesson, headlines often come
with built in idioms. Sometimes the idioms lend themselves well to
a certain trope. For example, if a headline used the phrase peeling
back the curtain, we could easily turn to the peeling back
the curtain trope. More often you'll
probably have to look a little harder for the right
trope for your concept, but you don't always
have to look very far. In the class project,
I'll show you how I use a list of existing tropes to find the most suitable
one for a given idea or headline and that becomes
the starting point for my own unique idea. Now, tropes exist in all
art, movies, and literature. This is just an
example from movies. We've all seen the movie where
the guy races against time to get to the
airport just before the girl of his dreams
flies off forever, arriving at the gate just in time to tell her he loves her, and then they live
happily ever after. Not out of laziness that
screenwriters use this trope. It's because they know that
everybody understands it. Everyone can relate
to rushing to the airport and we can all
relate to the pursuit of love. Now, tropes can be more subtle
than that, for example, space movies often will have a scene where the
characters are eating food or drinking coffee on the
spaceship or the Starship. This connects an
unfamiliar situation being an astronaut in deep space with one
that's familiar to everyone else
drinking coffee. This can just be a way to make
that connection stronger. I have a love hate
relationship with tropes. On the one hand,
I do see a lot of them overused and it seems like they're used really without thinking about why
or what they mean. You see this a lot with
stock illustrations, especially, but on
the other hand, sometimes we're
just attracted to a specific trope and we just want to try it for ourselves,
but in our own way. It can actually be really
fun to play with a trope and see how we can
make it more our own. Of course, it can be way easier to work with an
existing trope rather than trying to invent a completely new idea
for our illustration. There are no rules about
which ones you may or may not use or which
ones are to be avoided. What really matters is that
if you're using a trope, you're using it thoughtfully and hopefully you're adding
your own spin to it. Just keep in mind that a trope might help you get
to your idea faster, but there may not be a suitable one out there for
your particular situation. Tropes are a tool and sometimes the tool works and
sometimes it doesn't. If you can't find
a suitable trope, you don't have to
force one into. Finally, tropes are basically templates and like
all templates, if you don't spend
time customizing them, they're still going to
look like templates. A template isn't there to
solve your problem for you, but simply to give you a strong
foundation to build onto.
10. EXERCISE 4: Tropes BINGO!: This exercise is called
Tropes Bingo because it's a Bingo game where
you have to find certain illustration
tropes in order to win. The purpose here is to help
you become more aware of the most common tropes or
illustration tropes out there and also to see
just how different each artist's way of
interpreting a trope can be. To start, download the
Illustration tropes Bingo card from the class Projects
and Resources page, you can open it or
copy and paste it into Procreate or just have
it up on your screen. Now go onto PNTraS
and start looking for the tropes that you see
on your bingo card. Many different ways
to search here, and part of the fun is just figuring out what keywords you need to use in order to find
what you're looking for. Just for an example, I'll give you two modes or
search modes here. One might be more challenging
and one will be more easy. In challenging mode, this would be just to be more
general in your search, look up conceptual
illustration or editorial illustration and
then just start scrolling. In this way, you have to do
more of a treasure hunt. You're looking through
lots of different examples and checking against your
references on your Bingo card. In that way, it can be a lot
of fine a scavenger hunt. Now, you could also do
something more easy. This is what I call easy mode. This would be to search for each trope type more directly. Maybe you want to look for the balancing
stack illustration. You use those three words as your keywords and you might find those very
directly in that. Either mode, whether you're searching in challenging
mode or easy mode, it does help to include the keyword illustration
in your search, just to avoid getting other
types of media like photos. For every match that you find, be sure to save the illustration that you found and then put a dab on your bingo card that corresponds to that
particular trope. This works especially
well if you place that card in a digital
app like Procreate. To get Bingo, you need
to have a vertical, horizontal or diagonal
row your card. Once you get Bingo, share
the five illustrations on your class projects page or the four illustrations
if your line crosses the free
space in the middle. Be sure to include the artist's name for each
illustration as well. If you'd like, you could
also share an image of your winning Bingo card
with your dads on it. So I've copied and pasted
my bingo card into Procreate here and
then I've just created a new layer
just on top of that. As I go and look for these
tropes out in the wild, I can just start
dabbing them off. I actually have a brush in my inky Basics brush library that I've included in the class. You can get this in the class Projects and Resources page. There's one called Dabbi Dot, and if you make it big, I have mine set at 73% and
put it in a nice poppy color. It looks like a bingo dab
or like a bingo chip. I'm just going to put my first
dab down on my free space, and I'll start hunting. Now I'm going to start my hunt and see if I can get bingo. I'm not going to do
the whole game here, but I'll just get started and
show you what I would do. I'm just going to look up
conceptual Illustration. And see what I can
find and if anything corresponds to my bingo card. Here we have a stack of books. It's abstract, but it is a stack of books
and there's another. I would just save one of
these to my computer. Then I can go ahead and put
a dab on the stack of books. From here, I can definitely just start scrolling down
and right away, we have the book as portal. So I can just go and put a dab for that down
whereas my book as portal. And now, what about
the head montage? This is kind of a head montage. It's a head shape, and there's sort of a montage of
elements in there. Same with this one
here. So I could download any of these and then head over to my bingo
card and get that one. So as you can see,
it's a lot of fun looking for these tropes
out in the wild and it might be surprising how many you'll find
of a given trope. They really are tropes
and hopefully you can see that even though
they're super common, they're still very
interesting to look at because everybody does it in a different way and they always apply to
a different concept, a different headline,
a different idea.
11. PROJECT: Brief: Okay, it's time for
your project brief. What I'd like you to
do is imagine that an art director for
the New York Times has assigned you
to illustrate for their op ed or opinion section. They've given you a headline and some basic information about the illustration
you'll be making. Now your job is to go and make that illustration
using the tools that you learned
about in this class. Specifically, you're
going to want to think about how
you can use symbols, idioms and tropes
to come up with a suitable concept for your illustration based
on your headline. I just have one rule for you
here and that is no actous. I want to challenge
you to create a conceptual illustration
and that means avoiding the illustration
where you rely very heavily on a character
acting out or gesticulating or
arading the idea versus using something
more metaphorical, and of course,
using the symbols, idioms and tropes that we talked about already
in this class. Times an act out is a perfectly acceptable
approach to an illustration. But for this class,
your challenge is specifically to illustrate
something more conceptually. It's not to say
that you can't have figures or people in
your illustration, but the actout or the
scene or scenario can't be the main
driver of your idea. So now let's talk about
the image specifications. I'm just going to refer
to my notes here. The illustration is going to be for digital or online use. It should be either
square format or a wide rectangular format. That's up to you and how you want to compose
your illustration. Of course, I will
flash those dimensions up on the screen and you'll find them in the class projects page. Your illustration can extend
all the way to the borders. You can have that background, cover the entire space
of the illustration, or your art can float in the middle and
have no background. That's up to you. In terms
of your file format, you should be working in the
RGB color space and upload either a JPEG or a PNG to the class projects page when you share your final illustration. Let's talk about how
to get your headline. Typically, an art director would give you your headline and that's what you would
get to work with. Of course, for this class, I need to assign each
and every one of you a unique headline
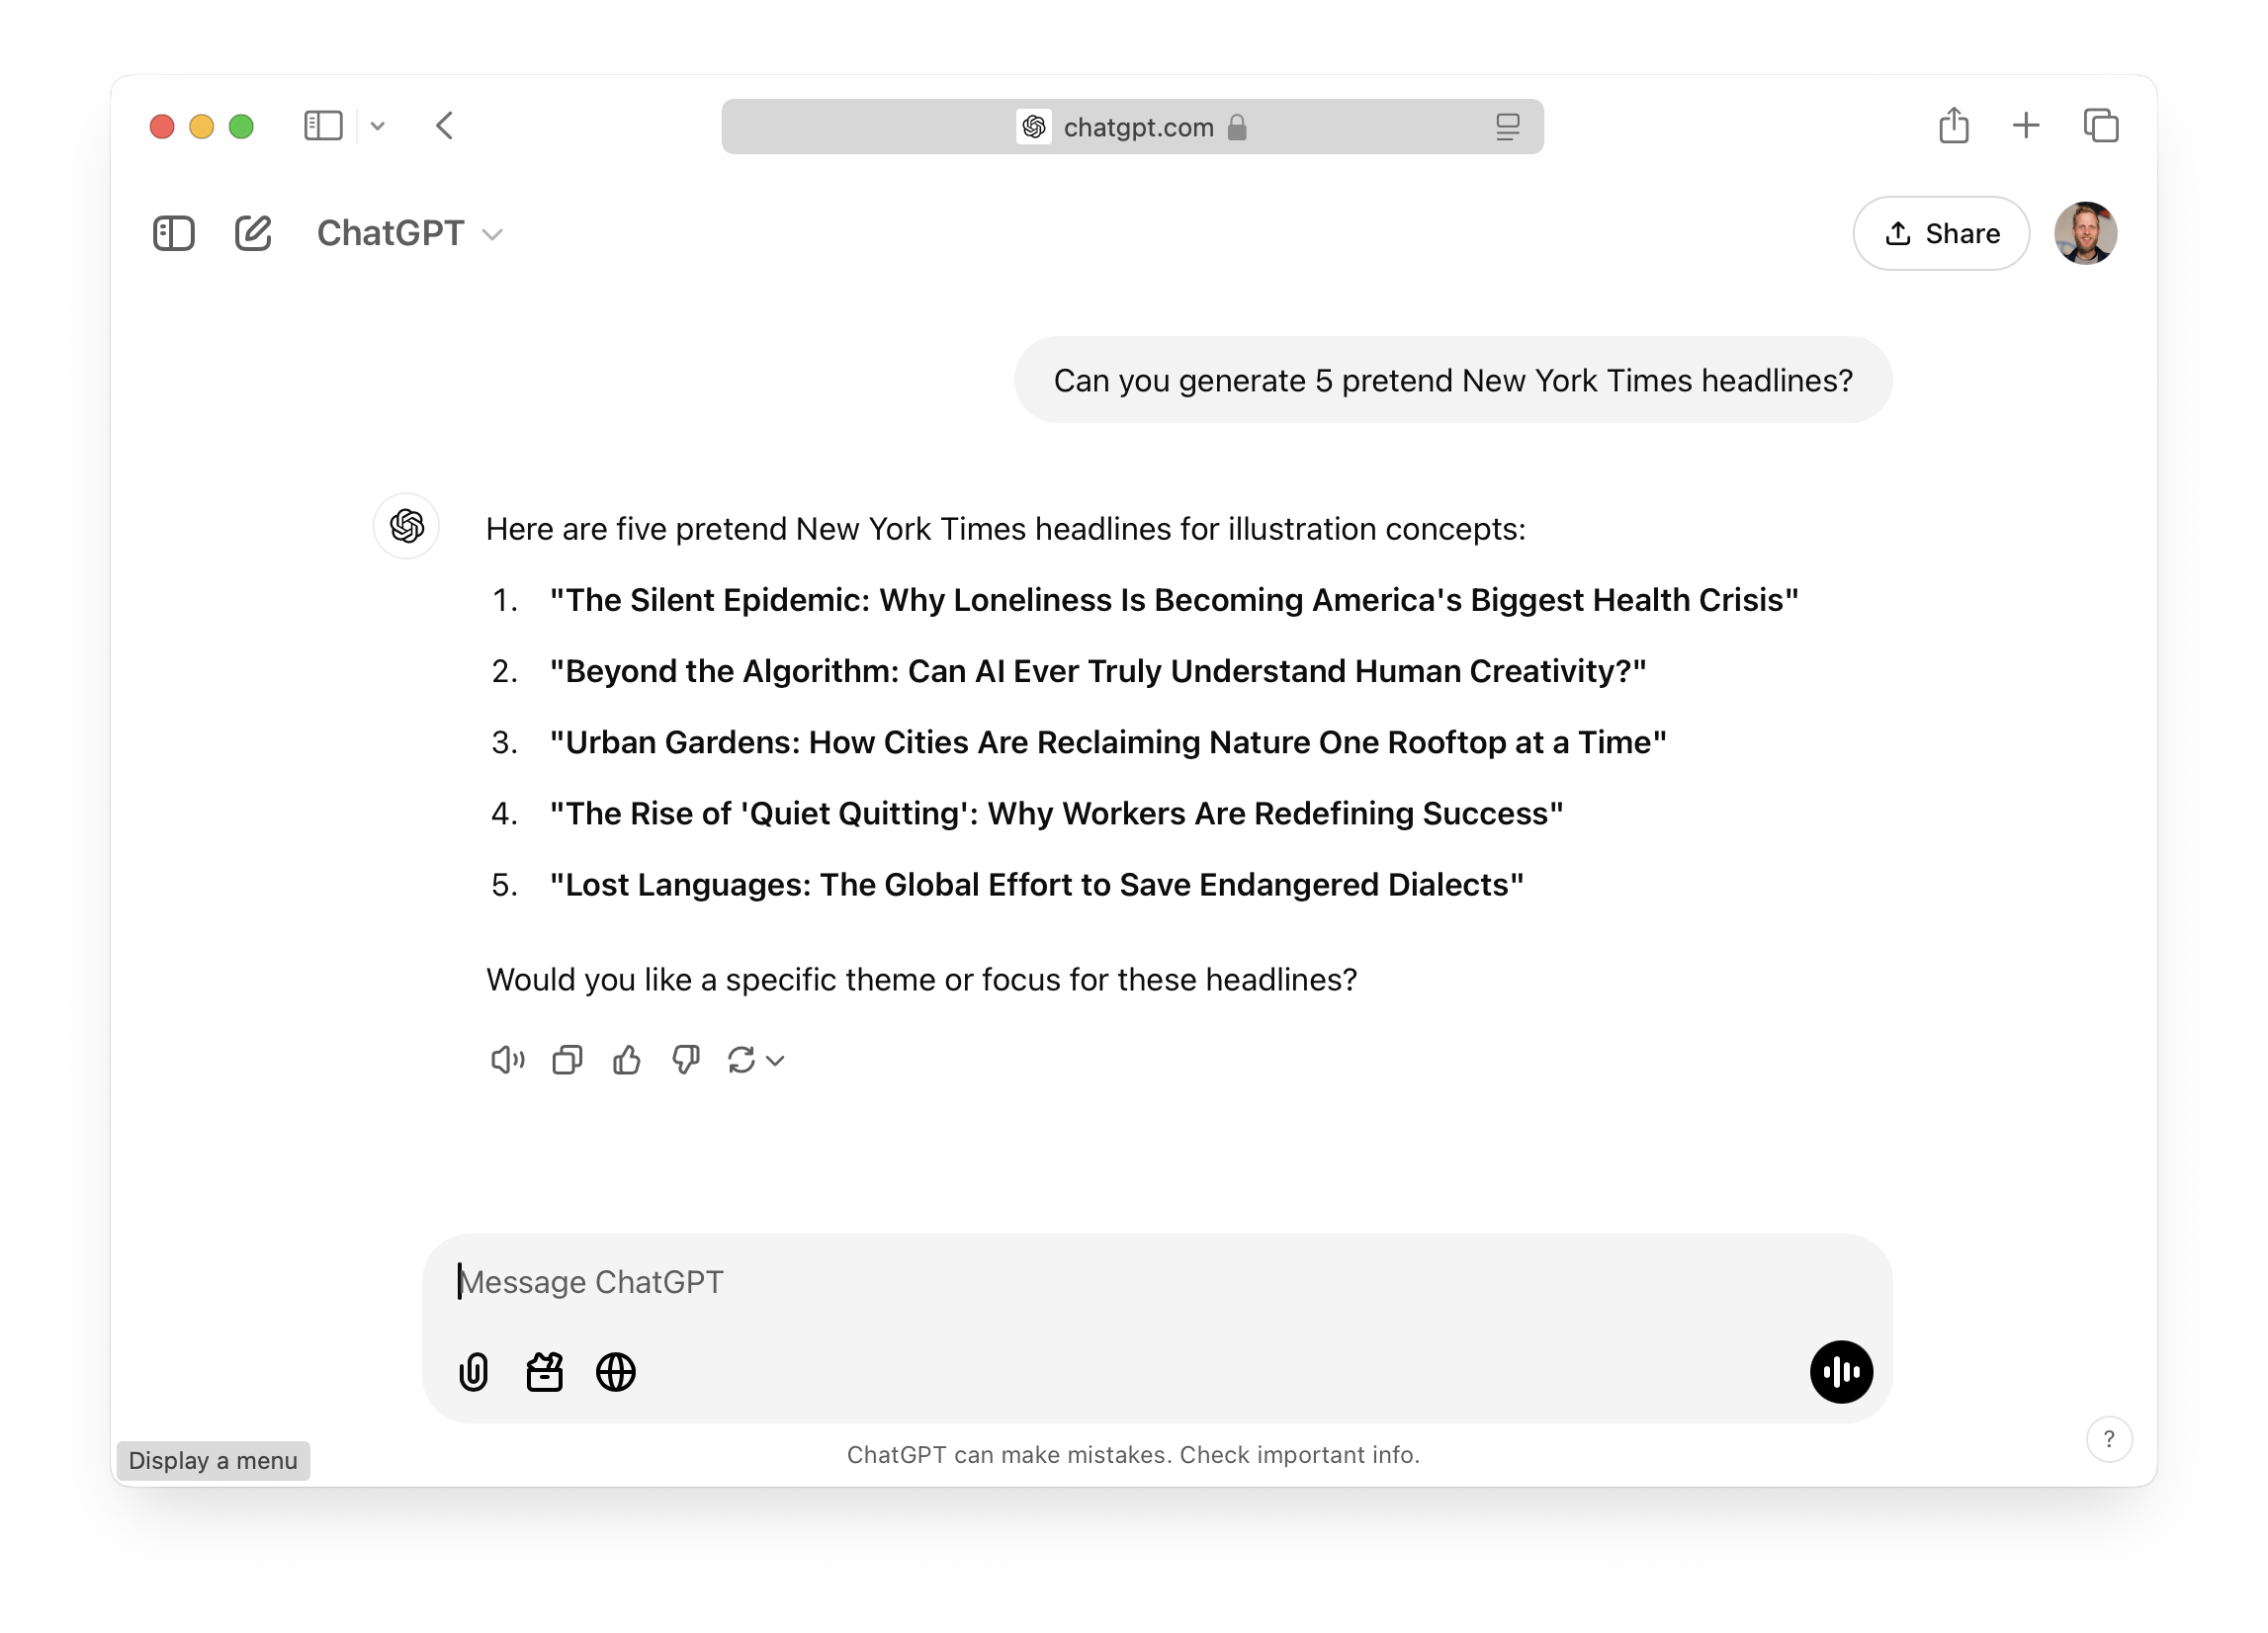
and the best way of doing that is to use AI. I use hat GPT to come up with the headlines for
this example project, and so I will just show you what that prompt looked
like. It was really simple. Can you generate five pretend
New York times headlines? That's all I said, and
then it gave me five. You're welcome to use
one of these headlines. I'll share these on the
class Projects page. But the point here
is that everyone should have a unique
headline to work with so that you're not
influenced from one another's ideas on
the class projects page. Now, if you don't like AI or you don't have access to it for some reason,
that's totally fine. Like I said, you can use one of the headlines here
that I've generated, or you can actually just go over to New York Times
and head over to their opinion section
and use one of the headlines that they have
up there on the website. Now, the risk is that you're
probably going to find an illustration or an image already there associated
with that headline. Do your best to ignore it, maybe cover where
the illustrations are with your hand and then challenge yourself to come
up with an idea that's fresh and based on the process that we're
going to go through in a. Just a quick and important note, I am not condoning the
use of AI to come up with your ideas or to come up with your actual
illustration imagery. I am simply saying that AI
is a great tool for coming up with randomized headlines that are unique for each
and every one of us. Finally, before we
get into the project, here are the deliverables or the milestones
for you to reach. So we're going to
be going through the following stages over
the next few lessons. We're going to start with
the brainstorm and that's where we start trying to come up with ideas in a more
verbal word based way, and then we're going to move
into rough sketches where we start to work things out more on paper in rough sketches. Then the third stage will be refined sketches where we try to choose our best ideas from the previous stage and refine
them and get them ready. Want to have at least one of those refined in
an estate where we can confidently illustrate over that in a final illustration. That takes us to the
fourth and final stage, which is creating that
final illustration. This is where you flesh out your idea in your own
tools and techniques, your style, however you
like to illustrate. I'll be working in Procreate in my own way and you're
welcome to follow along. I'll tell you everything
that I'm doing. If you don't have a process or technique that you're
married to at this point, you're very welcome to
follow along with me. Each lesson will walk
you through a specific deliverable and then you'll be prompted to share your work
at the end of each one. That's pretty much
it for your brief. Let's get started
with the brainstorm.
12. PROJECT: Brainstorm: All right, it's time to start our brainstorm
and of course, before we do this, we're
going to need a headline. You can source that by using AI or using one of the
supplied headlines on the class projects page, or you could head over to the New York Times website and use one of the real world headlines
that you find there. Once you've done
that, it'll be time to start the actual brainstorm. The brainstorm is broken
down into two steps. The first step,
we're going to do a headline analysis and that's where we break down the headline and make sure
that we understand it. Then in the second stage, we do what I call a
pre visual brainstorm. This is where we
start to try and find actual visual entry
points into our concept. This is pre visual because it's before we
start actually sketching. We're just doing it in words, but you'll be surprised
how much actual imagery you start to discover
at this early stage. The first thing that we
want to do is analyze our headline and make sure
that we understand it. In your sketchbook or
your digital equivalent, such as Procreate, like
what I'm using here, you want to write out your
headline somewhere on the page and then we can
start breaking it down. This way. There are five
categories of analysis here, and each one will help us find ideas from this
headline in different ways. What I'm going to do, this
is a little bit unorthodox. I don't know if many
people do this, but I'm going to break my page into these I wouldn't
call them quadrants, whatever the five version of a quadrant is these five boxes. In each one, I'm going to write down one of the categories here. So we're going to be analyzing
the headline by subject and then by the meaning or interpretation is another
way of putting that. Then we're going
to see if we can identify any built in
idioms and metaphors. Of course, we're going to
be looking for keywords and things that are associated
with those keywords. Then finally, sometimes
the headlines that we're working with raise
questions or issues. These might be ethical or
philosophical questions or just curious questions that we might ask by
reading the headline. Let's just start
with subject and sometimes this one's
very straightforward. So my headline is
lost languages, the global effort to save
endangered dialects. So the subject here would be endangered languages
or dialects. In my interpretation, what this is getting at is basically there are these dialects or languages that are at risk
of extinction, basically. And I'm also thinking, like, why is this important? Like, why would there be
an article about this? Why would there be
an effort to save, you know, these
endangered dialects? Maybe it's loss of
diversity or of cultures. And, you know, since we're talking
about the meaning here, we could actually shortcut right down to the questions here
that are being raised. You know, as we're writing
down in each of these boxes, sometimes we'll
think of something that goes under another one. So right now, questions
here are, you know, is it about homogenization
or globalization. These are just things
or issues that this headline is making me think of and maybe I'll return
to this as we go on. Now let's take a look
and see if there are some built in
metaphors and idioms. Sometimes your
headline gives you exactly what you
need and it's easy and other times it makes
you dig a little deeper. So here we have not really
anything in the way of idioms, but there is this idea or metaphor of saving
endangered dialects. So the metaphor, in this
case, is endangered species. Usually, when we
think of an effort to save something
that's endangered, we usually think about animals. Maybe I could pull something out of lost languages as well. So something like
a missing link, but I'm not sure if that's
going to go anywhere. So I'm going to move now onto
keywords and associations. And so, of course, we
have lost is a keyword. We have endangered. And I'm going to run
out of room here, so I'm just break open
one of my box, actually, both of my boxes and start using the space
down here, too. The boxes just help me keep these different categories
a little bit separate. And of course, we have
a keyword language. And I would say dialect
is synonymous here, and, of course, global. It may be global effort
as one key phrase. And then for each
of these keywords, I'm going to think of
associations like lost. Lost missing off the path, off track, whatever
comes to my head. This is a brainstorm,
so it's not about having the
perfect idea here, lost in the sense of extinction. So we have extinct, dead. I think of precious,
losing something forever. And if it's precious,
it's irreplaceable. I'll move on to Endangered now. So with endangered,
we have this idea of extinction as well
at risk, threatened. I think of animals, elephants, dinosaurs,
dodo Birds. And so as I come up with these endangered associations
like dinosaurs, dodo Birds, it makes me think of idioms
that might be related here, and I'm just going to sneak these into the idioms
and metaphors category. So we have maybe an elephant in the room and going the
way of the dodo Bird. I'm just put a box around that so it's a little
easier to read. The point of this category here, idioms and metaphors at
this stage is about asking, is it possible to
rephrase our headline in our own words and possibly even using another metaphor or idiom. My way of rephrasing
this might be, are certain dialects going
the way of the dodo Bird. This is just a thought
exercise and a way of thinking about your headline
from different angles. The important thing
here is that you're thinking about them in
your own interpretation. Your own point of view
and perspective is very important to being a
conceptual illustrator. Okay now moving on to
language and dialect. So I think of speech. I think of the Tower of Babel, I think of cultures, traditions, Lingua Franca,
dual lingo came to my head. I'm not sure if that makes
any sense, but it's there. And then global effort, I think of Globe, of course. I think of the map. I
think of countries. I think of cooperation and
operation, flags, nations. And there's one other
keyword here that I think is important as
I'm going, which is save. So I'm going to make
more room here. So it makes me think of rescuing or rescue
operation, salvage effort. Maybe think of ER of
doctors, surgery, but maybe more like
search and rescue SAR, search and rescue, helicopters, some kind of rescue operation
is what I'm thinking. And then, lastly,
we can think about questions or issues that
are raised by this. We've already talked about homogenization
and globalization. I just want to give
myself one more chance to think about my headline and ask myself if there are any other questions or issues raised here that
might be of interest. I guess, for me,
questions would be, and I'm going to open
up a little pathway here so I can write more. The brainstorm process can be kind of messy,
as you can see. So other questions
I'm asking are, who is saving
endangered languages? I'll just write in
short form here. Like, who are these people? Why are they doing it. In other words, why
is it important? I've started to try and
answer that myself, maybe something about
how we're trying to fight against a
loss of diversity and everything in the world becoming a little bit like Starbucks or
something like that. The point of this exercise that I just went through
is to make sure that I understand my
headline and that I have enough material to work
with for this next stage, which will be the pre
visual brainstorm. This is where we're
going to start looking for deeper symbols, idioms, tropes that are
related to the headline. So I'm going to circle
that headline again, just like the last
time, I like to break up my page into sections. This time we're going to
have three categories, so I'll make three sections. And the first category
will be symbols. The next category will
be idioms and metaphors, and the third category
will be troops. So these categories are now going to be more
visually oriented. So before I was looking for any associated keyword
I could work with, it could be adjectives,
nouns, whatever. This time, I'm looking
more at things that I can actually see
with my mind's eye. So this would be more
in the order of nouns. So why don't we start to see what kind of symbols
we can use to represent some of those keywords we kind of pulled
out in the previous Starting with symbols, I'm
looking for anything that can represent some of the
keywords here, basically. So a symbol for lost
might be a maze, could be binoculars, a compass. It could be kind of
like a black hole, a force or jungle. When something's missing,
it's gone altogether. So it's not even visible,
so invisible, nothing. Although these are not directly
things you can represent, there might be a
way of indicating this in the
illustration somehow, but it might be jumping ahead. So the next word I want
to look for symbols four might be this
idea of endangerment. So some symbols here would be a panda as an
endangered species. And it's not exactly correct because endangered
does not mean extinct, but there are definitely
symbols of extinction, which would be dinosaurs
and the dodo Bird. And I'm just going to quickly
jump over to metaphors here while I'm thinking about
it because or endangered, I think of something being
at the edge of something, at the edge of extinction
or at a precipice. These are idioms and also
metaphors at the same time. But then going back to symbols, there's this idea of saving. And this is probably
going to be a keyword here and a key source of symbols for at least
some of my concepts. There's this idea of, like, a military operation, a rescue. So I think of, you know, troppersF aid, maybe
it's an ambulance. And again, I'm trying to keep my symbols here as things
I can actually draw. So an ambulance could be a
symbol of saving or rescuing. There's the idea of conserving. So what symbols could I
pull out for conserving? I think of maybe a
conservation officer, not a very strong symbol there. You know, it could be hands
just holding something. And again, this is kind
of jumping categories. This might actually go into the illustration
tropes category, so I'll save that
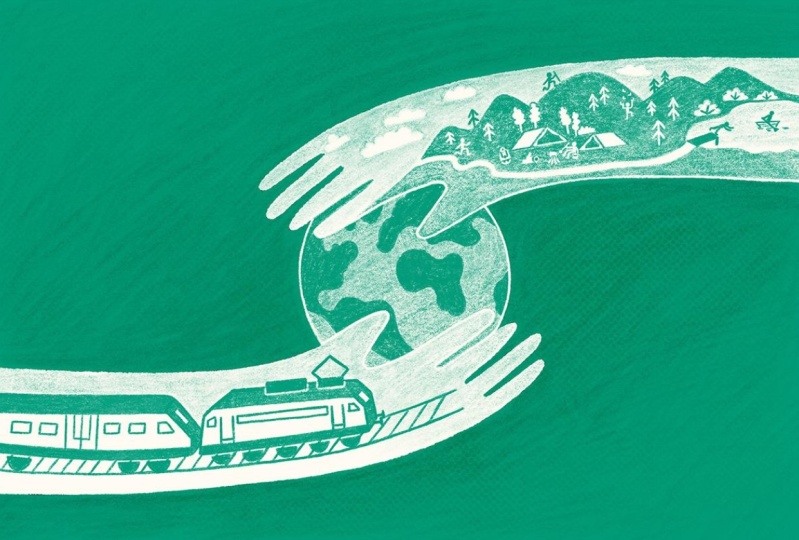
for a little bit. For global, there's the globe or countries like the shapes, and then for language, I'm thinking of a speech bubble. The Tower of Babel is an
interesting symbol of language, could be a dictionary or a book, could be a mouth, an ear, tongue, could be words. Those are just some
symbols that I could pull out of
my headline here. Now I want to think about
some more metaphors. I had the metaphors of something being at the
edge or at a precipice. What are some other ways of rephrasing this headline
in some other metaphor? People are going in to
save endangered dialects. Earlier, I said that
the dialects are maybe going the way of the dodo
bird, and that is an idiom. It's a global effort. So maybe there's this idea of all hands on deck
for lost languages, this idea of vanishing or disappearing act
or into thin air. You can see how immediately
you start to get visual pictures in your head based on these common
turns of speech. So another idiom here would be something about the
global effort to save endangered dialects
would be kind of like a rescue operation,
a search and rescue. And so when I think
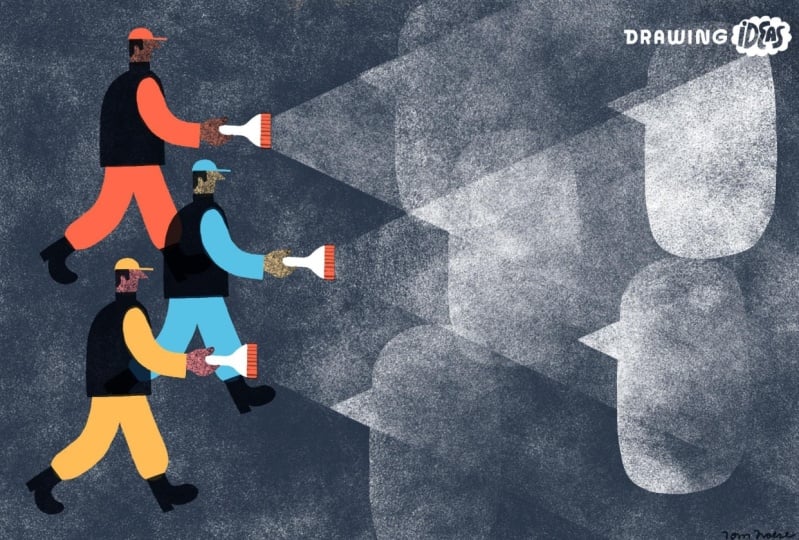
of search and rescue, it gives me symbols
like flashlight. And while I'm here, I'm
thinking about this issue of homogenization or globalization
maybe as the enemy. Let's just say the article
might be about how globalization is the enemy. What would it look
like for globalization to be threatening language? What would it look like
for this global effort, this team or whoever fighting against the enemy, fighting
against globalism. This might be a stretch because globalism wasn't mentioned. When I think of a
global or group effort to save something, it feels like a fight. So there's another metaphor. The fight against whatever
is endangering languages. So as you can see, as I'm going through this pre
visual brainstorm, I'm looking for
those symbols and I'm looking for those
idioms and metaphors. My mind is going in all
kinds of different places, making all kinds of
different associations. Sometimes I'm thinking
in one category and suddenly my mind jumps to
another one, and that's okay. This is a free
association exercise. As long as you're
getting imagery, along the way, you're accomplishing what you
need to do in this step. We've looked into symbols and we've looked into
idioms and metaphors. Lastly, we want to
start looking at any illustration tropes that are out there that exist that might help us visualize some ideas that we're starting
to come up with here. In order to do this,
it's helpful to actually see those
tropes in front of you. What I've done is I've
compiled a chart of some of the most common even
cliche tropes out there. What I'm going to do
is just put this up on my screen so that you can
see what I'm looking at. I'm just going to ask myself, which of these might
actually help me visualize or illustrate some of the concepts going on here? I'm thinking about the hand
holding the symbolic object, maybe instead of a
plant that you might see in a cliche
environmental illustration, maybe it's something about
language like a speech bubble, maybe a balanced or
balancing stack. With different language
symbols being balanced, and that would suggest this idea of precarious precariousness. When I think of a group
effort or that global effort, I think of the group of hands, and this could double
up with another trope, which is the globe the globe standing and another trope, which
is the puzzle. So I'm starting to get
an idea here of hands piecing together countries
in the globe maybe. I think it needs work, but that's where my mind
went with that trope. There's three tropes there.
Another one would be the globe stand in
the globe stand in is basically where you
have one object that is being substituted
for the actual globe. Maybe it's a speech
bubble and then it's the world or
it's a balloon. This wouldn't be appropriate, but a balloon and
it's the world. Whatever your object is, it becomes a globe. That's a trope
that I've observed out there in the
illustration world. Right so one more trope
that might be useful here is the symbolic
shaped hole, and that's where you
have some kind of hole that is shaped like whatever symbol
you're working with, maybe a speech bubble and usually have
some kind of figure either getting something
out of it with a fishing rod or climbing
inner out of it with a ladder. It could be some kind of a
rope coming into or out of it. I'm thinking of a
speech bubble hole, and then there's
a helicopter kind of rescue operation here, and they've got some kind of hero person on this ladder or rope going down into the
hole to save the language. This isn't quite going
to work, I don't think. But the idea here is
that it's a possibility. I have to play with
it yet in sketches, but just in using
words at this stage, I've started to
think of tropes that might be useful to me now. Another trope that I've
seen before is this idea of the maze and there's so many variations
on the maze trope. Often, you'll have someone
maybe in the maze, but they have some way of
seeing the whole thing. This is a really bad drawing, so you probably can't see it, but they have some
periscope or telescope and they can see over all the
walls and find their way out. Again, just another possible
trope to work with. So I hope you're not feeling totally lost after watching
me do this brainstorm. But basically, in stage one, I analyzed my headline, and I tried to break it down in those five different ways
that we talked about. And then I went into a more
visual way of thinking in what I call pre
visual brainstorming. And this was where I
started to look for actual concrete symbols
that I could use to represent some of the ideas
or keywords in the headline. And, of course, I
was looking for some metaphors and idioms that would help me
actually visualize, what is actually happening with this idea saving lost languages
or languages being lost. Then finally, with some of
these ideas top of mind, I looked to my
illustration tropes, reference chart and
started to ask, which of those off
the shelf ideas or illustration tropes
could I start with to help communicate
my metaphor. By the end of the
stage, you should definitely be able to describe what the article 0R the headline is about
in your own words. You should also feel
fairly confident that you have some good
starting points for how you're going
to visualize that in the next stage when we
start our rough sketches. Before moving on
to the next step, please be sure to share your headline analysis and your pre visual brainstorms
on the class projects page.
13. PROJECT: Rough Sketches: All right. Now it's time
to do our rough sketches. We've done some preliminary
pre visual brainstorming, and now we're going to
take that brainstorming into sketching. At this point, we're
really just looking for ideas in a more visual way. We don't need to be precious
here with how we're drawing. The most important
thing is finding ideas that work for our subject. By the end of the stage, you should have a lot
of rough sketches, which will mostly be the early stages of you trying to work out
your ideas on paper. Goal is to have a few
decent ideas there, but this stage is more about
quantity than quality. Again, this is all about your ideas way more than
it is about drawing well. Don't worry if your
rough sketches at this point aren't the best
drawings you've ever made. So at this point, I'm looking at my brainstorm from
the last stage. I've already identified
some of my strongest ideas, and so now I just
want to identify what my starting points
will be as I start digging into rough sketches. And so I find it easiest to
start with anything that is associated with a trope because trope that illustration
trope will already have a visual I can start with and start to
sink my teeth into. So we have the hand holding
the symbolic object, that would be the speech bubble. So this idea of
preserving languages. So I'll just call that
preserving languages. And then there's
the globe stand in. I think this has some potential. Something about
the world, global. We'll call it,
we'll just call it globe stand in for now
and I'll remember that. There's this idea of
the group of hands. This was the one where
we had, you know, the idea of a global effort
to save endangered dialects, and then we have the
balancing stack. This is the idea of the
precipice something at the edge of extinction. Now, there were a couple
more here that I liked. I like this idea of
the rescue operation. I don't really have a trope
for that in this moment, but I'm going to just
highlight that as a potential starting
point for sketches and then this
symbolic shaped hole, which might tie into that
rescue operation now that I'm thinking about it because
we have this helicopter that I doodled here
over that hole. Something about a
rescue operation in that symbolic shaped hole. What I'll do is,
I'll clean this up. I know it's a bit of a mess, before I completely
go to a blank page, I just want to in a
darker color here, write down what those
starting points are. I'll start with these four, and I think I might have
enough to sketch from there. I'm going to go of the
speech bubble world. I just think that that's
too cliche and not enough about this
particular headline here. So I just wrote down
the title up there, so I have that to
remember as well. I can hide all that messy stuff, make this a little bit smaller, and then begin my sketching. The first concept
that I explored in my sketches was the hand
holding the symbolic object. The symbolic object, of course, was the speech bubble. That's the most obvious way to represent a
language or speech. Really I'm just working on different variations
of multiple hands. Is it maybe just single hands? Is it multiple speech bubbles
or just one speech bubble? For a moment, I thought
maybe I could pivot and play with the idea of saving languages like you'd save
money in a piggy bank, but I quickly abandoned that because it was a
little bit off point. So I really wanted the idea of nurturing and protection
to come through here. So that's what I'm trying to work out with my hand shapes. And at some point, I started thinking about
whether the languages could be represented with different
shaped speech bubbles, each one representing
different language. And I remember that I had
this Tower of Babel as one of my symbols for different
languages or many languages. And so, of course, maybe this symbolic object
is the Tower of Babel. And as I did that, I started thinking
about other ways of protecting or
preserving an object. Maybe it's in this
kind of glass dome. It's protected, and we have this hand kind of placing that dome over the
precious object. And as I was going, I was thinking about this
idea of preservation. I think the glass dome made me think about conservation
in a different way. So I was thinking about
a butterfly collection, like the taxidermied
butterflies that you'd pin onto a board and maybe put
into a window box or a frame. And so, of course, the obvious replacement for the butterfly here would
be the speech bubbles. And so somehow maybe those speech bubbles are
butterfly specimens, so to speak, pinned onto
some kind of panel. I put that aside and just tried a few other things that
weren't quite working. At that point, I
felt like I explored enough and it was time to
move on to the next idea. So this next one was the balancing stack to
represent this idea of precariously placed objects and the overall idea here being that these languages
are at the edge of extinction or in a
precarious situation. The actual balancing act or the balancing stack didn't really communicate
what I needed it to. So I tried other
ways of representing the speech symbol at some
kind of an edge or precipice. And when I had a
personified speech bubble kind of clinging for dear life at a cliff
or on a cliff. Then I was thinking
about the idea of people catching a falling speech
bubble to save it. It was a little
bit of a stretch, but at this early stage, I'm really just trying whatever. Once I was satisfied that I
had explored that one enough, I went on to the group of hands times Puzzle, times Globe. This one, I was really pushing the cliches and seeing if
by mixing them together, I could create something unique. But everything I did started
to feel pretty cliche. There was nothing really great that I was adding to this idea. It just felt like cliche
layered upon cliche. I want to emphasize
that cliches are okay, but you have to add some kind
of a twist that's new or surprising in order for it
to really be interesting. So none of these
really did that. And so I quickly figured that out and moved
on to the next thing. So the concept that I
was most interested in exploring was this idea of the rescue operation,
people coming in. Doing some kind of a
search and rescue to find these lost languages or to somehow save them from getting lost in the jungle
or something like that. So I even did a little bit of extra brainstorming
with keywords, thinking about what my
metaphor specifically was. Like, what are the
lost languages? What is maybe a metaphor for
these things being lost? What are they being lost from who's coming
in to save them? I even tried doing a
hole in someone's head, and maybe the helicopter line or rope or whatever is being dropped into the hole
in this person's head. But again, that was a
little bit of a stretch. So another metaphor
that I came up with along the way here
was the seed bank. So the way seeds are preserved
for the future in jars, I kind of quickly sketch that out and set it
aside for a moment, and I return to that later. And then finally, I started thinking about this
idea of the flashlight. This is another trope that you
see in illustration where, you know, there's
this flashlight beam. It's kind of a triangle
or cone shape, and then whatever's in that
beam is being revealed. And so I thought maybe
the Tower of Babel would fit into that beam
kind of conveniently. Then I took another side trip here into this idea of ghosts in the forest being
like these languages are being forgotten, and so they're fading
out of existence. They're kind of
transparent and languid, kind of these flimsy sheets
hovering in the forest. And then I went back to
the flashlight metaphor or trope and started
thinking about, well, if it's a global effort, then it should be
multiple people holding multiple flashlights and
it's multiple languages. And then playing again with this idea of the Tower
of Babel, you know, sometimes as I'm ideating, I jump between one idea to another as things kind
of flash in my head. And it is a little bit
chaotic to try and describe and perhaps
even to watch for you, but this is just
how my mind works, and I'm doing my best here to share my creative
process at this stage, which is not always
as organized and linear as I'd like it to be when I'm teaching
how to do something. I played with different
variations of the flashlight. Some were working
better than others. I even paired this idea of the helicopter and
the flashlight, so the helicopter
has a searchlight. And these speech
bubbles are down below, kind of being revealed
in the light. I was doing some
more variations of the search party and
the flashlight beams. There was something
to that that I liked. I really did spend
the most time on the search and
rescue idea because it just felt the most interesting
to me for some reason. I'm not sure if it will pay off, but it's just where I tended to gravitate at
this time in the process. The last stops along
the way was thinking about these speech
bubbles floating in the water about to drown and
maybe someone was throwing them like a life ring. The final stop
along the way here was playing with
this idea of CPR. How would someone give CPR
to speech to resuscitate it? I was trying to figure out
what hands would look like. I ultimately came up with
this idea of the hands in the CPR position where they're clasping each other and
instead of a person's chest, it's a speech bubble. When you're done, please share your rough sketches on
the class projects page. Be sure to take a little break before moving on
to the next one.
14. PROJECT: Selecting Sketches for Refinement: All right. I've done a
lot of rough sketches at this point based on some of those starting points that I gave myself at the beginning, and now it's time to go through those and see what my
strongest ideas are. There's a lot of maybe
bad ideas in there, but there's probably
also some keepers and so that's what I'm on
the hunt for at this point. Let's just go through
one by one and start circling ideas that I
thought were the strongest. I started off with this idea
of the hand holding speech, and of course, I started with some pretty obvious
solutions that I don't think are
really that good. They don't really add
anything original to something that might be
a little bit more cliche. So I'll just keep looking here. I don't mind
something like this. It's a little bit basic, but there might be
something to work with. I'm going to actually
just circle that one in red so that
I know that it's something that caught my eye for one I was
trying to play with the idea of the shape of the speech bubble playing
into the shape of a hand. But again, I don't think there's anything really conceptually valuable to that
because it doesn't really speak to this
idea of saving anything. With this one, here I
started thinking about the Tower of Babel being
the symbol of speech, and I started losing touch with the hand as my trope device. It started here with the hand
holding the tower of Babel. But then I thought
about preserving or trying to protect it under
some kind a glass dome. So something like this
might make sense. In which case, the hand
isn't really that necessary except maybe to add
a human element. So I'm just going to really quickly play with an idea here, something like, you know, if you're going to
have a hand in there, it might as well
be doing something perhaps about to put
that dome on or take it off of the platform or whatever this Tower of Babel
situation is sitting on. Now, as I started thinking about that dome protecting
the tower of Babel, I thought about other things
that are collections. I thought about preserving
butterfly specimens, these dead previously
living creatures that you're collecting
and preserving and even if they are not alive. Preserving them is valuable because you can
study them later. That's what these lost
languages might be like. The fact that a
language might be lost may mean that people
won't use it anymore, even if you try to protect it. Maybe the Taxidermed butterfly is actually very appropriate
for this concept. So I'm definitely going to
keep tabs of this idea. I'll probably try and push
that a little bit further. Another one of my tropes
that I was trying to work with was this idea
of the balancing stack, and none of these were
really going anywhere. I didn't explore them super
far, but I didn't need to. It was like they're
balancing on things, but there's nothing
really speaking to this idea of language
extinction here. But I did think about
this idea of being on the edge more metaphorically. I have this speech bubble hanging on for dear
life on a cliff. That's a little bit of an interesting story
happening there. If I can make that speech
bubble personified in a way and you feel sorry for it because it's about
to fall off this cliff, that might be a nice
concept that has an emotional component
to it as well. And then here's this
idea of a group of firefighter type people holding a trampoline or
something like that, and the languages are
maybe jumping onto it. I guess the idea here is that the languages are
falling out of use. That's a bit of a stretch
in terms of a metaphor. But I'll leave that for now. I don't think I'm
going to pursue that now for the
group of hands trope, this is a very dangerous trope to try and work with
because it can be very cliche if you just leave it as a group of
hands with some object. But I tried to double it up with the idea of a
globe and puzzle pieces. I triple dipped here. We've got the group of
hands and the puzzle and the globe and I really do feel like this
is a bit heavy handed, so I'm going to leave
these concepts behind. Okay, so the one that I
was most excited about was this idea of the
rescue operation. I started off with the
symbolic shaped hole into which someone
is going or there's some kind of a ladder or a rope. And so I thought about the
idea of a helicopter and some kind of rescue guy
hanging on the rope. Going down into that
language shaped hole. The metaphor is a
little bit forced because he's going down
to save languages. He's not going into a language, which this speech
bubble could represent. There's a little bit
of a mixed metaphor. It's not quite right, but it still could make
an interesting image. I'm not totally throwing it out. I will keep it and maybe judge it more
critically in a moment. And so I continued
along the lines of the idea of a
rescue operation, and I thought about flashlights and the flashlight beam is another illustration trope
that you see out there where there's something
hidden beyond the beam, but once you're in the beam, things become clear and
that's a nice conceptually coherent fit with the idea
of searching and rescuing. I had this idea of
a search party. I continued to play
with this idea. It could just be a forest
scene with trees even. That somehow are a
metaphor for something, whatever it is that
these languages are getting lost in in the beam, you see these speech
bubbles being revealed. Another interesting
possibility is the flashlight beam going
down and that creates a conical shape that the tower of Babel symbol would
fit nicely into. I do have questions about
whether the tower of Babel is actually a very clear symbol of languages when it's
pulled out of context. Like, if you were to see
this picture on its own, would you interpret
that as language? You know, maybe I could
help it by sort of adding little speech bubbles
just to make sure people understand that
this is about language. But in a way, this is kind
of a nice elegant solution, and it has potential. And then I was thinking about, like, a scene where
there's, like, a city and there's
this dark alleyway, and you see a person holding
a flashlight from behind kind of over the shoulder and the flashlight is
being projected, and it's kind of landing
on a flat wall in front and so you have this cowering speech bubble down
there in the corner. Well, I think this
concept definitely has emotional value to see this poor little
speech bubble cowering by a garbage can in
a dark city alley. I also think that it's
close to an act out. The only difference is
that the speech bubble is doing the act out
instead of a human figure. It's a little bit, I would say, heavy
handed as a concept. I'm going to leave
that one behind. Other idea I had here
was this idea of the speech bubbles
being lost to memory. Maybe they're just
becoming ghosts. I see them in the
woods at night, these languid flapping ghost like semi transparent shapes, but I don't think it's a strong enough concept
given the headline. So these ones down here are
coming a little closer. I think this idea of
the search party, whether it's this one up here
or these ones down here, there's something about these
that work symbolically. I don't think they're exactly rich in imagery or
anything like that, but they are
definitely clear and possibly original or unique
enough for me to go with. I especially like
this one. Yeah, I'm actually going to call this one right here because it has the party, the
group of people, which would symbolize
the global effort, and then you have languages here being revealed
in the beams. So if there's anything along the lines of the search
party and the flashlights, I think this one's
probably the strongest. And then there's something about this tower babble
thing that I'm not ready to let go of yet either. So I continued my
search party metaphor or exploration here. This is very similar to
the previous concept. But instead of having all
those people separate, we have them more together to show this idea of
more collaboration, and so all of their
beams are crossing and revealing these speech
bubbles kind of here. It's just a different
take on the same idea. Then I was thinking about
helicopters with search lights, there might be something there. I don't know if the helicopter
is the right object to be looking for the
thing, why a helicopter? It feels a little
bit too military, I think, although it's unique, I don't think it's hitting
on the right notes. Okay, so this was my
last kick of the can here at the helicopter
slash Search Party. It's multiple
helicopters looking or dropping lines down into
this speech shaped hole. Again, I think the
helicopter motif is too military feeling. I'm
not going to do that one. Okay, so I just had one last rescue themed idea here where you
actually see a couple. One is these drowning
speech bubbles. So these are speech bubbles kind of drowning in the water. And I didn't really go
anywhere with that. But then I also had this
idea of someone performing CPR on a speech bubble. You have the way you
would put your hands like this for CPR to start pumping their chest
or whatever that is. Instead of a chest,
it's a speech bubble. One's a little bit
medical, I think. I'm not sure it's the
right connotation. But all of my concepts so far are a little bit
off in some way, but I guess when you have a metaphor that you're
trying to work with, especially for a very
abstract concept like dialects,
language, endangered, these are all things that have
very few concrete symbols, and so I'm just really grasping for the best or the
closest possible metaphor, or even an illustration trope that would work with
that metaphor here. Now there was one
other concept here that I didn't
pursue all the way, but it was this idea
of a seed bank. That might be a closer metaphor. We have this idea of a
see bank, which is jars, probably all the same
size and each one in a see bank would
have you know, certain kind of
seeds stored in it. And when you're thinking
about saving or preserving something for
the future to enjoy, seed banks kind of hit on
that idea pretty closely. And this reminds me of a trope where you have
things on a shelf, the shelf trope or
the symbolic objects on the shelf kind of trope. The trick with this
concept would be, you know, how do you indicate
different languages? So I guess you could have
different speech bubbles of different shapes and colors in each of the jars,
so that could work. I'd want to avoid having words
on these jars if possible. But I think in this case, it would be necessary
to have some label. It could just be squiggles
or it could be some blurred out gobbledego
that you can barely read, but you can tell it
might be some language, or you could try just doing it with the speech
bubbles inside the jars. The other thing that I
see as a problem with this particular concept is
it's a little bit same same. There's nothing breaking
up the monotony here, you'd probably need some kind of human figure or something that shows a little
bit more action. There's something to
this concept that is very much on point, but maybe not very interesting to look
at because it's same. It's just a bunch
of jars on a shelf. At this point,
I've done a lot of rough sketches and
then I went through and started to mark the ones that I thought
had the most potential. Then now what you see here, are my final nine selections that I've chosen based on
how on point they are. So I want them definitely to relate to the headline
as much as possible. I also want them
to be interesting. So I've chosen these
for how interesting they might end up being with
a little bit of extra work. And I've also tried
to keep them in this idea of illustrations
that follow known tropes. So each one of these, I
believe that there are a lot of other illustrations
kind of like them, which makes these
a little bit more accessible and
relatable for people.
15. PROJECT: Refined Sketches: After doing your rough
sketches and you identify at least a few
among them that you like, it's time to do what I
call refined sketches. At this point, we'll focus in on just a couple of our
selected roughs to make them stronger
and to get them ready for the finished
illustration. Now, in the rough stage, it was all about quantity and we really wanted
to just get out as many ideas as
we could without worrying about whether
they were good or bad. But now at this stage, quality
becomes more important. By that, I mean
quality in your ideas and quality in how you're
drawing those ideas. Also be more mindful of the proper proportions of
our final illustrations, either that one by
one square or the three by two wide rectangle, depending on how your
sketches will fit. By the end of this stage,
you should end up with anywhere 1-3 refined sketches, all of which you'd
feel good about taking into the finished art stage that we'll be getting
into after this. Just as an aside, when
I'm working with clients, I usually aim to have around three refined sketches
to show them. I also find that as I'm
refining my rough ideas, sometimes one turns out
to be a bit of a dead, by having a few others,
at least I have something else that I can
work with as a backup. Once you're happy with
your refined sketches, please share them on the
class projects page. Now, as you'll see
in this video, refining doesn't just mean
making my drawings cleaner. It also means
clarifying my ideas and sometimes adding to them or
removing something from them. Whatever I need to do to
make that idea make sense. Everything becomes clear as I focus more deeply
on each project, and that's why at the
rough sketches stage, I really can't expect much in terms of knowing
how that's going to work and things really just become clear the longer
I work with them. Okay. What we're
looking at here are my final selections from
the previous stage, and I want to narrow
these down to maybe just two or three that I'll take into
the refined sketches. I'm going to go with
the butterfly concept. I really do think that
that one is very on point, and I'll do one of these
flashlight search party ones. I think this one here is the
strongest just because of the scale of figures
and they fill the whole kind of
rectangle there, and I think that will make
a stronger composition. I'll go for those two, why don't we just start
with the butterfly one? I'm just going to select and copy that and then I'm going to bring it
into a new composition. As you can see, I've already
created a rectangle here. This is three by
two proportions, and that reflects the
wide rectangle format that my final
illustration will be in. This was one of
the sizes that we talked about in the
briefing stage here. If you remember, there was 2048 pixels by 2048 pixels square. Or 2048 pixels by 13 65 pixels in this
rectangular format. That's what I'm working with
here, and at this point, it's important now
to start thinking about those exact proportions. I'm going to paste my
very rough sketch in here and you can do
one of the following. You can place your sketch right
in your box here and then take the opacity down and just sketch over that
and refine what you have. Or if you like, you can take the sketch and
just put it off to the side to reference
it instead if you don't intend on
sketching right over. I always like to start by sketching right over my rougher sketch or tracing over it. I I feel like I need to
reinvent the wheel here, then I'll discard the sketch altogether and maybe
start again in some way. At this point, I will just use the free form distortion setting and that will just
help me stretch this right into the box in
a way that more or less fits and I will turn off snapping because it's snapping
to things in a weird way. What I like to do
with my sketches is set the blending mode of that original sketch
to multiply and then do my refined
sketch under that. That way, I can always see that original sketch coming
through a little bit. Before I begin, I will take this border down in opacity a bit as well.
Now it can get started. For this concept,
I want the idea of the butterfly frame
or this window box that butterfly collections
would come in to be in there. I think that's an
important part of making this concept meaningful
and recognizable. Then I want to have different shaped speech bubbles to indicate different
dialects or languages. So I'm thinking about
making everything just a little bit
more clear here, being a little bit more
mindful of space now. And if I'm not happy with how
things go in this first go, I can always begin again. So in a butterfly collection, you have these little
pins that hold the specimens onto some
kind of a card or board, and they are suspended or float
above they cast a shadow. Now, I think with
butterfly collections, there's usually some
kind of little label that goes under each specimen, and I have to figure out
what that would be for my particular concept
because obviously, I'm not going to put butterfly
species names in these, so it could be
different languages? The problem is, what
are those languages? I'm not exactly sure what the article would
be talking about. And I want to avoid putting words in an illustration
as much as possible, especially if they're specific, because the illustration
should stand on its own and not need words. So let me hide the
original sketch now. So this is feeling a
little bit static to me. There's something missing. And so I think what
I'm going to do is add some hands that are actively
making this collection. I think that will make
the composition stronger. I'm not going to just introduce a hand maybe holding
some tweezers, and it's holding one of
these speech bubbles. And then I'll see
how that looks. Okay, so it's getting there. I'm wondering if
there's just one more iteration that
I can do of this. I like these pins, and I want to have
the sense of this about to be pinned down as well. Maybe this is an opportunity
to bring in another hand. So I'm thinking about one hand using tweezers to
bring this in and the other hand holding a
pin about to pin it down. Maybe I'll just trace
over that one more time. As I'm drawing these hands, I want to be sure
that the hands are interesting and they're
in a nice gesture, but I also want to make sure they're not suggesting anything. Hands are very expressive
and it's possible for you to add too much expression to a hand that brings too
much attention for them. These are really just devices
to drive the concept of this butterfly
collection rather than anything to do with
the personality of the hands themselves. So I may spend a little
bit more time than I want on getting the gesture
of this hand right, and I may even, you know, reference my own hand or some pictures of hands online
just to make sure that I'm getting that right and I want it to be holding
tweezers in a believable way, even though it's
kind of stylized. Because this is a serious topic, I don't want the hands
to be too comedic, even though my style is fun. I just don't want my hands
to be silly cartoony hands. I'm being a little
bit picky here, letting myself get a
little bit carried away in the details here because details matter when you're
doing refined sketches. And now I'm looking
for consistency between the two hands. I think this hands too
big compared to that. We'll do something
like that so we can see more of the collection. Now we'll do the whole
thing together at once. And then with the pins, I'm going to try one where
you just see the pin head. Maybe you see a few
pins kind of scattered to the side there just to
get a little bit more story. Then for the labels, in a quick search on the web, I found that there
are these little pins that you can have
with numbers on them that are sometimes used
by butterfly collectors, maybe that's what these are. Okay, it's getting there. I need to clean it up a bit. And I do think this hand
needs a little bit more work. I'll see if I can just do
some surgery on it in place here just to get a little bit more the feeling that I
have going in the other hand. Again, I want to
be careful not to suggest anything with my
fingers in their gestures. So a little bit of
character is okay, but you don't want to draw undue attention to what
the hands might mean. It's simply a hand
holding a pin. That's it. Okay, so I'm happy with this
concept as a refined piece. Oh, I'll just indicate those shadows again
before I move on. But otherwise, I'm pretty happy. Now, in terms of these hands, I think I will
actually have them as white gloves if possible, and that can again, make
them as neutral as possible. We don't want to
get into details of whose hands are they,
what do they look like? What country are they from
or anything like that. The hands are just part of
driving the overall concept of preserving something
in the metaphor here is the butterfly collection. Okay, I refined my first sketch here, the butterfly collection, and now I'm going to go
over to my sketches again and pull out the
search party concept. This one is going to fit in this three by two
dimensions as well. We can take that down
in opacity and multiply it and begin the refinement process
of this piece as well. So with this one,
I don't want it to be an equal 50 50
kind of composition. I think that would be
a bit boring looking. So the choice is
whether I will have more speech bubble than search party or we'll have more search party
than speech bubble. I'm going to start
with the search party and the first third, and the second
third will be more dominantly these speech bubbles, and we'll see how
that works out, and we can adjust if
that's not working. So I don't want these search party people
to be too specific. I don't want to indicate
that they're from any particular country or that they have any particular
hobbies or interests. It's just the idea of a search party people
looking for something. It could even be as vague
as being all one color. They should all be kind of
holding flashlights, though. We'll figure out details about, you know, what does
it look like to hold the flashlight and stuff and their faces and
stuff in a moment. These look like
guns at this point. So we will definitely
want to fix that. So I think it doesn't make sense that the speech
bubbles were sideways, other than to fit the cones. But there does need to be
a sense of being revealed. Okay, I'm going to go with
what I sketched because the composition was stronger and I can make some
refinements later. And so this idea of
the dark and light. So sketching in some of that value dark and light
is important at this point. And then the question is, how do we represent these speech bubbles in the
light versus in the dark? What happens? I can turn
off my original sketch now. And I think I need to
keep trying that one. I didn't work out so well. There's something
actually better about the original sketch. And sometimes what
you sketch without too much thought can
have a better feeling to it and something more correct that you figure it
out without overthinking it. So I think I'm getting
somewhere with this one, but there's something not
quite resolved about it, so I'm going to try
going back to just sketching with outlines
without value for a second, and see if I can figure out what to do about those speech
bubbles because I like how the speech bubbles are
created by the light beams. So let's just see what
we can make work here. Always looking for the
most elegant solution, so it doesn't look forced. Now, while I said that the quality of the drawings
at this point does matter. The quality, I think
that's most important is the clarity of the
idea in the drawing. So even if it's not
the best drawing ever, it should be a lot clearer
than your rough sketch, and the idea should
be very clear. If you look at a lot of
conceptual illustrations, the art is an amazing
gallery quality art. Some of it is, but
a lot of it is just a good idea rendered in
a professional, clear way. I like how these speech bubbles are kind of like ghost like. And if you look back at some of the ideas that I threw away during the rough sketches stage, there was that one about
these kind of speech bubbles kind of floating and
fading in the forest, and that's kind of coming back again without
me meaning to. So somehow either consciously
or subconsciously, that idea has followed me, and I think that's just
part of the process and why you shouldn't be afraid to throw ideas away
because maybe later, they become useful anyway. And so I'm just loosely playing with value here this
time just kind of shading it in because it will be important for this
concept to work properly. And I don't want to
have to figure all of that out in the final. I think actually the speech
bubbles would be lighter than the beams because light would be catching them,
that would make sense. The beams would be like a mid lightness and
then the speech bubbles themselves would be layered over one another
semi transparently. But I think that's maybe the missing piece
here of this concept. Okay, so I've refined those two sketches and I've lined them all
up on my screen just together so
that I can compare them and make a decision about which one I want
to take into finals. I really like both of them.
I think they both evolve nicely and between the
rough sketches to now, I think they become a lot clear. The one that I'm most excited about is the second one though, the search and rescue one
because of it, it's so clear, whereas this one has so
many bits and pieces to it that I worry that it
will not be as clear. That it will be
just difficult to illustrate in the
style that I work in, which is a more flat way. I think what I'll
do before making that decision is just go in and sketch it over one more time
to see if I can simplify it. I I can't, I know that
I had this one as a strong contender to
work with moving forward. Every iteration that I take
my sketches through is an opportunity to just make everything more
minimal and clear. That looks more like
a tweezer to me. The key thing to remember here is the idea needs to be clear, more than this looking like
the best art in the world. I want it to be clear
and well executed, but it doesn't have
to be amazing art. Should definitely
be interesting, but we work that out
in the final art. With this one, I
feel like I need to work out a bit more
about what's happening, maybe just one less obese. Felt a bit too much
going on in there. Okay, so I think these concepts are ready to make
my decision with, and then I'll take one
of them and turn it into the finished illustration. These would be what I would present to a client
in the real world. Like if I was working
on a real project, this is the level of
refinement that I would expect from myself to
give to my client. I don't want to subject
them to any of the chaos or the mess of the
creative process. Up to this point, I feel like
it's my job to go through all that and give
it my best shot to come up with what I believe
as the illustrator. Are my best ideas and my
best solutions in this way. At this point, a client in the real world would
say they either love one of these
concepts or the other and have me go ahead
with one of them, or they give me feedback and
ask for certain changes. Now, since I don't
have the advantage of a client making this
decision for me, I have to choose one of these
to take into the final. In the next video, we'll find out which one I
end up going with. But before then, I'm
going to post these on my project page on the class and then I'll
see you in the next video.
16. PROJECT: Final (Part 1/2): It's finally time to make
our final illustration. At this point, you've already accomplished the main
goal of this class, which is, of course, the conceptual part of the
conceptual illustration. So everything from this
point forward is really down to how you
want to illustrate. What apps or materials do
you use? Which techniques? What's your style?
What colors do you like to work with and
all that kind of thing. Of course, I'm going to
show you my own process here for creating my
final illustration. Normally, I use Photoshop to create my finished
illustrations, but for this one, I'm going
to be using Procreate. You're more than
welcome to follow along and use any
of the techniques, textures or colors, et cetera, that I'm using here, and this could really help
you just get started, especially if you don't
have these things worked out for
yourself just yet. I'm even going to include the brush set that I'll be using here as a free download to
anyone taking this class. It's called Inky Basics, and it has everything
I'll be using plus many extra brushes that I probably won't get
a chance to use. Okay, so I'm going to start
by creating a new canvas at the final Illustration size. I'm just going to hit
this little plus sign up on the little icon there, and the dimensions are 2048
pixels wide by 13 65 high. For this, I recommend
that you just keep your color profile to
your default RGB setting. I'm going to use this
first SRGB setting and then everything
else you can leave as defaults and then create. I've already copied the sketch
from my refined sketch, and I'll just paste
that in here. Once that's down, I'm going to set the layer blending
mode to multiply. We did this in the
refined sketches as well, and I will also turn that opacity down somewhere
around 20 to 30%. So this allows me to see my
sketch over everything else that I'm going to be creating here without it
dominating my view. So I'm going to start with
my first layer here and tuck it under that sketch. Everything that I'm illustrating will be under that sketch. And so it's clear, I'll name that top layer sketch. And we can even lock it just
to keep it in place there. Okay, so for this
illustration in particular, I know that it's going
to have a sort of dark ambient kind of feeling. So I'm going to start by just creating a darker background, and that will just
help me kind of get a feel for what I'm
illustrating over it. The brush set that I'm using
is called inky Basics. It's a custom brush
set that I've made and I'm including it here for
everyone taking this class. It's up on the class
projects and resources page. As I use different brushes, I'll explain what they mean. For this background, I
want it to be a textured, not totally solid view. I'm going to hit this one here, soft edge Baer and I'm going
to use a darker navy color. This is usually what I
use instead of black. The way this brush works
is that you can use it as a stamp brush to put down
some of that texture. But you can also just
swirl it in there and it randomly stamps down
this printy texture. I want to get it nice
and text root in there without it being totally solid,
something like that. Always add more to that
layer later if I want. Now I'm going to start
with one mic eyes. I'm going to create a new layer and I'm going to use
Tom's paint pen. In this brush set, most of the things here are actually
just stamp brushes where they are textures that you
can stamp down one at a time, one impression at a time. I really only have
two brushes here. One is paint pen and one
is paint pen, wet edge. They're more or less the
same. The wet edge just has a slightly more
transparent effect at the edge of the stroke. I'm going to just go
with Tom's paint pen, the non wet one. I'm going to go in with yellow. I'm using the same brush
as my eraser as well. I just want to make
sure that I've closed up this shape and then
I can fill it in. Now, you might notice that I have this funny
little keypad here. This is a pen pad by Pen tips, and this is a hardware physical shortcut
keyboard for Procreate. One of the things that I miss about working in Photoshop
when I'm working on Procreate is the ability to use my keyboard for
keyboard shortcuts with my left hand while
I'm drawing with my right. This allows me to do
something similar, but all within Procreate. And if you want to
learn more about it, I have a link to it in the
class page somewhere there, either on the projects or the
About page for this class. And as you can see,
using the keypad here, the pen pad allows me to
just focus on drawing with my right hand instead
of doing certain gestures. I'm doing each different color
on its own separate layer. This is just how I
work with my style. I don't like to blend my colors or blur them
together so much. I like to keep them
nice and separate. Now for the vest and the boots and other
darker features here, I'm going to use a
darkler that's almost invisible against
that dark background, but maybe what I'll do
is I'll multiply it, so it just has a
darkening effect. So now I'm gasing out of that dark vest to bring
back the yellow of the arm. Now I can draw on the boots. This guy's pants have
kind of a Prince of Persia puff thing going on
here, but I don't mind it. So these paint pen
brushes that I've made have a very subtle
texture to them, and they're inspired, of course, by paint pens that I use a lot in my daily
drawing practice. They're definitely
not this exact same as working
with a paint pen, but it's my best attempt so far. And so when you draw in
with them versus just do a direct bucket fill, you get a very subtle
texture effect in there. Which is usually enough.
It's usually all I need. And create a
flashlight shape here. So you can choose to
use a bucket fill or just paint in by hand. And I find that doing things just a little bit
differently here and there in my illustration gives it a tiny bit of extra
spontaneity and variety. And then on top of that
flashlight, we'll add some red. Maybe we can even multiply that 'cause it's
white underneath, and give it a little bit
of a layered effect there. I'm getting carried away
with mama detail here. I have to keep in mind that this is a conceptual illustration, so small, subtle details
aren't as important. This starting again at
the hand 'cause I lost track of its shape. And sometimes I can start again, and it's easier than
trying to edit a shape. Okay, one other
thing that I'll do for the flashlight is just add some ridges
on that end there. This is a small
detail that might not be necessary,
but it could be fun. So I'm going to go into
my inky basis brush set and try one of
these strokes here. So maybe ink hash would give me something fun
to work with here. I'll show you what
I mean. Just gonna use a dark color here. And do one dab, and then I'll use the rotate
tool here and multiply. And I want that only on the red. So this is just above that
red part of the flashlight. If I use a clipping
mask on that, it clips it just to
the red area there. One other thing I'm going
to do is just blend the skin tone back a bit so it blends in
with the background. So I'll create a
layer above that. And I will create
a clipping mask. So you won't see
anything happen just yet because I haven't actually
put down any ink. But if I go up to
my soft edge brayer again and I have my
darkest color selected, it's the same color
as the background. I'm just going to do a
dab or two over that. And then I will multiply that. And so my idea is to have
I'm gonna start again, but my idea is to just
have that skin tone blend into the background again
so it's not as prominent. So I'll start with that, and maybe I need to lighten
it up later, but We'll see. Okay, so I have my one guy, and I think now what
I'm going to do is duplicate it, so
I have my three. All these layers above the texture background so
far are just this one fella. I'm going to create a group
from it and just name it to person and then
duplicate that two times. Keeping in mind
that the bottom one here is going to be the
one in the background. It's a bit counterintuitive. I'm going to rename
it just so I know. Then the next one up
will be the middle. And then this guy down here at the bottom is actually
the top layer. Naming these just helps me keep track of the layers
as I go along here. Now we can go in and maybe change the colors
of each of these to represent different
countries because that's what these are doing. If it's an international effort to save endangered dialects, then I can represent that international component
just by different colors. I'll do blue for this guy. I'll do red for this guy. I work with a very minimal
palette in my work, so I try to make do
with the colors that I have rather than doing lots
of different variations. Then I'll just change
some of the skin tones a bit just so it has an even
more international feeling. Anyway, I have my
three characters here. If I just hide my
sketch for a moment, I can appreciate those on
their own for a second. I think they're
looking pretty good. Okay, so the next thing to do is the beams of the flashlights. What I'm going to do
here is I'm going to rotate this so it's more
vertical for a second. I'm going to turn on
my drawing guide, just so I have a grid
to work with here. I want to make a cone that I can duplicate for
each of these guys. What I'm going to do is
just go up to a layer beneath the sketch just to
start. I'll call it cone. I want it to be more
or less symmetrical. I'm going to use
white as my color. And I'm going to make it a little bit narrower than
what I have going here. I want to make sure I'm using my paint pen here and not
one of my stamp brushes. Basically, I want to
create a triangle, something like this for now, and I'll just duplicate that and turn on my guides here
for a moment so it snaps. But by duplicating it, I can just flip it
and then I have a perfectly symmetrical triangle and that's what I want
to work with here. I'm merging those layers
here so that they're all on the same layer so that when I
complete it like this, I can just fill it in. In fact, I didn't need that grid at all, the drawing guide. Because I was able to just do that copy and flip and that
achieve the same thing. Now, what's happening
on this end here at the broad wide end of the beam isn't so much
of a concern to me because I'm going
to just bring it off the edge of the
page here anyway. Just making sure that when I hit Select here, freeform
is selected. This allows me to distort
in one direction, either width wise
or height wise. I just want to bleed that
off the edge of the page. I'm also going to just
extend this end here, just pass a flashlight so that once I maneuver
some of the layers here, it will appear to come from
just this one flashlight. So now might be a good time to tuck this one
under the middle guy, and that's where naming my layer groups will come in handy. Now, I want this
flashlight beam to be wispy and almost transparent. The way I'm going to do that is I'm going to go to my layer here and create a mask. This is called an Alpha
mask in Photoshop, but just a mask in Procreate. I'm going to invert it so
that the mask is black. Basically, in a mask, anything that's white on
the mask will show through, and anything that's
black is masked. Anything that's black
is basically invisible. Now I'm going to go and use
my soft edge brayer again. This is a very useful brush in this particular illustration. I'm going to set my
color to pure white and you'll see that I'm going to draw on the
layer mask it's selected. I'm just going to subtly dab
in some of this texture. And maybe go back to black and I can
dad out some of that. That's good for now. I still have this original
cone that I made, and if I ever want to correct
how transparent that is, I could start all over again
just by removing that mask. That mask is a non
destructive edit. With that in mind, I'm just
going to copy this layer, and then I'm going
to move one of them. Beneath the top
person back here. I can just move that
and tuck it back. I'll do the same,
duplicate this, can bring one of these
under the bottom person. Now you might see
what I just saw and realized is that because
this top one cut off, it's going to stay cut off. I cropped off the top there,
the part of the triangle. I'm actually going to delete this layer and go back
to my middle cone. That's the one that has
the complete triangle, and I'm going to
duplicate that instead. I will just move that one down. Let's hide our sketch for a moment and see what
we have going on here. There's a few things here. We have this hard
edge at the end of the cones that I push back, and then the texture itself, you can tell that
it's repeating. I'm going to go in and actually redo the layer masks
for each of these, and you'll see how
this works out. I'm basically going to use my texture to soften that
edge so it doesn't exist. The same thing is
happening on the cone top. So we'll just clear
it, invert it. And using white, I can go between black and white
to mask in and mask out that texture as I need. And here is actually where it's helpful to rename the masks to so now when I use my push
and hold with my finger, I can select the layer quickly, and I know which
one I'm looking at because they don't look
very distinct here. So I want to go to
my cone mask bottom and take out some of
the texture there.
17. PROJECT: Final (Part 2/2): Okay, so the last
part to go here is to draw in a speech bubble
that I can use over here. So I'll create another layer just beneath the sketches here, and I'll call this speech, and I'll use my paint pen again. And so what I kind
of want to do is mirror the proportions
of the triangle, basically this angle of the
speech bubble pointy part. I don't know if there's a
technical name for that. Should be the same
angle as the beams. And that just gives
us some harmony. There's a little bit of
visual logic happening there. That doesn't really hurt or
help the concept itself. That's more of an
aesthetic thing. So I'm going to start here. Just to reference that angle. And I will use my drawing guide here
just so I create a speech below that
has proportions. I tend to draw in a
very diagonal way. And so I want to
make sure that I'm not drawing too distorted
and diagonally. And this is not
vector illustration. I don't want this
being totally precise. That's why I'm drawing
things in by hand. I'm trying not to use quick
shape for everything. You can see what I mean by
how I draw diagonally here. We have very awkwardly
shaped speech bubble. I just want a little
more evened off, especially because as I copy
and paste these around, any of these
imperfections will be multiplied and
therefore more visible. When you repeat a mistake, the mistake becomes
more obvious. So I've drawn my speech bubble. I'm not sure how I
feel about that. It's a little bit funny shaped. I'm gonna turn that
off and try one more. So what I want here is to have a speech bubble that looks
like a speech bubble. Not too perfect. And I guess I have to speak the language
of a speech bubble here, where the I think having the pointy part of the speech bubble a little
bit more to one side helps. Then I'll just fill in
some of the awkwardness. Okay. I think what
it'll do here. I want to quickly copy and
paste the speech bubble motif, but I also want to
fade it back a bit. So I think what I'm going
to try and I'll see if this works is I will just make a selection from this speech bubble.
I'll hide that layer. I'm going to create a new layer, and I'm still using white, but I'm going to switch
my brush back to my soft edge and just fill that in a little bit like that. And then I'm going to
create a new layer. I'm going to I
think selection is still activated, and I'm
going to do it again. I'm going to create
another thing. You can't really see that. What I'll do is I'll
just move this over. I need five of these, I think. I'm going to keep doing this. I'm going to create a new
layer and press and hold select to re select that
speech bubble shape and then going back to
my brush, fill that in. And I'll move that
out of the way, and I will try two
more of these. So again, I'm pressing and
holding that select tool, making sure that my brush is set to that soft edge brayer, and that's four and
just one more to go. I'm moving these out of the
way and keeping them within the canvas so that I can see
the next one that I make. And I'm making sure that
I'm not moving it off the canvas because if I
do it will crop it off. So what I can do now is
turn off my drawing guide. I haven't needed
that in a while. And I'm going to place
each of these layers just roughly in place where
my sketch suggests. So we're almost
done. I just want to make these speech bubbles a little bit more subtle, I think. I'm going to make the backs of these speech bubbles
just a little less harsh so that
they feel a little bit more languid or ghosty. Now, I think I overdid
it with some of these. So this one, for instance, I'm going to try another
version of the same thing. Okay, so the next thing
that I want to do is play around with the
intensity of my beams. I could do that by just adjusting
the transparency a bit. You can start by doing that and see if that's good enough. I think that works, actually. Okay, so the next thing
that I want to do is take out some of the speech bubble that's not in the beam and
make it even ghostier. I think what I'll do for
each of these is I'll just go to each of these ones
here like this one here. Okay. I'm going to use my
selection tool to just isolate what's
going on on this side here and using my eraser set
as that soft edge brayer. Just dab it out a little bit, and the result will be you
get a bit of this line so that the speech bubble outside of the beam kind
of disappears altogether. And the same thing will happen wherever I see an
edge of a beam. So with this one up here, it just plays a little bit with beam versus speech
bubble, which I like. And some of the stylistic
decisions that I'm making here are deeply connected
to the concept itself. I'm not just randomly making
these lighter or darker. The idea is that these
languages are endangered and so they're fading out
almost like they're dying. I think as an image, this works really well. The fussy perfectionist in
me wants to keep working on this and add details and
do all tinkering here. But I really do feel like it's
possible to overwork this. What's really important in
this concept is that we have the characters representing the
international effort. It could be countries,
it could be scientific bodies,
whatever it is. Then you have on the
larger third here, these disappearing
speech bubbles, and those are the endangered
dialects or languages, and they're literally searching and trying to rescue these. So it's a little bit
open to interpretation. There's not entirely
the whole story here, everything that you and I know because we went through
this whole process. It's doubtful that
people seeing this image for the first time will know
everything that's going on, but when you read the text, and you see the headline, and then you pair this
up with this image. My hope is that it
will be on point and a strong image just because of that combination
and the context. Now, like I said, I always have a hard time finishing a drawing. And one way that I
signal to myself that I'm done is I sign it. All right, that's
it. When you're done your final illustration, you can share it on the
Class Projects page. Since you were probably using something temporary as
your project thumbnail, now's a good time to update it with your finished
illustration. I'm going to go and post this up on the class Projects
page myself, and then I'll see you
in the final video.
18. Conclusion and Next Steps: Okay. Congratulations.
Well done. You've made it to the
end of the class, and that means you learned
about conceptual illustration, and particularly, you
learned how to create conceptual
illustrations by using symbols, idioms, and tropes. You then applied this
knowledge to making your own illustration based on a hypothetical
illustration brief. Just want to acknowledge all the hard work
you've done here, and I want to thank you
personally for taking this class. As for the next steps,
please do share your project on the
class Projects page. This is the best way to
get feedback from others, including from your fellow
students and myself. If you'd like to go
deeper in your career as an illustrator or if you'd like to personally pick my brain, I do offer one on one sessions
as an additional service. Learn more, visit tomfroz.com slash Coaching or
just pop over to my profile page
here on Skillshare at skillshare.com slash TMFroS. Also, if you're
interested in any of the products and resources
that I've been using here, I will leave links and
descriptions to those in the About and class projects
page here on the class. Thank you so much for
taking this class. I'll see you in the next one.
 Tom Froese, Illustrator and Teacher