Transcripts
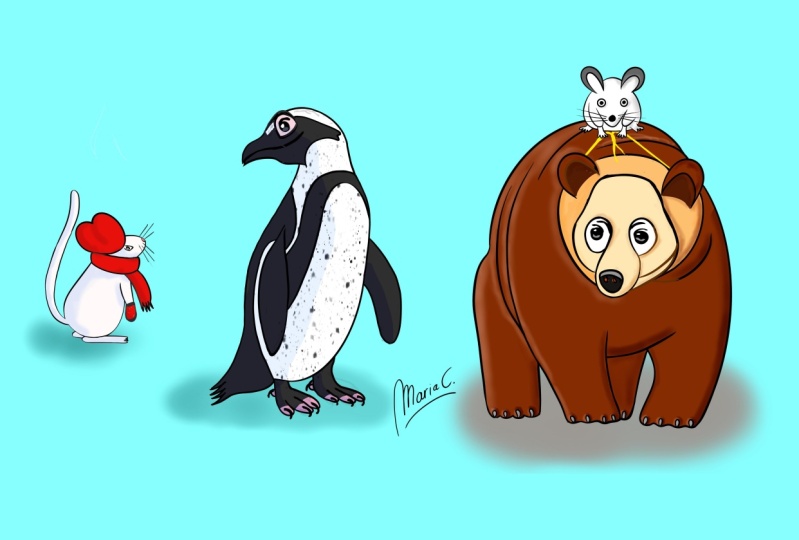
1. Introduction: Hey guys, my name is Dave Reed. I live in Brooklyn, New York with my girlfriend and our cat, Athena. And if there's one thing that I really, really loved to draw animals. So if you're here for my Instagram, then you've already seen my work that I loved to sketch with a beige background and I do my sketches with a red brush. I've been drawing all my life. I went to Art College here in New York City. I went to SVA School of Visual Arts as an illustration major. And I would say the last four or five years I've been really focusing on children's book illustration, just bringing people's stories to life. And I absolutely love it. The reason I wanted to do this class is because I love sharing my knowledge and I love sharing everything that I know about art so I can help you offer artist, just get better. We all want to get better. And I really have fun and making tutorials, and I'm really excited to teach this class. So I'm gonna show you how to take any animal you see, reduce it down to simple shapes, easy to draw. And with that, you can build up and then you can draw any animal that you want to draw. Of course, I'd like to make my animals really cute. You don't have to, you can do whatever you want. That's the fun part about this whole art thing and this whole subjective thing is you can turn these animals into wherever you want. You can actually use what I'm going to teach you with anything. You can use it with industrial artwork, you can do it with trees, plants, people. It doesn't matter. Everything breaks down into simple shapes that you can then build on top of and then create the wonderful art that you want to create. So I personally do most of my artwork for children's book illustration. But when you're drawing animals, you can use them for greeting cards, for 3D animation, cartoons, movies, everyone loves Disney animals. Animals are a safe bet. And if you're going to be any sort of illustrator or any sort of artists in any capacity. It's essential that you know how to draw animals. So I'm gonna make it really easy and really simple. So doesn't matter if you're a beginner or if you've been drawing forever like me, anyone that wants to know how to draw animals better and just have a basis on how to form animals from the ground up. This is your class. So once again, I really appreciate you checking out my video or at least economically intro. Just remember to have fun. This whole thing is about having fun and you'll create better art when you're having fun. I'm not going to test you. I'm not going to judge you. All I'm gonna do is help you get better to draw animals, because that's what I do and that's what I wanna see. You do better than you're doing now. And yeah. Sometimes I went, I'm talking too much, so let's get started. The first thing is going to be choosing references and in bringing them over into your iPad, into crockery, co-create, into procreate, so that we can start drawing. Let's do some drawing.
2. Getting Started: Okay, first things first, choosing references. Now the good thing about finding references is you have the best tool ever to find references and you're already a pro edit. Good. Oh, cell phone. We have Pinterest. Instagram personally, I use Instagram. Just find your references and send it to your iPad or where you can search for them right on your iPad. And have the reference you want to use. We're going to go to procreate. And we're going to open a new canvas. I like to use 3 thousand pixels by 3 thousand pixels works really well to upload to Instagram. And one of the things that I prefer is instead of having a white canvas, I'd like to change my canvas to a grey. A little bit easier on the eyes. Okay, so what we wanna do is we're gonna go to the little wrench, insert a photo recent. And then we're going to find our photo that we just put on the iPad. And I'm gonna go over here in the corner and just shrink it a little bit. And I'll put it right here in the middle. So as for these two penguins, this one isn't even paying attention. So we're not going to worry about him. This guy is ready to be drawn. He's posing forests, so that's the one that we're going to use. So I'll go to this little selection tool up here. I'm gonna put it on a rectangle. And I'm just going to draw, make a square around him, a selection square. And then I'm just going to invert it. I'm gonna do the three swipes down, which brings up my little Options here. And then I'm just gonna hit cut. So only our little penguin, our little hero penguins here. So now we have our canvas, we have our little penguin. And I'm going to move him over to the side of the canvas. Ok, so now we have our penguin. I'm just gonna make a new layer above that penguin and we're ready to draw. Personally, I prefer to sketch in red. And I'm going to use sketch master to I have all my brushes available there free. All they are is tweaked procreate brushes. Just so they work for me, but you can download all my brushes for free. That way we can use the exact same brushes. Okay, so we have our penguin. We have our blank layer above the penguin. And we have our brush sketch Master too. So now we're all set to start. Her really, really, really rough sketch, simple shapes and forms to start drawing this little penguin buddy. And otherwise had little penguin buddy.
3. Simple Shapes & Forms: Okay, simple shapes. So what do I mean when I say simple shapes may get rid of this. Ok, so we have a pang when we have our layer above, we have our brush sketch master to. First, I'm going to show you what I mean by simple shapes. Alright, I'll use, I'll use a nice orange. I'm feeling, I'm feeling orange. Okay, so when I look at this penguin, the first thing that I always do is I make a circle for the head. So that's kind of my base. That's where I start everything from, is that circle. From here. He's got a curve. That curve there. It's going to curve. Their body is like a little torpedo. Pretty much, pretty much his body. When I look at these pretty simple. What's important here is you have to think of everything is like a 3D shape. So his flipper here, it's like a, almost like a slice of pizza. Like thinking about his flippers is like slices of pizza. You can't see the other side of this one. So that's why it just comes off like that. This one, you can sort of see it. So you sort of make that line there. You make that slice of pizza is VDS or almost like little squares, sorta like that. Then he has his beak that comes out. So pretty much this is the shape that we are going for. So that's what we're going to. That's pretty much the base of what this penguin is. Everything else we can build off of. This would be like the blueprint. Alright, so I'm gonna clear this. I'm gonna take my red sketch master to brush. And I always make sure that I'm on the right layer. Okay, so I'm just going to name this. It's also really good to name your layers because once you start working with a lot of layers, it can get very confusing. Simple shapes, OK? So like I said, I always start with that circle. Like that. My brush nice and thick to that keeps me from trying to get into too much detail. So that helps me to keep it simple. So he has these curves that come off the side, sort of like that. And he's got that big torpedo body. That's a little bit off kilter, but pretty much like that. And everything we want to look at is. If the top of his body is here and is his flipper is down there. So you sort of just want to match that, you know, about that same distance. Like you don't want to put it too far up here, you want to put it too far down, sort of right in the middle there. So we're just going to we'll just make the shape like that. And the other one we want to bring right across. So we'll do our little piece of pizza. So the first thing that I can see, and I'm always looking at this when I'm doing my sketches. The first thing that I see is I made this flipper way too small. So and, and actually his body is too small too, because his body is sort of like the bottom of his flipper. But here it's just it looks a little bit too short. Like if we look at how tall he is, I made him a little short. So all I'm gonna do is I'm gonna take my little Select Tool and go to freehand. I'm gonna take this side. I'm gonna take the side of his body. Just stretch them down a little bit. That looks a little bit better. Sees he's tending nice and tall. So since I've done that, I'm gonna do the same thing when I'm going to grab my select tool, free hand. We're gonna take this flipper. You know what? I'll take the whole bottom part of the body and I'll just bring it down. And like I said before, now that this is flipper is sort of low, I'll take select again and just bring it back up and make it a little bigger. Okay, so that's a little more it just looks a little bit more, more proportioned to me. So let me finish off this little slice of pizza there. Okay, so now we have is feet which her quite flat and a little little boxy and little pizza ish, but a little boxy. So they're pretty much like this. So you can just wanna think of it in a 3D, sort of a 3D aspect. So 0 feet stick out, sort of like that. I can actually bring mine I can actually bring mine in a little bit because his feet sort of start in and then go out like that. Okay, so now what we will do his little beak. And we'll just do it simple for now, just so we kinda know where it is. We have this little i here. So we'll just do a little, just a little circle just to kinda mark where his I might be, We'll get to that later. But now we have a pretty good base. 2r, 2R penguins.
4. Sketching : So now that we have our basic shapes, we can pull everything together and add a little more detail to our sketch. Ok, so we have our base shapes down. So this is going to help us a lot. This is going to be our initial group blueprint for everything that we do. Moving forward. I'm gonna show you some tips, just some things to look for when you're, when you're looking at an animal. So just try to see the curves of the animal. So we have, so we have a curve here for his head. And then you can see we have this curve here for the beak, where it comes to a point there, sort of, sort of curves around a little bit. And then you have this curve which blends into this, which we drew before. We have this little, this little bit before. So you basically just want to do everything with, with, with shapes. You don't, you don't want to, don't try to actually like draw every little detail right now. When you're drawing your sketch, when you're free drawing or sketch, just think of everything as shapes and curls, curves, now curls. So this curve right here. And then you have a slight curve. If a slight curve there. And then it curves here, comes to a point and then occur curves under. And just pay attention to the slight, little, slight little curves. And you have his feet. And here you can sort of that's pretty much how I'm going to, I'm going to draw those because there's so much detail in there that at this point in time, you really just want to, you want to break everything down. He's still wanna make everything simple. So we have the curve there and then we have this little TO maybe a little curve there. And you have as other toe. And even if you want to do these little curves first for tos, you can do that. And then you can just, you have these little curves afterwards. And then you see you just following the curves of the body. That's all we're pretty much doing now when we do our sketch. If we're really just still using shapes and curves, but we're just making it. We're just using a little more detail. So I'm gonna go back to my rough sketch layer here. Okay, so I'm going to use sketch master one, which is similar to this. It's just a, it's a thicker brush. It's more solid. It's not as fat as as the one I was using for the rough the rough draft of the Penguin. Okay, so let's start, let's start at the head. So the first thing we did was that that front curve. Now you already have your blueprint here, so you can just sort of trace over that curve. And then he has a little bit of a bend here and is in his beak. So we're gonna do that little bit of a bend. And then here it comes forward. We're just going to, we're going to use that, that square that we have. And we're just gonna use that to sort of sculpt the beak. So this part comes over like that. So we're gonna do that here. And I'm not pressing very hard. Like I don't want like there's a difference between sketching and drawing line work. Like I'm not actually trying to get everything perfect like that. I'm just using light strokes to sort of get that shape that we're going for. Okay, so that was this part right here. Next under here we have a big curve there. So I'm going to use all of what we've drawn to sort of trace the outline of that curve. So that's this curve that we just made. And obviously he had a little bit of, a little bit of the opposite curve there and we have our sketch. So we're just going to, we're just going to follow through with our rough sketch. Ok, so now we have this, we have the body curve. Okay, so we'll just do this curve here. And this is all quite, quite simple. We have. So here's where it sort of merges comes out and then comes back. So let me move my little sketch. Move my little sketch over a little bit. And let me erase this little bit here, okay? Okay, so as we were saying, it sort of goes over like this. Then it comes down like that. And see how I use big movements. I use big movements to sort of sculpt out that shape and really keep it loose. So we have this going over like that, so we'll just bring that up. So now we have this whole part which almost goes, it almost goes straight down like that. So that's what we're gonna do. We're just gonna make it straight down with a little bit of, a little bit of a curve there. So we'll just do that curve. And now for the feet. So the feet are, they're actually pretty much in this, in this shape. But what I'm gonna do for tos is So basically you have this line here and then you have this little bit. And you can actually do that for the other tos. Now, you can just sort of duplicate that, that little line. And then you have and then you have a shape like that for the toes. So pretty much our rough sketch makes that line. And then we're gonna do this little wrap around with a toe and I'll do it for the other ones. And then I'll just make this, it has about flat lines here. These lines are sort of flat. And then this one comes around and goes right back up to the back. So that's what we're gonna do here. So we'll make this sort of flat, this one sort of flat. And we'll wrap this one around. Like so. And we'll do the same exact thing for this one. Here. It looks like his. And it looks like is his The line starts back underneath his body. So we're going to start the line all the way back. And it's sort of curves over like that. It's straight here. We can do the same thing that we did with the other ones will make that circle straight, make that circle, and then close off the back. Okay, so we notice that the footsteps kind of underneath the bias. So we'll just start the foot back here. And we'll go straight with a little bit of, a little bit of a current loops and they make my race or a little bit smaller just so you can see that a little bit of curve that I added in at the end. And then the same thing, I'm just going to match that middle toe and then I'll match the last toe. And this one is a little bit flat, coming in like that. This one's a little bit flat and coming in like that. And then we're just going to bring the foot. So when he goes right underneath his his his little flipper there. Ok. So for the back here we notice it goes like this and has a little jump. And then it goes, this actually goes straight all the way down. Okay, so we're gonna do the little, the little bump here. And then this actually goes straight down. So we're just gonna do the big. We can actually make it a little bigger, big curved down, which ends in it and his flipper. So you can see that i went right through my my rough sketch when I notice certain things like this, like this. This is a clean, clean round back there. Then I take precedent and that because I'm not doing a super quick rough sketch anymore, I'm bringing out a lot of those details. So instead of sticking to just my rough sketch, if I see a problem, if I see something that I can, I can hone in and make it better, and this is the time to do that. Okay. So if we're looking at his his other flipper, there was that line here that we made. We did it a little, a little, maybe too far. And in real life, it's sort of curved a little more here. So that's what we'll do. We'll just make it curved a little bit more here. And then we'll do the rest of his little flipper, which is pretty much already drawn, drawn out from the rough sketch. Okay, so I think we're doing pretty good so far. We have the head, we have the little bump here. And let's see, we can actually, and this will take some time to get where certain lines should, should overlap or not overlap, for example. So he has a kind of a round belly here which comes up and his, his, his other foot. So this line I'm going to make going underneath underneath this because if I was to do the opposite, if I was to bring this up and then do the line here, then it brings this whole foot in front of his body and it's not supposed to be, it has to be behind. So we're gonna make this little curve and then make that foot behind. Sort of the opposite of what we did here. Here is, is his leg sort of goes like this. So we put this line underneath it because we want this part of his leg. It's imagined his leg is behind here. Hopefully that's not too confusing. So essentially, we want this leg to be here and then we'll, we'll start this line and make the curve. And then for the foot will just keep everything in front of that and we just keep everything in front. So this just shows this just shows that the body's continuing behind this foot. At this foot is forward. Okay, so we have our sketch and it's looking pretty good. So now you can go through and if there's any little details or anything that you want to change that you think needs to be different. You can go through and actually look at it and you can also add little details like for example, he does have a little toes here, little toenails. So I'm just gonna go here. I'm just going to add a little I'm just going to add a little toenails. And I'm going to sort of round them out because I just don't want them to be like really sharp talons. Even though he has, you know, probably sharp sharp toenails. This is the kinda thing that, you know, if if you're making, if you're, if you're making an animal softer, then regardless of how sharp teeth are, you can always make it less scary or a little bit softer by having rounded teeth, even though their teeth usually are not razor-sharp. But there's little things you can do to sort of make, you know, it's a sort of keep the anatomy but then also make things queued. So like for the toenails, I'm just having a little bit, a little bit round. For the beak. Is you can see like my, my B maybe curves up a little bit too much. So I might want to just like tone that down a little bit and just not make so much of a curve. So you just want to have good shapes, good proportions, matched fairly close to your animal, and then you're good to go. Alright, so we're almost finished with the sketch. The next thing I want to concentrate on is the face. So the next video, we're just going to work on his face, making sure he looks cute and presentable and we've gotta keep them happy. He looks like he's having a good time in the picture. We're gonna make them having a good time as a drawing.
5. Sketching Faces: Okay, so now we'll get into his face. Now of course there's a million different animals and all of them have very different faces. But there's certain things that I do with any animal I'm drawing. There are certain things that I do with their face and, and more specifically with eyes. So he has this little i here. And what I always do is I always make this arc, this little button Shape. Button, this little button shape right here. I always make that army outside of the eye. So so let's say I am, you know, if I have an i here, just like I'm just drawing randomize. And you'll see an F. I have other videos where I'm destroying eyeballs. I always draw this arc here. And it's sort of doubles as this part can be the eyebrow and have a little bit where, you know, their little eyelid might be. But I always draw this in just to kind of give me a sense of the eye socket. Okay. So Let's start with his I. One thing I always do is I always start the I on a new layer. Even though I'm doing, even though it's all the same sketch, I just put the I on a separate layer because I like to play around with different shapes of eyes and different sizes. So when it's on a different layer, it's just easier to manipulate. Okay, so we're gonna start with his eye. We already have our little circle, whereas I is, I'm still using the brush sketch master one or just regular sketch master. So I'm just gonna do a loose circle here. So I'm just gonna loose circle where we, you know, where we had noted where his eye is, generally the same spot. And then I'm gonna do that little button shape. Draw it a little darker so you can see it. Ok. So essentially what this does is it sort of gives the eye a little bit of depth because I'm still thinking of everything in, in 3D. So like I wouldn't want to make, I wouldn't wanna make the couldn't make the button shaped like this. Because then it wouldn't make sense that is it because his beak is so high up. So you just want to have the bottom part just in line with the nose. If this was a different creature and he had a nose like this. Let's say if he had a kind of like a heart type knows something like that and it would be the same thing. So all I'm basically doing is just I put this bottom part of the eye just inline with where his faces looking. If its if its beak was down like this, then I would do the same thing. I will just put the arc probably are. Probably like that. Just because it's in the same direction as its beak. And then you could do like, you know, have them looking in one direction or the other. Okay, so let's get back to our guy. Our little guy here. Make sure I'm on the right layer. Ok, so we have the i in there. And now we're gonna do the beaker. So as you can see, it sort of starts here, goes up here, and sort of arcs out like that. And what I'm gonna do is do a little mark like that, sort of like a smile. And this would be like the cheek. And no matter what phase you're doing when you do the end of the mouth and do that little piece right there, that's a smile. It's going to look like a smile. So let's do that for our sketch. So we're sort of looked like came about here, went up a little bit, and then came down and arc like that. So that's pretty much the same, the same trajectory. And then I make it a little bit where I have him smiling. Ok, so we have our mouth, we have our little beak. So let's just take a look at some more details of his face. It looks like he has a different colored section here. And it sort of comes around. And as peak looks like, it's even got more colored section and it sort of looks like it sort of does that. So just take a, take a good look at the shapes on their mouth or how their beak is shaped and just sort of simplify it. So that's all, that's all I'm pretty much doing here. So sort of like a little make like a little circle down here. I'm just drawing it in very lightly because it's a it's a color separation. It's not actually like an outline or anything. Just so I know where it where it is later on. During If I want to color it in, I'm not sure how we're going to color this exactly yet, but this is just a mark down that there's a cullet is a coloration separation here. And there's a color separation here. Sort of comes around and then his beak sort of sort of angles n like this it looks like. Okay. So we have our circle here. I like to first figure out where the back of his eye is like where the decrease would be. So I separate as I like in half. That's how I that's how I think about it. You don't actually need the line in the middle of his eye. So I put this dark line here and then I can make if his eyes just black, I can make it like that. And then I do is it'll eyelash. So this would be like if he's looking in the other direction. This line, which is the mouth. And I can figure out how high on what this cheek, if I make this higher, then he looks happier. But also if I do that, you always have to leave room for this cheek here. So then he looks, he just looks happier. So the higher that xik is, the higher that cheek is, then the more it pushes up, the more it pushes up on his eye. So that makes it hopefully that makes sense. So if his if his mouth was more of we'll just we'll just erase it. And if his mouth was more of a frown, then this guy would be completely round. And this MIT and the arc might actually go down a bit further. And that would be like if he was, you know, if he if he wasn't so happy. So there's always going to be a cheek area here and if it's all the way down, you're not going to see it. But if this goes up and this line goes up, then all of this has to go up to you basically just want to make that you want to keep that cheek there. Okay, so let's start out with a neutral. We'll start out with a circle. Okay, so we'll make the mouth there, which means we'll make a little bit of section for that cheek, that chubby cheek. Here's our little arc here. And we'll even just, we'll just bring that right over to the top of the beak. We're gonna make a darker line up here, which is, which will sort of double as an eyebrow. Obviously. Penguins don't have eyebrows. But we're just gonna make this line a little bit darker because it's sort of, it's sort of looks like when it's sort of doubles as an eyebrow. And for humans to whom we're drawing this for. That always helps in showing the expression. Obviously we're not gonna make like big eyebrows. Although I could. We're not gonna make him that that stylize will just keep it simple for now. And just remember these little coloration differences. So let me clean this up a little bit. So when, so when we add color, if we want to add this pink here, we know, we know where that is. Ok, so let's just finish up with the eye here. We'll make our thick line up here. And what this basically is is that's sort of like the eyelash, you know, like like normally eyelashes would be sort of like that. We don't have to make them with the cartoon characters. You just do this thick line and it's sort of doubles. Almost just the way this doubles as an eyebrow, this darker line, this sort of, this sort of doubles as an eyelash. So let's see we want okay, let's just make his eyeball here. I'm happy with that. I think that looks pretty good. And all this is is just around, you know, just around dark dark eyeball. If I wanted to color it in maybe than I would, maybe make it a little smaller and then add a line around that if I wanted to colour in this part of it. But for now we're just gonna keep it black loops. Okay, so I'm, I'm pretty happy with that. So we have the mouth, we have the i we have the eye the eye socket area. I think we have all of our details and I think we have some good face details. So I'm happy with that. I think that's good for now. Definitely just continue to practice. Just draw little things like this. You can draw him. That's the best thing about digital art. If it doesn't look right, then just make a new layer, like you can duplicate it. You erase the eye and try again. If you're having problems or you don't like it, just duplicate the layer. You know, a race. What you don't like. Maybe you want to, maybe wanted to have them. Maybe you wanna give them like more accurate eyes. So you do like a little maybe you wanna do like a like a thin, thinner, I like that. You know, that would work too. And you can draw a thinner Aibo like that. So there's tons, there's tons of different ways that you can play around with eyes. It's just really important to practice. And eventually you'll figure out what looks right and doesn't look right. And the more you practice, the more you'll, you'll just get better at. I'm also gonna make some, some tutorials that just focus on eyes because I love drawing eyes, so that might be helpful as well. Okay. So yeah, I'm happy with his face, I think is face looks great. The only other thing that I can think of that we could add now is we can sort of, we can sort of start to think about these little little markings that he has. And I'm just literally just matching what I'm seeing here. This sort of comes around like that. He's got another little arc here that sort of goes underneath his little flipper. And this is just these are almost hits like placeholders. Obviously I'm not trying to really figure out as markings. I would do that in the painting stage. But for now, we have our sketch. He's looking really good. The next thing we'll do is really clean up this sketch. And I usually call that a drawing. So this is a sketch. The next one will be a dry. So we're doing really well. And yeah, he's, he's starting to come alive.
6. Drawing over your Sketch: Drawing a sketch. So we've basically done the hard work. You have, your character. You've worked it out from the rough, rough sketch to the sketch. So the next thing that we can do is just make a drawing out of it. It could be called line work as well. I don't always make a clean make clean lines over it. Sometimes I sometimes I will use the same brush that I did the sketches with. So the same brush that this red brushes sometimes I'll use that brush. Whoops, let me raise the opacity. Sometimes I'll use that brush as well. And this, but this brush is less streamline. So streamlined is the difference between C, this, this line is just a little bit more crisp and a little bit more straight. Whereas if I use the sketch master brush has a little bit more movement to it. So you can really go any brush that you want. You can go any thickness that you want. You can go with the tide or you can go to a thicker brush, a smaller brush and more textured brush. Procreate pencil is very kind of jagged. You know, you can really go with any brush that you want. So this is another thing that's sort of establishes what kind of style you want to draw with or what kind of style you want the end product to look like. And it's also really good to be consistent if you, if you're gonna do five characters are five different animals. You can use the same brush at this point in time. And then they'll all sort of, they'll all be connected because they have that same they have that same look. As far as the the drawing and as far as the line work, I think I'm gonna go with one that I call Disney, Inc.. And this is another procreate stop brush that I just I just tweaked it. I'm not even sure what I did to it, but I tweaked it so that it would be good for me. So it it has some streamline, but it also thins out pretty well. And to me it just looks like it did when I, when I draw with it, the characters just seem to have that sort of Disney esque sort of feel to at least the line work does. So the first thing that we're going to do is merge. So one of my sketch layers is that, one of my sketch layers is that. So I'm just going to merge these rough sketch and everything. I've already saved. I've already saved the rough sketch in a different layer. But I kind of like the way this looks with this sketch over it. I love the way this looks. Okay, so next thing we do is you hit the little n And then you just put the opacity down. I'm a PI, put it down to like, I'll put it down to like 30%. I like to be able to really see the lines that I'm drawing. I don't want to get it. I don't want to get mixed up with my sketch. I'd like to be able to see all the details of the line that I'm drawing. One thing you'll notice I keep the canvas really big. Oops. And I try to really limit picking them up and putting it back down. So try to keep the lines really simple and just really smooth. Okay, so for his, I will start with this bottom line. And then we'll do the arc. That's his foe. Eyelash or not eyelash, eyebrow. And for the eye to the nice circle. And this is the eyelash. Just make that nice and thick. Ok, so I can, I can draw in the lines, but I usually wait until I color in the character. And then I, then I make the line. So I'm not going to color that in either. We're just going to do is smooth forehead, smooth back of the head. And the rest you just trace your trace your your animal. And I just tried to I just try to not make too many few strokes as possible. And when you're doing this, you kinda just have to cleaning up your drawing so. There might be some things that aren't 100% figured out. When you did the sketch. This is the point where you just kinda make bold decisions. And you just, you know, you just, you just kind of figure it out because you have to. But that's the importance of really just having faith in your sketch and having spins, having spent enough time really working this sketch. Because then it's almost like, I mean, it's almost like you're cheating. It's almost like, you know, when you, when you do the rough and then you do the sketch over every, every, every layer that you build. Just makes this part easier because you're making all of your answers. You create all of the, okay. You've created all the lines, you've created all the work. So literally you're just tracing your own, your own work. And the reason why I'm doing the lines here is just to give them a little bit of a 3D look. Okay, this looks pretty good. The rest looks like it's probably all colors that are different. So I think we're pretty good there. Okay, so we can always erase these later, but I'm gonna go ahead and make, I'm gonna go ahead and draw in these colored lines. Because we can always erase them later if we, if we want to do, but sometimes it's just nice to add them in. Do I usually keep them really light? And d1 here as well. Okay, so for the i, I'm gonna make a new layer underneath the line Layer. And I'm just going to take my solid circle, which is very useful. I use it a lot. And I'm just gonna try to find the same size. So that's about the same size. So I just put that in there just to have and I will leave it. I'm not even I'm not even going to erase this part of it even though it's crossing the line. I'm just going to leave it because we're gonna paint we're going to paint in front of that anyway. Okay, so the only other things I do for the drawing is I figure out, I'm just going to use the breast sketch master. And I'm just gonna color in, I'm just gonna make this a little bit darker where his mouth is. So I'm just going to thicken that with that line up a little bit. Because I want this line to really stand out. So the lines are looking great. The next step is just coloring this guy. So in the next video, we're going to block out the colors. We're gonna make a base color. And then we're going to figure out how we want to call him in. We'll get rid of the sketch. After we paint our little penguin, credible hero penguin here. So, alright, see you guys in the next video.
7. Coloring: Okay, so let's call this guy. So the first thing we need to do is get rid of our sketch. We don't need our sketch anymore. We have our line work, we have our drawing here. And we're going to place the colored layer. We're gonna make a new layer underneath these lines. So I have a new layer here. And I'm just gonna use the color orange because it's easy to see when I'm coloring in the lines. I'm also going to use Studio pen and paper 11. I don't know why I named that, but if you download my favorite brush, it's the studio pen. Just because it's easy for me to call her in. It's easy for me to color with because there's no there's no brush. It's not pressure sensitive, so but you can use whatever brush you like to fill in the color. So if you notice I the only thing I don't call it ran as the eyes, the actual eyeball because we're gonna make a layer beneath this beneath our blocked out color we're going to have that's what I'm going to, I'm going to put the white for the eye below that. And the eyeball as well will be below this layer. Alright, I think we have him all blocked in. Let's see. Yes, he's looking good. Nice in orange. Okay. So now that we have in blocked in, let me make sure. So what I'm gonna do is I'm just gonna take this eyeball. And I'm just going to cut and paste. And I'm just gonna bring it below this layer because I want it to be underneath that. I'm also gonna make a layer behind that. And I'm just gonna take a little bit of an off-white and off-white color. You can of course use y as well. But I like to use a little bit. I like to use off-white. It doesn't always have to be a solid white or a solid black. Sometimes it's better to mix a little bit of something in there. Okay, so we have the white for his eye. The next thing we can do is figure out what we want the base color of our penguin to be because we definitely don't want it orange. So looking at him the most color at the most of what I see is an off-white color. So we're just gonna make him white. I am going to select our penguin. Make a new layer above the Penguin. So on this layer, we can work on the black. And I never actually use black when I'm painting, digitally painting an animal. If animals black, I use a darker grey. And the reason why I do that is because sometimes it can be it can get very difficult to make out shapes and lines and things like that if you do pure black because you won't be able to see your lines. So first you need to select your layer. So I'm gonna go to the color blocked layer. I'm gonna tap on the layer, hit Select. And now the only thing I can paint on is our penguin. Everything that's within this white paint that we made. That's the only that's the only thing that I can make a mark on. But you can also add a new layer. And as long as you still have that selected, it will be the same thing. You will only be able to paint on that layer. So this will help us. This part of this part of his neck area is black. So I'm gonna go ahead and I'm going to use the same brushes before. And I'm just going to cover in this section of his neck, this dark gray instead of black. It doesn't have to be super perfect. His markings aren't. They're not the, you know, there's a lot of variation in them. So it's really up to you if you want to. How, how clean you want to make. The lines at the end of his beak is also black, so I'm just going to color that in. And since he does have a lot of variation in his markings, sometimes you just really need to take take the colors that are most that are most visual, that you can see. The easiest, Those are the ones that you want to color in. As you can see, he has a lot of variation in his eyes and things like that. So you can always add a little bit of that in. But you don't always have to put everything. I think that's a pretty good compromise. Okay. So he's also got this stripe going down the back. So we'll start it here. And you know what, I'm going to, I'm going to switch to a message to graffiti one because this brush is pressure sensitive. And that way I can sort of make it bigger as I go down. Okay. Alright. So it looks like the outside of his thin is black. So we'll just go ahead and color this in black or dark gray, I should say. And we'll go ahead and make his other flipper, black as well. Alright? And then he has this nice curve. It's sort of it's not bad. And if you want to fix the shape, like I was saying before, you can take your eraser and sort of just sort of shape it to wherever you think looks. Looks best or looks neat. This is also where you can add some of your own your own magic to it. You don't have to actually match his colors. You can changes, can change his colors up. You can really do whatever you want. That's the, that's the beauty of it. All. His feet x look like they're pink with black on top of them. Just as this as. So what we're gonna do is I'm gonna make a layer in between the two. So it's above and below this dark color. And I'll find a nice, nice pink. That's a good one. I'll make it a little lighter. Just paint over his feet. And also so the in-between this part is also pink, so I'll just color that in as well. It's looking pretty good. Alright, so now I'm gonna go back to this, to this darker gray layer n, since it's in my history, I'm just going to tap that color again, the dark gray color and looks like he's toes or dark. So I'm going to color those in something like this. Almost like he has a I don't know, something draped over his foot. And I'll make it sorts sort of wraps around almost like he's wearing something, but it's good to be creative with things like this. I mean, it's obviously it's, he's got pink underneath. But then you don't actually have to try to match out every one of these little details. You can sort of simplified and dumb it down and just make it fun. Let's see what brush to I want to use. Elements driven snow is sort of similar to this. Okay, so I'm just gonna go and I'm gonna make sure I'm on a layer above that. I'm going to choose the driven snow brush, which is an elements. Yes, it's an elements. And I have my brush fairly big. And I'm just going to make and sometimes I'll, sometimes I'll just keep going over it until I get a variant that I like. Because sometimes there's, you can just put it in the perfect spot that you like and sometimes you may not. So you might have to just sort of experiment. The next thing I'm gonna do is merge. I'm going to merge the, the dark colored driven snow into R dark layer. So now all of that is together. So the next thing I'm gonna do is I'm going to erase. He's got some whites, white spots on his flippers. So I'm going to erase that into here. Okay, so the next thing I wanna do is go to the line layer and I'm going to alpha lock, alpha lock the line layer. So we've only selected his lines and I want to I'm going to make them, let's see. They actually don't look bad being dark, so I'm just gonna make them a little bit darker than a little bit darker than our darkest are darkest pattern. And let's see how that looks. And of course, this is just my own way of drawing. I, I personally just don't really like the harsh black outline. But in some applications it looks it looks good. It can look fine. I personally just I prefer I prefer to little muted. I don't I don't I don't really like the harsh black line. But that's where that's where each individual person comes into it and gives it there own, their own flair. I will leave this line dark black because his, his mouth is a focal point. So and I also want to leave this bit here and make the brush a bit smaller. And also going to leave this bit dark black as well. Alright, so he's pretty good with the color. The next video we'll just be adding some shadow. And we won't go too severe with the lights and shadows. We'll just give them a little depth. So we'll just, we'll play around with some shadows and finish our little penguin buddy right on up. Alright. Because you guys next video.
8. Adding Shadows: Okay, so if the light was coming here down from the top, then this part would be dark. This might get a little light. This plane will be dark. This would be dark. And little bit of shadows from his body would make this area dark. And probably a little bit of his flipper would be dark. And those are pretty much the main the main areas that would be dark loops. So it was coming from if it was coming from this direction, then all of this the light would be hitting him on this side and it would probably gradually get darker. Everything over here would be dark. This would be dark. This might get a little bit. The light might touch this a little bit. And this would be dark. And the light might, light was also coming here. The light might touch this and my touch this might touch a little bit of this. And with touch, this whole half of his body. So just think about where you want the lights coming from. Okay, so let's shade our guy in here. So the first thing I'm gonna do is go to my white color block layer. Since that covers his whole body. I'm going to click on that layer and hit Select. And I'm gonna go on top of our line layer. I'm going to name it shadows because I haven't been naming my layers and I should always name your layers. What I like to do is I'm going to tap the little n on that layer and I'm gonna bring the opacity down to about 20%. Okay, so we're in our shadow layer. 20% opacity. I'm gonna go to graffiti brush. And I'm just going to actually doesn't even need to be that, that I'm going to raise the opacity. Just see you can see it a bit better. Okay, so we wanted this area underneath to be dark. And the light is also coming down, then this bit would also be dark. Okay. So this area, this part of his stomach is actually dark as well. So I'm just going to color all of this in. It's getting all that shadow. All this would be in shadow. This flipper would be in shadow and probably just a little bit of his feet as well. Maybe not maybe not all the way to his toes, but a lot of his feet would also be in shadow and also be have a shadow underneath. All right. And since this, there's a sort of a bulge here. I'm gonna make a shadow under here. And I'll sort of make 12 here as well. So the reason why we put it on a separate layer is because as long as you're on that, as long as you're on that layer, the shadows layer, you can go to adjustments. You can go to hue saturation layer, and you can change the color of the shadows. So I think for him, a more blue color looks nice. I think that looks pretty. I think that's a nice color for a shadow for him. And you can try, you can try multiply. You can see how that looks. Sometimes you can try some of these mode, these layer modes, because you might get a really nice effect. Sometimes I'll just go through them to see if I see if there's something interesting or a color that I didn't think of. Like I really like the color of this shadow. I think it looks really, really nice. So there's a lot. So for me it's a lot of fun going through, going through the different layer modes and just seeing what you get will stick with multiply. You can lower and raise the opacity. Think that looks pretty good. And the only other thing I'm gonna do is just going to carve off some of this, some of this shadow. Okay, so the only way I'm gonna put a shadow underneath his eye. So I'm gonna change the color of his of that the whites of his eyes. I'm just gonna make that white. Since he's already got White in his, in his body. I don't want the AI to be darker. So what I'm gonna do is here's the eyeball. Actually I'm going to clear all of this in white in case I want to move the eye around. So let me just clear all that in white. Okay. So now we're in the layer where the eyeball is. I'm gonna make a layer above that. So it's above the eye and below is white paint. And now I'm gonna go to black graffitied graffiti one. And then I'm going to lower the opacity down to about 30%. And I do this with all of my artwork. I make the shadow from the from the, I suck air from the eyelid and eye socket. So I just do an arc around at 30% just to sort of give, give his eye shadow there. And now what, I'm going to take a White, I'm going to keep it at 30%. And I'm just gonna make a little jelly bean in his eye. So it's 30%. And all I've done is taken the white and drawn this little shape and the bottom of his eye. So that'll sort of double as a reflection. And then I'll raise this up to a 100% same brush. I'll make it a little bit smaller. And then I'll just add this little pop right there. Just to really give the eye some, some life. That looks pretty good. And that's an easy way to add tags shadow. You can go up to the, you can go back up to the shadow layer. You can use your soft brush. So we're going to choose eraser and then soft brush. And you can also, you can erase out parts of your shadow. So this will be a different, this'll be, This is another effect that you can do. You can erase the edges and make it a clean, smooth shadow. So you just softly GO around the edges. And then you'll have a nice gradient shadow. So instead of all these harsh edges, you can sort of lighten them up. And that gives it a really nice effect as well. And make it a little smaller here. It's a completely different look, but sometimes I sometimes I'll fade out the shadows. I think it looks really nice. So that's another, that's another way you can do it. You can also take the eraser and you can sort of he's got a little bit of light here. So you can lower the opacity of the, of the eraser in the soft air brush. And you can just sort of erase away. If you wanna give them a little. Though, chest is getting a little bit of the light. So now we have all of these layers that are separate. So if you wanted to, you can change any of the colors of any of the layers if you needed to. And you can even change the color of the eye. If you wanted to give him some an interesting color, I can change that as well. And actually it looks nice. And we'll go with a darker color. And you can even change the color of his. If you go to the grey layer, the dark gray layer can really make them kind of far out. Alright? So lastly, I'm just gonna make a layer underneath everything. And I'm going to show you two little fun things you can do to kind of put your character in space. So the first thing is, let's see what am I going to use? So decided to go with the flat brush. And I'm just gonna do a little bit of shadow and directly underneath him. And then I'm gonna take my smudge brush, graffiti one. And I'm just gonna smudge out, smudge outwards, sort of sort of put some underneath his little toes and then smudge the rest out. Not too severe, just a little bit of shadow underneath them so that our kind of plant him in space. So it's not floating. So that's one thing you could do. Ok, so another fun thing you can do. I still have all the layers. I de-selected the photo. And I'm going to group these. So now my, my penguin is in a group altogether. I'm gonna duplicate the group. So now I have to say I'm going to take this, I'm gonna flatten it. So now we have our original group with all of the layers. And then we have just our penguin is a single layer. I'm gonna put that underneath the group. And I'm going to select it. And I'm going to flip vertical. So I flipped, I flipped him vertical and I'm going to bring him down now. C will bring him down here. Let's see, I'll match his feet sort of like this. Ok, so we sort of bring it down and you can kind of see where I'm going with this. I'm gonna make a reflection. The only thing is the feet obviously are not matching up with his feet. So all you do is just go to liquefy. So go to adjustments, liquefy. We're still on the bottom layer underneath him. And I'm just going to sew in liquefy. I have push sizes forty-seven percent pressure is 37%. No distort. Twenty-three percent momentum. It's probably just your standard your standard liquefy settings. I didn't really I didn't really change much. But now that I'm in liquefy, I'm just going to push his feet into essentially sort of the same position as they are. So I'm literally just pushing the bottom photo until you can see a bit of the details. And I'm just stretching it. Just stretch it so it looks like he's standing on his own his own feet. Okay. So now what I'm gonna do is I'm gonna take my layer and I'm going to lower the opacity down to about 50%. Now I'm gonna take my eraser, soft air brush. I'll make it fairly big and about 50% opacity. And then I'm just going to sort of erase away. At the top part of this. Can raise the opacity a bit more. A little bit more. Raised the opacity a little bit. Okay, I'm pretty happy with this. Everything I've done, you can translate to different animals. I'll do some other tutorials with different types of animals. But the basic shapes are really what makes the animal what it is. So as long as you can really get that part of it and you'll be able to draw anything. So thank you guys again so much for watching. I really appreciate it. I hope that I came across in a way that was easy to understand. Hopefully you found some value in the videos. And I hope that you steal all my tips and tricks and use them for your own artwork. That's how we all get better as artists. We take things that we see from other artists, from photography, from life. We take things that we see and we incorporate it in our art. And that's how we all grow and get better as artists. So thanks again for watching the videos. I really appreciate you. And hopefully you'll join me for the next class unless you're with, will be as of right now. But I definitely wanna do some more. So hopefully, you will take part in those classes as well. And I'm excited to see your penguins and any other animals that you make. Please tag me on Instagram, drug Free. Dave, look me up on YouTube, all the social media things. I'm really excited to see what you've done. Alright, so once again, I'm Dave Reed. Keep drawing and I'll see you in the next video.
 Dave Reed, 2D & 3D Illustrator - Brooklyn, NY