Transcripts
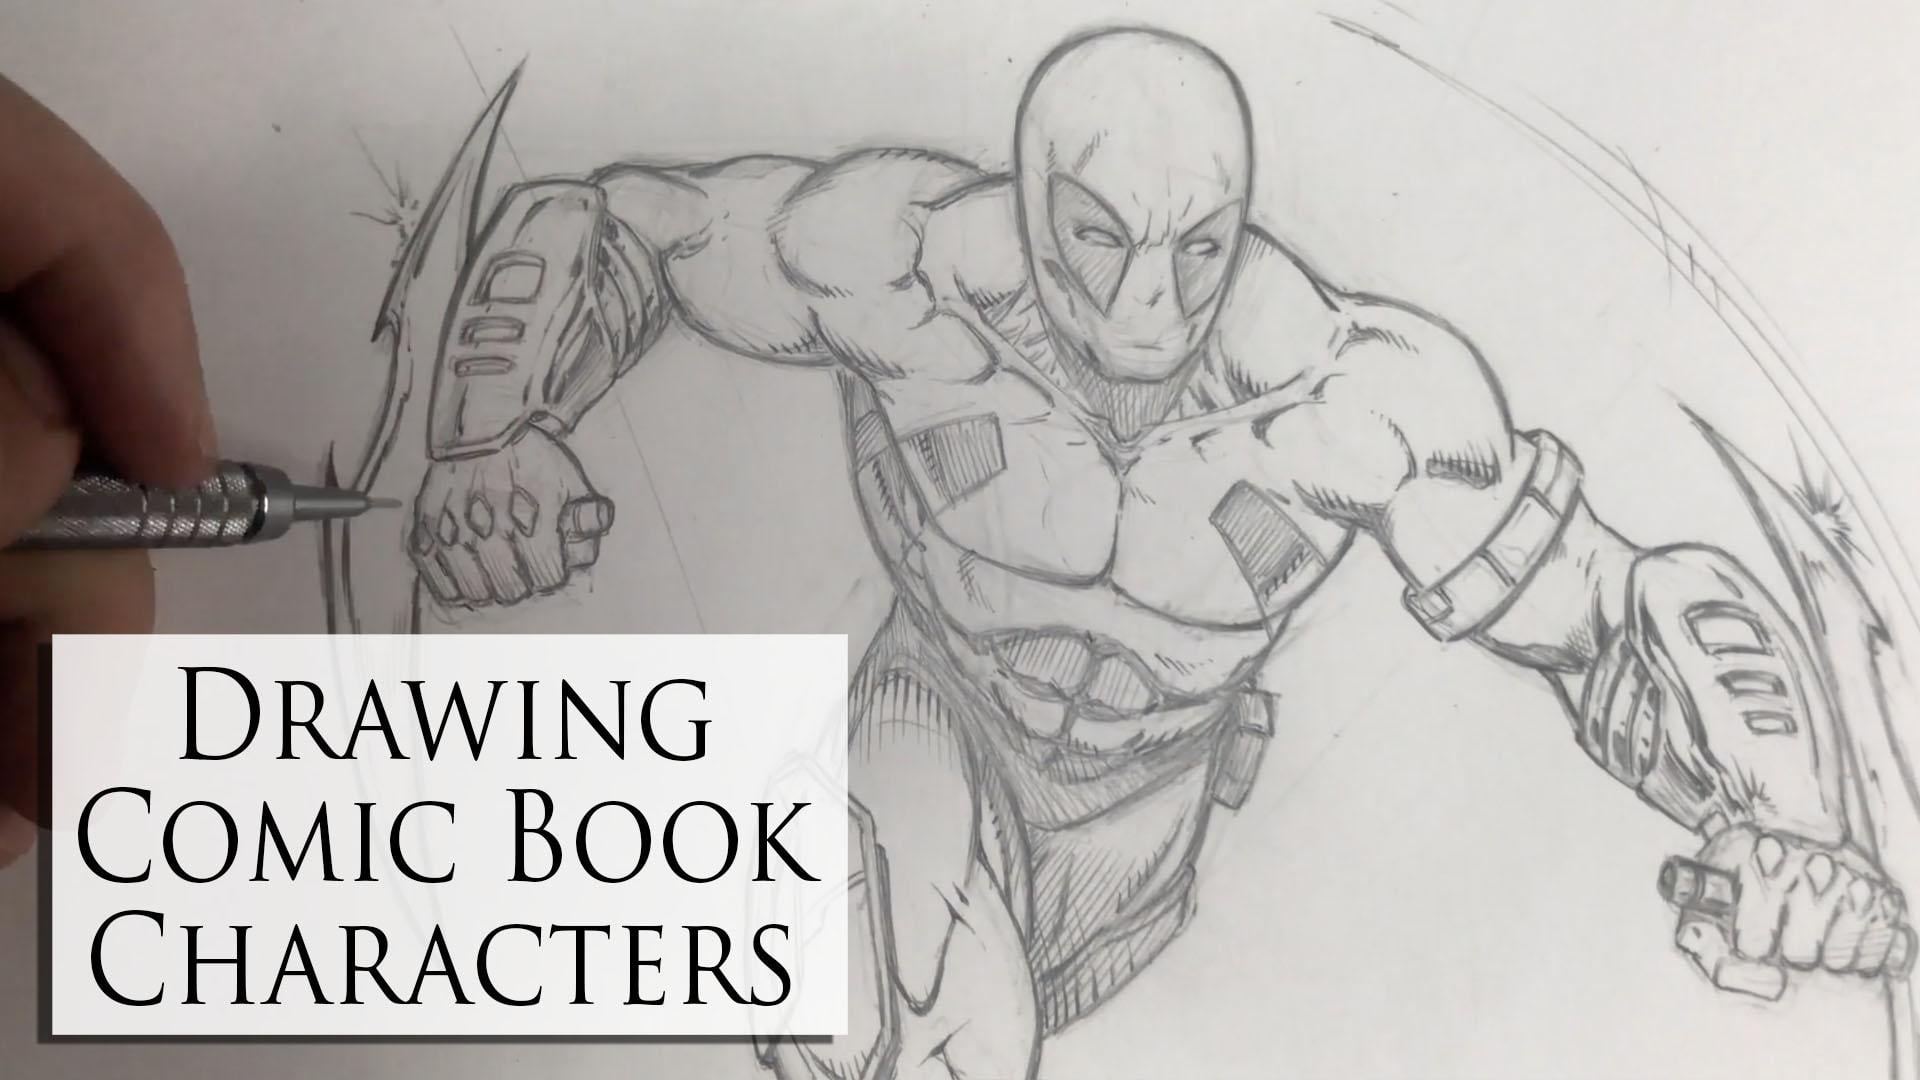
1. Introduction Video: Hello, everyone. My name is Robert Marcelo and welcome to my class drawing account book character from polls to rendering in this classmate of first walking through my process for using a sterile metric approach for developing the body and the three main masses the head tourists, one pelvis. They were going to talk about the benefits of drawing the torso first. This is a really great way to house the information. Everything connects the torso. So if you can practice drawing this in a variety of poses, the rest of the body becomes much easier to draw. Then after that, I want to share with you another practice activity that I like to do and that strong with think it makes you think more deliberately about the lines you're creating and it speeds you up dramatically. The benefits of this are that you're gonna express a lot of ideas on the page and really get to your best idea more quickly. And finally, we're gonna take everything that we learned in this class, and we're gonna create a character. So we're going to rough out opposed, going to show you how to adjust that pose and make changes and then we're going to refine that pose and render it and develop a character for your project file. Create your own character. Try to be inventive and come up with something new and different and just have fun with it . I can't wait to see what you come up with. As always, Keep drawn. Keep em fund and bye for now.
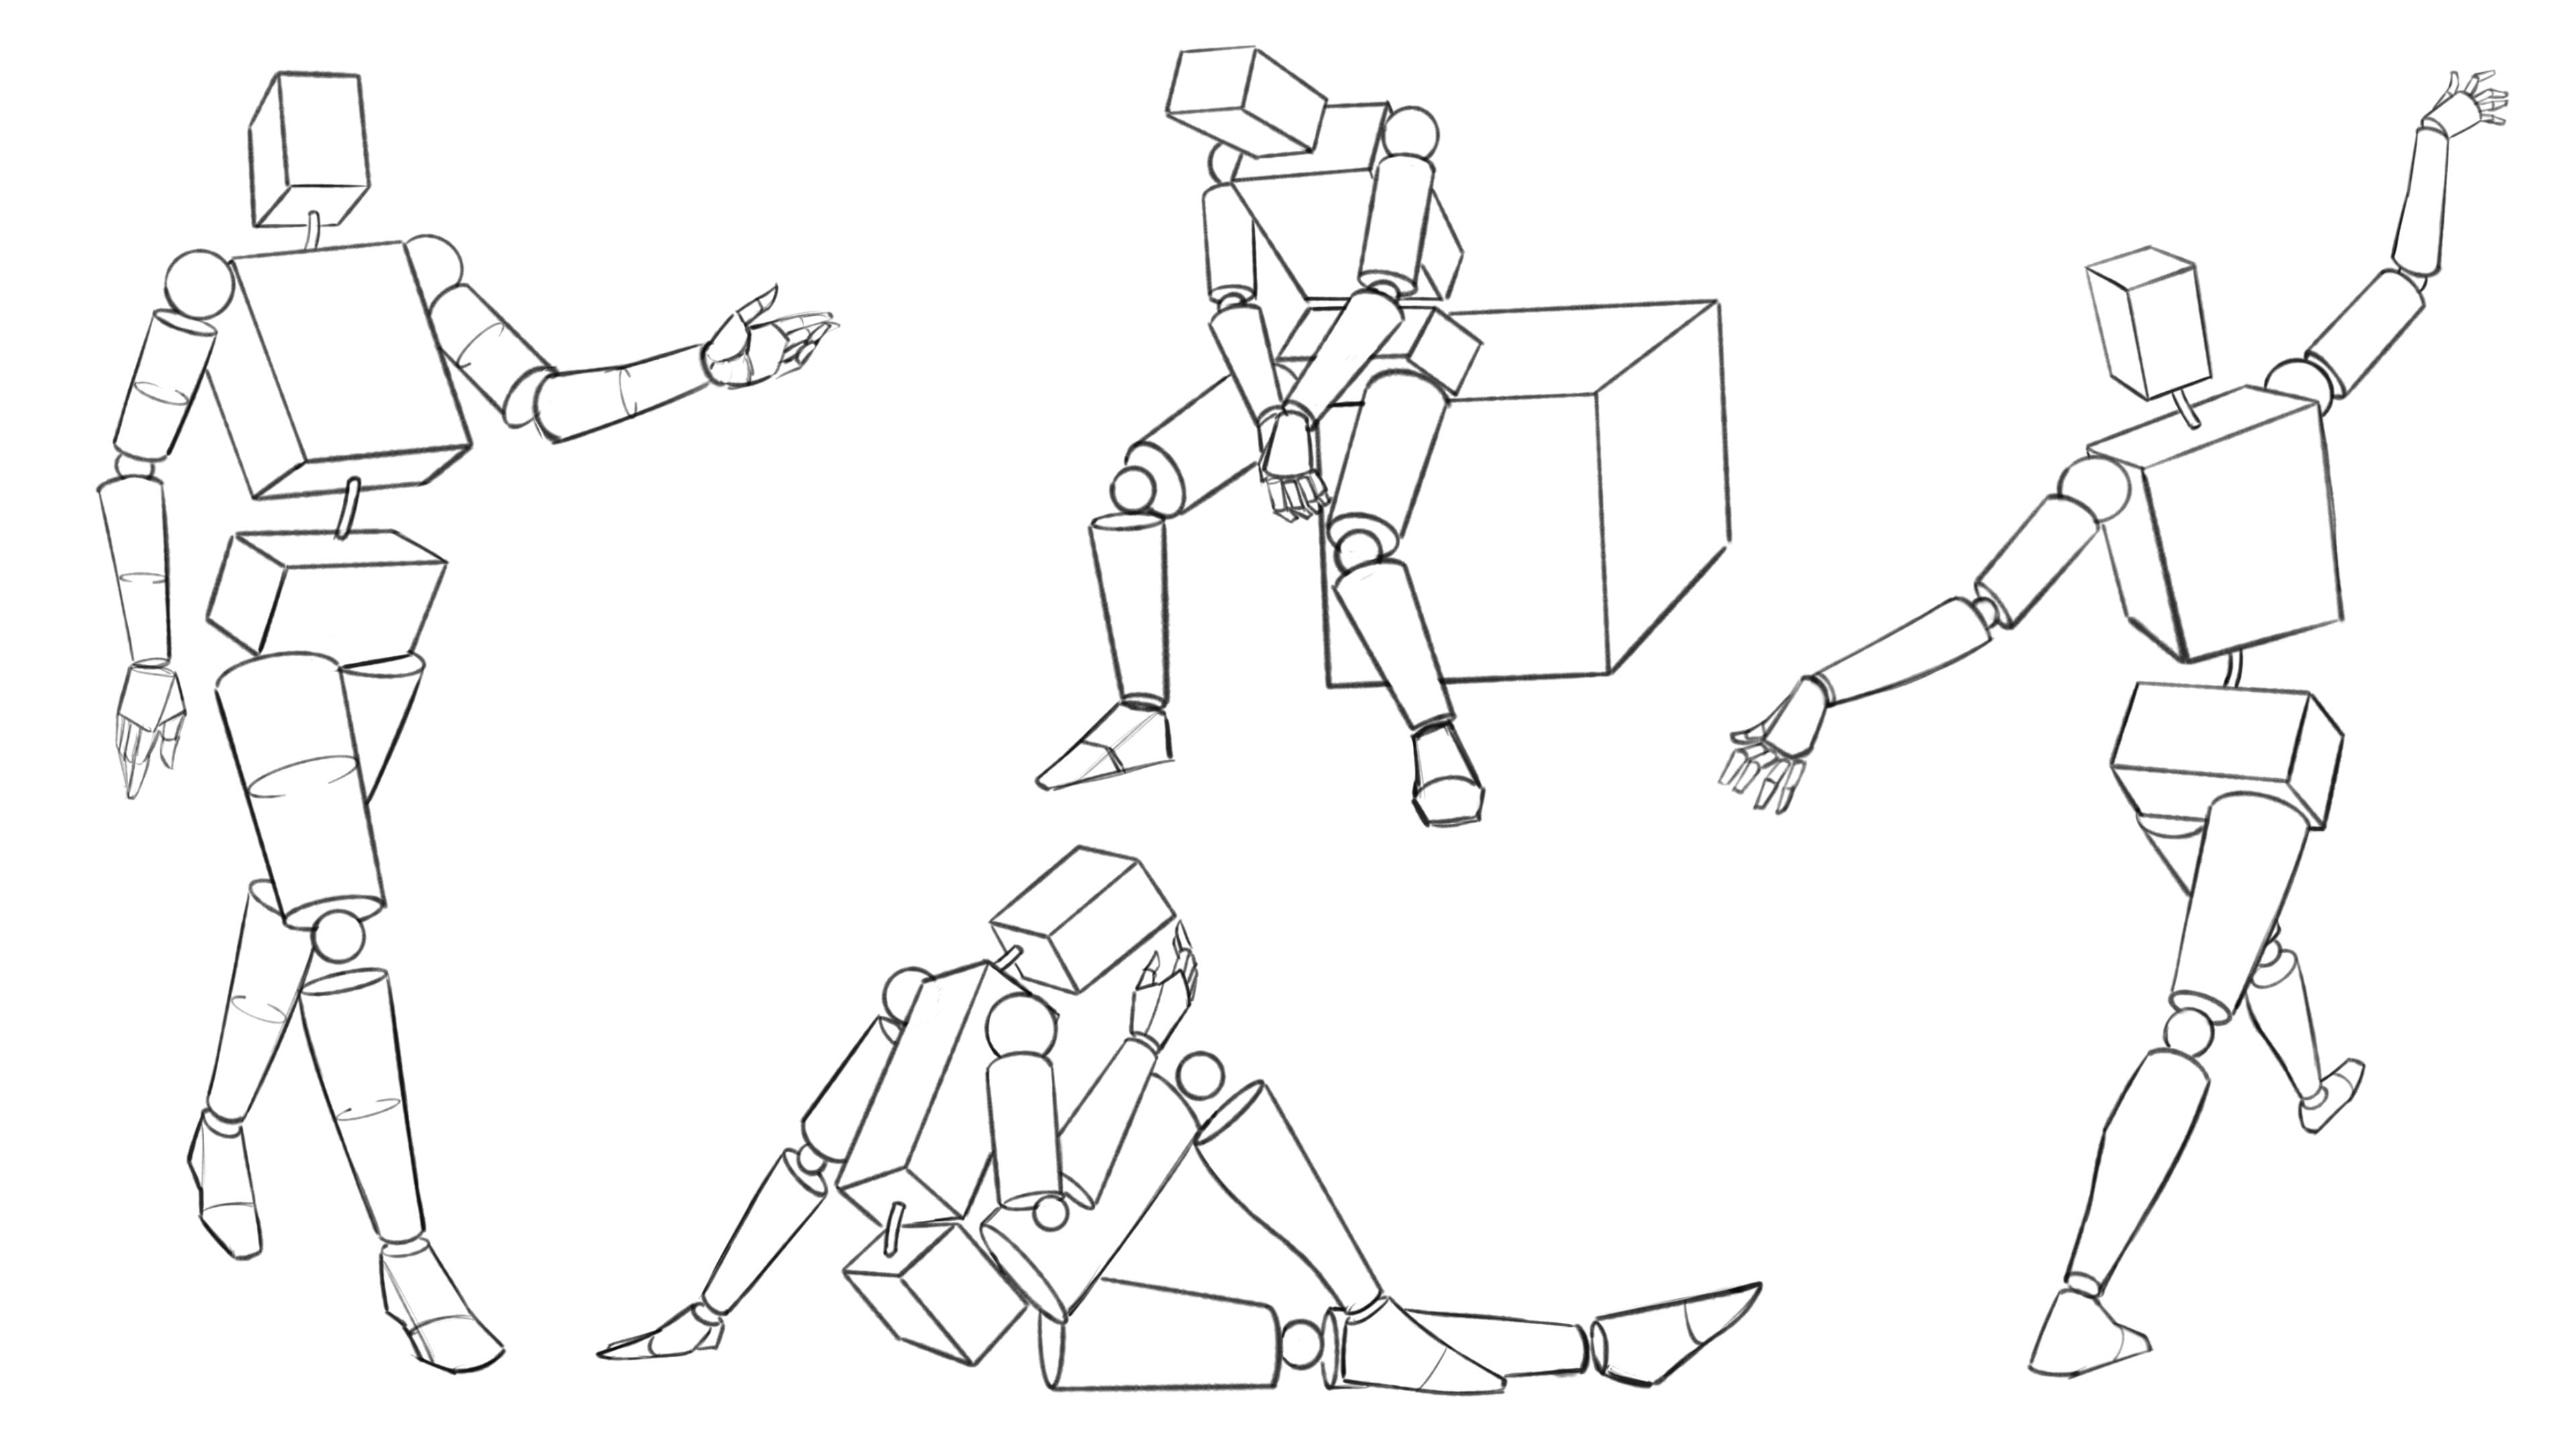
2. Drawing the Body Stereometric Approach: Okay, so now we're gonna talk about opposing the character, and what I want to do is first get you practicing sterile metric views of the body. So what that basically is is drawing the body in a very angular way. So practice drawing, Ah, few cubes, shapes, something like that. And what this is gonna be is that's gonna represent our head to our character and then for the upper body torso. We're going to represent that with something like this. I'm actually gonna do these very straight up and down so I could show you the the difference, but also the power of why this is important. So just like that, we have the three main masses of the body had torso, pelvis. You could connect these with a little line that could be the spine. But the main thing is that you get used to do in this because they allow you to think more perspectively about the body. So I do recommend a lot of times you draw basic perspective to a room or something like that before you start drawing the body. But not everybody wants to do that. A lot of people draw characters over a blank white canvas, obviously, but what you need to pay attention to is that there's different orientations from these areas of the body, and this will help you to see that this will also help you to align the other characteristics, even the anatomy. All that, but mainly proportions. This helps with proportions and perspective. So let's do another example over here. And let's make it look more dynamic. Then this one. No. So let's bring this shape slightly up when shade the bottom just a little bit so you can see the plane change a bit better. And then let's put a little bit of tilt to the tour, so change the orientation. And by orientation, I mean, if you were to draw a center line through each of these, you see that they're angled and oriented differently from one another and then, like flies with the pelvis, even a little bit more of a tilt. Another orientation for this one should actually shift down in a way a little bit. And don't worry about getting the perspective right the first time. Uh, I'm using a to H lead for that reason so that you can draw lightly and redraw over top of it to kind of pinpoint it. But notice that just like this, without twists in the body, we could obviously twists a lot more. Obviously, the head can be a totally different orientation than the torso. The tourists Okun twist pretty decently away from the pelvis. Not a significant amount of. Obviously, if you shift him too much, the character is gonna look broken, but hopefully could see it. This has a little bit more interesting feel where the orientation on these it's pretty close to the same. A little bit of a difference, but not much. We're here. There's a little bit more difference. So let's take this even a step further. Now let's take this and let's draw a line of action. So we're gonna draw a line right like this. So you know, you really want to pay attention to gesture of the body on, draw through supposes from life and pay attention to If you were to draw a line right through the body, where would that go? So a lot of times to be kind of the spine or something, but let's take the same basic drawing method now Let's attach it over the top of that, even though we're working with blocks here, which obviously stiffens up the idea of this line of action. But we're gonna try Teoh still pulled from that. And I know this can seem boring to a lot of people, like, I just want to get in drawing characters. I don't need to draw those boxes and things like that, but this does help. This is, ah, worthwhile practice. You just have to do it long enough to where you start to see the benefit. So just like that, I'm going to see there's a lot more motion going on in stretching of the body. And then let's take this shape here and let's actually bring this. But like this, we're tilting it back, kind of hiding it behind the torso, which shows more perspective. And now it shows that we're looking up at this, and also I'm gonna put the center line over here who these center lines here. So it's almost like a character dancing, you know, when they dance and they look back on one arms extended this way and ones down or whatever the polls might be from here But the main thing I want to show you is look at the difference from obviously from the 1st 1 toe. Third, quite a bit of difference. But it's all housed upon this disability to draw these basic shapes and then look into it a bit further. Look past the primitive shapes and try to try to see into it and constructs imposes. So I want you to practice doing a lot of these. I know again, it seems like it might be a little bit boring, but it's got a lot of benefits on. Then what happens is when you start to do perspective. Drawing this comes in really handy. So see, you have a perspective like this. You're looking up. It's something right? And then you you can't for the life you get all the anatomy and place and the characters just too hard to draw like this. Well, guess what? These boxy drawings translate really well for perspective. So it's very easy to kind of pinpoint with these guidelines where this perspective might be . And this works into three point perspective. You know, one point, obviously. So then you know, again, we want to really be looking up this character. So we start thinking about overlaps. So you're gonna play around with bringing this boxy torso up in front of the face and then likewise, the pelvis. But maybe you want the character walking, so, you know, as we start toe toe walk, we twist that the waste. So you get some of that twist on there. But it's evident even in these boxes, and again, these boxes translate really well into perspective. So now, once you have these center lines figured out, this kind of overlap and all that, it becomes a lot easier to start attaching arms and legs with cylinders. And again, you can keep it even. You could even convert a leg an arm and leg into a box first and then convert to cylinders . Do whatever it takes to feel comfortable with it. Now, as you get better at it, you won't need these primitive shapes. OK, you'll just naturally kind of take the training wheels off and start riding your bike. But in the beginning, it's helpful to do this, and it's also helpful when you think you're more advanced and then all suddenly run into a tough scene. Guess what whenever I have those tough scenes in my comic work, my own straight of work. If I can't figure it out, where do I go? Back, back to the basics. So let's go to the next lesson. Continue to talk about how to draw these poses, and with that, let's move on to our next lesson.
3. Drawing the Torso First: it's the next thing I wanna show you talked about is drawing the body with the torso first . So this is something that I don't always dio. But I think for beginners it probably is very worth noting. And it's probably should start. It makes a lot of sense and the idea that if you start with tourists first, it's the primary largest portion of the body. Eso It helps you to figure out again the gangland proportion or alignment of the rest of the body s. So what I want you to practice here is drawing the tour. So we're gonna skip past the boxy, sterile metric view now. But then I want you to still keep this as a primitive shape of sorts or permanent Siris of shape. So let's do this. We're gonna dio cylinder for the waste where the abdomen will go, and then for the upper torso. It's gonna be really just a big oval, but segmented with line down the middle all the way down like that and then opening for the shoulders. And if the shoulder is hidden, you could do some dotted lines. You could also do that for the neck opening back here. But what I want you to practice doing is drawing this primitive shape. You could do kind of, Ah, you know, pyramid for the rib cage like that, whatever you want to do. But the main thing is that you get this feeling of perspective in your identifying with the torso as a Siris of basic shapes. So I mean, draw through this. So you see a little bit better notice that by doing this cylinder going up, you can even have this other shape connect behind it, and it immediately conveys a little bit more of that perspective. So something like that, No. In the next us when we're gonna attach some arms and legs and we're gonna talk about doing some odd some simplistic poses almost gestural in nature. But again, I want you to practices. So what happens is, you know, you could think about the pectoral muscles being up there, Rip cage here, center line to the body. So let's take this Siris of shapes and let's rotate it. So now we're going to rotated to the side more. We're gonna put the center line on an angle like this. We're gonna put that V or I say it via text in more of a triangle are part of a triangle going up, and we're gonna get the bottom of the stomach area. Remember, that's a cylinder. We just do something like this. And then we bring this shape around and, you know, back here where this line goes around like that, that's basically where the latter Miss Doris about the lattes will go. So you, even though this is very simplistic, it still translates even, you know, to the anatomy the next stage of it. Ah, lot of this stuff is like a relay race. You give yourself a bit of a, you know, hand off to the next stage of the work. Essentially, uh, and again, a center line up higher and the pectoral muscles are now way up there. But again, we've rotated. This created another variation of this torso with basic shapes. And I can't stress how important this is for doing more elaborate, more advanced drawings. Later. Again, you're probably gonna look at this and go, Well, if you think you're more advanced, you're probably gonna look. It doesn't go on pass that I don't need that. But as much as I've been drawing have been drawn for over 20 years. I still see a lot of benefit to doing these types of studies. As I'm showing you now, I feel like I'm learning. So it just goes to show it. So even after all my years, I still do this. OK, so now we've got basically we're looking up in each one of these, okay? And we we've tilted it. So we're kind of stretching our ability, our exercising, our ability to slowly rotate. These were not very different from one another. But now let's take it. Ah, lot further. Let's do it down shot. Let me re Orient paper here and let's go and take this and let's go for a downward shot. So here's this is gonna be the opening to the neck. The pectoral muscles really gonna be pointing downward now. So this has been that was relativity would be straight to the body. But on an angle here, is there gonna be a lot more noticeably a downward bend? It's just how it works. So as we look down upon things, things that already facing down will be down even more significantly. And vice versa. We're looking up. It's something on area like the the rib cage here will be more significantly pointing up now, looking down at it, it's still going to point down, but it's gonna shift. It's not gonna be as evidence and as dramatic. So you just want to play around those concepts. We're not going to see the side of this arms too much. We'll do it. Small oval. Maybe that gets hidden based upon the side of the body might be in front of that on this side. You probably are going to see it. So let's see the opening there. And I say probably because I'm still figuring out this poses. I do this, you know? This is from imagination. It's not on. Obviously, we're looking at reference. We have a lot better. Clue is, too, you know. Would we see this from that? That particular edging perspective or whatever, But we're just figuring this stuff out, and that's okay. You just wanna lie herself to work through it, Seeing to it now Here's the other thing we noticed from right here that if we're looking up at this, we see the line go up. We see this cylinder that represents the lower mid section of the torso or the bottom of the tourists own mid section of the body. And then the latam in stores. He would go behind it from a perspective like this, Right? But now, since we're on top of it looking down, we have to kind of imagine that this bit of information would take precedence. So we're gonna keep talking about overlaps of the body and how that really conveys for showing how that conveys perspective. Um, and how that ultimate will allow you to draw better poses because you're paying attention to these overlaps. So again, this is probably gonna, you know, be more dominant from this viewpoint. Damn Draw through that one more time, a little bit darker. So again, this will probably come in front of here. Tura, muscles, collarbones. But a very simplified version like this would be the trapezius. But obviously the true pieces doesn't just go straight across right. And I do feel like the opening to this arm would either be covered by the torso or very, very narrow. And then on this side, it's gonna be visible, obviously not visible. If there was an armed there, but eso again, We're kind of taking notes as we do this. Uh huh. All right, so now what we got here? We've got one. We were looking downward at it. Seymour, the top are looking up. Uh, what's another good variation to these? Let's try and move this over. Let's try down in a way. So again, we're gonna work down off this and actually, let's do this. Let's try. Let's go back to our stereo metric approach just to get perspective in place, something like that. Kind of an awkward angle to the body. And these tend to be the trickiest for May, so might revert back to this basic starting point of drawing. Ah, block for perspective. So now let's do the opening of the neck that opening the shoulder is gonna be over here somewhere arm, and then the chest is gonna round out for the collar bowl. But it's gonna be probably a little less dramatic from an angle like this around over for the trapezius of the back. But from an angle like this, it's actually probably around. It's gonna be more boat out here and this go around down to the the mid section. So let's attach that cylinder. But it's gonna be very different from a view like this. We're just gonna get the side of that cylinder, Really? Just like that. This is one of those poses where a lot will get omitted from an angle like this. So you gotta figure once you attach ahead, it's gonna cover up a lot of the side of the body. Once you attach arm, it's gonna come up a lot of this side. So this is one of the ones where the anatomy really takes over. But again, it's still helpful to do this and get used to rotating these forms in your mind and on the page so that you can draw character from any conceivable direction because of not, your store will suffer, right. You'll start to, uh, dictate your storytelling by what you can draw. You hold yourself back only be able to tell so many variations within your your posing your characters so your store will suffer and we don't want that. So just like that, got a little bit of that and obviously we could sculpt this further. Looks a bit too wide office upper area of the body, but again, it gets us the alignment. We need to get started on that. So let's try one more now. Obviously, I haven't said male female, but at the same time, this this works with either you're just going to shift the proportions. And so let me show you how I might do one. That's a female character, so I might change the proportions to be skinnier or slim. But it's the same concept, because I'm not drawing anatomy as I'm not gonna attach the breasts or anything like that. But I would draw a little bit thinner. Likewise, if I was to just draw skinny person so I might just bring all these shapes. And maybe, you know, the V is gonna be more evident on then, as we get into drawing me on female, I'm gonna talk to you about the difference that I like to show, which would be mainly curves vs angles. I think that's the the biggest significance. So when I do this tend to soften up the lines and make more or curves for a female character and more angles for male character. But again, in this stage, I'm not worrying too much about that. The only difference here is I would make the overall body type or slender and again bring out with lines a little bit of refinement. Here. Sleep that. Okay, so there you have it. There's drawing the torso first and really practicing a variety now. Actually, you know what? I'm sorry. Gotta squeeze one more in because what we were not doing, you know, apparently, um during all these from the same view, in a sense, and that's the front. We have to practice at least one from the bag. So even though the back is without anatomy is ah, not very different, but the most significant difference I want to show you. Is it the V in the back, even though it's not as evidence of the rib cage is still there. So we actually get a couple of these in the bag, especially to get to the anatomy. But what I want to show you is this way that it dips in good one. So hoping for the arm. And then it kind of points up the trapezius point up in the slope, into the neck. But again, really fighting. That hurts Teoh drop in anatomy. So just like that, you're still going to get this V. But it's not gonna be as evidence, Okay, but it is still there. Eso we'll talk more about that. As we illustrate. Back muscles get a little bit more into the anatomy. They still have a center line is stuff openings that you want to be aware of. Where there, where the orientation of those are in that center line is just gonna have a little bit different curve to it. In fact, it's gonna come down, and then it's gonna have a slope right that lower believe it's referred to his lower lumbar right. Like when you get a good chair, you want to make sure it accommodates that part of your bag s. Oh, yes. So we'll get more into Viet as we talk about the anatomy. But there you go. So that your next practice activity draw lots of these. I know just tons of fun, but it's gonna make you better. So let's do it. So now let's head over to our next lesson and start to draw supposes
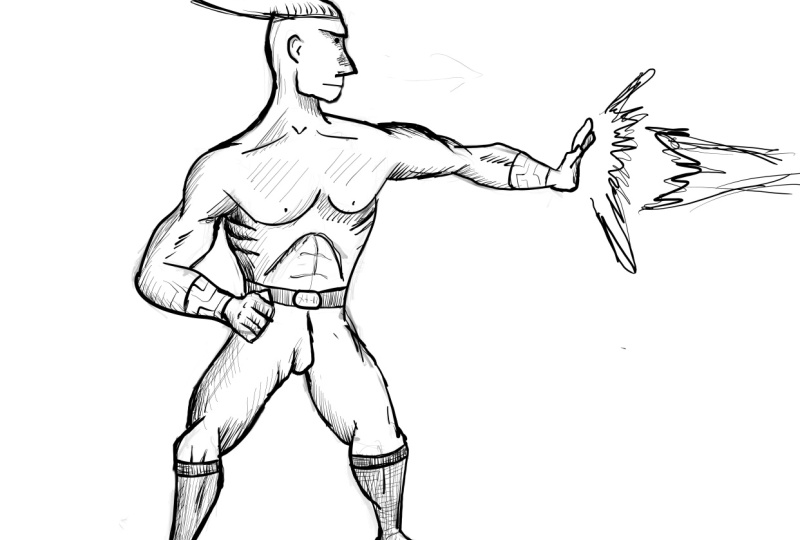
4. Thumbnail Sketching with Ink: All right. So now what? This one. I want to use a micron. You can use whatever you want. Disappoint. 08 micron and I like drawing poses. Or at least expressing some ideas with this doesn't mean that these poses are going to be utilized. They can. If I find a good pose in whatever way that I draw it, I could blow it up. I can elaborate upon it, But what I like about this is it's more immediate, and it forces you to think a little bit more deliberately about your lines. Eso, for instance. Let's start with the torso, and I'll just try to get these in with basic shapes. Center line to the chest. Let's bring in arm up. Not worried about the proportions as much. I mean, I definitely want to try to get him right. But I'm not worried about this being a funny looking pose. Okay, so the head might be small lecture that is small, uh, the, um you know, the proportions of the character might be a bit strange, but what I'm looking for is just to express a lot of ideas and ultimately, just really quickly, so I use a very stylized version of constructing the body. Lots of quick little angles. And just like that, we've opposed must in perfect, but it is opposed. So what I'll do here is just really play around with these concepts So I might throw the character whether leaned over quite a bit. Maybe the arms were together almost like a spider ring kind of polls. Don't you know? A lot of times I will think about the different characters, but I like to draw a zai, do this and pretend that it is that character because it kind of gives me a little bit more of my imagination, sorts of kick in as I do this, Um, even though it's a little hard to read. But that's another post and so on and so forth. So I really think that this is a great way to do it. But just remember, when you go to construct a leg, don't think about the leg is such a complex thing. Get in the lake with some simple, easy to read shapes like this. That's a leg that's a foot. You put a curve here, curve there. That's how the anatomy kind of goes eso you could do a little bit of that. But again, you're thinking very simplistic about it. Which again is just gonna save you a lot of time. And it's gonna light express lots of ideas which aids and not getting frustrated with what you're doing. So even for shortening, you might draw foreshortened pose like a punch center line to the face. The back kind of leaned over, leaning over the punch when I'm kind of hidden coming out from behind the head or the body back there and a really weird fists. But that's again. You just wanna lie yourself to make those mistakes. Maybe a really big twist of the body. Bring this, like, way back. This one back here, foot here. Just very exaggerated. Very fun. And easy. Though I think we're at three minutes or something. We've already done three poses, and that's through the power of this. I mean, imagine you could draw so many poses on that amount of time. Eso then you're you're not afraid to try lots of new and event of things. So here we're gonna do on we're looking way up the torso. We'll do the head kind of hidden behind the body and you will have the arms kind of Oh, like one of those mad with power poses right, their arms up in the air hoping hand expressions, maybe power emanating from their hands So you could draw on some cheesy little powers and the legs could be kind of overly wide because still establish your lengths. Even with doing this type of drawing, you're just going to it's going to appear a little more scribbling, but it's not a big deal, because again, you're not trying to This isn't something you're necessarily going to show off to a bunch. I guess you could chilies often sharing with your fellow our buddies. But at the same time, this is more for you. This is for you to work through these concepts. You could have a keep flowing in the wind, and again, you're just gonna drop very simplistic. So this is what I call or what often is referred to his thumbnail sketching. They're a little bit bigger than what I would do for thumbnails, but, uh, but you could do it any size, and you could do full scenes like this. So you draw what would be proportionate to 11 by 17. That's generally what I work on for comics, and you're going to draw your scenes were like, Character comes in and there got the mad face that the downward tilted head from something like this and, you know, motion lines buying because they are directional lines, energy lines. What? I'm gonna calm in the character. You know, you close up on their fists, clenching kind of tightly together. You see their forms, their biceps, their waists. But it's a tight shot of just their hands and maybe power coming off their hands. Okay, so there's those couple close up shots. Maybe you pan back to take in the scene. Generally, you start with an establishing shot. But maybe you pan back and you take in the scene of these characters and where they're at in orientation one another, because we're getting ready to fight. So you really wanna hit at home is to where they're at. So you show that give just enough information, because again, you got to remember, this is for you. So you get just enough information of the setting, you know? Where's their Where is their table? Is there other people in the room in a very loose, very gestural, energetic. That's what you want to worry about. Then the character throws a power punch at the other. Another one ducks. OK, so we get into here and we okay, this character throws a massive punch radiating with power. There's that fist arm. There's the power and energy coming off of it cuts through the air. All right back here, body kind of hidden one, like coming up one like back. So very over exaggerated pose. This character just steps back. It's another there. Lean back and looking at the character of the power just how they barely missed the the impact. Okay, But just like that, we roughed out a whole page and again that these poses that page still only at about seven minutes into this video. So that's really the power of this. But again, you have to think in terms off simplistic shapes and maneuvering your characters and letting imperfection be inside of the work. You know, perfection, for one isn't riel. It's doesn't apply to comics. And so what happens is, or anything in life, really. But But what happens is let your in perfect or your failures. If you want to call him that, lead you to the right Choices sculpt. You are direct you to the right choices because you want to essentially play around all these concepts is just like this power punch here, which I kind of like this. Actually, it's if the arm was coming out like this, the sexually reads pretty well to me. Hope we can see that I would actually probably use that again. As simple as that is, it works and I could see it a small that is. Hopefully you can, too, so that I might take that and bring it over here and just kind of double check and say, Well, can I make that work larger? And maybe I go to make it work larger, and maybe I lose some of that energy. In fact, that's something I tend to notice with my own drawings. If I if I mess up, I can take a good sketch and actually drain the energy out of it. So I got to really be careful of that. That's why a lot of times drawing them smaller and then blowing them up whether or not you're working digitally or using a light table. Whatever you got is really a great way to do it because you can retain that energy. Hopefully, we have to make sure of is when you go to refine these sketches that you use quick, sweeping lines, flowing lines. Ah, a lot of times artists will throw lines just for that reason. It's when you stop and you trade him. Really, Um, re sculpt line. I don't want to re sculpted when you really try to over draw the line over, work it, tighten it up too much will say that you tighten up the work too much. You can really lose that energy and see, even from here to here, I lost a little bit. I think that over hyper extended arm actually works better. We're here. I started to try to draw out what I thought would look a little bit more realistic. And again, I think that's another thing that happens as we draw larger. We tend Teoh, try to over correct things, but we have Teoh again. We want to keep that energy, so I think it would actually be better off the armrest further back. But I still to me like the pose. And I could throw into motion lines. Faction impacts, you know, whatever they're hitting, generally they're gonna swing past the impact, by the way. Yeah, just like that. That's the power off, sketching thumbnails. And again, they're not perfect. They're not meant to be. But they will allow you to express a lot of ideas quickly and ultimately settle on something you like. So with that, let's move on to our next lesson.
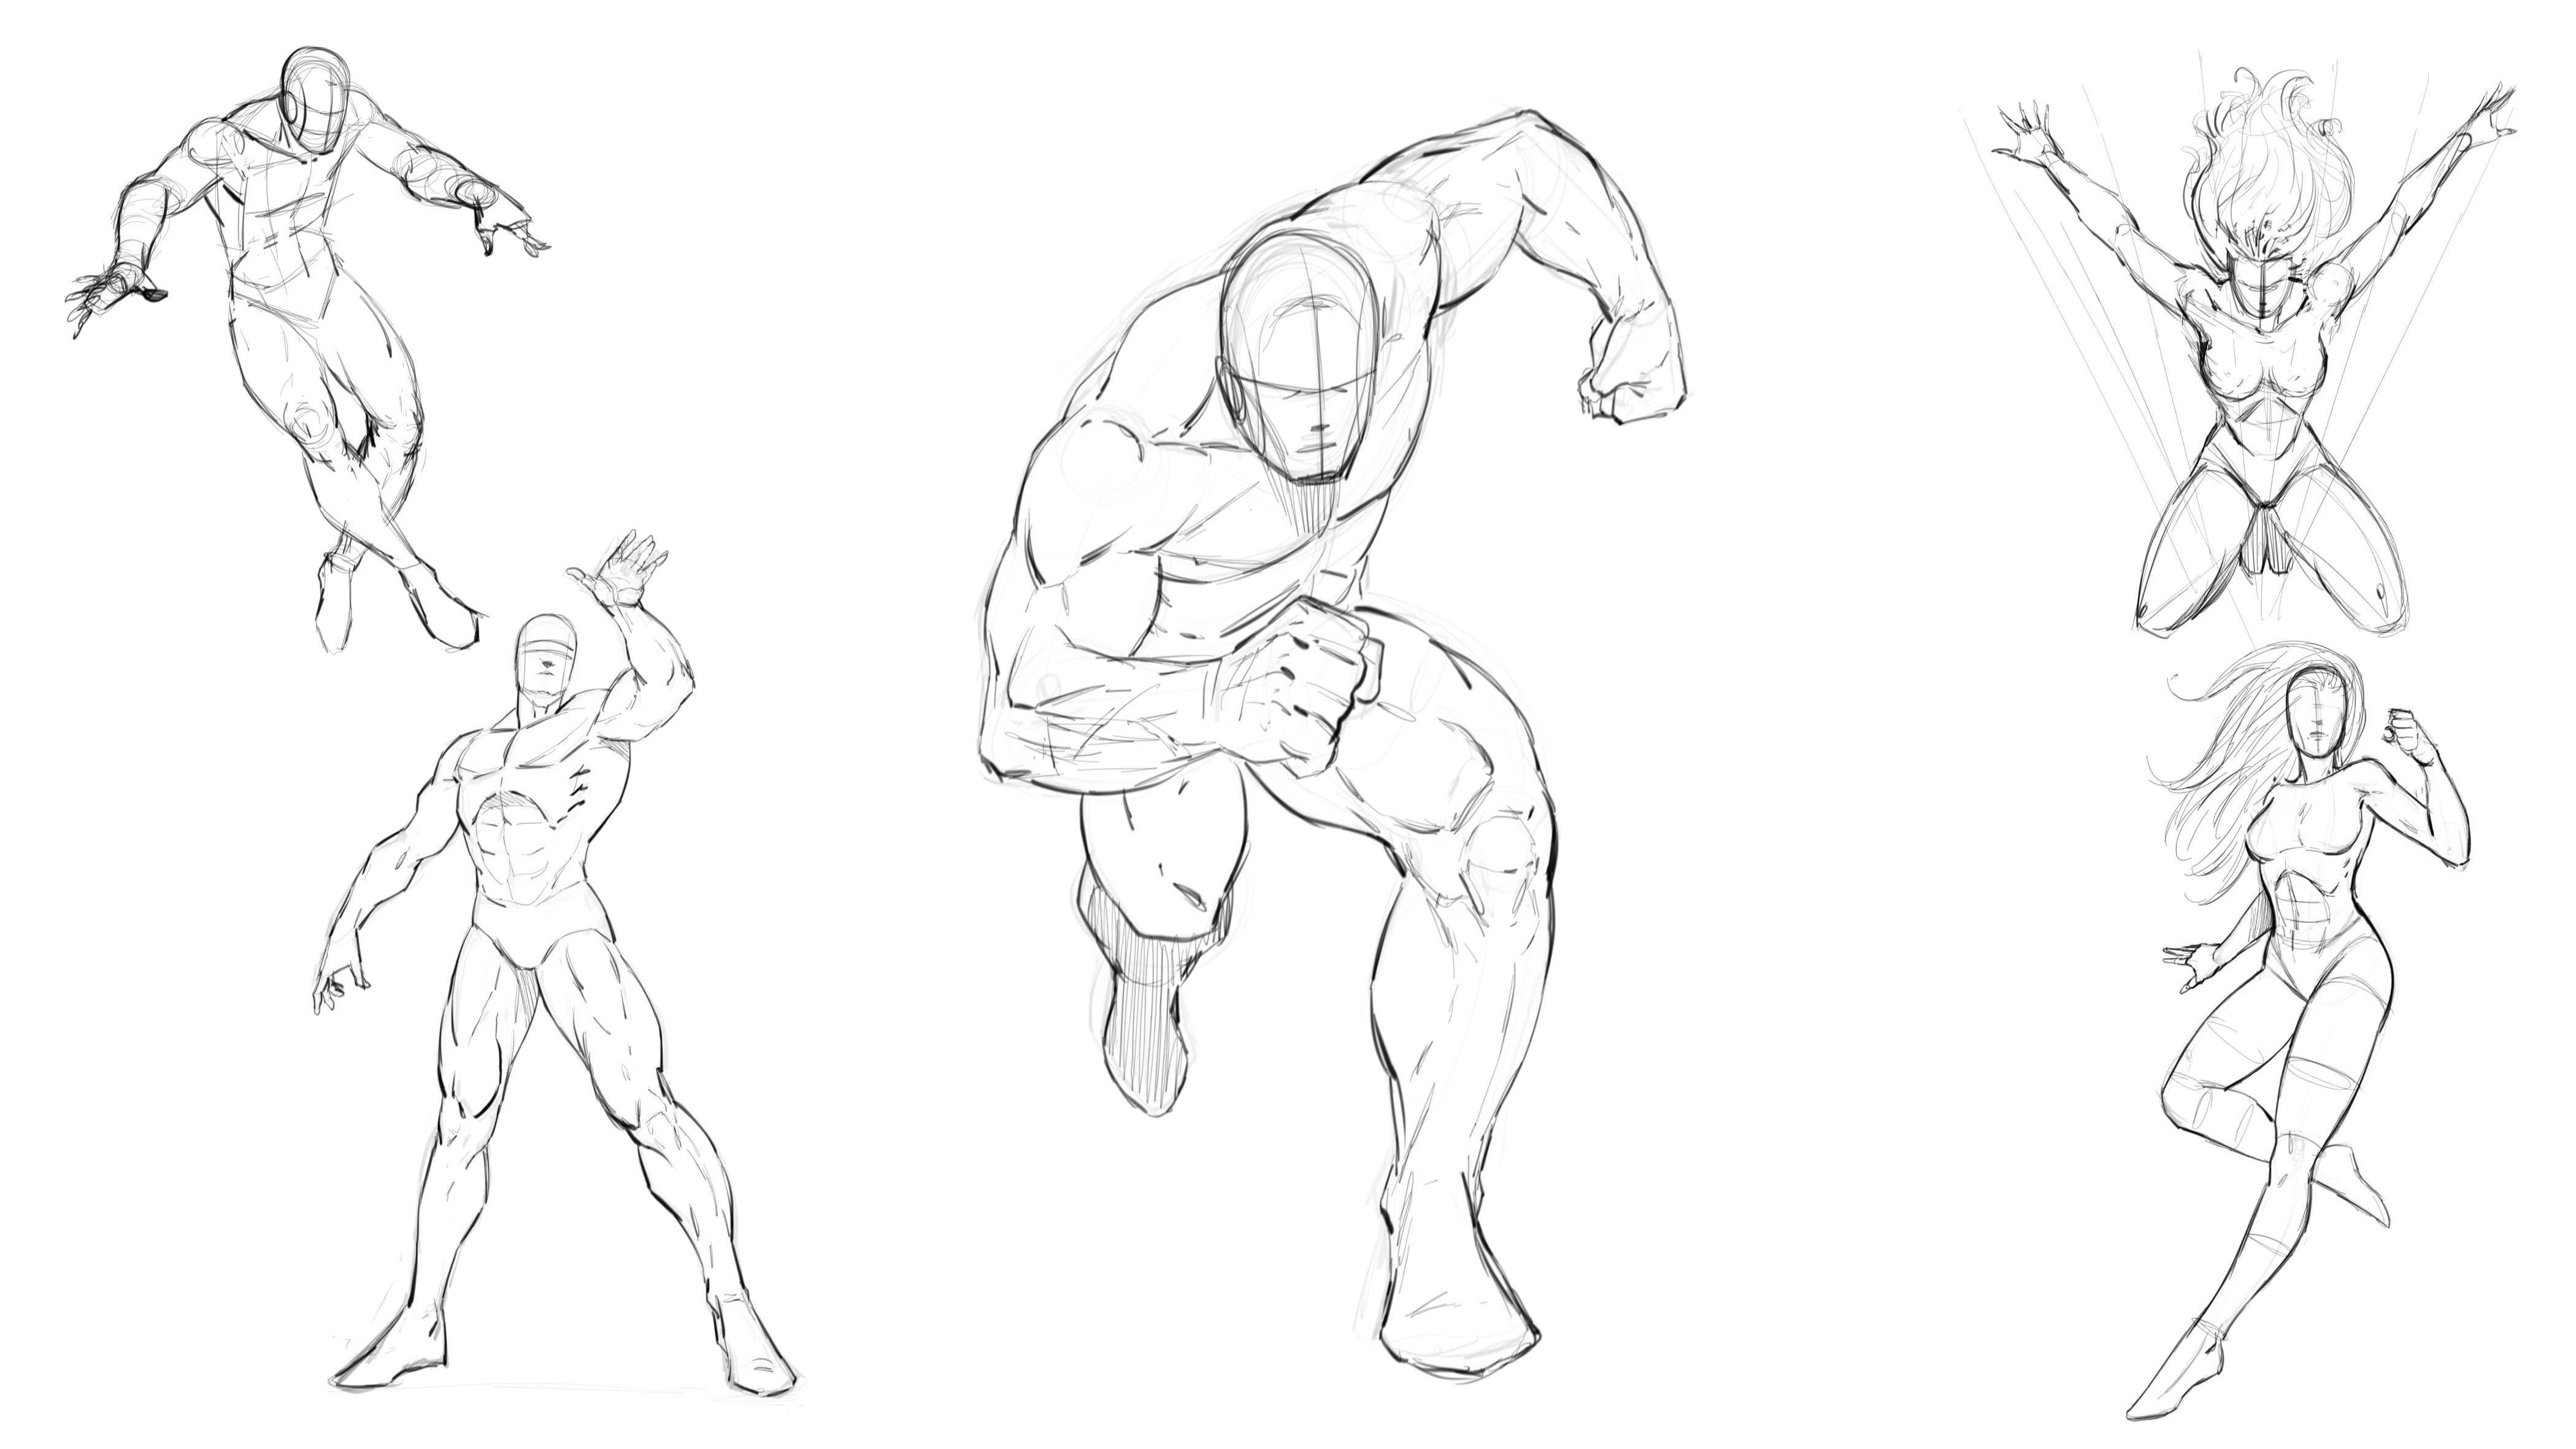
5. Sketching a Pose for Our Character: All right, Welcome back. So now we're gonna construct, oppose in detail. It kind of use everything we've already talked about. Put it all together into an example. And I really like that leaned over polls. I, like, leaned over poses anyways, because while they make it feel like the characters popping off the the canvas, it's it's usually really great for action and dynamics. So I'm gonna start with the head here. I know a lot of the other areas. It was something about starting with the torso, but for leaned over poses. A lot of times I will start with the head just because it's the closest thing the camera I seem to wall besides the arm which will be coming out. But I kind of need to start still in the middle of the body. Now draw a line across and I want that angle for the way the shoulders we're going to set and one shoulder will be lower closer. When will be further back on. Then we could do a V for the collarbones. And remember, we can use this lightning bolt kind of a fact to get the arm coming out towards camera and really remember the way the direction of the arm goes and see the neck comes down to a V, but this torso, we're gonna receive this information into space. Remember, a downward curve will beam or significant in the way that it's downward shows is the downward bend and, well, w there for the rib cage when we say that V for the middle. But it's really like a W. If you kind of connected all together like that, keep in mind, we're gonna move this head around. Looks pretty weird right there. Might even tilt it more, but just a starting point. And let's attach the waste We know here's where it usually gets tricky because we have to think about, ah, perspective like this. Okay, um, so it's e think a big problem that I always feel myself doing is trying to draw everything . So the rib, Kate's waste the hips and I feel like I want to force it all in there. The tricky part or the trick to it, really is to omit a lot of that information and be okay with hiding good parts of that information. Tucking it behind. I noticed the rib cage is really like right here. And I got to be okay with bringing that waste of the hips way up there. So it's like the hips are connected to the the rib cage. And, you know, we know by that old school song, whatever. It's not that way. All right, Have bone's connected to the label. So at any rate, just keep that in mind. You're gonna really stack this information, and that means omitting and hiding. So we're gonna hopefully I'm gonna explain more of these overlaps to you because it's a big part of making something look foreshortened. I want to bring this like up, but we have to keep in mind that work connects to the, uh, both pelvis here that it's gonna be relatively thin. But as it comes towards camera, we want exaggerate that you want a widen it out. So if we were to draw this off to the side, we know that we typically would go kind of thicker to thinner as it comes down to the knee . But here, we gotta fight that urge, and we got to go back the other way. If we want to create the illusion of four shortening for this, The shot. And then with this leg, we want to bring this down. That makes you just gonna hide this behind the other leg. Kind of like that. Sometimes you could make the argument that you'd see the foot over here are down here. You draw through, obviously, but sometimes it is gonna get hidden. If the leg is receding into space far enough on, I think it just looks more interesting for the shot. So again, this is probably even worse style in no creative thinking, I guess kind of outweighs actuality. Eso No what? The arm will bring this forward. Bring this in front off. So again, we want to think if I was to break these shapes down, I'm kind of thinking of a thin cylinder here. Two big kind of football shapes that are sitting on each side of that cylinder, one on top, one below football shape for the oval for the bicep, triangular shaped wedge shape for the tricep. So it's it's a connecting of these shapes, but again, the overlap and we'll talk about that as we detail this cause. That's kind of jumping the gun and doing anatomy, But Sometimes you're gonna want to think about those shapes as you go in there. Um, you know, because if you do think about everything is just stacking cylinders, it tends to flatten it out. So, um, but it's a great way to get started if you're not comfortable with thes thes other shapes yet, So we'll just attach a fist there that could be a wrecked a series of rectangles, really? And this one, we're gonna tuck it back. So once you get back here, the shoulder starts to round over the other way. So you get kind of like the trapezius comes down here, shoulders over here so you don't really have to draw full circle is what I'm getting at. Um, so let's go ahead and kind of received that into space a little bit. And let's figure out where we want this ago. I kind of want the effect that the upper arm keep in mind. You can add perspective lines for each part of the body. OK, so you could go like this and picture what this looks like receding into space to a vanishing point. If you had Teoh, but really just the directional lines are good enough. And then if this was to come out this way, if it's parallel to our view than these lines stay parallel and ultimately the form stays parallel in the sense all the anatomy in the shape of the forum doesn't get bigger. A smaller stays parallel to our views, so it just draw side view. Or you could say, Well, I want this to come back out towards camera. You change the opening to the wrist. You would change the overlap here, and then you'd have to connect the fist in front of the rest so that again it looks like it's coming back and then forward. So just remember, you can use perspective on any portion of the body, or if you don't need that, you know, we can just do without. But that's basically how you can simplify it again. All right, just like that, we've got our polls. We could think about the cross sections of the three main masses had torso, pelvis try to orient him a little bit differently, but they're pretty close to the same. The faces tilted up more than the chest, the chest. We really want to show. That's pointed down. Uh, it'll make this leaned over polls more dramatic and more effective. So just like that, we have our basic pose. So now what we're gonna do will stop here. We'll head over to the next lesson and continue to bring this together. So with that, let's move on.
6. Adding the Anatomy to Our Character: Now let's go and take this and chisel out the forms a bit more. Somebody's my kneaded eraser number. You want to really stretch these? How to kind of clean them so often a mom and for memento whatever shape you deem worthy. Okay, so just gonna lightly glance across is soften up the lines. However far you feel you need to. I like to push him back toe where they're not obstructive to my process. I also like to software a s'more on areas that just or not feeling right so that they don't become distracting when I go. Teoh fixem always seems a very versatile love. The soft erasers, kneaded erasers. Eso No, I'm switching to my HP lead and I was actually isn't a to h two initially sketches. Um, the nice thing about slowly working up to your darker ladders, you keep your board a little bit cleaner. Eso what I'm gonna do. I'm still exploring the anatomy and trying to figure out what I want to see here. I've got a little bit better idea, obviously, because I've puts himself on the page here, but now I'm sculpting it and trying to refined it a bit more. So what? I want to really pay attention to her. These overlaps that will help me to make this look convincing that it's ah, foreshortened So But there's certain things that are just gonna come into in front off. So, for instance, the forum here he's coming towards us. Okay, but the portion were it connects with the bicep. I feel like the biceps still needs to go in front of it a little bit. Now the more extreme the forearm gets in front of the upper arm them or that I'm gonna feel the urge to just kind of go like this and you'll see some styles. I'll show you both ways. You'll see some styles where they would do something like this. Uh, just because it looks more for short, it shows that the farms coming towards us, the more that this goes in front off the bicep, well, they're not use a stylized the anatomy. Or maybe they have ah specific way that their armors designed. So, for instance, if you were to have somebody had gauntlets, then it would probably make sense that it would look more like this. Okay, And again, that's gonna look more like a for sure imposed, but with anatomy to me anyways. And this could just be a style choice of my own. You're going to see the bicep cut into the form, and then this portion of the arm is going to be more defined and take precedence and, you know, kind of overlap that way. And also, you might want to show the rest, come back and fade into the muscle like this. So all sorts of ways, you really do that So again, you're gonna want to really pay attention is overlaps. It's gonna make make or break your heart or make it, you know, look like it's coming off the page of it better if you get those just right. But it's paying attention to anatomy. And then again, you know, you're gonna have tricky areas like this. OK, so here's the shoulder in front of the chest. You know, you might have the urge to go like this in a while. The the chest is gonna connect and go in front of it like that. And it is, um, you know, for the most part. But once the arm comes up so far again, it's going to start to poke in front of that in the muscles, gonna connect back this way. So you just have to play around with these these areas of the body and again, some of it's just gonna be style choices. It doesn't all have to be correct. Lots of styles out there very popular styles where the anatomy's extremely far from cried. And so it's just, uh you definitely don't want to hide behind that fact. But because you want to study your anatomy, you want to get better. But but keep in mind that ultimately we are creating imaginative characters, and you do have some a little room for error there. So where's the collarbones? Get those in these actually come up over the muscles, stretch and pull away from there. So do something bad. And you see, I'll keep nudging these around just again, trying to find these shapes, uh, and come back here and get this fist on there. So the fist actually like to draw these old diamonds, the knuckles, Rome them over and then the hand is somewhat rectangular, but not entirely, uh, again, this could be style choices because some people drove the hands very rectangular, but I like to think about how they they squeezed together. So the knuckles here are tighter than the knuckles up here, and then we can issues a couple rectangles to get the transition of a thumb is that pokes out, comes up and then the thumb usually meets right about the middle of the second finger somewhere in there, and then have this go back kind of perspectively, almost like the lines go back and meet the rest and want me to play around with the the size of that fist right there. But that's kind of how I work through it. Kit. Get the start of the fist, and I might just some of the distance that I have here. So it's another way to play around with Something is actually just the distance from the connection point eso. If you get too much rest here, it looks kind of funny. You needed to redraw the hand and bring it back or again. You can extend some of this anatomy and sometimes bridged the gap a little bit because we got to remember that it's somewhat foreshortened, but I actually feel like I need to bring that handbag. Yeah, just looks kind of awkward. Let's try that again. And I feel like I might want to hide the rest. That's another way to do it. Actually had the wrist behind. The connection of the fist can kind of compress ALS knuckles together around him over a little bit, just slowly moving these shapes around. I think that's a better software, a sad and try to bring out these shapes one more time. Let me just shift this. I feel like it's tilted in too much. E think that looks better. And I do this a lot, in fact, that probably draw hands 2 to 3 times every time or in this case of fist, but of the hand has a fist. But it's just kind of the nature of it. For me, There's certain things that I'm able to draw more quickly, and there's other things. I feel like I need to refine them a bit. Final shapes in the hand is definitely one of those areas where it just always a bit harder than the rest of the body. The stage. I can kind of get in here and correct some of this OK, And now let's go ahead and work over here with this Here. I want this really stretch Pull away from the chest and this is definitely going toe Brownback and over attach the bias up here can If I want this harm to come forward, I'm going to create the overlap in front of the bias up here and attached the fists over here. Here. The abdomen, stomach. Most of them have those compressed downward. Like this pelvis is gonna get smaller and tucked under information from behind it. Then I'm gonna bring this, like out, and here you're probably going to see a little bit of the side of the leg. Direct this for Morris is gonna get predominant past this media Alice, look over here from the curve. This information best this latter. Alice, over here. And then the knee gets relatively squared off from a angle like this. Or view like this. My dad from this side of the leg, we're going to get a little bit of that anatomy. But then we're just gonna probably just paid that right off. Appreciate that down. Remember, knuckles are curved for a break there. I want to shift this might wanna bring that bicep in front and feel like that Looks more natural. Okay. And just like that, we're starting to get all the anatomy in place. No. For the head kind of work. With what? We've got their start to sculpt this a little bit more. Keep the jawline pretty, uh, rectangular for no. So basically, the head is just a rectangle with a spirit, the top in a wedge at the bottom. So he needed to break this down further. But you also want to start thinking about the plane changes, who kind of get these flatter sides to this area and then also these kind of shifts in the almost Look at this like it's from the cheek. You know what year would be back here? So from the cheekbone down to the chin or the top of the air down to the chin, you get this, This little line again. This is more of a plane change. So we've got a front plan to the phase like this side planes. Then we'll kind of elaborate from there. You also want to pay attention to your silhouettes, so get used to look at the silhouettes of an arm, upper arm shoulder and you can correct some things that way as well is by noticing a Teoh flaw in this little wet were actually really good at spotting silhouettes for some reason, good or bad without, I want to say it's more subconscious, so you have to consciously try to think about it. Pay attention, those areas of the body or anything. Really? Okay, so now there we go. We've got a little bit better representation of the anatomy, so let's wouldn't stop here. We're gonna head over to the next lesson and give this character some characteristics and see if we come up with. So with that, let's move on.
7. Adding the Suit Design to Our Character: All right, So now let's work on some suit designs. This is always fun. And, um, let's put like a gloves here. So one of things I really like about suit designs is that they help you correct the perspective and anatomy issues. They're just they're very powerful for sculpting the character. And then also, they just obviously make care to look so much more interesting. So another worse than a boring suit design. So I'll try not to have a boring suit design. But the tricky thing about this as well is that so much has been done. It's kind of hard to be inventive, but we'll try. We'll do our best. So I'm just gonna throw in some basic shapes just to kind of get started. Also, like the fact that when you do this, you you're able to really bring out these tones of your character, so rendering certain materials darker versus lighter, it really breaks up the the design of a character and makes it a lot more interesting to look at. Also, let's get into some of the face attributes so eyes a good trick for these is to just, you know, put him halfway down from the face and then from there halfway down would roughly be the nose. And they need to buy this last part in tow. Three quadrants or three questions. Three sections. Forgive me 12 and three, and that will give you the placement of the top left. Bottom of this character isn't gonna have lips, but I just want to show you that's how you do it. You align the top lip to that first section bottom lip to this section at last section. Church in the mouth is a little bit closer to the knows that it is to the chin, and that's basically how you map out the face. Obviously, there's more that goes under thin that, but I just want to give you a quick recap on them. You know, we already talked about that in the other lessons. Now, another thing that you can do with the eyes and I see a lot of people do this, and I've been doing this more actually, but you can draw these little egg shapes, so you start with line through the middle. When you put these little egg shapes in place and what happens is it generally gives you a better three dimensional representation of your eye sockets. And so it's It's funny how little sketch lines like that can make a really big difference as you work up on it. Main thing is, you want to really get the spacing of your eyes. Correct if they're too close together, just makes the characters look kind of silly. Uh, and then if their eyes were too big, it makes him look a bit like a doll or non threatening typically things with big eyes or a little less threatening. So if you want to make your characters like more threatening, you're giving these tiny little eyes. Generally, Um, I think it relates to our our knowledge of our instincts of what What's a predator and what's not. Generally things with smaller eyes, more predatory all and also can make a character look bigger by giving them smaller eyes. So there's that size relationships as well, so no, let's do. Let's see what we give us character for a mask like these shapes like this, too. Everybody is wearing. He's kind of eyepieces, all the cool characters, right? So let's let's give these designed kind of I pieces like this and let's go a little bit further instead of just a suit design. Now let's add some kind of pieces to the character. So could it be here? Let's try. Well, it's it was traced center centerpiece to the chest. Maybe some kind off annual it or something like that. Uh, that looks a little too much like Karen Man or somebody. We don't want that. And again, this is that part where it's like luck coming up the original things about the character because so much has been done. But let's try some on some more tiki kind of gauntlets. I could be farm toe Leadsom designed to those. We could make it asymmetrical. So if you feel like the characters too boring just to one side, definitely there's there's no right or wrong to this. I think the main thing is that you just try to be inventive with it, Uh, and you do want it to relate while to the Earth character concept offices. So that's probably the only rules. But it should make sense with the narrative of the character. Now, in this case, we're going design first, um, most the time, not all the time. You're going to be going in with an actual script to the character. You're gonna go off of that. But this one, we're just kind of having fun exploring the drying process. Okay, then I think with he's weaken, do some segmentation. You know, maybe these kind of shoot out some different weapons or something like that, or explosives or whatever it might be. So we'll have some openings here. Andi, I know about a utility belt. I don't think so. Just a small separation of a couple little attachments on the side. It's hard because utility belts are nice and the idea sense of, you know, making the character more like he's got more tricks up his sleeve. So they're great in that way. Um, but then I kind of I don't like what they do to the characters silhouette personally, but but again, you really want them to have a lot of options for you know, what they can do in a in a fight. That's one of the neat things about a character like Batman is because he's always got all those different gizmos. And just when you think he's backed into a corner he can push him out of his utility belt and when the fight. Okay, so there's that and let's see what he needs. Needs more. We could do a band on the arm, and this could have some little attachments to it as well, so it looks like you could pull a couple of things from there. Gennett also breaks up the character a little bit more on, and I really don't want to give him a cape. So kind of fighting that urge. I don't feel like he's a caped crusader. We could also run some other lines parallel to this design. Trying that out. This could actually be raised off the body is Whoa. This could be another kind of mechanical attachment. Or maybe just protective padding that on both sides little wrinkles off the suit, sign, weaken. Kind of add those everywhere. Obviously, as we detail this character and it feels like he's kind of holding on to something, Lett's going to give him some pretty neat weapons. I'm kind of thinking like these Sarge Blades that he holds onto the Yeah , I think that's kind of fun. Anything about those we could I had some cool little glare lines off when they could be like these big, shiny chrome blades or whatever but, you know, bad that need kind of effect. That way, we could also get very inventive with shape of these and do all sorts of crazy, jagged edges, whatever we want toe whatever we want to do there. Yes, I'll keep trying to just that. But so now we've got a suit designed on What we're going to do now is get into rendering this and I'm gonna time lapse this because it's gonna be ah, little redundant as faras, you know, it's gonna take everything that we have here, and I'm just gonna tighten it up so I'll just talk about that as I do the process. But I'll have a areas of the character that are dark here. Is that our light? He tried to bring out this this to tone effect on also obviously rendering out the different materials that air speculator things like that. So with that, let's head over to our next lesson and refine this character
8. Rendering the Surfaces of Our Character: Okay, so now we're gonna soft to raise this back and all the information is there all the wines that they're Obviously you could really just jump over and start thinking something like this. There's times I will do that, but it's Ah, there's other times I like to really see how clean I can get the line work, and I still feel there's a few rough areas and I'm not entirely set in stone on the entire concept either. So sometimes I find that when I refined my character, I might find flaws that ultimately make me want to change the design. Or in this case, another thing is, there's too much resemblance of this character and other characters. Now, for the sake of just teaching these lessons, I just wanted to show you how it worked through something. But another integral part is really showing this to other people, whether it be people in your team or even social media sharing the work and then getting people's feedback. So I know that by sharing this man, have people that say, Well, I like it, but this could be different. This could be changed, and a lot of times you can choose to dismiss that, say, Well, this is my vision. This is what I wanted to see on the page. So I'm happy with that. I'm gonna leave it. There's a lot to be said for that way of thinking as well, but also for your growth. You have to think about what if those people were just like people on your team. People you're working with on a comic, if they have some good bits of advice and good information doesn't make you a better artist to be receptive of that. So again, that's another integral part, is actually just sharing the work. And I want to stress that because I think that's so important for us. Is artists to think about that when we create our portfolio that you can create amazing art . But if you're not getting it out there in front of people and more than that giving their feed bag, then you're only getting one portion of the story you're not, you're not. Implementing yourself is an artist and getting yourself ready for working professionally because as soon as you start to do commissions or work on a team, you are gonna have to make changes, you are gonna have to be able to look at your work objectively and take your personal pride out of the equation. So when runner in this character, I'm really just trying to separate all these materials at a little bit to drop shadow, a little bit of texture, I think it's really important to try toe text, arise as much of the surfaces you can me personally, I don't like a lot of blank white space within my character concepts, but it's just preference, so you might want a cleaner look where you do less texture ring. But I personally like to show as much variation from each surfaces I can. But another thing is just little bits of drop shadow. I always find that just adding tiny little bit to drop shadow here and there not only make the artwork look more interesting and separate certain pieces like, for instance, a little drop shadow from one finger to the next or small drop shadow under a knuckle on. What it does is it starts to make you kind of see if it's working or not, and then you can add more to it, So I always kind of pick up the shadows and keep kind of growing the area. So if I add something and it looks good, you know, in a small amount, I might add a little bit more, a little bit more. So it's just one of the ways I do it. I feel like if I try to jump in and add a big bulk of shadow to, you know, say, the deltoid of the shoulder, that I might overdo it. But if I add little bits and pieces here and there, I can kind of warm up my imagination, see if it's looking going to make a judgment call on it. So just one of the things I noticed when rendering that seems to help me, um, do this a bit more efficiently. But I think ultimately you just have to experiment a lot and make some decisions because there's definitely times when I'm doing this portion of the work and I'm not getting it right and I have to keep re erasing and redrawing. And there's other times where I might drop once or maybe twice, and it's just kind of looks good. So it's It's weird how certain days. We just feel more in the mood Teoh create and it shows within our work. But I think that as long as you're open to making changes and edits than your work, you'll eventually settle on some good ideas. New a lot, you know, ultimately incorporate that into your way of doing things and call that your style. So that will bring this section to a close. Hopefully, you found these lessons to be informative. I'd love to know what you think, and I'd love to see your work. More content is on the way, so as always, keep drawn, keeping fun, and I will talk to you soon.
 Robert Marzullo, Online instructor of Figure Drawing and Comic Art