Transcripts
1. Introduction: Hello, everyone.
Thanks for joining me for drawing roses today. We're going to draw the rose
in three different views. You're going to
get the top view, a side view, and also a bud. So let's get started on
drawing roses. I'm Tammy. I'm from Texas, and I'm
a multimedia artist, and I'm going to be
showing you how to do roses that are very simple. This is a beginner lesson. You're just going to be
making some basic shapes, and I'll be there
with you all the way. I'll be providing you with a
step by step guide to each of the three different types of roses I'm going
to be showing you. And the rose is a timeless
and romantic flower. This is a great
flower to be adding to your artwork or
to your journals, and even an item that you can be selling to
companies and stuff. Loads of companies
are actually buying line art from artists that
are doing botanicals, and it's a great thing to
add to your portfolio. I'm going to be just
showing you the basics, and then you can actually
add in watercolor pencils, pens, and really give these flowers your
own personal flare. But I'm gonna be showing you
how to use basic pencil, paper and stuff like that, and then how to do a line
drawing with a pen, as well. So let's get started on all the supplies
that you're gonna need. There's not too much,
but I'll see you in the next lesson for your
supplies. I'll see you there.
2. Supplies: Time for your flower
drawing supplies. You'll need a number two pencil, just a basic pencil
and paper. An eraser. A black pen. I'm
using these microns. I've got some different nibs. I've got a three and a five
I may use for this class, but just any pen will do. And then a sharpener
for your pencil. The rest of the supplies are
going to be items that are just extras if you want to
beautify your flour after. So pencils, colored
pencils, some colored pens. These ones have a
fine nib on them. A ruler can help you if you want to figure
out your sizings. And then I also use, like, a white gel pen if I want to add some white dots
to my flowers, adding that sense of
light hitting it. So that's all you'll
need. Next up, let's go over the
anatomy of the flower.
3. Anatomy: Let's go over the
anatomy of a rose. You can get these sheets, the anatomy and the
reference photos in the projects and resources
area of the website. I've got a rose
from the side from the top and roses in a vase. They're beautiful yellow roses. Let's now go over the
anatomy of a rose sheet. So you have loads of petals, and they're on top
of each other. And they're tighter in
the center and flow out. The stamen and pistol is
hidden in the center, and as it blooms, sometimes you'll be able to see that area. You've got a stem that's
typically thorny, and there's leaves and
supples underneath. You'll be able to see
those from the side. So those are the basic
themes of what a rose is. And in the next lesson,
we're gonna be drawing the rose from the front.
I'll see you there.
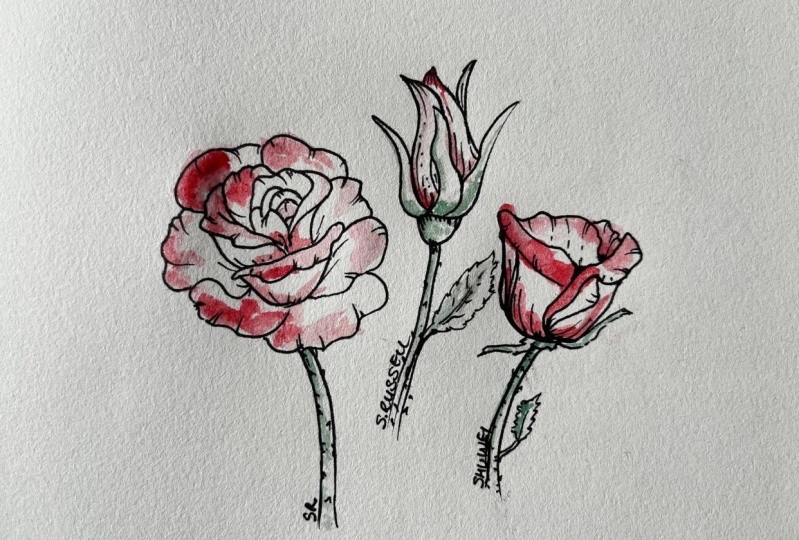
4. Draw the Front View: Et's draw the rose
from the front view. You'll need to get the step by step guide in the projects and resources area
of the website. Once you have that, let's get started on drawing your rose. I'll go over all the
steps with you here. Step one, create a small
tight rose center like this, it's just a small and we're
doing like partial lines. Mm. Step two, add some
upper petals like this. They're going to be tight
and small and curved there. Step three, let's branch
out with more upper petals. Let's broaden this rose. Step four, add a large
and wide bottom petal. Showcase the petal draping over. Step five, add three more big
puddles to the lower area. Step six, add four upper
petals to the left side. It's really coming together now. Step seven, curve the stem and add some texture
to the petals. Doing that pull
and flick motion. Make sure to go with the
angle of the petals and keep them quick strokes
that pull and flick, pull and flick, and group them. I like to do twos and threes, and it just gives it lots
of texture and movement. Do as many or as few of
the lines as you like, and they can be in totally different areas than
I'm doing them. This is just a generalization. So let's now lightly
erase the flower. So you just see the
ghosting of the lines. Mine are gonna be deeper than yours will because I'm
using a much darker pencil. A. Let's now move on to using the number five micron if
you happen to have one. If not, use that pen that
you have any pen will do. And we're going
to go over all of the areas of the rows outside of those little sections
of pull and flick. Let's now move on to using your smaller pen
if you have one. If not, stick to the pen you have and just go
over all the lines. Make sure you do your pulls
and flicks and make sure that you fill in that flower
giving it its shape. Do a few or as many lines as you like and add your own
personality to this rose. And there's your first
rose from the front view. Give it a signature if you like. In our next lesson, I'm going
to show you how to draw the rose from the side
view. I'll see you there.
5. Draw the Side View: H let's now draw the
rows from the side view. Get your side view step by step in the projects
and resources area, and I'm going to go
over all the steps, making it down into little shapes and that
type thing for you. So you need your
pencil and your paper, some pens, your eraser, and your sharpener, as well. So step one, start
by creating this lower petal with
two draped petals. Start here in the center
on the upper half because we're going to do the first petals and layering them. Step two, add a left pedal
and back pedal like that. Make sure that you pause if you need to and go
at your own pace. If you need to erase,
that's fine, too. Step three at two
center back petals up here. Step four. Let's now add the
stem and the suples. Step five, add a
small serrated leaf and texture the flower here. Add these lines, they give the rose petals their
shape and texture, and you can add as many
or as few as you like. Also clump some together. Go with the curves of the flour, and this really just
brings it all together. So let's lightly erase now. Now that you have
lightly erased, let's move on let's move on
to using your larger pen nib. I'm using my number five
micron, and later on, I'm going to use my number three for those smaller inside lines. So let's do the outside lines with this larger nib
if you have one. If you just have one
pen, go with that. Let's now move on to the
smaller nib if you have one. And if not, just stay
with the pen that you have and fill
in these lines, you'll do those polls
and flicks and just fill it in all along that area. So there's your side view. Make sure to give your flower
a signature if you like. Next up, let's draw a rose bud from the side view.
I'll see you there.
6. Draw the Bud Side View: Get your rosebud side view step by step in the projects and resources area and follow along. I'm going to show
you all the shapes to this cute little flower. So get out your supplies, your pens, your eraser,
your sharpener, your pencil and your paper, and let's get into
drawing the bud. Step one, figure out where
on the page you want to put your bud and draw three
flame like supples. You're using a U here, and then you're coming up
and you're adding these in. And they've got some
curves to them. H. Step two. Add some petals and
that back supple. Step three, pretty U base, and then add the stem. Give it a little curve here. Step four, let's now add this cute leaf and you're going to add
the lines in there. Step five. Okay, now
finish the texturizing. You're gonna make
these pull and flick motions along the petals, but not the supple,
just the petals. Finish off with
adding in some veins. Et's now lightly erase. I'm going to use my number
five micron and go over the flower here outside
of the smaller lines. Those I'm going to do with
my number three later on. If you don't have a smaller nib, just use one nib for your
whole flower, one pen. Let's now move on to the
smaller nib if you have one, and let's do the inner lines. And that's the last
rose for today. Add a signature, if you like. In your next lesson,
I'm going to go over your class project.
I'll see you there.
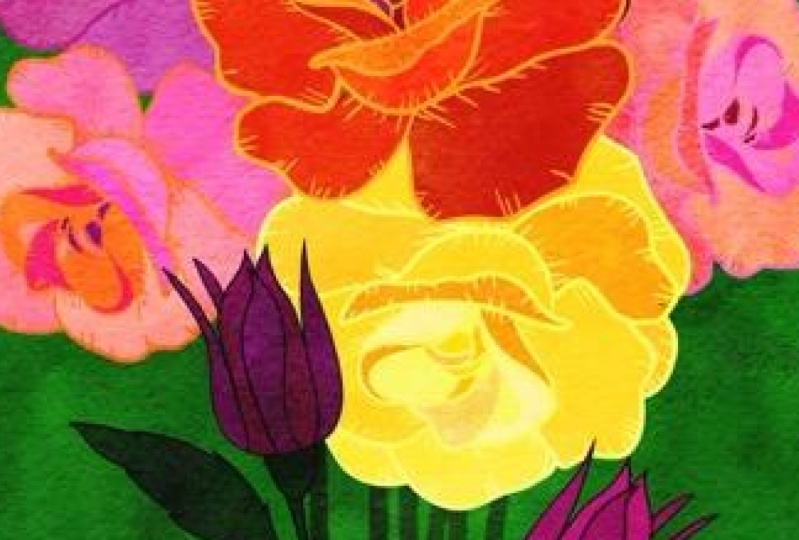
7. Class Project: You're now ready for
your class project. For your class
project, I want you to draw the rose in any view that you like or choose a brand new view that I
haven't shown you before. Once you've drawn
the rose in pencil, I want you to dress it up. If you're a watercolorist,
add watercolor. If you like pens or
colored pencils, use that. If you just want black
and white, do that. But once you're done
with your class project, I want you to upload it to the class of projects
and resources area. And let me show you how
to do that right here. First up, you're going
to go to the Class page, and you're going to click the Projects and Resources
there, that tab. Then you're going to
click Submit Project. And then on the next page, you're going to
upload your image. You're going to give it a
title and a description. At that point, you
can also upload a video if you like,
or additional images. And then you just need
to click Publish. Once you've done
that, the class is going to give you some
love on your project, and I'll be there giving you some tips and tricks as well and giving you some
love and giving you that encouragement
to try more flowers. I'll be doing more
classes on botanical, so do take a look in the classes area for me
if you want to do more. So next up, thank you so much, and I'll see you in
the next lesson.
8. Thank You: So much for joining me
today for drawing roses. If you'd like to draw
additional bactanicals with me, I've got loads of classes
including wild blue irises, sunflowers, and Gerbera daisies. The rose is just a
beautiful flower, and it look great with all those flowers as
well as a bouquet. So if you want to take
additional courses, you'll be learning
different botanicals and being able to do bouquets, do crowns, and other
things like that. If you'd like to join me online, I have an account on X, one on YouTube, as
well as on Instagram, and you can find those
links just down below here. Thank you so much, and I hope to see you in
another course. Take care, and bye bye.
 Tammie Ann Creative, Artist & Crafter