Transcripts
1. Introduction: Are you ready to draw
graceful and bold lilies? Well, I'm here to
help you do that. With my step by step guides, you're going to be able to draw the lily from the front view, as well as the side view. And I'll be here to show you
how to do that line by line. I'm Tammy, a mixed media
artist from Texas, and I'm excited to show you
this flower that I love. It's one of the flowers that I used to see at
work all the time, and it comes with so much scent that it really blows you away. But it also comes with
a beautiful flower. That I just love to draw. It comes in many different
colors and varieties, and I'm going to
show you all the distinct pieces to this lily. So let's get into talking about what supplies you're
going to need in the next lesson.
I'll see you there.
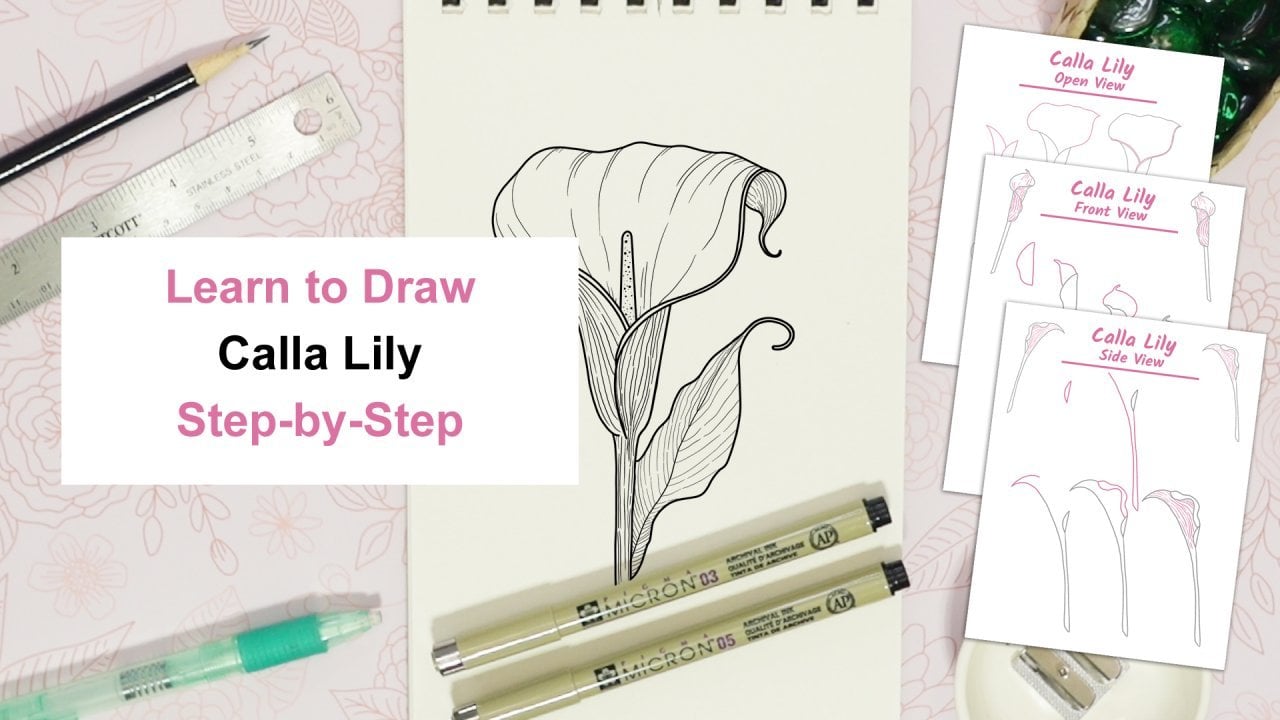
2. Supplies: For supplies, you
just need a pencil, some paper, and an eraser. Any eraser will do have a
few different types here. A black pen, I have some microns here that come
in different nib sizes, and I bought a four pack up
at Walmart for around $10, and there's different
sizes in there. A sharpener for your pencil? And then the rest
of these items are just extras if you
happen to have them. Some colored pencils,
some colored pens. These have a fine nib on them. A ruler, that's just to
help you with sizing, and then a white gel
pen if you're coloring your flowers to give
that extra pop of white. So that's it. Those are all
the supplies you'll need.
3. Anatomy: Et's go over the lies anatomy. You can get these sheets in the projects and resources
area of the website. They'll be the anatomy
sheet and reference images. They're just beautiful.
I got quite a few of the references
from unsplash.com. It's a free reference site. The lily represents
purity and renewal. It's great in bouquets
and in gardens. It's just a beautiful
flower for your garden. It's native to Europe, Asia, and North America. And it comes in loads of
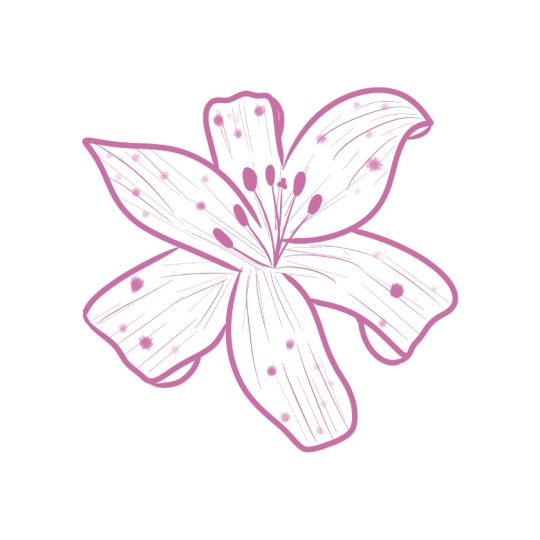
different colors and varieties. Here's the lily anatomy sheet. You're going to find six
very large beautiful petals. And then you're going
to see six stamens. They're around that area, and they go in
different directions. You also have the pistol, which is right there in
the middle of the stamens. You also have a stem and
these little leaves. You can see those on
the roughened images. And you can also see
these more flowers that have not opened yet. So these reference pages are really great to get an idea of the colors and how the different flowers from
different views lay out. You can see the pistol
there in the stamens. And you can also see the
different curves on some, whereas on some others, they're very, like,
just straight. So there's lots of
different varieties, and those varieties
have different puddles. Then you see here in the middle, a lot of the different
varieties have these little spots,
some more than others. This is a stargazer lily, and it has a huge amount of dots in that really
hot pink color. They're really
popular in bouquets.
4. Draw the Front View: Let's draw the lily
from the front view. You can get this step by step sheet from the projects
and resources area, and you're just going to
follow along with me. Step one, start with three
beautiful petals like this. It's sort of a triangle, and I'm going to make sure that it's easy for you by breaking this down into these
smaller little steps in different shapes. Pause if you need extra time and as if you need to as well. Just go at your own pace
and make sure to pause. Step two, add three
back petals like this. Don't forget to add those
little curls that shows the petal is curved
over. Step three. Let's now add in
the six stamens. These have oval like
shapes at the top. And depending on which
direction they go, it'll look like it's
straight up or to the side. Step four. Here you go
to add in the pistol. It goes up and then it has
this little shape at the top, sort of like a what is it called a puppy toes?
That's what I call it. And now we're also going to add loads of texture all
those little lines. And you're going to add as
much texture as you like. Just make sure that
your lines are going in the direction of the petal
outside to the inside. And I'm going to be doing a pull and flick
motion with my pencil. This is the time
where you really get to add your
own personalities. You're going to add in
those large and small dots, and you get to decide
how many you want based on what type of lily
you want to have. Some lies have loads of dots
and some have just a few. You can get close to
reference if you like, or just go in your own direction and add
whatever dots you want. Once you're done, we'll be moving on to doing some erasing. Because I have such
a dark pen here for it to show up on
camera or pencil, in this case, the
pencils really dark. I'm gonna be erasing
here for a while, and I'm gonna speed things up. So you're gonna be using, like, the number two, so
that's not as dark. So just erase, but don't erase to the point that
you can't see your lines. Now that you're done erasing, let's move on to using your pen. In my case, I'm going to use
this number five nibb pen. If you just have a regular
black pen that works too. But if you have different
pens with different nibs, use your larger nibbed pen. Just going to do the outsides of the flour and those stamens
and the pistol here. I'll speed things up if need be, and you'll just need
to pause as you like. Feel free to pause anywhere in these videos and
catch up as you need. So let's move on to that
smaller nib, if you have one. If you don't have
one, just go with the regular pen that
you already are using. We're gonna do all those lines, and we're going to use that
pull and flick motion, and it just creates
a beautiful line. Then use both of your pens, the big one and the small one, if you have those to create
those little dots like this. And I think that really
brings the flower to life. And as I said, make as many or as few dots as you like and add your own
personality to this flower. And that's it. So
now let's move on to drawing the lily
from the side view. I'll see you in the next lesson.
5. Draw the Side View: Let's draw the lily
from the side view. You can get this
step by step guide in the projects and
resources area, and you're just gonna
follow along with me. I'll go over all
the steps and break the flower down
into simple shapes. Step one. So start with a curvy
petal and an arch layout. And you might find that
turning your paper to the side is how you want to do this one because
it's more wide. Take your time and
pause as needed. Some of these shapes can
take longer than others, and sometimes you
just have to get your feel for where
you're on the paper, and refer to your step
by step guide as needed. Step two. Let's add three more petals to
fill in the shape. Step three. Let's add those
six stamens and the pistol. And you can make them
longer or shorter. The stamens go in lots
of different directions, and you're just going to create that little shape there at
the top for the pistol. Step four, let's now texturize the flower
with these lines. You're going to pull
and flick the pencil, you're going to create
loads of texture, and you get to add as
many or as few lines as you like to add your own
personality to this flower. I find grouping these
lines in threes can add some extra depth and really
give you that feel for Oh, this flower is bending
and has loads of texture. Also like to add some
of these lines in twos. These lines give
the flower shape as the flower moves in
different directions. And that can also show I can
also show when a flower is bent over or extra
deep, like a groove. Once you're done, we're gonna
move on to lightly erasing, so pause as needed. You're gonna lightly
erase this flower, making sure that your lines are still semi visible but not bold. Let's move on to using your pen. I'm going to use my number
five larger nib and I'm going to go over all
the outsides of the flower. The little internal areas, I'm going to wait to
use my smaller nib. So I'm also going to do the stamens and the
pistol in this. Now let's move on to using the smaller nib if you have one. If you don't continue to use
the pen that you're using. And make sure you're using that pull and flick motion with your pen to give the flower
extra depth and movement. To give your flower
even more personality, feel free to use
colored pencils or pens to spiff it up and
choose your own colors. One thing I found about
lilies is they come in loads of varieties
and colors. There's pink, purple, orange, and they're just
beautiful and majestic. Thanks for joining me
for drying this lily. And the next lesson, I'll tell you about
your class project. I'll see you there.
6. Class Project: Now that you've drawn the
lily in two different views, the front and the side view, I want you to choose
which one you like the best and then draw
the flower again. You're going to be able to
now take those skills and ramp them up just
a little bit by adding more of yourself
to this flower. I want you to get out your
watercolors, your pencils, your colored pencils,
that type thing, and give this flower
your personal feel. Are you a watercolorist? Do you like pencils over pens? Do you like pens
more than pencils? You choose what medium you like best to add to this flower. Once you've done
that, I want you to upload your piece of
art to the class, you're just going to
go to the website and go to the Projects
and Resources area. And let me show you how
to do that right now. So once you're there,
you're going to go to the Projects and
resources area, like I said, and you're going to click that Submit
Project button. Then you're going to
upload a picture of your art and give it a title
and then a description. If you'd like, you can add a
video or additional images. Those buttons are right
down there for you as well. Once you're all ready to go, click that published button, and I'll get to see it, and the other
students in the class will be able to see it, as well. And we can give you
some love and feedback. So let me say so thank you so
much for taking this class, and I'll see you in
the next lesson.
7. Thank You: Thanks so much for
drawing lies with me. I hope you got a lot out
of this class and that these step by step lessons
make you feel like you can target
other flowers like roses or guerrilla daisies
and try something new. I've got classes on
all these flowers. So if you need some help
on which direction to go, come and join me for more
step by step lessons. If you'd like to
follow me online, I'm on YouTube, X, and on Instagram, and you can find all those links
just down below here. I hope that this has been a great lesson for you and
that you had fun and that lies are gonna be one of those
flowers that you take into the future and just want
to draw and dress up. Thank you so much, and I hope
to see you in more classes. Take care, and, bye bye.
 Tammie Ann Creative, Artist & Crafter