Transcripts
1. Welcome to Animated Mandalas : Hello, my name is recur from texts in tulip. I'm an illustrator, Giphy artists and passionate about doodles. In this class, I want to show you that the healing power of art can be a spark of joy across all social media, your font off. How to do that? Well, recombine, they're very relaxing and focus empowering technique of drawing Mandela's with our unique doodles. Plus we elevate them into the 21st century with the animation tool in Procreate. To get you started, we will have a look at traditional man Dallas before we move on to your personal and unique doodle sketches, in our example, we will fill our sketching paper with lines and shapes that express gratitude. We will then delve deeper into the Procreate app to draw a stunning Mandela composition of our doodles. I will run you through the basic features in Procreate, especially the use of the radius symmetrical tool and the animation tool. My promise, whatever you come up with, the animation tool in Procreate, makes the process really easy and satisfying. Your result will be absolutely worth sharing. This class is for everyone. It is designed for the beginners, as valid is a beautiful way for well-experienced artists to have a creative meditation practice 21st century. By the end of the class, you will be able to design any geometrical pattern and complex signature form and have a clear understanding of how animation in Procreate works. You will be able to export your animation as a give plus uploading it to give you. Of course, it is a beautiful surprise on your Instagram account. Share your animated Mandela story and give to your followers as stunning moment of presence in your art. Now, it's time to connect with your inner doodle Mandela side. Make your inner spark move and move the people with your inner spark. Can't wait to see you in class.
2. Your Project: Your project will be relaxing in the making and stunning in its result. You are asked to design your very own moving doodle Mandela, based on shapes that express joy and hope. Joy and hope are essential for our well-being, even crucial to survive uncertain times. So here are the good news. While you delve into creating your moving Mandela for the theme, you may recognize a growing positive mindset. Once you are ready, please bring joy and hope to the whole community. Share your sketches as well as your final give in the project section. Last but not least, be kind and leave feedback to your classmates as well. But now, put all thoughts aside and dive with me into the beautiful world of Mandela's and Mandela animation.
3. The Tools you need: To make the most out of this class, I recommend using the iPads and the upper pen. I use the upper pen first-generation with the lightening charge on the top. Key to our animation process is to procreate app, which you can download in the App Store. Procreate is one of the most used drawing apps and favored by the high professional artists as well as beginners. Diversion Procreate 5 x comes now with advanced animation settings to bring your drawings more easily to live and share them as a gift. To support your learning. I prepared those practical helpers which you can find in the resources section. Practice sheet one are the traditional Mandela shapes. Practice sheet to the doodle shapes. This is filled with my style of doodles that can be used to express joy, gratitude, and support. Feel free to use them for tracing or as reference. This is our Mandela background, a yellow circle that fits well for the following grids. The polar grid. As a second option, the flower grid and A-star grid. These will support you to create effortless, well balanced Mandela's. Now let me show you how you can access the templates in Skillshare. By the example of my previous class. Dueling fun, it Procreate. Tap on the title to open the class and head over to Project and Resources. Click on each of the highlighted files and they will open in a separate window, tap, hold and save them on your camera roll. This will only work in your web browser, not in the app. Make sure to download all of them. We will need them later in class or set. Then let's dive into the world of Mandela's.
4. Basic Shapes in traditional Mandalas : People who practice Mandela drawing of my experience and relaxation of body and mind, they feel happier and a higher well-being. This means they're less stressed, overwhelmed and anxious. Instead, they feel more focused, calm, and satisfied, plus a deeper connectedness with others. As a bonus, day sleep better. And yes, most of them say it's pure joy. All those benefits involved by drawing simple shapes in a design pattern. You can find many different ways. But key is always the repetition in various appealing designs. A geometric or grid underneath balanced the visual elements to symbolize unity and harmony. To get you started and to warm up your wrist. I designed a practice sheet with some common forms in traditional Mandela's. You can open it in Procreate now or in your picture viewer to get inspired while you draw with pen and paper. You're welcome to start to draw alongside me. All simply listen for now. Let's start with a circle. To circular design symbolized the idea that life is never ending. It is the artistic representation of a perfect universe. The bell in Mandela's bell represent the openness and emptying of the mind to allow the entrance of wisdom and clarity. Flower and pestle. They are often related to the lotus flower. This is a sacred symbol in Buddhism. And the symmetry of a lotus portrays always balance. A flower shape. Mandela often represents empathy, love, passion, development, and hope. The triangle, when facing upwards, triangles represent action and energy. And when facing downwards, they show creativity and the pursuit of knowledge. For now, be creative and add your own elements or the men's and decorator of shapes to the forms. Practice, as long as you need to feel confident about your line work. See you in the next lesson where we envision our project.
5. Envision your Animation Project: In this lesson, I invite you to watch out for the resonance of your heart. Take a moment. Place your right hand on your heart. Place the left-hand above and close your eyes. Take a deep breath. Now think about something that truly sparks hope and joy into your life. Something that is already there, or something you wish you would have more of. Allow ever rethought. Let him pass and stick with a word that gives you a warm feeling inside. Art, nature, friendship, Brussels sprouts silly walks, stars. What is your word that sparks hope and joy? Now here's your first task. Write your word down and start to do the simple forms that symbolize your spark. Allow all patterns and forms that come up to run like a rainbow floating from your heart through your hands on the paper. Welcome them on and dismiss none. They are little letters from inside. Now, take your time, but taken lighthearted. It is good to have simple sketches for now. I will see you in the next lesson where I show you my doodle session for the emotional Mandela.
6. How to Doodle : There is one big reason why I choose gratitude as to inspirational source of this Mandela example, it shifts your focus to the positive sides of life. You can see what you have, rather in what you're not have. You can see the support instead of League of confidence. And you can see connection instead of isolation. So let me introduce you to the second Resources page, a summary of quick and easy gratitude doodles for you to practice. A heart, for example, is a worldwide understood symbol for Love. It also expresses where all our love is coming from and where everything flows into the wings were represent that nothing is static or grounded. With gratitude. I can lift up not only my heart, but also my mood and my relationships. So expressing relationships, support can come in many ways. Some money, Some through knowledge, and some support can come through giving company, or simply a small gesture that speaks, reach out, I'm there. So hence, are my choice for that. Expressing wealth. If you are grateful to have money, brilliant. If you want to focus on receiving more happy money. Beautiful. I left you a gratitude banknote with wings in the Resources page. You will also find one iconic hand with wings and two hands reaching out to each other. There are different ways of support will be symbolized by a dollar sign in one hand and the hard in the other. Now, I encourage you to go back to your previous sketches. Take them as an inspiration and draw up to six different doodles that express your word. And repeat drawing it. This word strengthens your confidence in your drawing lines. When we draw the Mandela in the next lesson, you will see that the forms will come more naturally to you. So no overthinking. The point of creating a Mandela is to have a meditation practice. Once you're ready, let's set up our digital tools and the canvas in Procreate.
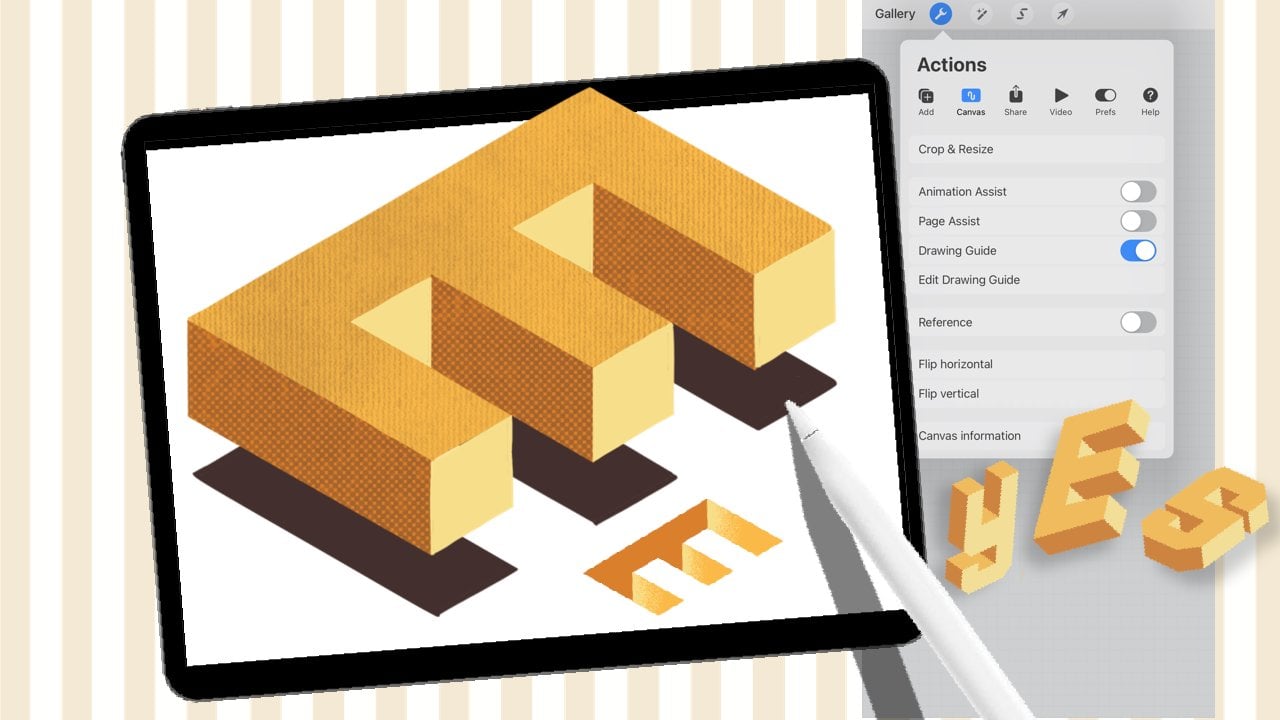
7. Set up your Canvas: First of all, we need a new canvas. Tap on the little plus on the right corner and the second plus on the black stack here you can customize your Canvas. We choose a 2000 by 2000 pixel with 300 DPI. This is plenty. Also, if you want to print one of your Mandela's plus, we're 40, 46 layers to play with. Now let's name our Canvas for the library. I just call it Mandela. Basic. Tap on Create and a new canvas will appear in your gallery. As a next step, we need to set up our layers in a way that makes it easy for the animation process. We need seven layers. As a start. You can either tap on the plus on the top or you can swipe your current layer to the left and hit Duplicate 1, 2. And until you have seven organized layers are key for the animation. So let us label them properly. Our first layer here is going to be our background layer. The layer on the top is the foreground layer. Those two layers will be static. Layer one to five between them will contain the drawings that are going to move. Just give them the numbers from one to five. In the animation. They will always play from bottom to the top. That's why we start with the one on the lowest. Once you've switched on animation assist, you will see that each layer will appear in the timeline on the button of the middle of your screen. And last but not least, layer number 5. To create a well-balanced Mandela, we set up one more layer for our grid, and one more layer above, which will be our sketch layer. But let's name them grids, and the next one will be our sketch layer. Beautiful. Now all layers are set. Now let's import the grid we downloaded from the resources section. Cap on the little wrench in the menu bar. Go to Insert a photo, and now you have access to your camera. Roll. Choose the prologue rates and what? It's on your canvas. Now hit fit to screen, so it has the same size as your Canvas. In the next step, we set up our drawing assist, hit orange again and choose the second action button, canvas, switch on drawing guide. After that, tap on Edit Drawing Guide. Underneath. Of course, we choose Symmetry and tap the option button to access all possible guides. By default, it's set to vertical. But we go with the radial guide, where our canvas is split into eight segments, hit Done in the right corner. And BC the guidelines on our Canvas. Now he's the fancy part. We have to make sure that our grid is perfectly aligned with the drawing guide. Otherwise, it will mess up the whole assisted drawing. So make sure the grid is selected and hit the arrow in the top menu bar to arrange it to the place where it has to sit, tap with the apple pen close to the broken line of this election. And this will move the item just one pixel, two words decides you tap on. Finally, we need to set up our brushes, go to the sketch layer and make sure the Drawing Assist switched on. Now move to the top menu bar and tap on the little brush. This is your brush library with a 100 of brushes to choose from. I go to sketching and from all the different options procreate offers me. I'm going with the Narendra pencil. Let's have a look. If it is the right choice for me. The Narendra pencil is really easy to handle. And you can see how our radial tool is already doing the trick. Tap with two fingers on your canvas to delete the strokes you just made. Congratulations. Now you are ready for our first basic animation.
8. Animation Basics: It's time for some action. Let me introduce you to the animation workflow. In Procreate, we start with sketching. Go to the sketching layer and make sure that drawing assist is switched on. Hit the wrench in the menu bar, go to Canvas and switch on animation assist. You notice that all your layers appear as frames in the timeline on the bottom of your screen. Now choose your favorite brush for sketching. I go with the Narendra pencil and choose a red color to have my sketch more distinguished from my final drawings. Let's start with sketching. Our first animation will be very simple, just enough to give you an introduction and to demystify how the magic happens. I will start with some traditional shapes to get the Mandela look, I start at the inner circle with smaller forms and move on to the outer circle of the grid to draw a bigger shapes of the same form. Rotate and zoom in the Canvas as much as you like to get inspired throughout your art-making process. Let me show you how to hands can reach out to each other. At first, I'm drawing the sleeve of the shirt and one hand. The Drawing Assist makes it really easy to have repeating forms that I exactly the same. So this is the direction they are going to move to. Tap with both fingers on your canvas to undo your last strokes. Now finished the hands also on the other side of the arm. And maybe if you like, at some little details to it. In the center of our Mandela, be we'll have just a simple floating tulip waving inside of our circle. And of course we need some leaves. Law thing. I want to introduce you to how to make a certain form getting bigger or smaller in an animation. In this example, I go with Chula pets. No, that's all enough as a guide. And you have a quick idea what's going to happen on your canvas. Those elements which are not going to move our static elements, they can be placed in the foreground or on the background layer. I switch the color of my brush to black for my inking later. They're not moving. Elements are my decorative elements, like those bells and the rectangle of this leaf. And of course, the basic of our tulips, but that's just as a reference. Now return to the Brush Library. We move on from the Narendra pencil to a more bold and fun brush. Go to the calligraphy collection and tap on the calligraphy brush. Now the brush studio will open up. I adjusted the streamline to 75 percent to keep the hand-drawn look with 100%, procreate will automatically even all shakes and formulas. Let's give it a go. I think we might need some help to get more balance in our drawings. Go to the sketch layer and place a dot in the middle of the upper line above your form. This is where the lines have to meet to make the perfect peak. Repeat this also for the smaller forms. Again, we go back to our foreground layer. Instead of the eraser, we just tap on clear to undo all strokes. Now let's start all over again. The beautiful thing about a calligraphy brush is that it's pressure sensitive. You have a playful variation of thin and thick. This already It's so much character to your line work. To aim for a cohesive look. Draw with less pressure in your upstrokes and with pressure in your downstrokes. Our foreground elements are set. Now let's lock this layer in the Animation Assist settings tab on the foreground frame to open all the Frame Options. Switch on foreground. And now this frame is added on top of all frames as a fixed element. Before we move on to our changing elements, make sure that drawing assist is switched on on all layers. Now we start drawing on one of the first layers. The tulips are intended to grow. So we start with the small flower head here. The hands are still away from each other. So we draw them on both sides with space to the hand that's opposite. And yes, we also have to do it on the other side. The last moving part is our Tulip in the center, which should wave from left to right. I'm not too precise with my drawings now, this lesson is more for an overall understanding and to warm up your wrist. So that's good enough. Tap on the frame next to the current frame in the timeline. And you will see that the static elements are still in bold black. Whereas our moving elements shining through underneath like a light box. This is also called the onion skin effect. Now, let's draw the elements slightly different again. We start with the tulips, which are going to be a bit bigger now. To create this stretch of the hand, we draw the arm a bit longer and start the shape of the hands a little later. And just repeat drawing until you are happy. Hour tulips in the center now flip into the other direction. Like this. And of course, we also draw the leaves. That's good enough. Now, repeat the same process again with the layer above. Tap on that layer and now redraw the moving elements. First the tulips, then the hands. And now they are nearly touching each other. Also on the other side. And of course, our little strokes. And in the center, our waving tulips. If it irritates you to see all the animation layer, just switch off the visibility and stick to the previous one. Of course, you can also switch off the sketch layer now. Now, are you ready to enjoy the first loop? Make sure only those three layers you just drew on us switched on plus the foreground layer. If you've already hit the play button. Wow, that's fast. Hit pause and head over to settings. Decide if you would like to have a seamless loop, ping-pong or one-shot animation. To reduce the speed, we need to adjust the frames per second. I bring it down to six. Now let's see. Oh, are only the correct frame switched on? Okay, Now we're good. Let's see. That's much better. Our hands are nearly touching each other and the wavy tulips are looking good. Now repeat the process for the last remaining two frames. Always keep in mind in which direction your design should move or in which form they should move into. Have fun and enjoy the next meditation time. Now let's see how the animation turned out. Make sure the right layers are switched on and hit Play. And let's switch off also the great. That's looking good. Now the two depends, are growing hands on nearly touching each other and we have beautiful waving tulips. At the last point, let me introduce you to the background layer. It works exactly like the foreground layer. It static, but all the other layers are laying on top of it. And that's a good place for some decoration. Make sure Drawing Assist, switched on and start to enjoy, to free up a bit. To keep your design val balanced even during your free style, I recommend switching on your grades. You can choose any form you like. So now I go only with those simple like that. I still add some curved lines on the outer ring. If you combine the traditional Mandela shapes with them, fresh doodles dies in between. I think that really can spice up your picture. So let's see. I think I still feel like adding another little animation on the sleeves. So on each layer, I add a slightly different variation of my line decor. I switched from one layer to the other by tapping on the frame in the timeline, only. Feel free to add any decor you like. And of course, you have to draw it on each layer to get a perfect seamless animation. Color drop comes here really handy. Just tap on the color circle in the top right corner, hold it and drag it over to the place that needs the color wheel. These depend and let the color drop. But you also cancel it out by hand. So this is our final look. Well, that's a start. And let's test our animation. Hit play. And the heads beautiful. For those who would like to bring in a colored background. Just go to the Background layer that Procreate sets by default and choose from there any color you like. I would also like to add the yellow circle from the resources. So I insert that photo, it Add, insert a photo. And there it is. Now I have to move the layer underneath the animation background. Be aware that the background layer is now fixed. So turn off the log in the frame Settings. Swap the background on the top of the yellow circle and merge. These two. Have the combination ready to be the new fixed background. Switch on the background options in the frame settings again. Now, let's see. Very well done. I see you in the next class where you're going to do your very first animated duly Mandela.
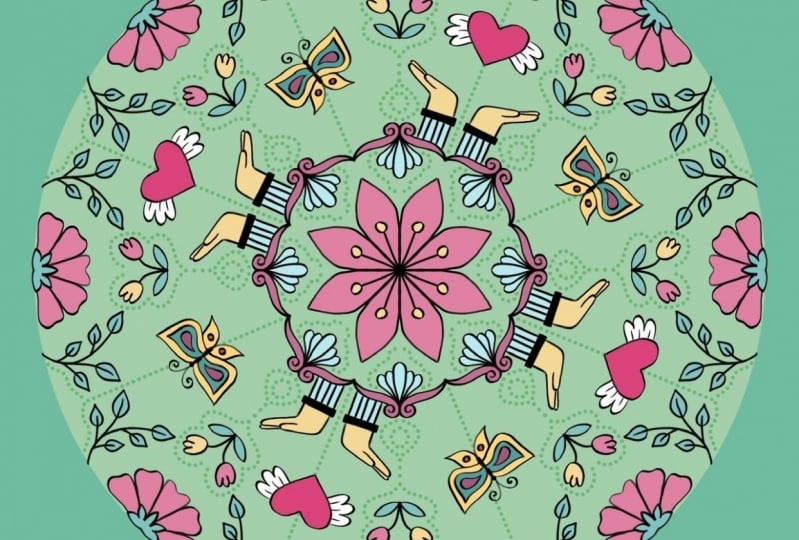
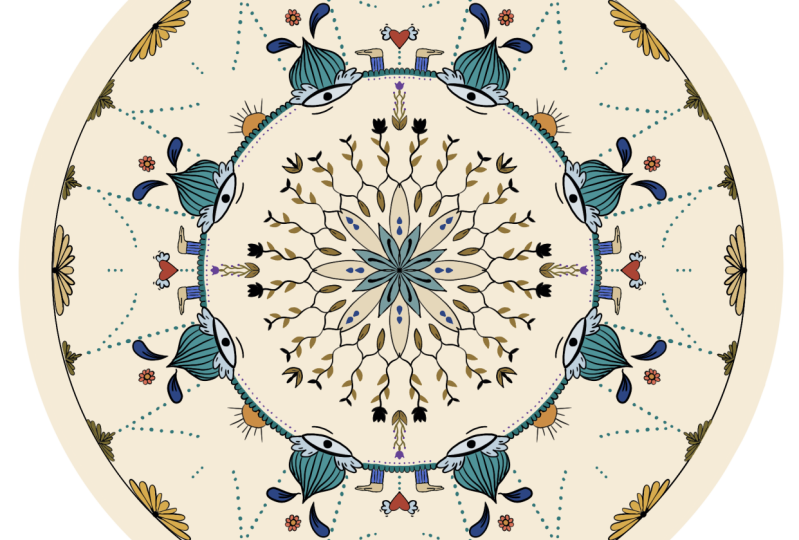
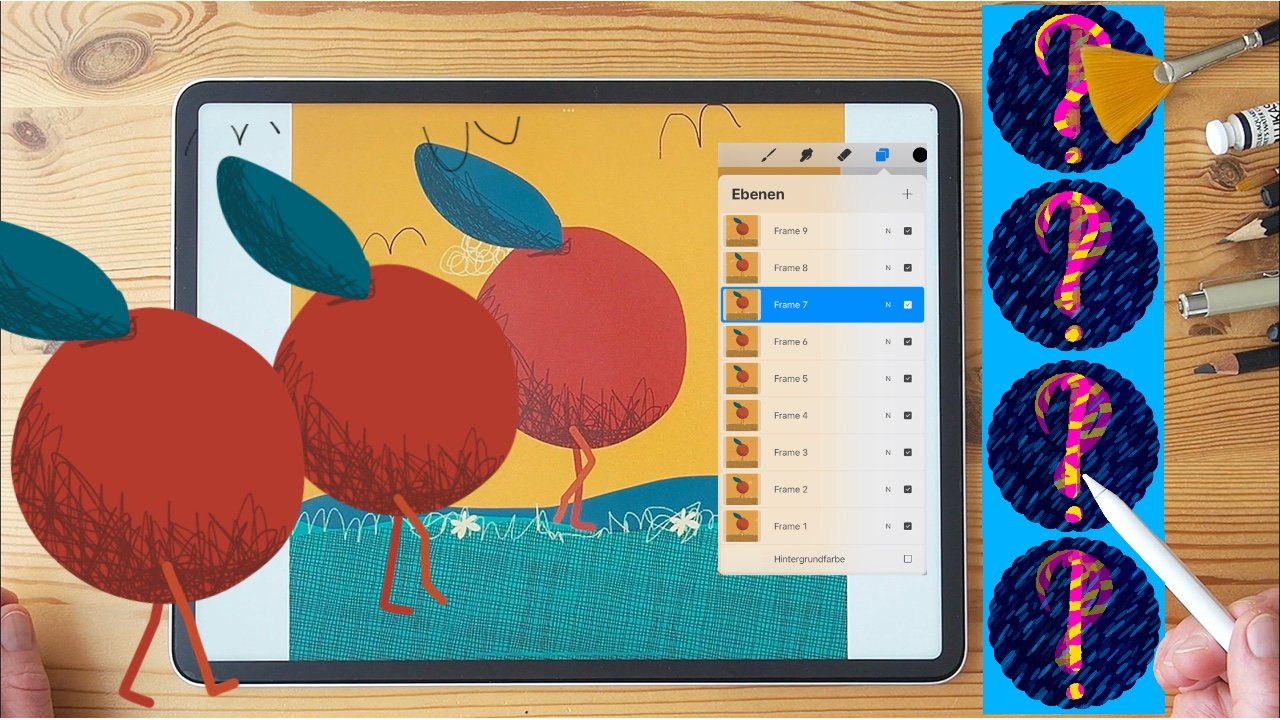
9. The Complex Doodle Mandala - part one: Welcome to the most exciting part of the class. Finally, we are talking about the complex doodle Mandela. Let's have a closer look at it. There are three key elements. We are going to talk about. The blossoms, which are going to open up their petals. This will be a growing effect in our animation. Secondly, hands and arms. We will have a look at what the effect of stretching straight line can have. Sylvia moving from a growing animation effect to a movement that goes up and down. Again. This third option is a really fun one, the flying heart. We have to modify the form of the wings in each layer to get that cool flying effect. To introduce you to the process. Let me show you how I organized my canvas. This makes it easier for you to repeat the steps we made in the previous lesson. And to sum up where this lesson we'll direct you to. As you can see, I have 125 layers for my animation. Those which are active. You see in the timeline, I used the foreground layer for the static elements that are placed on top. Let me show you this is the dot of the flower to have a consistent flower stamp. Secondly, I drew the clouds where the hands are going to move in and out. I also drew ops I sorry. I also drew the Duly I so I only need to think of the layers where I drew the class lit on top. From our flying heart, we see no reference elements. Everything needs to be drawn on an animation layer. Yet aesthetic elements are placed on a separate layer underneath all others. This is where I keep all my fillings, the ulna man's lines and flowers and some leaves. In the end, they are placed on the background layer on top of the yellow circle. This is how they look together. But that's good for now. Let's start at the beginning and follow me alongside the animation while drawing.
10. The Complex Doodle Mandala - part two : First of all, I placed my sketch underneath the third layer. In this position, it represents the middle of my animation. Then Animation Assist switched on. You can see all active layers shining through. That's also called onion skin effect. The foreground layer now functions as my guide to place the hands precisely. If you have a good sketch underneath. This is the part where the meditation sets in. It's just all about drawing and a fabulous way to improve your line work. Secondly, the flower. Remember, this is the size of the petals in the middle of our animation. So I draw them half the size they are going to be. Do not forget the second blossom on our radial drawing assist. Finally, the heart. At first, we draw the basic shape and now give them some swinging rings. Just think about some jess, why you're drawing. To keep the shape of the heart consistent throughout my whole animation, I create a reference tab on the ribbon in the top menu bar and circular round the heart. A dotted line should appear. Tap on Copy paste, and now the copy is on a separate layer. Tap on the arrow next to the ribbon to move the copy to the place you like. Let's duplicate the layer as well and move it. Adverts. Repeat copying this layer, swipe the layer to the left, hit duplicate. This one, I move downwards. And the last copy will be at the end of my row of hearts. Now I have them in the exact position for each layer. I make those cards invisible that I do not need for now. So I just hit the tick box next to the n. I go to Layer 4. And now I repeat to draw the shape of the heart. Now the wings should stretch towards heaven. Remember, they all aim for the cool flying effect. We repeat the same process for layer five. But be careful when you draw and hold your pen on the Canvas for more than a second without moving auto ship, but automatically snap in. So let's draw again. So I think twist and turn your Canvas to find the best position to draw. Again, our wings need to be different, and this time the wings spread horizontally. The last remaining hearts are on Animation Layer 2 and 1. They are underneath our reference layer. I'm now on Animation Layer 2. It needs some patients to get the form right. Okay? And this time I will go with wings that are facing downwards. Yeah. Repeat and delete, draw until you are happy. Now our last layer, this time, I reduce the opacity of layer 2. So to have a clear reference for the drawing of my new wings, I'm back on layer one now. And the first basic shape I have to draw before I can move on to the wings. And this time I'm going with horizontal wings again. Let's see what we came up with. We switch on all animation layers and switch off all our hearts we used for the tracing. Are you ready? Hit play. I think our wings are doing a good job. I will lock the foreground layer to get a better view. Go to the top layer foreground, head over to the animation timeline, open layer settings, and turn on foreground. Now press play again. That's nice, but a little something is still not right. We have to bring the opacity of layer two back to 100%. Now we are good. Next, the hands. First, we clean our layers and delete the reference of the hearts, swipe to the left and hit delete. Again, restart on layer 3. To get our tracing elements, we use the freehand selection again, the ribbon at the top menu bar, circular round the hands, tap on Copy paste, and our copy will be on a separate layer. To be more efficient, I make four copies straight away. Each of them will be placed slightly a bit more up or a bit more down to the reference. Layer 1, for example, they are closest to the Cloud. To make sure that they are perfectly aligned. I go to settings and hits snapping the circuit with a little thunder on the ribbon. On the left side, we turn on Magnetics. And when magnetics is active, you will see guidelines popping up as your content snaps from one useful position to another. I place now each of my cheating layers underneath the animation layer it belongs to or set. So now let the meditation pot begin. Make sure you work always on your animation layer and that the drawing assist is switched on. We start on Layer 5. The arms are now in full stretch. Layer four is the next one. And here are the arms already a little bit higher. But hence and hot remain the same. And in layer 2 and 1, finally, the hands are carrying the hot up to the clouds. That's it. We will have a look. Make sure only the animation layers are switched on. Okay, Now, let's hit Play it Ebola. I think I want to enhance the impression of stretching. So let's get rid of our tracing layers. And now we add vertical lines on the sleeves. In each of the animation layer. You can either tap on the layer in the layer section or tap on the frame in the timeline to access the layer. And finally, also on via 21. Now let's have a look again. Hit Play. Oh, that's fabulous. Now the flower should open their blossom. But to get not in conflict with the upwards flying heart. Layer 5 should have the smallest state of the blooming. And remember that you have to draw two blossoms. Of course they can have any shape you like. I will stick to the same form for each of them. Now enjoy drawing and repeat this for layer 421. All right, Let's play again. Looking good. I know one flowers missing. Let's see where it is located. Simply tap on each frame in the timeline, and let's see where we can find it. There it is. So let's draw it quickly. Fine. Now, I think I want to add a little bit of line work. And that's the part where your imagination should have no limit. Now go with any color you like. I change from one layer to the other simply by tapping on the frame in the timeline. I think that's much better. The middle of our Mandela should also get our attention with a little special heck. We had over to drawing guide. Adjust the drawing guide. And in the guide options we can switch to rotational symmetry. Now your stroke is reflected and rotated. Let me show you the effect. First. I lower the thickness of my stroke. And I will go with a curved leaf and repeat the shape on each of my animation layer. And that's really easy with the onion skin effect to follow up with the previous form. With an even smaller brush, I add the details to each of them. And the last layer. Now also, I think I would go with a little flower. I go from small to big and rising objects in the center of your design helps to support the hypnotic effect. So finally, let's play with the animation settings. Now it switched to ping-pong. Frames will play from start to finish and then from finish to start, and then repeat the process again. Loop. We have seamless playing from start to finish and a place endlessly in a loop all over again. With frames per second. You can adjust the speed of your animation to, is really low. And we have to draw ten to 15 animations to create a smooth and seamless animation effect. So, but I go for now with six frames per second. Okay? And finally, we have to draw the blinking of the eye. I place it on layer one. And this is really simple. It's easy, stroke halfway horizontally through the eye. And the upper part will be filled with black. Make sure everything is filled out with color. Fabulous. Congratulations. You mastered your first animated doodle Mandela.
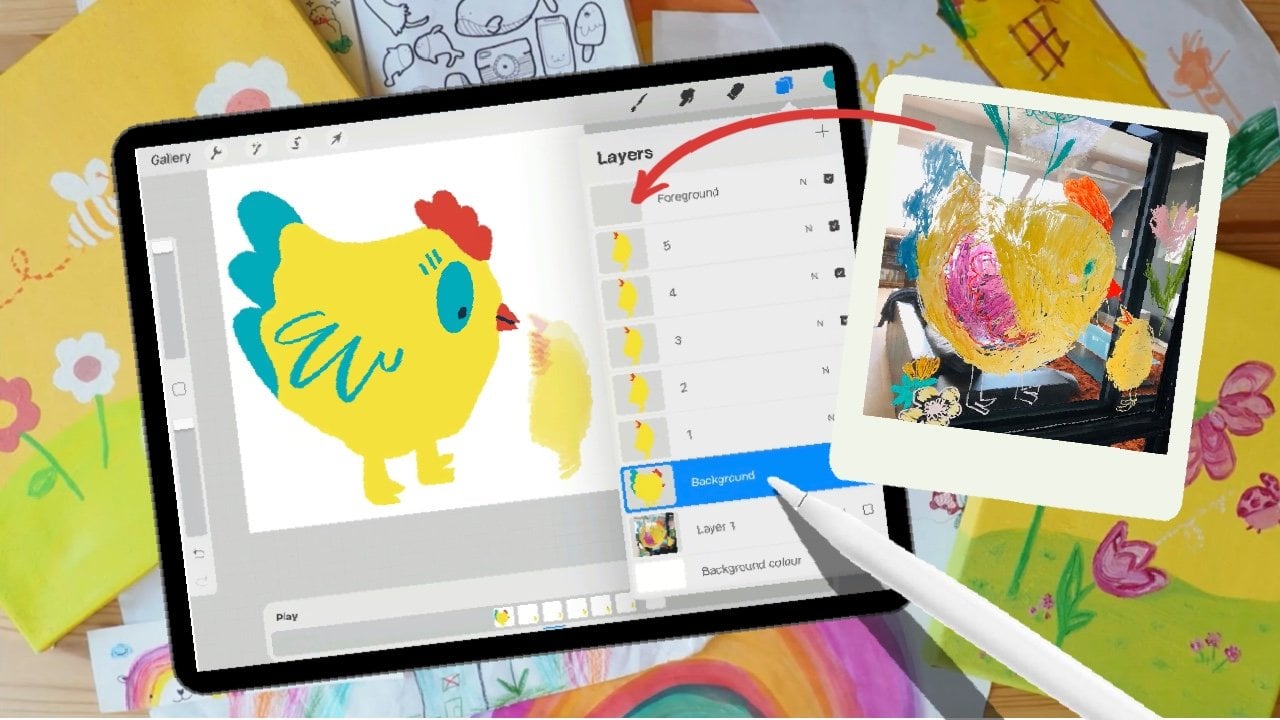
11. Colouring out: Welcome, welcome to our last little exercise where we just enjoy coloring out with this funny and bold doodle Mandela. In this lesson, we only have three animation layer plus a background layer. So you can see them in the timeline 12 and number three. Let me show you how I created this board and funky one. This is how my layer stack looks like. The layers with the red drawings are my sketch layers. Let me switch of the background to give you a better picture. Upfront, I decided which elements should be animated. So the heart and the opening of the eye, and I wanted to balloon as a symbol of striving for the best purpose in life to implement a basic Mandela shape, I went for the lotus flower in blossom. In my second layer. You already see that the heart is moving upwards. The flower head is more open and the eyelid also opened a bit more. On the last layer, the eye is wide open. The hands are not our nearly touching each other above the heart. I changed on the top of the balloon to a y. So it's y o, you, because you are the star of your life. In the resources you will find a inked version of each sketch as a PNG. You can download them into procreate and just enjoy a draw art session with me. So let's have a look at each of those layers. This is ink layer number one. This is layer number 2, and above, of course, there is layer number three. Let's turn them all on and see how they move. Let's hit Play. It's quite a fun exercise. And you decide whatever color you like and whichever form you want to feel. Let me quickly remind you on color drop how it works. So make sure that drawing assist is switched on if you want to fill the shapes in no time we start with the blossom. I choose one of my favorite colors. Down here. It is, this light yellow. I tap on the color, and now I tap on the yellow foods circle in the upper right corner. I hold the pen on the canvas and move the color to its desired position. And done. For the sleeve, I go with an apricots. And to make the balloon more interesting, I will fill it with two types of red, which then are going to swap its position in the next frame. So I start with a dark red and move on to bright popping read. So okay, you really have to precisely to meet that space you want to fill out. In the next layer. I will swap the colors. So go to the next layer. And this time, those elements who are bright red for now will be dark. And the other way round, we start with this darker red and place the brighter red in it. See, take it, place it here in this part of the balloon. Let's have a look how the color shifts. When we already. So no. Let's turn on our layers. We need for the, for the shift and hit play. And this should be it can't wait to see how your coloring looks like. So just turn on some relaxing music and just enjoy coloring out.
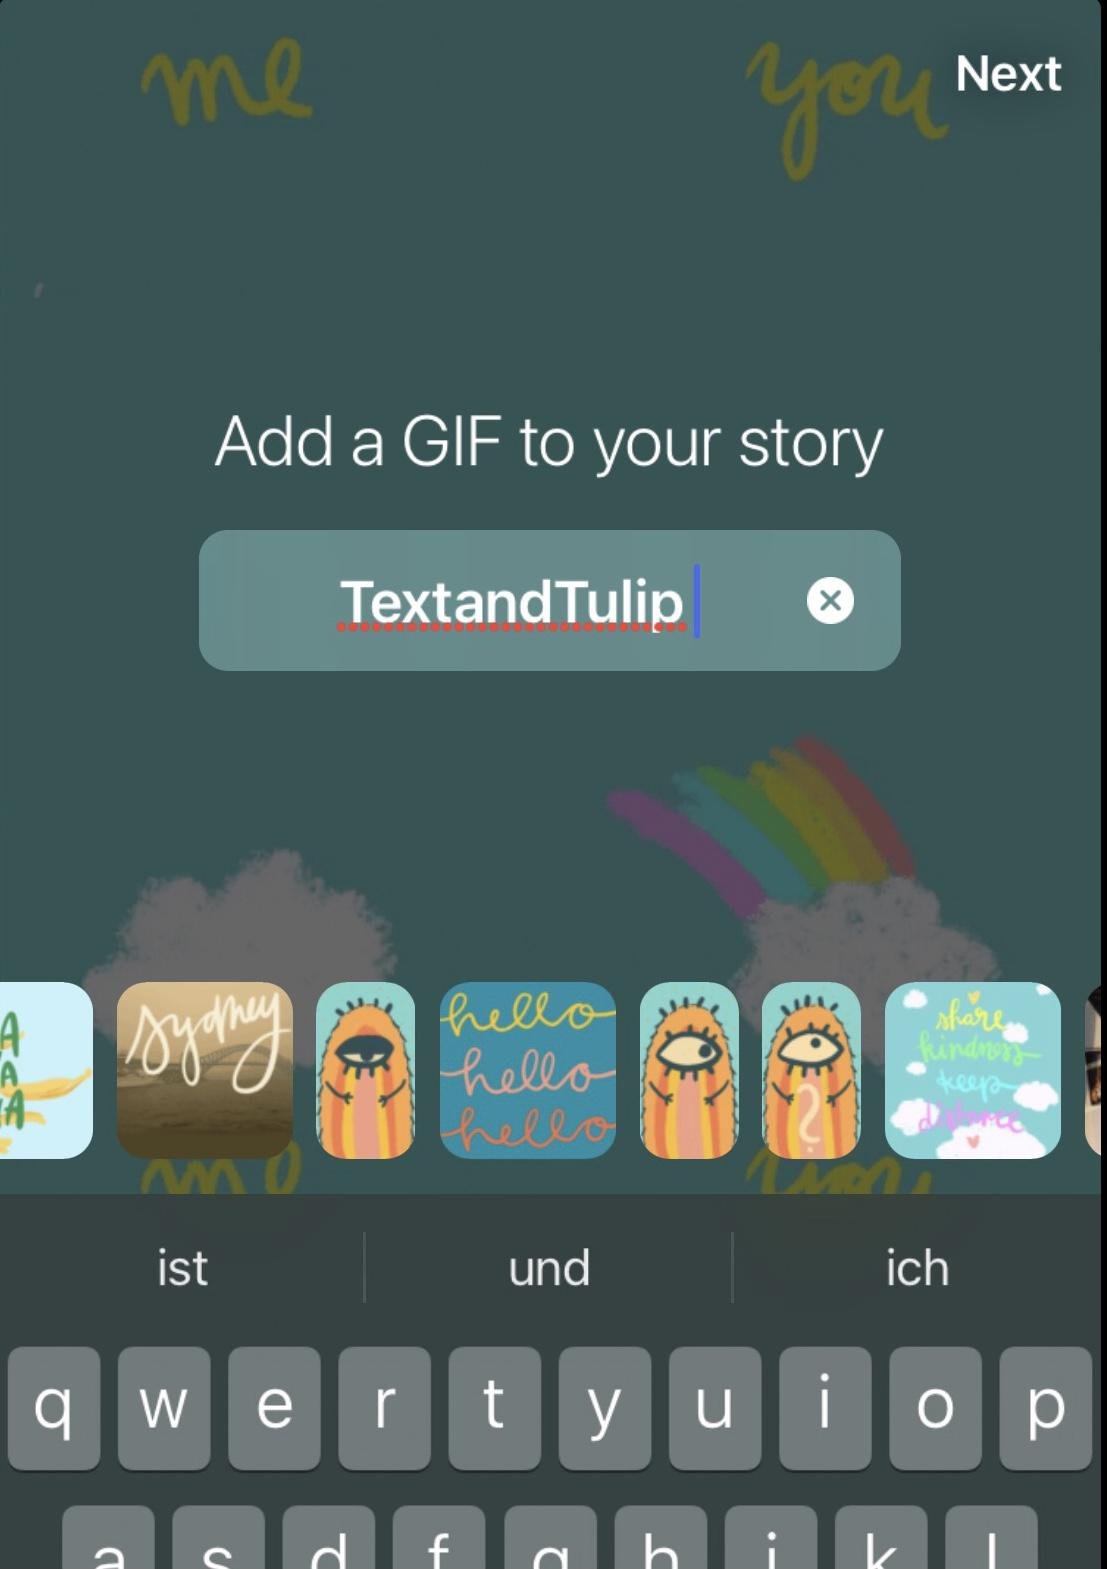
12. Export as a GIF and upload to GIPHY: Last step of our process, Let's make the Mandela sharable as a GIF. To make it work as a gift sticker, we have to switch off the basic background. Now it is on a transparent layer. You see the squared paper off to procreate canvas. Now. Now hit the wrench in the top menu bar. Go to Share and tap Animated GIF. We use the frames per second slider to adjust the speed of our animation. I will keep it with eight frames per seconds. Now, hit Export. To upload it on any platform you like, you need to save it to your files. Tap on, save to files and to your folder. Rename your document. And keep in mind that also your filename counts. When it comes to search engine optimism, I would always start with my name, followed by two to three major keywords. And then this will serve as my animated sticker. Now let's do the full background GIF. We go back to the layer options and switch on background color again. Now head over to the wrench, Share animated GIF and without any changes, tap on export. You can share these fires on any social media. But let me show you how to reach a broader audience. Let's upload it to give you, you need an account to start. This is mine, text and tulip. And between my Mr. Rainbow monster with a little coffee mug and hello and high stickers. You can already see the transparent Mandela stick up. Now let's upload the full background. Give, tap on, Upload and upload GIF. Now I have to choose Browse to access my folder on the iPad. Let's see where it is. Skip the part of adding the gift info here. Just click on uploading. I always had trouble if I added my text at that stage of the process. Wait until you see upload completed. There it is, move with the cursor over the image. And you will see a little pencil in the right-hand corner. Tap this to edit the information around your GIF. Let's add the tags to make my GIF part of my brand and to make it easily searchable by my fans and followers, I added my brand name first. Now, think about three major keywords and 6 closer words that are related to the topic. Of course, you can still add more later on. So I go with Mandela and meditation with self love. And also I want to take self-care. And two more things. Let's take hearts. But also I want to implement the blossoms. Texts are edit and they give us updated. And now you can see the text underneath the picture. It will take a couple of minutes, sometimes an hour to find it in the Giphy search. And unfortunately, you can't share a directly to Instagram. In the next lesson, I showed you how they look in your Instagram story.
13. Share on Instagram : To know the difference between a forgive and a transparent sticker, give its best to show you on Instagram, my account is texts and tulip. Let's create a story with our Mandela. Go to story, create and swipe to give. Now type in my brand keyword, text and tulip to see just my gifts. Now they appear in a row. So this is Mr. Rainbow in the background. And there's also our animated Mandela. Tap on the frame and hit Next. Now the sticker tap on the Sticker icon on the top and again, choose GIF and type in my brand name, text and tulip. So let's see where our animated Mandela stick is. There it is. Now as a sticker, you can move it across the template and use it in the center to enhance the Mandela effect even more. Let's have a little fun and send it as a personal meditation reminder to a friend. I want to implement a countdown to. So let's give it a name. We legs. Relax your heart. And of course, I have to set the timer. Finally, I can adjust the color and also the size. So once we are ready, we just can hit send. And it's done. Well, that's it. It's really that easy. And personally, I really enjoy doing GIS. This is one of the most easiest animation I made. Let me know if you want to join me on a class for that too. But for now, I really hope you enjoyed the animation Mandela class. See you for little sum up in our last lesson and also to encourage you on your project.
14. Sum Up: Congratulations, you did a great job. You completed a class and you're very relaxed. Creative muscles should be now ready to create any digital animation in procreate of your unique doodle in and with symmetrical design, you can export your file as a GIF, upload it to give me and share it on your social media account. I hope you had fun and feel inspired to create more motion when Dallas, for any topic you like, do not forget to share your Mandela in the project section, I would love to see them. Be proud of yourself and share them on Instagram with texts and tulip so I can see them to please also leave feedback for the class. This will make it easier to find by new students. Thanks for joining the class. Be creative and relaxed. Choose to live.
 Ulrike Text&Tulip, Digital Art in Procreate