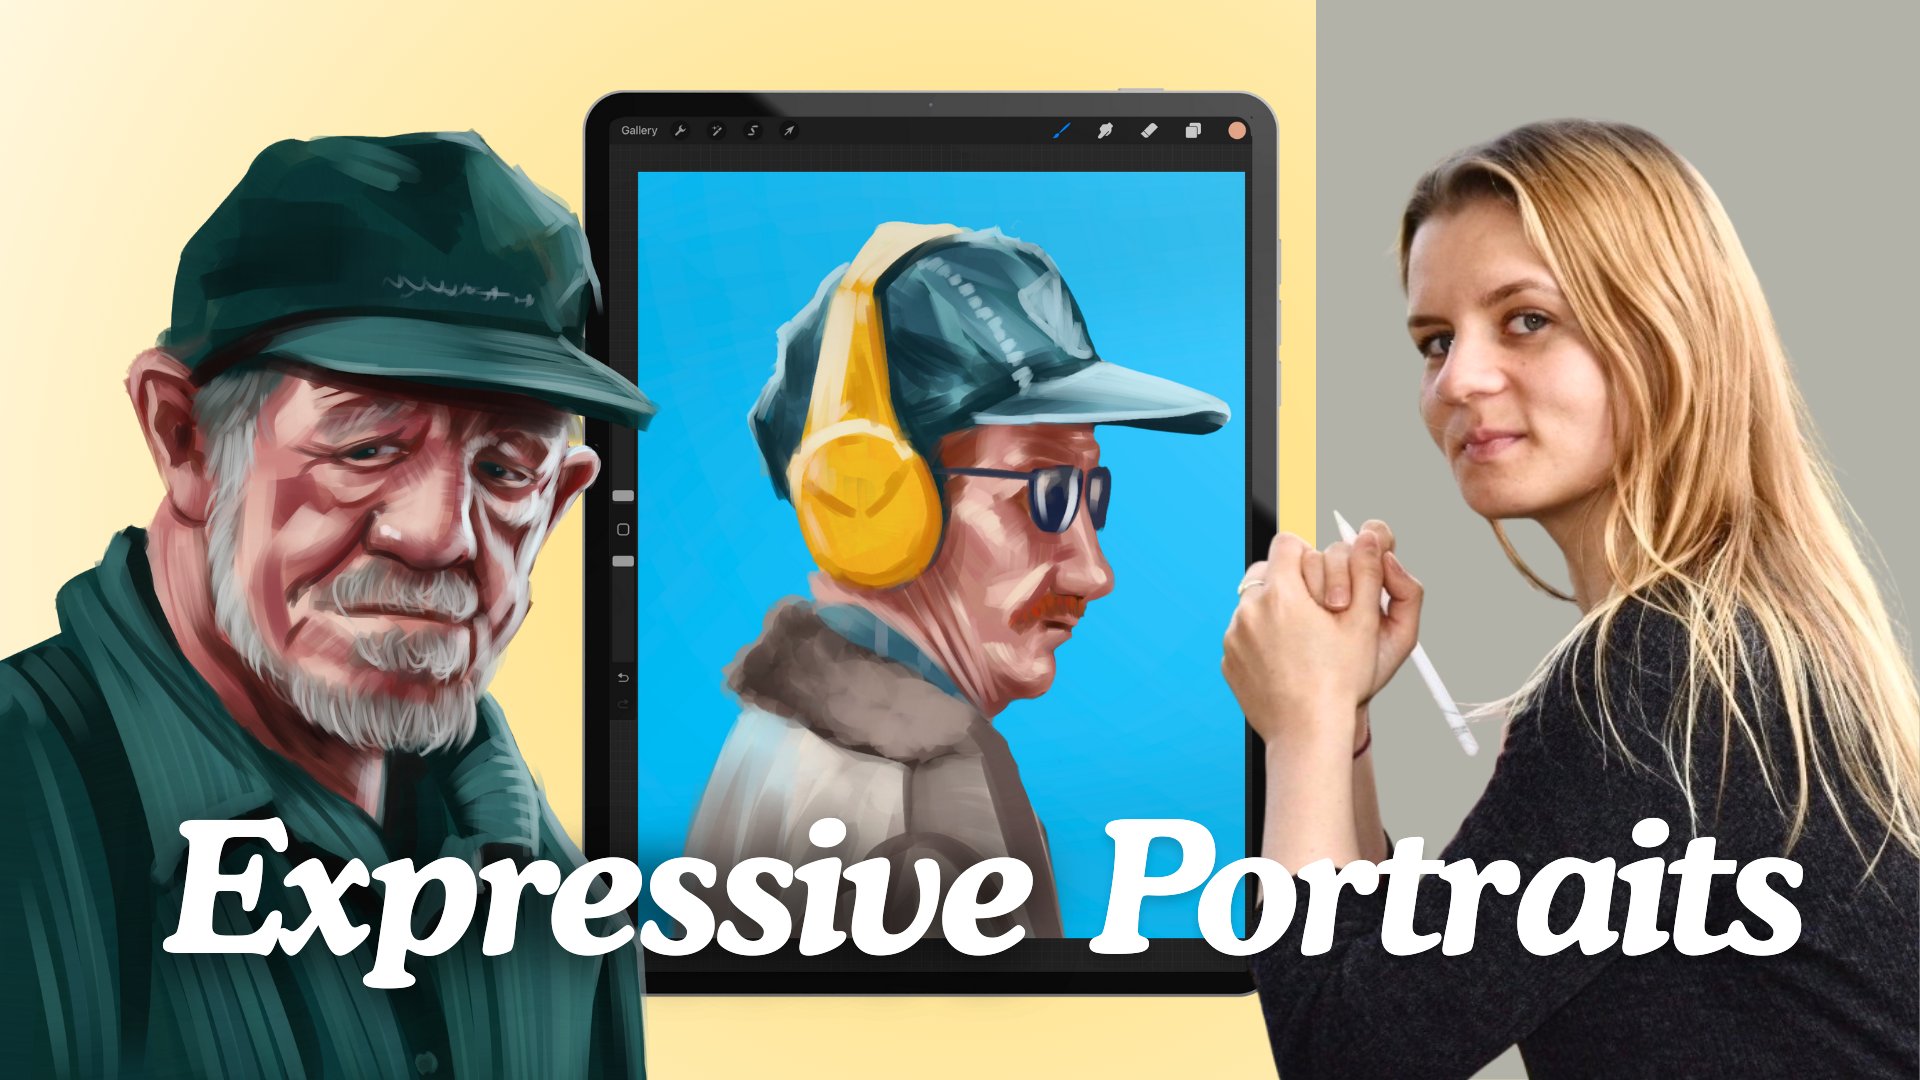
Transcripts
1. Introduction: Beautiful curls,
locks, and waves. They look great
in illustrations, but where to start
painting them. In this class, I will
teach you exactly that. Hi, I'm Gabriel
Shell, and today, I will teach you
how to easily paint beautiful curls and locks
without struggling. Ever since I was a small child, I love to create different characters and
bring them to life. I've been very fortunate to make this passion
my career and have been working as a professional
illustrator since 2014. Since then, I have worked
on a variety of projects, including video games and books, creating many different
character illustrations. I'm super passionate
about creating beautiful fantasy illustrations with expressive characters. One of my favorite things to paint in a character is hair. Hair is such an essential
part of a character. Especially beautiful
curly hair can add so much movement and
story to a painting. In this class, I will
teach you how to easily paint different
types of curly hair. This is a sequel to my
first class on hair, digital painting basics, paint realistic hair in
procreate easily. While in my first class, we were focusing on
painting hair in general. In this class, the focus will be exclusively on painting
waves and curls. The beginning, I will teach you the main approach to painting
different types of curls. In the next section
of this class, I will show you in three different painting
demonstrations, how I apply the techniques
to an actual painting. You will learn the basics
of painting wavy hair, how to approach painting
small wild locks, and how to create a fluffy, big hairstyle with
super tiny curls. This class comes with
a free procreate file of a primate character portrait. You can jump right into
practicing painting hair. I will also provide
my favorite brush set for painting hair for free, which I used to paint all
the hairstyles in the demos. I'm super excited to
teach this class today, and I can't wait to see your beautiful paintings in
the project section. If you're ready,
let's get started.
2. Class Orientation: If you're into painting any type of illustrations
featuring characters, including portrait paintings
or character design, then you've probably come across the topic of painting Hair. In my previous class
on painting Hair, I showed you some
basic approaches to painting Hair in general, including how to
plan the drawing, how to choose the colors, a bit of theory of
light and shadow, and how those behave on
different types of hair. What we haven't done
in detail is talk about how this approach
would work on curly hair. That's what we're going to
see in depth in this class. In this class, I will show you my process of painting curly, Wafy, and frizzy hair. We'll take a look at how to approach painting
individual locks, what techniques to use to paint different
types of curly hair, and how to make the painting
process quicker and easier. For the class project, I've prepared a photoshop
document with a pre painted character
without hair so that you can practice painting
different types of hair. You can download it from the
resource section and open it in Procreate or any other painting software
of your choice. I will also attach my
procreate brush set for painting here that I used for painting here
in the examples. Just keep in mind
that those will work exclusively with Procreate. Using the provided
character file, you can start with
painting air directly and practice different
hairstyles and types. Hair is a lot of fun to paint, and different hairstyles can drastically change the feel
and look of your character. If you're interested in
learning the basics of character design and painting a unique character
in the process, feel free to check out my other classes on
character design. For the class project,
I encourage you to choose a few curly hairstyles
you like the most. Using the provided
photoshop file with a pre painted character, create your own
curly hair painting. Don't forget to post your painting in the project section. So prepare your tablet and your digital painting software, and let's start painting.
3. Basic Approach To Waves: Thank you for joining my class. I'm really happy
to have you here, and I hope I can make it easier for you to paint
beautiful curls. In this lesson, I will show you my main approach to painting wavy here before we jump into a painting demo
in the next lesson. Before I start painting, I like to look for some
good reference photos. Good references will make
the creation process much easier and give the
much needed information about the flow of the hair, the light and shadow,
as well as the color. I like to search for
mine using pinterest, as well as royalty free
image pages like Splash. When painting wavy
and curly here, I like to focus on
three key aspects. Form direction, texture. Wavey and curly hair
comes in various types, ranging from big soft
waves to well defined, smaller logs, and
even very small tight curls like those found
in the Afro hairstyle. The primary difference
between waves curls and bigger hairstyles
with tiny curls lie in the size of the curls. Big curls might follow
one large wave or consist of multiple smaller ones moving
in different directions. The thickness of the hair
and the overall texture are also important to consider
for the realistic depiction. Thinner hair tends to have more straight hairs and moves
more easily with the wind, where ticker hair stays more fixed in place,
maintaining and shape. Locks can be clean and defined or messy with many
straight hairs. Curls can vary greatly, small, tight and well defined or loosen messy in different sizes, densities, and definitions, ranging from fully
curd to just wavy. In my other class,
digital painting basins, paint realistic hair, in procreate easily, I
cover the fundamentals on how light interacts with hair and the main approaches
to painting it. I recommend checking
it out as it will give you a great
foundation for this class. We need to think of
hair, especially wavy and curly here as a three
dimensional object. We don't think of hair
as single units of hair, but rather as a whole, divided by segments that have different forms.
Hair isn't flat. Parts that curve
towards the light will have lighter
colors and highlights, while parts turning
away will be in shadow. For bigger waves
and straight here, think of it like
silky bands of cloth. Parts turned outward will catch more light and draw shadows
at the parts under them. Since painting each
and every single hair or tiny log will be
very time consuming, we will instead focus
on segments of hair, defining the overall form
and lighting of each. Let's take a look at how I would approach
painting wavy here. I like to draw in
the overal shape and the direction of the hair. It has a certain rhythm to it as it flows and softly curls. I fill the hair with
the middle tone color. I prefer starting
with the middle tone, choosing it between the
lightest and the darkest tone. After that, to add depth, I define the shadow areas. For that, I choose a somewhat darker color
for the main tone. You can decide whether you want your shadow to be a
cooler or warmer shade. I love to make the shadow part warmer and the highlights
cooler in tone. By softly drawing in the
shadows around the lock, it starts looking more and
more like a voluminous object. You will see how
quickly it will start looking three dimensional
with a bit of lighting. To create more depth, I then choose a lighter color, somewhat cold in tone, and very carefully and softly draw in the highlights where
the light hits the most. Focus on hair as strands,
not individual hairs. The larger the log, the
easier it is to paint them. Don't be afraid to
get a bit messy. Hair never falls perfectly, and it shouldn't be perfect
in your painting either. So in the next lesson, I will jump right into the
painting demonstration. See you in the next lesson.
4. Painting Demo Waves: In the last lesson, I showed you my basic approach to
painting wavy Hair. Now let's see how that would
look on a whole hairstyle. I will use the character
portrait I made for my first class on air to
create a wavy hairstyle. We will start with
some soft, big waves. I found a picture on pinterest of a beautiful umbra hairstyle, I like, which I will
use as my reference. I will use the image as a guide to determine the main
strands of hair, the movement, the lighting,
as well as the color. But I don't plan to make an
exact copy of the hairstyle. Before I start, I like to open the image in the reference
window in Procreate, so I can always have it
next to my painting. A separate layer over the
character portrait layer, I will start sketching
the outlines of the hair. I use my smudgy soft brush
for my hair brush back. You can use any brush that feels comfortable for you to make
the initial outline sketch. I focus on the
negative space and the outline that the hair creates in comparison
to the canvas, the overall shape of the waves, and the direction of
movement of each strand. A very common
approach in painting, and I feel it works quite well for painting new
hairstyles as well, as it forces us to focus on the overall shape instead of directly looking at the details. I determine the main hair parts and separate different
hair strands. At this stage of the
painting process, I just sketch freely without
the pressure of being exact. Since we're going
to be painting, we don't need an exact sketch
or a clean line drawing. Now, if that's what you
prefer for a finished look, by all means, feel free to
add a clean line later on. Usually, when I paint, I move all around
the canvas as it helps me to not fixate to
match on a single part. You will see me sketch the top, then move down to the hair ends, and then jump over to
define the strands. During the sketching process, I slowly add more and
more details to my sketch that will serve as a guideline
for the painting later. After my sketch is done, I create a new layer and move
it under the sketch layer. That way when we paint, we can see the sketch on top of it. I will now proceed with filling the shape of the hair
with a solid color. You can use any brush
you like for that. I use this Magi soft
brush for that purpose. I chose a nice middle tone
for the underpainting. As mentioned in my
previous lessons, I like to choose a tone
that sits somewhere in the middle between the darkest
and the lightest part. Although I tend to go
for a darker shade, as I love to add many
different highlights later on. I fill in the outline and
the shape of that color, cleaning bits here and there. M Should the sketch and the underpainting
overlay the face, you can softly erase the
parts with an eraser. The underpainting is done,
and in the next step, I will add shadows
to start giving volume and three dimensionality
to our painting. For that, I create a new layer on top of the
underpainting layer. When it comes to
choosing the color, I like to use the
middle tone as a base, and move the slider somewhat towards darker yet
saturated colors. I like my shadows to
be saturated and deep. This works on hair
of all colors, but has a specially beautiful
effect on darker hair. For painting the shadows, I will use my smudgy soft brush. It has a nice soft texture reminiscent of that
of hair texture, which helps to achieve
a more realistic look. To maintain a clean workflow, you can create a clipping mask on top of the
underpainting layer. That way, all the shadows
that I'm going to paint on top won't be outside the
outline of the underpainting. Very softly, without
much pressure, I start painting in the
parts that are in shadow. Using the reference image to check for the
lighting situation. For best effects and to use the brush stexture
to my advantage, I will paint in the shadows following the direction
of each lock. I like to take my
time at the stage. By putting the
shadows correctly, following our initial
sketch and reading the necessary information
from the reference photo. We will do most of the
work in the illustration, leading only to add highlights
and lights later on. When painting the shadows, it feels sometimes like I'm
virtually brushing the hair, by following the
direction of the waves, making soft strokes
without much pressure. You can see how it
quickly starts getting the needed volume,
looking more realistic. M. Places in the hair
that are overlaid by other strands of hair will have natural occlusion shadows. Places where a light enters due to two objects
hiding the light source. We can see it in her hair, especially between
the bigger locks. Painting those will
give the feeling of plasticity and volume, and the hair will
appear less flat. One thing I love to do is to play with different layer modes. For that, I go on
that little end next to the layer name
and by clicking it, switch between
different options. This will change how the layer interacts with the layer below, creating beautiful
effects and oftentimes saving time by better
blending different colors. You can also play
with the opacity. In this case, I decided to leave it as it
is for the moment, but it's a great thing to do each time you add
a new color layer. Now I'm ready to move to the
next color phase, Umbra. Before I jump right into
adding lights to the hair, I want to recreate the
beautiful umbra effect we can see in the image. The easiest way to
do so is to use a big soft brush and on a separate layer on top
of our shadow layer, softly color the ends into
a lighter blond shade. Here again, I love to plate
with the color modes. The screen mode works
especially well with that tone, mixing well with the
underpainting layer, as well as the shadow layer, creating that soft umbra effect. Now we're ready to move on to adding lights
to our painting. For that, I create another layer on top and start
adding lighter parts. I switch back to my
smudgy soft brush and go to the color wheel. I want to choose a color that is not too saturated
and not too light. As I first need to establish a nice lighter color base before adding the
ultimate highlights. I turn the color wheel towards more reddish
hue and choose a light, quite unsaturated pink
tone for the light colors. Now, if you squeeze your eye slightly at the reference photo, you can see roughly where the lightest parts
of the hair are. They are always on top, followed by shadow parts, creating that beautiful
wave you look. I start by carefully,
without much pressure, drawing in the lights
on top of each wave, following the
direction of the hair. I'm taking time and slowly brush in the lights
on each strand of hair, creating volume and showing
the curve of each log. Don't worry if it's not
perfect from the start. We can always add it later on, erase parts that are not satisfying or smatch others
that are too strong. The most important task here
is to correctly identify parts that are supposed to be in light versus the shadow parts. By varying the size
of the brush and drawing in the highlights following the
direction of the hair, we create more of what looks
like separate strands, giving it more detail
simultaneously. I like to keep my
sketch layer with low opacity on top
of the illustration. That way, I can check in with the initially
established strands of hair in the direction
of each log. Don't forget to add
some highlights on top of her hair as well. Even though it's
not very visible in the photo due to the lighting in the position of her head, adding very soft lights
on top or the side of her hair will make the hair
look lossy, clean and silky. Now, I like to keep the
lighting layer separate. I find it a bit too bright, so I lower the opacity
of the whole layer. Now I create another
layer on top of the lights layer to start adding more depth and
definition to your logs. For that, I color pick a hair
color from the shadow area, and to make the color somewhat and also to give our
painting more color variety, I slightly move the color
to choose a more saturated, dark, orange warm tone. I start by drawing back in
the shadow areas between the waves to create more
depth between each log. I try to keep my brush
size not too small, to create soft transitions. Using the reference
photo as a guide to where the image might
need darker shades, I paint the brush strokes following the
curvature of the hair. The different color instantly creates more depth
in visual interest, making the hair appear
more realistic. I continue to carefully paint in the shadow strand by strand, layering the brush strokes. Occasionally, I vary
the size of the brush to create different thicknesses
of my brush strokes, simulating different
sizes of hair strengths. I also like to accentuate the strengths we established
in our sketch by defining those logs
and by painting in the occlusion shadows those logs create when they interla. As a reminder,
occlusion shadows are dark areas on objects that are hidden by
the object itself, therefore, not letting light. Now, I want to add even more
color variety to our hair. For that, I once again, color pick directly from
the illustration and use the new warm brown tone color to add more strands of hair. I do that by once again
layering them up. If you want, you can do
the step on another layer. Yet at this detailing stage, I decided to keep working
on the same layer. I also started drawing in more stray strands that are leaving the outline of the hair. I'm slowly adding
more and more locks. I keep on adding more
color variety by color picking the color of the light and in my color wheel, moving it to a more
saturated orange bage. Now I'm ready to add even
more details and lights. I lower the size of
my brush slightly and start by adding
more lighter strands. I define the strand
next to her cheek, the light big waves. I quickly switched
to the smatch tool and corrected a darker
patch that I didn't particularly like and continued adding layer upon layer
of lighter color variety. You can see how
it adds gloss and generally more interest as there are now more colors and
lights established, making the illustration
look more interesting. I will speed up the video as
this part takes some time. I like to keep the brush
sight smaller at this stage as I want to accentuate the
pattern of the single hairs. I occasionally change
the brush size, creating lighter
patches of hair. Should I find a part
of the curl to light, I color pick a darker tone from the illustration and draw
some shadows back in. This layering
approach will create a more organic look
to your illustration. As I'm more satisfied and more
confident with the locks, I start defining the
section more strongly. I do that by
outlining each lock, using the sketch
layer as a reference. I define the ends of the hair and add more overlying hairs. I create a new layer and color
pick a light brown tone. This time, I will switch
to my details bruh. I start adding thin more
well defined highlights. I place the brush
strokes on parts that I want to out, accentuating
some strands. Keep in mind that we mostly want to accentuate strands that are in shadow and want to
use this brush sparingly. I keep the brush size tin
to create more hair texture and always follow the direction of the hair strands
I'm painting. You can purposely add more realism by
making the lines go, but stray, not too perfect. As the hairs on our heads
never fall perfectly, painting them too neat in our illustration would
make them look boring. Have fun adding some little messy stray hairs
on your painting. Oh. Don't forget about
the hair line. Usually, we can see a bit of the skin where
the hair starts. As we start with
an under painting, we have to manually add
that translucency later. I like to do that
by simply painting hair strands over a
small part of the skin, creating the transition
between hair and head. I continue adding more in hairs, adding some of them
on top of her head, where the wind
might have ruffled some of her hair
and to show that her hair is actually soft and voluminous and not just
a block of plastic. By using the smatch tool, we can add some of the
parts of the hair. I do that to add the hair line. Since I have different layers, I use the smatch
tool to pull back some of the colors
from various layers. Now I will add some
final highlights. For that, I choose a very
light unsaturated color. I keep working with
my details brush. I added some highlights on parts that will be most curved
towards the light. Mostly, those parts will be on top of already
established lights. At this stage, it's
important not to overdo it and keep the
highlights sparingly. I place them on areas
that are in the light, carefully showing the strands and parts that need accents. At this point, we are nearly done with the illustration. H. Oh. One last thing is missing. Let's not forget to paint the shadows on her face
from the falling hair. For that, I like to
choose a soft brush. I create a new layer on
top of the portrait layer. I color pick the shadow
color of her skin and softly paint the shadows under
her hair and on her face. This hairstyle is done. In the next class, we will
take a look at painting smaller curls and
the best approach for doing that.
So see you there.
5. Basic Approach to Curls: In this section, I will share some techniques for
painting curly hair. Cures can vary in
form shape and color. There are several
different approaches to painting tight, tiny curls. In my last lesson, we
covered painting waves. Some hairstyles
consist of smaller, more defined waves, and the approach to painting
them is similar. For smaller curls, imagine a metallic spring that reflects the light on
some of the plane, followed by shadows where the curl turns away
from the light source. Though it requires painting
the logs individually. While this can be
time consuming, the results are often
worth the effort. There are two
different techniques I would use for painting curls. From big to small. This approach works well for
medium size to small curls. Begin by defining the
outline of the hairstyle, focusing on the
negative space and the form created by
different strands. I will focus on the
overall direction and movement of the hair rather
than individual strands. I will show this in more
detail in the next demo. After establishing
the overall movement, start defining some
individual strands without detailing
every single one. For realism, feel free to work on each strand
as much as you like. You can use the techniques I showed you in the waves class. Depending on the
illustration style, I might do so, but usually, I prefer a more painterly look while leaving other
areas less defined. Another approach
I like to use for very small curls is outline
and texture brush technique. This approach is ideal for
very tiny tight curls, such as those in
Afra hairstyles. Use a sketch brush to define the overal shape
of the hairstyle. Focus on the negative spaces and just look at
the form itself. Next, work directly
with light and shadow, treating the hair as a whole. Using textured brushes will help create the illusion of
small fluffy curls. After that, you can add some definition to
some small areas, defining some individual
strands or hair ends, giving the illusion of realism. By following these techniques, you can achieve beautiful
realistic curls in your digital paintings. Let's move on to
the demonstration to see those methods in action. See you in the next class.
6. Painting Demo Curls: In this class, I will show
you how I paint curly here. My approach to
painting hair can vary drastically depending
on the type of hair. As a rule of tamp, a
great way to start a drawing is by first
outlining the hair shape. Look at the negative
space surrounding the overall head and see
the different edges, shapes, forms, and
volumes the hair creates. I like to do that with
just a few simple lines. You can use any brush
you like for that. I use my Magi soft brush, which I use as a
universal brush for nearly everything from sketching
to painting to refining. This type of hair consists of more or less defined
separate locks of hair. The locks aren't
always very visible, but we can say the hair falls
into a few defined locks, which follow a
particular direction. I like to mark them with a few simple sketches of the curls. I focus on the most
prominent locks and hair strands marking the
direction of the curl. You can do that step as
detailed as you want. I usually just do a quick sketch before I move into color. But having a more
defined sketch of the single curls can make
the process easier later on. Later, we will paint on top of that drawing and refine
the curls further. After having the outline
and the rough direction, size and form of the
curls thrown out, I like to fill the shape
with a base color. For that, I create a new layer below the sketch layer and
pick a dark middle tone. I like to keep the
darks in warm tones, and so I chose a warm brown
for the underpainting. I fill the hair shape, leaving some spaces here and there where the single
logs will be ending. Since we will be editing refining and erasing
parts later on, you can be as rough as
you want at this stage. Oh. At this point, we will start adding
volume and depth. After filling in the color, I like to create a new layer
on top of the underpainting, yet still under
the sketch layer. For that, I choose a darker, more saturated and using
my smudge soft brush, I start painting in the
darkest parts of the hair. If you're squeeze your
eyes at the photo, you can see that we can find the darkest shadows
contouring her face and in the lower part of the hair,
wrapping behind the head. I like to approach this
part in a painterly way. I add the shadows following
the form of the locks, adding small brush strokes in between the locks where
the shadows will be. I continue refining the locks and the overall shadow areas, adding more definition
to the single curves and paying attention to the
direction of each lock. As you can see,
it instantly adds some more volume and plasticity
to the overall hair. I like to lower the
brush size to be able to create smaller logs and
inner hair strands, once I establish
the bigger ones. I now add curls and hairs
outside of the hair shape, making the hair
look more organic. Hairs are never homogeneous, so pay attention not to repeat
the same rhythm too much. The single curls
of hair fall into different directions and
follow different forms. Some c, others inwards, creating that organic look. Small messy hairs
across the curls create more realism as hair
never falls perfectly. Oh. I like to use the smudge tool
to clean the line, making it less harsh. For that, I like to use
the same brush I use for painting as usually
my smudge brush. I carefully smut and soften transitions between the line
and the parts next to it, making the locks appear softer. Highlights are the
magic ingredient, which will turn
flat looking hair into full voluminous locks. For that, I like to select a
slightly desaturated color, staying in the same color range as the base and the darker tone. I add the highlights on the
highest part of each log, highlighting and
just enough to give the feeling of light
falling on a tube. As I showed you in the metal spring example in
my previous lesson. We don't want to
overdo that part, as it can quickly
look like we're repainting highlights
as in dyed hair. We just want the lights to accentuate the form of each log. In this stage, I closely follow
the example in the image. While the most contrast can
be found on top of her hair, I will add a bit
of that highlight detailing each part of her hair. Later, we will soften that and accentuate the parts that are turned most
towards the light. I like to take my
time at this stage. Carefully placed highlights can make all the difference
in a painting. O Using the smudgy soft
brush as a smudge tool, we can adjust parts
that are too harsh, for example, where the lock
is carving away from us to soften the transition and
to make the light softer. It's important to occasionally out and see the
painting from afar. That way, you can
spot mistakes early on and also see what parts
need to be worked on. My approach to painting
here is very painterly. Depending on the style
you are working in, you will find many different
solutions to painting here. I like to leave parts defined, opting for big brush
strokes and the illusion of realism with a few
strokes of highlights. It gives the illustration that
handmade feeling I enjoy. This match tool can also be very conveniently used to clean
parts of the illustration. Instead of going for the eraser, you can softly push
back strands or stray hairs to achieve
a softer result. I like to do that on each layer, softening the sketch layer, the underpainting, and
the details layer. In the end, my process is
always similar in the sense that I like to add layers of color followed by another layer, softening, erasing if needed, and adding layers with more definition and
detail as I go. This layer of paint upon layer of paint method
helps to create a more realistic result and also makes the
process more organic. Also, I'm not worried about being perfect
from the beginning. I work on the
painting as a whole, gradually, slowly adding realism
and improving the image. O I like to add some well defined curls in the front of the face and
around the main focus. Sometimes, you can
achieve the feeling of realism by working out a few
details, leaving the rest. This works not only
for painting hair, but it is a general approach to illustration or
painting itself. After softening some
of the highlights, I like to add some sharp
highlights on top again. For that, we will continue with the same
approach as before. On a new layer on top of
the rest of the hair, I will choose a desaturated
pretty light color. If the shadows are
warm, cooler tones, even moving towards
bluish tones can look great as they will simulate
the blue skylight. In this case, I will stay
in the same color range, simply choosing a lighter color. I start accentuating the highlighted areas
on single strands, paying especially attention to parts that I turn towards
the light the most. I am also paying special attention to the
reference image. As it gives me all
the information I need about the lighting
situation in my painting. Can you see how
only smaller areas of each strand have strong
highlights on them? I try to add just those as we already added lights
in the previous step. I always try to work in the direction of
the brush stroke. I will often rotate
my canvas, my hand, and the brush itself, to make the lines look as
organic as possible. I also like to add some
frist and stray hairs. This will make the
hair look more real, less neat, and more
naturally looking. You can always add it
on a separate layer, and should it turn out too
strong or not to your liking, you will be able to
addit it easily. Let's make some color
and tone adjustments. I will now add a bit
more depth and volume. I created a new layer on top of everything and
chose a soft brush. With a dark, saturated color, I paint in the shadow areas
of the whole hairstyle, especially with the
hair curves away from us on the right lower
bottom next to her face. I also like to play
with color modes. Multiply is a great one to
add depth and saturation. But I always tend to just
scroll to various modes to see which look good and solve the problem
I'm trying to solve. I'm lowering the
opacity slightly as it looked a bit too
dark for my liking, but I really like how it quickly added more volume
to the hairstyle. Let's do the same with
the lighter parts. For that, I create a new layer on top of the shadow layer. I choose a light color and
use my soft brush to paint some very soft lights on top of her hair and the side
where the light falls. Here again, I like to play
around with the color modes. I often use lighting, but in this case, I really
liked how soft light looked. If you now zoom out, you can see that the hair
now has more volume. Now I'm ready to work on the
details of the painting. For that, I like to merge
some layers so I can focus on cleaning the outline without having to repeat
it on each layer. But this is totally up to you. If you prefer to
continue working on separate layers, feel
free to do that. I like to keep the amount
of layers minimal, so I tend to merge down some layers when I'm
satisfied with the process. I use an eraser with
this sagsft brush selected to clean the
edges of the hair. I go in the dark parts between the different curls and
add some transparency, as hair tends to get
less tick in the ends. Now it's time to detail and add yet another layer of
realism to our painting. We already added
quite some of them. The sketch layer, the
under painting layer, the shadow layer, followed
by the light layer, first rounds of highlights. Now it's time to add some
more gloss to our hair. At this stage, we are moving
towards the finishing line. I want to add some
more sharp highlights to the hair before finishing. You can use the
details brush for that or any other brush
that feels great. I often also paint them using this magsft simply by
making the brush size sm. I choose a very light color and go over all the lighter
strengths of her hair, accentuating the curls and
the single hair strands. It may look a bit strong
and too contrasty now, but we will later soften it up. It adds this really
nice gloss to her hair, making the different
strands pop out. I mostly focus on the
curls on top of her hair, which are the ones that
catch most of the light. I add some bits of sharp
highlights on the sides and on some of the curls that are turned
towards the light. O. Again, I use this smatch tool to
soften parts that are too strong or that need
a bit less contrast, making the glossy highlights. Oh H H. In this stage, I paint in
direction of each hair strand, making small thin lines, following the curvature
of each lock. I'm setting the highlights
only on the lighter parts of the hair to accentuate the lock further
and try to keep it. I also like to add some
more very thin hair strands to make the ends look thinner. I create a new layer on top
and choose a details brush. With a dark color, I will
now add some single hairs. Especially on the
side of her hair, we can see in the image that there are some
straight hairs. I paint them over the spaces I have left in the
ends of her hair, filling those spaces
with tiny curls. It makes the hair look
more soft and real as hair tends to have imperfections
and irregular hairs. A We are nearly done. There's just one
lasting missing. To make the hair blend even better with the body underneath, it needs a few shadows. For that, I create
a layer beneath the hair and using a soft
brush paints some soft, warm shadows right
below the hair. You can pick a shadow color
directly from the bust, such as the color
right below her chin. And now our painting is done. Congrads, you have now learned how to paint
smaller curls.
7. Painting Demo Afro: In the last lesson, I showed you my approach to
painting curly hair. But how would we approach painting smaller,
more frizzy curls? In this lesson, I
will show you how I would approach painting
another type of hair. The hair in the photo
is much more frizzy and thick in comparison to the
hair we painted before. The locks are smaller,
tighter, curled, and fall into what looks like small tubes in different
directions around her face? You could start by painting
an outline of her hair, which is always recommended. In this case, I jumped
right in to show how you could quickly create good
results with simplicity. For that, as usual, I
create a new layer on top of the bust and choose
my smudgy soft brush. Here, you can use any texture brush that offers a bristle like texture or some frizzy texture if you work in a different
software for that. The important part is that
with each brush stroke, we can imitate some of
that frizzy softness of each of he locks. I start directly with
the darker brown tone and follow the
direction of each lock. What I do here is that instead
of having a sketch first, I directly establish
the underpainting by painting in the locks. Her hair is full and voluminous, and we want to show that by layering locks upon
locks of her curls. I'll leave some spaces between the locks so I can see
the different strokes. I will eventually
fill those spaces up. Pay attention to the
movement I make. With my hand and brush movement, I imitate the
rotation of the lock. You can vary the
size of the brush, adding some smaller logs
of hair around their face. I like to refine the ends
by painting them with a smaller brush size and showing the tin hairs at
the end of each girl. Now, to add more
dimension and depth, I choose a lighter brown color using the initial
darker color as a base. I start painting in small curls to show texture and definition. In the picture, the locks
are fairly well defined, so we can directly paint smaller curls with
our lighter colors. In the case of an Afro where we wouldn't have such
a clear definition, instead of painting small curls, we would use a texture brush and later add lighter
texture on top. In our illustration, though, the curls are nicely visible and have some thickness to them. Oh. Oh. I use this match tool to
soften the transition, especially at the beginning of each lock and also adjust
the thickness of the line. I keep adding more
layers of hair strands. In my case, I'm working
on a single layer, since I'm treating
the hair as one. Again, if you prefer to
work on separate layers, definitely feel free to do so. I add some more hair
strands and keep layering inner strands on
top of the lighter color. I color pick the color
directly from the image. By doing that, in picking
the overlaid color, we will get new tones and hues, which will all look coherent
in our illustration. I keep on layering
more and more strands. I pay attention to where
the light falls on each lo. Should you make the
lighter color too thick and on what looks
like the hole of the lock, you can easily correct that
by smudging away from below, leaving most of the light
in the middle of each lock. As you can see in
the reference image, the hair falls nicely
around the head. Whereas in the
illustration right now, it looks a bit too stiff and seems to grow equally
in all direction. Let's change that. For that, I like to use the liquify tool. You can do that by going to the adjustments
and selecting. In the push settings, I adjust my branch size
as I don't want it to be too small and start softly pulling and pushing
parts of the hair. One thing I do here is to
open a bit of her forehead. I also adjust the volume on the sides of her hair and also lower the direction
of the curls on her sides more
towards the bottom. This makes the hair
fall more naturally. I continue adding lights
with a lighter brown color. Now, instead of
painting spirals, I mostly paint the light
on top of each curl, highlighting the logs on the parts that will
catch most of the light. Occasionally, where there
is still no definition, I will add inner strands
to create more interest. To add more volume
and definition, I also like to paint in some overall shadows on
the whole of the hair. For that, I create a
new clipping layer on top of the painting
and choose my soft brush. With a dark, nearly black color, I paint some shadows around
the lower side of the hair. Once again, I play around
with the layer modes. Multiply seems to work
the best in this case, and I adjust the opacity. This is a quick way how you
can paint this type of hair, without actually painting
each lock painstakingly, yet without leaving
too undefined either. Sometimes, depending
on the level of detail I want to achieve, I would continue
working on defining the hair as I showed
you in my curls video. For visualization purposes, it is sufficient to show
a good level of detail and give information
about the texture of your hair without spending
too much time on defining it. Now we can add some shadows
from the hair on her face as I showed you in my previous
video, and we're done.
8. Final Words: Congratulations on
finishing this class. You can be really
proud of yourself as painting curly hair
is not an easy task. I really hope that
my lessons help make painting curls and
waves a bit easier. We learn how to analyze and
understand how curls work, how to approach painting each
type of curly hair style, how to choose the
correct painting method, and how to make the results
look good without struggling. Don't forget to upload your hair painting in the project
section of this course. I will take a look at each entry individually and respond. Also, if you like this class, I would really appreciate it if you could
leave me a review, as this greatly helps to
improve my classes for you. I can't wait to see all
your beautiful works. So happy painting
and see you soon.
 Gabriela Shel, Illustrator and Concept Artist