Transcripts
1. Class introduction: This is my iPad, and this has been my
main graphic design tool for over five years. My name is Karim little and I'm a motion graphic
designer from Jamaica. And in this class,
I'll be teaching you exactly how I use my iPad to create amazing graphics and motion graphics for my clients. If you're interested
in learning how to use an iPad or how to use Affinity Designer to create graphics and
motion graphics. Or maybe even Canva in this
Skillshare class is for you. Join me as I walk you through
all the tips, techniques, and strategies that
I use personally to have helped me and
I've picked up so far. And that might just help you
to gain and do awesome work.
2. Introduction to Affinity Designer: So the app that I
use on my iPad for design is known as
Affinity Designer. And for the iPad it
costs around $20. It's a onetime fee. And that's one of the great
things I love about it. So while most people tend to use the quote unquote
industry standards like adobe Illustrator
and Adobe Photoshop. I strongly prefer affinity tools simply because of
their onetime fees, the regular updates
that they do provide, and the fact that
the software for iPad is really more robust and so much more capable
than the Adobe counterparts. So if you're looking for a
design tool on your iPad, I would definitely recommend
Affinity Designer. There is also Affinity
Photo that you can use for photo
editing and retouching. I'll see you in the next lesson.
3. Learning the interface Part 1: When you first open
Affinity Designer, you will be greeted
with a page that looks something like this. What if you have
projects before then all your projects would
be showing here on the, I guess this is like
your catalog screen. To go into a project, you can simply go ahead and
tap on that specific project. And that takes you inside. Once you're inside,
you see a bunch of icons on the left and right, and we'll be going through each one of those in this glass as we can as fast as possible, just to give you a brief
overview of how it all works. So let's go all the way down to the bottom where
we have a new project. Let's create a new document. We're going to change the document properties
from points to pixels. On the dimension side, we're going to go
to 1080 by ten atm. That's an Instagram square. And we're going to go ahead and click or select
Create art board. That's all we're going to do. Then click okay. It creates a new
document for you and with two fingers
you can go ahead and zoom out by pinching in the
screen and pinching owed. You can pinch in and autism. No, on the top left-hand side, there's our most looking icon
and that's your Move Tool. And to see the names
of all of these tools, simply select the question
mark icon on the bottom right. And that gives you pretty much an overview of every single
tool in terms of name. And we'll be going through the ones that you'll
be using most. So the move tool, once you have it selected, allows you to move
the canvas around, allows you to move things
around the canvas. So let's say you
bring out a shape, select the Move tool
that allows you to move the shapes
are on the canvas. The node tool allows you to move nodes on elements
that are curves. Now, currently this
rectangle is not a curve. What to convert it to a curve? I could simply go here, select convert to curves. And with the node tool selected, I could drag my
finger over one of the points and simply
move it up and down. Here you have the point transform tool and
this allows you to move the point that you
basically transform our own. So let's say I move it
to this corner here. I could now go into
my transform studio. And my shape is now
moving on this axis. If I go to rotation, you can see clearly moving
from the bottom left point. Let me go ahead and undo all of that by hitting or
tapping two fingers. Below that you have
the contour tool. And this is really just
kind of putting a border on whatever you choose
to put out below that you have your corner tool. And your corner tool really
allows you to change the shape or the corners
that you have with nodes. So let's say currently
this is a square corner, very sharp corner with
the corner tool selected. I can select this point
and click and drag it in with my finger
to change the curve. I can also change
the corner type from rounded to a concave, a street, or even
not caught out. And simply still using
that same mechanism where I'm selecting the
point and dragging allows me to change the
shape of the coroner. I can select multiple points by clicking and
dragging or using my finger to drag over multiple loads and affect
them in the same way. And as you notice, one of these is currently
a rounded edge, while the other is a cutoff. So you can definitely
get creative. You can do it one
at a time where you selected one and create some
really interesting shapes. So that's your cornetto. Below that you have
your pencil tool on. Your pencil tool is really about drawing with your
finger or your pencil. Below that, you have the
brush, your vector brush, and this draws vector lines similar but generally thicker. If you're doing a
lot of illustration, your pencil on your
vector tools or vector brush will come in handy. Your pen tool is probably the single most important
tool that designers use. So what it allows you to do is create complex shapes
and trace over. Images are elements
that you'd have brought in to your Canvas. Below that you have
your gradient tool and this allows you to add color or gradients to
strokes are fields. And if you don't know
what a stroke is, a stroke is really the
outline of your elements. So let's go ahead and add a
stroke to this one right now, let's select the Move tool. Select our shape. Let's go into our color studio and how do you find
your color studio? Simply select or Help icon. That's a question mark
down at the bottom. Color studio is the
one at the top. And let's go ahead and
select or stroke by tapping on that open circle
or a doughnut that's behind the fill color.
With it selected. You can simply move
your finger to change the color of the outline. We're going to
choose a black one. And below your color studio, you'll see a little
squiggly line. This is your Stroke Studio. Know what your Stroke
Studio allows you to do is change hold a stroke appears. You can change the thickness by simply increasing the width. You can make it a dotted line. You can make the brush. You can change dash pattern, which is the dotted line
pattern and so forth. But for now, we'll leave
it at this Ginger from 20 by typing in 20 and
let's say leave it at ten. So let's go back to
or fill tool now. And, or fill tool
really allows us to add colors to our
strokes or fields. Now, in order to do this, select your fill tool. Select the element at the top here in the
contextual toolbar, and this is at the bottom
center of your screen. On the right-hand side, you'll see this blue
icon highlighted. This one is telling you that, hey, this is your field. If you select the
one at the bottom, this one is for the stroke. So with this item selected, as you notice in the
color studio on it, a stroke appears
on what you can do is change the type
from non linear. And know you have a line
that comes up where you can decide to
change one side to any color you want and the other side to just
about any color you want, then you can get really creative with using your Fill tool. If we are to change
the color inside, simply select the icon at the top and change from
solid to linear again. Or you could go to radio. You can move your tool and simply select
the colors you wish. So let's go ahead and
create something different. So here we have a
really nice shape that just took us a
couple of seconds to create using our tools that would have
talked about so far. Continuing here you have your transparency tool that's
right below your fill tool. And what this allows
you to do is, however, transparency
gradient on some elements. Now I find that this
works sometimes, but it works best if you have
those elements in layers. So let's say you have multiple
shapes and you want to apply transparency
to those shapes. If I apply a
transparency to one, when I select the other one, it doesn't always
give me the option to apply a transparency
to it as well, especially if they're
on the same art board. So what I tend to do is
go to my Layers panel, create a new vector layer, put my shape inside that layer, and add the transparency
to that layer rather than the element itself. Let's go ahead and undo that. So that's a transparency tool. I think everybody knows
what a crop tool does. What, just for the
purpose of this class, your crop tool really
allows you to go through and crop the sides
of your image. That's pretty much it. Your rectangle tool is what allows you to bring
shapes onto the canvas. These are shapes
that I've pre-built and customizable
to a great extent. And if you want more than
just a rectangle shape, simply double-tap the icon or tap closer towards the edge. And what that opens up is a complete catalog of shapes that are pre-built
and customizable. So simply select one of those. I just selected a square star and simply by using my finger, I can drag that square star. If I hold on a finger,
it constraints it. Then once I have that
shape on my canvas, I can go ahead and
customize it by changing the number of sides and doing
all sorts of fancy stuff. So feel free to
go ahead and play with these elements too. Learn how they work and see
how you could go ahead and incorporate them in your design will definitely be using them. Right below your a tango
icon is your text icon. And this allows you to bring Artistic Text, unframed texts. And the difference between
the two is really simple. Artistic texts. These texts where you
can pretty much a lo, a lot for it to happen. And when I say a lot more, if you want to have curved text or text on a path going around
a specific shape. Just the text is your option. If you are looking
to write a paragraph or just to get some texts
don't under Canvas. Frame texts would
be your best bet. I generally use Frame
Text a whole lot more, but this is really based on lifestyle and the type
of work that I do. What you can use both given where the situation
or the need arises. Finally, on this left hand side, you have your color picker. And what this
allows you to do is simply drag your finger
along the canvas. And what that does
is select just about any color that your finger picks up on if you're using a stylus, than your stylus would
pick up that color. You pick up the color. It appears here in your color studio beside
the color picker. And to have it unto your
field or your stroke, simply tap the fill
or the stroke, and then go ahead
and tap that color. Now you can go ahead
and pretty much add it to just about any
design you want. You can add it to an artboard by going ahead to the layer panel. Select the artboard layer, going back and simply
tapping on that color. And that covers all tools that
are in Affinity Designer. Under left-hand side are the tools on the right-hand
side, our studios. And we'll go through all those studios in the next lesson.
4. Learning the interface Part 2: In this lesson, we'll
be talking about studios that are found on the right-hand side
of the interface, and how they allow you
to further interact with the design as you work
on your projects. So to find the name
of all the studios, remember you can go ahead
and click on the Help icon. That's the question mark
and the bottom right. Once you click and hold on
it or you tap and hold, you see the names of all
the students appear. Know the color studio
is at the top. The color studio does is
allow you to pretty much, I just looked color for any element that you
have on your canvas. You can adjust the color for the fill of the element,
for the stroke. And every element that's a
vector has a fill or a stroke. This is not the same
for images as these are pixel layers are
not vector layers. Below or color studio. You'll find your Stroke Studio. And this is what allows you to make further adjustments to the strokes that you would
add to your various elements. You can change stuff
like the stroke, width, stroke pattern, and change it from a regular
stroke to our brush. Below that, you have the brush studio and
this is where you are. You can really get into
the nitty-gritty of brushing and adjust the
type of brush that you use. And if I click here, you'll notice that it gives you many options to
choose from and you can actually create your own brushes or import brushes if you desire. Below the brush studio is one
of the most important ones, and this is the layer studio. This is where every
single element that you've put on the
Canvas will appear. And order in which they
appear is very important. Those that are stacked at
the top are going to be more visible over
those that are below. This is very important in design and you'll learn
more about it when we move on to future
lessons below or LEA studio is or
appearance duty. And this allows you to change the appearance of the
fill and the stroke, where you can add
multiple strokes to one shape or one element
or change the color, the fill, or the
appearance of the field. And you can really get some really cool effects
using your appearance studio. So here we have
our Asset Studio. And in your Asset Studio
you'll find icons for iOS 12. And you can also import
your own icon set along with icon sets that you would have created inside of affinity. This allows you to pretty
much use them or find them easier when you want to use them for future projects. Not to add an asset
to the Asset Studio, all you simply need
to do is navigate to the assets category
that you want. Click the hamburger icon here. Select your element. Go ahead, click the
hamburger icon and select Add to selection. It appears at the top. To add it to your Canvas. You can simply hold it
down and then click, insert or delete it. You can go ahead and tap on
it again and hit delete. Now below or Asset Studio, you will find your image
studio or your stock studio. This is weird. Affinity, somewhat integrates
with stock websites like pixels and Pixabay
and I believe Unsplash. Okay, so it's just
pixels and pixabay, I think Unsplash was there
at that point in time. And what this allows
you to do is instead of going to Google and then
downloading an image, you can simply type
in an image here. And it searches pixels and brings in or allows you to just drag in an image from the list that it
would have provided. And just like that, you'd
have downloaded an image from pixels to use in your graphic
below your stock studio. It's just symbols studio. And this allows you just as much features as
the Asset Studio. However, with symbols. When you adjust a symbol
or when you add a symbol, you create one and
then you adjust it. You can adjust all instances of that symbol for pretty
much any weird, you would have them
on your graphing. Let's say you're working in UI design and you have
a whole button or a navigation bar
that you want to adjust instead of going
through 59 words. And I just didn't
them one-by-one, simply make it a symbol. I'll duplicate it and
place it where you'd want to place it in your AdWords and whenever you
need to adjust it, instead of adjusting all 15, just adjust that same. Below your symbols. Do you find your effects studio? And your FX Studio is
really where you would add effects to your elements. So if you want to add a blur, a shadow on overly
bevel emboss or 3D. Look. This is all we are. This is where you'll
find all of that stuff. Below that, you'll find
your adjustments studio. And this allows for
nondestructive edits on to your images or
onto your graphic. You have your text studio, which follows on your text
Tudor really allows you to adjust the font
size, font style, font color, the
spacing, kerning, tracking, line spacing,
paragraph spacing, indentation on so forth. Coming towards the end, you have your transform studio, which allows you to
transform objects. This could be through
rotation, shear, or on your XOR y axis allows you also for alignment options, whether you want a center line or horizontal align
certain elements. Next, you have your
navigator studio. And this allows you to put
pretty much move around the Canvas just as you would
with your two fingers. He's also gives
you a view modes. So if you wanted to change from retina pixel mode to a vector, or you want to just see an outline of exactly what's
happening on your Canvas. You can do that using
the navigator studio. Finally, you have your history, and this is pretty much one
of the things you want to ensure that you understand
because it's very essential. History allows you to go back as far as possible
depending on the limit, use it in your
settings and let's actually go there now to see
what the history is like. Right now you see my
autosave interval is at 300 and my Undo
limit is at 128. Which means that at any
given point in time, my Undo limit will be
stored in the history. So I have 120 gestures, eye movements that I would
have made that I can undo before it runs out
of space or memory. I can definitely increase
this to a number that is pleasing to me, but I think a 128 is
pretty much good enough. So I like to keep it there. I've never really had an issue with my undo history before. And naturally, if you can undo, you can always redo. And there you have all the studios that are
found in Affinity Designer.
5. Masking and removing backgrounds: And we want to cut him out
from the background to use in the graphic that
will be creating later. So in order to do this, simply navigate from
your design purse or not to your pixel persona. And to find it, you can go ahead and
hold on the Help icon. And you'll notice there's a pixel persona right between design on
Export at the top. Once you get to
your pixel persona, you're looking for
your selection brush. And you can find
this by holding down your help icon
again and there you see or smart selection brush. So that's the one
that we'll be using with your smart selection
verse selected, check your context
toolbar to ensure that you have add, subtract. And once you have that selected, you can change the width of the brush and simply just brush over the sections that
you want to be selected. Now, you can get as granular
as you want it this, but we're just going to
do a general overview for now and then we refine it later. So here I have most of
the subjects selected. However, as you see there, sections or areas where it did not really
catch it perfectly. And to undo or subtract
that extra space, simply change the
mode from add to subtract and then go in, go in or zooming. Change the width
of your brush and subtract those areas simply by brushing over them once more. If you notice this
section here is not being picked up quite as
accurately as you would want. And this is because the
software is seeing weird. This is not completely sharp, so it's having a
hard time to figure out what is subject and
what is background. In an instance like this. There is another way we can
go ahead to select this area. Let's go ahead and
continue to work on the rest of or subject first. And then we'll move
into change in from our selection brush
to another brush, or another way we can
select a subject. Now another way you can go
ahead and select a subject is by using your free
hand selection tool. And when you double-tap on
the free hand selection tool, you want to ensure that
you select Freehand and then add the type in the contextual toolbar
at the bottom here, you want to change from
freehand two polygon, or once you change from 300
polygon or what you know, are able to do is with the
subtract or add mode selected. You can simply tap on the graphic to trace exactly
what you want to add. Our co-taught. Remember, you can
always zoom in to get as detailed as possible
with your selection. Once you have your
selection and complete, close it by merging the
beginning with the end. And then you can move
on to the next section that you wanted to
select, our de-select. So here we want to work
on this section here, the ensured that it's
still in Subtract mode. And we can just go
ahead and trace. Here. We learn to change
from subject to add. I'm just had this
section of his head. Let me just fast forward. Once we have our
image fully selected. So with our inter
item no selected, we can move from or freehand selection tool
to refine the selection. And you find your
refined selection by simply clicking the
second to last item, our tool on your button. Lifting. Once you have your refined
selection complete, if you are comfortable
with how you would have selected the subject, then you can go ahead and
preview it in transparent mode. And then you can change
the output from selection to a new layer and then
go ahead and click Apply. Once that is done, you will notice now we have our subject completely selected and the
background is transparent. Feel free to change the color
of the art board just to see how well you would have
selected your subject. And that's basically
how you'd go about selecting or cutting out an image using Affinity
Designer to get our mask ready. While we want to do is we want to show that this
young man is running. So in my graphic, I'm going to use Artistic Text and type the character's role. Now going to go into
my studio and change my font to something
that's a bit more bold and change the
color to white. Now I want it to seem as if he's interacting with the
design a little bit more. Now I can do this by
r in one of two ways. I can add a mask
to my text layer. I can, I can add a
mask to the young man. No mass that you choose to
apply is going to depend on which one are the items you want to be overlapping
more than the other. In this case, I want run
to be at the forefront. However, I want some aspects of demand or the boy to be in front while most being
behind the text. Now, with that said, I'm going to apply a
mask to the text layer. You can do this by
selecting the layer. Go into Layer studio, clicking on this plus icon
and select Add Mask layer. Now once your mask
layer appears, while you can then do is
go to your pixel persona. Choose your paintbrush, ensure that you have
black selected, and then remove the sections of the run or the text layer
that you want to be hidden. So it gives the look that those are actually behind the
boy as he's running. One way to get this
look even better is by simply
changing the opacity while you brush over the
mask so you know exactly what you need to
hide on what you can choose to have remained. So let's go ahead and brush over certain areas not to
give the effect that he is interacting in an
ODE with this design. Ensure that seem that this is a white mask and
you're looking to hide. Ensure that your color is black. Ensure that your flow. I like to use a low flow
because this allows me to be very intentional with how I paint and higher layers
that I wanted to hide. You can definitely change
your float or a 100 per cent. If you desire. A
100% flow means that a 100% opacity will be
added each time you brush. Using European brush. Versus a 3% flow. Essentially says,
each time I bush, only 3% of the 100%
opacity will be applied. For faster results. Feel free to adjust the
flow as you see fit. If you make a mistake, Let's say for some reason
you accidentally brush here, we can always undo. Or you can change your brush from black to white
and paint over that area that you would have mistakenly painted
white or black. We're not aiming for
perfection here. We're just really using this as a demonstration of how to global masking elements
using affinity. Remember, you can always
change the size of your brush as you go along to ensure that you're getting not only the best
results possible, we're not wasting time
with a smaller brush. I would suggest start
off with a big brush. And then once you're getting
into refinements territory, change the size of your brush to a smaller one so you don't make any mistakes in
refining your selection. So here, as you see, I would have used a big brush. And now I'm going back over with a different
brush color and a smaller size to ensure that the graphic
interacts properly. Wear the mask is not too
far off and it gives a realistic look of the boy
running through the text. So now that I'm comfortable
with my selection, let me go ahead and go back
to my layer studio and remove or anxious about the opacity to ensure that
it's at a 100 per cent. And here you have a graphic way. It seems as if the young man
is moving through the text.
6. Knockout text effect: Now we're going to
do a quick project using the knockout text effect. And you can use
this to add life to your text when you
are doing thumbnails, when you're doing flyers and other graphics that you might
be interested in doing. So let's go ahead and
create our art board. No, we're going to
set this to a square. Then next step will
be to grab an image. So let's grab our travel
image to get that vibe going. Then we'll take it from there. So in my stocks to do, I'm going to type in travel. And now find a nice
travel photo to use. Once you have your image, you can go ahead and resize it by dragging on one
of the four corners. Once you have it to a
position that you like, then you can go ahead
and add your text. Head to your text studio
to change your font style, the size of the font, than any other property that
you would want to change. Let's use a font
called Montserrat. And I would like to use black so I can get
a really thick. Next, you want to add
a shape, a rectangle, square circle, where in this case we'll
be using our rectangle. Know in your Layers panel, you want to ensure
that your rectangle is below your text. So simply select the rectangle and place it below
your texts layer. We can then go
ahead and adjust it by dragging to ensure that
they're both centered. Once you've done that, then you can make further adjustments to
the size of the text. And there are two ways
to do this effect. The first one really involves selecting both your texts
layer on your rectangle layer, going to the properties
here, and select, subtract. And while this does give you the effect In the event that you want to change the text
and type something else, you are unable to type because you've
created a new curve. What I like to do instead is to group both layers and then set my text layer from normal in terms of
blend mode to erase. What that does is
allow me to change the text that is written here. In the event that I need to. You can also change the color. And there you have your
non-code text effect. And to make this blending
the design some more. You could try
something like placing it at one of the
corners like here. So feel free to play
around with this effect and post what you come up
with in the discussion panel. I'll see you guys
in the next lesson.
7. Create a Spec Commercial Part 1: In this lesson, we'll be
creating this graphic here, going through all the steps that you would need to go through in detail so that you could create something just like
this for yourself. Let's begin. So the first thing you want to do is
create your art board. And I'm going to pretend this is going to be
an Instagram real. So we're going to make
this a vertical graphic. So the width is 1080 and
the height would be 1920. Select Create art board and
go ahead and click Okay. Now you can get the images
that you need from Google. So do a quick Google search. I'll go ahead and add my images, not to add your image. Go to the document settings
here and select Place image, and you can import
them from your photos once you've downloaded
them on your iPad. So now that I've added my image, the first thing I
want to do is go ahead and start
creating my scene and removing the background from these photos that I have here. Now, if you remember from
our previous lesson, to remove the background, all you really need to do, and let's change the
layer color here. So to remove the background, all you need to do is select the image that you want to remove
the background from. Go to your pixel studio. Use your smart
selection brush and select the area that
will be the subject. Once you're done, go ahead
and refine your selection. If there are any areas
that need to be done over, you can simply brush
over them to ensure that they're selected properly. Once you're done, go
ahead and change from the output to a new
layer and click Apply. So now we have our
first image cut-out. Let's go ahead and cut
out or cheap here. And it's really
the same process. So let's go ahead with
our selection brush. Let's select our chip. Let's go ahead and refine it, change it to a new
layer, and click Apply. And finally, this hand here. Remember you can always preview your work before
you complete the co-taught by selecting
the preview and changing it from
overlay to transparent. I think this is good
enough for graphics, so let's go ahead
and click Apply. Now we have all our images. Let's go ahead and create
the scene that we want. So I want to play on the
colors that I'm seeing here. So I want our background
to be mostly red. Let me remove the color from the art board and add a
rectangle background. We're going to use I read
from or Doritos chip here. Then we're also going
to use an orange. And instead of using
a gradient to get the gradient background
that we want, we're going to use a
different technique by simply dragging out and oval. And then we're going to
change the color of that over to an orange and add
a blur to this color. Now that gives us a similar
gradient type field. Let's go ahead and place our image where we
want it to be praised. And then for the chip, I think we want to have some, some of them are We
want them to be placed randomly throughout the graphic. So go ahead and
place them randomly. Simply just duplicate
them as you go along. Ensure that you change
the sizes as well. Just to have a little
bit more realism there. Some chips can be really small, some can be really large. This will also help
with perspective. Maybe some of them are a bit closer and that's
why they are larger. So go ahead and just add
as much as you want. Don't overcrowd the graphic. No-one. Try not to
meet them to linear. Once you're done
adding your chips, where we are going to do is placed all of
them in a group. And we do this by
selecting everything and then pressing the
Group icon there. Now our next step is to blur all these chips so as to give the graphics
some more depth. And to do this, let's go
to our effects studio. Select Gaussian Blur and change the radius to
something like ten. And here you have an
almost finished design. I think we want some
are four chips. Are, I think we want our
chips to be behind the bug. So to show that, hey, these are actually in
the background and to make it a little
bit more real, you could go ahead and add a shadow to the package itself. And there you have it. So
feel free to play around with the techniques that we
would have just gone through to create
something for your own. Feel free to post it in
the discussion panel. I'll see you guys
in the next lesson.
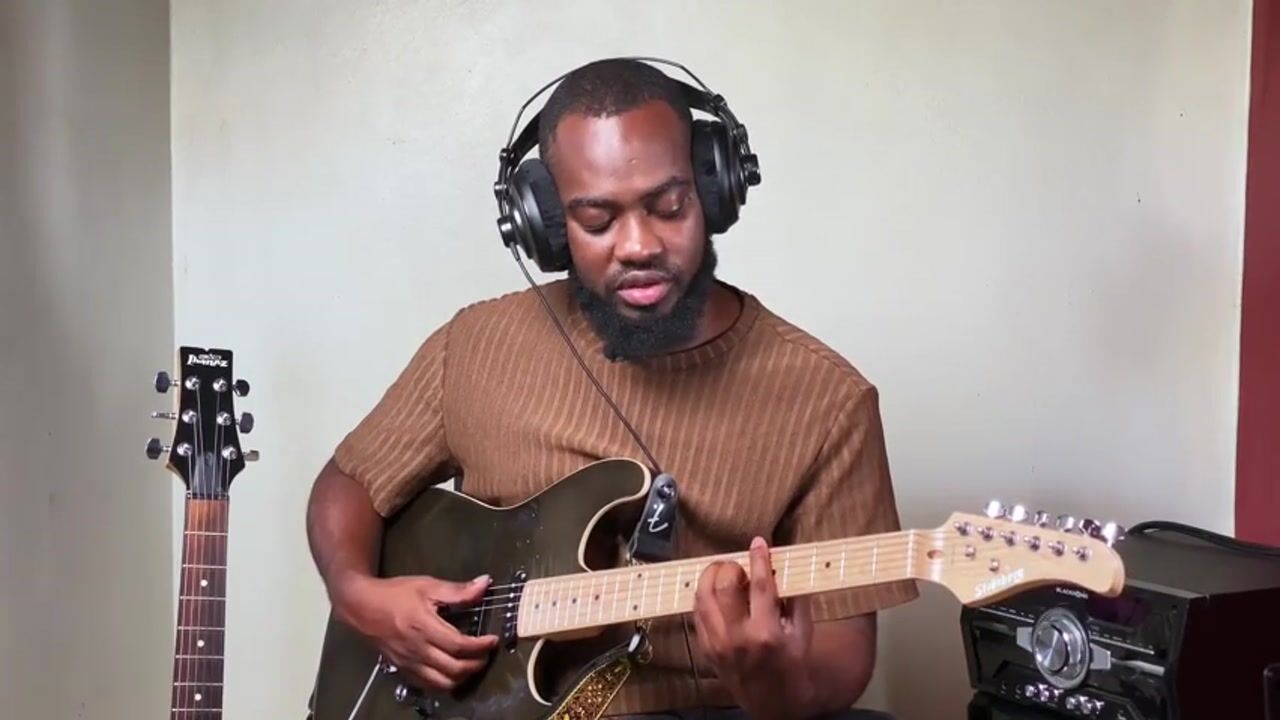
 Kareem Little, Motion Designer/Musician