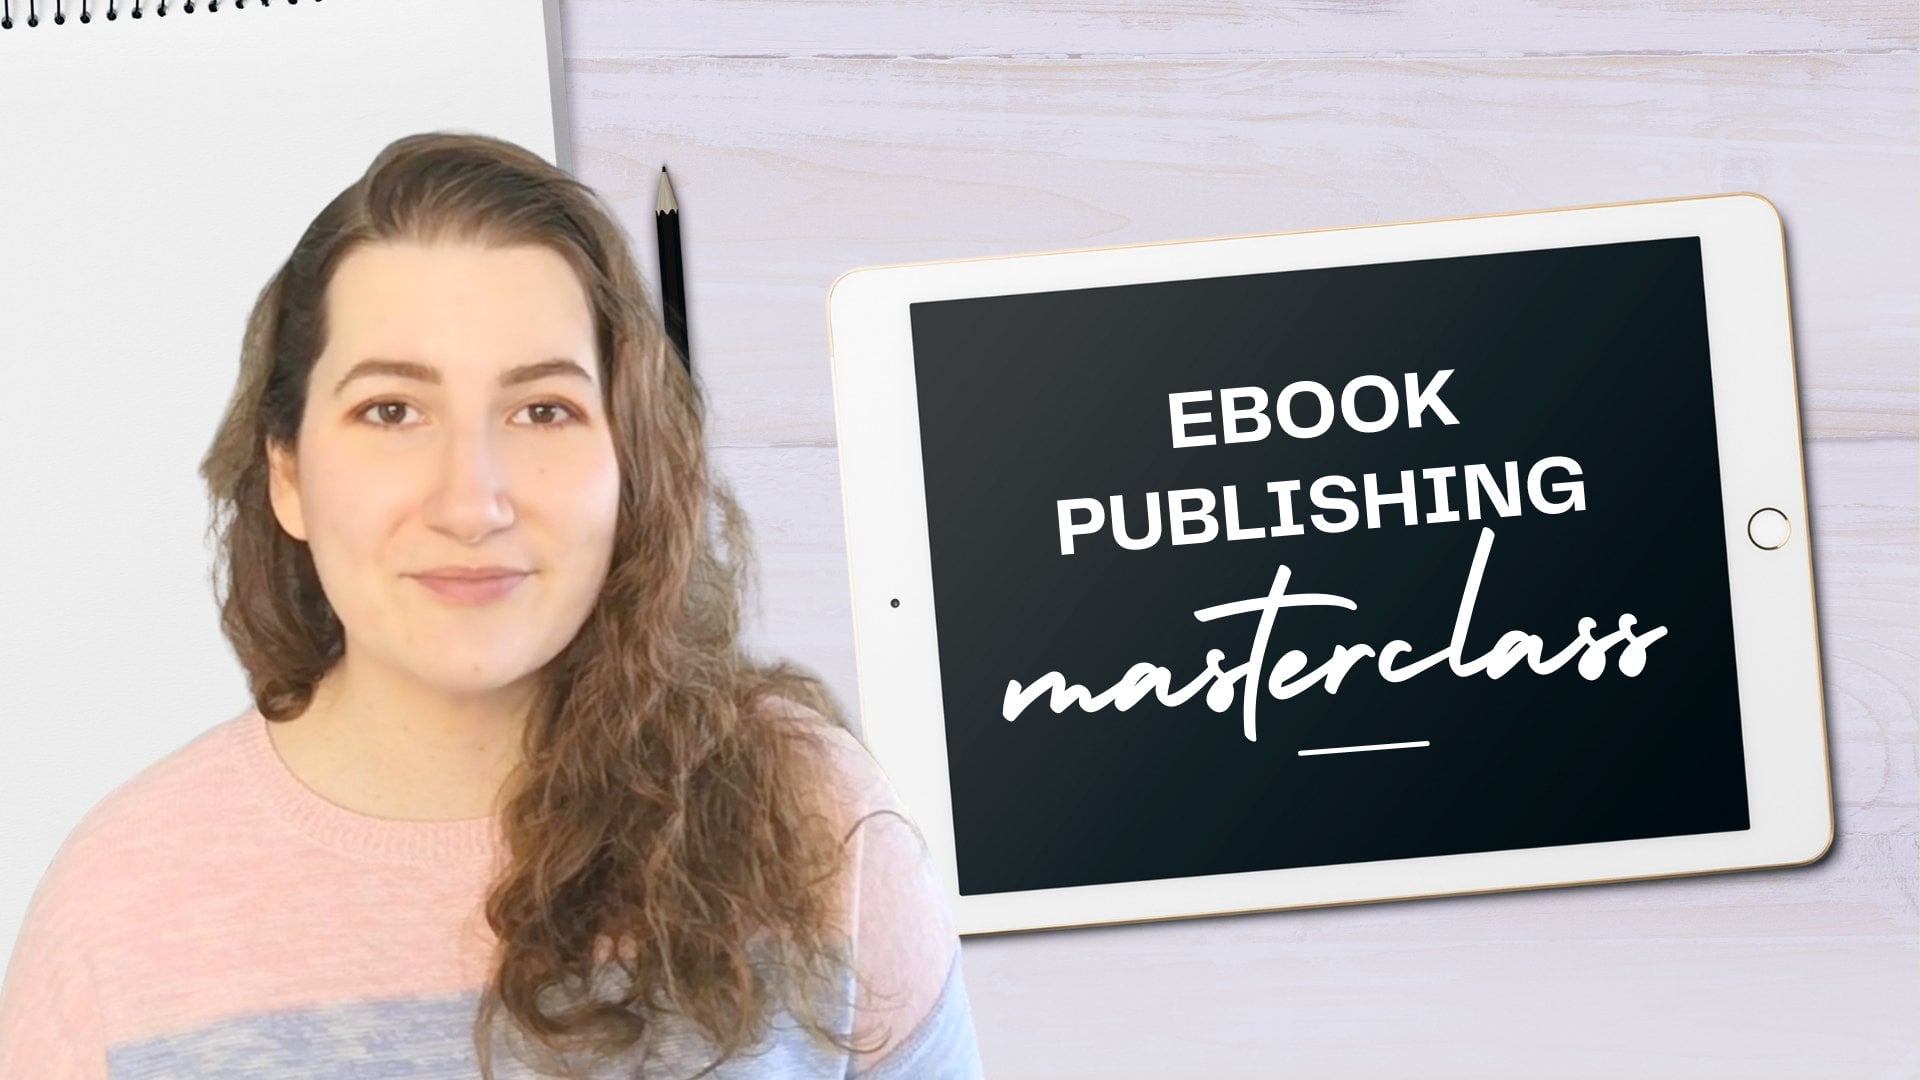
Transcripts
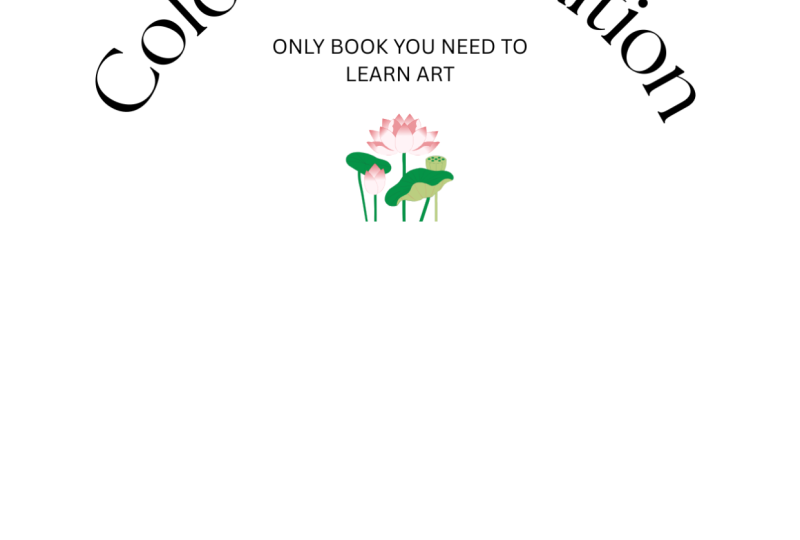
1. Introduction: It is easier than ever to design and self publish your
own book these days. And Canva is a very popular
free graphic design tool that people love to use. However, it is not specialized
book design software. So there are some specific steps we have to take in
order to be able to design a book interior
that will work on self publishing
websites with Canva, It is great for things
like poetry books, picture books,
magazine style books, travel books, art books, or anything that doesn't involve really long passages
of text like a novel. In this course, I'm going to
explain why that is and also suggest some alternatives if you are trying to
format a novel. But we are going
to be focusing on the tools and features
that Canva has that does allow you to
create a lot of different kinds of books
that look really pretty. By the end of this
course, you should have a finished PDF interior that you can upload to a
site like Amazon, KDP, Barnes and Noble draft, a digital or any other
self publishing platform. All you'll need also
is a book cover, and I have other courses
to help you on that. My name is Rebecca and I will be your instructor
for this class. I have designed hundreds of books in my career
as a book designer. And now my thing is really about empowering self
publishing authors to do their own design work
because the tools that are available to us now
are really interesting, easy to use, and let you
be creative in a new way. So if that sounds good to you, then let's get started
on the course together.
2. Types of Books and Canva's Limitations: Canva is a really great
tool because it is free, it's intuitive, and it's
very comprehensive. And I will note that
nothing in this course requires you to have a
paid canvas subscription. You can do everything
with a free account. There are a lot of
things that you can achieve with Canva
as your design tool. However, it has
three key features for book design
that are missing. So we're going to
be talking about how to work around them, but they do present
some challenges that I want you
to know up front. Number one, Canva does not currently have a linked
text box feature. This is something
that you may find in design or other
book design tools. But basically all
that means is that when you are putting
text on the page, when you run into
space, it should automatically go
to the next page and continue with your text. Canva doesn't currently
have that feature. If it changes and they
do, I'll let you know. But that's one of the
reasons that I don't recommend Canva as the
tool that you use for formatting a full
length novel or other really text
heavy piece of work. You can work around
this and just use textboxes and manually
do that transition. Which is fine for sections like an introduction or a forward
or a smaller piece of text. But I don't recommend
it for a full book. The second feature that Canva
doesn't have that is great for book design is
automatic page numbers. This means that there is
no way to automatically insert the page number of your book onto the
bottom of the page. You have to manually
change that number, which means that this job is not impossible to do by any means, but is a bit tedious
and time consuming. I always recommend that this is the last step in your book design so that you're not having to go back and change
the numbers as you rearrange pages or
edit your book. The third thing that Canva doesn't have that is helpful for book designers is a two
page viewing spread. This can be a helpful
tool that helps you visualize the book with left and right pages at the same time. That's just not available to us. We have to remember that
odd number pages in the Canva document are on the right side and even number
ones are on the left side. Just a little bit more hassle. Like I said, not
impossible to work around, but a little extra
work on your end. If those three challenges
don't intimidate you, then Canva will be a great
tool for your project. In terms of other
software options, if you are formatting a novel or a non fiction book
with a lot of text, I would recommend an auto
formatting tool like Atticus, which is my personal preference, or vellum, which is
very comparable. Alternatively, you can get an Adobe subscription
and get Adobe In Design, which is a very powerful
book designing tool. I actually have
another course on how to format a
novel using that. So if you are looking for
more of a text based book, those are some options
you can consider. But Canva is really great for non traditional book projects. Cookbooks, picture books,
poetry books, recipe books, journals, workbooks, art books,
travel guides, anything. That's just a little bit of a non traditional book format. So if that's the kind of
project you have in mind, then let's go into
the design work next.
3. Picking Your Trim Size: In this lesson, we are
going to figure out the right sizes for our
document, for Canva. And that means figuring out the dimensions of our book
before we start designing. In order to do this,
I have pulled up two different web
pages that are from the Kindle Direct
Publishing Help sections, and we're going to use
these as our reference. Now you can be doing
your book design for a platform other
than KDP or Amazon, but this is the most common one and the measurements
are fairly universal. So this is the reference that
we're going to be using. Now. The two pages
I'm referencing are the set trim, size, bleed and margins page, and also the print options page. I'm referencing two
because they provide the same information but some of the information is
not on both pages. I definitely think this
Help section of Kindle, Direct Publishing,
needs some help. But that's what we're going
to be using right now. So we're going to start with
print options and we can scroll down to look at
their trim size section. So there are some typical
sizes here on this chart. Now I will link all of
these pages that I'm referencing in the PDF document that comes
with this course. So you don't need to
remember the URLs. You can just download that document and
you'll find this page, so you can consult
this chart yourself. In most cases, this is actually a very easy step with just
one of two decisions. But if you're doing a book
that's a little different, you may want to try
something different. So let's walk through it. The top section here, these
are all but paperbacks, and then we have hard
covers down below. Hardcovers are
relatively new on KDP, so they don't have
as many sizes. In general, I find that people are looking for soft cover. They are more cost effective, and therefore you can make more profit off of selling them, which is often something
that people are considering. They're also a
little bit lighter, they're easier to ship. But there are some sizes of Hardcover available if
you are interested. I'm just going to focus
up on the paperbacks. Now. We have two
categories here. We have this regular category
and then large trim sizes. This is a change that
Amazon implemented about a year ago where
they are charging a little bit more for printing
costs for any books that are bigger than six by 9 ". You see all the sizes
here that are standard. In most cases, you
are going to be looking at a five
by eight inch book, or a six by nine inch book. Five by 8 " is what
I would consider a fairly standard paperback
size poetry books. Anything that's meant
to just sit and comfortably read
that is a nice size, six by nine is a
slightly larger option. If you are doing a book that involves that you want people
to write in a journal, a workbook, anything
with a writing section, I would recommend
the six by nine. I find it just a little bit more comfortable for writing in, but this is your choice. You can do either one.
Now, there may be cases where you are looking
for a different kind of book. If you're looking
to do a square book in terms of the
preset trim sizes, the first one that is square is 88 and a quarter by 8.4 ". If you're looking to do
a landscape style book or something that is
longer than it is tall, I don't believe there are
any preset sizes here. But this takes us to
the other option, which is to do a
custom size book. And that is why we're
on this page versus the other one
because it has been noted about custom sizes. This is the line right here
I've just highlighted. It's only for paperbacks. You can do custom sizes. The width can be 4 " to 8.5 ", and the height can
be 6 " to 11.69 ". Within these boundaries,
you are able to make a landscape size book. The smallest paperback book that you can make that is square would be 6 " by 6 ".
That's all to say. If this is your first
time designing a book, I would recommend
maybe just picking one of the standard trim sizes. Because you know that Amazon's got a chart here that can
tell you all the numbers, but it is technically
possible to do a custom size. You just have to be okay doing your own calculations and figuring out what
that looks like. As for the rest of the
numbers on this chart, these are minimum and
maximum page counts for each type of paper and ink. There are different numbers. There's four columns here and there is black ink
on white paper, black ink on cream paper. And then we have color ink on white paper and premium
color ink on white paper. There's two for black and
white and two for color. Now if you're doing
a book that has any color whatsoever,
even on one page, then you'll have to pick
the colored ink options because you can't just
make one page colored. If you're going to
do a book that's all black and white, so
that's most cases. Then you have the choice between white paper and cream paper. I find that white
paper is nicer for, again, journals, anything
you're writing in. It could be nice in a regular, a book that you're reading
with text on it as well. But I find the cream
paper has a little bit, it's a little easier on
the eyes if there is a lot of small text to read. I personally do my poetry
books with cream paper. It's just a very subtle change, but those are the two
options Now for page counts. Just looking at the 58
book as our example, we have a minimum of
24 pages for both. These minimums are
really relevant, mainly if you are
doing picture books, because you cannot do a book, I think at all on Amazon
that is less than 24 pages. That does mean both
sides of the page, Page one, page two, page three, not individual sheets of paper. When we're making this in Canva, that would be a document at
the end of the day that has 24 pages is the minimum that
you can submit to Amazon. They have maximum which is 828 or 776 depending
on the paper, but those are very big books and I don't think most people
have to worry about that. One of the differences
just for the color pages, they can only be on white paper. But that makes sense
because they're printing with colored ink, so you want it to
be true to color. If you are doing a
standard color ink rather than the
premium color ink, the page minimum is much higher, it's 72 pages is the minimum. My personal opinion is that this is just to encourage people to pay for premium color ink
for their picture books. I think it's a marketing choice
rather than a necessity. But that's just my opinion. So now that we've
looked over this chart, let's just say that we
are going to be doing a five by eight inch book
as our example here today. Now I'm going to hop over
to the other document, which is the set trim,
size, bleed, and margins. Just to talk about
some other options. This document covers
three main things, which is trim size, which
is what we just decided. I'm going to be using five by 8 " as for example, trim size. We're going to talk
about bleed and we're going to talk
about margins. Bleed is basically
a little bit of extra room on the size of your
document that is going to help you from having your material cut off when
it prints and is trimmed. Now, not all books need bleed. In most cases, you are
not going to need this. And you can just skip ahead and open up your canvas document
making it five by 8 ". But if you want to do bleed, we're just going to
cover that here. Why would you need
bleed, for example, if you have an image that is running off the
edge of the page, like in this example
here on the website. If you didn't include bleed, there could be a white gap at
the edge where your picture ends or it could be cut off
at an unpredictable point. You would also want
to include bleed if you are doing something
like a full color page, maybe a solid black page. I've heard of some
people doing this in poetry books where
they want to do a solid black page
with white text. Now, I don't
necessarily recommend that because I have
heard of some cases, all that black ink warping
the pages a little bit. If you are keen on doing
that in your book design, I would recommend designing
it and then ordering an author copy to proof read it first
before it goes live, but we can talk
about that after. In any case, there may be
situations where you do want your image to go off
the edge of the page. If that is the case, we need to add a little bit of extra bleed. And luckily there is a
chart down here to help us. I'm just going to
open up this chart. It just says examples of page sizes with
and without bleed. Kp.amazon.com There's
slightly different one for the Japanese site
and I'm not sure why, but that is just how it is. This is a similar
chart to the one we looked at but
it just includes this size is all without
bleed and this side is with. I'm just going to highlight the 82 inch book just to show
you the two measurements. If we're doing with out bleed, which again is most common, that's going to be most books, then we are just
going to be using 5 " by 8 " as our canva document. And if you're doing
it with bleed we're going to add
on a little bit. So it's going to be 5.125 " by 8.25 " for our
Canva document. At this point, you'd
want to write down what the measurement is that
you want to use for Canva. And in the next lesson we'll get into setting up that document. I'm going to be
designing with out bleed because that is
the most common way. But it's also going
to be applicable, you're just going to be
working on a slightly bigger canvas with some
different margins. And with that being said, let's scroll down to the
margin section. Now here is something
that I personally have adapted a little bit for Canva. The margin is basically
a little bit of space, blank space around all the sides of your book where you don't put important content
because you want to make sure it's not touching
the edge of the page. We're going to be using guides in Canva to set these up so that you always can see visually
where those margins are. Now KDP suggests minimum
margins for the inside gutter, outside margins,
and outside with bleed for several
different page counts. This is because the
thicker the book, the thicker the spine, the more glue is
going to be involved. And the more of
the inside margin, that's the part that is
the spine is going to be subsumed by the
binding process. The outside margins
are always the same. It's the inside or what's called the gutter margin
that is variable. Now because Canva does not allow us to set individual
margins per page, we can't really
determine which is the inner gutter versus the
outer edge of the page. Therefore, my method
for going around all of this is to set the same
margin for all sides. And I usually do a half inch, which is the
recommended margin for a book that is 151 to 300 pages. This is going to cover
the majority of books. It's also perfectly fine
for a book that is smaller. So I'm showing you
this just so you understand that there
are technical minimums. And if you were using a
software like Adobe in design, you could absolutely set very specific margins
based on the pages. But since we're using Canva, we don't have that
kind of flexibility. And I've made many books just
using a 0.5 inch margin, and they all look very good. One of the concerns that some
people have is that, oh, are the pages going to
look like they're not centered or too close to the spine versus in the middle of the page
when you print them. Because Amazon and
these print on demand services are
using a glue binding, a machine glue binding method. I find that there actually isn't a lot of the gutter
being consumed. So I've never had an issue visually with
looking at a book and saying, oh, the margins look off when I have designed
them all the same. So if you have major concerns
about this, by all means, you can order an author copy, like I said before it goes live and make sure it
looks good for you. But if you want to
trust my experience using Canva as a
book design tool, I will say that it
is perfectly fine to use the same margin
on all four sides. So I know this lesson
is a little bit boring and technical,
but that's basically it. In the next one, we are going to take
those numbers that we gathered and put them in a Canva document to
start designing.
4. Setting Up Your Canva File: Now that we have our sizes
for our document figured out, let's make it in Canva
and get it set up. Now I have Canva open here and I will let you know that you can do all of this with
a free account. You do not have to have a Pro account
whatsoever to do this. The pro account just
unlocks extra features, but none of them are
necessary for making a book. Don't feel pressured
at all to have a pro account unless you want the extra graphics that they offer or any other
little features, but you don't need
it for this project. I'm going to go up to create a new design and I'm going
to pick a custom size. This will give us some
options right here. We can design in
different measurements. And I'm going to be
designing in inches, because that is what I pulled
off of the KDP guides, but you can use whatever
measurement works for you. I did say our example
for this project is going to be a five inch
by eight inch book. But if you are doing
one with bleed, that means that you are using
a graphic or element that goes all the way to the edge of the page and off the edge, then you will want to add
the extra bleed measurement we talked about in
the last lesson. I'm going to click
on Create My Design. We should have our book
ready to start setting up. This is going to be the
dimensions of our book. You can actually visualize it at this point because
this is the shape. It'll be in your
hands when it's done. Now, a couple of things we're going to do to get this started. First, I'm going to
name this document. I always do that
when I get started. Now we're going to
add in some guides which are going to set the
margins to help us make sure that nothing is off the edge or too close to the
edge of our book design. First we're going
to go up to file, then down to view settings and add show rulers and guides. This is going to make this
little ruler appear on the two sides so
that we can make sure we can see the
side of our book. In order to add guides,
it's very simple. You're just going to
go to this ruler. My cursor has turned into a little arrow and
you click and drag. And this purple line
appears it's going to automatically lock
onto a half inch. So you can see right there,
canvavas default margins that they do offer is
generally a half inch. So this works
really well for our plan and I'm going
to leave it there. Now you can see this
purply blue line is always going to be
there on our project. But it will not be there
when you export your file. You can leave it
there the whole time, but your final project
won't have these lines. Don't worry about
that. I'm going to drag another one
down to the bottom. It turns pink when we
get to a half inch, so it's at 7.5 " right now. I'm going to do the
same on the side. Drag one in, drag a second. Now we have created
our page with a safe area which
is what's inside the inner box and
the margin area which we can put some things in but you want
to make sure that you know, you're getting
close to the edge. The only exception I'm
really going to make for that maybe page
numbers at the bottom. Now I'm going to
just add a couple of pages to this document
by clicking on Ad page. Just so we have something
to look at here. Up at the top, it says
page one, add page title. I like to use page titles to organize my book when
I'm designing it, so I don't get too confused. And the page titles are just
part of the design file. They don't show up in
any final product. As I mentioned before, Canva doesn't let us do
a side by side, or we can see the 22 pages of the book open like a spread. We have to think it through a little bit more and remember
to be checking this. Ultimately, what that means is page numbers are
very important. Page one, or rather
the page one of this document is going to
be on the right hand side. That means that all
odd number pages, 1, 35, et cetera, are all going to be on the right
hand side of your book. All even number pages like page 2468 are all going to be on the left hand
side of your book. You may want to note
that down somewhere. If the left and
right orientation of your pages is going to be
really relevant to your design, it sometimes only
really matters in the front matter and the
end matter of your book, because you want to make
sure the front matter looks conventional. But in general, this may matter or not depending on
what it is you're creating. Like I said, I like to use this ad page title section to label what my pages
are going to be. The very first page of our book is going to be the one that
is right inside the cover. The left hand side,
when we open it, is just the inside of the cover. The right hand side is
the first paper page. Generally, that can be a
lot of different things. It could have quotes and
reviews about the book. It could have an illustration. If it's a journal, it could be this book belongs
to name plate. You can be a bit
creative with this one. There should be
something on this page, but it typically isn't
like a title page. Typically, that's on page three. I'm just going to
label this front page the next page down, which would be, when
you turn the page, it is the first left hand
paper page of your book. That's usually the
copyright page. I'll label it copyright page. Then the next one is
typically the title page. I will label it like that. If this is a little
bit confusing, what I would really recommend is that you grab a book
off your shelf. Any book, but maybe
particularly one in the genre or style
that you're creating. And take a look at just what the first couple of pages are, what order they are in, and what kind of
information is on them. It's truly the best
tool that you can use, is to just study other books, especially ones that are
professionally designed because you can see how they lay
out the information. Now that we have this
document set up, we are ready to start putting
some content on the pages. In the next lesson,
we are going to cover the front
matter of this book, and that's going to be
the first couple pages that come before
the actual content.
5. Creating Front Matter: In this lesson, we
are going to start creating our front
matter for our book. Now that we have it
all set up in Canada, we're ready to put
some content in here. And I'm going to be
doing an example book that is just a little
bit of filler content. But just to show you what
can go on each section and how you can very basically
set up each page. As I mentioned before,
in the last lesson, you may want to
pick up a book that is in the same genre
you are creating. And look at how
they have organized the information in
the front matter. Because this can
give you some ideas about industry standards, how a professional book design might set the information up, or it could just inspire you. In general, I tend to keep a big pile of books
beside me when I'm designing, just so I can look
and get ideas for how they've laid out the text or
the information in general. So we're going to go
through a bunch of fairly typical
front matter pages that you can select from. You don't have to
do all of them. I would say that the
bare minimum would be this sort of front
placeholder page, a copyright page, title page, and then maybe a blank
page on the next one, or an illustration just to push the book along and have
something on the left hand side, because books typically start on the right hand
side, so the page, one of whatever content you're
putting, your first poem, your first recipe, whatever, is probably going to start
on the right hand page. But there are lots of
interesting things you can put in
your front matter. So let's go through them now. As I mentioned, your
very first page can have a lot of
different things on it. It could be an illustration. It could be a, this
book belongs to text. It could be reviews and quotes from places that have
already read your book. Or it could be a little quote
from your story to kind of lure people in for
the sake of simplicity, because I'm just making
a fake book here. I'm going to put an
image and I'm going to use something from
Canva's library. Now Canva has a really
big illustration library that you are welcome to
use for your projects. They have two kinds of elements, They have free elements and
they have pro elements. If you don't have a pro account, don't pick Pro elements and then you have nothing to worry about. If you do, you can
use Pro elements. These graphics all come
with commercial licenses. Canva has pretty broad
licenses and I will link the document that they provide that shows you
all the use cases. But in general, you
can use designs from their library for
commercial use, like creating in a book. The only time they have
a lot of restrictions when it comes to
graphics is when it comes to creating
digital products and specifically templates
out of Canva. If you're not doing
anything like that, you're pretty much
going to be safe. But like I said, if
you have concerns, I will link the licensing
agreement for you to check out. They do say specifically, you can use their
graphics for books. I'm going to go into
the elements library. They have a lot of options. I'm just going to type in flow drawing just to
pick something simple. They offer graphics,
photos, videos, frames. There's so much
you can pick from. I'm going to go into graphics. And you can see anything with a little crown icon beside
it is a pro element. Those you have to have
a pro account to use. It will still let
you put the graphic into your design if you
don't have a pro account, but you will be prompted to subscribe when you
try to export it. If you want to
avoid any of those, I'd recommend just using
the filter button right up here and clicking free, then it will only show
you free graphics. Just to make this easy, I'm just going to click on
this nice flower. We'll put it right here. You can drag it around and these little guides pop up to show you the middle of the page. So I'm just going
to put this flower in the middle. Call it a day. There's our front page. Next
we have our copyright page. The typical design for this is a block of text on
the lower half of the design or of the page that includes
your copyright statement. And a copyright
statement can be very simple or it can
be very complex. Again, you may want to look
at other books and see what they've included in theirs
and model it after that, but it can be very simple. I'm going to start
off by creating a text box just by
tapping on my keyboard. And before I add any text, I'm just going to
update my font. So I'm going to use Roboto as
my font because I like it. But I'm going to
change the font size to be a bit smaller. A typical book size
font is going to be anywhere from a size
eight to a size 12, with eight being very small and 12 being on the larger end. The main body of your
book is probably going to be around a size 1110 or 11. I have done books designed
all in a size 12 when I knew that the audience
was a little bit older, so they preferred the
slightly larger size. But it wasn't so large
as to be categorized as a large print book for a certain text like
copyright statements. I'm going to use a smaller font. I'm going to go down
to an eight just because it's conventionally a small font section of
text, Roboto size eight. I'm going to drag this
little box over here. It's also set up as
aligned center right now. And I'm going to
switch that to a ligned on the left hand side. And I will drag
this text box to be the full width of
the margin box. I was zoom in here so we can
see it a little bit better. Okay, now we just need to add
in our copyright statement. The most basic copyright
statement that you need to put in is
name of your book, copyright symbol, your name, year, all rights reserved. That's it. That's like covering
the bare minimum of it. Other things you can add are Information about your
publishing business. You could say if you
have a small business that you've set up
as your publisher, if you have a website, if you have an e mail address, if you want to provide
credit for someone who did artwork for your book or
design work, maybe the cover, you can put all that
information in here as well as just general
contact information, your social media,
anything relevant. Some authors like to
put their ISBN numbers in there for your
book, but not all do. And if you don't have one yet, I would say don't even
worry about it. Let's add in what I would call the most basic
copyright statement. And I will again put this
in the PDF for the course. You can just copy and
paste it if you like. We're calling this my great
book, I can't type today. And then we're going to
add a copyright symbol. In order to add a
copyright symbol, there's a shortcut on the
keyboard you can use. I'm using a Mac, so I can only really tell you the
option which is to press option and it will add the copyright symbol
on a Windows computer. The keyboard is going to be a little bit different
for the shortcut, but you can also just
Google copyright symbol or how to use a copyright symbol shortcut and just
copy and paste it. Or just copy and paste it
from the PDF for the class. That's the shortcut
on the Mac Is option, just so you know. Next we're going to
add our author names. Let's just say Jane Doe 2024, period. Going to hit Enter. All rights reserved. I like to make the title of the book in italics
and there you go. That's a very basic
copyright statement. That would be perfectly fine. You can format it
however you like. You could center this and put it just at the very bottom if you want an illustration or
something interesting up top. But of course, you can add more text with more
information about how to contact you publishing
information or other statements to claim
your rights for your book. I'm going to put that
copyright statement there. Call this page done. But like I said, you can add more to it. You can decorate it, you can add additional copyright
information, whatever you like. Next we have the title page. And this is a little bit more creative and a
little bit more fun. Now the typical convention is going to be title, subtitle, author, name, publisher information from
the top to the bottom. So we're just going
to follow that, Add a little bit of spice, a little bit of decoration, and we'll move on from there. Let's start first
with our title. Again, I'm tapping
on the keyboard. We call this my great book. I'm going to make this bigger
because it's the title. Line it up in the center, and I'm going to pick
a different font. Roboto is what I would
call just a standard font. And we want to display
font as the book title. You don't have to
change the font at all, but more interesting
fonts can be fun. I'm just going to type in
display in the search engine here that's going to show us fonts that are just a little
bit more interesting. I think I'll just grab
Playfair display C here, which I like, the seraph look of that you're going to have fun with this use the effects. Canva has some
interesting effects just using this button up here. You may want to use the curve
and make your text curved, which can be interesting, I think will use
that for my text. Next, we're going to
add a subtitle Again, I'm going to click on my
keyboard, gives us this. I'm going to create a subtitle
for this book. All right. We wrote the only book
you will ever need. I'm just going to
put it here. Below. Again, I'm keeping it size 12, not as big as the display
or the title here. You can play around with it.
We could make it all caps. Going to select all to
make them all, all caps. Then I'll space them
out a little bit. I'll click on Spacing
here, Letter spacing. As I drag this, the
letters get further apart from each other. There we go. Obviously I'm doing this
extremely basic style cover. Feel free to be way more creative when you're
doing your actual book. Next we want the author name
another text box, Jane Doe. I'm going to select it. I
will do it in all caps. Again, make this a
little bit bigger. I will space it out as well
because I like the look. Then if you have a
publishing imprint, you can put the logo
and the name here. If you don't, that's okay too. You don't have to when
yourself publishing, but if you do,
when you're making a lot of books, you
could include that. Let's just pretend
we do flower books, press as a fake name. Put this down at the bottom. Maybe for the sake of design, I will make it the same
font as the title, which was Playfair display C. I will make it
a little smaller, make it size ten, put
it in the center. If I had a logo, I
would put it there. So let's just grab something. Here's grab this little flower. Pretend that's our logo.
Put it right there. This is what a basic title
page could look like. You can decide how high
up you want to be, if you want to be
centered, and you can also add illustrations here, like this little leaf, you could rotate that
it right there, cool. This is just a
page, like I said, very basic example, we're
just playing around with it. But I would say
generally I stick with two fonts maximum when I'm designing
things like this. Because you can do a lot
of variations within, obviously you saw I
could do all upper case, you can do lower
case, the spacing italics all within one font. So adding in two fonts, generally I'll do one
that has seraphs, meaning these little decorations on the edges of the letters, and one without seraphs. So far we have our front page, our copyright statement,
and our title page. If you want to see all
your pages on Canva, there's a little icon
down here called Grid View in the bottom
right hand corner. And that'll show
you all your pages. This is our front page
on the right hand side, left, right, left,
and then right. If we add another
one, this could be the first page of
our book content. This is just a very
short front matter and pretty straightforward. I would call this a Spacer page, which is what I will name
it right here, Spacer page. This is just going
to be there on the back side of
the title page to ensure that the first page of
your book is on the right. You can add content here. You could use one of the other
front matter pages here, or you could just add a picture. You could also just
leave it blank. But this is what
I would consider the basics of front matter. In the next lesson,
I'll show you a couple other different
front matter things you can add that are optional. And then we'll move on to
other sections of the book.
6. Other Front Matter Pages: And we're just going
to cover a couple of extra front matter pages that you may want to
include in your book. These are optional, but these are some things that
are very common. We've already covered
the very front page, the copyright page, title page, and then a spacer
page to ensure that the book can start on
the right hand side. But let's go into
this blank page and design a couple
other options. Another common page you might
want is a dedication page. Dedications are pretty
straightforward, so we're just going
to add a textbox. I'm going to make it size
ten. I think that seems good. That'll probably
be the size that I use for the body
text for this book. You can add your
dedication in here. I'll just make one up.
Here's just an example. I find that often
dedications are in italics, so you may want to put
them in italics there. Commonly, they are on a
page all by themselves. You can also add
additional ones. It doesn't just have
to be one person, but if you're doing
a very long list, you may want to add like an
acknowledgment section at the back of the book
rather than at the front. But typically the book is dedicated to just
one or two people. That's a very simple
page you can add. Another option is to add
a table of contents. As we've learned from other
parts of this design process, Canva doesn't have a tool
that automatically does that. We have to do it manually
and that's okay. But table of contents is one of those things that you will
want to design and then come back to at the very end
of your project to update the page numbers based on
your final book design. Let's set it up
the design and we can show how you can
come back to it later. We'll start with
some text boxes, table of contents, and I'm going to make this
text the same font. I will use that
Playfair display SC. I'll put it right near
the top of the page. Next I'm going to create
another text box and I will make this size
ten like our body font. I'm going to change the
alignment so that they are all on the left hand
side, left justified. And then I'm going to make up some contents for this book. All right, so here's the
table of contents I made up. I added introduction
chapters one through seven. As I mentioned, this is not the best software to do books with chapters with
a lot of texts, but just for the sake
of a table of contents. And then I added four
different things at the back. I did add a line
break in between these sections just to visually
break up the beginning, the introduction from
the main content, from the end matter. But you can design
this hover you like. I'm going to put this
sort of up here. I don't necessarily want to put it all the way to the
edge, but you can. And next I'm going to
do a separate text box with all the page numbers in it. At this point, we don't
have page numbers for these sections, but we can add this in later. So I'll add another
text box and just make sure that there's one line
per all these things. I'm just going to
use the letter X to substitute in a number. Now we can line that up.
See it lines up perfectly. There's like a x per chapter. You can put that like that
and make these in the center, or you can make these
further apart and add dotted lines or dashes or
something to connect them. But this is enough and that's how much you can
do at this point for a table of contents. You just then have to remember
at the end of your book to come back and correct these X's to be the
right page numbers. Now if we look at the grid
view of all these pages, we just want to think about
left and right pages a little bit here at
the right hand side, at the beginning of the book. And we have left,
right, left, right. And then this would
be on the left, which I don't personally love. If I was designing this, I would add another space or page. I'm just clicking on
this one and using command and D on my
keyboard to duplicate. You can also click on
the dots to duplicate. And I'm just going to
drag this one in between. Now, the dedication
page and the table of contents are both on the
right hand side of the book. Like I said, you could leave
these spacer pages blank, or you could add
an illustration, a map, interesting text. You could add a little
quote, whatever you like. Really, your table of contents
could take two pages, in which case you may want
to rearrange these sections. The order is generally up to
you after the title page. The first three pages
are relatively fixed. I'm going to just
add another space or page right after
our table of contents. And then this page right here, which is the ninth
page in our document, is going to actually be
our page, one of our book. In the next lesson,
we're going to start designing some body pages now. Now there's going to be
a lot of variables here about what you actually
want in your book. Because this could
be a picture book, this could be a recipe book, it could be a poetry book, a journal, anything like that. So I'm not going to
be able to cover every single book
that's out there, but I will show you
some basic stuff for setting up the inside pages. And then we will cover
a couple examples of different things
you could design.
7. Creating Body Pages: In this lesson, we're going
to go over some basics for designing the interior or
body pages of your book. And that's going to be the text that is whatever makes
your book special. That could be recipes, poems, little bits of text like I've
mentioned several times. Canva is not ideal for
text that is linked, so flows from one
page to the other. But I will show you
how you can do it manually just in case
there's something like an introduction or some passage where you
do want to do that. Or maybe you're just really
brave and want to try and do it the manual way
through a longer manuscript. Not what I recommend, but
technically possible. We're going to get started
on this blank page here and this is going to be
page one of our book. I'm going to set this up
like the beginning of a chapter or the beginning
of an introduction. And then I'll show you some
other variations after. The first thing we're
going to want is like a title or a heading. To start off, I'm going to
do introduction as our text. I'm going to go to that
Playfair display font. Since we've been using that as our heading alternate font, I'm going to place it about
two thirds up the page. Exactly where you
place it is up to you, because this is up to
your design sense. But you want to leave
a gap at the top which generally indicates the start of a new section or chapter. After that, I'm going to
add another text box. This is going to
be our body text, which I did say before. I'm going to do at size
ten using the Roboto font. I'm going to change the
alignment to be justified. That is the version that has the equal lines on
all lines here. I'm going to get
some sample text just to pop in here
for us to use. I'm just going to
paste in my text here. I'm using text that's
called lorum ipsum. This is a Latin document. I can't remember if it's
written by Cicero, I think. But it's very commonly used in the publishing industry
as placeholder text. You may have heard just
the first two words before, Laurm ipsum. That just refers to the name of this practice of using this
specific Latin document. I pasted it in here, and
I'm going to just move the textbox around to
fit within our margins, and you can see it's obviously
running quite long here. Additionally, you can see how the justified alignment works. Basically, that makes it so
that all the lines touch either end and it will adjust the spacing in between the
words to accommodate that. That's pretty common
in book formatting. In a software like Adobe Design, you can actually
adjust that per line. It's very technical
and you can go in and change everything so it
looks the way you want. In Canva, you just get
how it looks here. You could also do your book
in a different alignment. This is left justified. You can center your
text if you prefer, but generally one of these options is going
to be most common. As you can see this text box, it's quite a long one,
runs off the page. What I would like is it to continue here on the next page, but I don't have a feature
that will automatically do that for us, like in Adobe. What I'm going to do instead
is grab this same textbox. I'm going to copy it. I'm using
command C on my keyboard. I'm going to go to this
next page and paste it's pasted the exact same
text box in two places. I'm going to move that so it reaches the top and
as you can see, it's still a super
long text box. What I'm going to do is find the place where I want this to end on this first page, this last word, vehicula, is where I think this will end. I'm going to
highlight everything after that and delete it. There we go. Now this text box stops right here in
the following page. On the text box, we're
going to find that same point vehicular and we're going to delete
everything above that. It's right here in the middle. I will just select all of it. Race those couple little
fragments, and there we go. Now we have what
we're looking for, which is this page goes on, you get to the end here, and it continues on the next page. You can do this for pretty
much as much text as you want. It obviously is the
manual way to do this. The difficulty comes in
is if you have to do any edits and then all of a
sudden it domino effects. All your pages need
to be adjusted. And it can be very
time consuming depending on where you're
at with your project. Maybe time isn't an issue and
you're more interested in sticking with Canva and using a simple software,
that's another option. Some of the design features
that you might want to add to this really basic text area is to first of all change the first couple words of
this text to be in all caps. That's a common convention of the beginning of a
chapter in Canva. You can use the upper
case tool, however, if you do that, you'll see it changed the entire
first paragraph. The way to work around
that is just do it manually and just type
them out in all caps. That is how you do that.
One Pretty straightforward, if you want to indent the first section of each
subsequent paragraph, the first paragraph of a chapter is typically not indented, then you just want
to add some spaces. I just added five right there, and that will indent it for you. But you see that that did bump down the text a little bit. It is better to do
some of the formatting ahead of time before you
start moving things around. I'm just going to undo
those changes so that I don't have to resize
my text boxes. Now, two other things you
probably want to add on most of your pages is going
to be a page number and then. The title of your
book or the chapter at the top of other pages. We'll start with
the page number. So I'm going to, I had
my guides turned off. I'm just going to
turn this back on. Okay. So in order to
add page numbers first, I'm going to add a textbox with, we're going to start
with page number one. I'm just doing this up here so it's a little clearer to see. And I'm going to change
that to size eight. I like my page number small. I'm going to drag and put
this right below the margin. And I'm going to center
it on the document. I put it right below
because we gave ourselves a two inch margin. You could also put it
above if you prefer, but I'm just going to
put it below here. It's up to you if you like, more space between
this and your text, you can move the text up. The first couple
times you do this, especially for page 1.2
are going to be creating almost like a
template that you can duplicate for subsequent pages, so you don't have to readjust this stuff every single time. You can always add more
guidelines if you want to be able to remind yourself of where things start or end. Now, four page numbers. As I mentioned,
Canva doesn't have an automated feature
at this time. I hope they add it. That
may change in the future, but we're going to just command
C to copy that page one. Going to scroll down
to the next page. Click on it and then
command V to paste it. And we have that
page number there. I'm going to change
this one to page two. And that's it. Now I
strongly urge you to save the job of changing
every page number to the end of your project. If exporting the file to upload it onto
Amazon is the final. Step one right before that
is to update the table of contents and one right before that is to update all
the page numbers. Last final tasks you do after all the design work is done because you
don't want to have to go through number
of all your pages and then realize you have to go and do it all over again after shuffling
something around. It does happen, but you
just have to be patient. Unfortunately, the other
thing you may want to add is the title of the
book or chapter at the top. I'm going to add
another text box with, I'm going to just move
that up temporarily. My great book. Highlight that with
command A to select all. I'm going to change this
down to size eight as well. You can make it
bigger if you like. I'm going to italicize it. It's just a style preference. I'd actually like to
put this right here, right below that top margin, just so it has a
little more room. And I'll slide this text
box down a little bit. I'm centering both this
and the page number, because although in
some books they may alternate between which corner those pieces of text show up in. That's much easier to
do in a software like Adobe in design versus Canva. Everything's going to be
centered for our purposes. Now, if I had
additional text boxes or more text to add
to this section, I would just duplicate it. And then all of this
would stay the same. Paste in the new text
and go on like that. That's how you create some
very basic text pages. Obviously, it is not ideal for really
long pieces of text. By all means you could be
ambitious and go for that. But just to anticipate
that there may be some points of frustration where you have to be
fixing everything as the domino effect happens and things move
around a little bit. So it's very possible to
format a full book this way. I'm not here to tell
you you can't do it. It's just going to
require some patience and some diligence in order
to make it all work out. And that's okay. If you
really like working in Canva and you prioritize
the free software, then you know this is
the method I recommend. So that's just very basic
body pages of your book. In the next lesson, I'm just going to
show you a couple of variations for poetry
book recipe, book, picture book, and a
journal just to show you some ideas to inspire
your book content.
8. Other Body Page Designs: That we've covered the basics of a text design for your
body pages of your book. Let's look at a couple
other variations that you may want to do
depending on your project. Now I've created a couple
different ones and I'm going to walk you through the thought
process on each of them. The first one is for a poem. Now, I've included the
standard items like the title of the book at the top and the page
number at the bottom. The title of the book at the
top is definitely optional. That's not always in
things like poetry books. I've added the title of the poem here in
the same body text, but I'm using size 12, the standard title size. Not all poems have titles also. This is just in the
style of what I would call modern
poetry book design. It's very popular and
standard formatting. I have the body of a poem here. This is actually just the
same placeholder text. I reformatted. I have centered it, but it
is also very common to see it aligned along the left
hand side of the page. And you could also move
the poem title to be the same way I added a graphic
here in the bottom corner. Now this is a odd numbered page. That means that it is going
to be on the right hand side. By putting the picture
down here in this corner, it's going to be in
the bottom corner, not the spine side of
the page When it prints. You don't have to add pictures to your poetry book, of course, But that's just a little detail to look at it
without the guides. It looks like this for a
poetry book, I would say. You could also choose
to move the margins in a little bit if you
want your poems to be a little bit more compact. If you wanted to do that,
turn the guides back on. You could move these
in a little bit. I'm not doing it perfectly,
but imagine I was just move the poem so that it fits within a
smaller constraint. Again, just design choices
that would look like this. With it a little bit
more towards the center. Poetry books are a bit
more creative design, but once you figure out
one or two formats, you can paste your poems within them and just use that
over and over again. You're not having to make every
single page super unique. That's a poetry book example, which is a great way to
use Canva for book design. Another example is to do a
cookbook or a recipe book. That's the format I have here. For the title, it
is still size 12. I changed to the Playfair
display SC font, which I've been
using for the title, just as a little
bit of a variation. The body font is all size 12 for Boto that I've been
doing everywhere else. There's lots of ways you could
form at the ingredients. In this case, I have done using the list which
adds little bullet points. You don't have to add the
bullet points of course. Or you could add the ingredients as one large list centered. You may want to
make the font for the ingredients
slightly smaller, perhaps down to a size eight if you're doing
everything else in a ten. Just stylistic choices.
At this point, I'm just trying to inspire
you with some things you could do for the ingredients. I have put them with numbers, which you can access through
the same button as the list. See I can turn them off. This is a list with dots
and a list with numbers. You can also go in and you
could bold the ingredients. If you wanted to make
them easier to spot, you could underline them. Book formatting is a lot
about following rules, but it's also about creativity. So you don't have
to feel locked in. And again, I do
recommend looking at other books in your
niche to get inspired. I've added a picture in here. This is just some
chicken soup from the canvas photo library. If you were doing
a real cookbook, I imagine you'd have photos of the actual food
you're cooking. I've just put this
photograph here now. Again, if I was adding a
color photo like this, I'd have to choose color
printing for the whole book. But because we were doing
a book with no bleed, it has to be, I'm going
to keep it within these little boundaries
of the margin boundaries. But if your book had
bleed and you had added the extra dimensions when you
set up your file initially, then you could put
the photo all the way to the edge of
the page like that. And it would cut it off a
little bit beyond that edge. But you'd have a photo all the way to the edge of the page. Not necessarily
what you'd want to do in this particular use case, but that is how it works. And I will say that if you did decide that you had started
making this book and you're like actually
I do want it to be to have bleed so I could do something to the edge and you had already designed it. If you have a Canva pro account, you can use this
magic switch feature and go down to resize
custom size and just choose Add in the
correct measurements and it would convert
this document to add that bleed space in. But unfortunately, that is
just a Canva Pro feature, which is why I recommend
that you consider ahead of time what kind of
interior design you need. That's a recipe. I did leave
the page number and did not use the title at the
top, just style choices. Next I have a picture
book example. This is not a very strong
example because this book, the five by eight, is not a very common shape
for a picture book. I just put it in
just to show you. I pulled this picture from
the canvas elements library. So it was just a little
illustration I found. In terms of font
for picture books, I would recommend using
something that is either a son sera font
like we were using Roboto. I also like Montserrat. Montserrat. It's another
free one that looks good. I have made this size 14. I would recommend maybe 14, 16, maybe even up to 18, depending on the age range. The book is four for
picture book text. I've also spaced
out the lines more, which I do right
here with this tool called spacing at
the top tool bar. And I have pulled this line spacing all the way up to two. That just gives the text
some more breathing room and makes it a little bit
easier for young readers. I've also removed
the page numbers. Some picture books will have
page numbers and some won't. That's really subjective,
just based on your project. The last example that I pulled
out here is for a journal, a very rudimentary journal
design At the top, I have a little prompt
today I'm grateful for, I'm picturing like a
gratitude journal. I've just added this text, this is size 12 in
our Roboto font. I made this little lined space for writing on the way
that I created this. I'm just going to delete it. I can show you just so
that we get it correct. I'm going to tap L on
the keyboard for line, and it gives us this line here. I am going to do two things. First, in line color, I'm going to pick this medium
gray because I don't want to harsh black line
when it prints out. I just like the
indication of a line, I'm going to go to
line style next to it and turn the line
weight down to one, just so it's a very fine line. That's our little line there. Next I will grab one end of the node and drag it
over to the margin. I'm going to do the
other one as well. If you're having
trouble like this is wiggling around a lot, you can hold down shift
while you do it and it will keep it on tidy angles. There we go. Now
we have our line. I'm going to just
have it highlighted. And click on Duplicate, which pops up right here. I'm going to move this
just below it and about. Try and guess the
space I want for spacing for writing.
That looks pretty good. Then we can actually
continue to duplicate. It actually messed up
because I clicked out of it. But let's just say there I can duplicate and it will
automatically repeat that spacing. I'm going to do this
a few times. Pardon? For going over the
note section there. I'll just delete that section. We'll get to that momentarily. They are my lines. I'm going
to highlight them and then put them in a group just
so that they're easier. Drag it up and just
place it right below that prompt or you can make it a
little further down. That's an easy way to
make some lines for writing on in a journal
or a workbook of sorts. Other types of shapes you may want for a journal could
be a box to write in. That is a little more free form. In order to create a
box, it's not hard. We're just going to tap R for
rectangle on the keyboard, it gives us this peach box or maybe a different color
as a default for you. The first thing
we're going to do is go to that peach color, and we're going to
choose this box no color so that it goes clear. Then we're going to go next
over to the border style, and then we're going to pick
this solid line so it has a border change the border weight down to one, just
like the lines. Now this box is popped up,
which is the border color. And I'll pick that
same light gray. That is the shape. It
gives us just a rectangle, same weight as the lines. And I'm going to
just position it below whatever kind of
workbook you're doing. You may need different shapes or different number of boxes. We have a box and
I'm going to just add a little text box, put it right there,
and say notes. Maybe I'll make that
a little smaller. There we go. A very
simple journal type page. I would encourage you to make
it a little more complex if you are doing this
for a journal book. But those are some of
the very basic shapes you can use to get
creative with. When I turn off the lines, you can see it a
little more clearly. This is what this
page looks like. Journals don't typically have
page numbering or title. I wouldn't add either
of those unless you were doing a
guided workbook that had a mix of journal pages and content
or something like that. Those are a couple of
different ways you can format the body
pages of your book. I hope those are inspirational. Obviously, there's a lot of
creativity you can have here. A lot of flexibility. But those pages should
give you some idea of some common different ways you may want to lay things out. In the next lesson,
we're going to move on to work on the end
pages of our book.
9. Creating Back Matter: Now that we've gone over
setting up your book, doing the front matter
and also some body pages, we're going to look at the
back matter of your book. And this is a sort
of different section in that there's no real
standard practice. But I'm going to
cover three kinds of pages that you may
want to include, which are about the author, other works and up
cells or an offer. So this is all the pages
we've created so far. We have our front
matter at the top. We have a couple of examples
of pages for the body. And then we're going to just
go on a blank page here at the end and work
on our end matter. And I'm going to turn
back on the Rulers and guides back Matter doesn't necessarily have
page numbers to it, so I'm not going to
bother adding that. But you can also choose to use Roman numerals
to distinguish it from the rest of
the text if you wanted to add some navigation. Depending on how big
the back matter is. Back matter can contain
stuff like an appendix, vocabulary reading,
group questions. There's so much you can put
back here. Don't be limited. And as I always say, I've said a lot
of times already, feel free to be inspired by other books that
are in your genre. The first one we're
going to create is about the author page. It's going to be fairly
straightforward, so I'm just going
to add a textbox. I'm just going to write
about the author. And I'm going to make this in
our Playfair display font. There we go, Size 12. I'm going to put it much
like in beginning a chapter. I'm just going to put it part
way down through the page. Next, you probably
want an author photo. You don't have to
include a photo of yourself, but
lots of people do. You may want to do this
in black and white. If you're doing a
full gray scale book, you could add color. But I don't think
an author photo is the reason to do
a full color book. If that's the only thing that
is color in your design. I'm just going to go
into elements and find a photograph, Head shot, maybe. There you go. Let's grab
this photo of this person. I'm just going to make it small, put it right below in order
to make it gray scale. I'm going to go to Edit photo. You can go through filters, there's like some
monochrome filters, but I'm just going
to go to adjust and go to saturation and
turn that down to zero. There we go, I find I do that. It just keeps the tones nice. It doesn't wash out the
black and white photo. Now we have a little picture. We're going to add
some body text with just a little description
of the author here. I just made up some
fake information. We're just going to
make this text box fit within the frame. And I'm going to
change it down to our body text size which is ten. I'm going to select all, make sure I get all
of it and make it size ten. There we go. We'll put it just evenly
spaced below the picture. Select all of it. Move it up
a little bit. There you go. That's a pretty straightforward
about the author page. You can add in whatever
information you like. You can make this more
centered if you like. This could also be a line to the left or you
could justify it. You may also want
to put something like a website URL here, a social media handle, some other call to action. But this is just a pretty straightforward about
the author page. Like I said, you don't
have to use a picture. You can put a picture of your
pet, you could put a logo. If you're a business, feel free to do whatever makes sense. The next page we're going to
design is for other works. I'm just going to
duplicate this, just to use some
of the features. Going to remove the photograph, and we're going to change
this text to say other works. By duplicating this page, I have preserved the
location of the header. And I'll just do this so that all my end pages are
uniform in that way. Let's say that you have a couple other books
you want to promote. Probably what I would
recommend is to include the cover image in black
and white of those books. I'm just grabbing
some photographs from the Canva Library to pretend
these are book covers. Let's just use the
same one twice. I'm going to edit this and
do the same thing and remove the saturation that it
wouldn't print in color. Let's pretend that these are my two other books I've written. I will center them below there. Then I can remove that text. May want to add their titles. I'll make that size ten
to match everything else and position it
right below the photo. We can do that for both. These could be my other
books and then you can also provide information
on how to find them. Another, another text
box we could say, available at find booksellers near you and local libraries perhaps visit and books.com for
more information. You could also use
different URL if you had. The thing is here, it's not a clickable link,
like it on an ebook. You have to tell them
an easy place to type in on their computer or their phone that they can
go and find your books. This is just a really simple, straightforward,
other works page. The last thing we'll do
is a upsell or an offer. I'm going to just
duplicate this again. I'll just remove this text here, so we just have our heading. What's an upsell or an offer? This is a way that
if someone reads your book and they
want more from you, but maybe it's just
not more books. You can offer them
something else. For example, if you were
writing a business book, you might want to upsell
a service that you have. Or you might want to get
people on your newsletter. What this could be, let's use the newsletter one
as an example, like this book question
mark as our title. Then we'll add something
along the lines of, now this is not good sales copy. Please just use your
imagination for this. Okay, here's the text I made up. If you enjoyed this book, sign up for my newsletter and get a free workbook that
will help you on your journey to be more
organized and motivated. Visit Jane Doe books.com slash offer to claim
your copy today. Just some really
basic sales copy. Doesn't have to be fancy, but I'm just going to resize it. I'll make it the size of our
body text, which is ten. Put it there, then you may want to put a
screenshot of the workbook. I don't have one again, actually, Let's just grab
that book cover example. You can imagine this
is a screenshot of maybe the cover of the book or something they're
going to get for free. You could do more sales text around it, something like that. These are just three
things you may want to put at the back
of your book that are fairly common things that you'll find
in the end matter. Like I said, there's a
lot you could put here. You could do a bigger
acknowledgment section, you could do a more
detailed biography of yourself or whoever
wrote the book. You can do references,
further reading, and lots of different
things that would count as marketing or sales
tactics as well. That wraps up the design
portion of this course. Now let's move on
to the next lesson to talk about exporting, making sure that you get
the right file type, and getting your book up
on a site like Amazon.
10. Exporting Your Book: Now we have our
sample book created. So I'm going to just talk
to you about the process of exporting it from Canada
and uploading it to Amazon. Now in this course,
I'm not covering the entire process of creating
a KDP account and like creating metadata and
all that because it's just a much bigger topic and not everybody is going
to be uploading to Amazon specifically, so we're not going
to cover that here. Although I will tell you it is not terribly difficult
to figure out. But I'm going to show you how I export this and I'm
going to show you a preview on Amazon's KDP
site of what it looks like, just so you can visualize
the two pages side by side. So first of all, I have
all of my pages here, and I have duplicated the journal page just to
get me up to 24 pages, which was the minimum just for publishing a book this size. I have all my pages together. Now I'm going to
go up to share on Canva and we're going
to go down to download. We are going to select
the option of PDF print. You have lots of
different formats that you can export your file as, PDF standard and PDF print. We're looking for
a PDF in general, but print is just a little
bit better quality. You can ignore all
of these checkboxes. We do not want to
flatten the PDF because that will turn text into images and that confuses Amazon's software. You
don't want to do that. You don't need to
include crop marks and bleed, we have
factored that in. You don't want to add an
extra bleed or anything. You want to exclude any pages. You could do that here,
but based on our design, we don't want to do
that color profile. This is a black and white,
so it doesn't matter. But CMYK is only available
for pro users anyway. Rgb is perfectly fine. We're going to hit
download and it's just going to save the
PDF to my computer. I have already gone and uploaded that on like a tester book. I have on KDP. I'll show you what
this looks like. Here is our print previewer, and this is where you can do your quality
check after you have uploaded your cover file and your interior
file to Amazon. And obviously we
are just covering the interior file
in this course. This is what it
looks like and you can visualize the
beginning of the book. So on the left hand side here, this is the back of
the front cover. Just like the other side
is the shiny cover. This is our first page with
our flower placeholder. I'm just using the keyboard
to go through these. Then we have our
copyright page and our title page on the
right orientation. Also note that this
previewer has guides, this little dash line which
you can turn off and on. It looks fine here, but you'll see when we get further on that, if we take the guides away, all of our designs are
centered to the overall size. Not their suggested margins, which are different
on the gutter side, which we cannot
accommodate for in canvas. So we already talked about that. But that's just what's going
on in the previewer here. Next we have a placeholder
and our dedication page. Another placeholder and
our table of contents, which you would have updated by the end of your book
with the page numbers. Then we have a placeholder and the start of the
introduction of our text. As you can see, the spacing is a little different
on either side, just because, again, their margins are slightly different. In the previewer, we can
turn off those guides and see that it's perfectly
centered on the page. Then these are just the
other pages we created. Here we have the page numbers, we have the body of the book. The photographs are
in black and white, because we have chosen
a black and white book. Here's the journal pages. I'll just flip through quickly because I had to
duplicate those. This is some of the back matter. Now, you could add another
space or page if you wanted this one to be on this
side or anything like that. Our final page, like this book. Here's our little upsell,
that's the preview. And it turned out pretty great. You can see everything
is evenly spaced, nothing is touching
the edge or too close. At this point, you would
want to approve this. Make sure your
cover is uploaded, and then you could submit it to Amazon for review
before it goes live. You can order a author copy. And then that will be a copy
that has a banner across it that tells you that
it's not for resale. But you can preview
and make sure everything looks
the way you want. You should definitely
be doing this if you haven't designed
books before, if you have designed
tons of them, eventually maybe you
get to the point where you're very
confident in your work. But in almost all cases, I would say get an author copy. This preview window
will also tell you if there are any
errors in your design. And they'll typically
be right here on the left hand side
in the red box if something is too
close to a margin or if the overall design
is sized wrong. So you'll get any
notifications there and they should explain relatively
clearly what the issue is. You can go in on
Canva fix the issue, download it again,
reupload the file. Sometimes you have to play
that game a little bit, especially when you're just
learning this process. But it should tell you what
the actual issues are, if there are any. As you can see, there
weren't any issues with this design aside from the fact that this is
just a nonsense book, so nothing has popped
up as a flagged issue. It is important that you design this interior book before you do your cover or before you
do your final cover. At the very least,
because the number of pages in your book will determine the width
of your spine. Cover design is a
much bigger topic. We're not going to
cover it in this class, but I do have other classes on different aspects of
book design for you to check out if you
want to learn more with me as your project
for this class, I would love to see a page that you have designed
for your book. So feel free to either just take a screenshot in Canva when you're working on
it and upload that. Or you could export
the single page as a PNG and upload it to the class if you
want any feedback or just want to share the great
work that you've done, I would love to see the books that you have been
inspired to create. So please feel free
to participate. If you have any questions about anything that we
covered in the class, there is a discussion available
for you to join in on. So leave your questions there and we will
be able to chat. Finally, one little
request from me, If you enjoyed learning with me. Not only would I appreciate if you check out
my other classes, but I would love if you left
me a review for this class. It makes a really big difference
for my small business as an online teacher and tells other students that you like
what I have to offer here. So that would be
really appreciated. And I read every
single review and sometimes screenshot them
and send them to my mom. I'll provide some other
information about places. You can find me online if you're interested in other
content that I create. I have a Youtube channel. I run a small art business. I hope you found this useful. Again, any questions,
just let me know in the discussion and good
luck with your project. I hope you create something
really wonderful.
 Rebecca Wilson, Artist