Design a Classic Ink and Wash Watercolor In 20 Minutes | Ron Mulvey✏️ | Skillshare
Search

Playback Speed


  • 0.5x
  • 1x (Normal)
  • 1.25x
  • 1.5x
  • 2x

Design a Classic Ink and Wash Watercolor In 20 Minutes

teacher avatar 
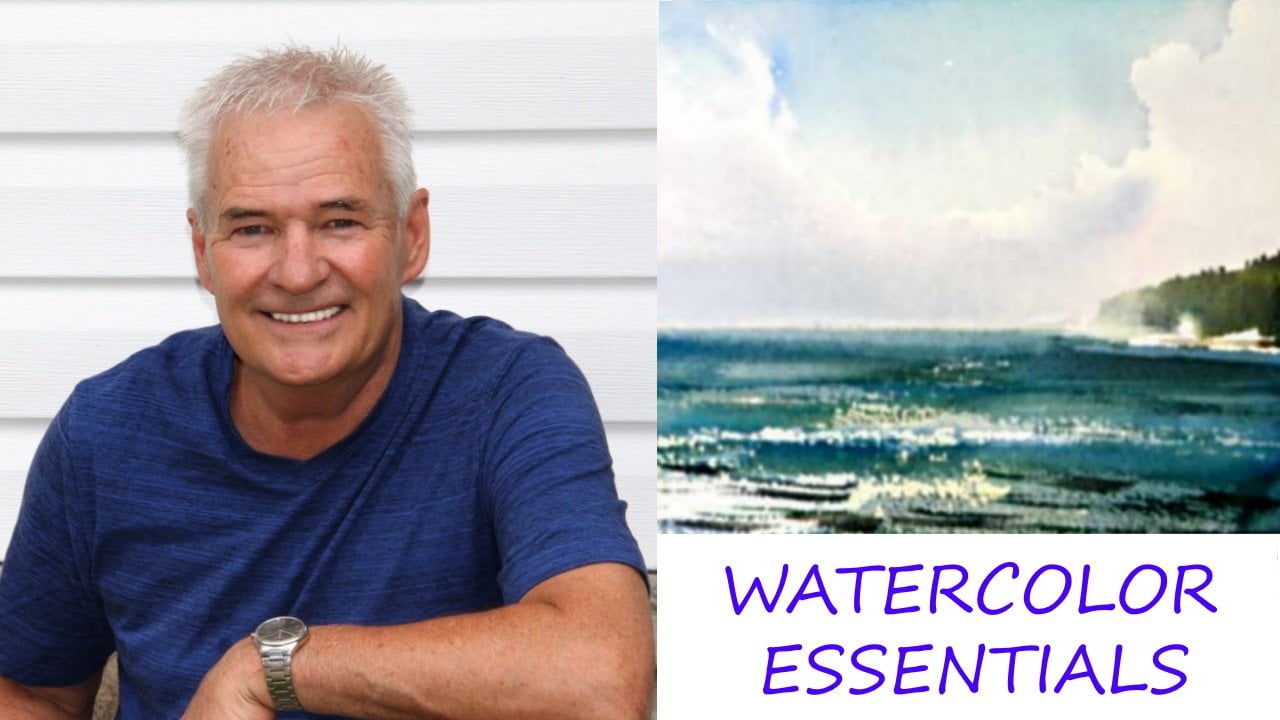
Ron Mulvey✏️, Artist / Art Teacher

Watch this class and thousands more

Get unlimited access to every class
Taught by industry leaders & working professionals
Topics include illustration, design, photography, and more

Watch this class and thousands more

Get unlimited access to every class
Taught by industry leaders & working professionals
Topics include illustration, design, photography, and more

Lessons in This Class

    • 1.

      Intro / The Magic of Ink and Wash

      1:32

    • 2.

      First Design to Watercolor Finish

      17:21

  • --
  • Beginner level
  • Intermediate level
  • Advanced level
  • All levels

Community Generated

The level is determined by a majority opinion of students who have reviewed this class. The teacher's recommendation is shown until at least 5 student responses are collected.

645

Students

9

Projects

About This Class

The Essentials of Watercolor: Simple Techniques that Bring Paintings to Life 

 About This Class

 Hi Everyone,

Watch as I teach you the Traditional / Ink and Wash Watercolor Technique, a 3000-year-old technique that is still being used by artists of the present. Ink and wash will bring depth, expression, and boldness to your watercolor paintings. No experience needed and no student ever left behind! 

As a professional landscape artist, I've painted thousands of watercolor paintings and studied hundreds of books from the old classical masters and those who have shaped our Modern Times.

Working in the studio, sketching in the field or on the street corner, this technique will bring home the 'gold' and with amazing simplicity and ease of execution.

Watch as I teach you this simple technique step-by-step. This is an expert technique used by professional artists. Within a few minutes, you'll see how the Ink and Wash brings a confidence in your design and to  your work that produces expressive, bold and engaging watercolor paintings. 

By the end of this 20 Minute Lesson you'll be able to: 

> Create bold and expressive  Watercolors with a simple mastery of the Ink and Wash Style 

> Relax and learn—you'll never be left behind and no experience is required to master this wonderfully simple technique.                                                                          

In my 30 years of painting, I've discovered that 90% of professional watercolor painters use 3 techniques: The No Drips, No Slips; The California Style, and The Ink and Wash . 

This course focuses on the Ink and Wash. Enroll in my other Skillshare courses to master the other 2 professional techniques and watch as I reveal other simple secrets of the craft!  

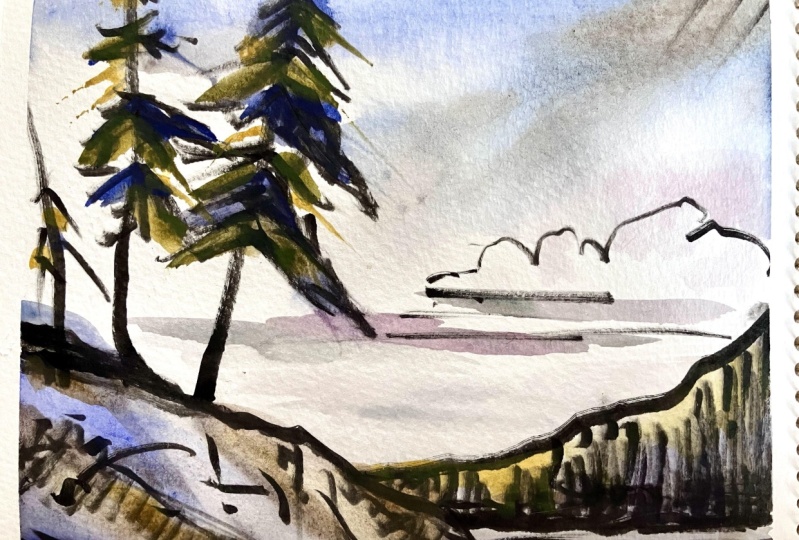
Let Ron Demonstrate how the 'East' set the stage for 3 millenniums of watercolor painting with Ink and Wash. The Ancients dipped their fingers and charged their brushes with pure black ink, deftly drew and boldly washed color onto their creative efforts for future generations to admire.  

                                                      BOLD   BRILLIANT   FLUID

                                 Action is the foundational key to success. (Pablo Picasso)

Meet Your Teacher

Teacher Profile Image

Ron Mulvey✏️

Artist / Art Teacher

Teacher

I've been working as a full-time artist since 1980. I have had the pleasure of teaching art since 1983 and have taught thousands of classes on drawing and painting. I would consider it a privilege to assist you in achieving your artistic goals.

I have taught the basic and advanced mechanics and principles which give us the skill and confidence to express creatively, for the past 30 years. Sharing them is my passion!

What Do I Like Teaching?

Watercolors and Acrylic are my specialty. I work with oils also but not as often as the water based mediums.

I love trees, mountains, rocks, water, flowers, and all that nature has to offer. Getting out into nature always gives me a creative boost. You get the real energy and feeling of space and belonging.

See full profile

Level: Beginner

Class Ratings

Expectations Met?
    Exceeded!
  • 0%
  • Yes
  • 0%
  • Somewhat
  • 0%
  • Not really
  • 0%

Why Join Skillshare?

Take award-winning Skillshare Original Classes

Each class has short lessons, hands-on projects

Your membership supports Skillshare teachers

Learn From Anywhere

Take classes on the go with the Skillshare app. Stream or download to watch on the plane, the subway, or wherever you learn best.

Transcripts

1. Intro / The Magic of Ink and Wash: Hi. I'm Ron Mulvey. Welcome to ink and wash. You're home from school, home from work, home from exercise class, home from something, finished dinner kids are all busy, and you've got 20 minutes to be creative. This is how you do it with ink and wash. Hi. I'm Ron Mulvey and I'll be showing you how to be successful at the quick picture. Oh, you need a big brush, and you need a medium size brush, and a small brush. 2. First Design to Watercolor Finish : Let me just show you how I basically drew this. I'm going to redraw it again. I have my calligraphy pen here. Just watch what I'm going to do, I'm going to do this, got it taped, I'm going to do this part here. I'm going to put it a little above the center. There we go, and there's the rock. Then I'm coming across here with not a straight line, a bit of an angle just for perspective. If it's straight, it won't quite look right. Then I draw a shape here, put a few lines in. Inking is great because when you ink something, you can use the brush pen like this to get some nice skinny lines. Maybe put a little bit of something at the bottom here. You'll notice I've added a few ground lines here and there to give the shape of the rocks and a couple dabs here and there, a couple of straight lines, a little crack in it like that. Here comes the big number one tree. It just rips up. Then the number two tree, not quite the same. We want a distance between here that's not the same. This one's coming up straight to the top. My little guy here, I'm not going to put it the same, I'm going to put it right hear and straight up. Notice I just pushed my hole arm up. Now I can switch to the other side of the pen for now and I can get finer strokes with this. So bottom of the grounds here, put a line in to sweep it across, a couple of wiggles, and I've got two lines down here, three lines. Back to the nib, I can work on some flick strokes. Notice, it's completely different. Each time I do it, I use some other different, I think I'm going to bring one down here like that for a different. This one here and then just go back and fourth and back and forth, more of a pine tree. I need those. This is my spar, which I'm going to put hardly anything on a couple of broken lines here. Be the sun is coming from here. Put my name on it, Ron. Might want to put the year if I want, 2016. These are $0.99. I bought them at a paint store. They're wonderful, the slanted wells. So any pallet and a carton, anything, little dishes, anything that will hold paint is worth calling a pallet. You need a big brush and you need a medium-sized brush and a small brush. We're almost all setup. We got our water, three brushes, we have pitcher that we can do. Let's talk about the colors. First, we have Alizarin crimson. Then we'd have three blues two choose from. Cobalt blue, which is the most deer in price, then we have the Thalo seen blue, the best all-round blue, and of course, ultramarine blue, which is somewhere in between these two. This is raw umber. Now, these are our two special colors here, right there, ultramarine and raw umber. We have Hansa yellow, that's H-A-N-S-A. We have Indian yellow, which originally came from India. Then we have the Azo yellow, another good yellow. Start with two paints, two colors. You can't go wrong with two colors. Are you ready? So just watch and see what I do. I'm hitting the west coast. First thing I'm going to do is take this Picasso brush and I'm getting it all over the paper for the sky, but not the cloud. See, not the cloud, but all over the sky. Right over my ink, see waterproof ink, perfect. I waited a couple of seconds. I wanted the sky to bleed down into my landscape here. So I wet it to. The only thing I left is the cloud. It's definitely not been touched. Now the paper will buckle a little, it's a 140 pound paper, no big deal. Put my brush aside here, take some more water. While the water is sinking into the paper, I'm taking some ultramarine here. I'm going to do a quick dispersion test because the papers wet and I'm probably going to be tilting my paper because water runs downhill. I'm going to get a nice little sweep across the sky here. I'm going to see what happens, not bad. I can't even take some of my ink here, see my ink, and I'm going to paint it so that it's falling down. Now you'll notice this paper is what's called surface wet. I'm just going to play around with a few of the shapes here and see how much it's going to drip. You see, it's not dripping too fast. Very nice. Now, instead of adding more paint, what I am going to do is take my big Picasso brush here and I'm going to run it through like this. I'm going to clean that brush off here. Always have a rag handy, we don't want too much water. I'm going to do it again. Those are those ink lines there. I'm going to do it again. I'm watching. I like that. I like just what happened there. Look at it go. Is it going for the clouds? No. Is there bleeding there? Yes. I'm going to tilt. As I tilt, I can simulate wind. I can go like that. Look at this nice white spot here. Things are happening. Now I'm going to lay it flat because I don't want to lose it and I'm going to be really careful. I'm going to take a little bit of the umber. See the umber, just a drop of it, very thin. Umber and ultramarine will make a lovely soft grade. I don't want too much water on my brush. There's a little drip there. I think I'll just add that there. There we go. Here comes a little umber. Just drop it in too there and one here. I'm going to put a darker one here. You think this is sky blue here, but I'm thinking it's a cloud bank coming in. Now that's wet. That's a lot of amber, Ron. Let's seen what happens there. Should I just leave it or let the water go back on it? It's not really going anywhere, is it? I'm going to let sum of the water collect it here. That went on a little bit thick. But you known what? Bold is good. What do I do if it's a little thick? I watch it for a second. I realize that I can give it one little swipe here to distribute it better. That's it. That's as far as I'm going with that. What I've done there is we can see that I have lifted a little bit of the paint off with it's now on this brush. I clean it off. I'm just going to let that sit. I'm going to add a little brown in here, and here, and then clean my brush, take a little brown here, and gently distribute it through there. Nice, two colors so far. I look up there and I go, I'm a little more blue in here. There we go. See, that's a lovely, it's almost black. Look at that, that's a perfect stormy cloud right there. It's going to disperse, just leave it alone now. That's nice. You see trees there. A fairly thick mixture of the ultramarine and I am mixing them together. Take a little drop of moisture. This now has become almost like ink. It's the same thickness as ink, I load the brush up, get the tip on it, putting a few of these in here going over. Wherever I see dark, I'm going to put in these little strokes. Now you see the predominantly blue. Let's see if it mixes in there, if it spreads out a bit. Yes, it starts to spread out a bit. Wow, that is pretty cool. These little wave forms here, that's where the reflection is. This because it's being disturbed by the wind, reflects the sky. Here's my Indian yellow and I'm going to add a little bit of the ultramarine to it. Definitely got green there and just going to add a little bit of that on the trees here. Don't want to get too carried away. A little bit in here and there. I'm going to take some pure yellow, pretty much pure, clean it off. Nice thing with these pallets, you can just add water you see? And that cleans your color off because clean colors are the best thing you can have, water going out, got the nice clean yellow. See it's bleeding a little bit there and I like that little bit of a mist coming in. Put a little bit of the yellow right in there. Maybe a drop in here, there we go and a little bit here to warm it up and here, and little bit on my trees here, drop it in. That really spread out there nicely. Going to make a two mark here with the end of the brush. The thing I like about this it's got a nice two mark. Not good to push that way. Always good to have the brush or the tool on an angle see? When you put it on an angle, it won't rip the paper. I like this a little browner here I'm going to mix a little bit of the Indian yellow with the amber. Now I'm getting a fairly thick paint in here. See a rich paint, almost opaque, and that's okay. A little bit of opaque is great in a picture. Opaque meaning you can't see through it, and that's good. Let that dry for a minute. Now what if I took a little bit of Alizarin just to touch. Because the paper is wet and very thin with a drop over the ultramarine is dirty, so what do I do? Just add a little water to it, and there we go. Runs down. You can get quite a nice violet with the ultramarine and I'm just coming under here see, with that little violet shape. I might even drop a little bit of the ultramarine up here too now. Add little more of that, there we go. Shadow, it looks like the sun is coming from here, so we'll pull it over there. There, drop a little in here and little here. You can use a big brush like this or you could use a flat brush like this. Anything that will pick up paint. I got a little light area there. This is the sky, so I don't want to pull down because the reflection is from the sky up here. Let's see where else I can pull off a little light coming through. Remember I said the light was coming from here, so I'm going to pull it off right there. Take that brush. There's a little white spot here. I don't want to touch it. That's good. That's lifting a little bit here and there. That's nice, and right here, there. Anywhere else? No, I'm going two let that dry. I might want to add with my small brush a little something to set the clouds off here. I think I might take a little more of this light purple or violet and because I wet that with my brush, no problem. Lights coming from here. I like that, hey, I could put a little bit of that now, you see? Painting start to talk to me. That's a good sign. I can put a little bit of this purple in the water just a little bit. Now you think that's too dark, so I light it up with little water. Just lift it, and I'm going straight down. Here we go looking just fine. Okay, that's good. Take a break from that, get a little dark up here. Maybe I'll just lift a little bit of a cloud off. There. Oh yeah, look at that. That's cool. I like that. The magic of the green tape. Notice I'm pulling away from the picture. A picture always looks better with a nice white shirt on all the way around it. People get colored mats and they do work occasionally, but honestly, a white mat is probably the best thing you can get. That's a great little picture. Remember, no mistakes in art.