Transcripts
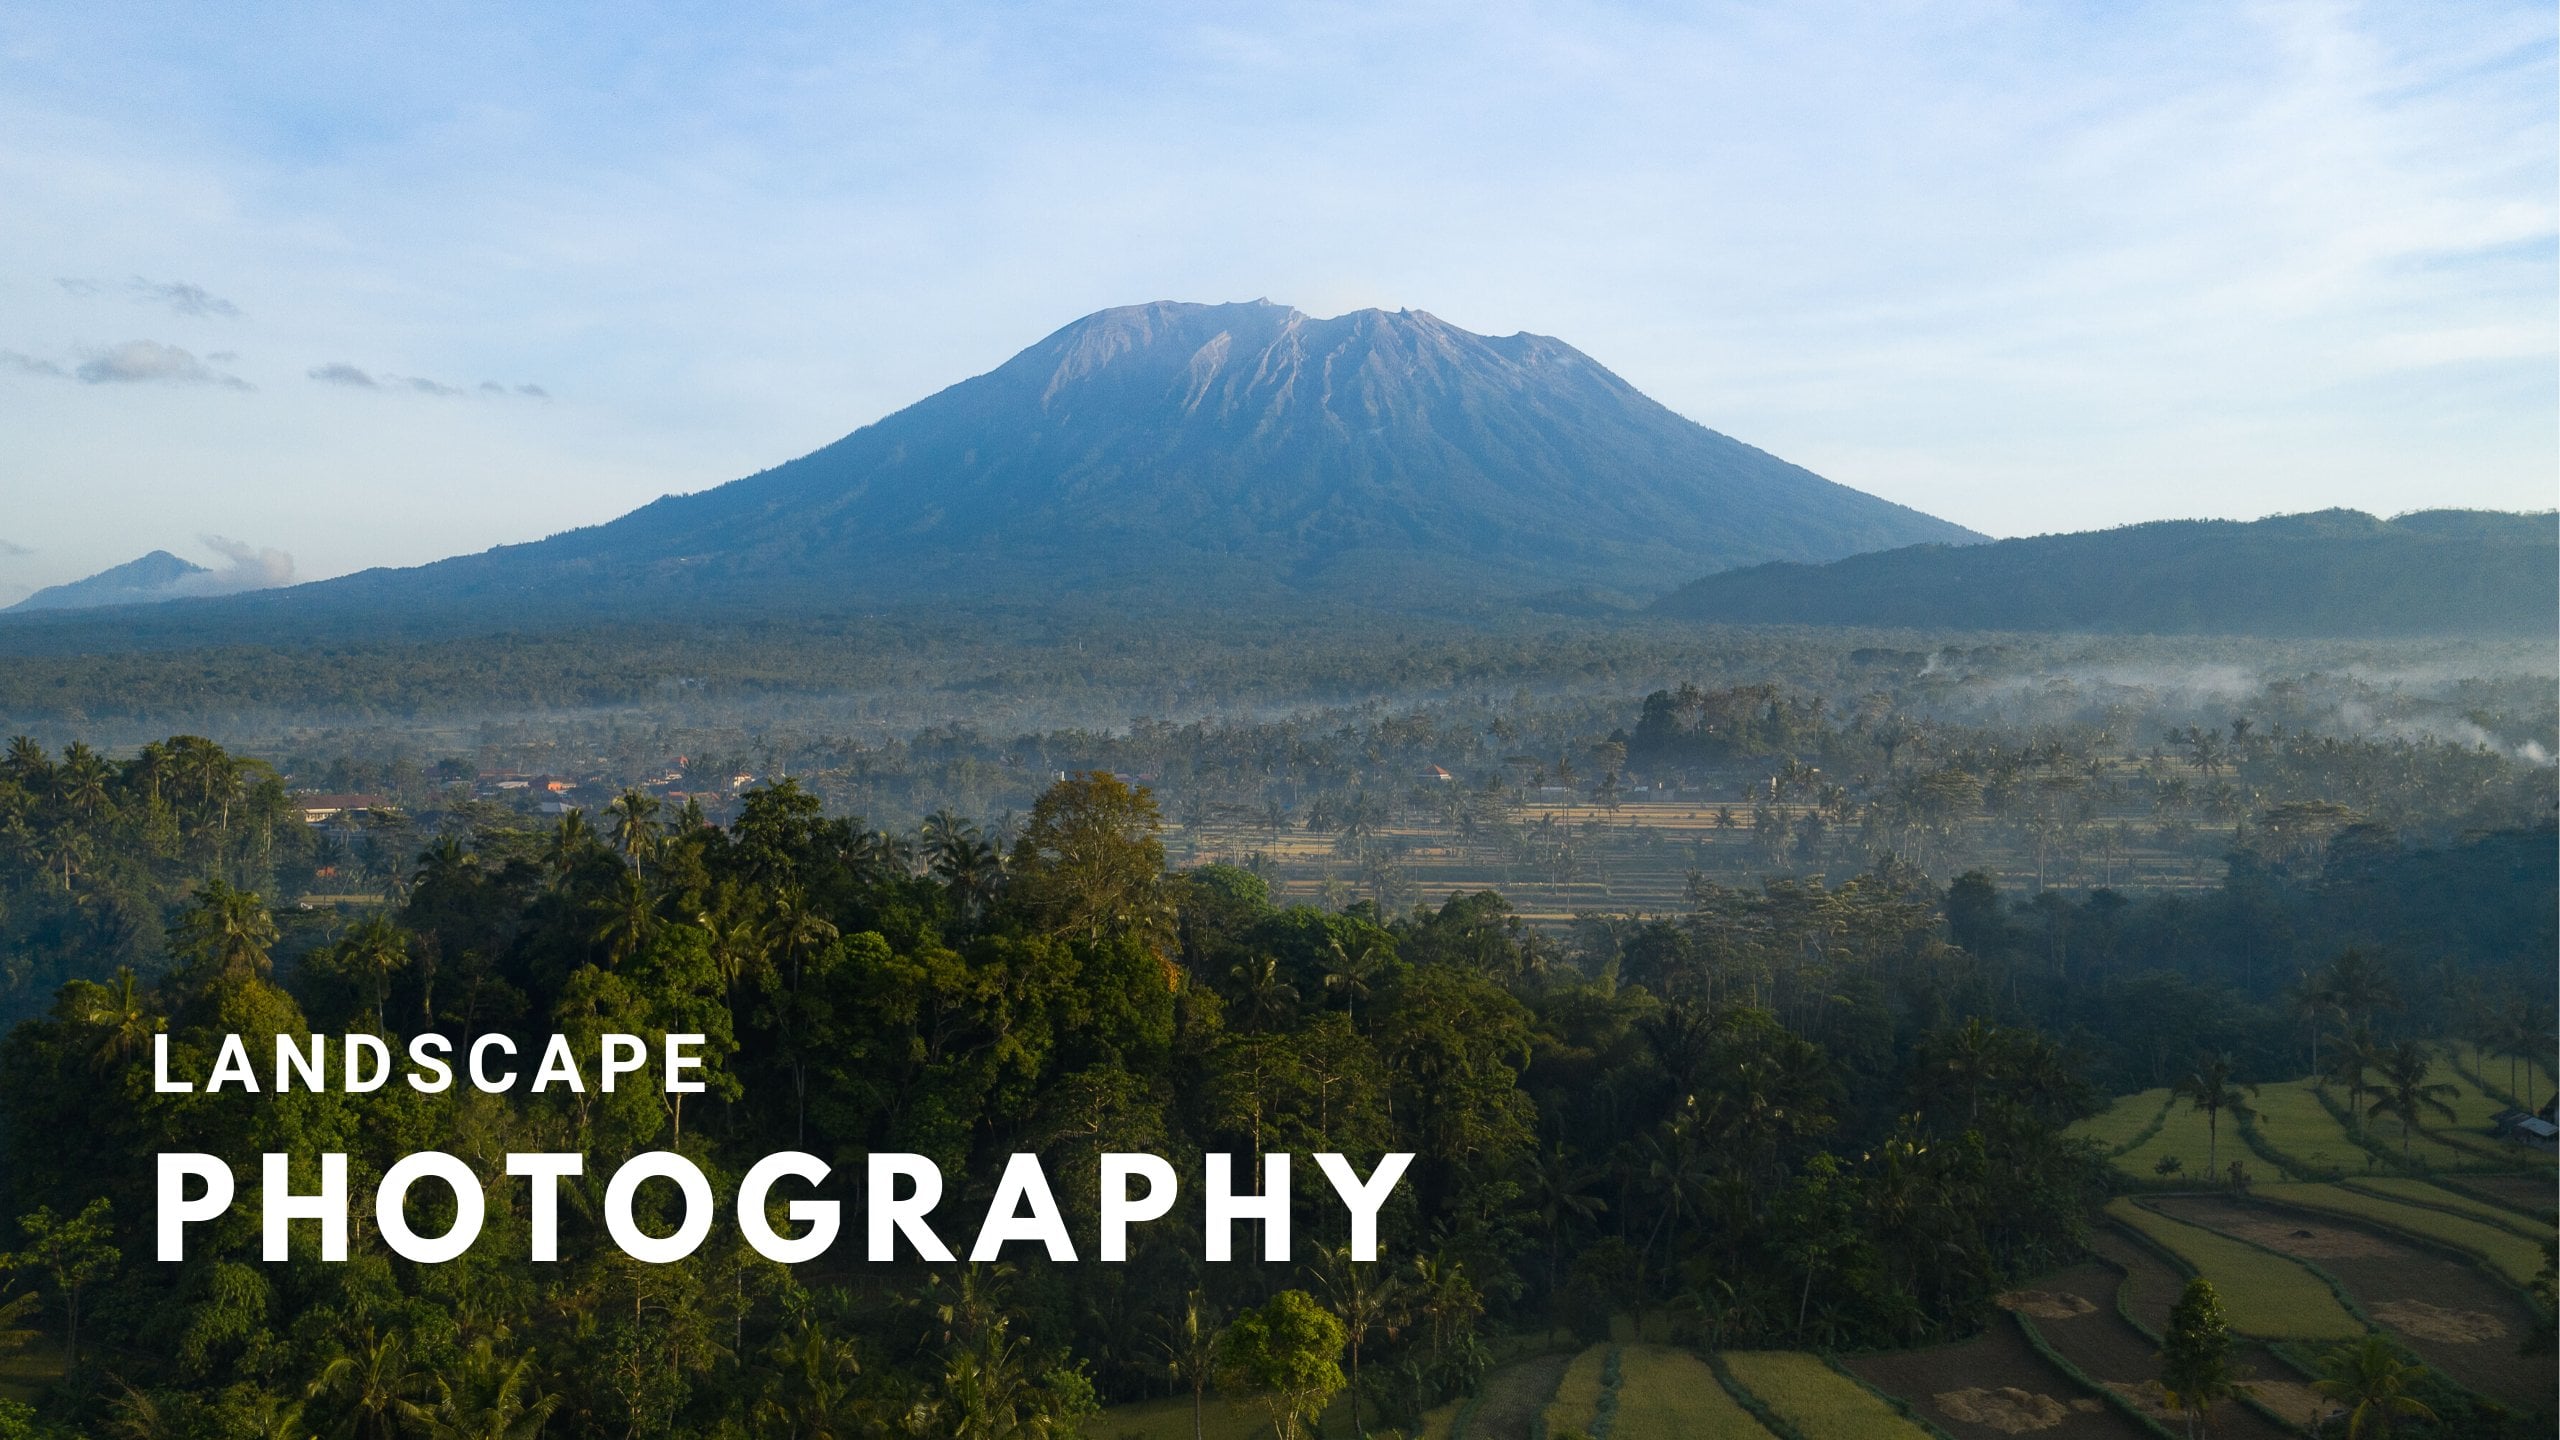
1. Introduction: I think one of the best things you can do as a beginner photographer is just grab your camera and head outside for a walk. Walk around in your neighborhood or your city or wherever you are, and just take photos of things that look interesting to you. Photo walks are one of the activities that helped me become the photographer I am today. They're also an amazing form of creative therapy and self care as well. What's up guys, and welcome to the creative photo walks class. My name is Sean Dalton. I am a travel and lifestyle photographer based in Bali, Indonesia, and I'm also a top teacher here on Skillshare. In this course, we're going to be exploring one of my favorite forms of creative therapy, and that is the photo walk. A photo walk is exactly as it sounds. It's going on a walk with your camera with the intent of capturing photos of some of the things that you see while you're out and about. You can go on a photo walk anywhere. You could do it in a city, you can do it in a park, on a trail, or even in your neighborhood. It doesn't really matter as long as you're outside walking and taking photos, that's a photo walk. I started going on photo walks during the hardships of 2020. I fell into a massive creative route. I wasn't taking photos, I wasn't editing and I completely fell off the creative course. Going on these photo walks, just put a camera back in my hand and allowed me to exercise that creative part of my brain and allowed me to practice the fundamentals of photography once again. But more importantly, it just helped me feel better. It really helped me climb out of that rut of 2020. I still use it as an effective form of self care to this day. Today in this class, I'm going to show you guys how you can use these creative photo walks not only as a way to improve your photography skills, but also as a form of creative therapy. You're going to learn some basic concepts of photo walking in photography. I'm also going to take you guys out with me on my personal photo walk. We're going to head to a little surf town in Bali called Uluwatu. I'm going to walk you guys through some of the photos that I'm taking and explain them and just show you guys the behind the scenes of one of my daily photo walks. After we shoot, we're going to come back here to the studio and I'm going to show you guys how I would edit those photos to really enhance the moods and the emotions that I felt when I was capturing those images. This course is for anybody that wants to become a better photographer. Just being outside, taking photos is one of the best things you can do to becoming a better photographer. But this course is also for anybody that's just looking for an effective form of creative therapy. Maybe you feel like you're in a creative run, you hit a wall. You're not as artistic as you used to be, photo walks have an amazing way to climb out of that. I really think that they can benefit you in some way. If you guys are ready to get started in this class, you can go ahead and click the first lesson below. We're going to start talking about some of the benefits that you can get from a photo walk and also some of the things that you can do to ensure that you're getting the most out of your own creative photo walk.
2. The Benefits of Photo Walking: All right guys. Well, welcome to the creative photo walks class and thank you so much for taking the time to enroll. If you guys have seen me here before on Skillshare, welcome back to another class. If this is your first time seeing me here on Skillshare, welcome to your first course. I have a ton of courses here on Skillshare, and I hope you guys enjoy this one here today. One of the first things I want to talk about in this course is just the benefits of a photo walk and also what are some of the things that you can do to make sure that you're getting the most out of a creative photo walk. I think one of the most important things to realize about a photo walk is that's a very personal experience and you're going to get different things from it depending on what you're looking for. For example, if you're the type of person that wants to use a photo walk to just improve their photography skills, maybe you just want to learn how to use your camera better. Well, if you go out and do a photo walk with that intention and you put that effort into learning how to use your camera better, well then that is going to be one of the main benefits for you, is just learning how to better use your camera. Now say you're somebody that doesn't really care about that. You don't care about the technical side of photography, you don't even care about capturing photos to share online. Maybe it has nothing to do with sharing, but it's more about the experience of a photo walk. For me personally, that's what I am most interested in. I get a lot of benefit from just being outside and capturing photos and exercising that creative side of my brain. I'm not necessarily looking to capture amazing photos to share online, it's not about the end result, it's about the actual process of just being outside taking photos. I think it's important to think about that before you go out on your photo walk is, what do you want to gain from this experience? Do you want to use it to become a better photographer? Do you want to use it to capture really cool photos to share online? Or do you want to just capture photos of your everyday life for you, for yourself that you can look at in 30 years and remember some of the places that you lived? That's another reason why I like photo walks, is just to remember some of the places that I've experienced in my life. It really depends on what you want from this experience. Because if you go into a photo walk with very clear intentions as to what you want to get out of it, you're much more likely to see those benefits. But for me personally, there's three main benefits that I get from these creative photo walks. Those three things are creativity, exploration, and health. Let's start at the top with creativity and what I mean by that. I think the creative benefits for a photo walk are pretty self-explanatory. If you're outside taking photos, and you're engaging with a creative experience, of course, you're going to benefit creatively from that. Not only learning how to better use your camera and stuff like that, and also just how to view the world as a photographer and how to see things like a photographer would see things. This is a concept that we're going to discuss a little bit more in depth in a few lessons here as learning how to view the world like a photographer and gain the ability to create beautiful images despite being in a place that might not be beautiful. I think honestly just the act of being outside and exercising that part of your brain is a very healthy experience, and it's very good for breaking through those creative ruts that you might fall into. For example, the beginning of 2020 when I just wasn't shooting or editing, I wasn't doing anything to grow creatively. The photo walk helped me break through that because it put a camera back in my hands and it allowed me to start thinking like a photographer again. The creative benefits are very clear, and I think everyone can benefit from a photo walk in a creative sense. Now the second benefit is exploration and the best example I like to give for this is my first day in Japan. I lived in Japan a few years ago. I spent three months living in Kobe. The first day I got there, I was so overwhelmed by everything that was happening, in a good way. I was so shocked by the difference in the way that people live their lives there. Every single thing interested me, the roads, the signs, the people, every little detail. The first thing I did when I got there was I just put my stuff down, and I went for a walk and I walked like 40,000 steps in a single day. My legs were ruined. I was so tired, I was sunburned, but I didn't care about any of that because everything just looks so interesting to me. I took thousands of photos that day, every little detail. I was just so intrigued by it all. But that was the best way for me to explore the new place that I was in. Because if I had sped by on a bike or in a car, I would've missed so much. I would have missed the little details of everyday life, the small interactions, the people arguing, the cat climbing on a fence, the smell of the local coffee shop nearby, or the mom scolding her children, whatever it is, those seemingly normal human interactions can be missed if you're zooming by on some other form of transportation. But walking just allows you to slow down and see these things and see the beauty in these things, and also it gives you the opportunity to capture some of these moments, to capture some of these scenes in a beautiful way. For me, exploration, major benefit of photo walking, and I hope it is for you too. When you guys go out and do your personal photo walk later on in this class, I hope that you go somewhere new and explore somewhere new. If you can't go anywhere new, and you're confined to your neighborhood, we'll explore it in a different way, walk a little slower and notice some of the things around you. You can still explore places that are not new to you by just going in with different intentions, exploring it through the eyes of a photographer and looking for different things that you might not usually notice. The last benefit that I find from photo walking is health. Remember that day where I went out in Japan and I walked 40,000 steps, I burned so many calories that day. It was just so good for my body to be outside and just getting the blood flowing and the blood pumping. Not only is that good for your physical health, but it's also incredibly good for your mental and emotional health as well. Honestly, if I had to choose one main benefit from a photo walk for me personally, it's the creative therapy benefits that I get from being outside and being mindful in the moment, taking photos. When you're out on a photo walk and you're looking for photos, you're so incredibly present in that environment. The mental health benefits for that are immense. It helps me relax, it helps me calm down after a tough day. Also, like I said, I'm engaging the creative side of my brain and that makes me happy when I'm creating something. I'm producing something beneficial. For me, out of all three of these benefits, I think the health is the main one because at the end of the day, that's the most important thing, is our health, our physical health, our mental health, our social health. Those are all things that can benefit from a productive photo walk.
3. Your Personal Photo Walk: Like all my classes here on Skillshare, this is an interactive course and of course I'm going to ask you guys to go out and take some photos on your own personal photo walk. I think one of the best ways to improve anything, it's just the practice. If you guys are actually going out on your own photo walk and putting some of the principles that you learn in this class to practice, I guarantee you're going to see some of the benefits that we talked about earlier on in this course. With that said, I want you guys to go on your own personal photo walk. This can be anywhere. All these can be in your neighborhood, this can be on a hike nearby, this can be in a city somewhere. Maybe you're traveling, maybe you're not traveling. It doesn't really matter where it is. As long as you guys are getting outside and taking some images. After you guys go on these photo walks and capture your photos. By the way, you can take as many photos as you'd like. You can take three, 10, you can even take 100 photos if you want. It doesn't really matter how many photos you take. But once you take those photos, come back to the course, navigate down to the Project and Resources tab below this video, and then upload 1-3 of your favorite photos from your photo walk. After you guys upload those, tell us a little bit about your walk. What did you encounter while you are out there? What were your intentions of the walk? What did you want to get out of it? Were you looking to improve your photography skills or were you trying to learn how to use your camera a little bit better, or were you just in it for the creative therapy aspects of it, you just wanted to relax a little bit and exercise that creative side of your brain. Let us know in the description of your project. Also if you don't want to share any of your photos, you don't have to. Like I said in the benefits of this course, a photo walk is what you make of it and you don't need to go out with the intention of capturing photos to share online. You don't have to share photos if you don't want to, you can just tell us a little bit about your experience walking and some of the benefits that you got from it. Then you might be thinking to yourself, Sean, I don't live in a beautiful place. I don't live in Bali. I don't have beautiful places to go out and walk and take photos. But one of the things I want to remind you is that there is beauty absolutely everywhere you look, you just have to look a little bit deeper to find it. I think it's all about perspective as well. I like to give the example of me growing up in California, I grew up quite near San Francisco. In my whole life growing up, I thought I lived in the ugliest place. I thought it was so dry and dead and boring. But after moving out when I was 18 and living in these foreign countries and living in different places. Now I look at California and I think, oh my gosh, what a beautiful place. I would love to go back and photograph that place. That's because my perspective has shifted and now I see the beauty in the place that I grew up. I want to photograph that place more than anywhere else in the world. Don't try to convince yourself that you don't live in a beautiful place, I promise you, you just got to look a little bit harder to find something beautiful. But anyways guys, I'm really excited to see what you come up with for your class projects. I'm really looking forward to seeing the world through your eyes and seeing some of the things that you capture while you were out on your photo walk.
4. Gear & Camera Settings: Now I want to take a few minutes to talk about gear. The first thing I want to say is, gear is really not that important for this class. That's because we're not necessarily worried so much about the end result for this class. This class is more about the experience of being on a photo walk. If you can get good photos while you're out there, that's amazing. But rather, we're focused more on the benefits of just being outside and capturing photos and learning and bettering ourselves. Now with that said, you do need some type of camera to do this. If you guys have an iPhone or a smartphone, that is perfectly fine for this class. Most of the time when I'm out shooting, I'm actually using an iPhone because I don't want to carry around my DSLR every time I go out and shoot, it's not practical. I walk every day in my neighborhood, and I always have my iPhone with me. Most of my photos that I capture on my photo walks are usually captured with my iPhone. Now with that said, if one of your main goals with a photo walk is to just learn how to use your camera better and understand the technical side of things better, well then definitely bring your DSLR outside and practice choosing your camera settings and really dialing in the technical side of things. I think the photo walk is one of the best ways to learn how to use your camera better by just being outside and practicing. I mentioned that earlier on in this course. But I do want to talk about these cameras a little bit. This camera in the middle is actually a medium format film camera from the 1990s. This camera is amazing because it's still shoots with that old technology. It literally burns light onto paper. The images just look much different than a digital photograph. I think film photography actually goes amazingly well with something like a photo walk because film photography causes you to slow down even more because you only have X amount of photos on one roll. I can take 15 photos on one roll of film with this camera, so I have to choose my shots wisely and I have to really spend time thinking about the photos that I want to take and also setting the camera settings and setting the focus, that all takes time. This is a fully manual camera. There's no auto-focus, there's no auto-exposure, and I like that. I like that it causes me to slow down and be more present because that's one of my main goals with a photo walk, like I discussed earlier on in this class. I used this camera a lot last year. We'd go to a new place in Bali and I would just start walking and taking photos of different things. Not only did it help me learn how to shoot film better and I became a better film photographer, but also, I had the other benefits of a photo walk. If you guys are interested in film photography, I think it goes hand in hand with photo walks. That's why I just wanted to mention this a little bit because I do think it's a beautiful form of photography. Even though it's really old and a lot of the film cameras you're going to be shooting on are going to be from the '70s and '80s and '90s, I still think it has its place in modern day photography. But I am primarily a digital photographer, so later on in this course, we're out shooting and we will walk too. I'm going to be shooting with this camera here. This is my old busted up Sony A7 III. The shutter button is broken and the screen doesn't work very well because I've used it like crazy for the past three years. I just know this camera in and out. It is an extension of my body. I know how to use it, I know how to change the settings very quickly. It allows me to capture photos without having to think about the camera at all. I think that should be the goal for every photographer, is to get to the point where the camera is no longer a barrier for them to capture their creative vision, but rather it's just a tool. It's just an extension that allows the photographer to capture the vision that they have in their minds. But until you get to that point, the camera is only going to be a barrier. I understand how to use this camera perfectly, so I'm going to be shooting in manual mode because it's not difficult for me. But if you're not quite there yet and you don't want to fiddle with the technical settings of your camera, you can shoot in aperture priority, which means you're going to select the aperture of the camera, the little iris, and your camera will auto-select the ISO and the shutter speed. Or you can also just shoot in full auto. If you don't want to focus on camera settings and your main focus is just identifying composition and looking for those beautiful things we talked about earlier, like light and texture, and detail and color, you can shoot in full auto, that is totally fine. You're still going to benefit from this experience. But ultimately, like I said, it's what you want to take from this course. If you want to improve the technical side of photography and you want to learn how to use your camera better, shoot in manual mode. If you're not worried about that at all, you just want to capture cool compositions and you want to make it easy, shoot with your iPhone. If you want to become a better film photographer, shoot with your film camera. You can really use any camera you want just depending on what you want to improve upon. If you do want to learn more about the technical side of photography, definitely check out my photography essentials class here on Skillshare. I talk about the entire technical side of photography in a very short amount of time and I make it super easy to understand and it's not overwhelming. I promise you guys will enjoy it. If you haven't seen that class, go ahead and check that out. But of course, that's not the focus of this class. This class is more focused on the subjective side of photography.
5. Learning to Look: One of the recurring themes you guys are going to hear me talk about in this course a lot is this idea of learning how to look and learning how to see things differently than how you usually see them. Well, what do I mean by that? Well, say you go for a walk in your neighborhood, you might notice certain things. You might notice your next-door neighbor watering their flowers or somebody walking their dog, or maybe you see some kids playing over there. You're going to notice those things. But think about all the things that you don't notice, all the things that are happening around you that you're just not paying attention to. Now imagine just slowing down and trying to look at things differently and spending more time looking at things that you just really wouldn't pay attention to. If you do this, I think you're going to be surprised at some of the things that you see. For example, say there's a tree in your neighborhood and you see that tree all the time but you never really paid much attention to that tree. So next time you see that tree, go up to it and look at it from far away and then go a little closer and look at the details of it. Look at the texture, look at the shapes, look at the leaves, look at any life that's in the tree. Maybe there's a little squirrel living in there. Maybe there's something happening and really spend time looking at these things and trying to find ways to photograph it that are different than how you would usually photograph it. This idea of learning to look and learning how to find beauty and things that you would usually dismiss is something that great photographers can do. They can step into a place and they can look at a scene that most people would completely write off and they can find the beauty in that scene. I think that is one of the main benefits of a photo walk is learning how to look, learning how to see the world through the eyes of photographer, through the lens of a camera, and identifying beautiful images within that space. Some of the things that I look for when I'm out and about shooting my photo walk, and this might look different for you but these are just things that I'm looking for, I'm looking for interesting subject matter, of course. So interesting people, interesting plans, interesting buildings. Anything that just looks interesting to me from a subject matter perspective, I will take a photo of it, but then I also look for smaller details. I look at the texture of specific objects, for example, the trunk of a tree. If you go up close to it, it's a very interesting texture and you can find patterns within it. I like to photograph textures. I'm looking for color and I like complementary colors, so blue and yellow or green and red. Colors that just look nice next to each other. These might be naturally occurring or they might be man-made. For me, it doesn't necessarily matter, I'm just looking for interesting color. I'm also looking at light as well, and this is probably the main thing I'm looking for to be honest because cameras actually capture light. If you can find some beautiful light and you capture with your camera, it can result in a very beautiful image. That's because in photography, light gives our subjects form, it gives them shape and it can make objects look 3D and much more interesting. That's why we always say, oh, shoot at sunset or sunrise, and that's because the sun is horizontal in the sky and it's coming in and hitting things at an angle, and it's also a beautiful color as well. So that's personally one of the reasons why I like to go on my photo walks at sunrise and sunset is because I really like that light. So pay attention to the light where you're out shooting and try to look for scenarios that have beautiful light within them. One of the things I like to do while I'm walking is first I identify something that looks interesting to me and then I just spend more time looking at it. I look at it from different angles, I go close to it, and I just look for interesting aspects within that main subject and I dissect it a little bit and spend more time on it. Now if this overwhelms you, you step outside and you're like, there's so much to look at now that I'm thinking like this. How can I ever dissect all of these things that are happening around me? Well, you don't have to do it with every single thing that you see. Maybe you have a recurring theme on your walk. So maybe one day you're like, okay, today, I'm just going to focus on plants or on trees, and another day you might just focus on colors. Maybe you're going to capture just reds that day or blues that day. Or maybe you're focusing on a specific subject matter like mailboxes. Maybe you're going to go around your neighborhood and photograph different mailboxes in your area. You can really focus on whatever you want on your photo walk, and I think that's one of the really personalized aspects of it. You might go on the same photo walk as a 100 other people, and all 100 of you are going to get completely different images. So that's something that I like to do when I'm out shooting. Sometimes I go and I just focus on textures and other times I go and I'm only focusing on light or on color and sometimes I just go and I don't have any expectations and I just take photos of anything that I see. Maybe I'm not really thinking so much about composition, I'm just snapping random pics. That's okay too. It really is whatever you want to make of it. But I think the main takeaway from this lesson is to just learn how to slow down and look at things a little deeper than you usually would. Spend more time on things, look at them from different angles and a walk closer to them, walk far away and look at the environment around them. How do they fit within that environment etc. Now I know some of you are going to be thinking, well Sean, I don't know what a good composition is and I feel like you're talking about things very broadly and this isn't very technical and I'm looking for something more technical, and I totally get that. But one of the things that I was thinking about when I was making this course is, I don't want this to be a technical course. I understand the importance of that, and I have other courses that talk about composition from a technical standpoint and more solid photography rules. But as important as those things are, also think it's just as important, if not more important, to be able to see the world as a photographer and slow down and take in a scene and really dissect it for what it is. So if you are interested in learning more about the technical stuff, I recommend my photography essentials class that covers everything you need to know in regards to that. But this course is more focused on the process and learning how to look as a photographer and learning how to act as a photographer, not necessarily the end outcome.
6. Field Lesson: Photo Walk in Bali: Welcome to Uluwatu. This is the southern point of Bali. It's a little surf town and it's one of my favorite places in Bali to take photos. Over the course of the pandemic, I was coming here quite often to take photos. This is where I really started my photo walk adventures. I would come here with nothing in particular in mind, just looking for interesting things to photograph, whether it be textures or light or landscapes or whatever it might be. This was the place that I was really drawn to and I still am to this day. Today we're going to be walking around up and down this beach. We're actually on a cliff called Bingin Beach. There's a lot of interesting winding pathways that lead down to the beach and there's some interesting abandoned hotels along the way. There's some cool little surf repair shops as well as some interesting little houses, people. Hopefully we can get a mix of everything. Just to reiterate, I'm looking for texture, I'm looking for light, and I'm looking for interesting subject matter. Just anything that catches my eye. I'm not exactly sure where I'm going, but that's part of this process. It's just wandering and getting into that creative zone and enjoying the place that I'm in. Let's start walking, I'm going to keep an eye open for cool compositions and hopefully we can get some interesting photos. Walking down these steps here, I found this cool little scene. It's a nice colorful door, but I really liked the light spilling onto the front of this little cement step right here. It's really beautiful and one of the things I said, I was looking for out here today was beautiful light and this is certainly beautiful light. It's about 4:30 in the afternoon here and the sun sets at around 6:00 or 6:30 here, so very nice time to shoot. Absolutely love how this pathway is winding down to the beach and there's a nice little balcony right there and a big palm tree. Behind that you can see the ocean, so this is a beautiful shot. Not only are the colors amazing, but the composition is great and the subject matter is interesting as well, so you hit all three heads. This is a really cool spot. He's just repairing surfboards and I love the interior of this place, so a lot of shots here. I'm just going to shoot the whole scene and hopefully get some cool photos. Found another really cool shot here, we have this staircase with this balcony, and then right behind it are the waves with the surfers coming in. I can get this beautiful balcony with the light on it, as well as the surfers in the background. This will look amazing on something like an iPhone. Any kind of general camera, this would look awesome. I'm going to shoot this. I'm going to try to time it for when the surfers come in and then I'm going to shoot it, got it. Some of the things that stand out to me in this shot is the lighting, really loved the soft light right now, as well as the Blue ocean behind this golden patio. Just complimentary colors, it just looks really nice. I find myself drawn to this green plant because the light hitting it is very beautiful and there's a lot of layers going on and there's no way I can get all of it in focus, but I don't really necessarily want that. I want to just capture it as it is. Now this is definitely more of a texture, I think if you saw this photo, you might not really know what it is, but that's okay. I'm not necessarily looking in this particular shot at accomplishing anything with the subject matter, it's more of the colors, the tones, the textures, the details, that is what's drawing me to this particular photo here. There's two surfboards here, and they're both just completely wrecked, ruined surf boards. Seems to be a recurring theme on this beach, but the light is coming in. It's very beautiful, it's very soft, and I love soft light. As soft as possible, I like shooting after sunset when the light is beautifully soft, but right here, the light is just coming in at an angle, creating a lot of really interesting lines, a lot of interesting shadows. Not only that, but that the colors are beautiful as well. They're a little bit sun bleached on these surfboards. I'm sure these surf boards were much more vibrant back in the day. But now they're a little sun bleached and I like that vintage colors. The more I look at these boards, the more I see in them, so I love that. Just being out here and just spending time photographing old surfboards. This is an abandoned hotel. This is Rockies. Fortunately, it's abandoned since the pandemic here, but there's this deck facing the ocean right here and there's something like, bamboo. I guess, it's like paneling. It's acting as really nice leading lines that got our eyes onto the ocean and out into the distance. We're going to capture some photos here, the light is beautiful as well. I love this shot here. I'm shooting through this tree at the surfers right here, they're all just hanging out. All right guys, well, the sun has set, so that's about it for our shooting today. I captured quite a few images today and I'm pretty happy with some of the images that we've got. Once again the point of an exercise like this is not necessarily to like capture insane photos. It's great if you do capture insane beautiful images, but it's more about the process and enjoying the walk and getting the benefits that you would get from a mindful walk where you're very present in this situation and also getting the creative benefits of the photography side. Looking at things differently and seeing things in a new way and spending time on things that might look seemingly very boring or normal and looking at them in a different way and identifying something interesting within those things. We certainly did that today and overall, I just think I got a lot from this activity. Just being in this place in Uluwatu makes me happy. I love being here and I love walking and exploring here. We've walked and shot a lot, so we're pretty tired, guys. We're just going to enjoy this beautiful sunset. We're going to watch these surfers before we climb back up this mountain and head home. But I hope you guys enjoyed this lesson and I'll see you guys in the next one.
7. Editing in Lightroom Mobile: All right, guys, welcome back to the studio. I hope you enjoyed that little photoshoot there. I honestly had an awesome time, walking around Uluwatu, taking photos. Like I said, I love that place and I feel like I got a lot out of that photo walk. I wasn't expecting to get so many cool photos, but after getting home, uploaded the photos and taking a look at them, I'm honestly super surprised at some of those images that I capture and also I finally changed the background of my iPhone. The lock screen on my iPhone with one of those images that I shot out there and in Uluwatu. But in this video, I want to show you guys how we're to edit some of those images that I captured on that photo walk and do it in a way that really helps preserve what I was feeling that day. The moods, the emotions and just the way I saw that place. I want to maintain that and enhance it with my edits. Now, when it comes to editing, I actually do a lot of my editing on my iPhone, and the reason for that is because you can do 95 percent of what you can do on a computer, on an iPhone these days. My basic workflow works like this. I usually upload all of the photos to my computer into Adobe Lightroom, and then I sync those photos over to my phone using Adobe Creative Cloud. In order to do this, all you have to do is import the photos onto your computer, put them into a collection, and then sync their collection and then as long as you have an Adobe Creative Cloud account, those photos will sync over to your iPhone. Now, once you have those photos on your iPhone, there's actually a few ways you can go about editing them. In my iPhone photography class, into my iPhone editing class, I talked about this. You can either use like photo filter apps like VSCO or Snap Seed, and in those apps you just put your photo in there and then you slap a filter on it and it's pretty much good to go. Or you can edit in Adobe Lightroom Mobile, which gives you much more freedom over your photo and you can do a lot more to it to really make it look the way that you want it to look. Now, this is personally the approach that I like to take. I really like having control over my edits and I can do a turn to my photos in Adobe Lightroom Mobile and I'm going to show you guys how I do that now. I'm going to open the app here and show you guys my basic editing workflow for Adobe Lightroom Mobile and how I edit most of my photos for Instagram or for my website or wherever I'm posting something online, I'm often editing on my phone. These are some of the images that I imported and synced over from my computer. These are some of my favorite photos from the shoots. There's some surf porch shots. There's some photos of the guy fixing the surfboard, the plant, just different things that we saw that day. I want to edit this photo first, and this is the before and this is the after and I'm just going to reset it and show you guys how I edited from start to finish. Now, I actually edited most of the photos that you saw in this course using Lightroom presets. Lightroom presets is basically like a fancy photo filter that you can use in Adobe Lightroom and how it works is basically, I can edit a photo and then save all the settings into a preset and then you can apply that preset to your photos to get a similar looking edit. The cool thing about Lightroom is there's a lot of really awesome presets already built into the app and you can see those here on the bottom under Presets. Under premium, you can see there's portrait presets. There's also cinematic, futuristic travel and then you can just go through and tap each one and see how it's going to edit your photo, and they're really good. I'm honestly really impressed with these. But personally, I use my own that I've created myself and if I go under Library, you can see all five of my preset packs. I have one called Autumn glow, classic portraits, dark and moody, food and cafe and a travel one as well. I actually used the dark and moody one the most in this class just because I really like those colors. You can see I can just go through and hit each one and it's going to changed the way my photo looks. I mean, I think I actually used Hollywood a lot for this because I really liked the warmth and the softness of it and after I applied that, then I would just go in and make my adjustments. I'm going to show you guys how to make these adjustments in a second here I'm going to explain all the different sliders, but yeah, if you guys are interested in checking out my presets, they are available on my website. I'll put a link in the description of this course and you guys can check those out. But I want to show you how I would edit these photos from scratch as well. I don't think you need to use presets to get amazing edit and also mindfully editing your images and changing things slowly is also a very good activity to just better understand the app and how it works and also how to engage with the tones in your photo a little bit better. Let's reset this photo and start editing it from scratch. Let's start with this image here and this is one of my favorite photos that I took that day for so many reasons. The colors, even though the colors are washed out and know that there's a lot of potential to bring those colors out and I felt like even though there was a lot of desaturated things on that beach, whenever I think of that beach, I think of colorful things for some reason. I want this to be a colorful image, a little bit warm. I mean, I really want to enhance the shadows as well. I also just love this composition. This is probably one of my favorite photos that I captured that day. Now, when I'm editing in Lightroom Mobile, I like to follow a very basic editing progression and it starts with editing light then editing color and then editing detail and then it's pretty much done. Let's start at the top here with light and you can edit light by tapping that little light icon there at the bottom. The first thing I like to do is bring my exposure to a point that I like. I'm going to bring it up by 0.50. That's just going to brighten the image. Then I really want to enhance the contrast, but I'm not going to do it with the contrast slider. I want more control, so I'm going to bring the highlights up and then I'm going to bring the shadows down. What that's doing is affecting the bright areas of the image and the dark areas of the image. But whites and blacks takes that to another level and it affects the brightest parts of the image and the darkest parts of the image. If I want to add contrast, I can do that even more with the whites and blacks here you can see how that really adds a lot of contrast to our scene. But there's also something called a Tone Curve and this is what really is going to dictate all the tones in your image and it's under light in the top right-hand corner you can see curves there. Now, what I do with all my photos is a basic S curve. I put a point there on the bottom third, point in the middle, point in the top. It looks like a little bit of an S, and then I drag the bottom corners up and down respectively and that just softens things out. That actually changes the white point and the black point and makes it more soft and makes it a little bit vintage looking. After I do that, then I'll go through and just adjust the tones even more, and yeah, I think that looks pretty cool, nice, high contrast seen. But after I adjust the light and the contrast, now it's time to adjust the color. I think this photo really needs some serious color adjustments. I'm just not a fan of the colors that are in the image right now. I think we can change them and bring them out a little bit nicer. You can see here under the Color tab we have a few things. We have the white balance that makes your image warm or more cool. You have the tint, you can make it purple, more green, vibrance, so you can make the image more vibrant. That brings up the more subdued colors in the image or the saturation, which just increases all the colors in the image and we're going to get to those. But the first thing you always want to do is make sure your white balance is set. I often just use As Shot because I shoot in auto white balance or I'll do auto, or I'll just flip through these and see which ones looks the best. But I think As Shot looks the best. But then we'll go into the color mix here. This is such a cool feature and this is what makes Lightroom what it is, having the power to edit the colors like you can in this app. It's pretty simple to use. Each color has a hue, a saturation, and a luminance. The hue is the actual tone of the color. Is it more red or is it more orange, for example. The saturation is the purity of that color so how strong that color appears. The luminance is the brightness of that color. A light green versus a dark green, for example. In this image, it's clear that we have a lot of reds and a lot of blue. I'm going to start with the red, orange, and yellow here. I'm just going to drag the hue and see what it does to the image. The red is not doing much. Let's move to the orange. That's doing a lot. You can see we have a lot of oranges in this image and I'm going to drag it over here because I want it to look more red. Then I'm going to go to the yellow and I'm going to do the same thing. I'm going to drag it all the way over here and make it more orange almost. Then I'm just going to work my way through the colors here and see if it's affecting our image very much and just testing it out, seeing what each adjustment does. We don't have a lot of purple, so I'm just going to leave those [inaudible]. It seems like we have a lot of oranges here. What I'm going to do is maybe bring the saturation up, play with the luminance a little bit, maybe bring it down. I think that looks pretty sweet. Maybe try to bring the blue saturation up a little bit. I'm just experimenting. I'm not sure what each adjustment is going to do to my photo. I'm just taking it step by step, but I think honestly, that looks pretty good. I'm pretty happy with that. There's the before, there's the after. We've made a ton of progress on this so far, but now I want to bring the vibrance up. I think we can just have more color in this photo so I'm going to bring that up. But now I feel like that red is popping too much. The orange is popping too much. I'm going to go back bring that down. Right there. That looks pretty good, but there's one more way to edit color, and that is through the color grading panel. If I go back to color in the top middle here, I select, "Grading." Now, I can actually add colors into the image. This is going to add colors into the shadows here. I could add blue into the shadows or a teal. I'm going to do that. I'm going to add a little bit of a teal into the shadows there. This is going to affect the mid tones, the middle areas of the image, the middle brightness areas of the image. I'm going to add a little bit of warmth in there maybe. Then we have the highlights so I can add color into the highlights. I just think this is so cool. You can add colors like this. It just adds so much color depth to your image. If I add a little bit more warmth into the highlights, that's really going to bring out the warm tones in the image. That's one of the things I wanted to bring out, is that warmth in our image. I think that looks pretty cool honestly. Color is mostly done. That's a quick overview of editing a lighting color, but now we want to move on to detail in effects and you can see under effects here there's a few things. There's clarity, there's texture, there's dehaze. I often use dehaze to just add more contrast, I'll add a little bit here, and also a little bit of clarity, but not too much. A lot of beginner photographers totally overdo this. They just ramp the clarity up and it makes it almost difficult to look at the photo because there's so much happening, but those are about the only things I do there. Sometimes under detail, add a bit of sharpening. I'll drag that up maybe to 25, 30. Then you can actually mask that. You can slide the masking slider here and tap and hold the photo. Only the areas that are white are going to be affected by sharpening. If you see it's all the way to the left, it's going to sharpen the whole image, but if I go all the way to the right, it's only going to sharpen those lines. I only wanted to sharpen that middle area. We'll leave it right there. That is how I would edit this photo from start to finish. That's just a quick edit, but I think it does embody some of those things that I wanted it to embody. It's warm, it's colorful, it's vintage. It's also very high contrast. There's a lot of interesting shapes and shadows as well. I love this photo. This is one of my favorite photos that I captured that day. There's the before, there's the after. Drastic difference, but this is a photo that I'm going to keep with me. I'm going to add it to an album. I'm going to look at it from time to time. I'm going to remember that day that I had taking a walk in [inaudible]. Now, let's do another photo here. I really liked these images that I shot of the guy fixing the surfboards. Let me just reset this here. I'm just going to rapid fire edit this image just like we did the last one. I'm going to start in light. I'm going to bring the exposure up. I'm going to bring the highlights down because I want to make sure I'm maintaining information in this part of the image where it's really bright there. Then I will drag the shadows, maybe up a little bit to increase the dynamic range, bring the whites up a little bit for contrast and the blacks down for contrast. Turn curve, same thing. We're doing an S curve. We're going to drag those corners down to make it soft, a little bit vintage. For the most part, that looks pretty good. Before and after. Move on to color here. I like the white balance. Maybe I'll make it a little cooler to bring those blues out in the background, but I think it looks pretty good. I'm not going to adjust the vibrance to saturation because we have skin tones here. We need to be careful with not overdoing it because if we bring that up, it makes him look really strange. We're not going to do that, but we are going to go into the color mix and see if we can maybe change the colors around a little bit. I like that blue in the background and maybe I'll make it a little bit more teal and more green and then I can increase the saturation a tiny bit. But I honestly like the blues as well. I don't think we need to do that much. I think that's pretty much a complete edit. I'm not going to do any detail. Maybe a bit of sharpening here, I'll mask that in just so it's on his face. Maybe a tiny bit of clarity. There's the before, there's the after. Now, what you can also do is if you have several images from the same scene, you can tap on the right-hand corner here and click, "Copy settings" and select all the things you want to copy. Hit the check mark in the top right and then you can swipe to other photos that you shot that day. Tap on the top right and click, "Paste settings." Now, it'll paste that same edit from the last photo over to the new one. You might need to make a few adjustments like for this one, maybe make it a bit brighter. Bring the shadows up a little bit. But it's the same scene. There's not a whole lot that needs to be changed. There's the before, there's the after really bringing out those colors, those tones, and just embodying the way I witnessed it that day. I want it to be true to how I imagined it when I was shooting that day. But that's basically how I would edit my photos using Adobe Lightroom Mobile. There's so much potential with this app. I recommend just hopping on and sliding the sliders around and just testing it out and playing around with it. That's the best way to understand how it works. I think the more you practice, you'll actually be pretty surprised at some of the edits that you can get using this app. But like I said, if you guys do want to check out my Lightroom presets, you can check those out in the link in the description of this course. With every purchase, I also have install guide, so you guys don't have to worry at all about installing them. It's super straightforward. If you guys do decide to buy those, I appreciate all of the support. and I think you will enjoy them as well. But that's a basic rundown of editing guys. I hope you enjoyed it. Of course, if you guys have any questions, feel free to leave those in the discussion section of this course or in your class project.
8. Conclusion & Next Steps: Guys, well that brings us to the end of this course and I just want to say, thank you so much for making it to the end. I appreciate you being here, watching my classes here on Skillshare. If you guys want to see more of my classes, like I said, I have a ton of courses here on Skillshare. Some of the courses that I recommend, most are my photography essentials class that I mentioned earlier on. I have a great class on Adobe Lightroom that'll teach you guys everything you need to know about that. That's a great course, my iPhone photography course, which talks about not only iPhone photography, but editing as well. I also have a really popular course on Instagram, if you guys want to learn more about that. You can also check out a bunch of free content on YouTube. I make videos about photography, travel, lifestyle, and kind everything in that space. That another great way to support me as a creator. Also just learn more about photography and creativity and productivity and everything surrounding that. But I really hope you guys took something away from this course. Like I said before, it's not a super technical course, but that's the route I wanted to take with this. I wanted to step away from that and just focus more on the creativity side. The mindful side of things where you're very precedent and you're allowing yourself to see things like you wouldn't usually see them. I've been going on photo walks a lot recently and when I was scripting this course, I realized actually how beneficial these photo walks were for me. I knew that they were. I was going on them weekly, almost daily, but it wasn't until I started writing about it and getting my thoughts out in an actual course script that I realized that this is something that I attribute a lot of my current success to in terms of creativity and productivity is these photo walk and just being outside and being creative and fulfilling that creative need that I have in my life. I hope it's beneficial for you guys as well, and I am super excited to see your class projects. After your photo lock, after you go out and take some photos, please share those. I want to see those, like I said before, I want to see the world through your eyes. I want to see how you would depict things and how you see different things. Super prop to see those. But that is it for me guys. I hope you go on to watch some other courses and as always, feel free to reach out if you have any questions. I hope you have an amazing day.
 Sean Dalton, Travel Photographer