Transcripts
1. Introduction: When you make something with your hands, you give it a life of its own. It has a timestamp of when you're feeling in that moment. The result is an authentic and original work of art. Hi, my name is Diana Escamilla, and ever since I was a little girl I have loved crafting, creating, and making things with my hands. As I grew up, rather than silencing my inner child, I have kept her curious and always dreaming of new possibilities, and this has led me down many paths. Like decorating cakes, making hand brooms for my family and friends, working with glass and painting murals. Sometimes you just need that bit of curiosity and a little bit of time to learn something new and who knows where it will take you. I also love sharing and teaching. Today, I will share with you my class, Creative Paper Embroidery, simple steps to creating stunning pieces of art. This has become my latest obsession, and full disclosure, this is a slow craft and that is probably my favorite part about it. These days we are constantly rushing from one thing to another expecting immediate results. We expect immediateness. Paper crafting and specifically embroidering on paper has helped me break this cycle. When I embroider, it grounds me to the present moment as I take a pause and make a rebellious stand against immediateness. My hope is that you also find this for yourself as we take on this journey together to learn this new craft. Though, whether you're a beginner looking for our new craft or you are proficient in embroidery and want to try paper as a medium, there is something in this class for you. During our journey together, I will show you the materials that I use, the process, the embroidery techniques, perhaps my tips and tricks, everything. Once you have completed these lessons, you will be ready to take on the class project. You can choose the design that I provided or you can create your own. I hope you join me so that together we can make a stand against immediateness as we discover the wonderful and slow craft of paper embroidery. With that said, let's get started.
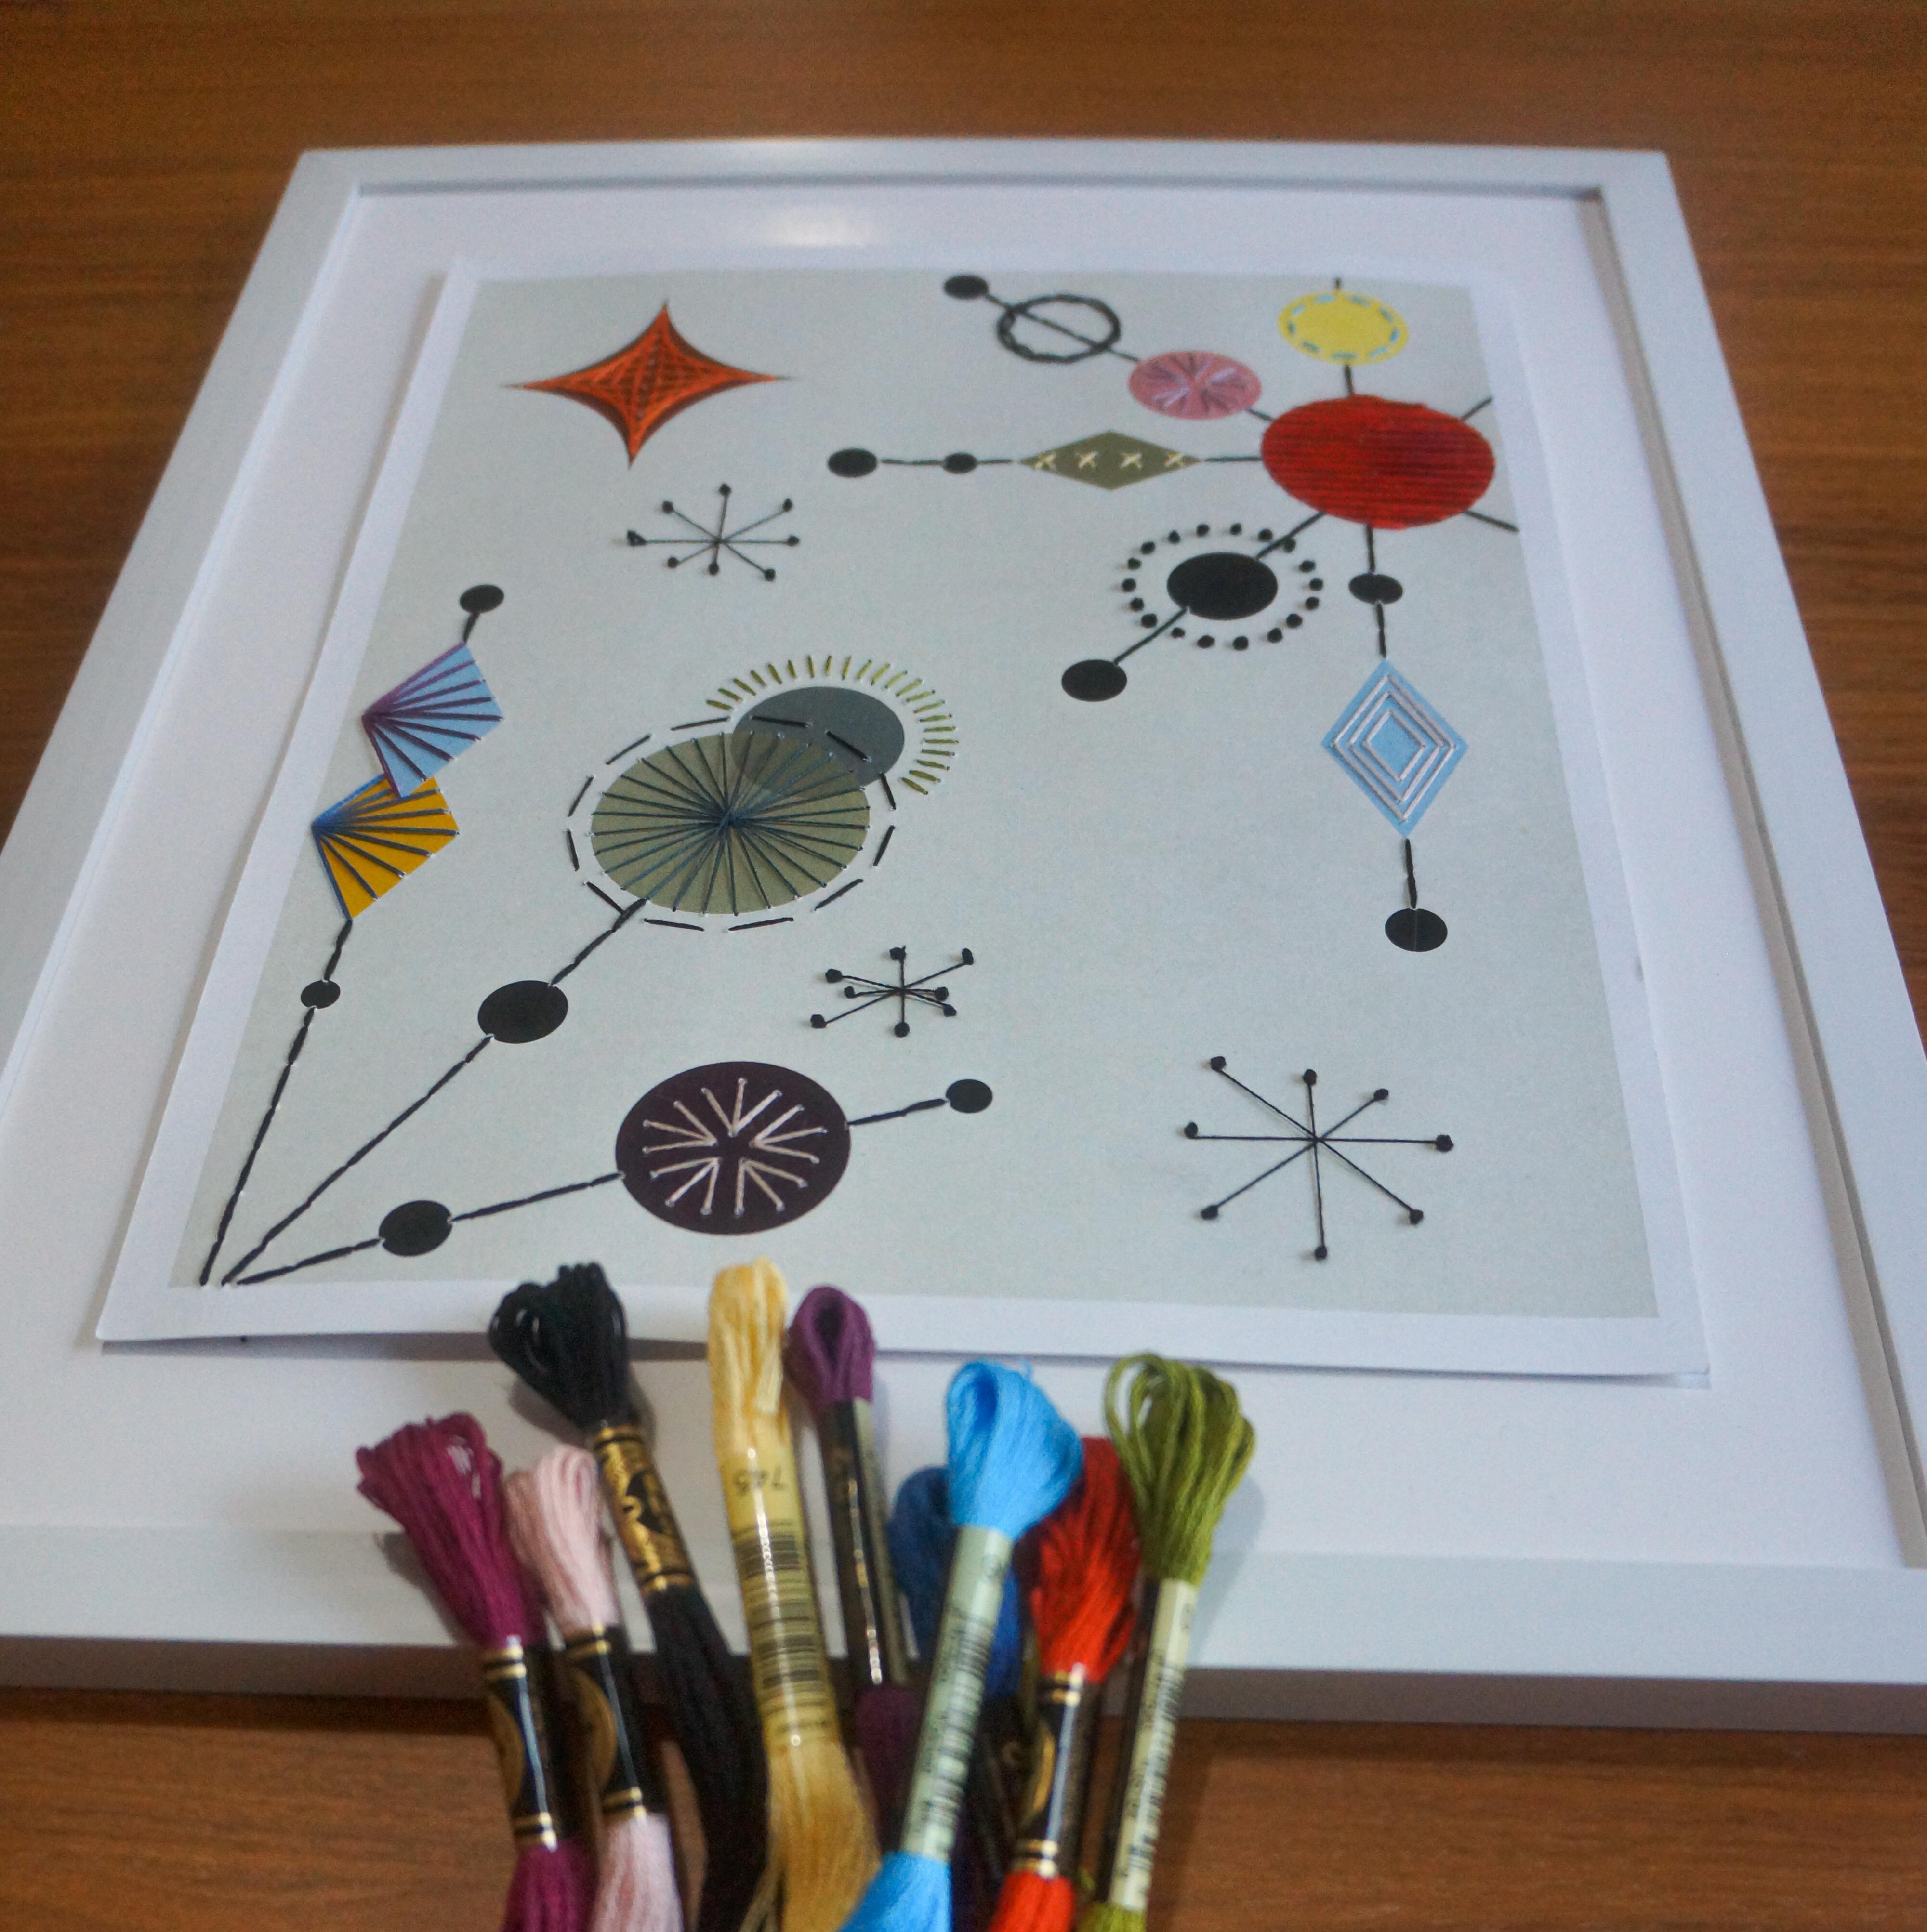
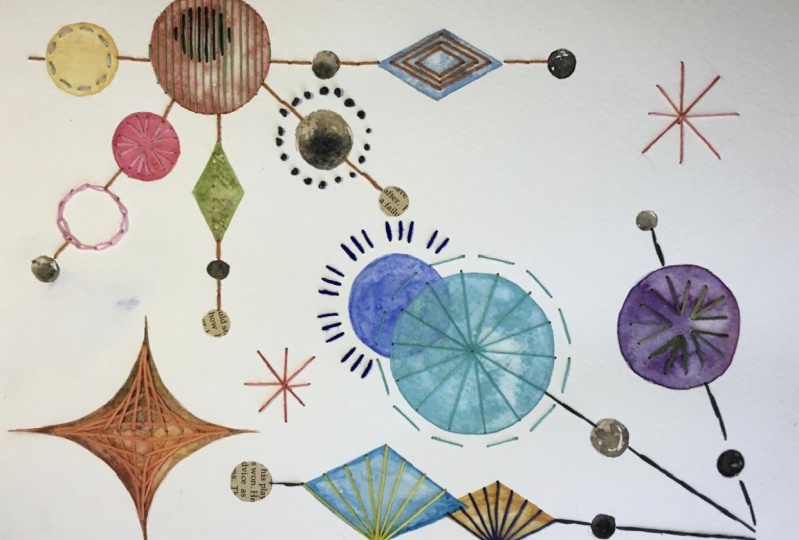
2. Class Project: Hey, there. It's great to see you here. You've decided to take this class, kudos to you and your rebel impulses. The project that we will be creating is a mid-century-inspired poster. I love everything about mid-century. The shapes, the lines, the forms. It makes it so iconic. The best part is that this poster is ready for you to just print and stitch. This poster has been specially designed so that you can easily follow and practice everything you learn in class. From choosing the paper, punching the holes using every stitch we learned, and the finishing touches. The end result will be a work of art made by you that you can hold in your hands, display on your walls, gift to a friend, and share it with the world. My suggestion is that you watch every lesson first and then you can start working on your project. Don't worry, we will get you ready for that. Or if you prefer, you can start stitching on your poster as we go through the lessons. You have choice and control over that. Just know that you can always come back to the videos to review anything that you might have missed. In your class materials, you will find everything you need to successfully complete this project. You will find the list of materials, the ready-to-print poster, the practice sheets, and the stitch and color guides. Step-by-step, thread by thread, a piece of the poster at a time, we will complete this work of art. Remember, we are rebelling against immediateness. Give yourself permission to take a pause and come back later, or the next day, or the next day. Take your time to savor every minute and enjoy the process. With that said, let's go to our first lesson.
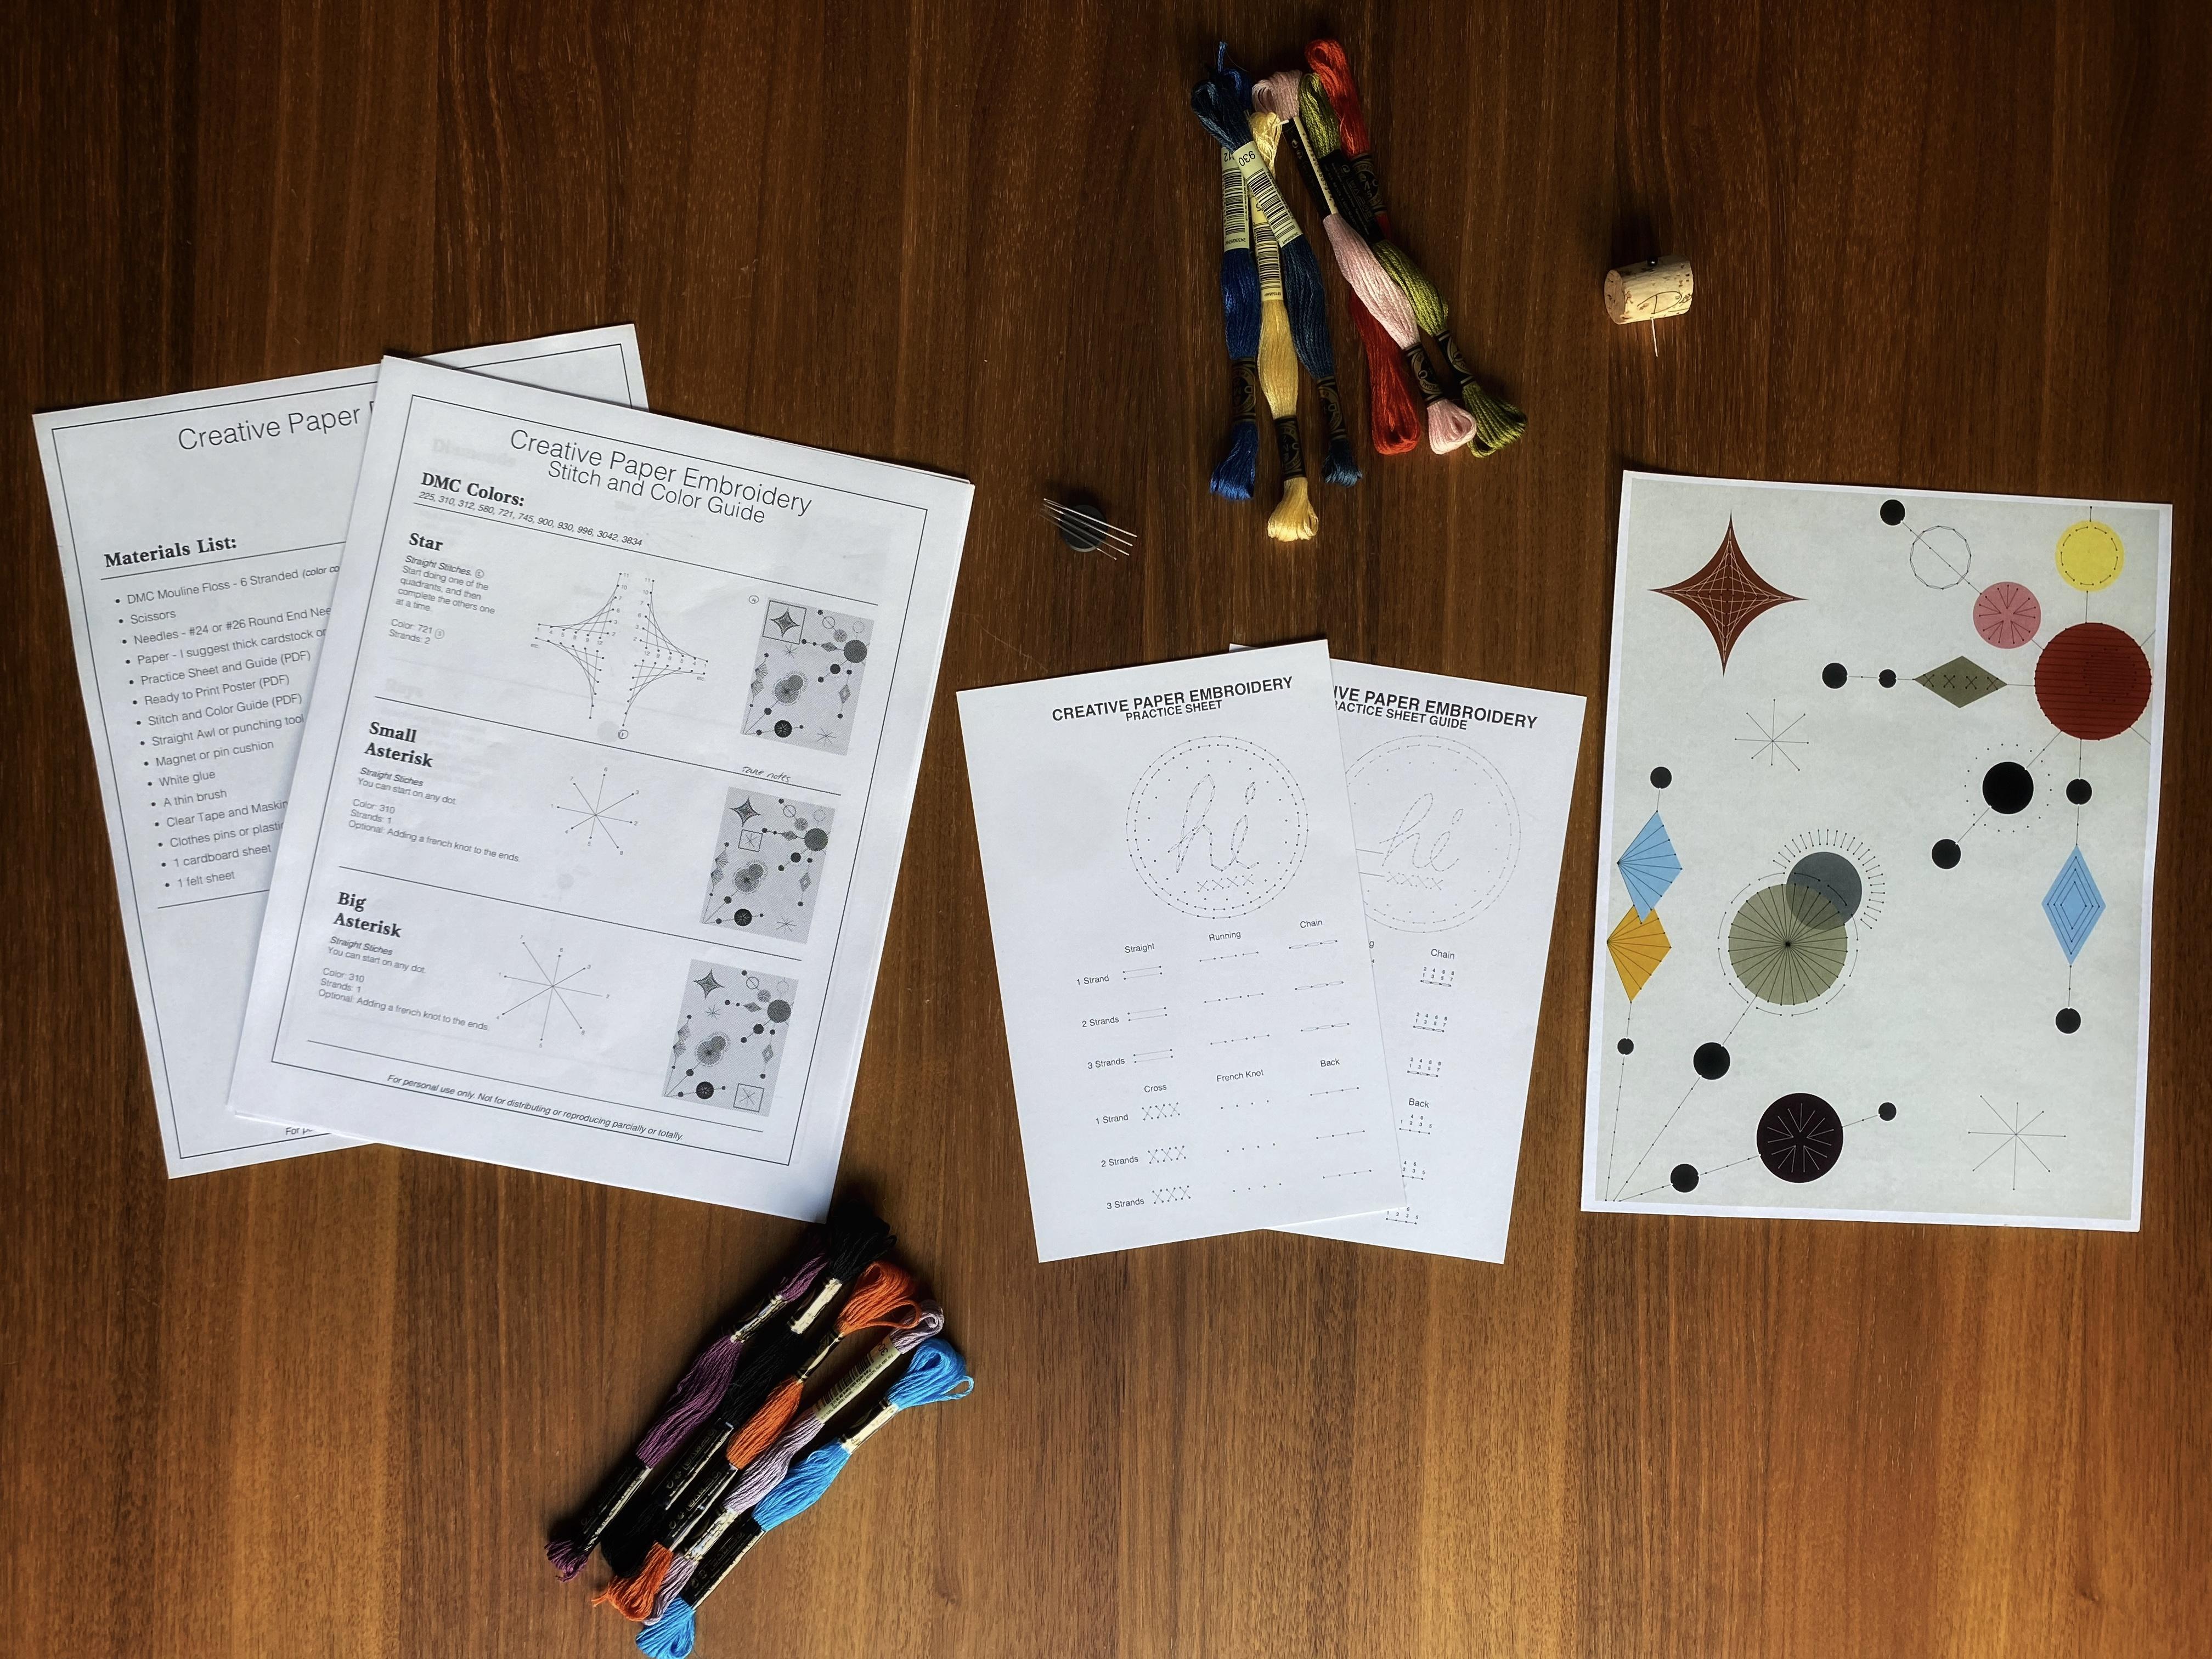
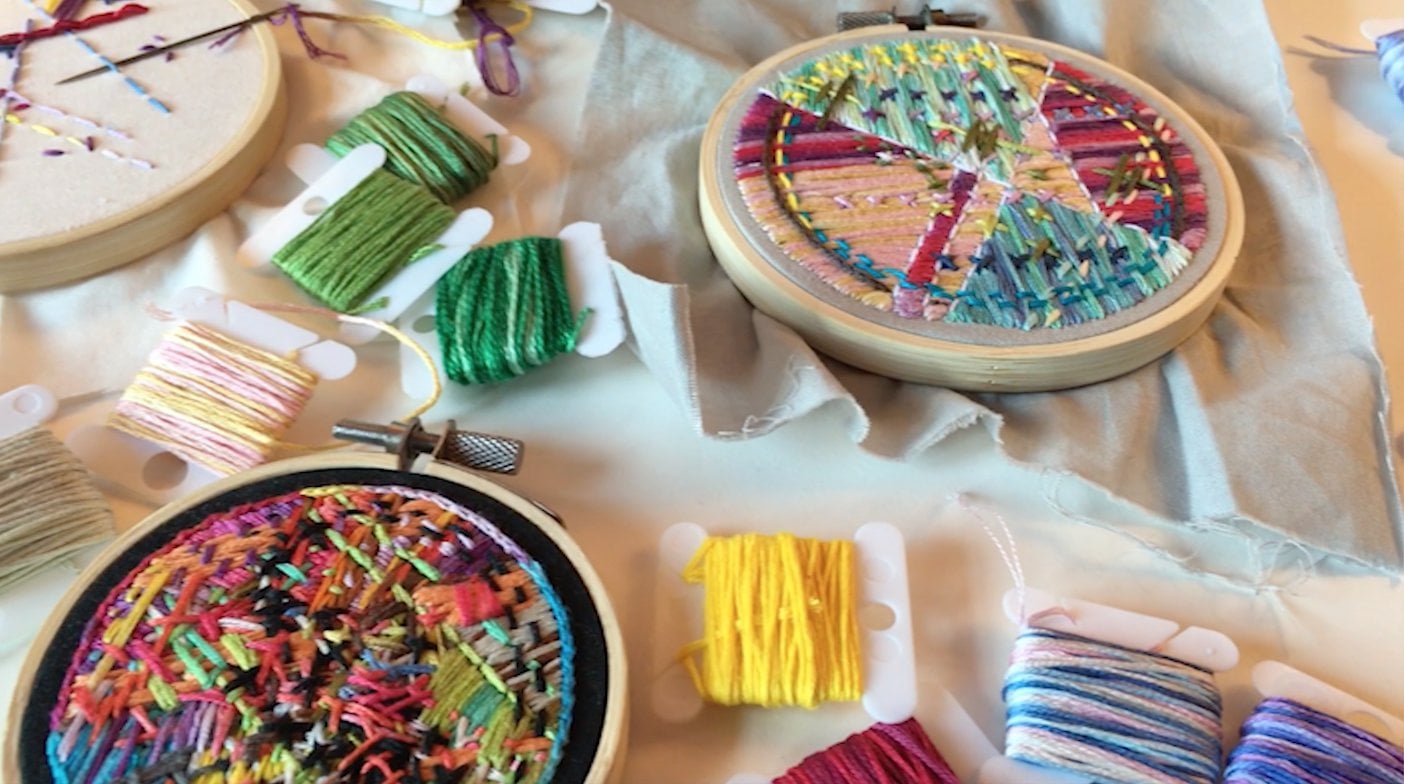
3. Materials: In this lesson, I will share with you the materials that I use and how you can hack a couple of them with easy to find materials. Let's start with the four essential ones; mouline floss, scissors, needles, and paper. I use the six stranded DMC mouline floss. It comes in over 500 colors and has a great quality and shine to it. A pair of scissors to cut your floss. Needles, I recommend the DMC round-end needles, emphasis on the round end. These are not as sharp as regular needles, which is just what we need because as we will embroider, sometimes we will use the same hole multiple times. If we were to use a regular needle, we could damage or break our threads in the process. I like using number 24 or number 26. The difference that you want to look at is at the thickness of the needle and the eye. Here, I show you how this hole became larger as I past each of the needles. The upside of a larger eye is that it is easier to pass the strands through. The downside is that the hole will be bigger and can cause other complications, like causing a tear between two holes, making it one. This is just a fact to keep in mind. Paper; I like using paper that is thick enough to not tear or bend as I work with it. I use 200 gram paper and when I print a design on it, like our class project, make sure that it is a matte finish. Some shiny or photographic papers out there have an extra layer that could break and show us your embroider. Let's talk about the paper documents we'll be using throughout our class. In your class materials, you will find three documents. The first is your practice sheet, the second is your ready to print poster for your class project. These two must be printed on thick and matte paper since we will be embroidering on them. The third is your poster stitch guides and color guides. This one you can print on regular paper. Here comes the first hack. If you're unable to print on thick or 200 gram matte paper, I suggest that you print on a regular sheet of paper and with a fine layer of glue, paste it to a thicker paper or card stock. You can also try other paper sources like watercolor paper, postcards, photographs, or posters, so long as you can punch a hole through it and has enough thickness, you are good to go. I encourage you to experiment with what you have to see if it's a good choice for embroidery. In lesson 6, paper prepping, I also show you how to use a regular paper print as a template. Next up, the straight hole. I used this one as I started to embroider on paper to punch my holes and it comes in different thicknesses. Mine was too thick and making really large holes and I couldn't find a thinner one. Here is hack number 2. You can create your own punch tool using a cork from the wine bottle and a regular needle. What you do is grab your needle and place it on the cork, unless you have around half an inch of the needle to poke through. In this case, I can cut the cork through the middle. Then, very slowly and carefully, you will pass the needle through, slowly to avoid bending it and carefully so that you don't stab yourself. You can also use a plain needle to punch holes, but it is a bit more tiresome on the fingers. I also recommend having a magnet to mind to your needles. Bomb fact, I sometimes embroider in bed and I get small panic attacks when I have a missing needle. I keep picturing my cheek being stabbed as I roll in my sleep. To avoid those unhappy thoughts of lost needles, have a magnate close. It can be one from your fridge or a pin cushion to keep them safe. We will also use white glue, like the one used in schools, a thin brush, masking tape and magic tape. Close spins or plastic floss bobbins so that you can wrap your floss on. A cardboard sheet, I usually grab one from the boxes that I get on the mail, and a felt sheet. As we go through the lessons, I will share when and how each of these are used. It is okay if you don't have all the materials. As long as you have floss, needles, scissors, your print on thick paper or pasted on card stock and felt or cardboard, you're good to go. In our next lesson, I will share how we will use the floss and the fact that blew my mind. See you there.
4. Lets talk about floss: In this lesson, I will show you what you need to know about the floss we will be using, a fact that blew my mind, and tips on how to thread your needles. Earlier, I shared that we will be using the six-stranded DMC Mouline floss skin to embroider. That's quite the mouthful. You will notice that it has two tabs, a small one with the brand DMC and how many meters or yards it has, and a large one with the bar and color code on it. This is also called a pull skin, which just means that you are able to easily pull the length that you need while keeping the rest nice and tidy. We have two ends of the floss and be warned, only one will pull out, while the other one will create a bit of a tangled mess. Let's remove the guessing part, let me tell you which is the end that you want. The end that will allow you to pull the thread easily, is the one on the side of the larger tab with the bar and the color code. This end is your friend. You can pull and pull while keeping the rest tidy. Just to show you what happens when you pull the other end, let me show you. This is what will happen. You won't be able to pull much and you will have to remove the tabs and untangle it all. This is where you can use the bobbin or the clothes spin to wind it up. Now that we are pulling, I usually use around 25 inches because it is easier to control and avoid any accidental knotting. I will talk more about that later. Like I mentioned before, this is a six stranded floss and the fact that blew my mind is that you pull the strands apart to embroider. I had no idea that you could do this. This piece of floss can go a very long way because of that. Let's pull them apart. First, untangle an end a bit so that you can grab a single strand. With one hand you, will pull on the strand, while the other holds the rest in place. You will pull until it's free, and you will notice the other one start to bundle up. Don't panic, this is normal. Once your strand is free, place it somewhere safe, and pull down on the other strands to get them back into place. That is how you pull them apart. What was once a six stranded floss, can become six separate strands. I usually use one, two, or three strands at a time, but feel free to experiment with more strands as you practice. Now let's get these on the needle. This is how I do it. Here I got three strands. I get the ends together and as tradition in my family dictates, don't judge me, I lick them a bit. With two fingers, squeeze and pull the strands to create a flatter surface. Now with a little bit of patience get the thread through the hole and if you rather not lick it, you can also use water as a substitute. Once your strands are through the needle, you will have a couple of tails. I like to have a long one and a short one that I usually keep around this height. Those are the basics for floss. In our next lesson, I will share with you the simple technique that gives me a great knot every time. See you there.
5. Knotting: A key step in embroidery is making sure you have a nice and sturdy knot. I will show you the method that will quickly get you a good size knot, no matter the number of strands you are using. You will be knotting like a pro in no time. All right, let's practice using a two-stranded needle. With one hand, grab your needle between finger and thumb. Let your other fingers wrap around the short tail and the long tail. Now, grab the long tail end and bring it to run parallel to your needle. We will grab that too, letting the end show a bit. Now, grab the tail and wind it around the needle and strands three times. A quick tip here: you don't want this to be very tight because it will have to go through the eye of the needle. After you wind it three times, pull it down just a bit so that now you are holding everything together. Once you have them all secure and held between your thumb and finger, you will pull on the needle, and you will end up with a great knot. You can cut these messy ends if you want. Let's do that one more time with our one strand of needle. I grab the needle, wrap my fingers on the tails, get the end of the long tail to run parallel to the needle, and wind it around the needle and the ends. Only this time, I will wind it 10 times. If I only did it three times, it would probably be a tiny knot that would go through other holes in the paper. Doing it 10 times gives us a big knot that shouldn't go through. If it does, give it a couple of more winds. Now, pull this down to grab it all, and pull on your needle, and there you have it. This can take a little bit of practice, but in no time, it will become second nature to you. In our next lesson, I will show you how to prep your paper for embroidery. See you there.
6. Paper Prepping: Let's talk about paper. As I mentioned in our materials' lesson, you will need thick paper that doesn't tear or bend easily. I like using card stock, thick watercolor paper, or 200 gram paper. In your class materials, you will find a document called Practice Sheet. We will be using this throughout the following lessons to practice the different stitches I will show you. The first section is where you will practice and the second is a helpful guide. First, you must print it on thick paper. If you have thick paper but cannot print on it, go ahead and print on regular paper and you can use it as a template. I will show you how shortly. But first, let's zoom in on the paper. You will notice it has dots, lines, and numbers. The dots is where we will be perforating or punching our holes, the lines are the guides that show you where the flaws or the strands will be as we embroider, and the number is the order in which the needle will be going in and out. Now, let's get ready to start my favorite part, the punching of the holes. First, place the sheet of cardboard, this will protect your surface from our tool. On top of that, place your felt sheet. This helps buffer the needle as it passes through. On top of that, place your thick paper. If you weren't able to print on thick paper, grab your tool, and start punching on the dots. Keep the tool as straight as possible so you have clean holes. If you print it on regular paper, the setup is the same. Cardboard, felt, your thick paper, and place your printed paper on top. The only difference is that we will be using tape to secure it on the thick one, like this. I used magic tape here. Now, you can go ahead and punch the holes. When you are done, remove the taped paper and mark up the number of strands and the name of the stitches, just so you know and you don't get lost. This is my favorite part of the process, I love the poking sound of needle on paper, it soothes my soul. Continue to do this until you've done every single hole. Now, let me show you my second favorite part, the texture from the back side. I always take a few moments to pass my hands over this before I embroider. Remember to take pauses to look at the progress that you've made, the patterns that you've formed. Enjoy the process and take it all in with each lesson. When you finish, your paper is prepped and you must be anxious to start embroidering. In our next class, I will introduce you to the first embroidery technique, the straight stitch. See you there.
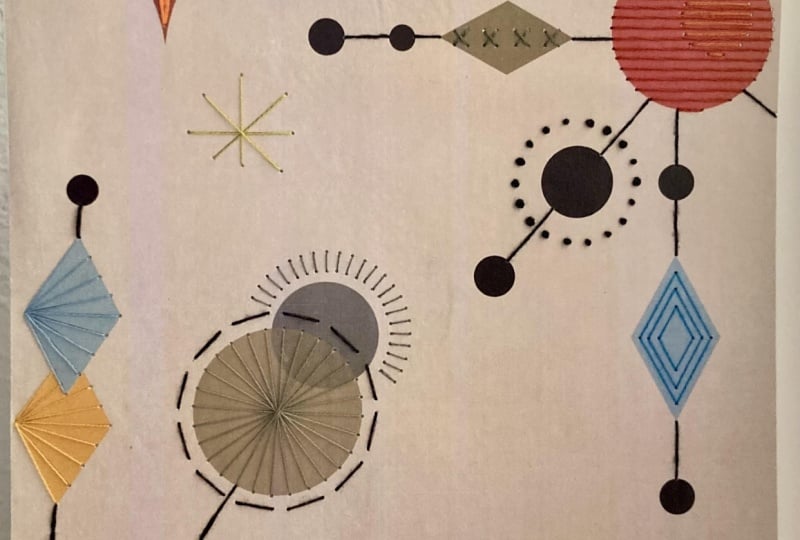
7. Straight stitch: Before we begin talking about the straight stitch, there's a couple of things that I want to call out. We will be embroidering and your practice sheets. Keep your practice sheets guide handy as a numbers will guide the order of the stitches. Get familiar with it so that you can easily read the project guide too. For each stitch, we will be learning, we will use three prepared needles with 1, 2, and 3 threads so that you see that different look each creates. You will also do this pattern for some additional practice. Now let's talk about the straight stitch. This one is very simple and it's made by creating a line that can be any length. You guessed it. It must be straight. The motion of this stitch is going up one hole and down the next. Although it is simple, it can be used to fill in areas and create beautiful star bursts or geometrical shapes. Let the stitching begin. Grab your one stranded needle and bring it up through the back of a hole marked with a Number 1 on your guide. We go up, pull all the way until the knot is next to your paper. I use my finger to secure it in place or quick tip you can add a bit of tape to keep it there. Then it's really simple. You just bring your needle back down through hole Number 2. Another quick tip go slow as you pull on the threads and use your fingers to keep it from bundling up. Sometimes if you go too quickly a knot will materialize halfway through your thread that might be too hard to untangle, forcing you to cut your thread and lose your work. Remember that this is a slow and mindful process. Keep an eye on those threads. Let's continue. We go back up hole Number 3, that is just below and the needle goes down hole Number 4, make sure that your threads are tight so that you avoid any loosening along the way. We're all done here. Now it's time to knot. First, I like doing a few small talks very carefully so that I don't tear the page. I just want to make sure that there's not any loosening of the threads. I put a bit of pressure on the last stitch with my fingers and then I thread through another stitch. This helps to keep it nice and tight. I wind it around one time, do a loop and pass the needle through the loop. Hold tight. Do another one. Just for safety reasons. Pass it through, pull and cut. Beautiful. Take your time to admire your great work. Look at the front of the card and look at the back. Right now, we're just starting. But as you progress the back will have a story to tell. Once you are done admiring your work, grab your two-stranded needle, and let's do that again because I want to show you about combing threads. When using more than one thread, it is normal that they get a bit twisted. But I like them looking as straight as possible on paper for a cleaner look. Let's go up the first hole, and before going down the second hole, place the thread just over it. Here's where I make sure that the lines are not twisted and I use a needle to comb if necessary. I also take the needle down between them because it also helps to avoid any twisting. It gets a bit trickier as you add strands and know that you can also comb the threads later. But for best results, do it as you go. There you have it, the straight stitch. Go ahead and do this with 2 and 3 strands before we go into our next lesson. Keep in mind, you can come back and re-watch the videos if you need to review the process. In the next lesson, I will teach you a variation of the straight stitch, the running stitch. see you there.
8. Running Stitch: Let's talk about the running stitch. This one also goes and an up and down motion. The way it varies from the straight stitch, is that it is evenly spaced with a gap in between. The gap can be even or uneven. This is a great one to create outlines, dashed lines, plant stems, and intricate swirling patterns. The process is pretty much like the straight stitch, the difference being that we are leaving a gap in between. We go up in hole number 1 and down in hole number 2. Out again on hole number 3, down on four, up on five, and down on six. Now, let's flip our card, and we travel to a stitch to work on our knot. There you have it. Take your time to admire your work and go ahead to practice the running stitch with two and three strands, and complete the design section marked with running stitch. In our next lesson, I will show you the chain stitch. See you there.
9. Chain Stitch: The chain stitch is one that I just simply love how it looks. This one is not an up and down stitch, which means we will be doing something before it comes down. This is a great decorative stitch to use for outlines or filling in. We will start by going up hole number one. Tight on your thread and we will be going down the same hole. But first, let's create a loop that just goes over our next hole. If possible, secure it in place with our finger, leaving our hole clear of thread. We want to keep this loop, so we won't be pulling all the way just yet. Notice how your guide will have a symbol that is calling out the loop. All right. We go down the same hole we came up and come up our next hole, making sure we come out from inside the loop. Now we can pull a little bit more and a chain link will appear. Keep in mind that that tighter you pull, the more closed it will be. You can use your needle to loosen it up if you want, just like this. Pull until it is just like you want it. Let's create our second loop. Go back down that same hole, we come back up, we pull a bit, create our loop, and come back down and up again. Since this is our last time going down, we will do it from the outside of the loop to avoid arm stitching and do it slowly. If we pull too tight, chain will close up completely and go through the hole. You can easily fix this by using your needle to pull up a bit and open it up again. When you are happy with it, make your knot. Awesome work. For your project, you will use this stitch and a circle. Let me show you how that last stitch will look like. As you come up, rather than creating a loop, you will pass your needle below that first stitch and come back down the hole. This closes up the chain beautifully. Take your time to practice this stitch with two and three strands, and doing the practice pattern. Remember, you can always go back to re-watch the video in case you need to go over the steps one more time for this or any stitch. In our next lesson, I will teach you how to do the cross stitch. See you there.
10. Cross Stitch: The cross stitch is also an up and down motion stitch and it is pretty straightforward. These can look quite stunning when used repeatedly in a pattern. We will follow our guide, but note that this is one of those stitches that there are several ways to get into this result. We will go up hole number 1, then in a diagonal line we go down hole number 2. We go up through the hole above that, and down diagonally. I will then go up through the hole next to that, which is number 5, and diagonally up to six. Then up through the hole on the left, and diagonally down. We come up the hole to the right, diagonally up and down hole number 10. Come up from the hole below, and diagonally up hole number 12. Here is where I say there are many ways to achieve this result, the different size on how we optimize our thread. As you can see, there's not a lot of thread on the backside. Before stitching, I thought of where to start and how to go about it to save thread. This is a personal preference, and looking at the backside can give you clues or learnings of how you can optimize thread, or if you don't mind using more, like your spirit be free, so long as you achieve the stitch pattern that you want. Finish this up by creating your knot, and there you have it. Take a look at your results from both sides of your card. Admire your great work. By now, you know the drill. Do this with two and three strands and the practice pattern. In our next lesson, I will teach you how to do the French knot stitch. See you then.
11. French Knot: The French knot is probably the only kind of knot that you want to see your in work. It is great to add texture and dimension to your embroidery. You can cluster them together or they can be standalone. You can use it to create little clusters to form flowers like lavender or dandelions. Like the chain stitch, we will go up our hole, do something and then go down the same hole. Let's start by doing just that and going out through our hole number 1. If you look closely to your guide, on top of number 1, I added a spirally symbol and to the left a times 10. This is to signal we will wind our thread around the needle 10 times like this. I like to do this about an inch away from the paper, so I wind it a few times and pull back a few more and pull back a few more and pull back. Quick tip, do not wind the threads too tightly because the needle will be going through them later. When you finish winding, keep holding the thread with your non-needle hand. Now, stick your needle through the hole we came up just enough to keep it in place and leave it there. Next, we will do two things at the same time. First, your needle hand will push the winded thread down towards the paper to create a little bundle. While your non-needle hand pulls in the thread gently to make sure we have clean but loose threads around our needle. Here we go. We will push down and pull very gently at the same time. This is the result we are looking for. Our threads are cleanly wound up in a bundle around the needle. We don't have crazy or messy threats or loops poking out and since we did it gently, it is still nice and loose. This is the formula for our clean French knot. Now, secure your thread with your finger and pull on the needle gently. Be patient. Sometimes we pull a bit too much on the previous step so just keep pulling slowly so that we don't tear our paper until it goes through. If it is too tight and the needle can't go through, here is what I do. I pull out the needle a bit and with my finger I pull up and down threads a couple of time, and finally, pull them up like this. This helps to give them some extra space between them. Now when we pull on the needle patiently, it goes through. You need to pull all the way and look at that gorgeous knot. Let's do that one more time. We wind our threads 10 times, we stick a needle through the paper, we push down to make our bundle and we pull gently. We go through and there we have it. A word of advice. We want to make sure that our knot is big enough so that it doesn't go through our hole. That is why with one strand, we've went around the needle 10 times. Finish up the practice and travel to a close stitch and do your knot. I absolutely love French knots, so be sure to admire them as you practice with your sheet. Although I suggested how many times to wind the thread on the needle for each, feel free to experiment. Just be sure to mark your card to keep track of the changes you made. Complete your practice with two and three strands and also complete the pattern above. In our next lesson, we will go over the last stitch called the backstitch. You're so close to starting your class project. See you there.
12. Back Stitch: You made it to our last stage, awesome job. Let us get to it then. The backstitch also goes in an up and down motion, and it is great for creating outlines or lines with multiple stitches. The key to this one is that we will be going back and forth. Let me show you. The first stitch we will do is the straight stitch. We come up our first hole and down our second one. We will come up on our third hole and we go back down on the hole behind it. Now you know why it's called the backstitch. We go up our next hole and come back through the previous one. As you can see, it gives us a nice line, and you can also mix and match the lengths of the stitches. In your project, there will be a couple of instances where we will combine the straight and backstitch. Let me show you an example. Here Here started with the straight stitch and then a series of back stitches. As we reach this point, you will do one more backstitch and then cross the circle from behind the paper to come up on our next hole. Do a straight stitch and then a couple of back stitches. You can do it all as a backstitch, but you will be wasting a good piece of thread underneath, and then it's also fun to combine stitches. Go ahead and complete your practice sheet and the pattern. After you're done practicing on it, you will have a card that looks like this. Pretty cool. Pat yourself on the back because you just learned a ton, and you will also have this handy info sheet to look at the stitches and the differences depending on the number of strands you used. Make sure to also look at the back of your sheet. This is where all the process and the journey shows up. The hacks, the tape, maybe a tear or two. This is also worth taking pictures of, and I would love to see both sides of your practice sheet. Make sure you upload it with your class project. Be proud of the work you've done. In our next lesson, I will go over some extra tips and tricks that will prepare you for things like fixing loose stitches or paper tears. See you there.
13. Tips and Tricks: Let's go over some things that might show up as you work, and some tips and tricks for them. Sometimes as you move through the stitches, you discover that somewhere along the way one has become loose. Here is an easy way I fix this. I locate the threads on the back side, woolen them to make sure they are now nice and tight. I use my needle to help me out here. I then pass a thread through it, and then pass it through another thread that is farther away. Then I make a knot. You see, it is not the end of the world. You can easily fix loose threads. Another thing that can happen is the threaded page tear that could connect two holes. Never fear. When this happens, first, flatten the paper from the backside, trying to close everything up. Then I add a piece of masking tape. I like using this kind because other tapes could also become connected as you make your hole or pass through them. [inaudible] your holes one more time and you are good. No need to stress over tears anymore. Here's another one. Sometimes as you embroider, you might go up the wrong hole or holes. To course-correct, do not go back down with your needle to avoid making the hole larger or is threading through other stitches on the back side, it will be harder to untangle that. What you do is remove the needle from your thread, and start on threading with it slowly. Once you're ready, thread your needle and you are all set to continue. When you're done with your work. I like to be extra sure that nothing will loosen up or move around. On the backside, using your brush and glue, I place a thin layer on all of them, especially on the knots. An extra step that you can take is to glue a piece of paper or fabric that covers all of your work for extra protection. Now you are ready for our final lesson. We'll go over some details so that you can successfully complete your class project. See you there.
14. Project Final Details: Congratulations on making it to this point. By now, you have watched all of the lessons, and you are ready to take on your class project. But before you do that, there's a couple of things that I want to show you. The first one is about your ready-to-print poster. As you're printing this, just make sure to select the feature fit to page. That way, you'll have a poster that looks like this. If you cannot print on thick paper, you can print on regular paper and just glue it or paste it on thicker card stock. The second thing is about our stitch and color guide. Here, I'll share all of the DMC colors selected for the project. Then we also go into details to each one of the shapes. You will see how I call out the order of the stitches, the type of stitch that you will be doing, the color, the number of strands, and to the right, you will see a map so that it's easy for you to locate the shape that you will be embroidering. Just know that these are all suggestions. Feel free to play with the colors, the strands, the stitches. Make it more your own. There's also some extra space on the poster, in case you want to add something new to it. As you do that, just make sure that you take notes in your guide so that you know what decisions you made and what changes you did. Lastly, I would love to see pictures of the whole process; as you start, when you're doing it, when you're finish, the back side and the front side of your poster, everything. I'm sure that all of us in the community would love to see your results. Just make sure that you take your time, and enjoy every single second of it. I can't wait to see it.
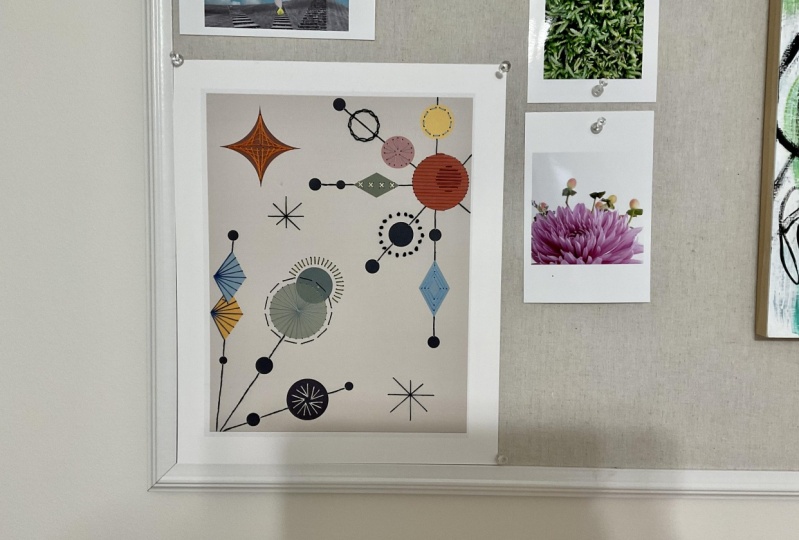
15. Thank You!: We did it. We finished our poster, and it looks all so amazing. You will notice that I added an extra asterisk over here, and that is simply because I spilled a little bit of coffee, and I didn't want to look at this stain all my life. But what I'm really interested in is that looking at your process and your poster. Go ahead and add it to the project gallery for all of us in the community to see, provide feedback, and simply marvel at. If you upload it to Instagram, please tag me, I would love to see your work there too. My hope is that you enjoyed every minute of this class. I had a ton of fun putting it together, and I hope to see you soon with new ideas and projects so that together, we can rebel against immediateness. Thank you so much for joining the class, and see you soon.
 Diana Escamilla, Crafter, Maker & Teacher