Transcripts
1. Quick Intro: Have you ever
illustrated something and been interested
in making it move? Or have you been curious
about what it takes to make those animated stickers that
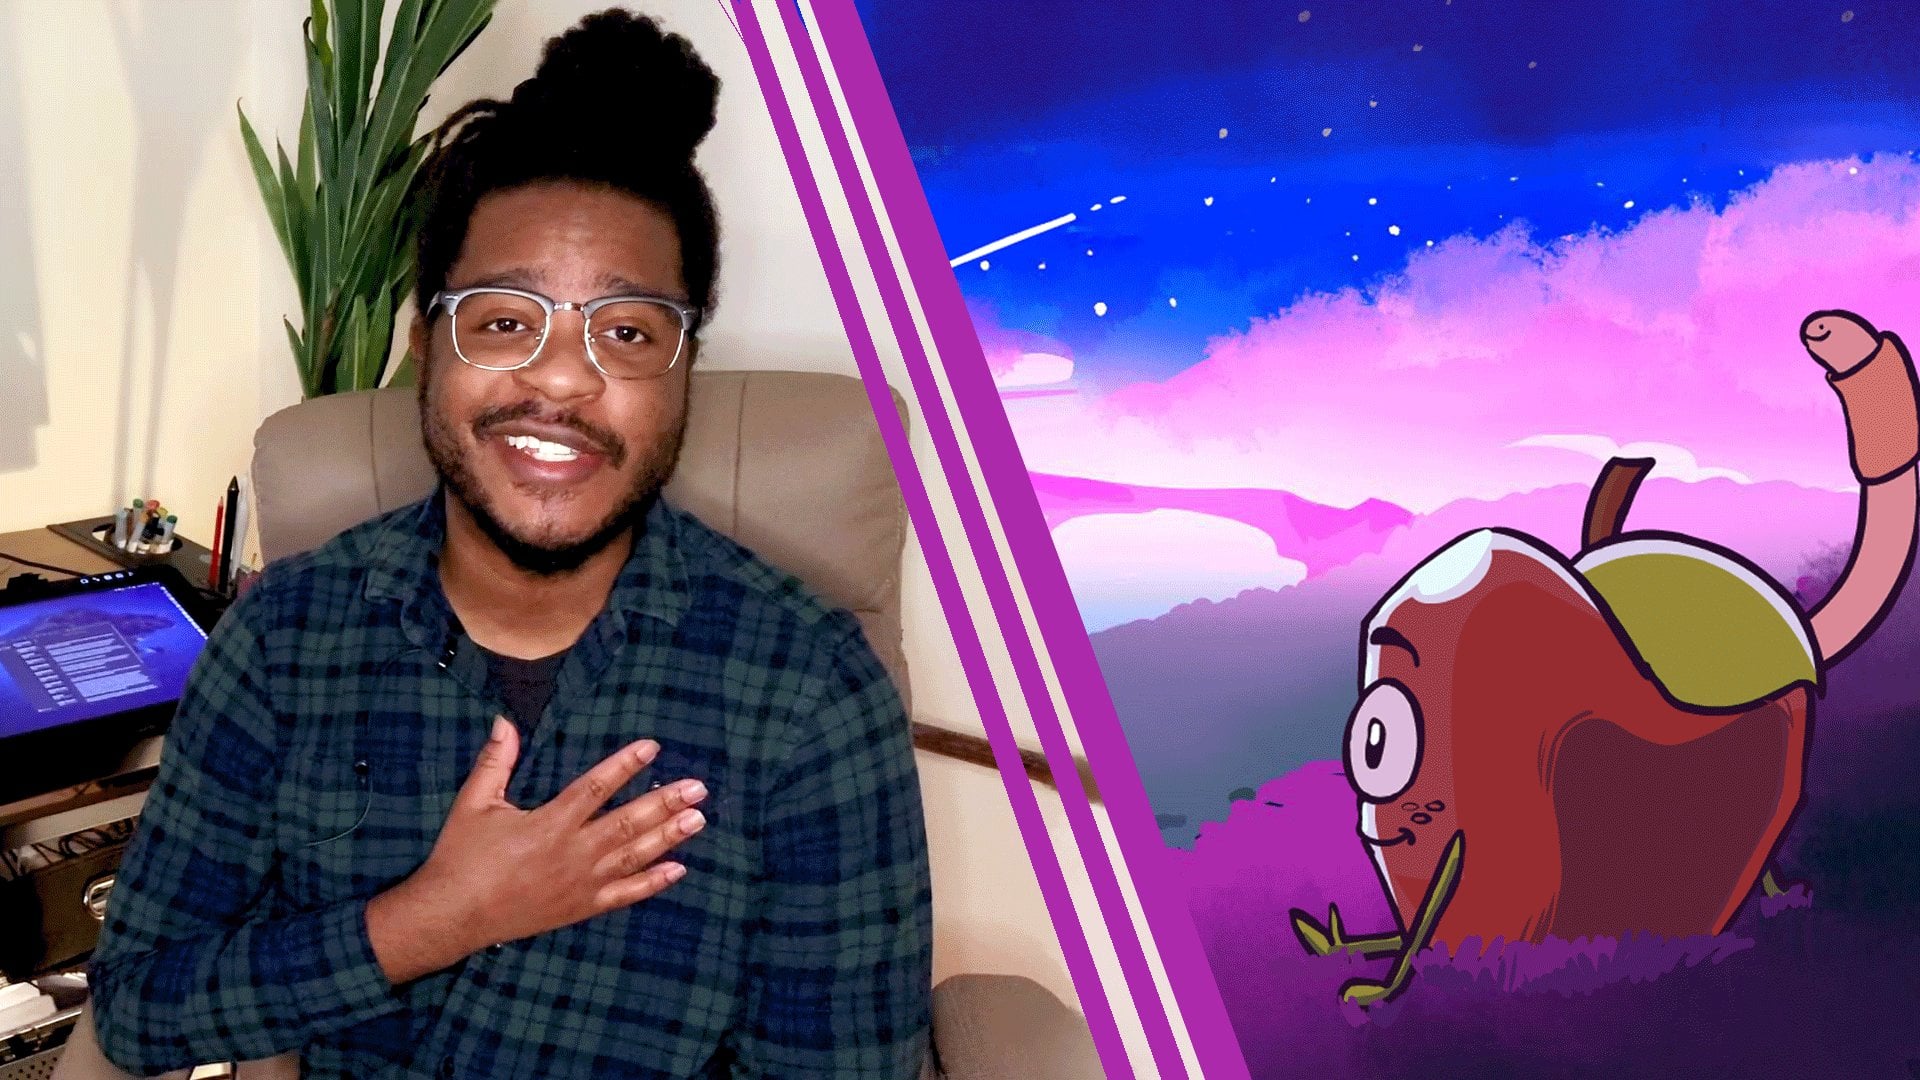
you enjoy sharing on Social? My name is Monique Ray, I'm an animator and illustrator
originally from Miami, currently based
in San Francisco. I've been working in industry
for about 13 years now, producing a wide variety of
projects across mediums, including brand and editorial animations
and illustrations, as well as animated short films. I love hand drawn animation, but for the longest
time it intimidated me. I broke the ice for
myself by creating my own series of
animated stickers. This sort of creation of these really short form
animations allowed me to realize that it wasn't as scary as I
originally thought. And at the end of
making this project, I also had this product
that I could share with the world but also share
with potential client. It actually won
me more projects. In a similar vein, I just
wrapped up a commission with Giffe and I've done a few
other sticker commissions. Hand drawn animation
has become one of my favorite ways
to move imagery. It's now an invaluable part of my practice in
artistic expression. In this class, I want to
take you through the process of making your own series
of animated gifts, or animated stickers as they're
really called for Giffey. I'm going to take you
through the process using my favorite animation
application, Clip studio paint. So feel free to
join me if you're using an act that isn't clip, there's still valuable
content that you could get. From this class, I'll be sharing best practices for gifts
on gifty platform. And show you how to export
and upload them to the site. Also take you
through the process of creating your own
artists accounts. So your gifts will be searchable
and sharable on social. Maybe this sounds interesting
to you if I'm looking forward to seeing
you in the class and I'm excited to
see you inmates.
2. GIFs VS Stickers: Before we jump into the class, I wanted to explain the distinction between
gifts and stickers. On Gifte, you'll hear
me using these terms interchangeably in this
class, and that's my bad. They are two different things. A gift is an animation
that has a background, a sticker has a transparent
background stickers. You see more often in media apps like
Instagram and Tiktok, where you put stickers on top of photos and videos, gifts. You see a lot in
messaging contexts like DMs or Facebook comments. For example, you'll need an artist's account in order
for your stickers to be, it would be shared
on social wherever gift is integrated
in this class, we'll be focusing on the
creation of stickers. But you could take
what you learn here and make regular gifts too.
3. Sticker Ideation Through Sketches: Okay, so in this class I'm
going to walk you through the ideation process of
creating a sticker pack. When making a sticker pack, there are some best
practices to consider. I'll link to the full page
so you can check it out. But the highlights are
The background should be completely transparent
with no edges or borders. The animation should loop and be around six to 15 seconds long. At least 20% of it has to be transparent in order for
it to work as a sticker. And in order for your artists
account to be approved, you need to have at
least five stickers. That feels like a good amount
also for us to create for a sticker pack to make sort of this holistic piece of work. We're going to aim for
that when we're designing my stickers will live
within the world of a personal project that
I've been developing for a little while
that's based off of my childhood growing
up in Miami. This is a great avenue
to promote any sort of creative projects that
you're working on yourself or any characters
that you've been designing. And if you're at a
loss for what to draw, just pull up the
emojis on your phone. Emojis were a big part of the inspiration for the sticker pack that I did called
Brown Skin ladies. Okay, since already
know this based on, so I'm going to start out
drawing my main character. The main character
of Serah C is based off of childhood version of me. You're going to call her little, she's pretty active
rambunctious girl. I'm seeing her running, I'm just following that bread
and drawing that out all. Don't worry about these
being really sexy drawings. These are about getting
your ideas out. We'll refine them later. Either here, um,
analog or I'm going to bring them back to clip studio paint and refine
the sketches there. So think of this as just
sort of idea dumps. All right, so we got
a little mo run in, kind of drawn to that
sort of imagery of her. I'd love to draw one eye. Don't ask me why she's
happy she's running. And I feel like adding another
character from the story, her dog Abby, which is based off of my present day dog, Abby. In this story, we're playing like Abby and I knew each
other when we were younger. She was in my life when I
was a kid and we're running together and she's feeling
good about the day too. So I'm going to draw
that I, that I love. All right. So I'm
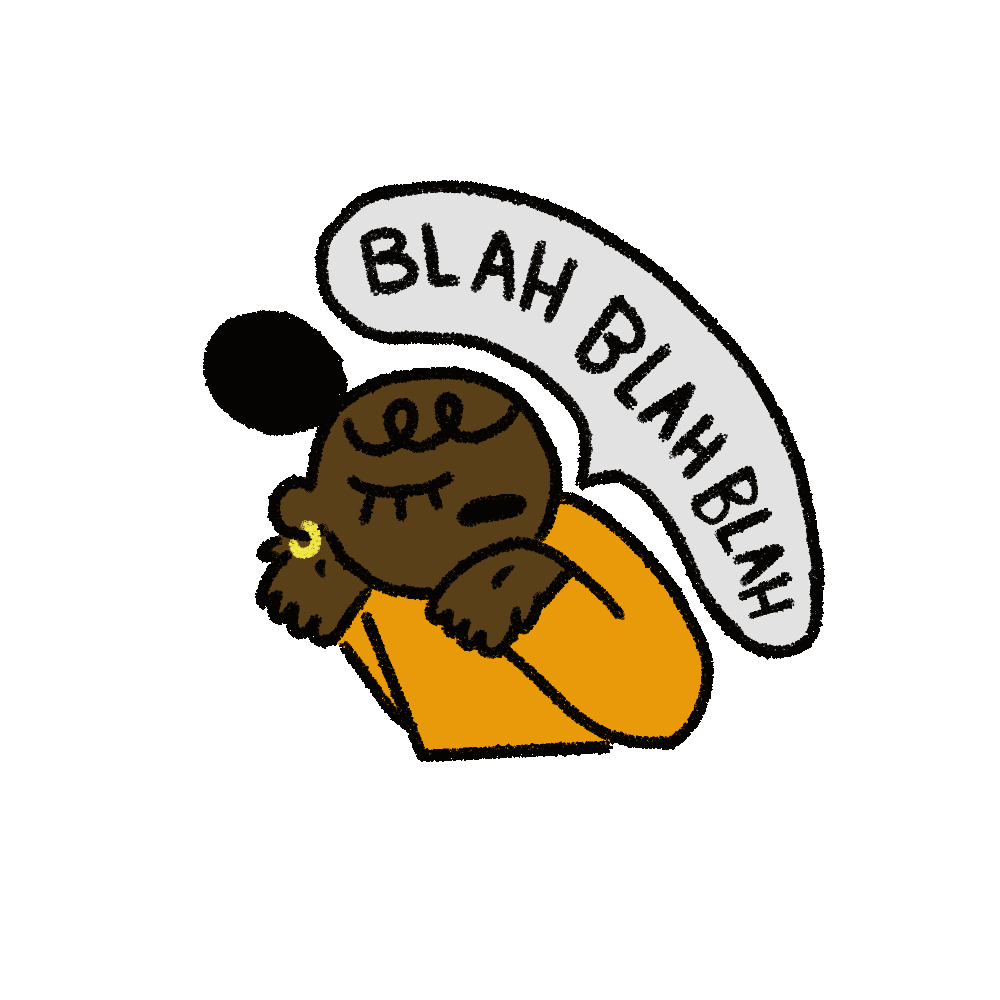
loving that idea. Okay. And lomo is a chatterbox. She loves drawing
our own stories and sharing them with her
friends and her family. So I'm seeing her like doing a little like
blah, blah, blah. You know, like with her hands really enthusiastically
sharing a story. She's like, and then
this happened and then that happened. You
know what I'm saying? Text works really well
in these stickers. Try to stick text in
wherever you can. You know if it works
for the drawing. And I love me, a chat bubble, I think we're going to have blah blah
coming from her mouth. Blah, blah, blah. That
feels good. I'm digging it. Okay, so we have two ideas
already that I'm feeling. Speaking of chatter box, I see another one
with little Mo and Abby having a convo, why not? This is cartoon and they
got things to talk about. Let me tell you they got things to talk
about. All right, so. Abby and chatting up a storm. Yeah, I can already
see this animation, Right? I can see it. I know y'all can see it too. These mouths opening a heads, moving these little lines. I love the expressive
comic lines adding those to my
animations to con, illustrate, talking or action. I could see those sparking
out the, moving their mouths. I'm digging that. Let's see. Sometimes when I'm at a loss
for what I'm going to draw, I like to just jot
down of a few ideas. Words, words help me ideate. I'm going to do that right now. Miami is the most obvious
word that I can think of. This is where the whole
story takes place. Thinking about childhood,
what we got up to, fish market, mine, fish market, fish market, my
family, my parents, and I used to go down to
the beach on the weekends, on Sunday especially, and
we'd go to local fish market. You could think of it
like a farmer's market but like Island style. You know, there
was a vendor there who would sell coconuts, chop off the top and give you a scoop and a straw so you
can enjoy the contents. I'm enjoying what I'm saying, so I'm going to put coconut thinking about what
else little gets up to. She loves to draw. Drawing is like one of
the oldest hobbies. Thinking of the things
that I've done throughout my life and drawing
is one of them. So we're going to put down draw. What else does Lim get up to? She skateboards. She's a skateboarder. And true story I did
skateboard when I was a kid. I was not very good. I maybe was able to do kick
flip and that's it. Lim is a better
skateboarder than I was. We're going to put that down
because I think that could be really fun drawing. Let's see, Family. Serious is all about family, man, so let's write
that down to. All right, cool. So I'm feeling inspired
by these words. Let's see what sort of imagery
I can pull from that fish. Something about that drive to the fish market which
was super scenic. Miami's a beautiful
place, it's never been. I'm seeing, I'm seeing little mo in the car
head out the window. Enjoying the weather. Though in real life
it is super hot and humid in Miami,
depending on the day. Right? So we'd actually have
the AC popping in this car. We'd have the AC
going in real life. But you know, this is cartoon. So we can embulge a little bit, head out the window, let's see, maybe a hint of mom and Dad, We can just draw
some heads here. Mom and Dad always
had on shades. Draw some glasses. We'll figure that all out later. I'm actually thinking,
maybe this is already feeling too
long as a sticker. If I'm going to do
this, I may want to do maybe just a half of them or think about how
I can size this up. This is given Sunday
drive and energy, maybe I'll put Sunday
somewhere here. It could like I'm kind of enjoying the idea of
being in the car, right? So maybe actually grab another color so that I can
kind of see what I'm doing. Maybe there's some palm trees was by quintessential Miami, you know, and that could be fun. That also helps sort
of simulate motion. You know, movement even though nothing's
moving in this, right, this will be static, that image. But we can have some elements
in the background going by. I think that could
be fun. All right, cool. What else we got? Coconut, coconut,
Enjoying a coconut. I think that's the best
thing to do with that. Maybe go ahead with
the straw, you know, coming straight out the coconut. Okay, cool. So I skipped ahead a little bit because I think you
guys get the idea of sort of how I work through the ideation process
when thumbnailing. I'll walk you through the ideas. I ended up coming up based off of these words that
I jotted down here. Here we have the skateboard. Beyond a skateboard, here's how the coconut drawing ended up
turning out. I'm loving it. We have me drawing,
enjoying laying down. Then this one right here was going to be a family portrait, but I'm actually feeling
like I don't need it. The rest of the sketches are feeling really good and
we're already at five. I think I'm just
going to stick with these skateboard coconut draw and then the other ones
that we walk through, Sunday driving sketch that
I'm enjoy blah, blah. Maybe one of my favorites. And then me and Abby
chatting up a storm. And then she and I
running as well. Feel like it's more
than enough for us to start expanding
on these ideas. Now that we've got
some ideas down, some sketches that
we're enjoying, we're going to go
ahead and scan or take a photo of this and bring
this over to our computer. We're going to begin
a digital process of this clip studio paint, which would be refining
the sketch and then pushing it into
final illustration.
4. Getting to Know Clip Studio Paint: Now that I have my drawing scan, we're going to go into CSP. And I'm actually
going to familiarize you guys with the
workspace before we dive into actually producing
any illustrations in that. Okay, we're going
to jump into CSP. Your apple like can look
very different than mine. One of the great
things about CSP is how modular
it's workspace is. You can yank out, pull them wherever
you need them to be. If there's any panels
that I'm referring to that you can't find
in your workspace, you can really easily find
them up here in the window. Drop down for example. Say I come in here and I don't see the animation timeline.
Just come up here. To start, I'm just
going to walk you through some of these panels. The panels that you're very
likely to use the most, all of your tools
here, high level. Some of the most
important ones for me are going to be
the brush tools. I encourage you to play with
these clip studio paint, comes stocked with so many incredible
brushes that you can use. What I love about it,
they really simulate real world textures in traditional mediums.
Check these out. Pencils are some of
the ones that I'm gravitating towards
a lot lately. You can also import brushes. In here you can see some
of these I've manipulated from the stock versions and also imported
in some of my own. This is actually appropriate
pencil that I love. I think it's the six
pencil that I have brought in to clip studio paint. This one is one of my favorites
right now. Sketch pencil. We got our pen, our pencil, our eraser, our brush. We've got our field tool, which you're going
to be using a lot. I'll walk through all
these settings while we're in the illustration phase because we'll be using
this tool quite a bit. We've got the object
tool which allows you to manipulate vectors to
better illustrate that. Let's create a project. Let's actually bring
in our sketch so I can better show utilization
of some of these tools. We're going to go
over to the folder. I'm bring CSP back up, drag drop that on the icon,
and that brings that in. Okay, to show these layers. All right. Csp is a few
layers that you can use. It has a rasterized layer
which is really great. There's a vector layer
which is amazing. The object tool is going to
allow you to manipulate that, which is really awesome. The pinch tool also gives you another way to
manipulate these vectors. We have some amazing that
can allow you to push this how you need to,
didn't feel that. Then we have our timeline. Csp is a little different
than some other apps when it comes to how animation works. First of all, in order
to do any animation, you're going to need
to create a timeline. You can do this one of two ways. You can either create
an animation project when you go to a new project, and that'll be this
last one right here. Manipulate these settings
however you want to hit, okay? And that's going to automatically
give you a timeline. Or you can just make a
time line by tapping this button right here
for the playback time. I'm going to shorten that.
These are short animations. I'm going to make this 1 second. For now, I'm going to be
working at a frame rate of 24, which means 24 drawings per second and likely
animating on two. These are gifts and they
had to be small sizes. I think this is a good start. I'm going to link that
playback time, 24, 1 second. There's our timeline. You ever create this
and you're like, oh, I want it to be longer,
I want it to be shorter. You can just really
easily drag this if you want to make it something
really long and you don't want to drag
that out like crazy. You can go over here,
you go to timeline, change settings, and you
can change that to 100, and it's going to
bring that out. Be wary of this
because your drawings, whatever you've created before, you've done that,
they'll end still at the last frame of your timeline before
you extended it. You need to stretch these
out. You can do that, really. Shift. Click those and drag them out to where you need them. I'm good with 24, so I'm going
to go back a little bit. Okay, a moment in animation
in CSP is called the cell. And the cells need to be connected to the timeline
in order to register. If you want to create
any animations, you're going to create this guy which is a new animation folder. And then your drawings are going to be nested within that. Each of these
drawings is going to be a second of your animation, but these need to be
connected to the timeline in order for it to be seen. All what we're going to
do is connect those. In order to connect them,
you can just go over here, hit that button, hit one, go over here, hit
that button to, this is a roundabout
way to do it. You can also disconnect these, which is really powerful. I still have that two drawing. Maybe I drew
something and I'm not so sure about it, But I
don't want to delete it. I can just disconnect it from the time line and that
drawing will still be there. But another way to do this
and how it's typically done, another way to do this, and
maybe easier way to do it, depending on what
you're going for, is to just do that. And that'll create a
new drawing for you on the area of the timeline
that your indicator is on. You can see the pop
over here, okay? And this button right here is going to cut on onion skinning. Let's put some of this to work. Let's create a new animation. You can use this guy that
I created previously. We already have an
animation folder here. And let's draw something easy. How about a blank?
Let's go blank. That's these brushes. I like that draw. I like a la, a las. Okay, here we go. All right, awesome. And
then we're going to go over a little bit and I want to create a
new drawing on six. So I'm going to hit that and I want to see my
previous drawing, so I'm going to hit this,
which is onion skinning. Drawing another pieces looking Now say I want to utilize drawing two
for my third drawing. I want to build off
of that drawing. For my next drawing, I'm going to share an auto action that automates the
process for you. But I do want to show you
all what the process is, what this auto action is, Sally, essentially doing is
duplicating that layer, renaming that three and
connecting that to the timeline. You can see that
was a whole lot, that was the whole
thing. Delete that. Disconnect this so you guys can really see what's going on. This is something good to know. Two, you're going to see me utilizing this in
a later lesson. When you delete a layer
from your layer stack, it doesn't erase it. It's indicator
from the timeline. The timeline is still looking. For drawing number three, you need to disconnect that, but this can work in your favor. I like to do this and just
create another drawing. And you can see CSP is smart. It knows the next order is 3.3. Is already here,
so it's going to automatically connect
that drawing for me. This is something you'll
see me utilizing when I'm doing my line work and my
field work for my animations. All right, so this and I'll show you guys the
beauty of this auto action. Select two on your timeline. Bring your layer
stack, excuse me. And then move over to where you want this third drawing to be, this duplicated version of two. Then you're going to go to this auto action
that I'm going to provide to you
guys and hit play. You can see it did
it all for me. Now we have a
duplicate of drawing two that we're utilizing
for drawing three. Which handy? All right. I'm
going to leap back, put on my onion skin because
I actually don't need it. That will just to
illustrate the idea, I'm going to do another frame. I'm doing this, I
like a walkie line, but if you want to
draw straight lines, shift allows me to get there. All right, closing it on up. Let's see what this
is looking like. My time line is too long. I'm going to go over here. Go to time line,
change settings long. I'm going to make that 24. We can bring it in closer. Okay, now I want to
open it. Eye back up. Instead of drawing
those frames again, I'm going to utilize
the drawings that I already have in this case. I want an instance of two here. I'm going to hold all grab
two and drag it over. And you can see now I'm
using that two drawing, You can see it two over
on the layer stack. It's when I go to two, it's bouncing back
to that two drawing. This is really great because if I make any changes here,
I'm going to raise something. See it? I go over to two,
it's the same drawing. Those changes are
going to carry across. Undo that, grab one, hold, all, drag that over. See how this is looking? We're going to hit play.
Play is right here for all. Okay, cool. Maybe I want to hold this open a little bit and
I can hold it on the end. Maybe I want to hold
this close a little bit. Can drag that out, you can play will give a different
result for your animation. Now do we have a better idea of the clip studio paint interface and tools and
animation timeline? We're going to move on to the next lesson
where we're going to refine those sketches
that we did previously. Next lesson, be ready
to bring your scans or your photo of your sketches into clip studio paint or whatever
apple you're choosing. And we're going to start
working on those sketches and pushing them and finalizing
those for animation. I'll see you in the next lesson.
5. Refine Our Original Sketch: Now we're in clip studio paint. I have my sketches
that I've brought in. I'm going to start
refining one of these and taking this over to the
final illustration phase. I'm feeling blah, blah, blah. I think I'm going to refine
this sketch right here. So what I'm going to do
first is create a new layer. Mean that sketch like that. Zoom in. All right, so this is really me just taking this sketch to the
next level, right? So that when I'm doing
my final line work, I have a pretty good guide. I don't have to think about it. So much stabilization is on, I'm going to cut it off. I like to leave that for
you when I'm refining my sketches or doing my final
line work, I should say. Okay, you see me racing pretty quickly
without clicking buttons. That's because I have my eraser attached to this
button on my Waco. Let's, you know these characters. I, it's been interesting
to see how they develop. You know, the more
that I draw them, I kind of with the characters not having ears sometimes and then
drawing ears other times. You know, I don't, who knows where that will
land eventually. But digging there being an ear because these heads are so simple, right? And ears. Nice additional data to know like what direction she's
looking in and what she's doing to be a little more oblong. Okay. The proportions don't
feel right to me. Little is little, so
let's make her smaller. See about this, blah, blah. I'm actually going to dim
this light a little bit. You can see we start to see those transparency
cubes back here. So what I'm going to
do is just create a new layer, make it white, Fill it completely in so that I can have something that this can be transparent against some, a lightness a little bit. Go back to that layer, go back to my pencil, select my red again, blah, blah. I like the idea of this
sort of forming around her. Okay, I draw her. Mm hmm. Let's start
to write this out. See how this is feeling? I know the power of threes. I feel like there needs
to be another block. So let's do that. Let's squeeze another
blow in here. Blaw, let's see if
we can cram it in. I think we can blow, and it could be cool that it's like trailing off a little bit. Give these a little more space. I'm going to my lasslol, I'm going to manipulate
this a little bit. All right? So that there's a little more
separation between these words. I'm gonna bring this
in a little tighter. I kind of like breaking
arms and doing like weird and wacky
proportions, you know. Okay, awesome. So we see sort of
how that developed from this sort of
rough situation, this rough idea to
now this drawing.
6. Complete Linework: So we're just going to
jump into line work. To this, I'm actually going to hide my timeline. I
don't need it yet. Drag this down to give
me more drawing space. And then I'm going to
create another layer. I'm actually going to
go into my line work. What I created right here
was my vector layer. Let's start naming these.
Name this line work. This is already named
sketch. Okay, cool. I have my line work and
I'm going to go over, I'm digging this pencil. Yeah, that looks good.
I like that a lot. So this is what
I'm going to use. So now we're going to go in,
start to illustrate this. Okay? I like to turn on
a little stabilization. When I'm doing like
these big shapes, I don't like to do too
much but two each is on. Draw this ear. All right. One what you just saw me do right there. Sometimes I get some weirdness
if I have to cut on, on certain brushes, so I
occasionally cut it off. Sometimes I work with it, kind of depends on the brush. So if you're experiencing
any sort of like weird, you could probably see
that happening here. Line withs. Check your
tilt. Maybe cut that off. That, right. I always make sure to zoom out. You know, these stickers are going to be really
small on a cell phone, you know, you want to
make sure your ideas are reading at the size folks
will likely see it at. Right back in, so I can finish up these arms. This. So here, select this with my objects selector. Move it around a little
bit around, all right. Give her a pony blend. Okay, So I'm going to
go to correct lines. Sometimes what I like to do a correct line is connect
these lines here. You see this sort of when I
came around with that shade, clicking this on,
it'll connect it. You can also use this. Select that from
the subtool section and draw on it like that. And that'll connect
the lines too. But I need to move
this around anyway, so that looks so weird to it. I like to use the
vector layers to just like finest my
drawing a little bit. I don't want to change the
way I drew it too much. I wanted to still have
that unique fingerprint. You know what I mean? But it's nice to have to move
some things around. Something that's also really
cool about vector layers is the ability to a line
that's gone across. This is really great
if you want to draw big shapes because it's easier to control your line
work when you draw that way. And then you can delete those extra bits in order to make sure you
have that selected. You're going to go
to your eraser tool and you're going to
check on Vector eraser. You're going to want
this, something that I always keep on
is really useful to. Okay, cool. I'm
going to turn off the to see how this is feeling. I'm actually liking it a lot. So now let's go and
create a color here. Let's put this on folder, okay, so in our
radio, do our colors.
7. Add In Color: All right, I'm ready
to do my fills. I'm going over into the colors that I like to use for these characters and
I'm going to pull them. But feel free to select whatever colors you
need for your artwork. A lot of times I'm pulling
from this color wheel, seeing what looks good
but feels good first. Before I do that, I want
to make this earring. I'm going to select it
with the object layer, go to the color I want, and click All right. I'm going to color, I'm going to go back to fill
and refer other layers. You want to make sure
that refer multiples on because we're going to want to reference our linework layer. In this case, all of our
art is in one folder. This would actually work for us. We can now reference any layer that's within
this folder and cut on go to my color layer and it knows that it wants to respect
this linework layer. Alternatively, say this
is outside of that layer, that's all good, we can
just hit this lighthouse. What this means now
is it's going to respect any layer that's
a reference layer. Then you just make whatever
layer you want and you can make multiple layers or
reference layer at one time. Click that on, go to your color, and it's going to
do the same thing. We're going to go
back a little bit because I want to keep
those in the folder. Go back to this, start
to color this character. Now you can see because
my line is broken here, it doesn't know, it
fills everything. This is actually her shirt. I don't know if this
is going to work here, because this is such
a massive break. But let's give it a shot. If you close gap, I'm going to up it to like
50, something really big. And look at that, it
actually did work. That's pretty cool. If I
don't need it anymore, I'm going to cut it off or
bring it back down to 20. Because if you have it too high and you don't need
it to be that high, it starts to do some greatness. Going to go back to
black, fill these layers, and then want orange
for her shirt out. And then don't forget to color
anything that needs to be white because these stickers are going to be
transparent, right? I mean this being having no background is actually
a cool look to me. Maybe I'll leave this but say
you want this to be white. A lot of times our
background layers are white and we
forget to color in those white things, fill that. I actually think that would work better using the sticker
on a busy background. This text could get lost. Zoom out, see how it's reading. I think we can do a
little something here to make this more legible. So let's pull this out. I love this a little bit. Let's just use a brush
to fill this in. I'm going to start to
manipulate this text a little bit to make
sure it's reading that little thing.
Let's see out. I'm like law. And as I'm doing the action too, I'm realizing that
I probably don't want this hand to be like this. I want to be this way. So I'm going to augment that. All right? Let's fix that. I don't want her
thumb to be out here. I don't want her, her
whole palm broke. See sometimes for me, it's nice to just do another
layer and start to work. See what's good,
draw my fixes over it and then come back
and be precious about it later. So let's do that. I think it needs a
little more lane to it so that it reads. Yeah. Okay. I'm just going to hide my color real quick
so I can make these. I'm actually going to
duplicate this layer, and I want to keep that around so I can see
the difference. And I'm going to this hand, I kind of like the looser
nature of this hand. I might take that across
to the other hand too. This is No. Yeah, I like that. I like the energy of that can. Right. So let's bring
this layer back. And it feels more like the action that I'm
trying to illustrate. Anyway, law. Law, law. All right, so let's go ahead and
erase these and find that. So it's feeling, it's giving
what it needs to give. Okay. Hello, Bett. Boom. Wonderful. A little
palm line, P, B. Okay. Let me bring this up. I want to bring this back
down a little bit. Can you see more of a
hand on the other arm? Perfect. So cut
my color back on. I'm probably gonna just I
can keep I can salvage it. I'm gonna get rid of this stuff. I'll be under wrong, er. Okay, go back to
those colors again. Go back to my film. Do that back here. I'm just going to erase this. Know I'm gonna just pencil this and I'd like to come
over 'cause these, these brushes have really
awesome texture in it, right? I like to sometimes come behind those lines and add my fill. I think I'm going to
extend this down. So I'm going to grab
my correct line tool and just drag that
over a little bit. It doesn't need to be
fully connected for me connected a little more, select my color line, color, fill that over. I think I do want
to bring this over. I bring my correct line just a little bit, blah, blah, blah. You know, sometimes
you got to act it out right when you're
doing his work. It's best to not take yourself
too serious, you know. Okay, cool. So it's
feeling good to me. Could maybe just for the
sake of perspective, make this hand bigger. Because technically it would be causes closer in space to us. But this is cartoon and I'm like the whacky
nature of the Strong, so I'm going to
leave it as it is. All right, cool. Zooming
out. That feels good to me. Don't forget to save all. If you drag your image in here, you're going to need to save as if you just do
a regular save, it's going to save it as
whatever that image was for me. If it's a PNG, it's just
going to save it as a PNG. You don't want to do that. You want something that you can open up and CSP and see
all of your layers. So make sure you save
As or you can save, duplicate, save As, name
it, whatever you'd like. Make sure it's Clip studio
paint format and then save it. I've already saved so we don't need to fix that.
All right, cool. So now that we have an
illustration that we love, we're going to take this over to the next lesson and animate it. Think about, this is a moment in your animation that we're going to build on in the next lesson. I'll see you in the next class.
8. Rough Out Our Animation: In this lesson, we're going to animate one of our stickers. I'm going to stick
with blah blah, blah. We're going to go ahead
and create a new scene. I'm going to make these, the scene 1,000 by 1,000 pixels. And make sure you toggle on
your animation projects. And I'm going to bring
this down to 24 frames. I might want something
more, maybe 48. Okay, I'm going to go
over here and grab my line work and
my color command, C command V. You see that? Put it in this animation folder and that's why we can't see it. I'm just going to
pull it out and you can see a little bit
of her pony over here and drag it over, center it up, and get
my time line back in. Okay, a good way to
think about frame by frame animation is to break it down to sort
of the key poses, the key moments
in the animation. Lucky for us, we already
have one key moment. This illustration that we did. I'm going to name
this original name, this rough on my
animation folder. Put this on top. Dim
this a little bit. What I like to do
when I'm animating, even if I'm working from an illustration that
I've already done, I like to draw a mock
of that illustration. It's easier for me to digest
it if all of the frames have constant visual
quality to it. I'm going to do that
right now for the phrase frame digging this real pencil. This doesn't have to
be sexy drawings. Again, you know, we're back
into really keeping it rough. The idea is the gesture, the idea of what we're
trying to convey. Clean it up in the next pass. Okay, just draw everything in. All right, cool. So we
got our first frame of animation and I'm going to
create another empty layer. I'm going to cut on
on. I'm thinking about what is the
other extreme moment in this animation, right? If we got this, then this feels like the other
most extreme moment, right? I like to act these out. It just helps me think
about the animation. I'm even seeing how my shoulders move as I do that movement. I lean back, I lean into it. The head is probably
going to come up a little bit with this, considering all of that, I'm
going to redraw this head. I'm definitely going
to animate this mouth. That's too good to
not do that, right? In this case, I actually want to keep the head and
the body separate. It's just going
to make it easier for me to plan this out. What I'm going to
do is take two, drag it onto the folder, and you can see that it put
it in a folder called two. That's why you can
still see it because all the timeline cares
about is what layer is Mam, whether it's a folder
rasterized layer, whether it's a vector layer, it just wants to know
which layer is named to. Once it finds it, it
connects it for you. This is great, because now I'm going to move this
head up a little bit. A good thing to think about
when you're animating is art. What I'm going to change
this color so I can illustrate what
I'm saying better. Making sure these
movements happen on some arts help the
animation cell. So let's undo that. I'm going to draw the hands coming
in, clasping up, cut off my skin real quick. It's good to sort of flick between your drawings
to see what's going on. Definitely want to cut off
your skin every now and then and just go
between these drawings. If you see me making noises
that aren't keyboard noises, it's because I have this hot key remote that I'm utilizing. All of my hot keys
are binded to this, but I'm also sharing all
of my hot keys with you. You don't need one
of these in order to use hot keys forever. I was using a good old keyboard. Whether you have one
of these or not, all you need is your
hot keys appended. In order to do that, it's good for me to show you all
how to do that as well, so you can create your own
hot keys if you'd like. You're going to go up
to Clip Studio Paint. You're going to go to
Shortcut Settings. Click here. Within this menu,
you're going to be able to change any hot keys you want, add any keys that
you would like. For example, you
need to get from the previous frame or to the next frame or something
that I'm using a lot. From a previous cell to cell is option option, and option X is option
Z and option X is F. Quite a bit for that then for me to go from
one frame to the next, which would be not one
drawn to the next, but from frame one to
frame two to frame three, I have that set to option shift. And option shift,
back to animating this that I'm going to hit
back on my onion skin, and I know my shoulder
wants to come up. I animate that up
a little bit more. I also want to animate
this up a little. She's closing up her
fist so I can see, do you put my blah
blah in another there? I created a new layer. And I'm going to put this on a separate layer instead of merging
it because I'm not sure what I I don't know
if I'm going to she's talking it's cut off skin to
see what that looks like. I'm going to love
that. Maybe it'll be behind the stay in place, but behind she, I
think that might be, she wants to let that
see how that's reading. Maybe even bred girls, it's behind her head but then
comes in front of her pony. All right, so let's
keep developing these drawings since
her head is coming up. I'm using all to
grab this red again, all essentially brings up
your eye dropper tool, it's a hot key for that. And the cool thing
about learning frame by frame animation through a
process of making gift gift. Inherently, we need to be a
low frame rate so that you can make something that a lot of people can use on different devices
regarding themself. I have a zip that taking advantage of that and
minimizing your drawings. You're really focused on
the acting as opposed to. So this animation is, you know, we like
smooth animation. You can also aim for that. There's nothing
wrong with, there's nothing wrong with that at all. But definitely wanting to sell the motion more
than anything else, with as little drawings as
possible. It's a good idea. Okay, so I'm just going to drag this so I can get a quick idea of what
this feels like. It's actually feel
bad. Bring this in. I can get an idea of timing. I kind of want another sort of motion to bring alive
a little bit more. So what I'm thinking about is some sort of follow through, a little bounce back
when she goes like this. So she kind of doesn't just
land flatly at that motion. I'm going to build
on this one drawing. So what I'm going to
do is go ahead and use our duplicate raster
cell and make this, you can leave that out soon. Bring one over, I'll
click bring that over. Fix that spacing so it's
not happening so quickly. Okay, so now see how
we can push this drawing a little bit that
effect that I'm looking for. So I'm gonna put this in a folder and I'm going
to separate these. Elle, Okay, cool. So once I sort of have a rough animation that
is looking good to me, I'm ready to kind of move on
to adding my lines back in.
9. Add Linework To Our Animation: Okay, now that I have a rough animation
that I'm enjoying, I'm going to go ahead
and do my line work. Go ahead and create
another animation layer. We're going to call this line. I'm going to use vectors here. I'm going to name this
or create a vector layer by ticking that
and connect them. The great thing is, is that if I want to create
another blank layer here, another animation cell, and I
hit that clip studio paint, knows that I've already
been using vector layers, so it's going to make
that a vector layer too. All right, so I'm going to
start doing our line work. So for starters, I'm just
going to go ahead and grab my lines from my original
drawing, my original art. I'm going to go ahead
and copy that, Taste it. Here's our first frame.
I'm going to go over here. I'm created. Let's
hide that for now. Again, bring this back on. I'm going to go to one.
There's some things that I want to
utilize from this. What I'm going to do is go ahead and hit my object tool
and start grabbing the elements that I
need to no paste them. And I'm going to do
something similar work in the same non destructive
way that I was working on my rough layer
so it's easier for me. I'm going to drag that
and pull that into a folder so that I have separation
between these elements. Go ahead and grab the head separately in
the earring as well. Copy that, create a new vector
layer, and paste that in. Now I can move that
up really easily. Let's hide this for now. Go back in with my black, go back to the pencil
that I was using. I'm going to check
my line with to make sure I'm using the right
line with for this art. Looks good. Make sure it's 12 so that I match it and draw that. We're going to change this, so. All right, cool. So I'm also going
to pull the body, so I want that to stay
relatively the same. And then I'm going to paste
that into that folder. I want this to move
up a little bit. I don't want to be too
stiff. Okay, cool. So I did pretty poor drawing
for these hands for myself, so I'm going to have to figure
out what I was trying to do or I could, you know, refine it in a sketch, but I don't think
that's necessary. Let's see if this is
make sense a little bit. Let's pull that over and you can see I'm using, I have my Select Layer tool appended to this button
on my Waken pen. So it allows me to really just
select layers really easy, really quickly, so I don't have to go up
here and toggle it, so that's what you see me doing. Okay, that's fine. I'm feeling that this round carry, I'm gonna hide my roof and
just make sure these frames are working together
like they feel right. No feeling good to me. So I'm gonna keep
developing this one. It's fine in the head, up top so that that hearing doesn't get clipped by the hand. I'm actually going to move this chest line
into a little bit. Alright, cool. So I'm loving those two frames. Move on to two, which remember
was an extension of one. I duplicated one to make that I'm going to do
the same thing here. Now remember we can't
use this to do that. It's going to rasterize
our layers and we don't want that. I'm
going to undo all that. I'm going to do it.
I'm going to go ahead and create an empty cell. It's going to
create a folder for me because that's
what I did before. I'm cool with that. I'm just
going to delete everything. Actually delete everything, but one thing, I
do need one layer. I'm going to go back here and I'm going to go
to my object layer. And I'm going to
go ahead and copy this and paste it here. I'm going to separate
these guys again. She grab everything, cut it, and paste it into a new layer. All right, cool. And
we're going to do some more separation
than we did before. I do want the head separate from the body cut. All right, cool. So now I have these elements so that I can
independently move around. And I'm going to go back to that body layer for ahead
and erase this hand. Actually know I'm going to keep it. I do want to maintain. Bring it down. Let's
see how this reads. Sometimes it doesn't look good. We just kind of squash and
manipulate things like this. I think it could
work. Let's see. I don't hate it, so it's
the starting point. At least I feel like I'm losing a little
bit of an arc there. Let's bring the one over. Okay, it's feeling good to me. Can let's go ahead and get this arm in order. I can go ahead and
use this to kind of move things where
I want it to be. This is great because if I cut this up to something like 90, it's going to really
move a lot of elements. And if this size live
about can move this around and create this. Let's bring it
down a little bit. Again, bring it up a little bit, lock that, turn the
sides down again. I don't love what's
happening, man, just to make sure
that's making sense. Let's cut on onion skin. Should be aid. They're out. I kind of want this to bend more, so I'm just going
to go ahead and use that correct line tool to kind
of push this a little bit then I want this to, so I'm actually going to do that since this is
a straight line. Just all right, let's see how this is reading without
onion skin in the rough on. So fun, I want something more
happening with this mouth. I think what I did here was I widened it. Let's follow that. I'm going to use my
correct line tool again. I'm going to hit
on Connect lines, so that this can
become one shape. Turn this down a little bit.
10. Add Color to Our Animations: Okay, so this is
feeling good to me, so I'm going to hide my
rough layer and I'm going to zoom out so I can see
this in its real state. I kind of love the idea
of this popping up, this bubble, so I think I'm
going to leave it like that. You're digging it. It's fun. Okay, so now that I'm
ready for my color layer, instead of just creating
a new animation layer, naming it color, and then
going to each frame, what I'm actually going to do is delete that and
duplicate my line layer, name that color and go in and delete everything that's inside
that color layer. What that does is it leaves
these markers for me. This is awesome,
because now I have these points that I can go to really quickly using
those hot keys, as opposed to going here,
making a new frame. Naming it like
doing all of this, this creates a nice
little template for me that is based off
of my line layer. Now I'm going to go
ahead and create a new raster layer because it understands
that one was here. It's going to connect it for me. I'm going to cut
on my original up, the opacity and I'm going
to move it out of the way. Move it up here. I'm just
going to use that as a color. Go ahead and pull those
colors from here. It looks like I already
have them in here. But if you don't, this is the way you would do it. I'm going to have
that then I'm going to start filling refer other layers is what you
want to have checked on for your subtools instead of
the folder like last time. What we're going to hit
is this lighthouse. Then I'm going to go to the
entire animation folder for lines and I'm going to
hit lighthouse for that. I'm going to start with
filling the blocks. I'm going to cut this
on for reference. I'm going to cut this
on for reference. I think I'm going to up
the scale just a tiny bit and make sure guys you can
see if fill up to Vector isn't on it creates these
weird lines going on. You definitely want
that to be checked on that and inside the
mouth is black. I'm going to go to my next key. I'm going to add
another key frame. Do the same thing, go to
my next one for three, add another, and repeat. And I'm just going
to do this for all my colors and we're
going to zip through this. So you guys going to have
to watch me do this. All right, there we
go, blah, blah, blah. For the next chorus, we're
going to export this out as I'm going to upload me animating all of these if
you want to check them out, it'll be just a sort of fast time lapse
if you're curious about how those
stickers develop. I'll see you in the next class.
11. Export Your Stickers: Hey y'all, It's a new day. I had to take some time to animate the rest
of the stickers. I hope you enjoyed
yourself animating yours as much as I enjoyed
myself animating mine. Now we're going to jump into
exporting these files as gifts in preparation to upload them onto Giffy
in the next lesson. Okay, so let's get into it. I am going to start
with blah blah, that first gift that I animated. Okay, And starters, what you want to do is hide
your paper layer. This is going to give you a transparent
background to your gift. And that's what those
blocks in the back indicate indicates transparent
space. Cut that off. Then we're going to
go over to file. Actually, before
that, I like to check my animations with
the transparency. Sometimes you can see like
little errors and things you didn't fill in when the
background is transparent, that you may not see when
the background is white. This looks good to me. I'm going to go to file an
export animation, excuse me. Then I'm going to go
to animated gift. I'm kicking my folder that I
want to save it into save. And then you're going to
get this prompt from CSP that gives you loads of
options for your gift. For starters, it's likely going to re size
yours like it did me sometimes.
That's good, right? You want your gift
to be as small as possible in most use cases. But in this case, gift actually resizes your gift
based on the context. Theoretically, it
doesn't matter how big it is resolution wise, as long as the gift file
is under 100 megabytes. So if you're within
that file size, then you can make
it pretty large. I'm going to stick
with the original size that I develop these at, which is 1,000 by 1,000
Then export range. This is pulling data
from your timeline. If your timeline is exactly the length that
you want it to be, this is going to
be right framer. I'm going to leave
it the same tip. If you want to size
your gift down, you could make your frame
rate 12 frames per second. I'm good at 24 FPS. I'm going to leave that as is. And you want to make sure
that your count is unlimited. Then also make sure
this is ticked on, even if you hide your background
layer, your paper layer. If this isn't ticked, you're still going to have
a white background. Make sure that is good to go. Then we have this
setting for dithering. I don't need it because I'm
using really flat colors. And that's just my stylistic
approach, typically anyway. But if you're using
more gradients, you have more detail
in your stuff, in your animation, then you
might want to click this on, see what it does
for your file size, you'll see you make more. There's a lot of
trial and error in the export process to make
sure that your sizes are good, to make sure that your
file size is good, to make sure that you're
not losing detail. To make sure that
your colors are as accurate as they can be, that you're comfortable
with the color accuracy. Sometimes gifts can shift
colors a little bit. There's settings that you
may need to play with, but depending on the
outcome of your export. The great thing is
when I hit, okay, Clip studio paint is going to tell me how
large the gift is, and that'll give me
instant indicator of whether I need to
lower some settings, lower my resolution, see what I need to
do to size it down. I'm going to hit
okay. It's not even, it's 862 kilobytes, which
is way under 100 megabytes. I'm good to go. I'm going to hit okay for that,
This one straight. Now I'm going to go to the
next one, which is chat. I'm just going to follow
the same process and hide the paper and then go through the export process
and check them first. Before I do that, something I highly recommend looking good. This is a perfect
example of why you should check your gifts with
your background transparent. What I noticed is that I
forgot to color in my straw. You can see those transparent
blocks going through there. Lucky for me, these
are only a few frames, and it's going to be real
fast to take care of this. Go in and fill in
this real quick. So you can see on some of
the fills are a little more rough because I didn't use the paint bucket tool to
fill some of these gifts. I actually went
in frame by frame and scribbled in the fill. Just inspired by some of the traditional work
that I've been doing. Traditional medium
work, I should say, with color pencils and these. I didn't do it to
all of the gifts, but you have fun with it. Keep it loose, see what
works, see what doesn't. I thought it was cute, so I
added it to a few of these. Now you can see that
this is filled. All right, so I'm going
to go in with the white now and take care of that. And then export
this gift as well. Cool, so now that's
looking good. Go ahead and exploit it. We could see you there. I'm
noticing another little air. I'm in a fixed thought. A little loose is good. That's kind of what
I'm going for. Cool, I gonna go
to the next sort. All right, here's another
instance where I'm noticing my cartridge
isn't colored. So it's color in my game girl. All right, let's
look at it again. Out, cool. All right, let's export this animation. Animated Gifs Game Girl man. I would have killed
for a game girl when I was young, Huh? Why we didn't have one of those? You know, I read somewhere, supposedly they made one. They were testing it,
you know, anyway. All right, so game girl. Now we're going to
go into skateboard. I had my background check us out, fun Export animation. I need a gift. Kind of raise
something there by mistake. I need a gift skateboard and we run it. So I'm going to check my gifts out, make sure
they're good to go. All right, so start
with blah blah. And you can see when
you preview it, that it's transparent, which is good.
That's what we want. Good chat, looks good. You may notice this fluctuations
in some of the colors. I'm not mad at it. You know, if color accuracy is
something you could play with forever, I'm okay with it. I can tell she's still
melinated, right? It's still giving the effect that I want some good with it, I believe it is. There may be some way to fix that within clip studio paint. I know there's ways to export
gifts from other apps that allow you to control your colors more
accurately or more easily. I should say, like Photoshop
is really great for that. But man, I pressed about it. I think it's all right.
I think if you had some radically weird
stuff going on, then it might be
something to look into. But you know, she's still brown skin,
so I'm good with it. All right. So I'm loving them. I think they look
great. We're ready now. We're ready to upload
these to Giftey. In the next lesson, I'm going to show you how to
create a Giftey account, if you don't already have one, and upload your gifts that you created and then apply
for an artist's account.
12. Upload to GIPHY and Apply For an Artist Account: We're just going to go over to, let's just type in
artists account, Gif. This top link is going
to take us where we need to go apply for an artist's
account on Giffee. This is actually
going to give us some really good
information too, if you haven't already
checked this page out. Gives you an idea of what
the process will be. Just because you apply
doesn't mean you'll get in. This is something
to keep in mind. Make sure that you
do all the things. Making sure you
set up an avatar, making sure you have
at least five gifts. Just every, all
your ducks are in a row so that your
account gets approved. As you can see, I click that, It's giving you more
information on all of this. I'm going to click
this right here. What it wants you to do first is either sign in or log in. I'm going to actually use the dummy account
that I created. I can give you a better idea of what your screen will look like if you don't have an
artist account already set up. I got that going.
I'm going to log in. What it's telling
me is that in order to be considered for a
brand artists account, you must have at least five
gifts on your channel. I'm going to upload
that I created. We're going to
want to go sticker and I'm going to
select the files. I'm going to start re
running, looking good. Add another one. I'm
going to add skateboard. And I'm just going to go
through all of these. I wonder if you can
add them all at once. It looks like you can. Perfect. Okay, so these are uploaded. Awesome. What you can do too
is instead of going one by one and adding the tags that you need for
these individually, you can do it in bulk. Something to consider when
you're adding these tags is also easy for you to
search for these gifts. For example, this is from my
world that I'm developing. I'm going to put seras, which is the name
of this universe, and also the name of herbal tea. It's named after that.
I'm also going to put in Monique, this
is really for me. Nobody is going to
be searching for these, I don't think they will. If you need to find them, you need some distinctive titles to help you access those. I'm also going to do Let's See, Fun Stew cartoon. And the cool thing too, is that you can also add
some individual texts. So this is giving me
best friends energy. So I'm going to put those
friends best friends. Any, so you guys get the idea, find some tags that are
relevant to your animations. But also find a few that are obscure enough
that when you search it, really only your
animations are going to pop up and that just makes it easy for you to search them. All right, so once
these are feeling good and you've added
all your tags in, you've either done them all bulk or gone into
each of your gifts and done them individually or done
sort of a mixture of each. Then you're going to go
down and upload these. Upload it to Giffy. All right, upload is complete and I'm going
to go to my channel. And you can see all
my gifts are here. Don't fret about
if you have any of this weird anti aliasing
outline action going on. Once you zoom in, your animation is good to go. I'm going to go back to my profile and
something to consider. Also, I highly recommend that you customize your
profile as much as you can already have
my actual account where you can see my avatar and all of my
information outlined. This is going to help your
account get approved by Giffe. Be sure to go ahead and
open these settings, change your avatar, fill in
as much of this as you can. Having a link to your
portfolio or your Instagram, your art, Instagram
specifically, all this stuff is going
to help you get approved. Once you do all that, let's
go back to my profile. Once you do all
that, we can then go ahead and go back to
our artists account. This is how I always find it. And then we're going to
click this here again. It's going to bring us
back to that application. And I'm already signed in. If I wasn't signed in,
it would ask you to. What we want is a
creator profile. Brand profiles are for orgs,
musicians, public figures. Think about this as I've done a sticker pack for
a company before, they would create a brand
account that they would then upload all
the stickers that I created into that
brand account. What we want is creator,
we're going to select that. Then you're going to fill
all of this jazz out. If you haven't already. I imagine if I had already
filled this out of my profile, it
would autopopulate. But if there's no information here, make sure to fill it out. Make sure again, you have
your avatar, good to go. Once you things,
you're going to submit your application and then
you're going to wait. You can take anything
from a few days. I can't recall how long it
took mine to become approved. I think it was a day or two. Give it a little beep and
they're going to get back to you and they're
going to let you know if things were
approved or not. If that's all set, you are
ready to test your gifts. We start sharing. I'm going to find a device
and share it on a story. All right. So I found a device and I'm
in Instagram and creating a story using a photo of
kid Seems fitting right. Given what s gifts
are inspired by. Then I'm going to
search for them. So I'm going to use
one of these keywords. You can see my animations
and only my animation. You can see the power of having distinct tags to help
you find your gifts. They could easily get
lost in the sauce. I'm picking one, I'm using chat kid me will get a kick
out of this, I'm sure. Shoot a dope me is getting
a kick out of this. I'm gonna get another one.
Actually, let me see. Let's go with blah blah. This is one of my favors. And there we go.
14. Conclusion: All right, congrats on
animating your own gifts. Send one to someone
you love or a friend or share on social to celebrate
completing this class. To recap, we
illustrated our gifts. We animated them
and then exported them and uploaded those to gift and created
an artist's account. Jump back into any
of these lessons if you had trouble
with anything. Repetition is an awesome way to these concepts that you
learned here. Yeah man. Upload your projects and share
your progress and tag me. I want to see what y'all made and thank you for
taking this course.