Transcripts
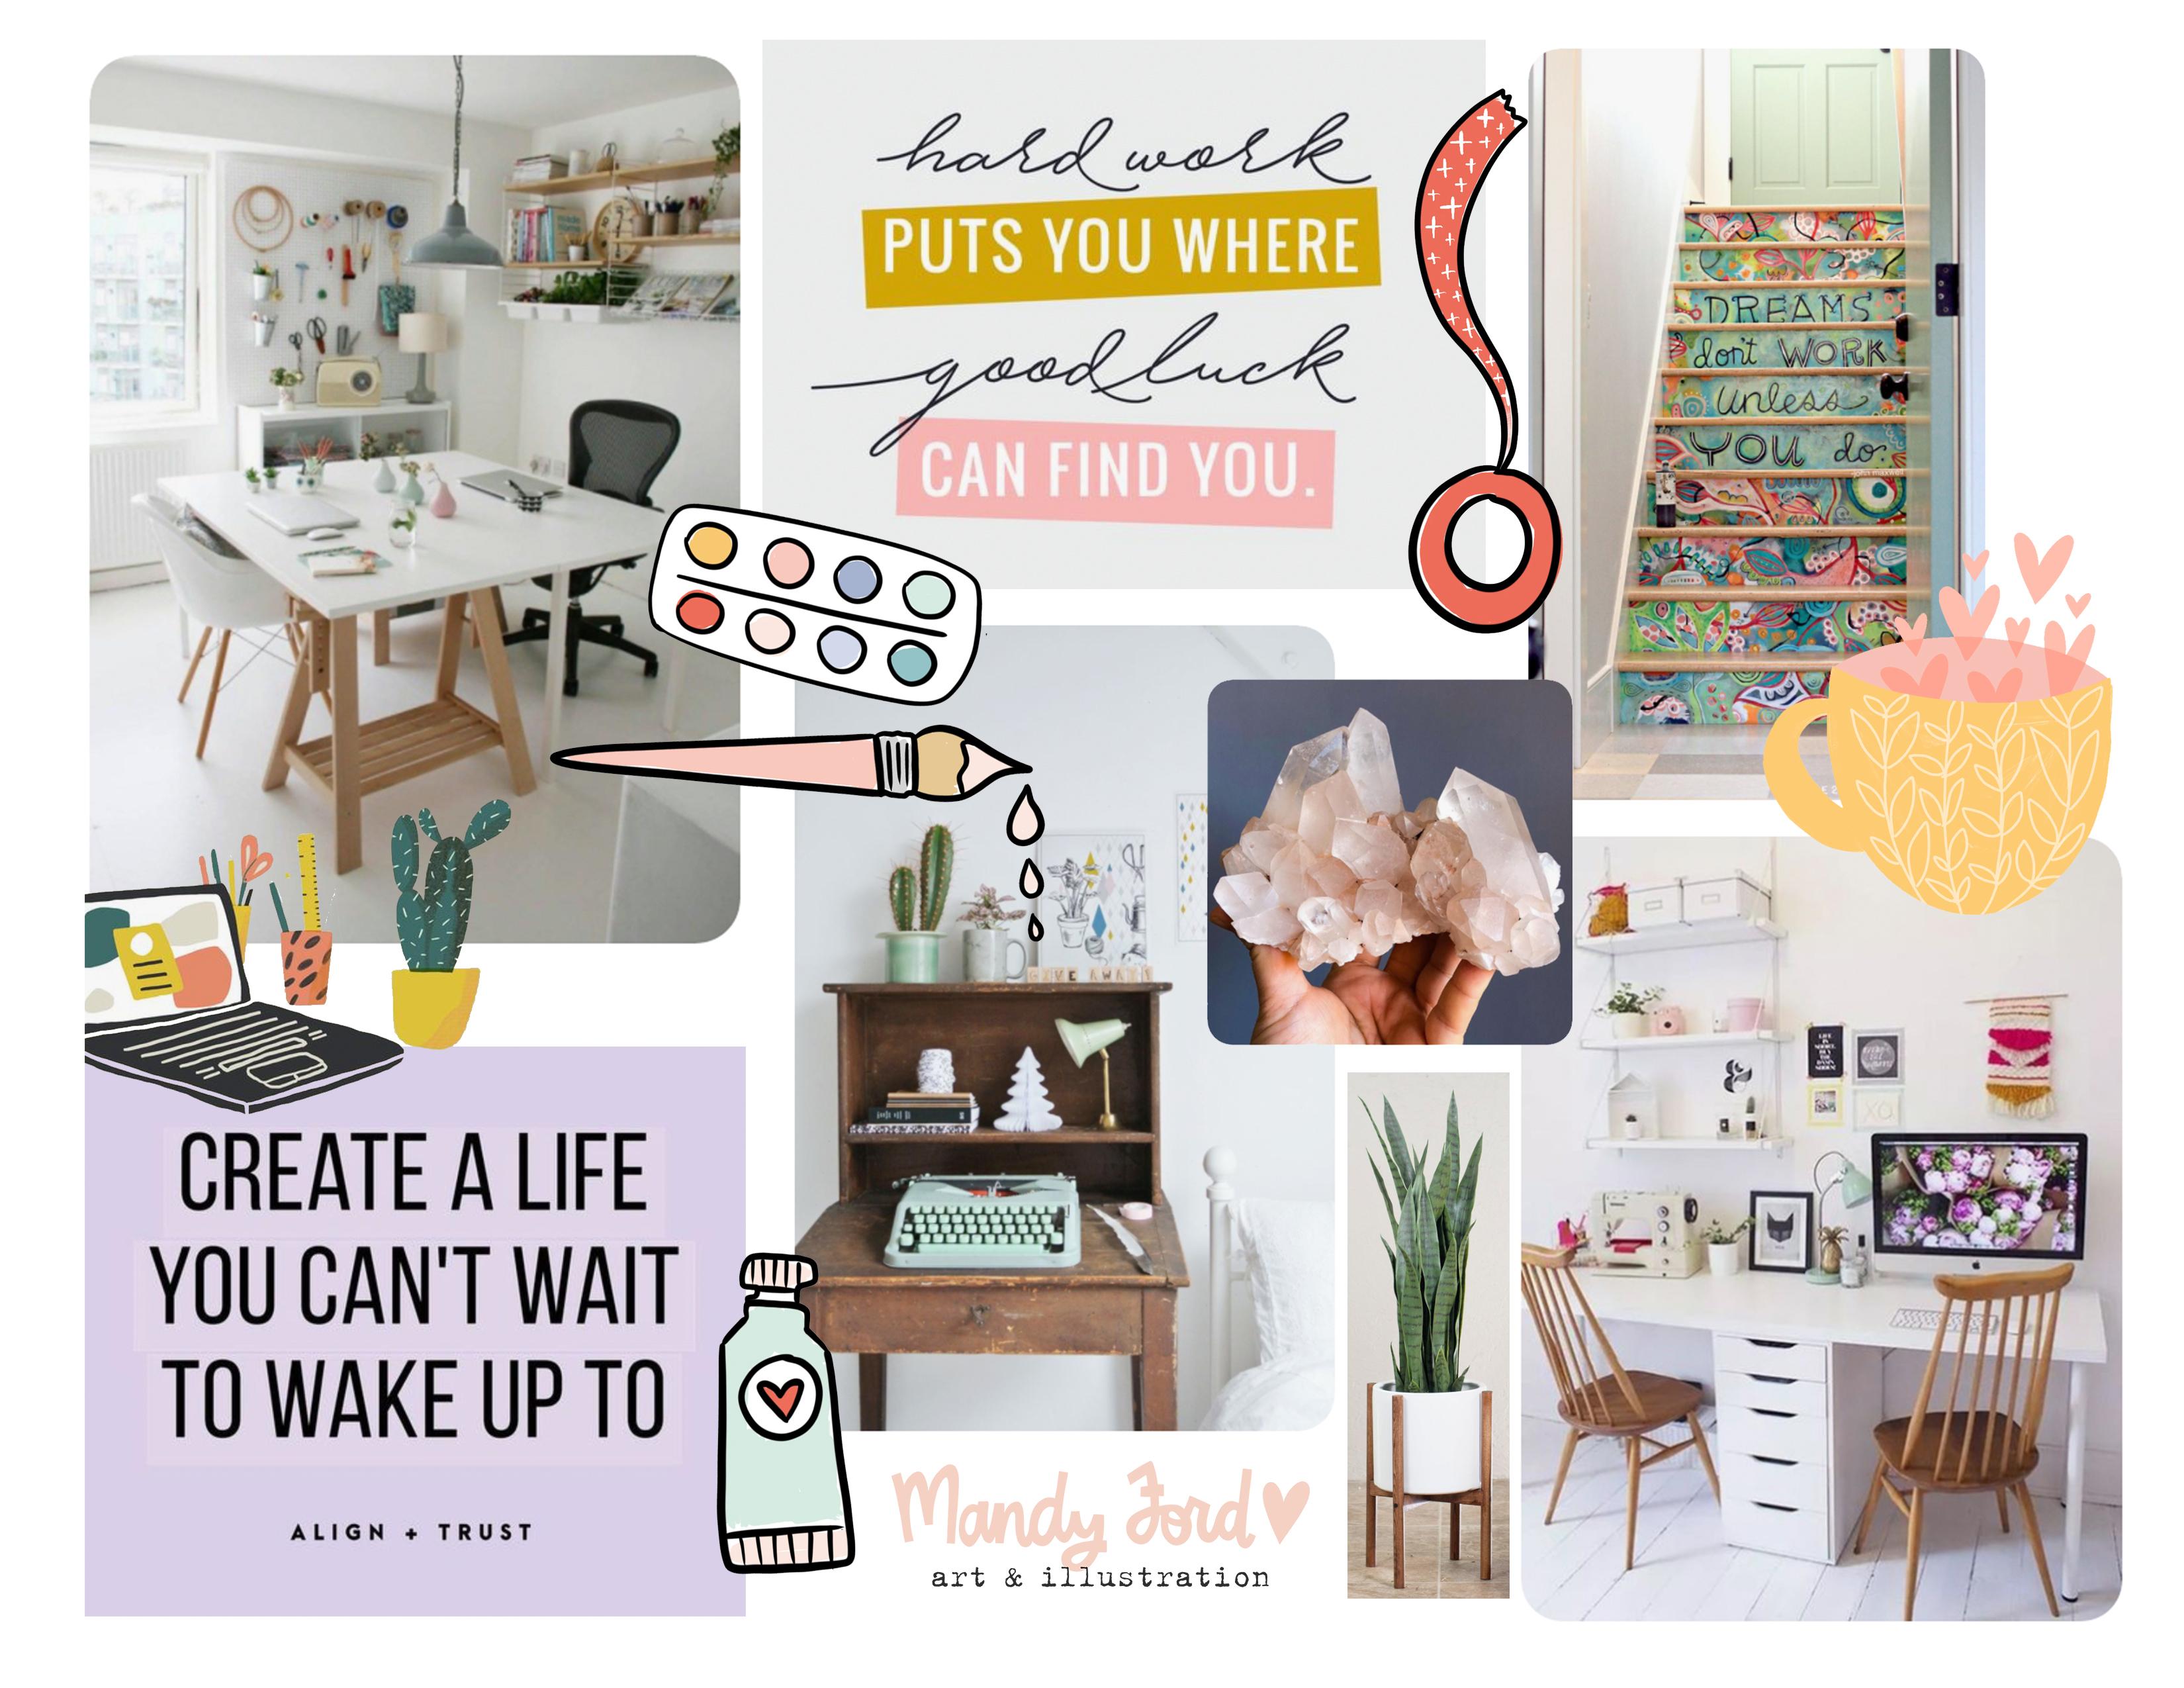
1. What is a vision board? : Hi there. I'm Mandy Ford. I am an illustrator, an artist and just a lover, of all things crafty. And I'm so glad that you decided to join me for this class, creating vision boards and procreate. I absolutely love making vision boards, and I also love procreate. I use it for almost all of my illustration projects, but it's also a great application to use for creating projects like vision boards. So in this class, I'm going to combine my love of those two things and show you how to do the same. So let's get started. So let's start by talking a little bit about what a vision board is and how you can use one . It's a place to gather ideas and inspiration. It's a place to dream about your future projects and goals. It's a reminder of what your soul wants that you can return to whenever you need. The reminder. It's a private only for you. Visual touch point for your deepest desires. A vision board is the place to dream big. Put it all out there, and most of all, have fun there. No rules and no limits. The supplies for this class are an iPad with the procreate app installed Internet access on your iPad and optional supplies are a stylist, like an apple pencil and fun clip art you can add to your vision board, so let's get started.
2. Picking a theme or direction for your vision board: and this lesson, I'll be walking you through how to pick a theme or a direction for your vision. Board some questions to help you choose your topic are what's pulling my attention right now. Is there a project I'd like to focus on? What part of my life would I like to cultivate a deeper vision for and what is? Bring me joy Right now. Ideas for your vision board include a dream job or career change, re envisioning a space in your home. Self care relationships, cultivating a hobby, a vision for your your head or a topic that's interesting to you right now. Like two of my most recent obsession, Czar Moon Phases and the India Graham. There's so many options you can choose from choosing something that brings you immediate joy. When you focus your attention on, it is a great way to find your topic for your vision board. For example, in this class, I'll be sharing to vision boards they created with very different topics. Want us for my dream, our career and the other is for a bathroom renovation. Take a few minutes right now to pause the class and write down ideas for your vision board , and the next lesson. I'll show you how to collect the images for your vision board. And here's a hint. If you don't already use Pinterest, you might want to start now.
3. Choosing images for your vision board: So now that you have chosen a theme for your vision board, you can start searching for images that you would like to include my two favorite places to find images for my vision boards are Google and Pinterest, so a Google search is super simple. You just type in your keyword search on your topics such as art studio or modern bathroom, and then you have tens of images to search through. Ah, Pinterest search is a lot like Google, but it's simpler, in my opinion, because you are saving damages in the APP. You can create a Pinterest board for your vision board, and that way you can go back and, um, find your images again and save them all in one place. I have pictures, sports for both of the vision boards I'm sharing in this class, one for my dream job and one for our bathroom renovation. When you start saving images for your vision board, don't worry about if they go together, you can save anything that speaks to you, and then you can sort all of the images out Later. As you start collecting images, you may notice a theme. Start coming together for example, this is a screenshot from my bathroom idea board. I obviously have a thing for round mirrors. You may also start noticing some more color schemes coming up in your images. If it matters to you on your final board, you can narrow down your images to moms that have a cohesive color palette. One important thing to note. If you were saving and using and other artists or photographers work for your vision board and planning to share it online, such as on your instagram or your Facebook being mindful of keeping track of their information, it's important to give credit to an artist if you share their work. Of course, it goes without saying that your vision board is only for your use and not to sell a reproduce for a profit. In the next lesson, I will show you the process for saving images on the iPad so you can add them to procreate and start creating your vision board.
4. How to save images on your iPad: and this quick lesson. I'm going to show you a couple ways to save images onto your iPad to use on your vision board. So the first way is to find images through a Google search. So I'm going, Teoh, open up my Internet browser and do a search for my theme, which is art studio, and I'm going to click on images and then just start scrolling through the images that come up and start looking for any photo that catches my eye. That is something that I think I might want. Teoh add to my vision board, and I found one here that I like so in a tap on it, and the first way to save it is to do a simple screenshot. So hold down the home button and the power button at the same time, and it will take a screenshot for you, and then it will let you crop it. So you just slide in the corners. Teoh the finished image that you would like and it will pop up and you can hit, done and then save the photos the other ways to tap on your image, to take you to where it is hosted. Um, usually that work and you can find your image. I had to scroll down a little bit here to find it. And then if you hold down on the image with your finger, it will, um, let you save it to your photos. This simple Is that so? That's two ways to save your images on your iPad from a Google search. So now I'm going to show you how to save them. Just from Pinterest. Some going to open up the app and I'm going Teoh, go to the search button and do a search just like in Google for art studio. It's gonna bring up lots of images to choose from. And I see one right at the top that I like some going to tap on that one. And just like in the Google search, I'm going to do a screenshot. Oh, no, I'm gonna save it to my board first. That's an important step. So I'm gonna save it to my Pinterest sport and I already created for my vision board. And then I'm going to do a screenshot holding down the home button and the power button at the same time and then it's going to show me my screenshot and let me crop the image down. And there's a couple little things you're gonna want to crop out that Pinterest added to the image there and then save it to your photos. And then another really easy way to save it is to tap on the three dots in the upper right hand corner next to the photo, and it will let you download the image. So that is a super easy way as well to save your photo for your vision board. So now that you know how to save images on your iPad and the next lesson we will be creating our vision boards, I'll see you there.
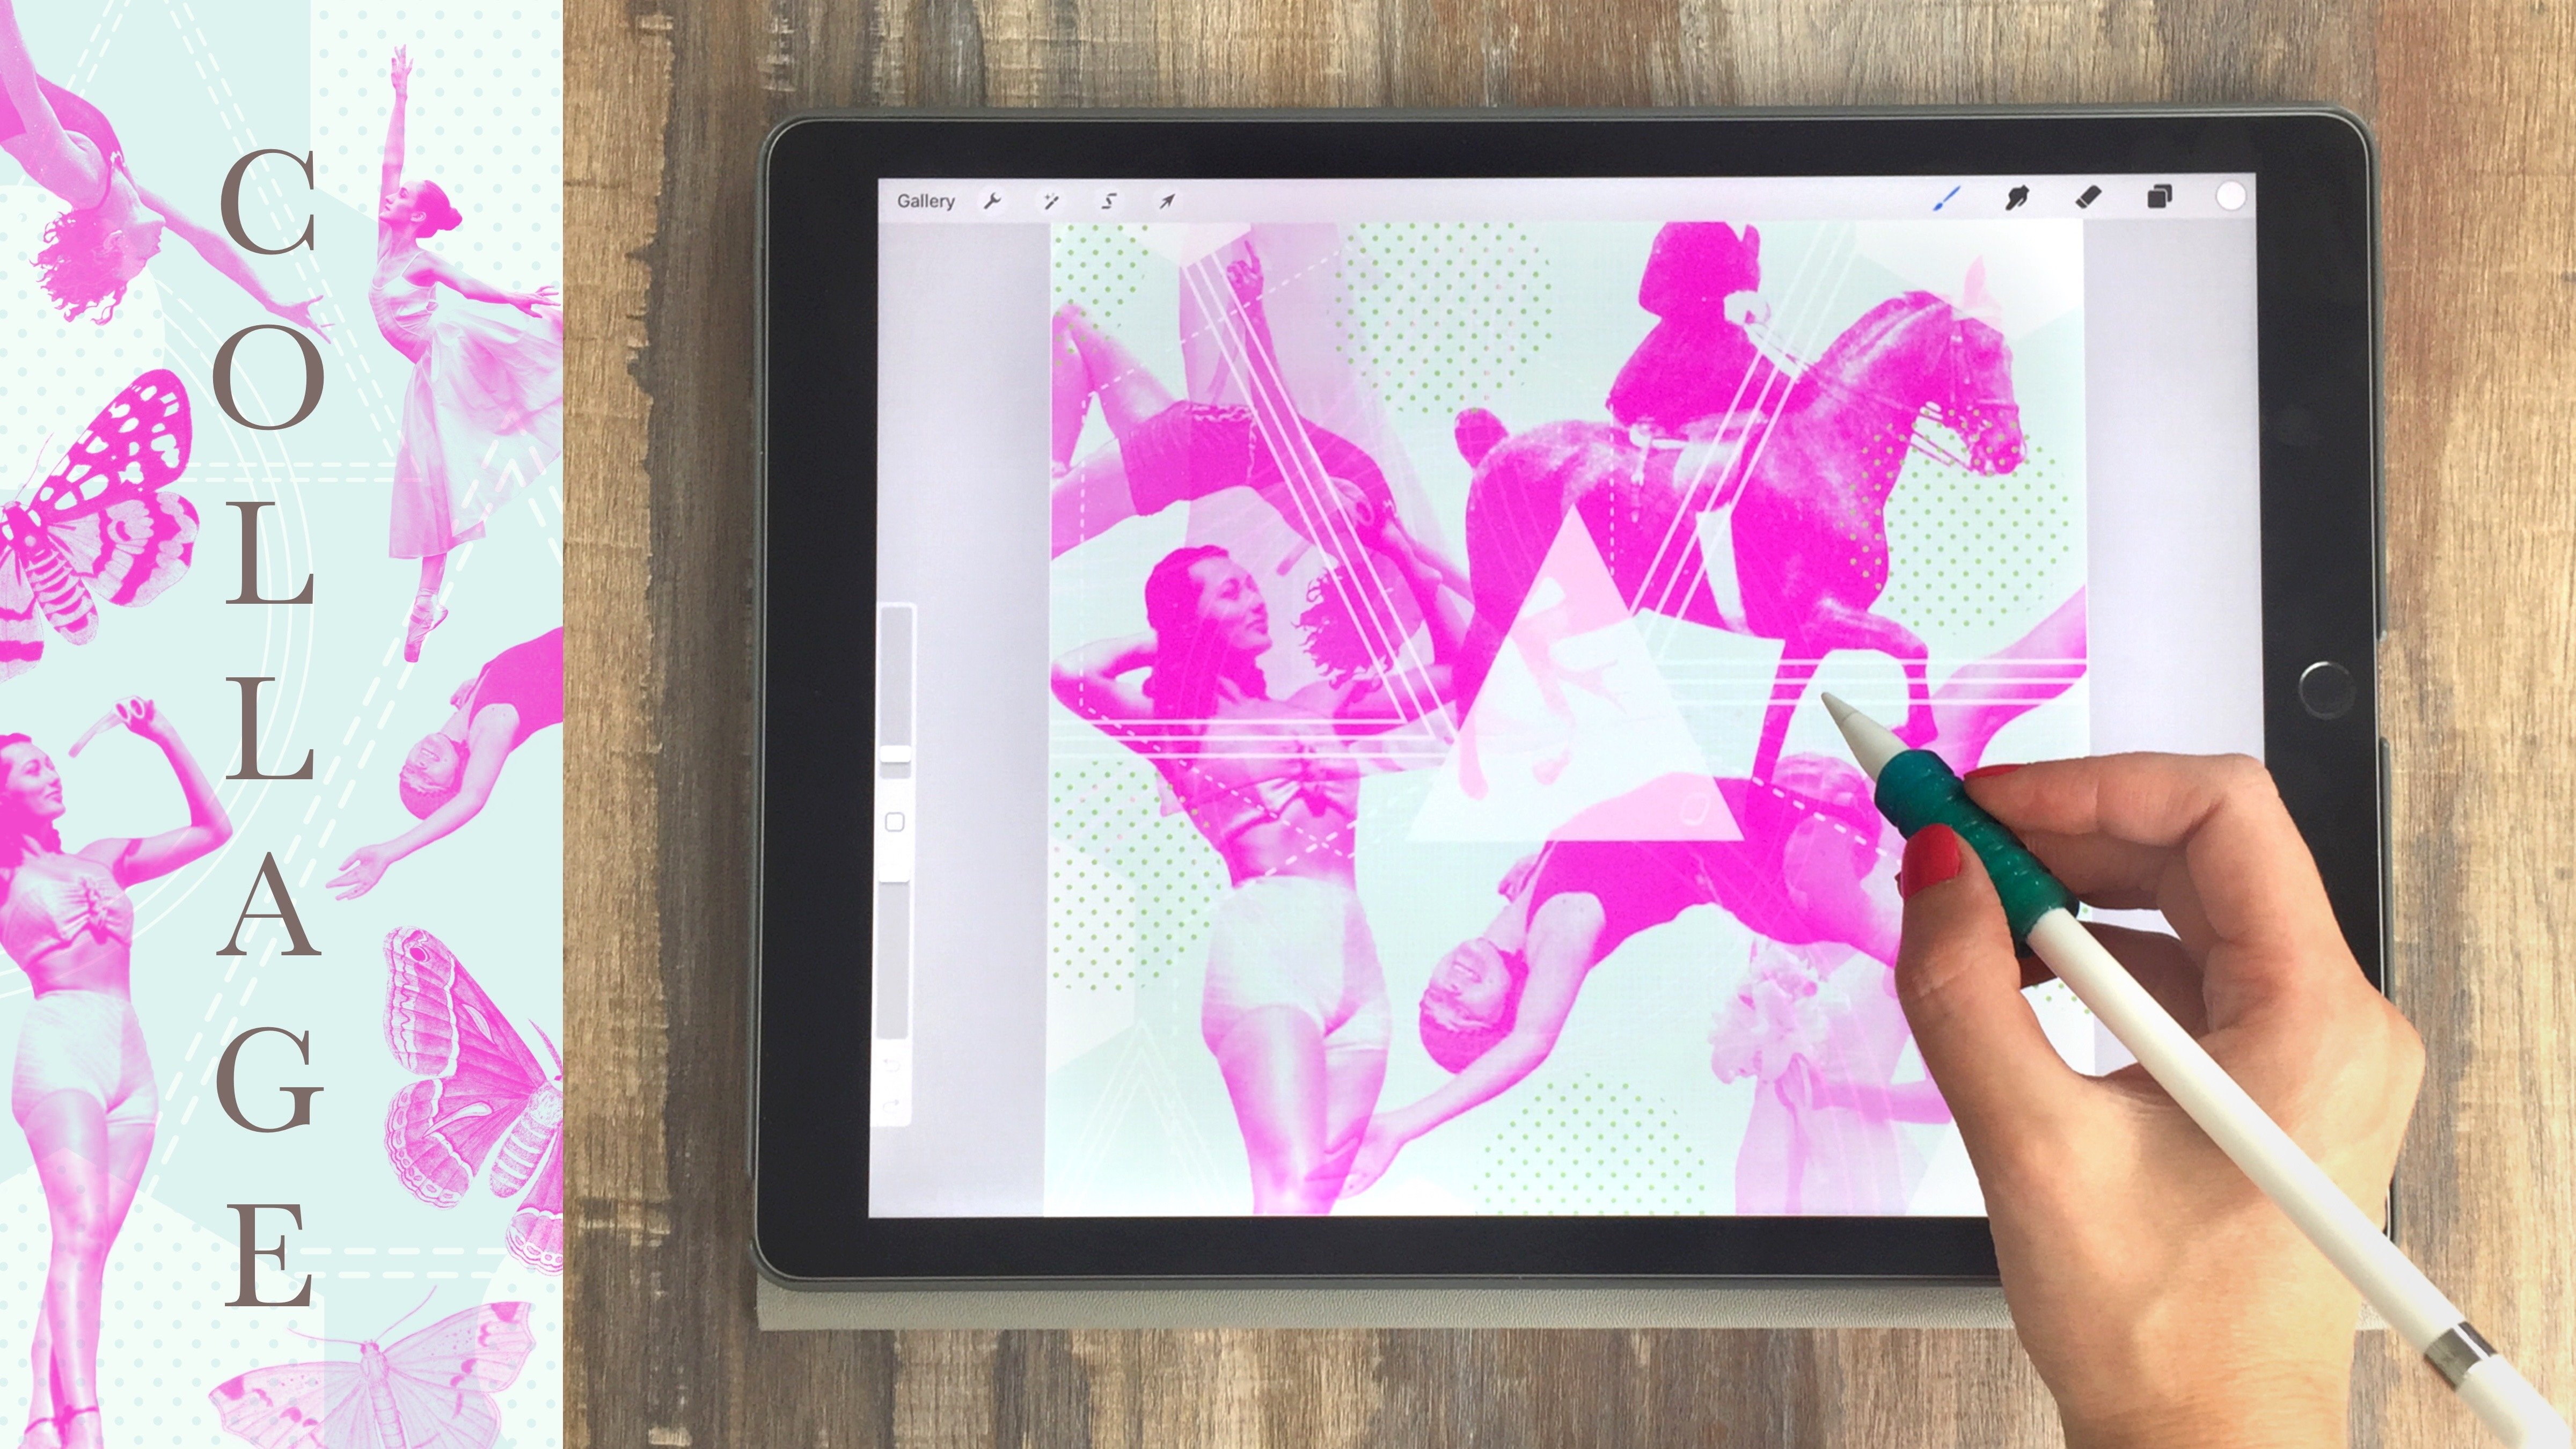
5. Creating your vision board: Now it's time to pull all of those fun images you've collected together and create your vision board. A quick note. We will only be using basic procreate tools to create our vision boards. But if you haven't used procreate before and you need a primer, there are tons of great tutorials here on skill share and other places like YouTube to learn the basics. With that said, Let's get started. Okay, so we're going to start by opening procreate app and hitting the little plus sign in the upper right corner to make a new canvas. And you can create any size you want for your vision board. I like to do an eight by 10 landscape. That's just kind of what I usually go force. That's what I'm going to create here, and you'll get this nice, big, blank white canvas. I'm gonna zoom and a little resume out a little bit here so I could see the whole thing, and then I'm gonna start adding my images. So how you do that as you go up to the wrench in the upper left corner and click add picture at photo and any photos you saved will be in your recent. So you're all photos at the top. But I have created a folder for mine for my bathroom vision board. So I'm gonna go to that folder and hear all my images. And unfortunately, you can't add them all at once. Or at least I haven't found a way to do that. So you have to add the more at a time. So I'm to start adding those one of the time here and go in, just tap on the image and allowed it there. And I'm gonna speed this up a bit so that you don't have Teoh watch the whole process for each image. And then once I get them all added here, we will get started on the really fun part of making our collage with all these fun images . Okay. All right. So now I have all of them. And if you go up to the upper right to the layers, you can see that each photo each images on its own separate layer so you can go through and you can see each one, and you can select each one separately to move them around. So for this vision board and for a lot of the ones I create. I like to have a good mix of different images. So for this one for my bathroom, I decided to have a few images that are of an actual bathroom. So, um, you'll see that one in the upper left and then this one on the upper, right? And then I have another one. Um, here. I'm just kind of separating them out so that I can see all of my different images. And then I have some things that are accessories. So I have some rooms. There's another one. I'm gonna zoom. Okay, I move over to the right, and then I have some things that are accessories. Um, like this cart like that cute cabinet. Um, and then here I have a shower curtain idea. Just actually, one of my patterns, which is makes it even more fun. Um, it's cute. Tapestry and a funding potted plants. You'll see this plan doesn't have a background. Um, I played around without a been photoshopped before I saved it and remove the background. Says something you can dio if you want to do that extra step, you can also raise backgrounds and procreate which I will show you in our next average and board. Um okay, so I also have this cute plant shelf is Well, that's all my images. Now I can see everything. And I can kind of start arranging things, um, in a collaged and make it look the way that I wanted to to look for the final vision board . So I've tried to kind of put the room images, um, separate from each other in different corners of the vision board. So I have this one that were left with a nice start. Great walls and I made a little bit bigger. I have this one on upper, Right? Um, that is a really pretty kind of bath tub scene with a plant shelf. Really? Creteil And then I have Let's see here. I've got this that you can't see right now. I need him with layers. So I'm going to hold my finger down and then move it up so it becomes one of the top players here. You can see it again. So this cute photo with the shelves and the fun lighting, I'm pretty sure it's for Michio. My favorite places to shop. Um, the card as well. So that card up to the top. Now, I'm doing some kind of accessorizing, um, of the plant over to the left here, and I want that to be in the front, so I'm gonna move. That one up is well, so now it is layered on top of all the other images. Then I've got this cute plant shelf as well. That need Teoh make space force. I'm going to kind of size down this Cherica an image a little bit. You want to be careful? You don't size things up too much from the original size. You could do it a little bit, but if you make things too much bigger than the original size, they could get a little pixelated. So you wanna be careful for that? Take this cute little cabinet and move that up in that white space there. It's kind of like, just a fun puzzle to move things around and figure out the best places to put them. So I'm kind of just fine tuning things a little bit of this size, that image down a bit, Gonna move this cute, um, tapestry. We being that piece which your super popular right now down to the bottom, next to the plant, going to move my little plant shelf here to the center. It's starting to look the way that I wanted. Teoh. I really like how this is coming together. So what else do I need to tweak a little bit here? I think I'm going. Teoh, take this image, Move it up a little bit to the right. So there's just a nice spacing between that and the top photo. In a move, the shower curtain went down just a little bit. Then let's see. I'm going. Teoh. Teik this car to make it a little bit smaller is a little overpowering there. If you notice I'm kind of making accessory photos smaller. Kind of like in real life. The rooms air are larger and accessory images or smaller on the move. The card up our that. Keep cabinet up a little bit and let's see here. When I was doing want Teoh move around or change a bit, I think I'm going to take this on this. Want to make it a little bit smaller, so I have space down here for this tapestry piece from the size down a little bit and move it down. Is there some white space around it? And this is looking really good. I think I am close to being done when I move this plant shelf over just a little bit. I like the lines on this one. I like that. Everything's kind of angular, and, um, spacing is kind of the same between everything. It's nice and clean. So now that I have all of that looking the way I want it, Teoh, I think I'm gonna add one final touch, which is some texts. If you go up to where you add your photos, you can also add text. But first, I'm gonna edit the text and change the pot. Procreate comes with all these fonts Now you can choose from, but I'm going to choose one that I added myself. This cute typewriter thought it's when I purchased and downloaded uploaded whatever myself , um, type in that the wording that I want to just dream bathroom. And then once you click out of the keyboard and and the arrow you can move it. You can resize it some to move it down to this empty white space and I'm gonna size it down a bit to fit, and there we go. So I've got my dream bathroom vision board. So next I'm going to show you a different vision board design with my dream job Vision board. Okay, so for this next division board, we're gonna start with the same eight by 10 landscape sized canvas, and I've already uploaded my images for this one. So we don't have to go through that for this vision board and you'll see for this when I have some fun Clip art's. That's a new addition that we didn't use in the last one. And these are all PNG files. Most of them are clippard that I illustrated, but one of them, the cute laptop kind of desk scene, is when I found on Pinterest and I removed the background myself in photo shop so that it's transparent behind there. Several excited to add clip art to this vision board. It's a really fun addition. Um, on top of the other images, I'm using this cute paint palette. Um, so anyway, I'm going Teoh, go ahead and go into my layers and hide all of the clip art for now and open up all of the other images. We're gonna start with those. So I've got a couple quotes and I've got some cute rooms, thes air, all kind of my dream job for professional artist vision board ideas. So, like in our last vision board, I have a few images that are rooms and then some that are kind of accessories. So we've got this pretty art studio room and upper left. I've got another one in the bottom, right? And those air kind of my anchors on the two corners for this vision board. And then I have this cute desk with a blue typewriter, which is one of my kind of wish list items. I would love to have a vintage typewriter, so I had to include that This great quote that I put in the lower left. It's a good balance for the other images you might see here than I have. I'm gonna move my cute desk over so we can see that whole image and size it out just a little bit. And I've got this other great quote that I'm gonna leave up here in the middle. I think that looks really great. That spot and then we're going Teoh, See, when you move up this plant, it was hiding behind all the other images. So I'm a bit obsessed with these midcentury planners right now. So I had to include one of those in this vision board is kind of a fun accessory, Some in a size that down just a little bit So fit, then I've got a beautiful crystal if you know me at all, if you follow me on mine, don't know that I'm kind of obsessed with crystals and rocks and gemstones, so that also had to be included. I'm moved it up to the front, and then you'll notice that this image has a bit of a whiteboard around it that I don't really love some to show you a way to delete that if you want to. If you go to the eraser tool, you can go in and with your stylist or even with your finger you can't erase. Excuse me can erase the border around it. Now, it's not gonna be perfect, but that does not bother me one bit. If you use photo shop, you can also go in and delete your background as well, but this is a really simple and easy way. Teoh. Take care of that. All right, so now that looks the way I wanted Teoh. I am going, Teoh, start adding in my clip, art. So I got this cute laptop kind of desk Sinop over here on the left. And I wanted to kind of look like it's sitting on top of the quote. So I'm gonna move that purple box up just a little bit, so it looks like everything is sitting on top of it. There you go. Going to add in my paintbrush. I'm gonna size it down just a little bit. Move it over. When it comes to look like it's dripping paint into the onto the desk there, I think that looks cute. And then, of course, if you're gonna paint, brush and paint, you need a paint palette. So I'm gonna put that kind of right above there and size it down a little bit. Us. Well, I've got this role of washi tape. Also, if you know me, you'll know I'm obsessed with washi tape. So weakness size that down a little bit and move it over here to the right and I also have this cute paint tube. Oops. Okay, so we need to choose the paint to. There we go. And that down the color matches perfectly with that cute typewriter. So I want to put that kind of close to the typewriter photo and then gotta have a mug. I love my coffee. So we've got to that mug that I size down a little bit. Um, yeah. Okay. So I really think this looks cute. I'm loving how it looks, and I'm gonna do a little more treat game, move that plant a little bit. I really like that. Now, I have one last finishing touch here. Since this is for my dream job Vision board, I am going to add my art logo. So I have that saved in my files. I'm going Teoh, search for it here and find it. My file. Same way you found your photos. You can go in and search for file as well. That's really large. Someone this size that down and add it there in my little white space that I left open. And there we go. My dream job was your board all finished? So now it's your turn. I can't wait to see your finished vision boards. Please share with me in the projects and next in the final bonus. Listen, I'm going to show you how to use the free clip art that I included for you.
6. Bonus Clip Art: If you would like to add clip art to your vision board, I have created some free PNG clip our files for you. If you go to the projects and resource is tab on the far right, you will see a Zip folder called Vision Board Freebies and the short lesson. I'm going to show you how to add those Clipper files to your vision board. So if you're using a Mac, the easiest thing to do is to download the Zip folder to your iCloud drive, and then you can simply open it from my cloud on your iPad. You can also email yourself the Zip folder, or add it to your Dropbox to access it. Once you found the Zip folder on your iPad, you will tap on it to unzip it, and then it will give you all of the PNG Clipper files. If you don't already have an application to unzip the folder, you might need to download one from the APP store. Once you have the folder ends it, you'll be able to see all of these fund Clipper files for you to use on your vision board. Okay, so I have my dream bathroom vision board open here, and I'm going to go up to the wrench and click on add a file. And it already has my freebie folder open here showing me all of this clip art. So all I have to do is scroll through tap on the one I want to add. I'm gonna add this pretty vine. And the nice thing about these is they're transparent, so you can see your images through the leaves, which I think is really nice as long as you have it as your very top layer. Um, you're good to go. So I'm gonna pick something else here. Think I'm gonna choose one of the flowers, and I'm gonna resize a little bit and probably rotated some here so that it fits in this spot right here. And if they come to choose this other vine and added in this white space, I have right here size it down a little bit to fit, so that looks good right there. Going and shoes. Maybe another one of the flowers and add that next to the other flower. I think so. We're gonna rotate that a bit, making a bit smaller. Not quite sure where I want to put this yet. That's the nice thing about it. You can just kind of move things around and see what you like it. It's kind of keep right there. And then I think I'm gonna go in and she is one more just to show you how everything looks on here back in. Think I'm going to pick the little group of three stars here and size it down and put it next to flowers. Groups of three always look nice, so I think that looks Yeah. I think that was key right there. So this is how you add the clipper. And I hope you have a lot of sign adding these special touches to your vision board.
7. How to use your vision board: So now you have a finished vision board. What do you do with it? There are lots of great ways you can use your vision board to keep yourself motivated and inspired and encouraged. So one really simple way is to save it as a J Peg file and use it as the desktop screensaver on your computer. I've been doing that for the last few years, and it's great. You can also print your vision board. He compared at home. Or you can send it. Teoh Ah, local printer online printing option if you can't print at home and once you have it printed, um, one great thing you can do is hang it up. I have mine hang up over my desk. You can hang it in your kitchen and your bathroom wherever you need some extra inspiration . I also like to print one and put it in my planner. You can put in your plan or your journal or anywhere that is private for you, but also place that you can access every day and get inspired by it. Thank you so much for joining me for this class. I hope that you are inspired and encouraged to create all sorts of fun vision boards, and I can't wait to see what you've created
 Mandy Ford, Mandy Ford Art & Illustration