Transcripts
1. Introduction: Hello, My name Johanna and I am a most the self talked botanical on natural history illustrator In this class, I want to show you how easy it is. Teoh illustrate your very own mushroom using watercolors and wash. So I really hope you join me in the class on that. You're curious about wonderful world, so there are a few things that you'll need. One. Some article, a paper hot press is best. But if you have something else than just use that Cem paintbrushes, mortar colors and some wash By the end of the class, you'll hopefully no house to illustrate pretty much any mushroom on. And it's so know little bit about because mushrooms are very amazing. Did you know that they are actually more closely related to us that the Ark two plants
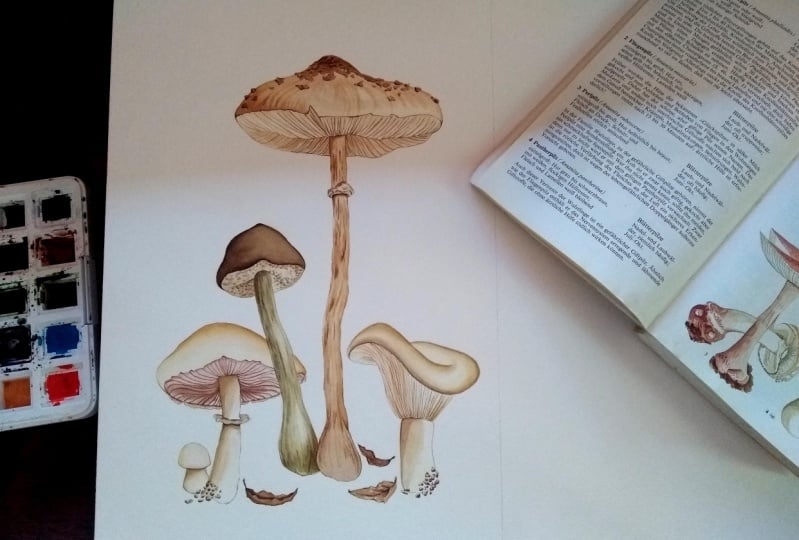
2. A Little Bit About Mushrooms : before we start drawing and painting mushroom, let's look at what it actually is. If you have seen a mushroom than you've probably seen something along these lines, they come in a new, incredible amount of different shapes and forms. What we call a mushroom is actually a fruiting body of what is known as a fungus. Andi. What seems to be the root is known as the mycelium. Basically, the mycelium is the constantly expanding and growing fungus. Many fungi in the forest breakdown, deadwood, leaf litter or even dead animals. So that's where the mycelium would be. You can compare it to a fruit tree, the mushroom being the apple and the mycelium. Being the apple tree, like the apple has Appleseed it. The mushroom has spores that come out of its gills. Although they're not the same thing. They do aim to create either a new apple tree or a new fungus somewhere to reproduce. Typical mushrooms have some recurring features. They usually have a cap, some gills stem a base and most importantly in my Serie um, so now that you know that a bit more about mushrooms, you can look for these features when you were illustrating one yourself
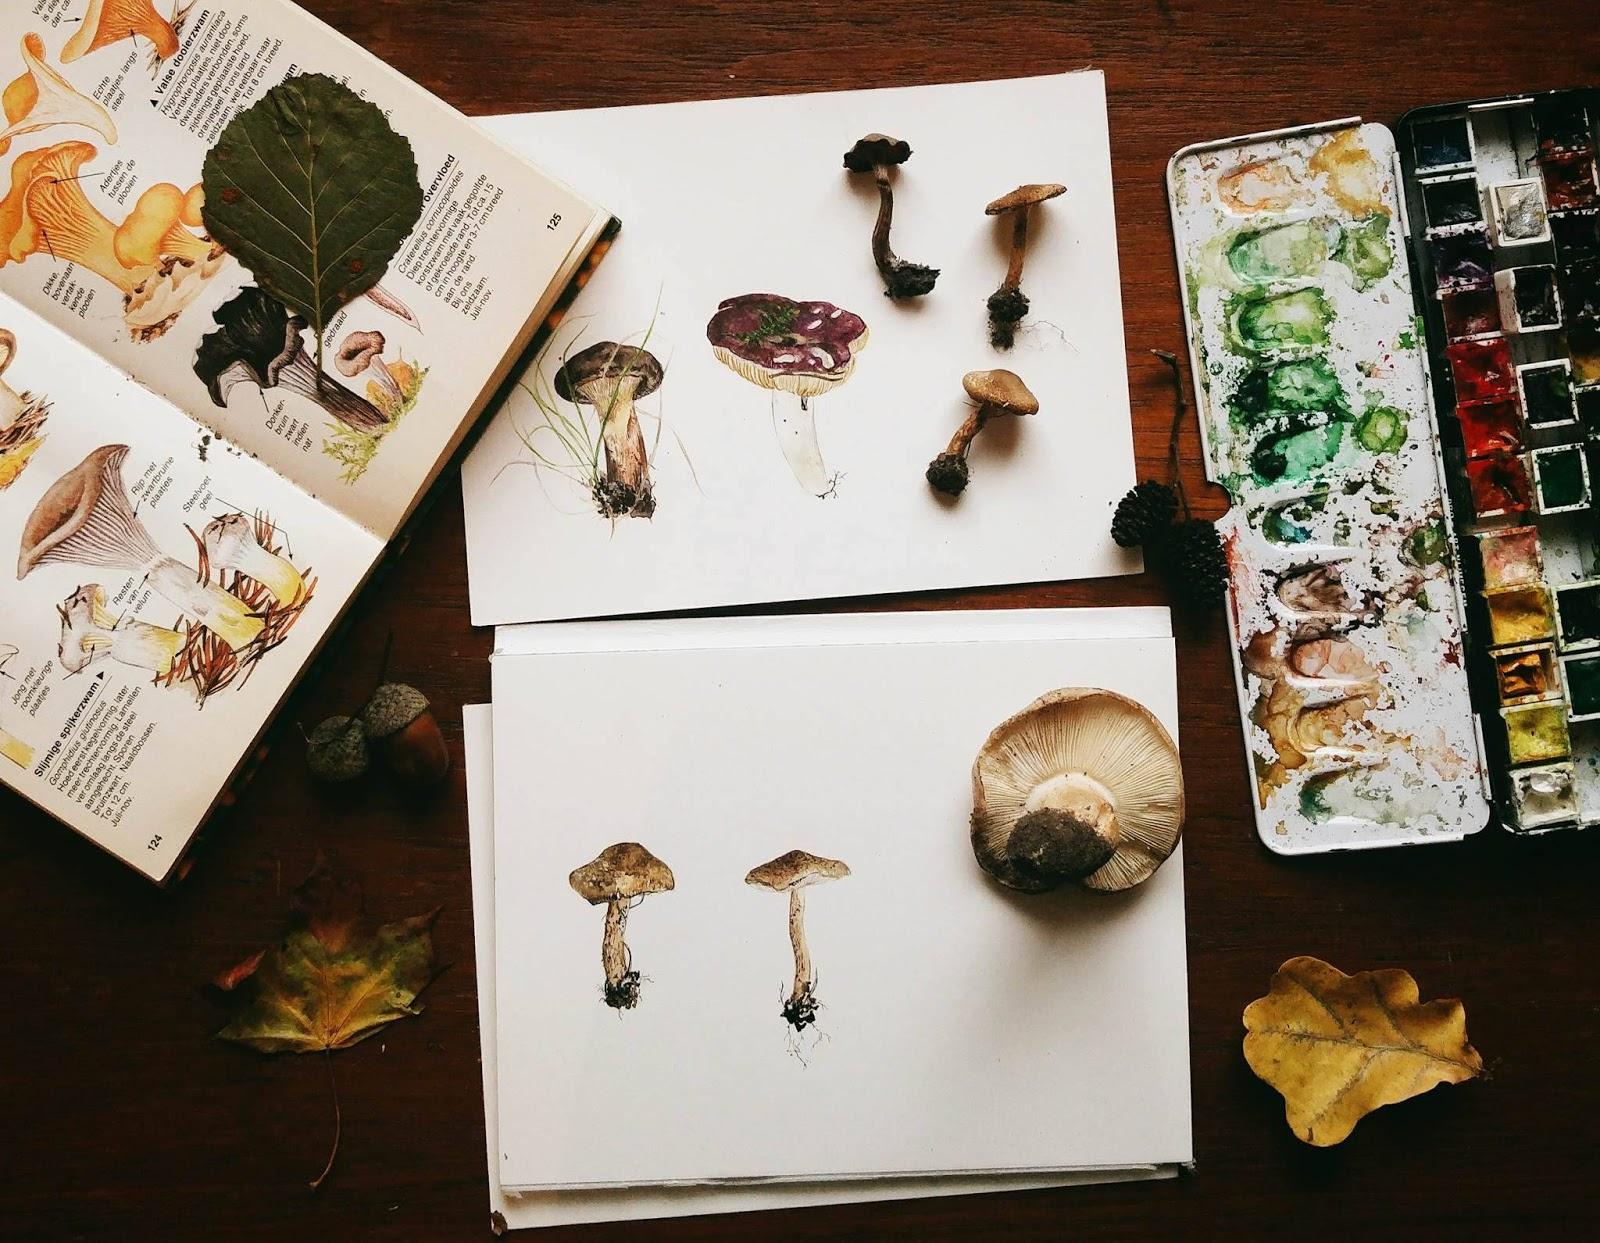
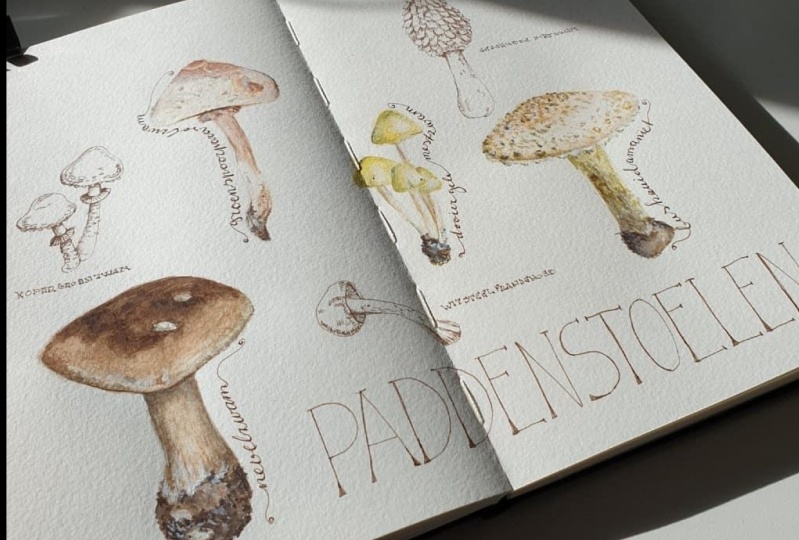
3. Sketching Your Mushroom: Before we start drawing, you need to find reference for inspiration. There are some amazing books with great photographs and illustrations of mushrooms out there, but if you don't have any of those that worry, you can find a lot of great photographs online, too. If you choose a photograph online, make sure that it is quite a high resolution image so you can zoom in and kind of see the textures and details in the mushroom because you will need those in later stages. If you do want to get your hands on a great mushroom book, here are three that I highly recommend. They have either great illustrations or great images in them. For this lesson, you need paper pencil on a razor. I like using a put to your razor. But if you don't have one, don't worry. Just using normal. Also, depending on how confident you are in sketching, you might want to use some tracing paper. Now you want to start sketching. It sounds simpler than it is, but essentially, this is all about observing carefully. Take your time. Look at the mushroom you've chosen to droll, and if you were having difficulties genuinely just use tracing paper to trace it once, turn it around trace of the second time and then put it on the paper. You wonder. Transferred onto its a super simple for says, you really don't need to be ashamed if this is what you're doing. For now, you need to kind of practice the shapes of a mushroom. If you're just starting out, take your time to get a sketch like maybe practice a few shapes and different mushroom types. Put on some music or a podcast. Once you're happy with the sketch, a new feel confident enough to proceed to the next class. Then I'll see you there. Good luck and have fun.
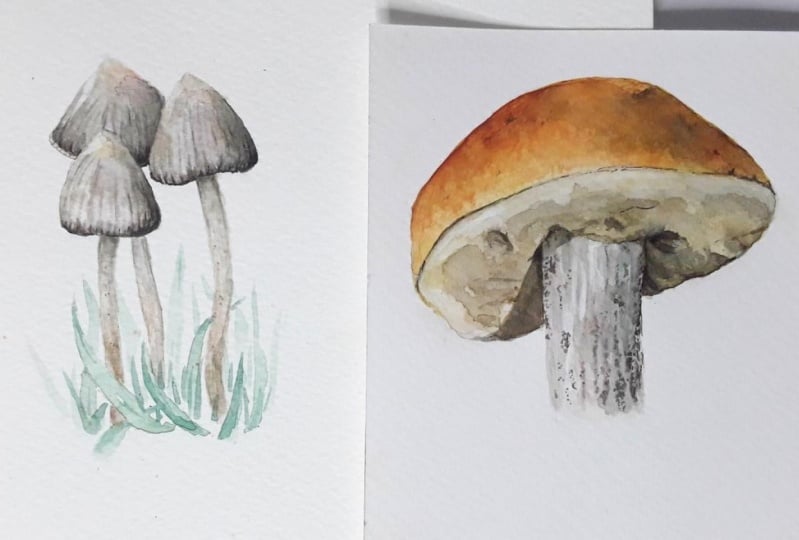
4. Adding Layers : Now it's time to get the table set up. You need some tissue paper water. You're to color squash and paintbrushes before we get started on the mushroom. I'd like to quickly explain how to move watercolor on a page that the brush into water, add some paint to the paper, then dab the Britain water again and then onto the tissue paper so it isn't too wet when you smoothed over the paint. Repeat the process is many times it's needed. Experiment a little, see what works for you tried to find an underlying color or tone in the mushroom that you chose. In my case, I chose a light brown or a CPO sort of color. The most important thing is that you do not use a lot of paint at this stage. These watercolors only and keep it watery. We want to create depth and dimension, so make one side a little darker than the other, even if it's only ever so slightly. It's very important that you don't just start feeling the whole sketching. See how I left the left side lighter in the right side, darker. The middle part is almost without paint. You can practice is a few times until you get the hang of it. Once the paint dried, I sketched in some little details I wanted to include. This isn't necessary but very helpful to me. So give it a try if you like. I continue to add layers of paint while sticking to the same principle of keeping the right side darker than left. While it was drying, I started to add the soil crumbs of the base. It's basically just dabbing different shades of brown to black paint. And if you don't like something you painted, you can actually remove it. But only up to a certain extent just played dabbing a tissue paper on it. Obviously, you can't do it repeated amount of times, but while the paint is still wet, it works pretty well again. Take your time. Enjoy the process repeated this many times is needed and try different mushrooms. Just experiment with techniques. When do you think you're ready to add details? Continue to the next class. I hope you enjoy
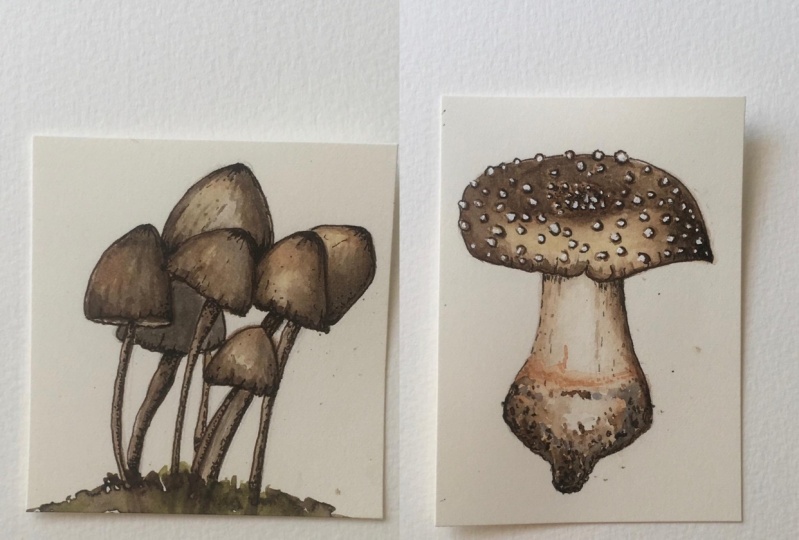
5. Adding Details: At this point, we're going to add little details. Details can be added in many ways. I'm illustrating am Anita mushrooms, so I wanted to get the spacing of the white dot Sit out. But if you're painting another mushroom, you might just want to experience with the little dots and maybe emerging different colors , maybe even lines. Color matching is quite difficult, so don't be too worried if the colors don't match perfectly. It really comes with practice, and even I'm still learning it. Um, and I've been painting for over five years, so really, just take it easy. Adding the really small and tiny details is best on with washing a small paintbrush. This part is the one that will take most time on patients while adding the lines dots in different colors. Make sure to try and keep that depth and dimension of your mushroom create a contrast and outlines and parts of it trying them outlined the parts and the right side, the darker side that is a little bit more than the ones on the left hand side. In my case, why quash is perfect for the use of white spots on this mushroom. It doesn't blend as much as watercolors and to give the spots a bit more of a realistic look. In contrast, I circled them with dark lines, and it's like AG more details. Mushrooms start to look more and more like an actual mushroom. Really, Do not underestimate the difference. A few small lines can make, uh, again do this for more than just one mushroom practice and enjoy the process of adding details. Observe carefully and be patient. Listen to the music. Put on a podcast. Before you know it, you will have a lovely illustration. It's all about experimenting, just adding all those lines, dots, little bits and bobs.
6. Conclusion: Hi. Thank you so much for joining me on this class. I hope you had a good time on that. You now know how to illustrate mushrooms. Let me know what you thought. Eso I can improve from the next class. And please, if you feel like it share results of your own painting, I'd love to see them, but obviously that's no obligation. You can do whatever you want. Yeah, I just wanted to say thank you on good luck with everything else and yeah, motions are amazing by, - uh
 Johanna ✳ Foraging Gardener, Artist