Transcripts
1. Introduction: Do drawing, animation,
painting, music, and you want to share your
knowledge as a video. In this class, I will
show you everything I do to make video tutorials
and online classes. I'm Baja Ma Serb and
I've been creating videos about animation
and drawing since 2015. I'm also the co
creator of Calpeg, our two Animation
app for iPad Phone, and I create all
the video tutorials and the advertisements
for those applications. I also do videos and
live streams about the creation of my different
artistic projects. The main one at the moment
being my animated short. Over the years, I've tried many techniques and many
ways to film and record my process and to
explain how to make art projects and also
how to talk to a camera. You're going to learn how I'm currently creating my
videos and classes. Making videos to share your
artwork is to me the best way to explore different kind of
techniques in video editing, in recording, and also know better about
how you make stuff. Because explaining and teaching can also be a way to learn. In this class, I will talk
about the equipment, also, the preparation before shooting, the shooting and recording itself and a bit about
editing at the end. Hope you will learn many
things in this class and that it will motivate
you to create your own. Let's start with a
bit of writing tips.
2. Writing: You know that you want
to make tutorial, a video about a specific project or a specific way
of doing things. But you have to define
what you want to explain exactly and how
you want to share it. I advise to take notes about
what classes you want to do, what video IDs you could
make or just a question. What would have been nice to know before making my projects. That's the kind of context
that can be good for a class. In my example here, I would
have loved to have a class talking about everything from start to end about
making videos. Once you have chosen
an ID for your class, you have to structure
with different points and define the order of
what you will talk about. Case here, I want to talk about the writing because
that's the first step. Then I naturally
go to equipment, then to the preparation
of the shooting, then the shooting itself, in the order of production. And the last advice for writing, let it sit for a while,
for example, a day. Go back to it and see how
you can improve it in a way. Change the order of ideas, just add a few notes in it. I advise not to write everything
sentence by sentence, but just having main
points that you can look at and then talk on it. For example, here are the notes I have for
this part of the class, a few points, and then I
just talk and talk and talk. Now that your class is written, let's talk about the equipment.
3. What to film: To define your equipment, you need to know what
you want to share. There is many different ways to just talk about your work, so we have to choose. This will guide
how you will film. You can film the process
or screen capture without talking and then making a face camera like
here or a voice over. You can film the process with
explanation with the voice and then do camera for other
parts of explanations. You can film
everything all at once to have maximum flexibility. That's what I do, but it's also because I have two cameras. For my videos, I
film myself here, the iPad or the
sketch book here, and I also record the screen
of my iPad of my computer. If you have only one camera, you don't have the
possibility to do everything at the same
time, but that's okay. You can just do
with one camera and then do it again for
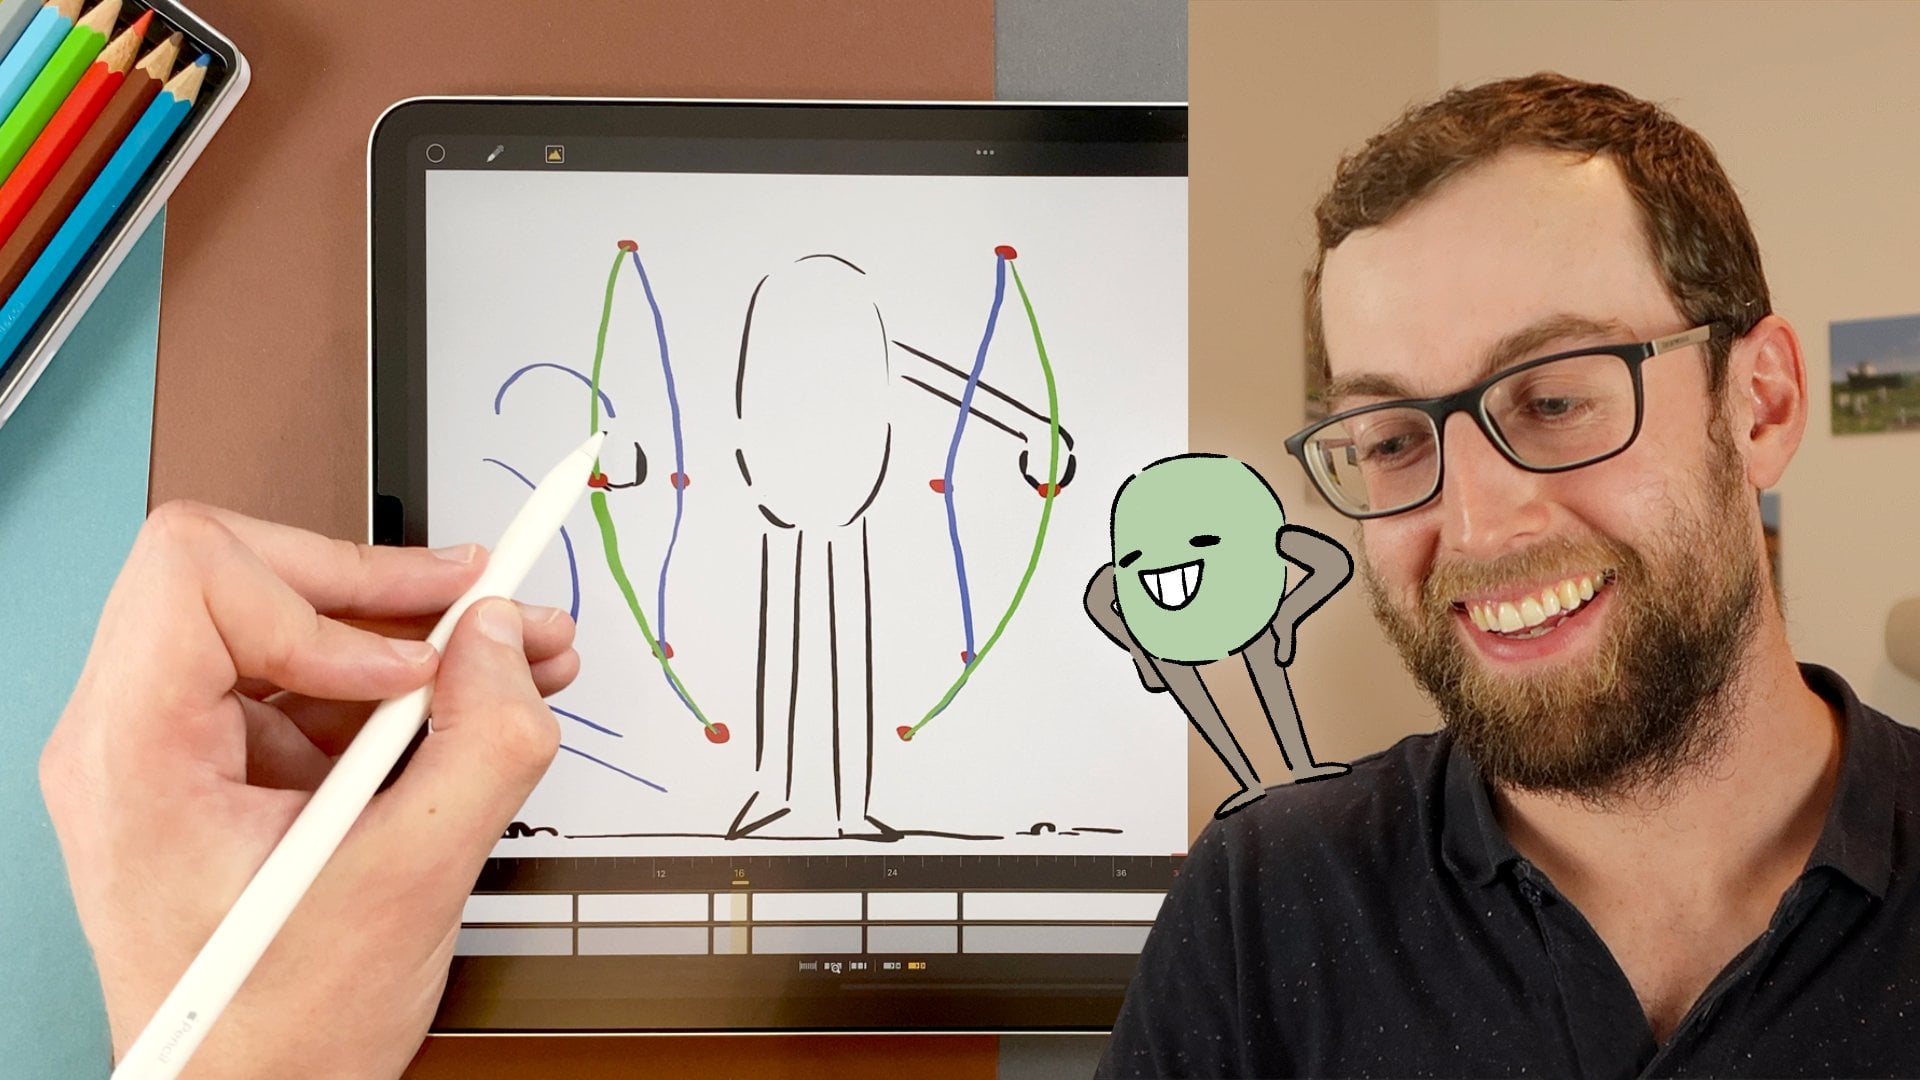
the base camera. It can totally work. You do drawing, painting,
music, animation, I advise you to record
and film when you do it and have the hand doing to animation the drawing
in front of the camera. I think it's way better to
see the artist doing the art. To see the gester
it will also be easier to just show some
stuff with the finger. So if that's a
possibility for you, I advise strongly to record with the hand doing
what you're doing. And now let's talk
about the camera.
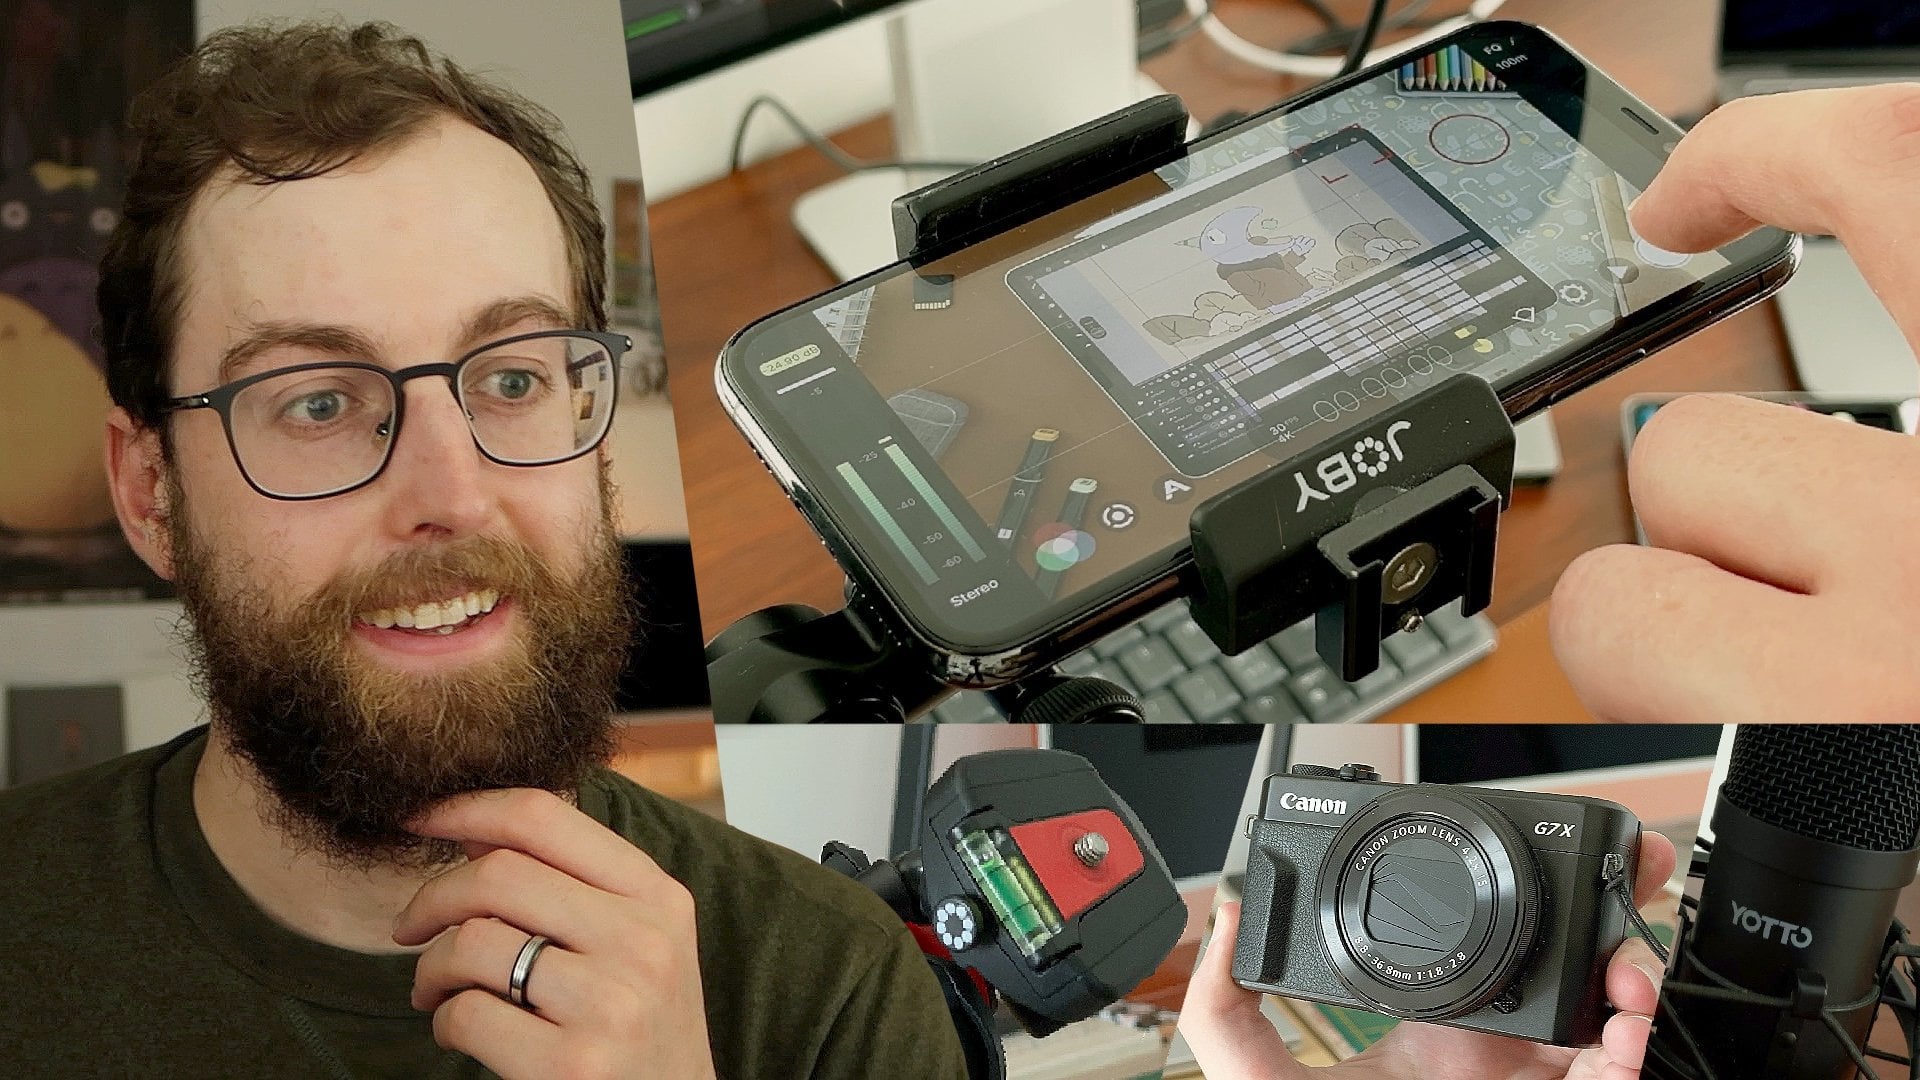
4. Camera: Regarding cameras, I use
two different cameras here. The one I have in front of
me is a canon d7x from 2016, and I have it since 2018, and I also use an iPhone
11 pro from 2019. I prefer to tell you how old are the devices because
that's also a point. My cameras are five
to 6-years-old and it's okay to use
older cameras too. The lighting, the camera angle, the setup in general will increase the quality
of your content, even if you don't have the best quality within the cameras. In my case, my phone
can film four K videos, but the camera here can't. Here it's only full HD. But that's fine for
a video like this. You don't have to
record everything in four K 50 frames per second. Take your phone,
any camera you have and start testing
how it can look. Another important point is
the microphone for the audio.
5. Microphones: Sound is very important in
your class and in any video. You have to be
clear and audible, and the cliche sentence is real. You can see a poor quality video with a great sound.
It would be okay. But a great quality video with poor sound will be unbachable, or unhearable, in that case. You can find different
types of microphone. I don't go into the complete details in
the techniques here, but you can use the built in
camera or phone microphone. Nowadays, you can use
different tools to improve the quality of
the sound afterwards. So maybe the phone microphone
would be okay for this. But if possible, use an
external microphone. It can be a la vale
microphone that you put here, and that you plug to your phone, your computer, or
a voice recorder. Or you can use a
stand microphone. In my case, there is an arm located on my desk that
I can move around. For me, if you don't
need any movement if you don't shoot outside, that's the perfect solution. In my case, it's a
really cheap microphone from the brand Yuto. I got it for around 50 euros, I guess, a few years back. Bit low volume by default, and I don't have
any settings on it. But when I boost it afterwards,
it seems to be fine. And to record your audio, you need to have a
software, an application. It can be the voice recording or the voice memo on your phone. If you don't use your phone
for recording the video. That can be completely okay to record with a camera
like that and have your phone on the table with the microphone plug to it. You can also record
with the software like Odacity, which is free. In my situation, I use
logic pro because I also do music and I wanted to have
a more complete software. But dacity can be a great
tool to record your audio.
6. Screen capture and video editing software: Regarding screen capture now, because if you do animation, drawing, painting
within a software. The best way is to film you
while you're making the art, and also record the screen of your computer
or of your tablet. On the iPad, there is a built in recorder that you
can use anytime. That can be a backup solution if you want to be sure that
you have a recording. On MACOS, you can
use quick Time, that can be a screen
recorder application too, and on any computer,
you can use OBS, which is a free
recording software, that can also be used
to do streaming. And there are probably other screen capture apps
that I don't know of. Ing and editing software will be an important part at
the end of the process. You can find many different
editing software. In my situation, I do
that on Final Cut Pro, but you can also do it on
Davinci Resolve on premiere. Luma fusion is a great tool, too, especially on
tablets and phones, and you can also use some free
software like IMV CP cuts, and Davinhi Resolve has
also a free version. Don't worry too much about the editing software because when you do a class like this, there is no special effects
and incredible transition, for example, I prefer in my
situation to make it simple. Any editing software
should be okay for that. Now let's talk about
stabilizing your camera, so having a tripod.
7. Tripods: Over the years, I got
different tripods, and I kept all of them, I think. And I now work with
three different tripods, which is not necessary. You can have one and it can work well if you have
one camera only. I have a small tripod like
this from the brand Jobi. The main advantage here is
that it's small and flexible, so you can attach it anywhere. If you want to film
from high level, you can just fix it on a chair. I also have a medium tripod, which I call medium because
the other one is huge. That's the one I'm using here. That's a classic tripod. I can make it high enough
to shoot anything. I can use it outside,
for example. To me, the main tripod I use for the tutorials is a huge one. At least it's the
largest I have. The main reason I
have it is because I can set it to
horizontal position. That way, I can easily film
from the top of my desk and having the camera right
above the object I film. It is the most expensive
tripod I have, but to me, it's really important
to have it because I record tutorials
basically all the time. But if you want to achieve that setup with the
cheap alternative, you can just put a
chair on a table, fix your jobby
little tripod on it, and that can be a nice solution. That's what I did here in
this video, for example. Let's talk about lighting
and how you will be seen.
8. Lighting: Oh. Let's talk about lighting. For many years, I just had the natural
light to work with. I just worked in front of a window or just next to window. Recording outside is also a nice way to get natural light. Well, of course, it's a bit
more complicated if you want to make a class
about drawing and so on. But natural light is moving all the time. You
can have some clouds. You can have the sun going way
too bright at some points. I had many problems
with that because I had many different lighting
within the same video. That's a possibility.
You can just wait for the lighting
to be okay again. But if possible, I advised to shoot in a completely
closed setup. My window here is
completely shut down. Use lighting spots on the side. Those spots are from AMZ deal, and they are pretty cheap. I think for 50 euros,
I got two of them. There is no special settings. There is no a different
color for the light. It's only white light. That's it. On intensity.
I have two of them. Sometimes I only use one. For example, here, I can
just close it here and here. You can see I just
have a desk lamp in the background to eliminate
a bit around the face. With one here and with two. I think that's a good
simple setup for lighting. If you only have natural light, it can be a bit more tricky, but you can also work around it. What I call background is
simply what's in the back here, so having a nice setup and
accessories is everything I put around the tablet in my situation to make
it nicer to look. It can be a desk mat, it can be a keyboard, it can be sketchbooks,
sensors, markers. I also have some sheets with
different patterns on it, different colors, anything that can add some life to your shot. Once again, you can just pick different things
you have around. I'm sure you can already make a nice setup
with what you have. Now let's talk about
the next section, which would be preparing everything and setting
up before shooting.
9. Prepare before shooting: Oh. Now you know what
you want to film. You have to set up
everything and be prepared before
starting recording. In my situation, I film
everything simultaneously. I prefer to do it
that way because I have one block of explanation, and there is no
separation between explanation and
showing the work. Even if I can make some
mistakes and there is the power of editing
so I can cut silences, hesitations, and just make
it more dynamic and clear. So it's almost like I did
a demonstration in live, but without the
pressure of live. We have two shots to
set up in my situation, the first one being the
desk with the iPad. It can be a tablet, a skate
book, whatever you need.
10. Filming the desk: To film my desk. The first step is to set up the tripod and place
the camera above. Here, I use a large tripod,
but if you don't have it, you can just put a
chair on the desk or on the table and add a
small tripod on it. I use the merge up
on my iPhone to set everything
straight regarding the angle of the camera. It has to be just above the tablet to have the
focus on a straight plane. If you film a graphic
tablet which is tilted, you will need to tilt
your camera also, just to align with the
screen orientation. Record with the phone, you have different choices of apps. You have the basic camera
app of your phone and also more professional apps like Pi or Black Magic camera. Since recently, there is
also a final cut camera, but I didn't try it yet. In my situation, I
currently use PI P, and Black Magic is also a really nice way to
do that because we have to be able to shoot while having a locked focus
and white balance. Also want to choose the ISO, the aperture and everything you need to check to have
a nice looking video. I also shoot in log to have
all the control possible over the different colors contrast situations in
the post production. On more recent iPhones, you can also do that with nel cut camera or
with black magic. But in my situation, the log
is only available on film. Center the iPad and
make sure that there is enough space at the top and the bottom to make a
square ratio if needed. Now I want to make a setup
that is more joyful. My main tool for that
is patterns on sheets. Here I will choose that one
and set it on the right. Be sure that it's
larger than your frame, so you don't see a
border in your video, and now I will add
different objects around. Like those sketchbooks
here, for example, at the bottom right, I
will put a notebook there. I add some markers pointing
toward the tablet, and I also like to
use color pencils. And you can of course add any object that will
symbolize what you do, so it can be about music, video, art in general. The goal is really
to make it yours. For setting up your desk, I have a few composition tips. I often put objects to
point toward the subject, so my iPad in my situation. It can be a pencil,
it can be a marker, it can be the line of the
border of a sketchbook. I use different colors
just to add more life, and I can also use, for example, a reminder of a color. In this example here, I have yellow on the keyboard and yellow also on the marker. Use one or two patterns
on the sheets, but I don't use too many
because it can be distracting. I try to create depths also with objects smaller
than others. In that example here from the advertisement for alpigmini, I place the iPhone on
my small tripod and put different objects under to create that sensation of depth, and also having a depth
of field which can add some blur and
interest in the video. If you're filming
a larger tablet, you can also shoot
from further away. It can be from the side, it can be from over the shoulder, but be careful not
to block the shut. If you're film
over the shoulder, it's pretty easy
to just move a bit and hide everything
in your shut. Same goes for overhead views. You don't want to d
appear in the shut. I recommend to find the balance in the location of
your camera to have it low enough to see it and be able to check if
everything is going well. And high enough to not be
seen in the camera here, face camera, if you have one. Always checking if everything is going well if
there is no crash, no glitch, if there is enough battery in my
different cameras. Be mindful of reflections
on the screen. On my iPad, I have
a mate screen, which is from paper
like, but there is also different brands. That makes the screen
of my iPad less glossy. It's not a complete
mirror anymore, and I also do my best to have lighter colors on the iPad to avoid the reflection
of the phone. But sometimes it's
just impossible and so I try to deal with that. Also see yourself in the screen, that's okay, but try to
avoid it if possible. For tablets, I suggest
50% brightness. It seems to strike the
right balance between sufficient light and not making the surrounding
areas too dark. Now I will show you in
details my philic settings. That should be applicable to black magic camera,
final cut camera, and probably also other
types of cameras, but I'm focusing on phone
filmmaking here for that chart. Here is my philic application. The first thing I
will make is to go to white balance here and then
set the auto white balance. Often, I will just put my hand here and then palidate to
lock the white balance. You can also play
with the temperature here to make it cold or warm. Here I have the loug. If I'm in natural mode here, it will look like this
in terms of colors, and in lug, it
will be like that. I will have more flexibility
at the color grading. Film in four K definition
in filmic quality codec, which is better than
economy apple standard, but a bit less quality
than filmic extreme. But filmic extreme is too
heavy in terms of file size, and even that it's a
bit heavy already. You have to find a balance
between file size and quality. I shoot in 169, so the classic horizontal ratio. But I make sure that It also
works in a square ratio. If I want to resize my video. My frame rate is 30
frames per second. I can go up to 60
on that iPhone, but I can film in log only at 30 frames per second maximum. I prefer to shoot in Log
30 than in natural 60. Here I can choose the
ISO and shutter speed. To change one, I
will lock the other. For the shutter speed, the
best way in video is to set it to one s double
your frame rate. In my situation, it's
30 frames per second, so I go to 160. Then I lock it. And I set my ISO to
the minimum possible. If I want to add more light, I will rely on my
ie spots like this. If possible, audio
lights in the setup itself instead of just
increasing the ISO. You can set your audio level
here by going up or down. Be sure to not be on the red, and in the settings here, you can go to audio and
choose the mic you want. You have the mi exterior here, the mic at the back at the
front, or at the bottom. Choose the one which will
be closer to your mouth. I think here the stereo
version is the nice way to go. You can also choose between different audio formats
and frequencies. Be sure to set that here
the circle to lock. Because you want to
lock those parts here. Unlock the focus rectangle here. You can set it anywhere. I set it here in a corner in which I will
not too much interfere. If I want, I can change the focus here if I
want to show an object, for example, and then
it will set back. Or you can also lock it here, so it will be always focused on the tablet itself and
not on the hands. Now I just have
to tap on record, and I can start
showing stuff within my animation to make my
demonstration video. Adjusted to your needs and
always make a test beforehand. The desk shot is now set up and we can go to the
face camera shot.
11. Filming yourself: To shoot the face camera apart, the first advice would be to
not shoot from low angles. Slightly high angles
are okay, and to me, the best is just to go straight like this and
shoot from high level. For the setup of
your background, find a space that is pleasant
for you to shoot in, and that also can be arranged
to be nice to look at. In my situation, what I do is I have a corner in my office. Everything else is not
really ready to be shot, but that part here from
here to here is nice. Ideas to make it nice is to have pleasant colors in the
furniture on the walls. You can add some posters,
some background art. I printed, some paintings I made just to make
a nice background. For the colors, I try to keep it warm, add
the color grading, but also directly
in the camera here, and also within the
colors I choose, even for the here. Regarding composition,
I like to be at the center and having some
lines directed to me. You can see here the
lines of the shelf here. There is a line like this
around the eye level, and there is some
space around here. There is a lot of
composition to try, so just play with the camera, try different locations. Remind about lines. I don't use auto focus on my camera because it's
a bit too noticeable. Depending on the camera and the auto focus power you
have, it might be okay. I can show you here how
I set up my camera. Once my camera is on top of the tripod,
I just turn it on. First thing I will do is to zoom in to hide some
parts of my setup. I can tap on my face here
to make the auto focus. But I prefer to do manual focus. I will show you a bit later,
because in auto focus, there is a bit of vibration
in the background, so I try to have
something really clean. For example, here, if I do this, I can change the focus, and then it will take some
time before going back to me. When I shoot videos
with the Canon g7x, I'm in video mode, and I try
to make everything manual. Here I have the aperture. Which can be up to F
1.8 when zoomed out, and when I zoom in,
the minimum here, so the maximum of
flight is a bit lower. Regarding shutter speed here, I set it to one by 50, because the rule to be simple in video is to make
double the frame rate. So my frame rate in my situation
is 24 frame per second, so I just go to one by 50
because if I go less like this, movement will not be smooth. Double the frame rate, it
will be the perfect spot. Regarding ISO, I try to
be as low as possible. Here, the lowest point
is a bit too low, so I can either place my lights differently or I can up the ISO. Then I also set the temperature of the colors
for the white balance. In my situation, I
go to Kelvin here and I put it to 5,600. If I go lower, it
will be more blue. And if I go higher, it will be more orange. I like to have a warm color already in the shot
because in that camera, I can't shoot in log, so I won't have as many color
grading options afterwards. I pretty much like the colors
here on that little camera. Once everything is set, I will just start recording and here I will set
myself where I want to be really set the focus like this and tap on AF to
go to manual focus. If I do this, there
is no change, but I have to stay
in that spot here. The angle of the camera
will be very important. Don't advise you to go
at a low angle like this because first you
will have to be higher. You will see the ceiling. The perspective will
be completely changed. It's possible to do like
this kind of a high angle, I'm not sure of the
term, where you can film yourself from up there. You can see a bit more of the floor and you
have to look up, which is better
than looking down. But I prefer to set everything
at level around there. And whenever I'm done
with the recording, I just press again the record
button. To stop filming. An important part
also is to have a distance between you
and the background. That will allow depending on the length you use a
nice depths of field. I can't have a big blurry
background on my side. There is not enough distance and my focal length
is not made for that. But that's almost
always a nice way to just detach yourself
from the background. You film yourself and the desk at the same
time, like I do, be sure to avoid having the mic or the
cables in the shots. That can be a bit tricky, for
example, with the tripod. It can be just high here, so I have to make it a
bit on the side and then shoot from here so I can be
in the center of the camera, and the iPad is a bit
more to the left. So I'm not in a very
natural position when I draw that way. So that's a balance to find
between the comfort of drawing as you do usually and filming
good composition shots. Now we're going to
talk about the light.
12. Light setup: We talked a bit about lighting
at the start of the class. I basically have two different light setups in this studio. First is day in a way with a natural light for
the background, and the second is the
one you see here with everything closed and
only artificial light. The most important
part of your shot in face camera like
that is your face. So that's what you have
to light in priority. You don't want to
have a situation where your background
is more lit than you. And for example, here, It would be too much
of light on my face. You can also have
reflections in the glasses, which is a problem for me. What I do here is to be
in front of a white wall, and then I have my light
spots facing the wall. So it would be reflecting
light on my face. If I have only one
light like this, it will be too dark around. So I could do this and
have a different lighting, a different atmosphere,
which can be also nice. It might be nicer than
when I have with two. So here it's more
uniform, balanced. Everything is lit the same way. What you want to avoid
is being lit like this, of course, or like that, because here I miss
some light here. There is too much
shadow, so I can balance by moving the
light from my right. Yeah, just play lighting
to find the right balance. If your light is a natural
light from a window, I advise to not shoot directly
in front of the window, but pay me a bit
with a rotation, so you don't have a full light in front of you, of course, it's more of a problem if
you have glasses like me, because you will see
everything in it. You also want to avoid
distracting shadows. For example, too much
shadow on your face, a big shadow in the background, too much light in
the background, making it over exposed. To me, the main
challenge is to have a correct lighting with
two shots at once, lighting here and
lighting on my tablet. Everything has to be clear without light appearing
in different chats. So it can be a bit tricky, but with that setup here, just my desk, tripod
over the tablet, my camera here, two lights, and anther light here just to detach more the
side of the face. Seems to be what
works for me for now. So as always, experiment, try different stuff, test, make a small section of
your class, for example, the introduction or
a two minute part, just to be sure that
everything works well. And same goes for the audio, which we'll be talking
about right now.
13. Audio setup: Recording audio can be simple, but you have to be aware
of different things. First, we talked about
the different equipment possible in the equipment
part of the class. The main difference being
external microphones and built in microphones. With the built in microphones, it will probably
be a bit further. For example, here, the mic on the camera is a bit away from my If you recall the phone
just over the tablet, it could be at the nice place. I want you to focus on having
the clerest sound possible. Avoid background noise.
You close the window. You turn off the fans,
you choose a quiet time, everything to have a calm
context for your audio. Then you will be able to
improve it in post production, but you want to avoid having
white noise on the back. Dogs barking outside. I say that because
I have that often. So be sure to make it calm. Then you have to place
your microphone, so if you have a la bale, it will be here, it should be placed easily at the
correct distance. And for the type of
microphone I have here, the best is to have
20-30 centimeters of distance between your
mouth and the microphone. I'm not an audio specialist, but there are different
types of mics. Some are recording
only from one point, some are recording around also. You have to be sure that the microphone is
in front of you. That's a simple advice, but be sure to have the microphone in the
correct location. In my situation, it's
where the brand is, so that have to be
directed to me. When you record audio, sure that the levels
are not too high. You don't want a
saturated sound, that would be almost impossible to fix in post polluction. As I told you before,
my microphone is wit low in volume when
recording by default, but that's okay
because I will boost it later and reduce noise. But the best seems
to be to record at -12 decibels to minus six. In my situation, it's way
lower, and then I boost it. Better to have a low sound
and boost it than to have a high sound and try to
reduce it and unsaturated, which is quite impossible. One last tip, if you record
audio at different times, for example, for voice over, or just recording the
next part the next day, be aware of the energy you put in the voice in the
previous recording. You don't want to have
a sentence like this with energy and just
going like that, and then the next step is
a really recording like this because you don't want
to talk too loud and so to avoid contrast in your audio
because very often we can hear the difference between talking to a camera and
making a voice over. Listen again to the
previous recordings and try to emulate
the same energy. Now that everything is set
up, we can start recording.
14. Action and pay attention: Everything is set up, and we have to start recording. First, be sure that
every battery is full. You don't want to need
to change the batteries, or if you change, you want your backup
batteries to be full as well. If you film from a phone, you can also plug
it the whole time to be sure that it
won't be shutting down, but you also have
to be careful about not showing the
cable in the shot. When I start filming, I
always do the same routine. I start to record the audio and I tap on the mid to
see if it goes well. Then I start the phone camera, then I start the iPad capture or the computer
capture if needed, and then I start the
main camera here, which by the way, is limited in the duration of the
video you can record. It goes up to 24 minutes and then I have to stop
and start again. So know your devices because it can have that kind
of limitations. The phones have no
limitation from what I know. Regularly check that
everything is recording. I can see the timing here, the phone is recording, everything is going well, but I always have to keep
an eye on everything. Can be a bit distracting if
you are working on a drawing, an animation in kind
of a live session. That's why people sometimes have someone to check if
everything is good, audio wise, camera wise. And in my situation, I'm
just one person to do it, so I have to check all the time, or every few minutes. One tip for recording
the screen of your iPad, I always check the mic in
the recording, first of all, because it helps for
synchronization, and also because it will add a little orange dot
at the top right. I always know if the
recording is still recording. So avoid tapping on the
mic, shaking the desk. So I try always to not put my arms too much
on the desk like this when I'm speaking about something because it's not
really nice to see that. Everything is recording, and we have now to speak to the camera.
15. Talking to the camera: Speaking to a camera is not
something that natural, so you will have to train
and progress day by day. If you watch my first videos, it wasn't that great
regarding how I spoke to the camera.
In historic. I'm not perfect yet,
even less in English, but I try to do my best
to be more natural. First tip and one
important tip to me, look here in the length of the camera and not on
the recording here. Because if you watch yourself here and here on
the screen monitor, it will look very
unnatural and strange. You want to watch here. It's a very simple tip, but very important because
it can distract if you don't really talk to the
people in the camera. Speak as if you are
talking to someone and not to camera and not
alone in your studio. There's two approaches to that. You can just talk to one person as you
would do if you were, for example, a teacher
with a student, just showing one to
one something to do. Or you can talk a bit more like you are in a lecture
with the larger public. The goal is to really speak more naturally like you would do in a live session and not
rely completely on your text. Because if you are in
front of an audience, you won't stick to your text and read like this word by
word, it won't be natural. Have to find the
correct balance between clarity and just
talking like you talk. Or I should say finding your
teacher voice in a way. Avoid hesitations. It doesn't mean that you can't repeat sentences that are
also part of the deal, but avoid to say
things like this and excitating and just breathing too much in
the mic and so on. The best way is to replace
hesitation by silence. If you don't know where to go for the end of your sentence, Just add a silence,
just pause for a bit. And then you will
also be able to see those silences
within the editing, and that can help a lot
to just edit faster. For me, it's a way to help
at the editing process, but also a way to think
a bit more about what I would say and be more
careful in the words I use. Also, of course, restart
your sentences if needed. You are not in a live station, and even if you think about it, there is no audience
in front of you. You can restart everything. You can make
different sentences, different versions of
the same sentence, and then choose at the editing. To me, I almost always
choose the last version I did because if I did some
repetitions 45 times, often the last one
is the best one. I just avoid and cut the previous ones
in the editing part. Guarding notes, I advise to have simple notes,
not full sentences. You can have bullet points and more precise
explanations sometimes, but avoid to read it
directly word by word. It's less natural, and
also if you don't have a monitor right in
front of the camera, it will seem
unnatural because you will be looking elsewhere. The last tip here would
be to take breaks. For example, here, I
made the first part, then I did go for work, and I make the second
part right now. Take breaks, don't do everything
all at once because it's also burning energy
activity to do. It can be difficult to talk
and talk for hours and hours, even more if you are
not used to it yet. Take breaks and whenever
you take a break, just stop every recording
and save it somewhere safe.
16. Demonstration test: I started everything
to be recording, so the iPhone here, the
canon here, logic pro. I can also set my
recording for the iPad, and now I can make my
demonstration by doing anything I need on Cy peg here and make
my entire class like this. The tablet is a bit
off to the left, so I can't be just in front of it because
if I'm like that, I'm not in the
frame on the canon. So I do my best to stay here at the center and just do
that with a bit of offset. Also make sure to not show
the microphone here or there, even just a tiny bit of cable. Always keep a look on the
different recordings. Edit recording here, recording
here and recording here. Regarding the light, I'm using natural light and
artificial light. My window is shut to halfway. So I don't have a huge
light in the background, and I also have my
two sets of light. Without it, it's like this, and it's not good. I just have to put
them like this, and everything now is perfect
to make my demo class. I'm going to use that
footage here to make the demonstration of video editing at the end of the class. That's the test you can make. Just a test where you
set everything on, and then you just talk a bit for 5 minutes and then you do
a video editing from that. To test if everything
goes well in terms of audio, lighting, video, just the demonstration itself, and then you should
be more confident to make it for the entire class. Now let's talk about
shooting other shots, which will be the B words.
17. B-Roll: The main videos are now
shot and backed up. But to make a class
a bit more alive, we can shoot some be rolls. B roles being the
illustrative shots, so showing other stuff than your face here or your tablet, sketchbook, and so on, which are the main shots in your course. It can be shots of
your equipment. In my situation here, I
will shoot for the tripods, the microphone, maybe
shooting a bit of my desk. Thing that can add
explanation and just overall life to your class. It can be yourself at work, so behind the computer, just making music, painting, and that's a great
moment to play with compositions
with depth of field, with camera movement,
with color grading. That's a chance to try something different and
have shots a bit more complicated and a bit
more fun to do than just a steel face camera
and a steel tablet shot. Hap fun with that, play with the composition, and
in the editing part, it would be fun to just choose what to show at which moment. That would be the next part of the process, the video editing.
18. Video editing, audio correction and color grading: Okay. Let's talk about the video editing
process of your class. I won't go too deep into
the details of editing. That could be detailed
in another class, so just tell me if
you're interested. To start my editing process, the first step is to
organize the files. So I have one demo folder, which is the main project. Then I have projects here
with the final cot library. I get my brushes, IPhone 11, g7x, and if needed
screen recording. Some visuals that I
often use in M Video. Exports will be for
the final exports or different ratios, subtitles, and thumbnails here will be for the images and final
images of the thumbnails. Everything here is in French because that's my real template. Now I will go to final
cut. Go to my rush. Dragon drop iPhone 11, canon, g7x, and into the audio. Here. Now I have different ways to make the synchronization
of audio and video. The most basic one
would be to do this, to synchronize, so
just put everything at the same place to start
at the same moment. To see if everything
is going well, I will just cut the sound here and here and only use that. Put it to deer. Now we'll go to the
English version. Enter and just do
that with a bit of. It seems to be okay here. But usually, I just select
my different clips, right click, new
multicam, name it. Use audio for synchronization, and now I have my multicam here. I can just right
click, detach Audio, right click, active audio
gle for the microphone here. Option and slide to make
the other video like that. Then I will be able to switch by tapping V to hide or to show. I could also cut here, then activate another angle. Cut again, activate
another angle, but I prefer to have one
track for each video, and I mostly use multicam
just to synchronize my shots. To improve the audio
directly in final cut, I will go to voice isolation. Put it to 50%. Then go to my effects.
Add a limiter. Will boost it fairly high and the output level to -3 decibels. I will also add an EQ and boost a bit of
the low frequencies, decrease the high frequencies. I made a preset from that, which is voice podcast that
includes everything here. I just have to drag and
drop every time I make a video because that's always the same settings
for the microphone. I can also use a
different process to help with the audio, which is podcast dot ado b.com. From there, I can
just select my audio. It will upload and then convert
it to a better version, so it can help with
noise reduction, or if your sound
is a bit muffled. It's not perfect every time. Sometimes it doesn't work
very well in your situation, but that's just a tip
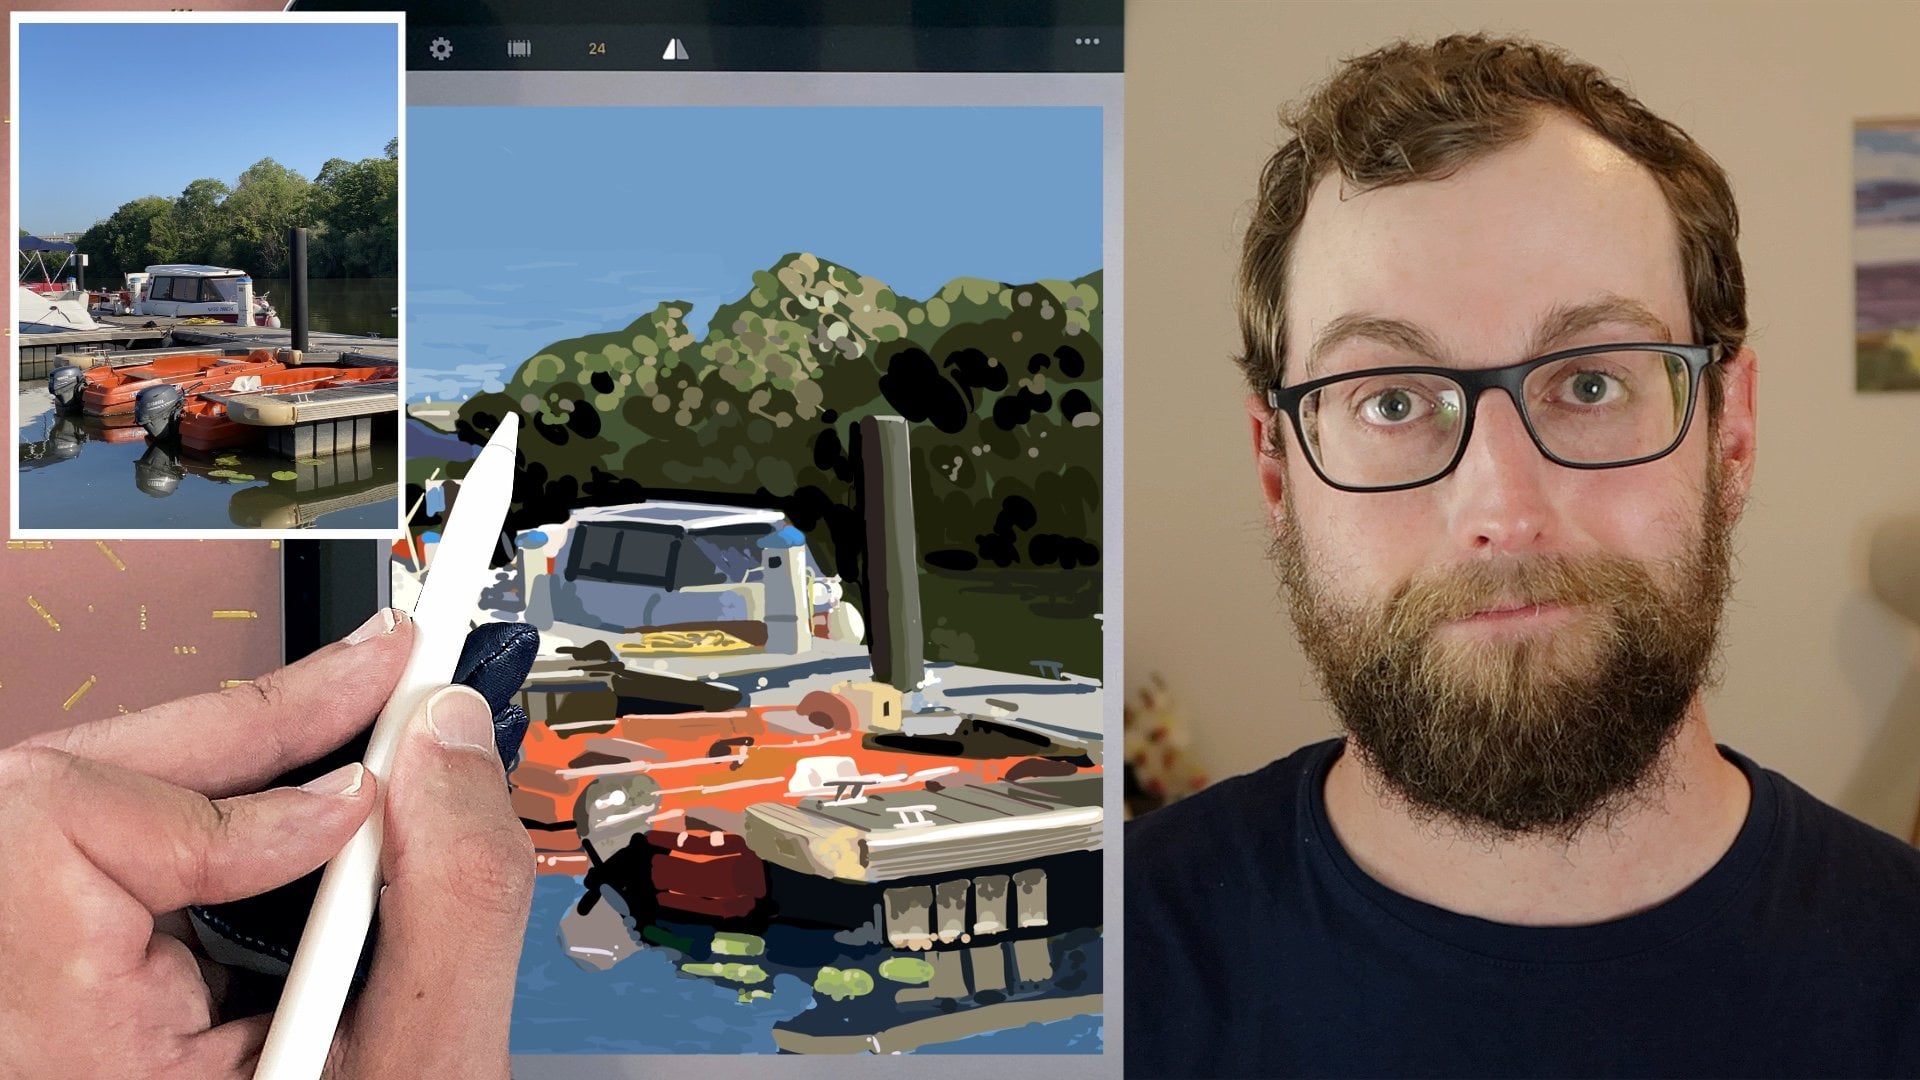
if that can help. Regarding color grading, I
don't do any on the Cang seven x hat most of the time because it's good enough
in the colors to me, but I have to improve
the iPhone chat. I choose a moment where I
can see the skin tone also. I select the clip,
go to effects. I add a lot custom let. Then from here, I
select filmic pro, and I usually go to
Film D flat v2v. You can download the fillets
on the filmic website and you have instructions to add it in your editing software. Then I will go here
and add a color wheel, and I can adjust the shadows, the highlights, the mid
tones, the saturation. I can play with the colors also. Make it more blue, more yellow, to go from this to this. I do that quickly here, so it's not really precise,
but that's the idea. The audio is now enhanced, so we are going to listen to it. Is it recording here?
Is it recording here? Is it recording here? Is it recording
on the phone here and on the audio in front of me? It helped to boost the volume, reduce a bit of the noise, but I think it's not as clear as doing it in final cut
in this situation. To make the editing
faster in final cut, I made some keyboard
and mouse shortcuts. Regarding the keyboard,
I can go to common set. I made the W zooming in, that key here to zoom out, and I created shortcuts
for the mouse here. The wheel button will
delete the selection. That here will make
common B, so cut. I can navigate in my timeline
with that wheel here. Button here is to make the
playback two times faster, and I have two buttons, one to cut the end of the clip and one to cut
the start of the clip. Before or after
the current frame. And I can show you
an example here. I will start here,
mage button to cut, then I select that, W to delete, and I can edit very
fast like that. Recording icon here, the C here, logro. I can also set. I can select this
cut what before. I can also set my
recording for the iPad. Here, I can see
all the silences, so I can just cut like this. IPad. Now I can It's
a bit rush here, so I just extend the iPad. Now I can make my demonstration. By doing when I talk
about the demonstration, I can just get v2d. Now, I can make my
demonstration by doing by doation, by doing. Class. And what I can
do also is to start like this the next
audio before the video. So that's a JCT. Here and make my entire
class like this. That's basically how I work on my video editing regarding the synchronization
of audio and video, improving the audio quality, doing some color gradings, and then editing fast with
keyboards and mouse shortcuts. I will not go much
further in details here. The goal is just to give
you some tips so you can explore different possibilities
yourself with your tools. Then you can add
music at some points. For example, in the chapters, music that you do
yourself or that you can find online
for free or paid. Since you are teaching
something creative, probably about your
own art universe. Illustration chapter
cover could be a nice way to just customize your lessons and make it yours. Add your own characters, your own photographs to the typo that reflects
what you want to tell and maybe even have a little music pattern for
the start of your lessons. That's it. Now your
course is done, and we can go to
the last section for a few more tips
about what to do next.
19. What to do next: You video tutorial or
online class is now done, and now you have to share it. It can be shared on a
teaching platform like here, on your website, on
YouTube, or elsewhere. I advise you to create one or several clips short form to promote your class
on social media. If making classes is
an interest to you, just keep writing
different ideas, what you would want to see,
what you would want to share. For example, what you'd
wish you'd learn earlier. O specific project you're passionate about and you
want to share the behind the scenes of experiment with different filmic methods and just upgrade your
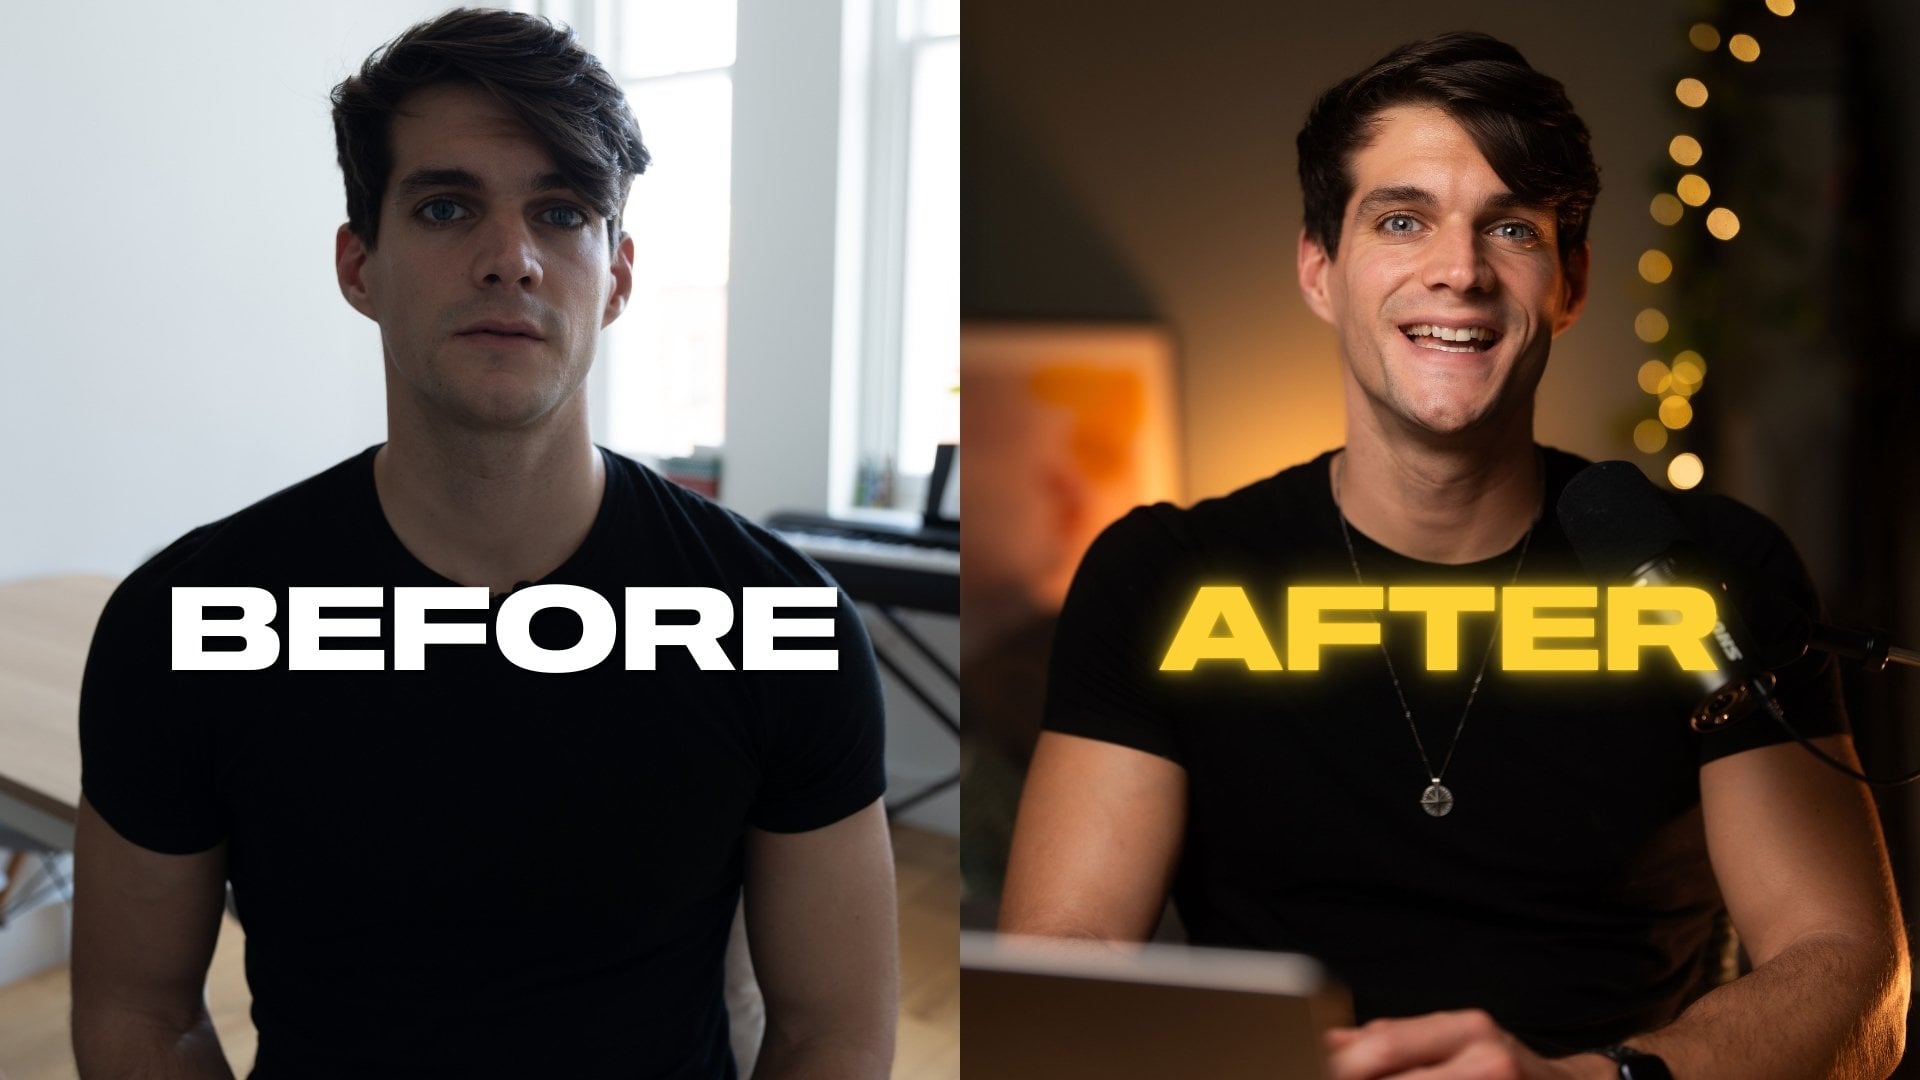
gear if you need to. But remember that the
current equipment you have can also lead to great results. For example, those videos were made with the
same equipment. The difference is the set, the background, the lighting,
and the camera angle. I recommend to stick to a setup that works for you in
terms of camera placement, lighting, audio, and so on. Personally, I know
that now I have a space and a setup
that fits my needs. I could upgrade the camera, for example, have a better mic. I want to do that in the
future, but for now, I just stick to what I have and try to
make the most of it. You can also analyze different creators and
say that that lighting, for example, is good, so I will try to emulate it. The way the person
talks to the camera, the way you do the editing
to add the face camera, and the artwork
process on the right, for example, in a video. Experiment with that and just take a few ideas
here and there. Have time to experiment, your first videos won't be
your best, and that's okay. I recommend to just start making mistakes now and then
improve along the way. I hope you enjoyed this course. Feel free to ask
any questions in the delegated section
of the e mail. You can find all my
videos on YouTube. It would be in
French, but if you want to see my English videos, it will be on the
Calipe channel. Thanks a lot and see you soon.
 Benjamin Cerbai, Artiste/Co-créateur de Callipeg