Transcripts
1. Introduction: [MUSIC] You've probably
never thought about creating your own pattern
library or how to consistently develop
your own unique patterns that you can use
in your artwork, and yet pattern had so
many applications in art. If you've ever been stuck
staring at a blank page, not knowing where to start, the pattern creation
provides you with patterns that you can use in so many different art pieces, including Surface
Pattern Design. If this sounds like an
asset that you can use in your art work and a creative way to move past
the fear of the blank page, then you are in the right place. For this class you don't
need any experience. You can get started just
using a pen and paper. I'll show you how
easy it is to create your own unique patterns every time you work
through this exercise. Hello, my name is Mitchelle. I'm an artist who works in
mixed media and textiles. I exhibit and sell paintings, prints, and sculptural
textile pieces. I create using many different
mediums and I really enjoy incorporating
patterns into my artwork. During my art journey, I developed a technique for creating my own unique patterns. After a while, I
began to collect pages in a hand made journal. I call this journal
My Pattern Library. This library has become my go-to reference for inspiration
in my art work. In this class, I'll
show you how to record your patterns
as journal pages, which will become your
own pattern library after a pattern
creating session, really inspired to find ways
to use my new patterns. This exercise helps
to kick-start my creative process and I'm
sure it will for you too. Once you learn the process, you'll be able to continue developing your own
unique patterns, adding to your own
pattern library overtime, giving you a great resource
for future projects. In this class, we'll be working through
design inspiration, patterns in nature, ways the patterns are
incorporated in us. We'll do some line
practice and explore the use of line
weight in patterns. We move on to the technique I use for developing patterns. Our project for this
class is to create a modern painting artwork incorporating patterns
from your library. I'll also give you
some ideas for future pattern artwork projects. If you stick with
me until the end, I have a bonus project, where I'll show you how to
create the no-so side journal, which is perfect for housing your growing pattern library. These process made such a
huge difference to my work. Even more importantly,
it gave me a creative way to move
past artist block. I'm really excited to be
sharing this method with you, and I can't wait to see
you in the first lesson.
2. Class Project: [MUSIC] For the class project, I'm going to show
you how to achieve two simple stress-free paintings that are great for showcasing the patterns that you'll
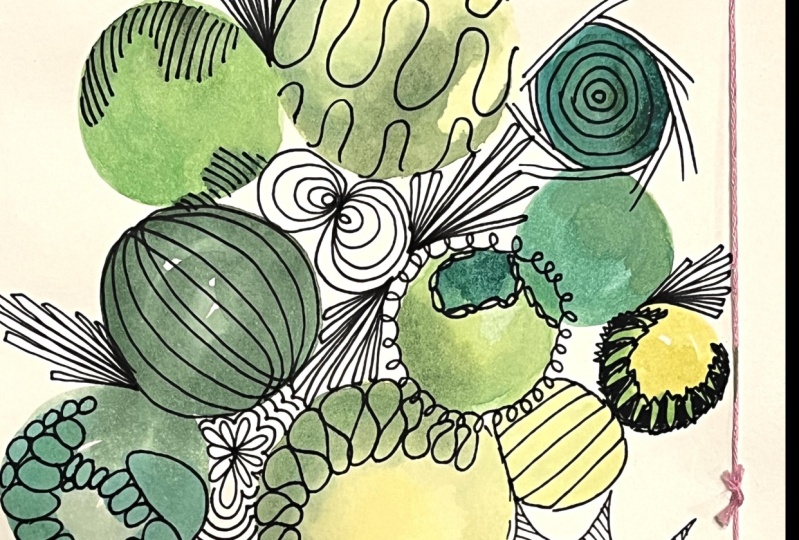
create during the class. This one is one of my favorites. I call it a blob painting, where you just put down
circular shapes of paint and you can
join them together, run them together, keep them separate and you
just come up with a design as you go
that fits the size of paper that you're working on
and is pleasing to your eye. This is a watercolor
one and this is how it looks before you
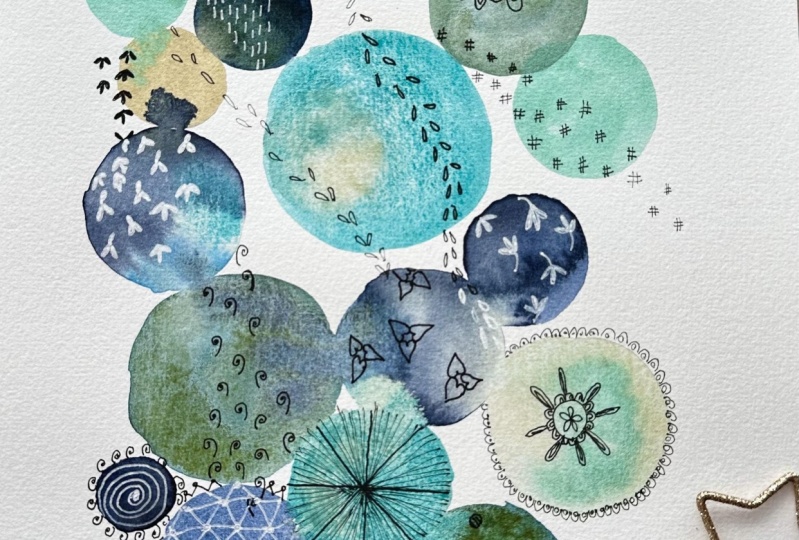
add your patterns. This is a watercolor one with some patterns added in a
random type of manner. You don't need to
stick to the shapes. You can add your patterns
out onto the negative space. This one I did with
acrylic paints so it's possible to achieve the blending of paints with acrylics
for this style of painting and I
will show you how to achieve that
during the class. This one is a watercolor
one and I have put some snowflake designs
on there in gold, black, and white marker
pen but I haven't actually followed the
shapes of the circles. I've just randomly placed
them over the top. As you can see,
it's easy to choose a style that you might
like for your patterns. The other painting
I'm going to show you is called a geo painting. This is an example of
what a geo painting looks like before you
apply your patterns. Geo paintings are achieved
by sectioning off parts of your page
with narrow tape. Then you apply the
paint over the top. When your painting is dry, you remove the tape, and this is what
you're left with. These little boxes
and shapes are really great for adding in
little bits of pattern. This is one that I have
decorated with patterns. I've used colored markers. I've used black marker, white, and gold. Some of the boxes or shapes I have filled
in with patterns and some I have left space so you can see the
painting underneath. You can put as much patterning on or as little as you like. It's such a fun painting
and such a good way to showcase some
of your designs. This is another one that I have done recently with
colored markers. I think I used a
jelly roll up here, jelly roll marker and I
then went over the top with a gold paint marker and added some hexagonal shapes just to bring a different
element to the painting. You're going to have some fun. You might like to do
both paintings so you might just go for one style. I would encourage you
all to upload photos of your projects under the Project and Resources tab in the class. The sense of community that's created through sharing art is really helpful in motivating and inspiring you to
keep on creating. All you need to do is
go to the Project and Resources tab in the class and then click on
Create Project. From there you'll be prompted
to upload your photos. I really can't wait to see
your wonderful designs. Next, we're going to talk about supplies for
the class. [MUSIC]
3. Class Supplies: [MUSIC] For the first
part of the class where we're exploring, creating our own
individual patterns, you're going to need some paper. You can get started with just ordinary [NOISE] photocopy
paper and just a pen, like a gel pen. Another choice of paper might be drawing paper or sketchbook. Cartridge is fine. I'm just showing you
my preferred brand for using these days. These paper is by
Hewlett Packard and it's 100 years seems
it's copy paper, but it's a little bit stiffer. But when I started out, I used ordinary copy paper. You're also going to need
a ruler and a pencil. You're going to
need an eraser of some description and I've just got [NOISE] a variety here. I'm going to show
you my favorite pens but you don't need
to have these. You can simply have a gel pen
or I biro will work fine. These are Pigma Micron pens
and I have them in a variety of sizes because I get different
line whites with them, 005, 01, 05 and a 08. If you have a metallic
pen of some description, then that may be useful to you as we progress
through the course. This one's a Gelly roll. Gelly roll work smoothly
over the top of paint. Also, [NOISE] you could substitute a paint
marker for highlights. When we get further
into the course, you might like to
use a white pen. I have a few different ones. Gelly roll again is
a really good one. Or these uni-ball ones, which are Sydney, is a
broad tip and a fine tip. You could get away with
just a paint marker, a white paint marker
or you can just use some white paint if you wanted them on some highlights. For our project, you're
going to need some paint. I'll be using watercolor mainly, but I will demonstrate
some acrylics. You could use
watercolor, gouache, acrylic paint, or
acrylic paint markers. Whatever you have that you would like to create your
background with, you're going to
need some brushes, just a selection of brushes
that you might have at home suitable for the
medium that you're using. A pellet of some description, some paper towel for spills, a pencil, eraser, and some wash tape. One is the paintings
we will be doing is a GO painting where you tape
all sections of your paper. If you don't have
tape and you can get by with a ruler and a pencil. You're going to need your pen or your markers that you use
for creating patterns. You might like to introduce some colored fine tip markers. You're going to need
some paper suitable for whichever type of paint
you're going to be using. Look for a paper that is not too hard on your felt tip
pens or your pen. I always test out on a
little scrap of paper. This is a rough textured
watercolor paper and it is a little bit hard on the
pen so I can get a good line, but over time I'll wear
the tips of my pen. So I recommend you
try your pens out on a piece of paper and choose
your paper accordingly. You can use cold press, fine grain, I use that a lot, or hot pressed watercolor paper, either of those work quite well. You might like to use
some mixed media paper. This is a heavier weight paper for creating mixed
media half on it. We'll hold off to some water medium and is a
good choice because it's smooth for drawing your patterns over the top of your painting. The supplies you're
going to need to make the journal
are pretty basic. A cutting mat, some kind
of glue, burn folded, something to score
your papers with when you're making the
concertina is very helpful. A paper trimmer, a
pair of scissors, or a craft blade for cutting, a pencil and eraser, and a ruler for measuring
and marking out. You're also going to need some card stock to create the hinge sleeves in
the cover boards, scrap booking card
stock will work. You need a scrap
piece of cardboard. It needs to be 1/3/8 of
an inch or 3.5 cm wide. Some colored paper, you
need to allow a piece of paper that's 11.7" by 11.7" or 29.7 cm by
29.7 cm and you need two cover boards that
are 12.5 inch by 8.5 inch or 32 cm by 24 cm. Then you're going to need
some strips of colored paper. You need two strips of
paper for every two papers. Those strips need to be
one-and-a-half inches times 11, 13/16 of an inch
or 4 cm by 30 cm. You're going to need some
card viewer accordion hinge. The sizing for that
strip is 36" by 6" or 92 cm by 15.3 cm. I joined three strips together
so that I got my length. Then you're going to need
some decorative paper to cover your book boards. You'll also need
some extra paper to cover the hinge sleeves. The amount of paper
that you need is, two pieces for the book covers, 14.5" times 10.5" or 35 cm times 29 cm and you're
going to need two pieces, 12.5" times 8.5"
or 32 cm by 24 cm. If you're making a full-size
journal like I am, then you need 20
sheets of paper. Or alternatively, if you're not going to use
the colored strips to bind your journal width but I simply wanting to make a
journal with folded pages in, you could use larger sheets
of paper and you could fold the papers in half and
create the slit in the back, which you could then
hinge through without needing to join
with paper strips. To finish the inside
of the journal covers, you're going to need
some colored paper. You'll need two
sheets that measure 11.3 quarter inches
times eight and quarter inches or 29.5
cm by 21 cm. [MUSIC]
4. Nature Inspiration: This session is about finding
inspiration from nature, and there are a lot of
different ways to do that. One of my personal favorites
is to go for a walk. I'm lucky enough to
live where I can either go for a walk
beside the ocean, looking tidal rock pools, look at erosion in cliff
faces at the beach, look at the patterns
in the sand, and I also like to observe the patterns in wave formations. When I walk on the beach, I often find little
bits of interest, such as shells that I collect. I find interest in
the shapes of them. This one not only has
a lovely curve to it, it has tiny little holes in it, and it has striations in it as well and
from the other side, it has textured ripples. The inspiration in
nature is looking at things in different ways
and asking yourself, how could you reinterpret
that in a pattern design? When I go walking, I
look for these things. I take many photographs. More shells with
interesting spikes on them, little spirals, textures,
patterns. Lots of them. Lots of things to see when
you walk by the ocean. If you don't have
an ocean near you, the Pinterest or Google
Photos search will bring you some beautiful
photos to look at that you can examine things. This sea urchin came from
a holiday I had in Bali and it has the finest little
patterns in it, zigzags. It has little rise bubbles. My daughter collects fossils
and these ammonites, and not only are they
interesting where they've been cut and polished on the inside for the patterns they have, but also on the outside
where you can see the swirl and the
shape that they were before they became
encased in sand. The other place that I am
fortunate enough to walk is in eucalyptus rainforest
which surrounds my home, and I look for
interesting leaf shapes. These are eucalyptus gum leaves, but they've been eaten
away by different insects. In my own garden, I have different plants
with interesting seed pods. When I'm walking
either in the bush, in the rain forest, along the coastal
area of the beach, or in my own garden, I'm on the lookout for
these types of things. It has these
interesting little pods that open up and they
look like little mouths. Feathers that I see
when I'm out walking. They get this downy
fluff down the bottom, which can also be interpreted
in a pattern formation, but I also like to look at
the patterns that are on the individual feathers and also the shapes that
the feather is coming. This one has a bit of
a rippled edge to it. Now, this is not actually something I picked up
out of the garden. It was given to me and
it's been carved out of a piece of tree from overseas. I believe it was from
the Philippines. But I'm very interested in
these underneath part which I have drawn many times
in different kinds of patterns because the
striations that come out, the lines coming out from the
center just fascinate me. More seed pods from the forest. These are two different types
of eucalyptus gum nuts. They are interesting
on the back side of them as well as on the front. One is from a stringy bark
and one is from a blue gum. The blue gum has the four
cutout in the top of it, and the stringy bark
has the three cutout. They almost remind me
of little Jingle Bells. Another interesting
seed pod with lots of raised areas on it but I also found the top of
it quite interesting. A great big pine that I've
picked up during my walks. I love this circular spiky triangular type
pattern on the base of it. I'm not so interested in
the other side of it. I think this side is
far more interesting. These are just dried legumes. A legume is a seed and so I thought I would add them
with inspiration from nature. With these type of things, you can place them around into patterns or you can
just spread them out. Let them fall however they like. I have a little paper
cup I shoot them out of. Then you can just draw
however they align. Then add more to it to
make a bigger pattern. Dried seed pods from my garden. These are the seeds
that come out and I like to play with these too because you can scatter
them like that, but you can also arrange them
in little groupie patterns. Three and three and you can just move them around to create patterns of interest
and then draw them. Different seed pod from a Hakea
tree which is split open. I love looking at twigs. Different shape twigs can be used to create
patterns as well. This is more of the
Hakea tree with more seed pods on there. If you have any indoor plants, you can have a look at the
shapes that they grow in. I like this one because it looks like tiny little round cushions, but it has some shape
and form to it. The textures and
patterns on leaves, not only the shapes
of the leaves. This is another plant from my collection of indoor plants, and I've drawn it many times and created different patterns. For example, this piece here where it has the little
prongs coming off the end could be
quite interesting, arranged in a pattern. I have an assortment
here from my own garden. They're just different
things that I think could work really well for interpreting
into pattern design. Inspiration from nature
it's everywhere. You just need to look
with fresh eyes. If you don't have a garden and you're not
lucky like me to be near the ocean and the
bush where you can go walking and looking
for the unusual, then hop onto Pinterest. I have curated a
board for this class which I have a lot of
my own photographs on, but also a huge collection
from Pinterest itself, which will give you a lot of inspiration for creating
patterns from nature. [MUSIC]
5. Everyday Inspiration: You can even find inspiration in the everyday items
around your home. I quickly went around and
picked up a few things so that I could give you some
examples of what I mean. This little vase is a little bud vase from
different angles. It's quite interesting. It's just looking
at it and thinking, what do I say here? It has a sort shape
carved into the bottom. With these marks down the side, it gives an interesting
pattern from underneath. On this side, it has a
diamond shape carved into it. The top has a little bit of
a flute to it and side on, it is an interesting shape too. I imagine that you
could draw that in many different orientations on a page and repeat it
and have a pattern. This is a copper taste
scoop that my daughter made many years ago when she
was at secondary school. I have always liked the
shape of the handle. I also liked the curve that
it presents in profile. This shape has
actually found its way into some of my patterns before. A little box that I just
picked up in the lounge. I don't even know
where it came from. Someone's given it
to me at some stage, but it has leaf design
on it and squiggles, which sometimes
something like that will get you thinking
and asking yourself, what could I do with
the shapes on here and how could I make them
into my arm pattern? This is the lid of an
antique ginger jar, and it has a flower
designing it. But I'm really taken with
the shape of it too. That could be used to
inform our pattern. I just have to show you. It's a little lion on the top, but it doesn't look
very much like a lion. It looks a bit squashed. These are out of
my utensil drawer. This is a tea infuser and I find it interesting
because side on, it has this part here
that could be drawn. It also has the loop shape. You could draw the whole thing. It also has a texture pattern. I also like it from
this angle because it looks like a little
mouth opening up. That's found its
way into some of my pattern designs before. This one, I'm not
exactly sure what it is. It's a handmade utensil, but I like the whole shape of it and I have used that before. It also has a textured
pattern on the handle. This is an old
folk that a friend of ours turned into
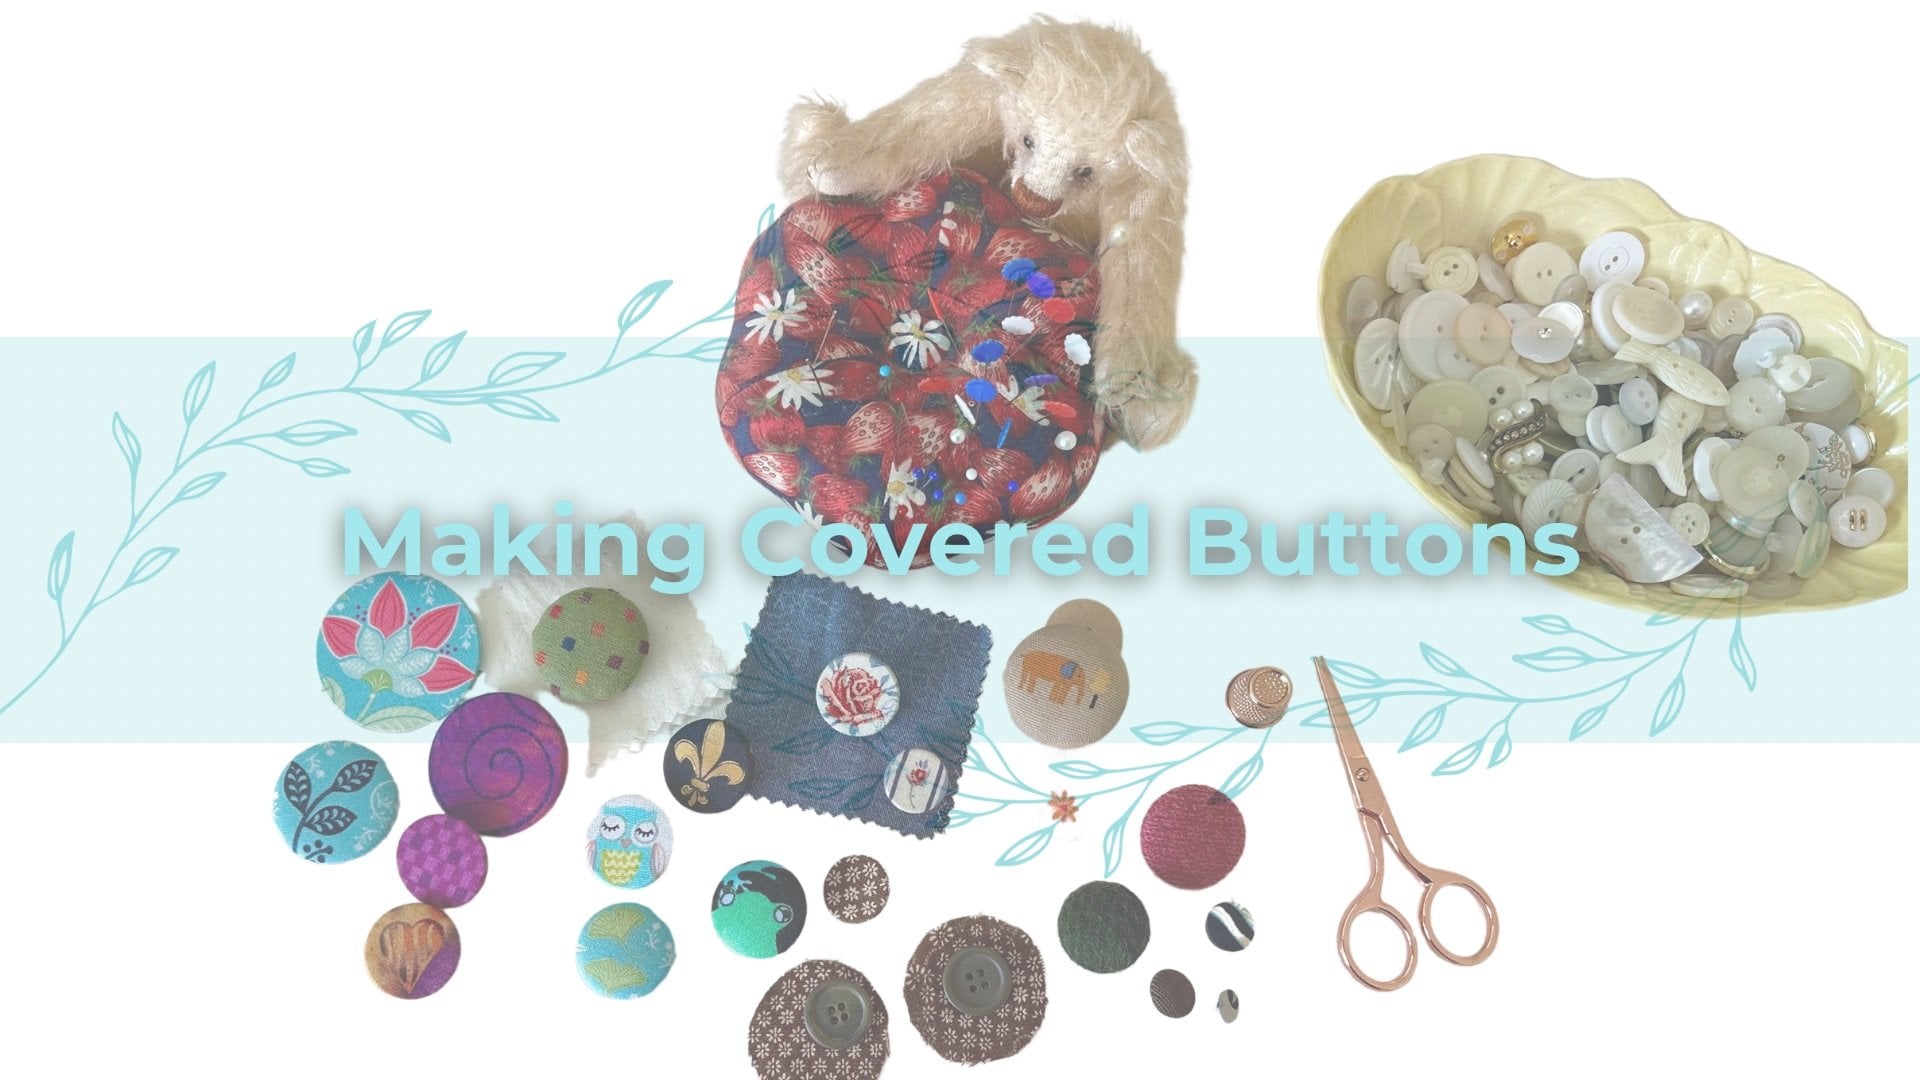
a pickle fork. But again, it has curls. It has an interesting profile. This is just a few buttons I grabbed out of the
button jar and a buckle. Sometimes when I'm
lacking inspiration, I will just grab a few
buttons and throw them out. I look for ones that have
something different about them. Then I'll draw them, then I'll redraw them and re-draw them and
before you know it, you've got a pattern. Lastly, I raided the pantry and it's a shame
we don't have [inaudible] because I've got some
little cloves here which I often use
to get me started. These ones without the head have these little
four-shaped star to it. The ones with the
little round head, add another element and with
the little stems and you can arrange them into designs or you can scatter
them and draw them. These are star anise
and they smell amazing. No two of them are ever the
same as you can see here. This one is a bit
stunted on this side. This one's got a couple
of stunted pieces. This is the perfect one. This perfect star shape. Again, they can be
grouped on their own. They can be scattered. They can be interspersed with other shapes like the clouds. While you're drawing
these into a pattern, you can enjoy the lovely aromas. I hope that's inspired
you to take a walk around your own home
and have a look for unusual items that might spark the pattern
creating process. Don't forget to look
in your pantry and also in your utensils
and cutlery drawer.
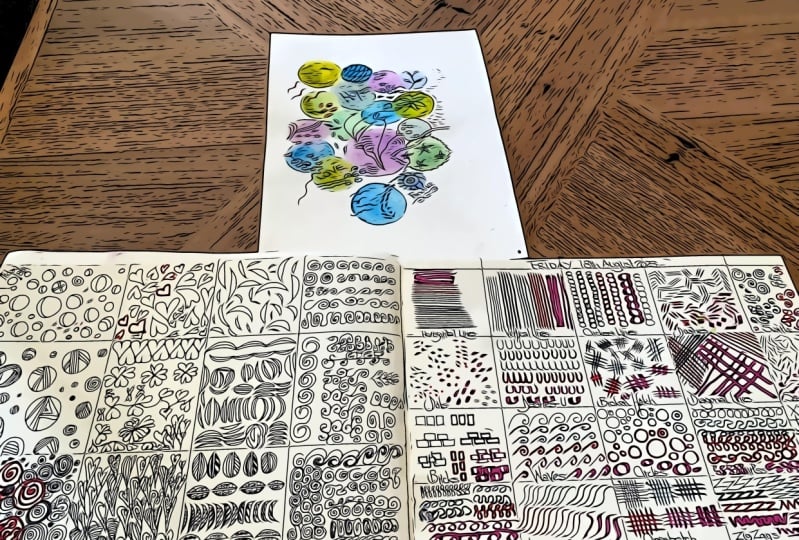
6. Warm Up Exercises: [MUSIC] We're diving into warm-up exercises before we get started with
pattern creation. Warm up exercises allows you to loosen up your fingers
and your hands and to get comfortable making marks with
your pen just to practice some shapes before you actually
start working on design. I have a piece of
paper here which I have written exercise names on, so that you know
what we're doing. The first thing I
always do though, is test out my pen
sizes just here. I've done two
different gel pens, a Uni PIN 0.3, which is a super fine line, a Pigma 005, Pigma 01, Pigma
05, and Pigma 08. The heaviest pen I've got
is a Fude and it's a 1.5, very rarely use that pen. I just thought I would draw
them out on here so you got an idea of the
different pen nibs. We're going to start
with horizontal lines. I'll run through the
exercises with a 05. [MUSIC] I'm just moving my paper to a
position of comfort, and it's just simply as it says, just drawing horizontal
lines across the page, getting comfortable with
the handling of the pin. Seeing how straight you
can keep your lines. If you anchor your
hand against the page, it's much easier to keep
your lines straight. Of course, hand-drawn lines
are always going to be, a little bit wonky, and you just keep going
until you're ready to move on to the next exercise. The next exercise
is vertical lines. Again, I'm moving
my paper so that it's at a better
angle for drawing. Next one is circles with lines, what I'm talking about
there is little circles, and then we're just
going to link them up as we go down
and create a line. The aim of the game is to try
and keep your circles neat, link them together, and when you get to
the end of that line, you create another line next to it and link them along the side. Next we're going to do broken hatch and a hatch
is like a cross hatch, it is just lines
going one way and lines going over the top
in the opposite direction. Broken hatch means
little tiny ones, rather than a great big
area of cross hatching. Moving on now to dashes, which is exactly how it sounds, just small and large dashes,
just different sizes. Next we're going to do dots. Dots can also be
called stippling. Generally, best if
you hold your pin perpendicular to the page
and just press down, you get nice little
dots that way. You can put them very close
together or further apart. They can create shapes. Next we're going to do
some diagonal lines. It's just straight
across on the diagonal, similar to doing the vertical
and the horizontals, find the spacing
that works for you. Now if I turn my page slightly, I can come back the other way. Next one is called lazy S, so it's like the
letter S except it's a very stretched, relaxed shape. Try not to get too much
of a curve on the top. You can go the other way, it's a little bit different
to writing an S. Next, we're going to do U shapes, which is exactly what
you would think. Just curved U's. [MUSIC] Next we're going
to do upside down, U's. Same shape, just turning
it up the other way like it would be if it
was part of a rainbow. Next we're going to do zigzag. Then flip it the other
way and go above it. Then you can go back in and
add in some chevron shapes. Now we're going to
do some loopy lines. Next we're going to
do some brick shapes, which are what they say. They are just rectangles, stacked on each other. Next, we're going
to do some waves. This time we're going to do larger circles [MUSIC] and we're going to to
do some swirls. [MUSIC] Next, we're going to just do
some middle crosses. We're just going to do
some scattered dash. Lastly, I'm just going to do
your everyday cross-hatch, which is your horizontal lines with vertical lines
over the top. Next we're going
to jump into how to create your own
unique patterns [MUSIC].
7. Pattern Creation Part 1: [MUSIC] Before we hop
into pattern creation, I'm just going to have a
quick word about setting up your pages if you're going to go ahead and create
the bonus journal. You can, of course,
go ahead and just use a pre-made sketchbook, so you could use one
with a spiral binding, you could use a little
thin one like this, or you might use a bigger
hardcover one like this. You need to consider
whether you'll be doing a portrait-style journal or
a landscape-style journal. To set up your pages
in either journal, you need to leave a
half-inch border to attach our art pages into our journal. Both journals are
exactly the same. This one is the same as well. This is the method
that I use for creating my own unique patterns. This exercise can be applied
again and again and again. You can come up with
different patterns each time. It's a simple process
and it's worked out on a piece of paper that I
like to roll into a grid. I've ruled out my
page and I've got four boxes across
by four boxes high. The idea behind this is that you start with simple shapes. Across the top here, I'll choose four
different shapes to get me started and then
you simply work down, you feel the squares, and then you go down to the
next line and you look at what you've done in the
box above and you see, how can I change that? What can I do that's different? You work through each time, changing it slightly from
the iteration before, and each time I aim
to make my patterns a little bit more sophisticated
than the time before. Not all patterns are
created equal and by that, I mean that some of these will turn out to be
dags and some will turn out to be patterns that you can use and apply
in your artwork. To get started, I'm just going
to work with a 01 paint, and in the first box, I'm going to start with circles. Some are going to becoming
slightly off-page. Now I'm going to go back and I am going to put some
lines through my circles. I'm going to vary the direction. What I want you to do
is to come up with your ideas about what patterns you're going to start with
in the four top boxes. Rule up your page and start
drawing in your patterns. Then you can continue
to work through your pattern iterations
alongside me. Pull my next one. I spied a really
unusual leaf shape this morning when I was in
the garden so I am going to do this shape and it just
looks like a heart shape. I'm going to do random
shapes like that. Now, I'm going to put
some wavy lines on this. The leaves I saw had a
variegation in them. In my next one, I'm going to do some pointy spires shapes that are wider at
the base like this, and that is basically the shape of the leaf
on this plant here. Be be much easier if I use a 08 for that. Now for this next one, I think I will do
a scallop shape. Now I'm going to go back
in and I am going to make an acre of
that shape inside. The plain shapes are filled
with possibilities and this process is all about
asking yourself, what if? What if I was to take my circles and take away the circles but make the lines still
in a circle shape? How would that look? What if I was to
take my leaf shapes here and just using the
squiggles out of them, rearrange them in
a different way, or take the leaf shapes and
make them uniform like this? The whole idea of
this process is to challenge yourself
to come up with a different way of using
what you've already used until you get to
the bottom of the page. Now for this one, I am intrigued by the lines. But this time I think I will repeat the circles,
maybe slightly bigger, then I think I will draw a spiral inside,
concentric lines perhaps. The beauty of these exercises is that you can
let yourself play. You're not creating
masterpieces. It doesn't matter if your
lines are a little wonky. It's all about working out new patterns to
use in your art. There's no pressure here. It's meant to be a
little bit of fun. Now this time with these
heart-shaped leaves, I think I might arrange
them in small clusters. With this one, I think
what I'm going to do is do them as random shapes. Now for this one, I'm thinking that I might
put the scallops in again. I might try some lines
on the diagonal. Then I think I will come back the other way in the next line. I'm going to turn my
page upside down to make this a bit easier
for myself. [MUSIC]
8. Pattern Creation Part 2: [MUSIC] Now back
to circles again, I'm wondering what would happen
if I created a pattern of concentric circles
joined together and probably vary
the number of lines inside them to give
some visual interest. This time I'm wondering
what would happen, if I started with one cluster in the same time and then
made it bigger and bigger. What would happen if I
join these together, head to tail in rows? What would happen, if I colored in the negative
space around these patterns? Whilst working on this pattern, I had several other ideas. I decided that I would divide this pattern up
into different ones. I've got my coloring
of my negative space, then I've left some
with no coloring in at all to have a look at that
lattice-type pattern. Then I decided to switch
over to coloring in the teardrop shape and leaving negative space around the dot. While I was doing that, I suddenly thought about
putting little twist shapes. I've tried out four patterns
in one little box there, that's just what
happens sometimes. Now this one I've been
thinking it looks something like little trees. I might actually take those
shapes and break them up and turn them
into little trees. Now that I've got
my little shapes on sticks that look like trees, I am going to put in
tiny lines in U-shapes. Now back to the circles again. Now I'm going to add
smaller circles into this design and then
I'm going to join some of these smaller
circles to some of the bigger circles with lines and now I'm going
to put some lines, through the circles, similar to what I did
in the first one. Back to my heart-shaped beak, what would happen if I
made them a garland? I think I'm going to make some stripes
on them because I made a little bit
of a mess there. It's all about
exploring what you can do with the shapes
and how you can interpret textures
that you may have seen on different kinds of
items or out in nature, plants spotting on, then I might do, take away the lines
on these ones. I very much like the idea of these becoming random again, and now I'm wondering what
it would look like if I made a circle around the tip. Now I'm wondering what it
would look like if I added back in that circle shape again, what would happen if I put another circle
inside that circle? As I said, not all patterns
are created equal. Some of them you like
and some of them you won't and some you can take on to the next page and play with them some more to see
what else you can create. Now after doing these
little trees over here I will maybe make them into feather shapes to make
them a little bit longer and a flat bottom on them. They almost look like
windows at the moment. That is one exercise complete. You take them through, from simple shapes through
to more complex designs, testing out ideas as you go. Now you can head off and start your own process of testing out your simple shapes
and taking them through to create
new unique patterns. Apart from showing you the different pen widths
in the warm-up exercises, we haven't really
discussed the use of line weight in art. I just thought I'd show you
some examples of the use of different width pens and the value that it can
bring to your drawings. In this example, this
composition that I created, I used several
different-sized pens and it has given more
interest to the composition. You can see where I've
used thicker lines, finer lines and the
balance is much nicer in the composition
than if I had just drawn the whole
thing with one pen. This is an example where
I haven't quite finished, and you can see just here in this section where I
began to go back in with a darker pen
and you can see the difference between the lighter and the darker section. It's an example of where you get some more visual interest by adding a little
bit more white and this example shows the
same thing where I've used heavier line weights in places
and lighter line weights. I've used a darker pen around
the edge of the circles. It actually gives it a
little bit more value, which creates a bit
more visual interest. Same in this one. I've got very fine lines and
I've got heavier lines in different areas and probably this one is the most dramatic to show what
I'm talking about. This design was created with one sized pen and I
went back in later with a heavier 08 pen to
add in some contrast, which lifted the design.
9. Acrylic Paint Demonstration Markers: [MUSIC] I'm going to do
a quick demonstration of using acrylic paint markers. I have some paint markers. I'm using watercolor paper, but it's a reasonably
smooth one. I've got some water, a couple of paint brushes, a scrap piece of paper
for testing out on, and some paper towel
for blotting with. The first thing I'm
going to do is start with putting down
some blob shapes. [MUSIC] I'm going to mix on the paper. Just using a little bit of water to help the paint
blend together a little. I'm going to wet the paper here. I've still got a bit
of paint on my brush, which works to my favor. I can introduce
another color here. [MUSIC] I'm going to put
in a brighter pink now. [MUSIC] When you're mixing like this on the paper
with a couple of different paints on over the top of the other
when they're wet, you need to clean off your
marker between each use. Otherwise, you could contaminate it with different paint. Again, just adding a
little bit more water. Effectively, what I get is a
stain of paint on the paper. You have to be careful not
to rub too much because the paper can actually
rub up and peel. [MUSIC] Just choosing a
different marker now. This one's a little bright pink. These big ones have
a lot of painting. When you touch them into the
water, they really flow. [MUSIC] I'm going to put some of this lucky
purple color in. You can see the difference. These ones are not
quite as juicy so they don't flow as much. Encourage the paint to
move a little bit more. Just a word about paint markers, just be careful when you're
using them that you don't go too dark because you'll need to then use white or a light color over the top
to create your patterns. [MUSIC] Just adding a little bit
more water in here. [MUSIC] I'm going to
bring some of this pink. [MUSIC] You get the idea that you can flow the paints
around the page like that. Another way of using
the acrylics is to create some sort shapes,
square-type things. I might use some water
here and spread it out. You can make these
rectangles and squares and stack them together, which gives you a background
for creating patterns on. This is using more solid colors [MUSIC] rather than
blending them. [MUSIC] Now, I'm going to flow a bit because I wet the paint to
move it out a little. It's all right. It all
adds interest underneath. [MUSIC] The idea is to create interest
with the shapes, so don't have them too uniform. [MUSIC] Now, I've just shown you
doing a small sample. You would do them much bigger, if you are doing a
full-size painting. This is just to give you an idea of what you can achieve. [MUSIC]
10. Acrylic Paint Demonstration: [MUSIC] Now I've got some
acrylic paint I've just squeezed out of the
tubes here and I'm just going to play with that and show you some
similar things. Again, with the blob paintings, which are a lot of fun, bringing a little bit of white
and mixing it on the page. Then just blending a little
bit out into your food color. You soften it a little and you can add just a touch
more blue over the top. You can make the page wet with water still using
what's on your brush and you can introduce another color into
that something like go with a little bit
of this blue color here and see how that
goes mixed in here, with a damp brush, I'm
just mixing it out a little so you get
those pretty tones. On this paper, it
works better if I make the paper damp
first because it's watercolor paper and it's pretty thirsty so by adding a
little bit of water first, it makes it easier for me
to manipulate the paint. Just going to pull it out with my brush a bit,
add some water. That's one way of fighting
out a color a bit. In another blob down here, it's a little bit stained
with paint, but it's okay. A little bit of
green in this one. Now, that's interesting that green is pushing the water away. You can actually suck up the water if it's interfering
with what you're doing, so you just squeeze out your brush a little bit and
put it back into lift that water out and just reshaping my shape and then you could also add some of this blue in here
just mix it in a bit. Add some white to that. Of course, you can do
the block paintings. You can keep them to one color per block
if that's what you like. It's though I've got
a very wet brush and things are flowing a bit. You can allow them to flow a little bit
into each other if you want to and you can also add in other colors as
well like we did up here. Add a little bit of
that green here. You can mix it out a
bit if you want to, or you can leave it more
like a two-tone strip. You just put the
shapes together in an abstract format to create a base for your pattern
design over the top. This was just a little
snapshot to show you what you can do with acrylics. The rest of my demonstrations
will all be in watercolor.
11. Watercolour Blob Painting: [MUSIC] I'm just going to wet
my paper in a circle shape. I don't draw anything on
[NOISE] to start with and I'm going to use a little bit of this color that's Daniel
Smith, cascade green. Quite like this color because it separates into a blue and green, it's a magical color. While that's still wet, I'm going to use a bit
of cobalt teal and just start a blob next to it and hopefully I'll get a little
bit of merging a color there. To that I might
drop a little bit off [NOISE] buffed titanium. Let's drop a little bit of that in and then I'm
just going to put some more water down to encourage the paint
to come out a bit. Now we might use a bit of
this one which is indigo. Let it do its thing in
the water going back into my cascade green and I'm
going to add one over here. It's good thing to
vary the sizes of the blobs to add interests to. Drop a bit of this color
which is kyanite genuine, it has a little bit
of shimmer in it. I'm just going to let that water settle there a little bit and
come over to here. I think we'll use a bit of this lovely
cobalt teal here. I could add a couple
of colors into this one so I can do that [NOISE] and maybe just
a tiny bit of this one. Use very strong color. I think this one's my dark blue. These are all Daniel
Smith colors by the way. I quite like Daniel Smith's
selection of colors. This color is very similar
to the indigo on the paper. I'm going to put some
cascade green in it and I'll want a fairly thick amount
of paint to mixing that. I feel like I need
a bit more cascade green down here so I'm
using what's on my brush. Now, I might put a bit of
buff titanium in here. I just put a little bit
of that one in here. I'm just going to
add a little bit into that one I like that. But I would like
some this one down here which is the
kyanite genuine. As you can see sometimes I let them run together and sometimes I don't it [NOISE] just
depends how I feel. I think a little bit
cascade green in that one. I feel like I need to put something
over here and I might use some
of buff titanium. Going to add some of the
folk site genuine into it because it's only
in one place on my painting so far
and to create a bit of a balanced so I'm going
to add some more in. I'm going to put it up here. These are by no means perfect circles and
they're not meant to be. They are just best for us
to do our patterns on. I'm going to call
that done and ready for some decorating
when it's dry. [MUSIC]
12. Paint Preparation Geo Painting: [MUSIC] This is what
a page ready for a geo painting looks like when
the tape has been applied. I like to create
a border on mine. I used the wider washi
tape for the border and narrower tape for dividing or making borders on the inside. If you're having trouble getting your washi tape off the
role without tearing it, the best technique is to just pry it up a little bit
and pull it back gently, slowly on itself like that. It usually then comes
without tearing. When I'm ready to do one of these paintings
to get it ready, I usually apply my border first. You don't have to have a
border if you don't choose to. But if you do, it's better
to put the border down first and then I roll
off from my tape, the size or the
length of the piece of tape that I think
I'm going to use. I usually start with
a section either across the page
or down the page. Once I have my length
of tape measured out, I apply a couple of times
to my clothing to pick up some fluff that stops it from sticking so
much to the paper, makes it easier to remove the tape after you've painted without removing the
surface of the paper. That's all I do, I just choose places and roll off a bit of tape and stick it
down and you end up with these random designs. You can go ahead and prepare your page ready for
your geo painting. If you're going to be using
a ruler and a pencil, your page might look
something like this. I did this one with a pencil and I used
a Quilter's Quarter, which is a little
bit of a cheat way. I found the Quilter's
Quarter when I was looking for a ruler
and realized that it create exact same size by ruling off the
lines either size and using the quarter
inch as the major. It can be done with a ruler
though I've done it before when I haven't had any
tape of available to me. Once you have your penciled
in design on your page, then go over it very lightly
with your eraser and lift some of the graphite so that it doesn't show through your paint. Go ahead and get
your pages ready. When you're ready, we'll move on together and paint our
geo painting. [MUSIC]
13. Watercolour Geo Painting: [MUSIC] This is the
fun part where we get to do our Geo painting. The first thing I do is
just double-check that my tapes are all
okay before I start. I usually start in the top-left, [NOISE] it can pretty
wet your paper if you like and drop color in, or you can just go in and paint. I like to put [NOISE] a
couple of colors in most of the shapes just to add a
little more interest to it. It gives me the
opportunity to then carry those colors over
into the next shape. [MUSIC] When this is dry, I'll show you the best
method for removing the tape for minimal damage
to the paper underneath.
14. Tape Removal Geo Painting: [MUSIC] My painting
is touched dry. I can feel that it's not cold anywhere and I'm going
to remove the tape. This can sometimes be
a little bit tricky. My best advice is to go
slowly with it and pick a corner and start pulling
the tape back very carefully, right back onto itself like you did to get
it off the role. Just work up a
corner and then very carefully pull it straight
back on itself, go slow. If it starts to bring up the
paper from underneath it, stop there and go
from the other end, sometimes that helps stop the paper from
tearing underneath. Another trick is to
give the type of blast with a hairdryer
before you remove it and that activates the tacky part of the glue and makes it
easier to pick it up. This little piece
of tape here is starting to pick up the
paper from underneath. So what I'm going to do is
just leave it there and go from the other end to see if
I can minimize the damage. Just drag it back on
itself very slowly, it's a little bit of
paper kicked up there, sometimes I just repair
that with a little bit of glue from an acid free
a glue stick. [MUSIC]
15. Adding Patterns Blob Painting: [MUSIC] I'm making a start on adding patterns
to my blob painting. I chose the blob
painting first because it's a good one to
get warmed up with. It's quite a simple
design and easy to do. I have a choice of some colored fine tip markers
and my black markers. I do have some white markers available to me as
well as a gold one. I've also got my
pattern journal with me for inspiration. [MUSIC]
16. Adding Patterns Geo Painting: Now I'm going to add
patterns to my geo painting. I have the same range
of pins available to me as I head for
the blob painting. I also have my pattern journal next to me for
inspiration. [MUSIC]
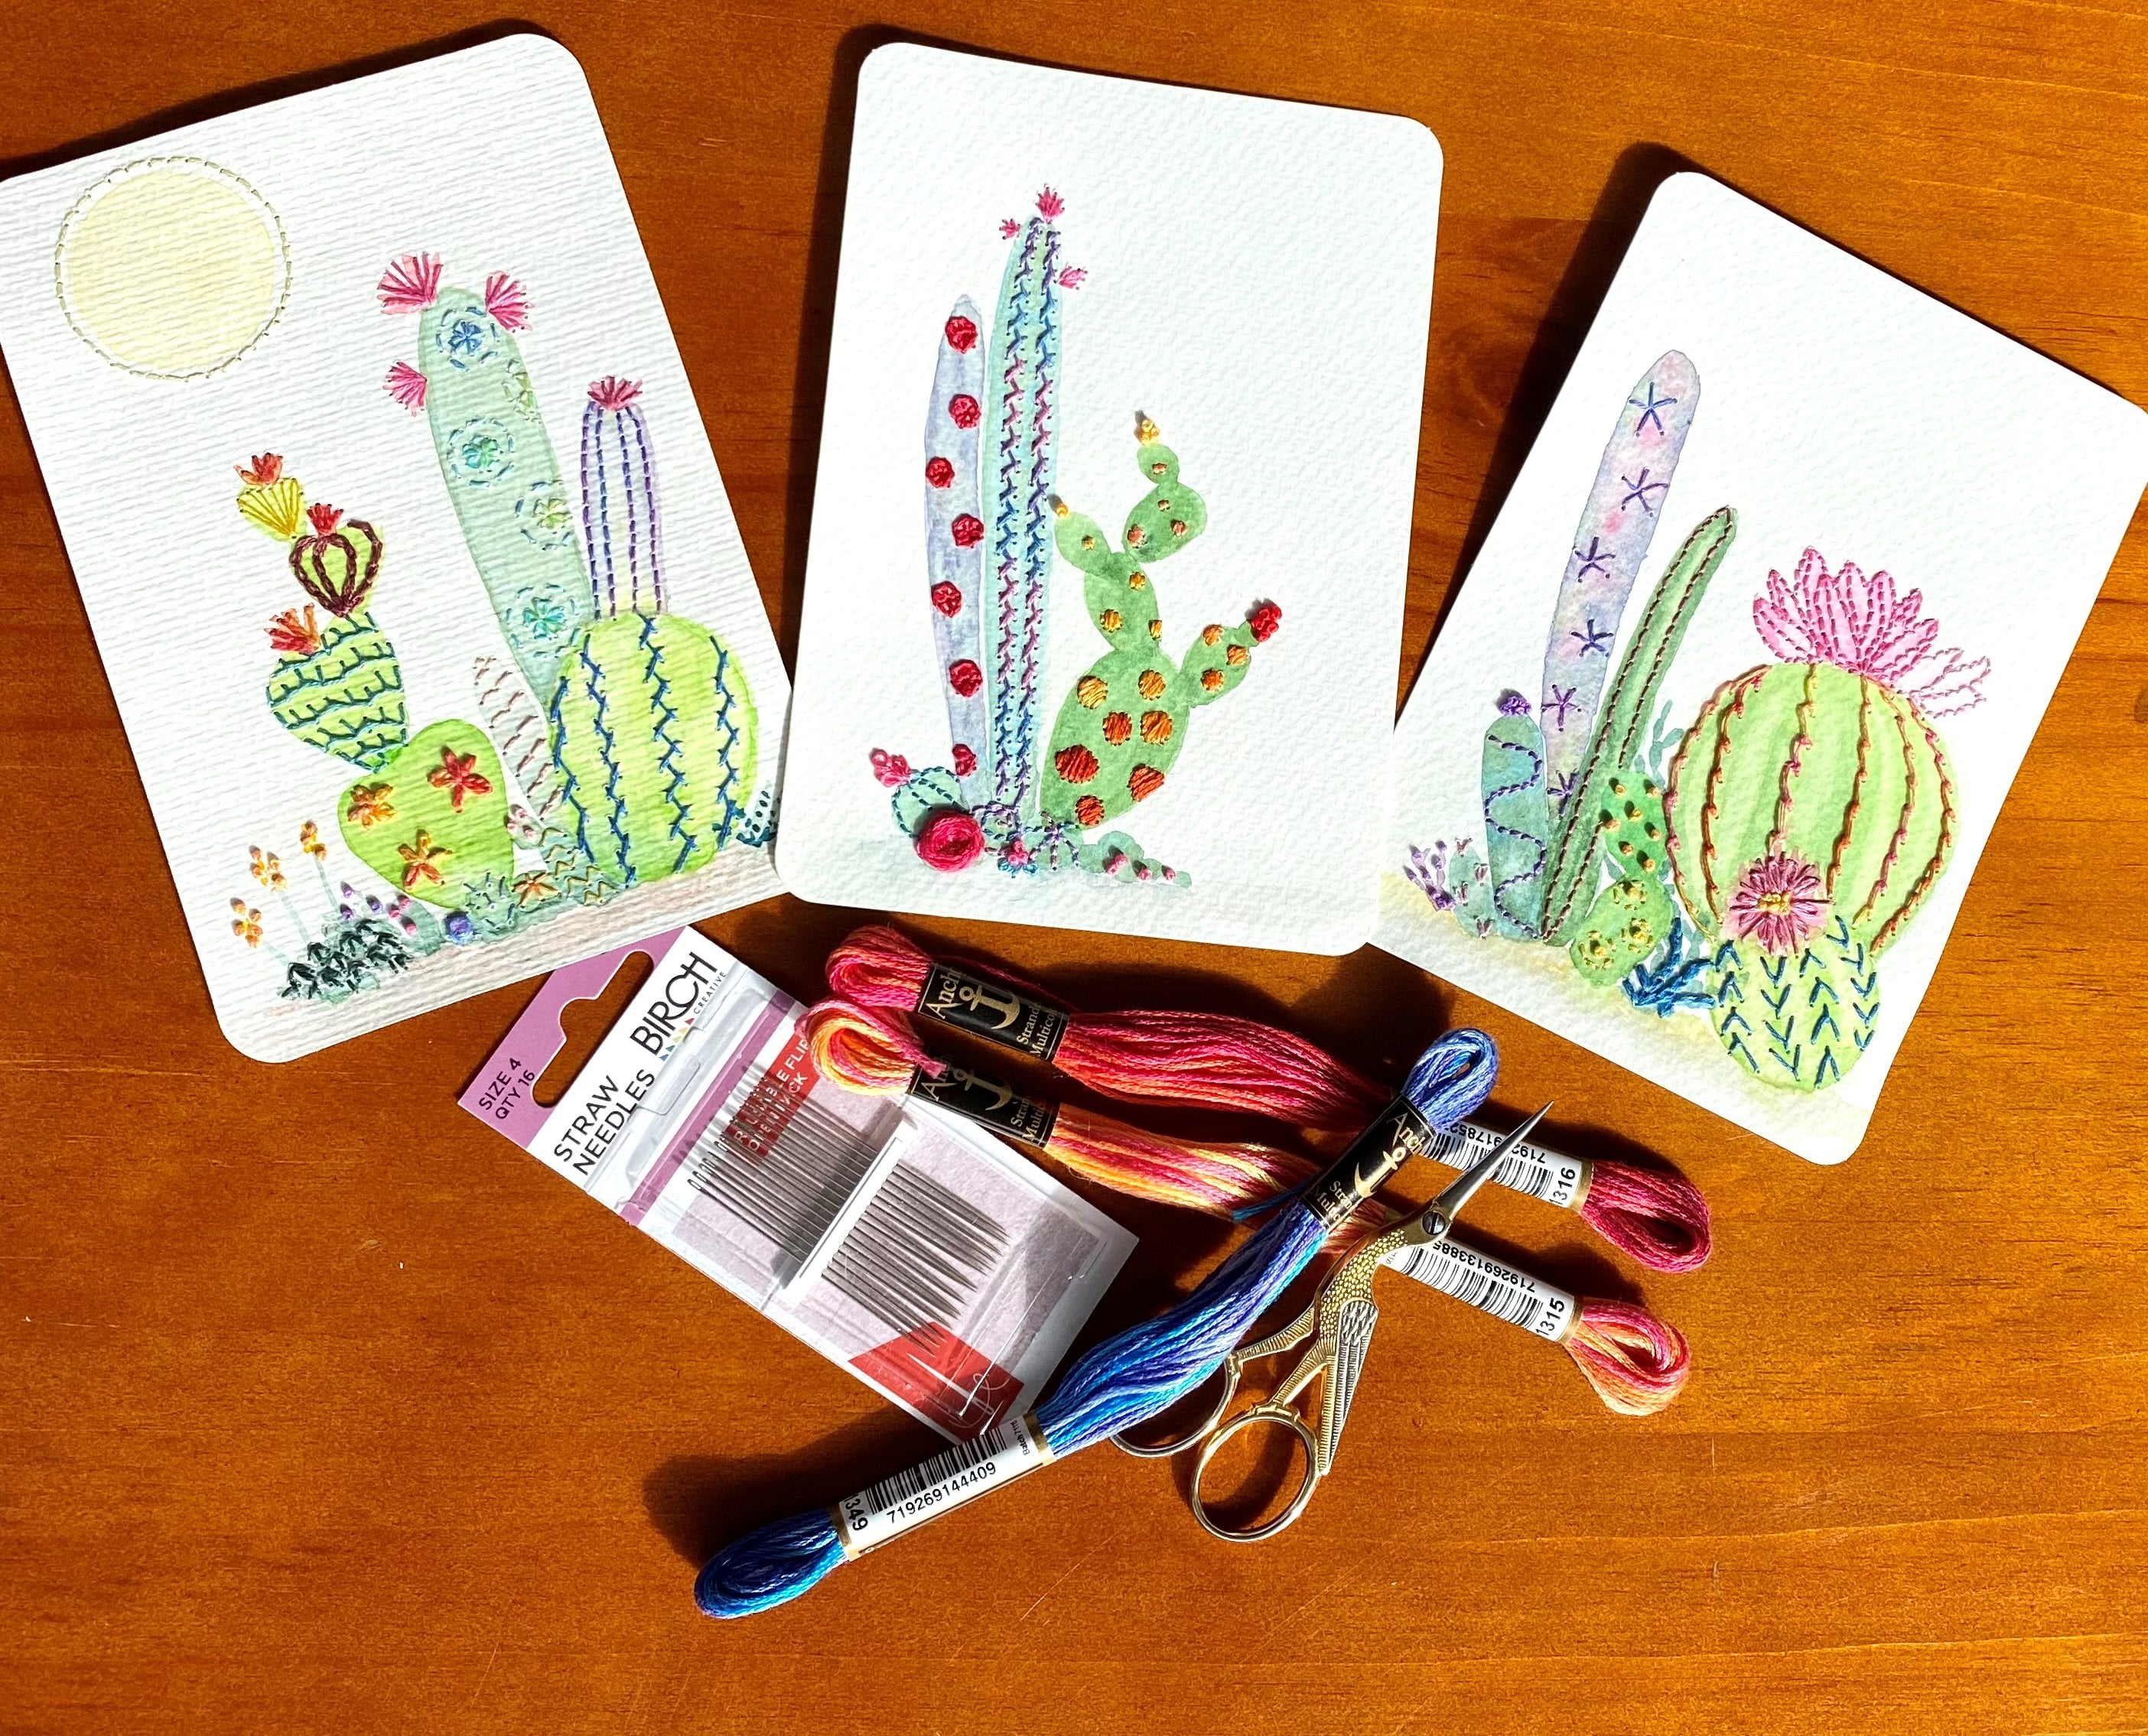
17. Future Patterned Art Ideas: [MUSIC] I expect the
question you have for me is, what do we do with all of these patterns now we
know how to create them? I've shown you the quick
and easy blob paintings, but there's a host of things you can do with your patterns. You can make grids and
showcase individual patterns. They look fantastic
when they are framed. You can create new
and interesting abstract art using
your patterns. You can use your patterns in
landscapes and seascapes, Some of these are really
good fun for relaxing. One thing I like to do is reinterpret my patterns
into stitching. I do traditional embroidery
and free machine embroidery. Also, I like to combine watercolor and
stitching on paper. You can also use patterns
to create pinprick designs. This particular pattern was created using those
clothes that I showed you in the everyday
inspiration video. That one came from
a leaf pattern. Adding patterns into frames, bring your patterns alive
by adding color to them. Combine different
elements together to create a new pattern design. Change it up with colored markers join them all together in a type
of collage pattern. Have you considered painting
your art as a wall mural? You could also use
sites like SnapFish. You can have your art made into gifts for
family and friends. I created a beautiful coffee
table book this year. Where I uploaded
photos of my art to SnapFish and had it
printed out as a book. You could join websites
like Spoonflower, Society6, or Red Bubble. There is a lot of different
ones and on these sites, they are called print on-demand. You can upload photos
of your artwork and people can buy them on
different types of items, anything from clothing
through your household items, even furniture, Spoonflower, you can get fabric
and wallpaper. The only limit to what you can do with your art is
your imagination. I encourage you to go out and explore different ways
of using your art. Up next is the bonus
journal project.
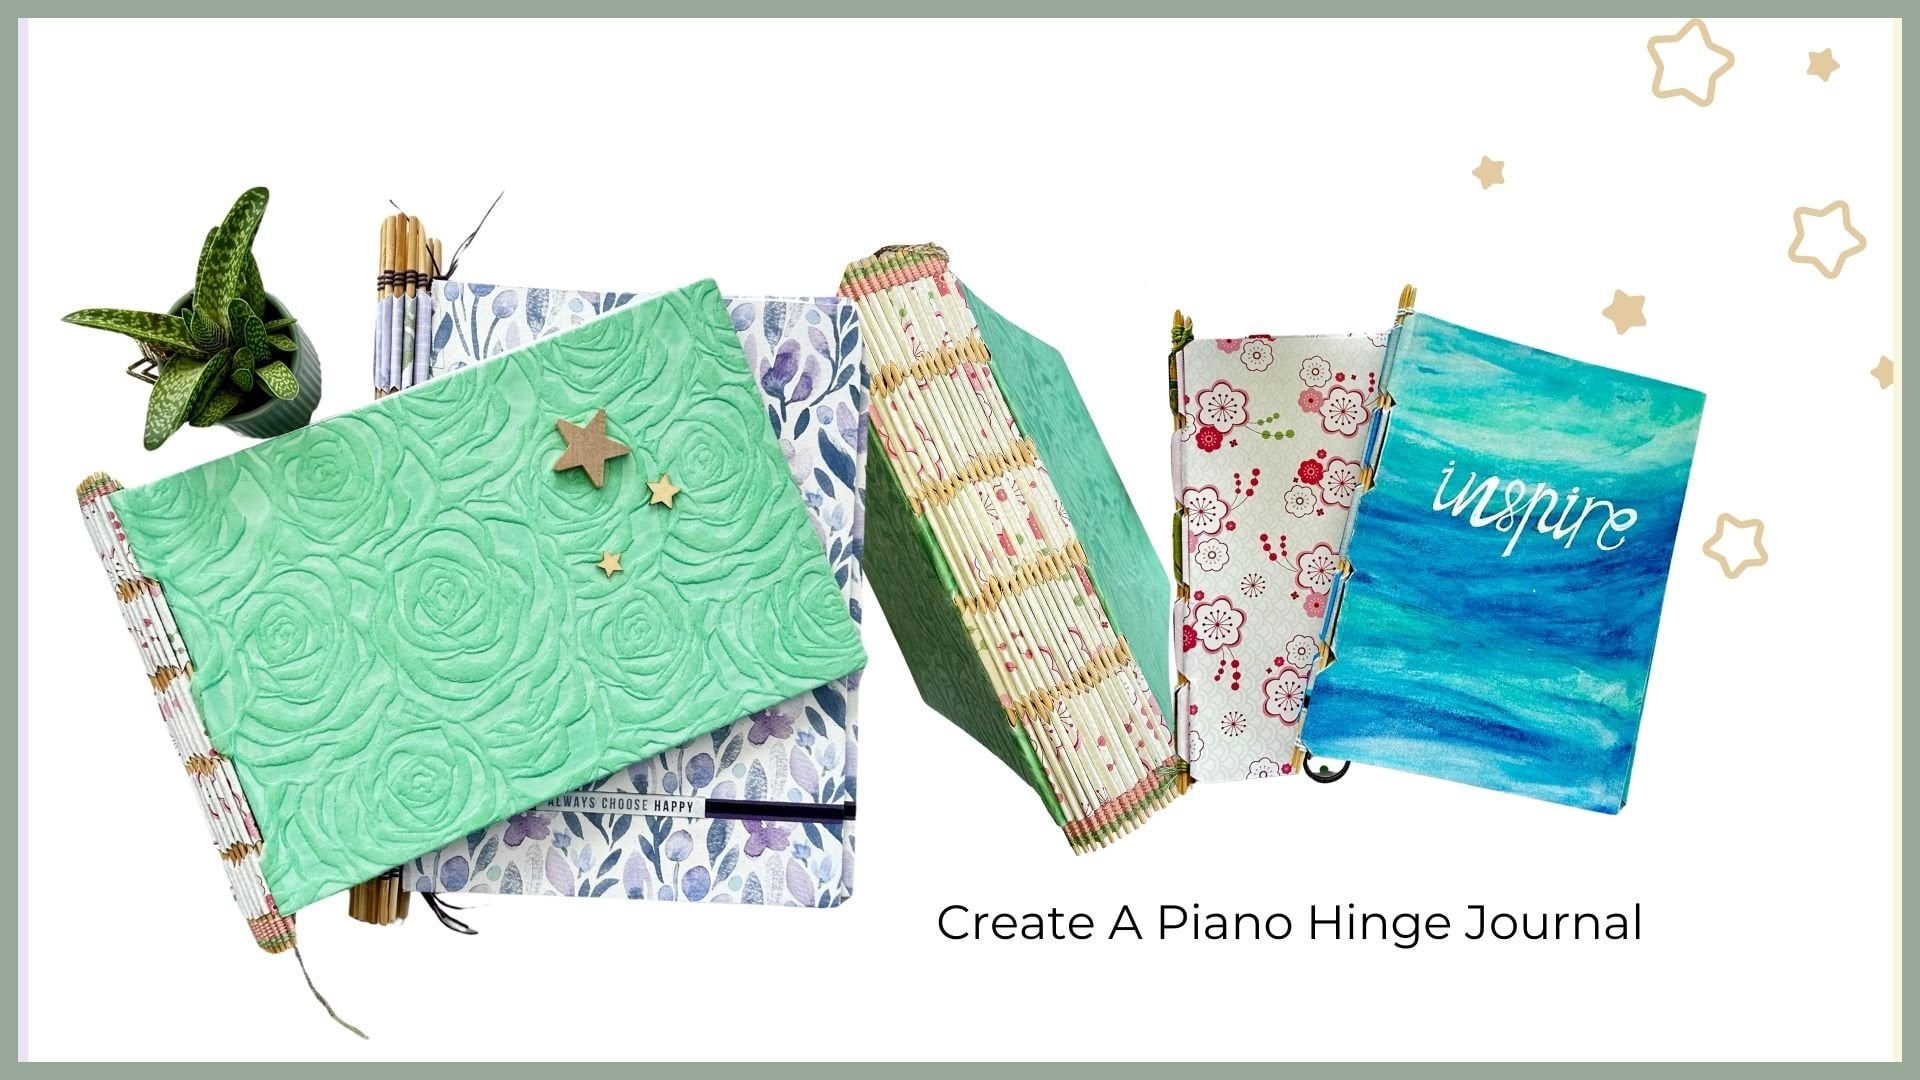
18. Bonus Journal Overview: Welcome to the bonus class where I'm going to
show you how to create this Australian
reverse hinge journal. It's a really simple
journal you don't need to be able to solve at all. It's just cutting,
folding, and gluing paper. This channel has two hard
covers which are detachable, and inside I have
made 10 folios, which gives me 20 pages. The journal hinge system
is really simple. It's based on an accordion fold, and each accordion fold
slips through a slit in your papers and
it's held together by strips of paper that
slot through the accordion. That gives you the
ability to be able to add pages or remove pages
or rearrange pages. The journal itself
is easy to open. If you want to make a journal
without removable covers, then you simply glue in the tabbing mechanism that
holds these covers in place, which is just a piece of card at the end of the accordion
fold that slips into a small sleeve or
pocket in each cover. The journal is
expandable by adding extra accordion fold hinged
paper onto the tab section. You would simply fold your tab section in to
make another accordion. blue the rest of
the accordion on. Making another tab at the end, you will then join it
back into your covers. This journal can be made without adding
these paper strips. I like the paper strips
because it gives me the option to add in pages that already
have artwork on them. But you can simply make this
journal if you wanted to by folding drawing pages
from a large pad in half. Using paper that size would give you the same size
journal as this. The other thing you can do with these journals is
make them half-size. Now, this is just an example of about the size that you
would end up with, but this journal has a
different hinging mechanism. The way you would do
that would be the same as with the larger
sheets of paper, you just fold them in half. Now, this one is made with the standard size
paper A4 folded in half. I have created folios
of three pages of blank paper for writing on and an outer cover of
patterned paper. You would fold them together to make a signature and
then you would just make your split in
the back of the fold, and then you would
be able to slip it onto your accordion fold and
slides of paper to hold it. There are quite a
few different ways of making these journal
and using it. [MUSIC]
19. Bonus Journal Construction Part 1: [MUSIC] To make your
folios for your journal, you're going to need
20 strips of paper, 1 1/2”
wide or four centimeters. The length of the strip needs to be the length of your paper. If you are making
a journal that’s half the size or
a landscape size, your strips of
paper would be long enough to join this side. What you need to
do is rule a line either side on 10 of
your pieces of paper. These lines are 6mm
or 1/4” in from the
edge on both sides. To join my paper, I just glue it so that it sits there meeting the
line on the paper. Then you would glue the
next piece on this side. Set them aside to
dry and then come back and glue the other
piece over the top. Put them aside to dry. Your folded papers will look like this and this
is called a folio. With your 10 folios, you need to fold them in half. The way I do this
is just by meeting the edges of my
paper on one corner, holding it down,
pulling with my finger in here because once you've
attached two strips of paper, it does become a little
stiff along the join. I just bring it down and put
that first crease in there. Once I've done that, I then come up to the other
end and do the same thing. Join it up together. Make sure it's nicely together.
Put your finger in there. Pull up making it a lot
softer and a little easier to bend and put that
first crease in there. Then roll it around your
fingers in the middle, making sure that
it's all lined up. I run my fingers down at first. Then you can use a
handle of your scissors, a bone folder, old credit card, something that has a clean edge and
just make that crease. Now your folios are all
ready to be hinged. Just put them aside. We'll come back
to those. [MUSIC]
20. Bonus Journal Construction Part 2: Next you need to make
your hinging strip. If you are using
scrapbook paper, you will need three
half sheets for this. I joined my strips
together by overlapping them and gluing them 6mm or a 1/4”. You will need to
make a template. The template is for marking out the concertina
or accordion folds. Now my template is made out of a scrap of cardboard
and it just makes it easier so that you don't have to measure each segment
with a ruler. The template I made is
1 3/8” or 3.5 cm. Working out your spacing
for the tabs that fit into the cover
is pretty simple. What I did was
measure the whole of the page and I started from the center and
worked my way out. But you don't need
to do that if you're using the same
measurements as I am. My allowance on this side
is 3 5/8” which is about 9.2 cm. I ruled a straight line there. After that line was ruled, I then using my template, went along and marked along
there then I moved it along, put it against that line and made the next mark until I had enough accordion folds to make my ten that I need
to hinge my journals. To make an accordion fold, you need three lines. The middle one comes
up to a peak and The two side ones
sit the other way. Valley mountain, valley,
mountain valley, all the way through to the end. That means that every
third line is one hinge. At the end of this end, I've ended up with
slightly more. I think I've ended up
with 9.8 centimeters, 3 7/8”. I'm not worried about
that little bit. Extra doesn't really matter. The important thing when you
do this is to try and keep your lines perpendicular
to the page. You want all of your accordion
folds to line up nicely. Once you have all those
lines on there and I should mention that these lines need to be ruled as faint as you can. Mine are a little bit darker on purpose so that you
could see them. But if they're fainter, you won't have as much to erase after you've
made your hinges. What you do is you come along
and just score each line. Go ahead and measure
in your space for the tab area and then
with your template, mark out your accordion folds all the way
across to the end. Make sure you've
got a tab left at the other end for attaching
your cover boards. Once you've put
all your marks in, go back and score them. Then you can go along and lift any graphite and
when we come back, we'll fold up the
accordion [MUSIC]
21. Bonus Journal Construction Part 3: [MUSIC] Now you have all
your scoring lines in. Make sure you have your
tabs facing upwards, if you have a particular
side of your paper that you want to see on the
inside of your journal. One thing I should
perhaps mention here is if you have plain paper, you can actually attach some colored paper
over the cardstock. If you want a pattern
on these tabs, but I decided I wanted
these plain because I'm going to use a plain paper to slide through them to
complete the hinges. With your paper facing
the way you want to see on the
inside of your journal. The first line that
you scored gets folded over and using a bone folder
just go over the creases. The next one goes
up the other way. Fold it and use your
bone folder there. The next one will go down, I scored mine on the back. I need to turn it. Couldn't quite see
the crease. That one goes in here. Then as you are making these folds make sure that your
strip is lining up. Otherwise, if you get off center a little bit, at the end, your hinging
won’t sit nicely. It might be a little bit off and it will sit a little bit askew. That is one hinge that will fit through your papers inside
in the center part here. Your tab of paper
will slide through it to hold your
page to the hinge. You just simply keep going
that way, you want a valley, a mountain, a valley, a mountain, a valley, and you just continue in
that way all the way across. Remembering to check
that your card is lining up. Anytime that it's a little bit off straighten it and re put your
crease back in. You begin to see the
accordion taking shape. Go ahead and do that,
remembering valley, mountain, valley to get you
started and then just keep alternating a
valley with a mountain, keeping your card stock or
your cardboard together at the edges to make it a
nice neat accordion hinge. If you've joined your
card stock like I have, these ones here
where the joins are, are a little bit tricky. You can fold it against
a piece of card or edge of a ruler to get that
fold where it needs to be, where the scoring is. Go both sides. Push up against your
straight edge or your template whenever you're using to make sure
you get that in. Then on the reverse side, line it up and get crease in
with the bone folder, or the handle of the scissors, whatever you're using for that, just rub your join if
you get them in the way, You might have to come back
and add a little bit of glue in there after if
it's come up like mine did. That's okay [MUSIC] Then, we have the concertina
hinge made, ready to go. You need to make sure that it lines up reasonably well where the joins in the
cardboard are, can be a little bit out of
shape, but that's okay. We've got all our hinges there ready to receive our papers. We have a flap either side
for tucking into our covers, which will come up and
hold our papers in. The next step will be
cutting the slits in the folios or pages ready to
receive the hinge [MUSIC]
22. Bonus Journal Construction Part 4: [MUSIC] To work out where
to put the slits in your pages to poke your
hinge tabs through, I measured the
center of my paper. I measured the
center of my hinge there and I lined the two
up and made a mark. To make your slit, you're going to
either have to use scissors or a craft knife. Craft knife, I think would
be the easiest for these. What I'm going to do is put
my first slit in and just check that the hinge fits before I go on to
mark the rest. Then I want to get
it in the center. So I'm just making
sure that that’s where the center fold is. With my craft knife, I'm just going to make that slit starting at my first
pencil mark up here. Now let's just test that out
before we go any further. The idea being that this
will sit inside here like that. Then when we
get to the tab part, the tab will feed through there and hold your
hinge in place. Now, we need to
go along and make the hinge slits in
all of our papers. So now we have one we
can use as a template. Because these are thick, I'm only going to
do one at a time. So what I'm going to do
is line them up [NOISE] till they fit
together pretty well. [NOISE] Then I'm going
to use a sewing needle, but you could use a push pin, anything to mark
through either end. That's given a mark to cut to. I'm going to do that with
every one of these papers. If you're not using a
thick hinge like this, you'll be able to do a
stack of papers in one go. Now you know how to
make your slits. Go ahead, mark them out, and cut them in all
of your papers, and then we'll go on
to the next step.
23. Bonus Journal Constrruction Part 5: [MUSIC] With all of the slits made in the
hinge part of our papers, it's now time to audition a hinge so that we can work out the width we need
to make our strips. I'm just going to
slide this one into a hinge and take a measurement. Now that I've got
a hinge in here, I need to take a measurement
from this edge to this edge to work
out how wide to make the paper strips that
will hold the hinge in place. My measurement now
has shrunk down from 3.5 centimeters to about 3.3, maybe 3.2 centimeters, which is one 1/4 “. When you cut your strips, it's a good idea to make them just a fraction under
your measurement. I'm going to make my strip. I'm going to try
it at about 3.2 cm We'll say 1 1/4 “. I'm going to cut one strip. The length of my paper times 3.2 centimeters or 1 1/4 “, and trial it first
before I cut the rest of the papers just in case
it's not quite right. Let's see what
happens with this. It needs to be slightly
smaller than that, so I'm just going to take
a very small amount off. I've cut a strip at 1
1/8 “ and that is 2.8 centimeters because you want to be able to
feed your strip in nicely. If you're making your journal at a slightly different
measurement to this one, just take your measurement
and take a little bit off it, so that your strips
fit in nicely. That's how the hinge
holds the pages in place. Go ahead now and cut your strips to fit
inside your hinge. Once your hinge has
been put through your paper so that you check your measurement
and just cut it. Just always go smaller so that you can slide it
through with ease. Once you've cut your
strips of paper and hinged your first folio, cut the rest of your strips, add your papers and
you're hinging strips in. Now you have your papers
all hinged and ready to go. One thing I can tell you
is that you can actually make little arrowheads on
these papers if you want to, and the other option
would be to maybe use a decorative craft punch to make some decoration on the end. I'm going to leave mine
just plain square. I think it sits
together pretty well. For the next step,
have your cardboards ready for your covers
and your cover paper.
24. Bonus Journal Covers Part 1: [MUSIC] To work out the
size of the cover boards, you need to know the size of your paper and then you
need to add, at least, an 1/8” or 3.5 millimeters on three
sides of the journal. You don't need to add any extra on the side
that will be hinged. Cutting your cardboard
covers is not too difficult, you just gently score
several times down. Following the edge of your
ruler, just go slowly, keep it up against the
edge of the ruler and eventually you'll get
through the cardboard. Now you have your covers, we need to put in
some markings for our sleeve tab before we start
covering the cover boards. What we need to do
is find the center of the sleeve piece and
make a mark either end. Then we make a mark either end on the cover boards at
the center as well. We line those marks
up and then we mark the four corners where your
sleeve board measurement is. Then rule a line between
the outer marks. Then we need to figure out
how much space we need to allow for our hinge tab
to slide into the sleeve. So from your center
mark on your board, measure out the
size of your sleeve. For mine, which is 6” I measured 3”
either side, which gives me
these little marks, here where the arrows are. I know I need, at least, that amount of space to
slide my hinge tab in. However, we're going to
be covering these boards, which will take up a
little bit of space. We're going to be putting
some paper on this, which will also take up
a little bit of space. We need a little bit of
wriggle room to allow the sleevee to go in
and out with ease, but not too much room that the tab will slide
out on its own. If you're using a thicker paper, you will need to leave a little bit more
wriggle room to get your hinge tab in and out. If you're using a thinner paper, you need to leave
less wriggle room because the paper is not
taking up so much space. Once you have these marks here, you need to work out how much wriggle room
you're going to leave. Now, I've got a couple
of marks on here because I always leave an 1/8”
for thin paper, so an 1/8” either side. If I'm using a really
thick bulky paper, I'll leave a 1/4” either side. The reason we're doing all
these measurements is because this paper here and this
card gets glued down, and we need to know how far
in to come with our glue. From your outside edge marking, you are going to mark a line of where you're going
to put the glue to. I have ruled that line there for a journal
that has a thin covering. For a journal with a
really bulky covering, you need to allow a bit
more and I'ld suggest maybe a 1/4” either side. Once you've done that, you can then make a mark on your sleeve so that you know where the glue has to
go on the sleeve as well. With a pencil rule
those lines in. The final thing you have to
do is turn your sleeve over, line it up with your ruled
lines on the outside edge, and add in these marks
from your glue lines. These little marks will help you lining up your sleeve
when we glue it down. Once you've done all that for
both boards then we'll go ahead and cover the boards
[MUSIC] and attach our sleeves.
25. Bonus Journal Covers Part 2: To work out your paper
for covering your board, Find a straight
edge on your paper. I align mine up with my
cutting mat so I use the straight edges to line
it up and then I measure around two inches and
I place my board down. I measure the 2”
from the other side of the paper and then I
draw around the edge, the corner of my board. Then I go up and measure the
same on the other corner on the same side to make sure that this measurement and this measurement
are the same. Again, I make those little marks on the corners just
around the edge of the board and then I go over and do it
over on this edge, so I measure 2”
along the edge. Once you've got it all
the way to the edge, I make my line on this side
all the way up to the edge, all the way down ruling
a line along there. Make sure you've
marked your corners so that when you remove your
board to add the glue, you know where to line
your board up again. Then I take a small clear ruler. If you don't have a
small clear ruler, you can actually do this anyway, but I line up my line
with the corner, try and keep it at a
45-degree angle if you can. What you're aiming
for is to allow a little extra here
that you're not going to cut off and
then you're going to mark a triangle across the edges and then this
triangle will get cut off. Do that on all of the corners. You want that little bit
of overhang so that when you actually come to
fold up your papers, you've got a little
bit that will tuck in the inside and cover the
corner of your board. Cut your paper off. Cut your corners off in preparation for
covering your board. Once have your paper cut out, you use it as a template to cut the other sheet
for the other cover. Go ahead and do that, and then we'll move on to
the next step together. Now you should have
your two papers ready, your two boards ready to cover. Just one thing that you
need to be careful of, if you have a one-way design, which I have, then
you need to make sure you have a
back and a front. This is going to be my backboard because I want this
bird to face this way, so that means that my
hinge side is this side, and then I need
to make sure that my front cover is going the
opposite way, which it is. The hinge side for my front cover needs
to be on that side, and when you lay them down, you'll have a hinge side and a hinge side next to each other. Just mark it so that you
don't make any mistakes. If your design has
to go top to bottom, then just mark the
top, and the top. That will help you
not to mess up. Yes, that is the voice
of experience speaking. I have made more
than one journal with two boards hinged
exactly the same, and with a one-way design, you end up with one
board the correct way, and one board upside down. Of course, it goes
without saying that the upside-down board goes
on the back of the journal. For this step, I like
to use a glue stick. Particularly when I'm using
this type of wrapping paper, it doesn't like PVA
glue very much. What I like to do is cover the cardboard with the glue first and then put
some on the paper. You might have paper that
stands up better to PVA glue. If I was using a scrapbook paper to cover this, rather
than a wrapping paper, I would use PVA glue. It's all about using the right tools for
the job I suppose. Move the board out of
the way for a moment and go for the paper, again getting right
up to the edges. If there's any
lumps in your glue, try and get rid of them. Now, just positioning the board, go for your corner marks, and then try and get your top marks in the
right place as well. That looks pretty good.
When you're happy, just smoosh it down,
give it a rub. Bone folder or
the back of the scissors on the cardboard
side to start with. If there's any glue
squeezing out, mop it up with a bit of towel
or tissue or something. That's another reason
why I like glue stick, you don't tend to get
too much smooshing out. Now, turning it over, I need to be a little bit more gentle on this side and trying to work from the middle to
get out any bubbles. [MUSIC]
26. Bonus Journal Covers Part 3: [MUSIC] Once you've
got all your paper attached and you're
happy with it, we have to address the
sleeve for the hinge. The first thing we
need to do is fold the hinge side in
and attach that because when we slip
our hinge tab in, it's going to go in here between that
decorative paper and the decorative paper
strip that will be covering the sleeve here. We'll glue it in place. Just in a little
bit from the edge. We're going to put a piece of decorative paper on here so that from the outside of the journal
you can't see the sleeve. The first thing
I'm going to do is attach this hinge
side to my journal. I like to put some glue in that space against
the cardboard. [MUSIC] Now we've glued
the hinge side down. We have to put some
paper on this. I'm going to use this
paper and I'm going to use the pinky side because
it will blend in here. I want my pinky
side to be sitting along this edge because
I want to align those lines up here
so I know where I'm gluing and I want it to be reasonably close to the width of this because our cover paper on the inside needs to cover
this so that it looks neat. I've got about a 2”
overhang here, so I'm going to
measure two inches on this paper for where
I want my fold to be. I'm just going to
mark on along there. I want some of this paper to be on the inside of the sleeve to help with the hinge
tab sliding in and out. I'm just going to mark
it there like that, and then I'm just going to fold it up here so I
know where to cut. [MUSIC] Now I'm going to attach this piece of paper
to this board. I want to remember
that I want it to face the lines so I can
match them up here. On the reverse side of that, I am going to put down some glue because the paper is going to go on this side
as well as along the edge. [MUSIC] Make sure I've got that going the
right way and I have. I'm just going to bring it up
to the line that I ruled on my paper, there. Now, I'm just going
to smoosh it down a bit and finding
a bone folder and giving it a little bit of a rub over. Really don't want
any bubbles in this because I want it
nice and smooth so that the hinge tab can go inside easily and it can also be removed easily if I want
to take my covers off. Move at it gentle, smooth over with my bone folder. I want it to be
just inside there. [MUSIC] Make a line down there and the
same on this side. Now I want to apply glue
either side of this line here and then I want to
put a small amount of glue just on the board here as well to help
with adherence. [MUSIC] I’ll just put a
little bit of PVA, just for a extra
bit of insurance on here. [MUSIC] Now, while the
glue is still tacky. Let's position it
where we want it. I'm lining up my lines here
and just keeping it just a teensy tiny bit in from the edge and now
with the bone folder, I want to make good
contact with the glue. Then I'll also
give it a rub with my old soft cloth just to help and then from
the other side as well. [MUSIC] If you can see here, there is the tiniest little edge just along here where I've positioned it
just back a tiny bit. The next bit to do is fold
the rest of these up. It doesn't really matter
what order you do this in. I'm going to do the
long side first. Now the same thing
as the other side. You want good contact
along that edge. Go on and attach
the other pieces. Make sure you get a bit of glue on this little edge here because we fold that in
for this next tab. Now to do this one, push up your edge like
you have previously. But in here, you just
work the edge in, with the bone folder or a
finger or a fingernail. Just tuck it in and
then fold up your tab. Make sure you’ve got good contact
here and roll the paper over and smooth out any bubbles
you might have as we go. Just going to use my cloth to
give it a bit of a rub up. Checked my corners. Now
we're on to the last tab. [MUSIC] Allow that to
dry and then we'll come back and put a cover piece over here to neaten
all the edges up. Now you've made one. Go ahead and do the other board. Now, the other thing
is while it's drying, it's good to put
some weight on it, some heavy books or something on it to keep it nice and flat.
27. Finishing The Journal: [MUSIC] We're up to the last
part of putting this journal together and what we need to do is cover up this part
of the cover boards on the inside so that
they look nice and neat. What you need to do
is cut your paper to size and leave a
little margin around the edge so that
it looks cohesive. I was lucky enough
to have paper that fits so my paper matches
my paper size and is A4, and I decided I would just use these couple of colored sheets. I'll glue those down and you go ahead and do the
same with yours. If your paper doesn't fit
nicely like mine does, just take a measurement
leaving a small margin around the edges and
cut your paper to size and then stick your two inside papers
over your covers [MUSIC] After the glue has dried on those papers, you can go on to the final step which is putting
the whole book together. I'll show you how simple it is. You just find the slit
of the sleeve you made and slip your cardboard
sleeve inside there. It's as simple as that
and then on the back, doing the same thing. Slip your cardboard in, push your cupboard down, and here you have your journal altogether with protective
hardcovers on it. Hinges that can be removed. You can add onto your journal
by detaching the covers and creating a new
concertina tab and then slipping it back into the cover after
you've made it. This journal will expand comfortably another set
of hinges like that. That's the expandable journal. I hope you've enjoyed following along with me and I
hope you make your own. It's perfect for housing your pattern library when it's
constructed this way with the strips because
you can work on your sheets of paper
and then join them in after or you can create
your journal first and use it for your pattern designs. Thank you so much for
sticking around to the end of this class. [MUSIC]
28. Final Thoughts: [MUSIC] Thank you
for joining me. I hope you had a fun time creating patterns and painting, and I hope you learned something new to add to your art toolkit. If you're looking for
a new art adventure, take a look at my
class Embroidery and Watercolor on Paper. Stitching adds a special
element to artwork, and it's also fun and relaxing which is a
win for everyone. I would love to see
your beautiful artwork, patterns, paintings, and let's not forget
the bonus journal. Please don't forget
to upload photos of your artwork to the project gallery. It's really easy. Visit the Project and Resources tab and click
on Create Project. Then you'll be prompted
to upload your photos. It just takes a
couple of minutes. If you enjoyed the class, it would really mean a lot to me if you'd leave me a review. If you want to see more
of my classes in future, then follow me here
on Skillshare. Thank again for
joining me and happy creating until I see you
next time in the classroom.
 Michelle Watson, Brunybear Art - Mixed Media & Textile